
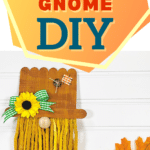


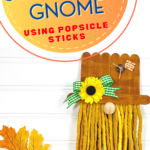
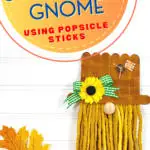
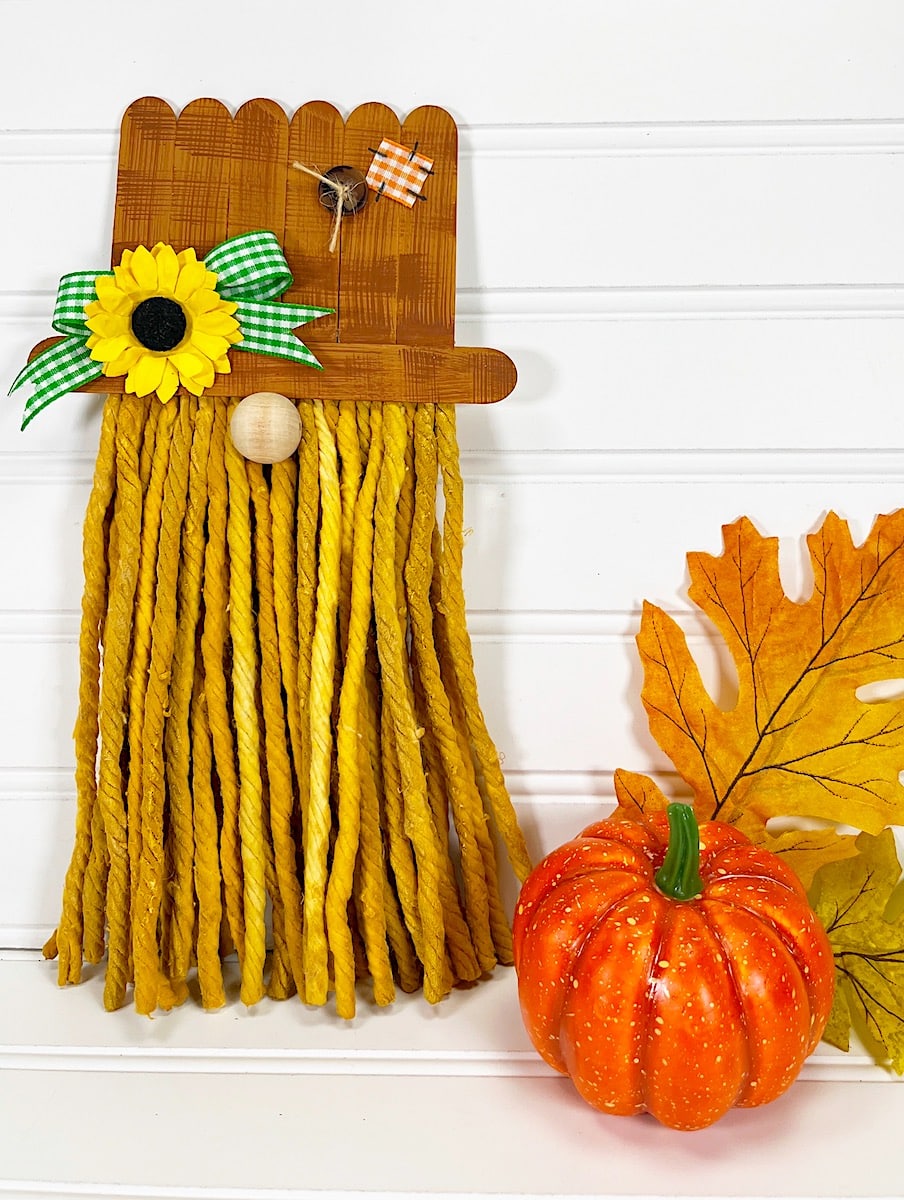
Gnomes are always a popular craft, and I especially love when crafts are easy and inexpensive. Which makes this cute scarecrow gnome one of my favorites for fall!
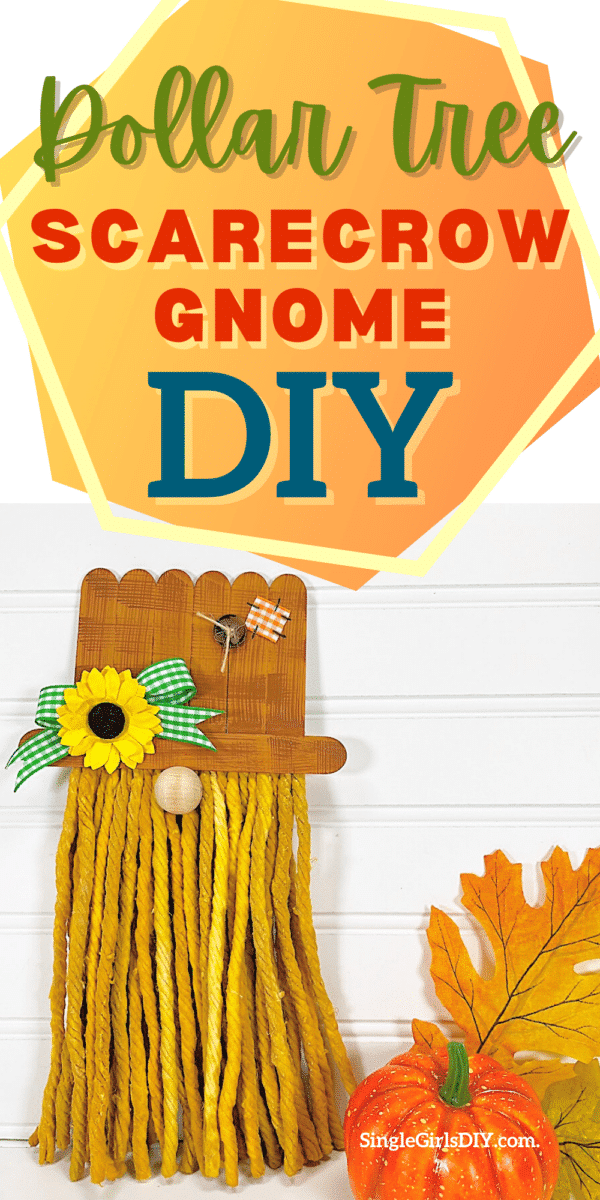
Using a Dollar Tree mop head, we made an adorable scarecrow gnome that is perfect for hanging on the front door or inside your home.

Dollar Tree cotton mop heads are a surprising craft material that you can repurpose in so many ways. Be sure to see my mop head ghosts for a really easy Halloween DIY!
And we also used a mop head to make this witch gnome, as well as a Santa gnome.
All of the materials (except the wooden bead) were bought at the Dollar Tree. Quite honestly, you can probably find the wooden beads there, too, but I didn’t see them.

If you love scarecrow crafts, be sure to see our foam dice scarecrow and scarecrow decorative plate, or these easy fabric scarecrow stuffies.
This DIY project actually uses many of the same supplies as our cutting board scarecrow, so you can easily make both for less money.
How to Make a Scarecrow Gnome (Using a Mop Head)
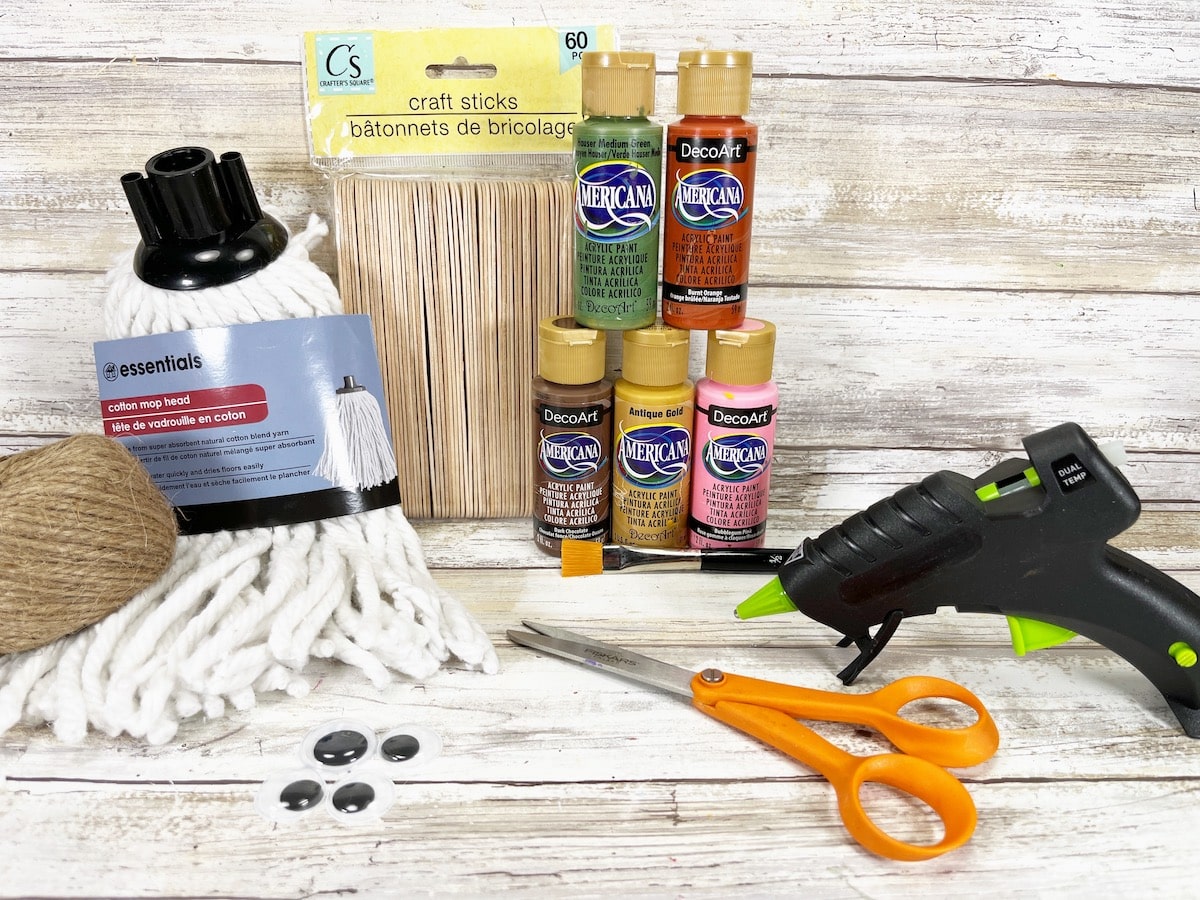
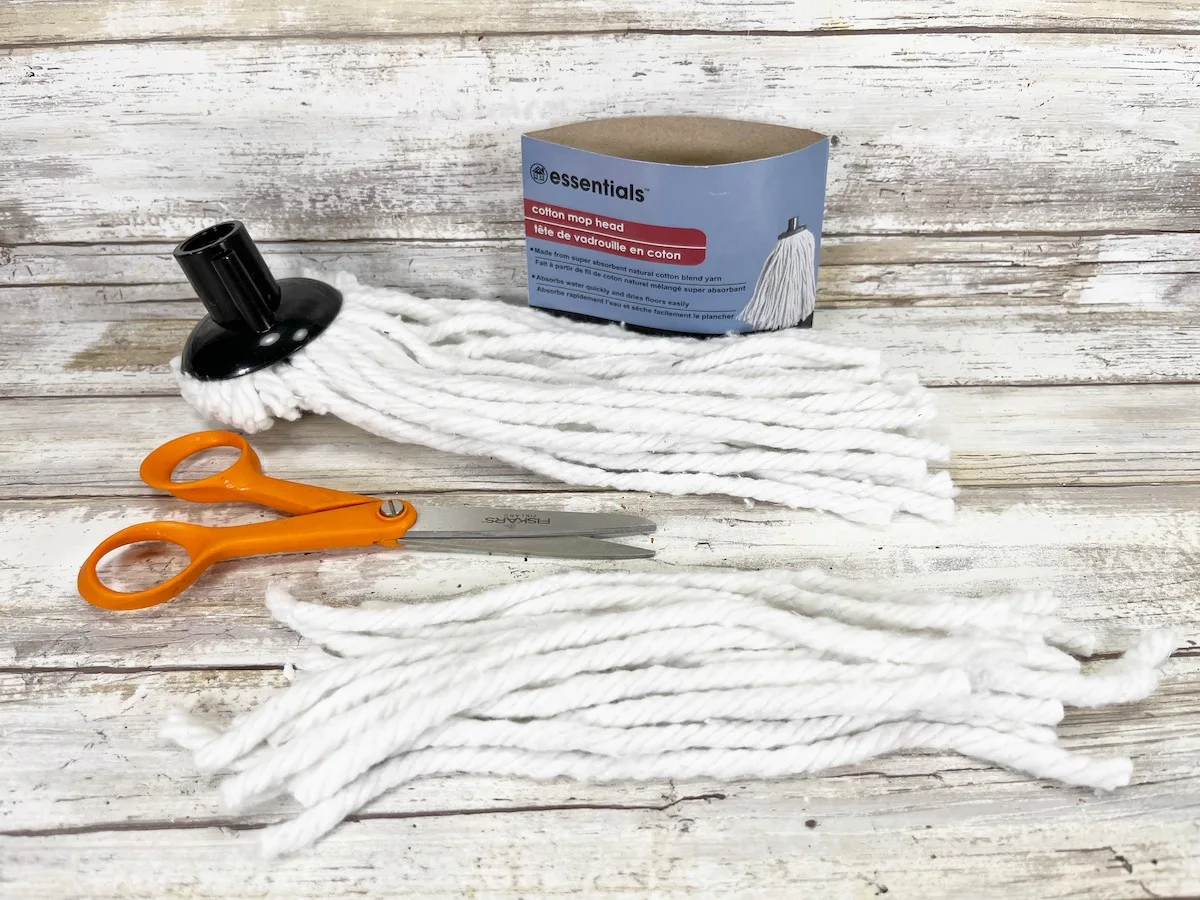
Materials
- Jumbo Craft Sticks
- Cotton Mop Head
- Wooden Ball or Bead
- Brown Buttons
- Gingham Ribbon (Orange and Green)
- Silk Sunflower
- Natural Jute Twine
- Acrylic Craft Paint (Gold, Light Brown, and Medium Brown)
- Hot Glue Gun or Craft Glue
- Gallon Zip-Top Bag (such as Ziploc)
- Aluminum Foil
- Scissors
- Paintbrush
- Ruler

Process
Step 1
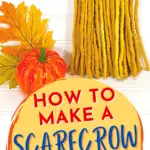
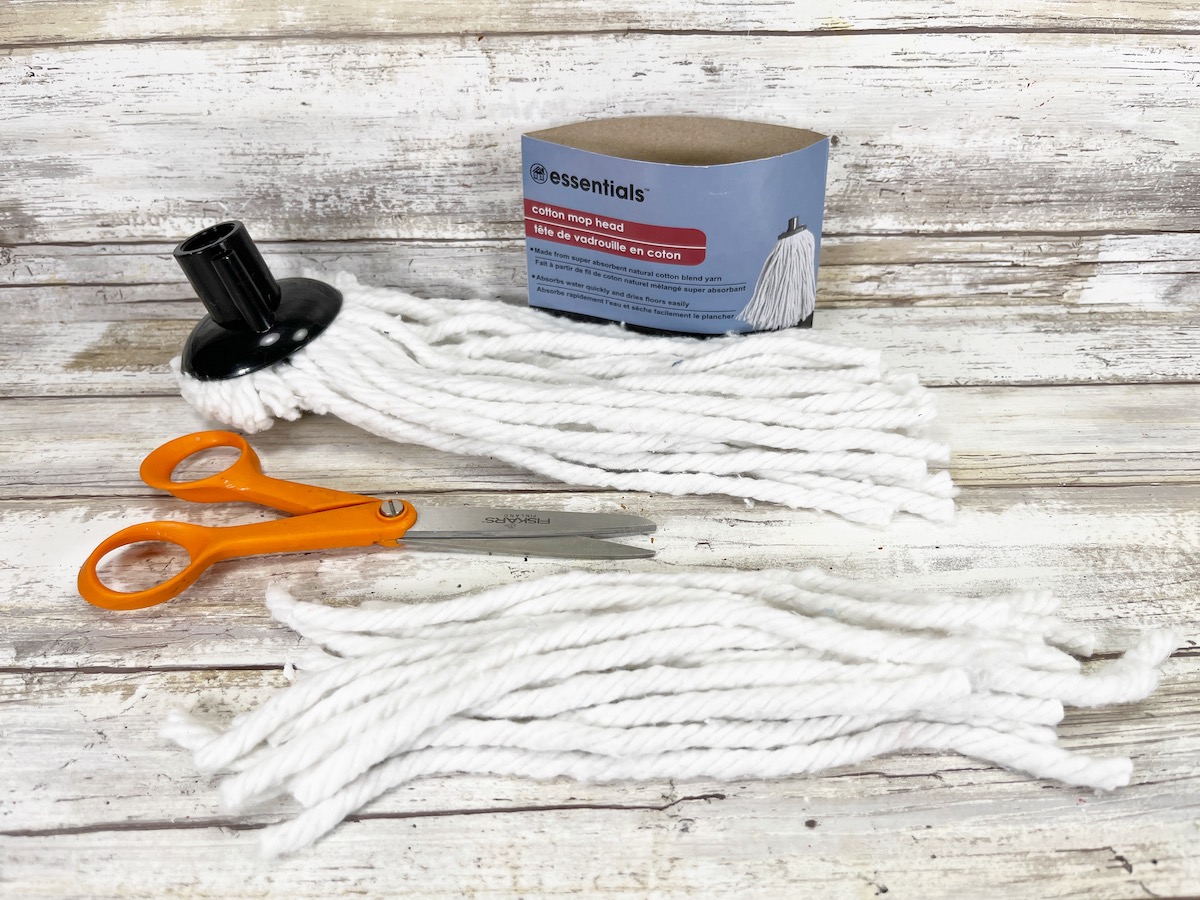
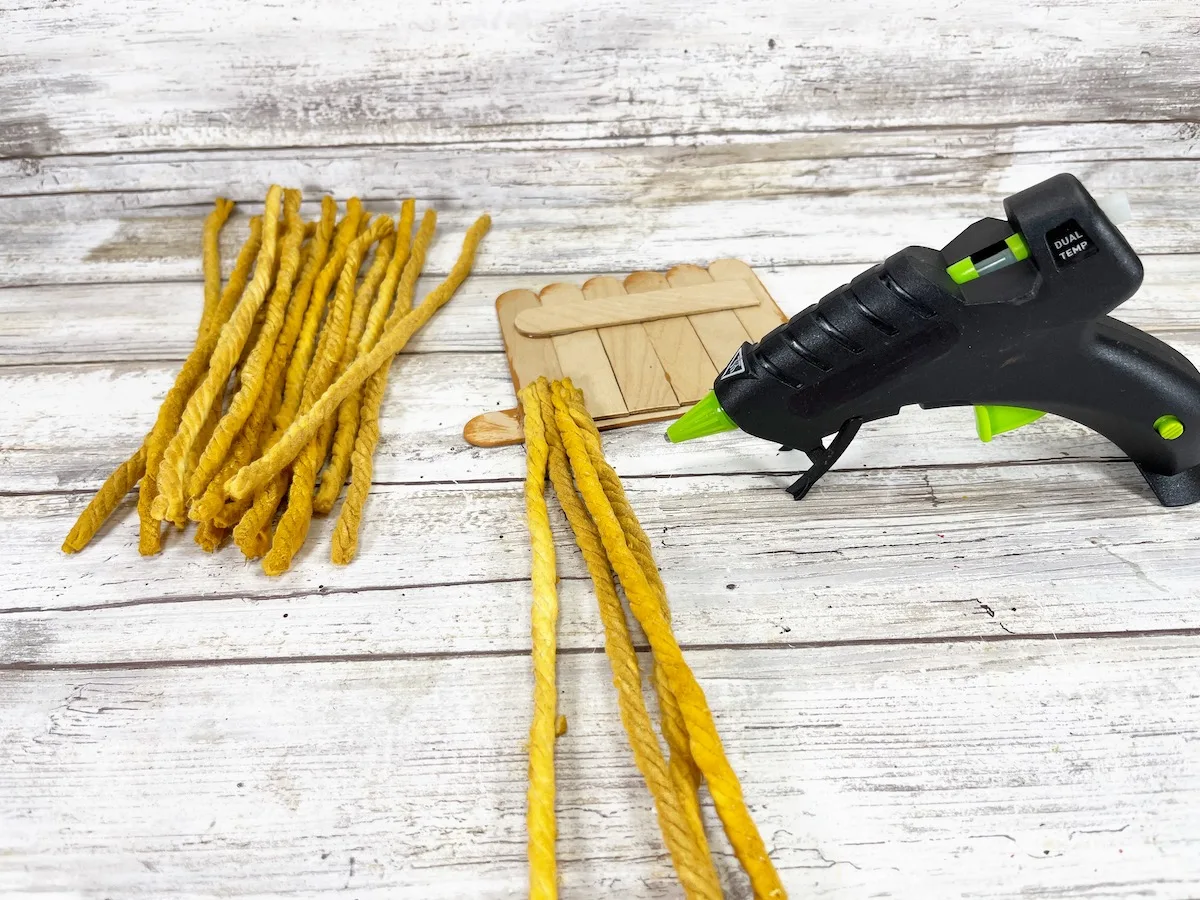
Cut approximately 30 strings from the cotton mop head with scissors.
Dampen the cut mop strings under running water and then squeeze the excess water out. Place them in a gallon zipper bag.
Step 2
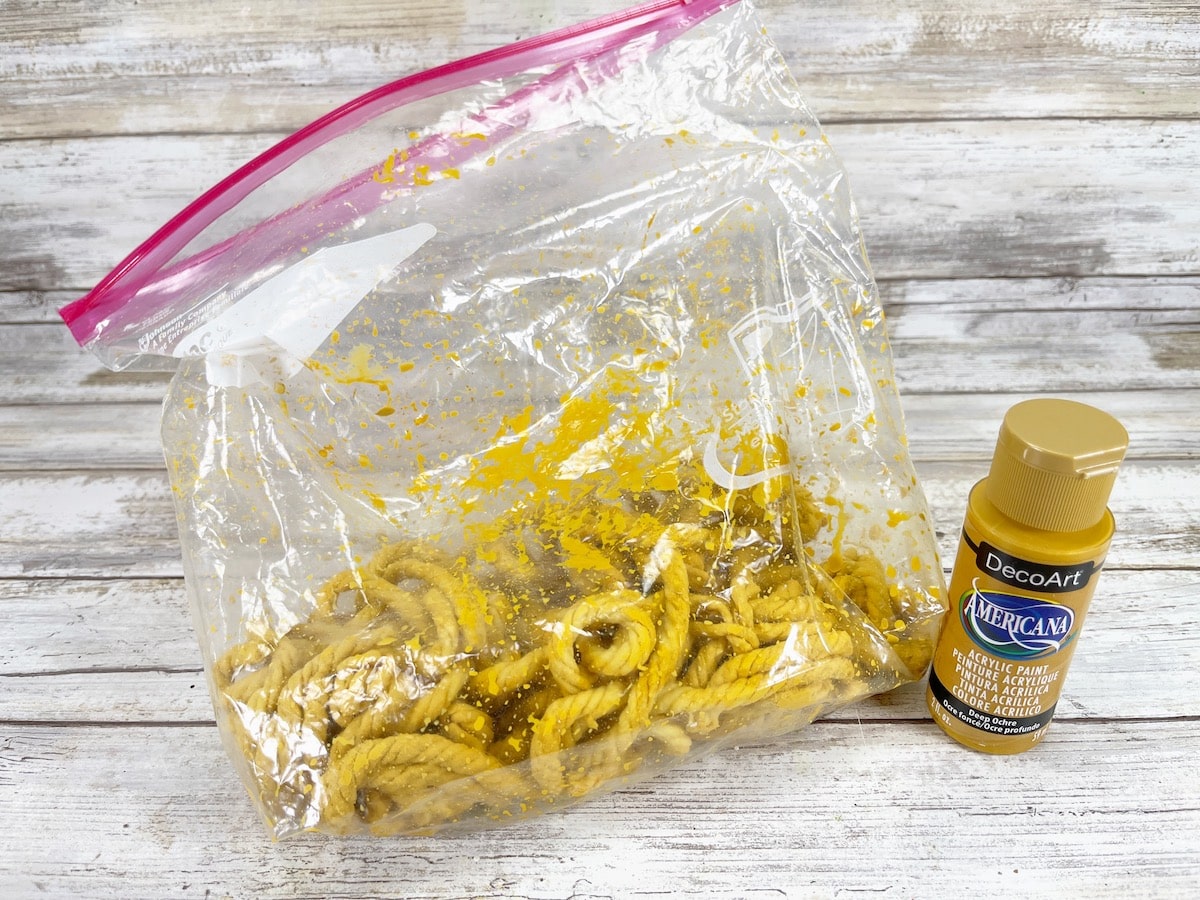
Squeeze the gold acrylic craft paint into the bag with the mop strings, then zip it closed.
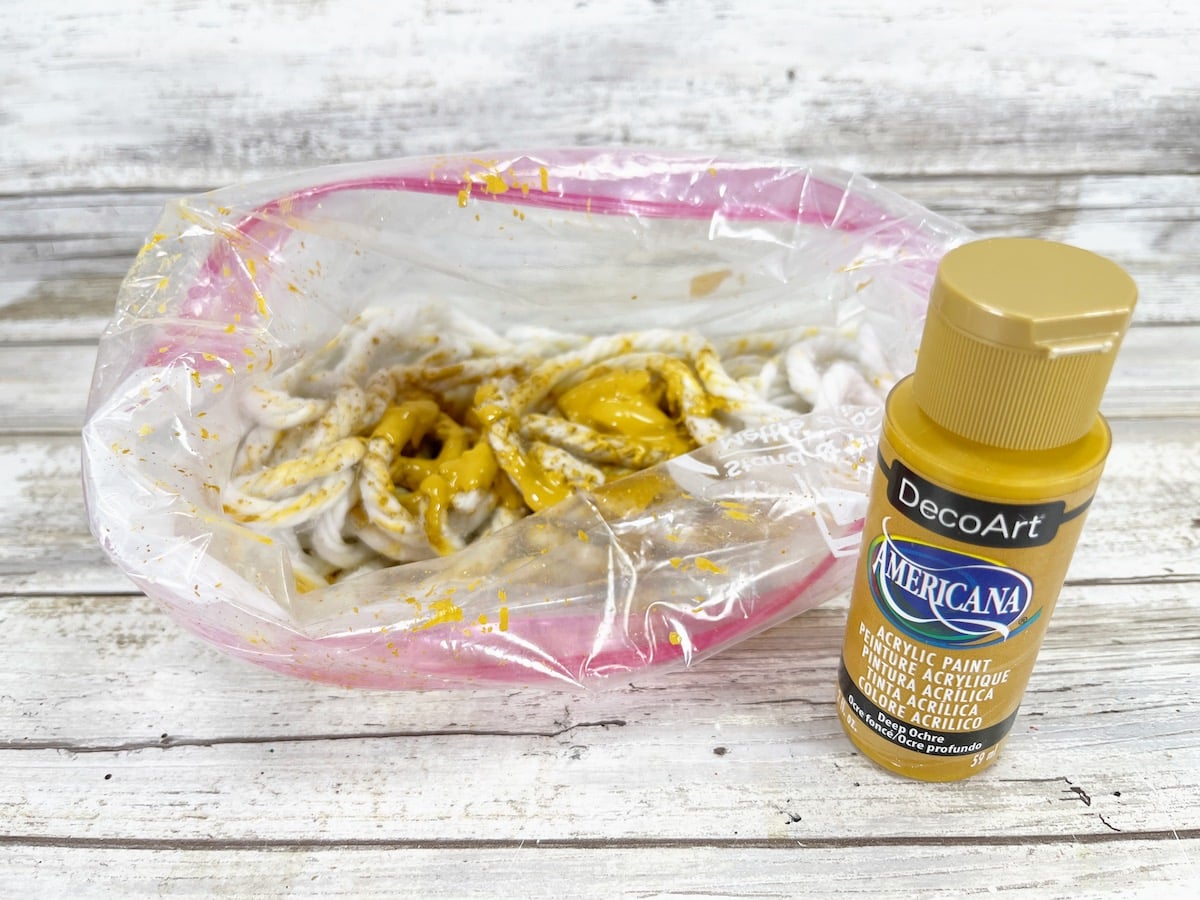

Squish the paint around inside the bag into the cotton mop strings until they are all coated.

Step 3
Dump out the gold mop strings from the plastic bag onto a piece of aluminum foil.

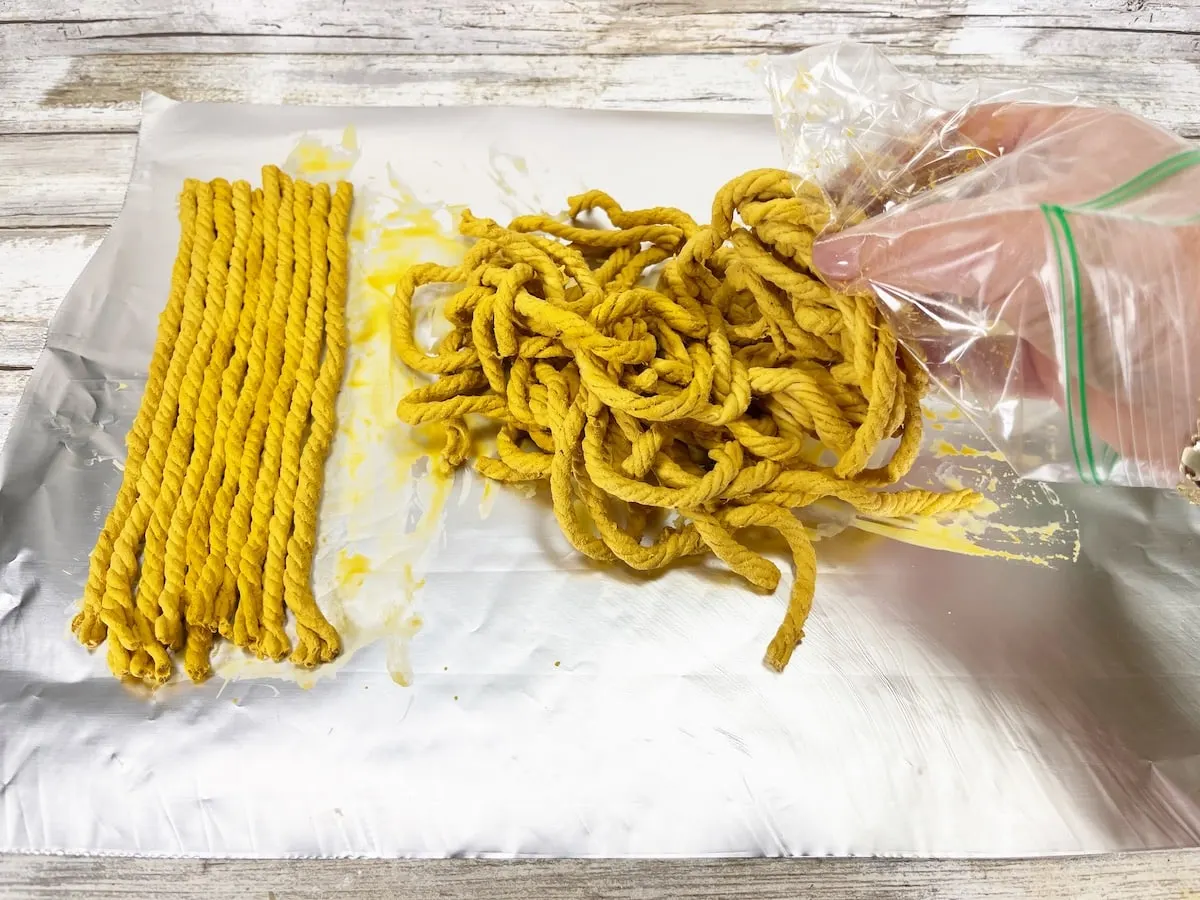
Then line up the strings to be straight, and set aside to dry.
The paint will stiffen the mop strings into the shape that you lay them down as, so make sure they are straight during the drying process.


Step 4
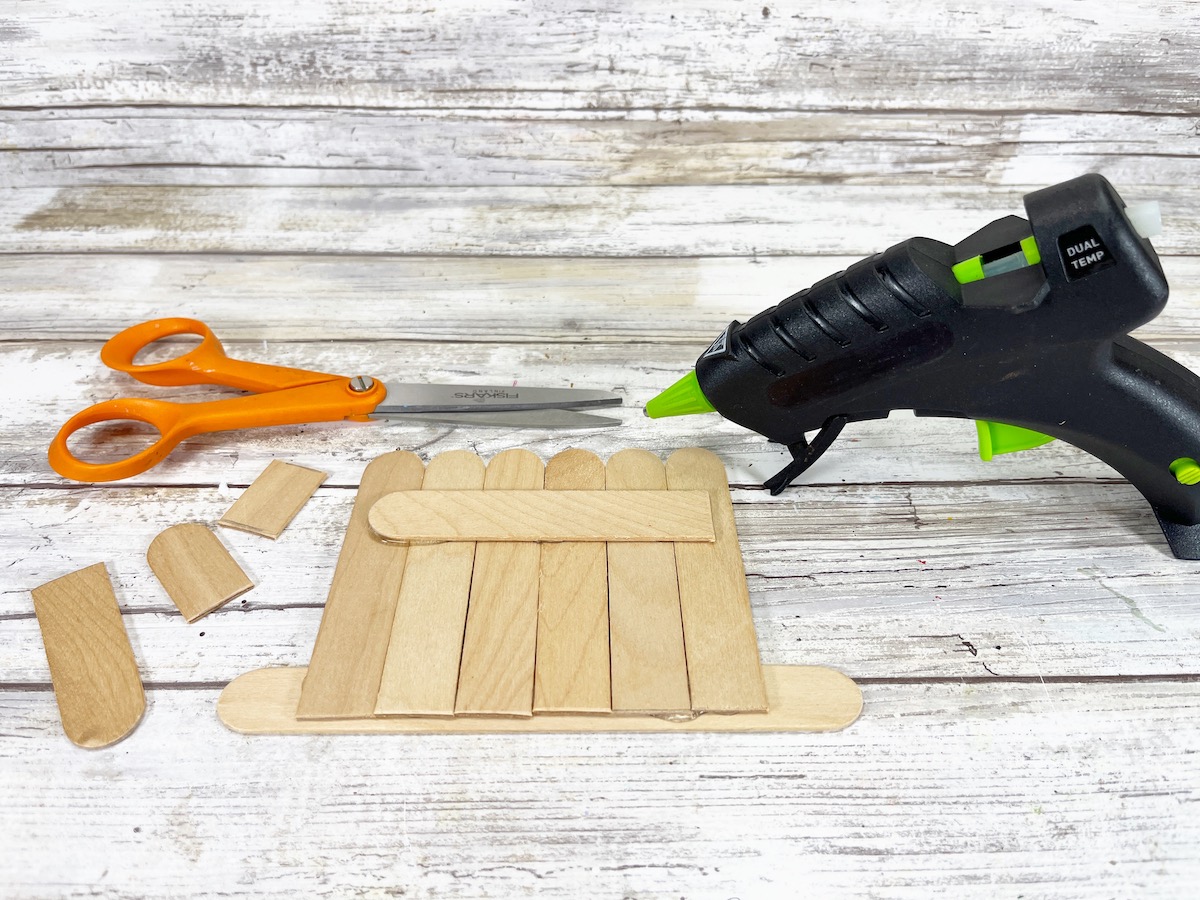
Now make the scarecrow hat. Measure six jumbo craft sticks to be four-inches long and cut with scissors.
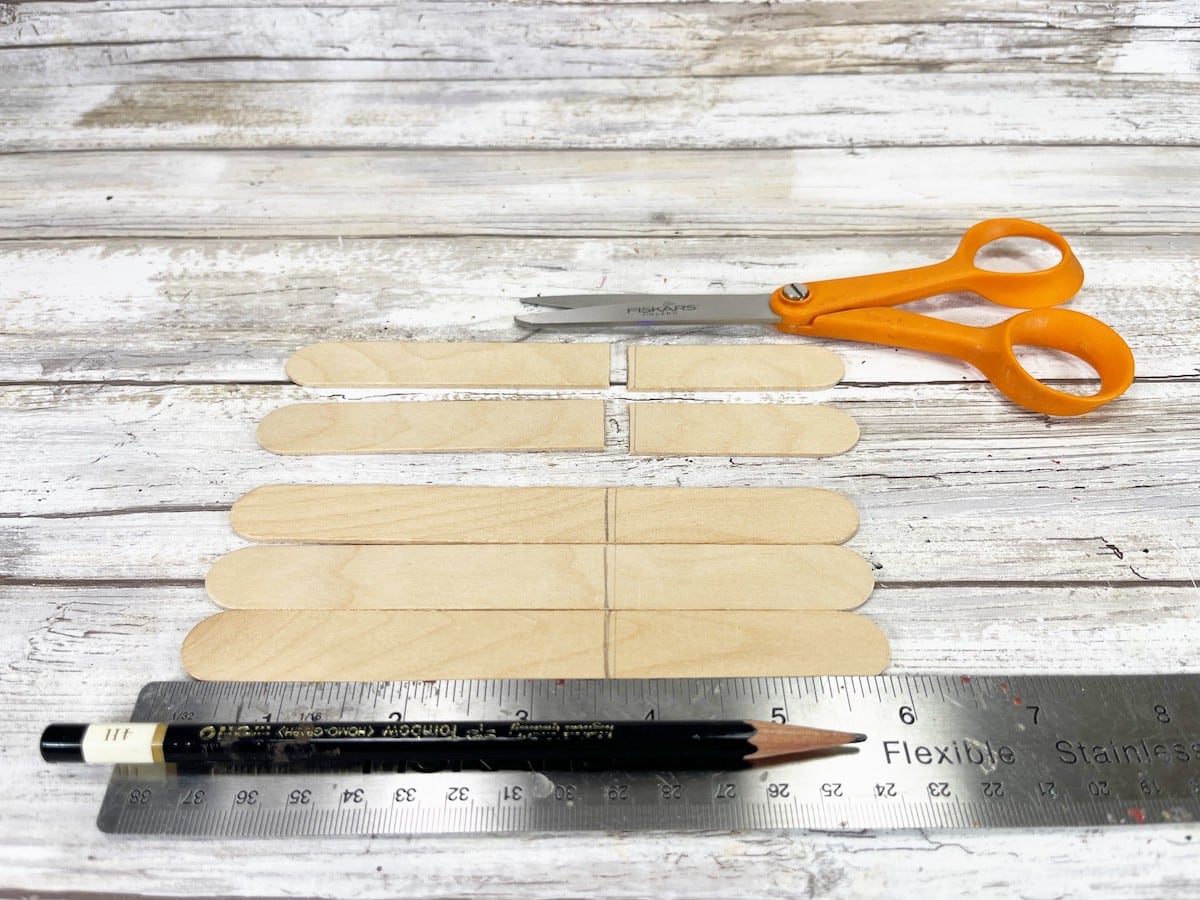

Using scissors, trim the additional jumbo craft sticks to the width of the hat and glue in the back to hold the six sticks together.
Flip the hat over and attach one full craft stick to the base as the hat brim.

Step 5
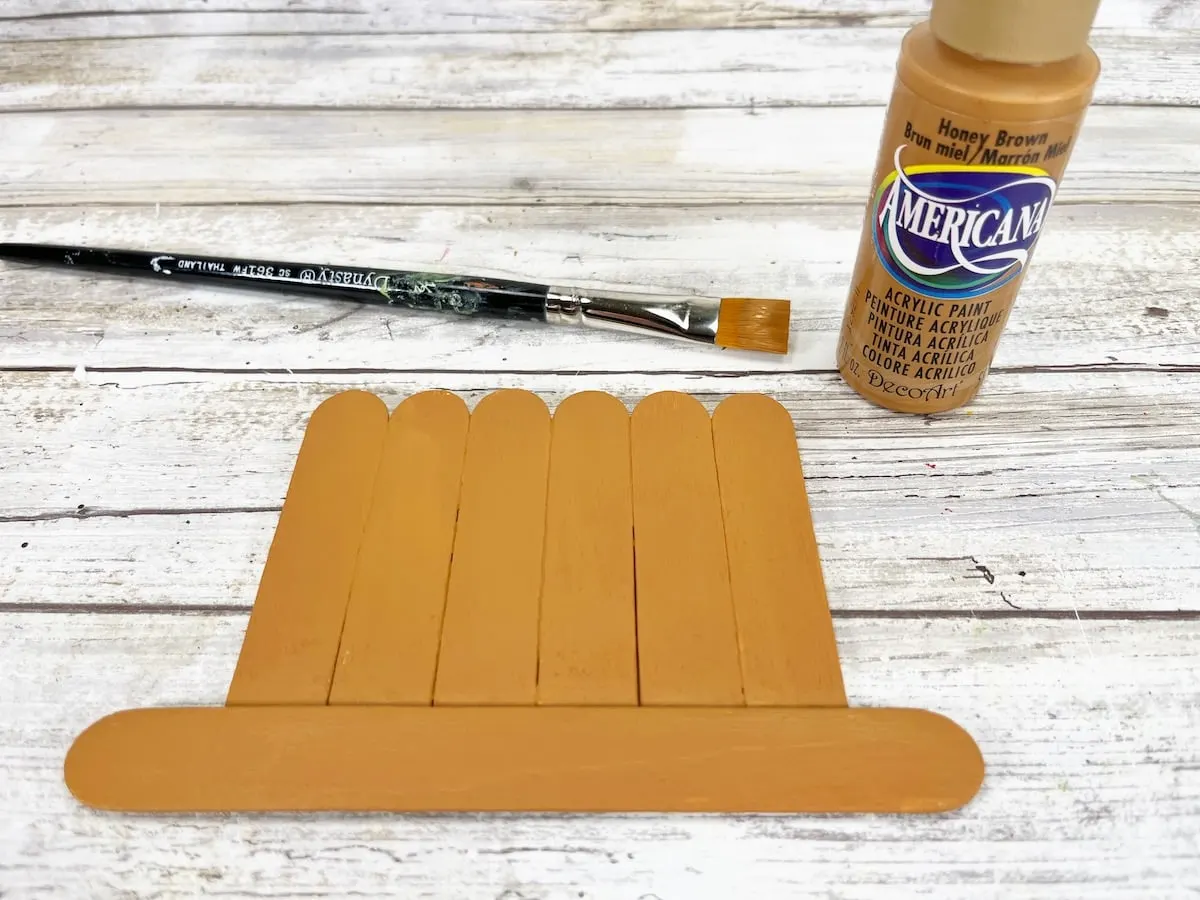
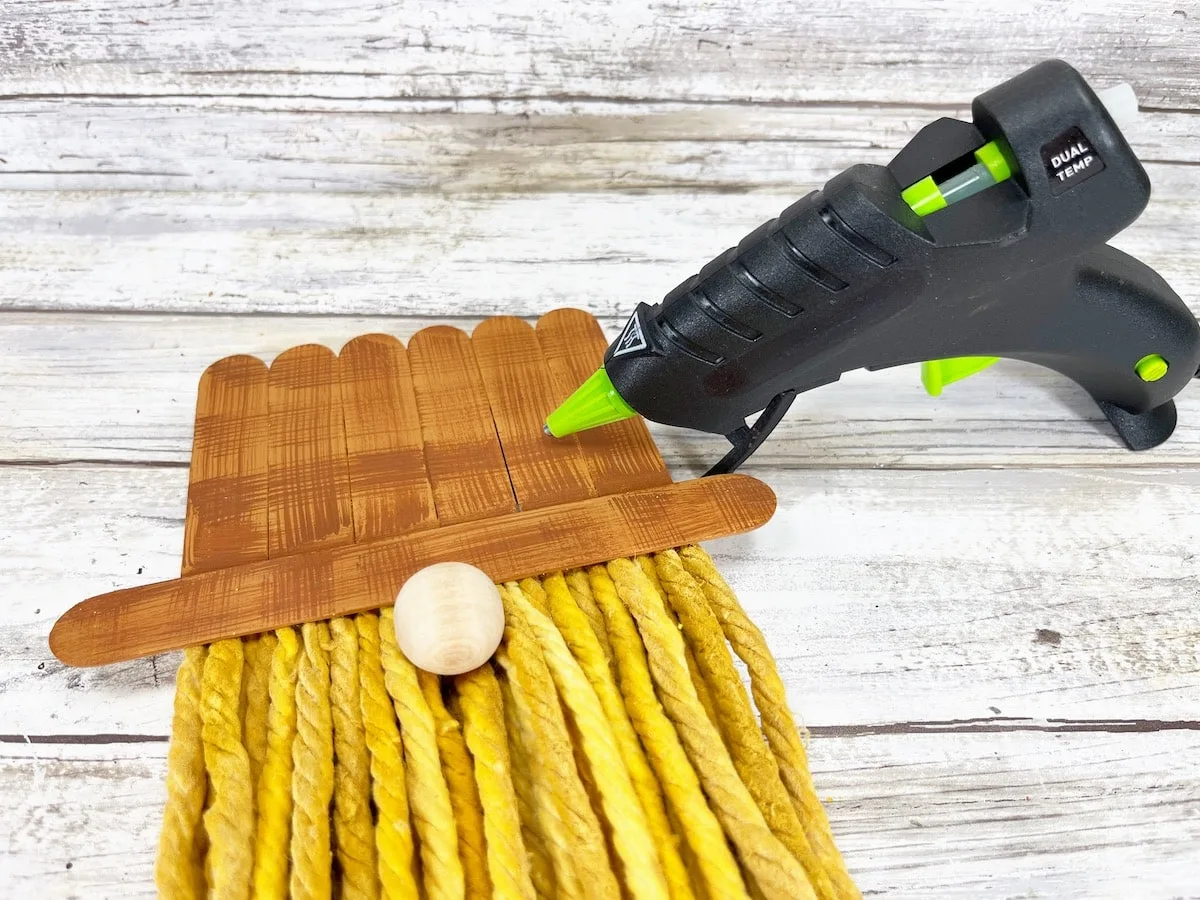
Paint the entire front of the hat with light brown acrylic craft paint. Let dry, and apply a second coat, if needed.

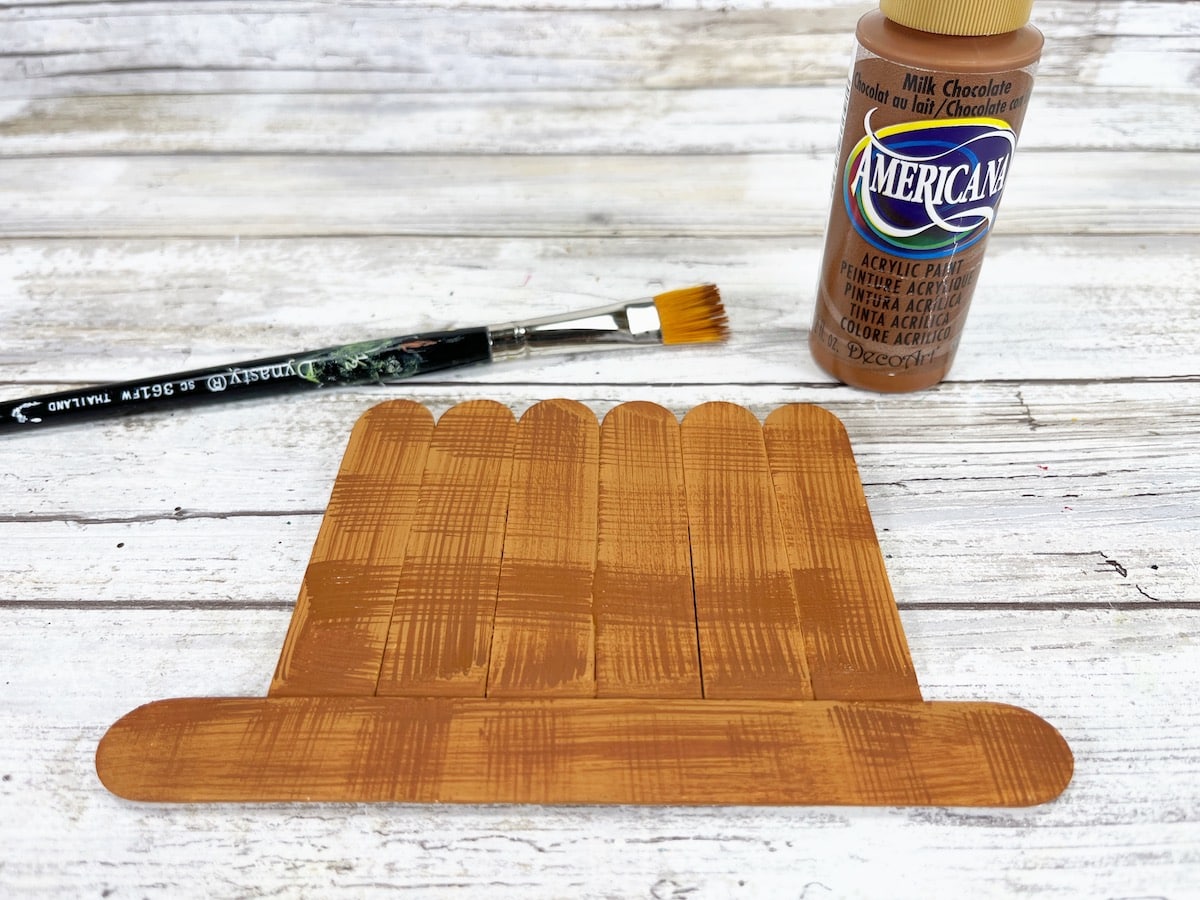
Dry brush medium brown acrylic craft paint in a cross-hatch pattern on the front of the hat to resemble burlap. Let dry completely.

Step 6
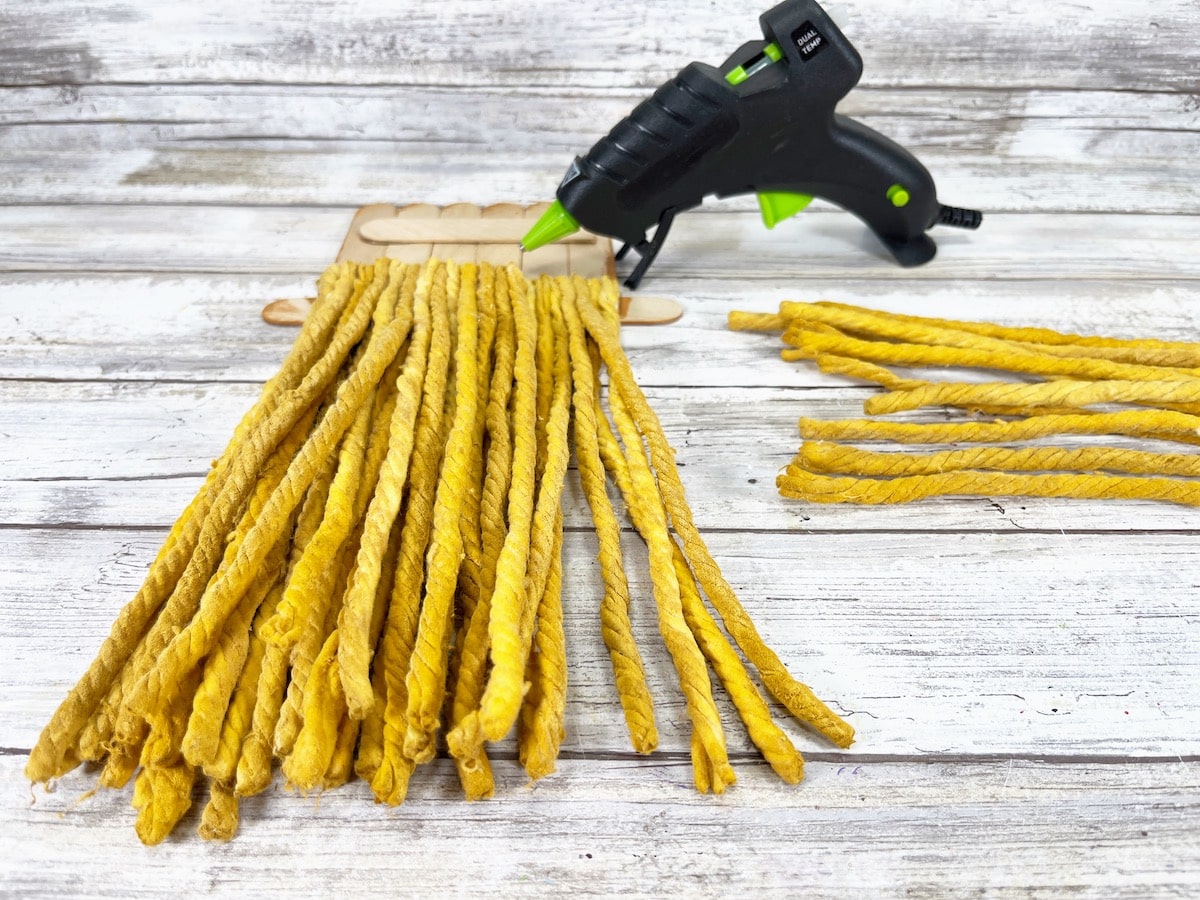
Flip the hat over and glue 15 cotton mop head strings along the bottom wooden craft stick.

Step 7
Glue the other 15 cotton mop head strings on a second layer.

Step 8
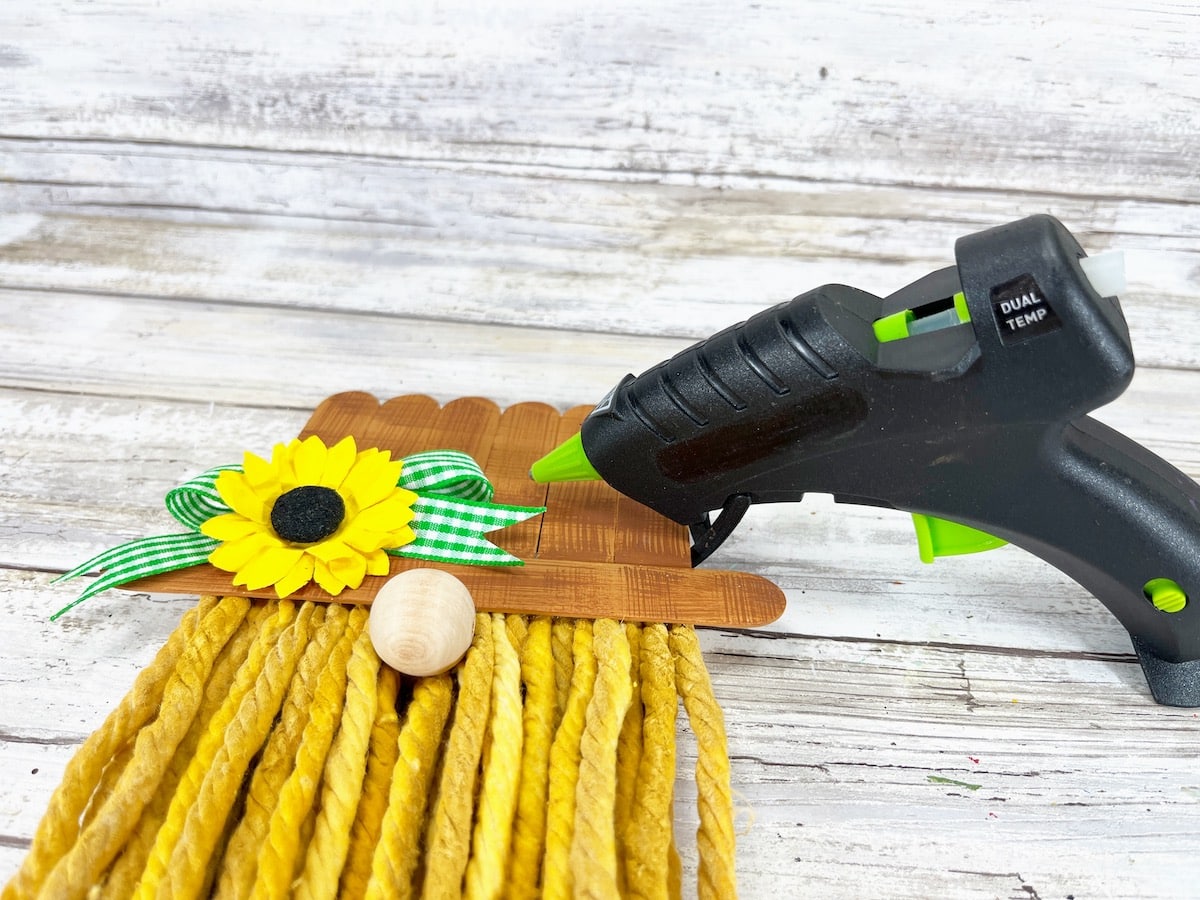
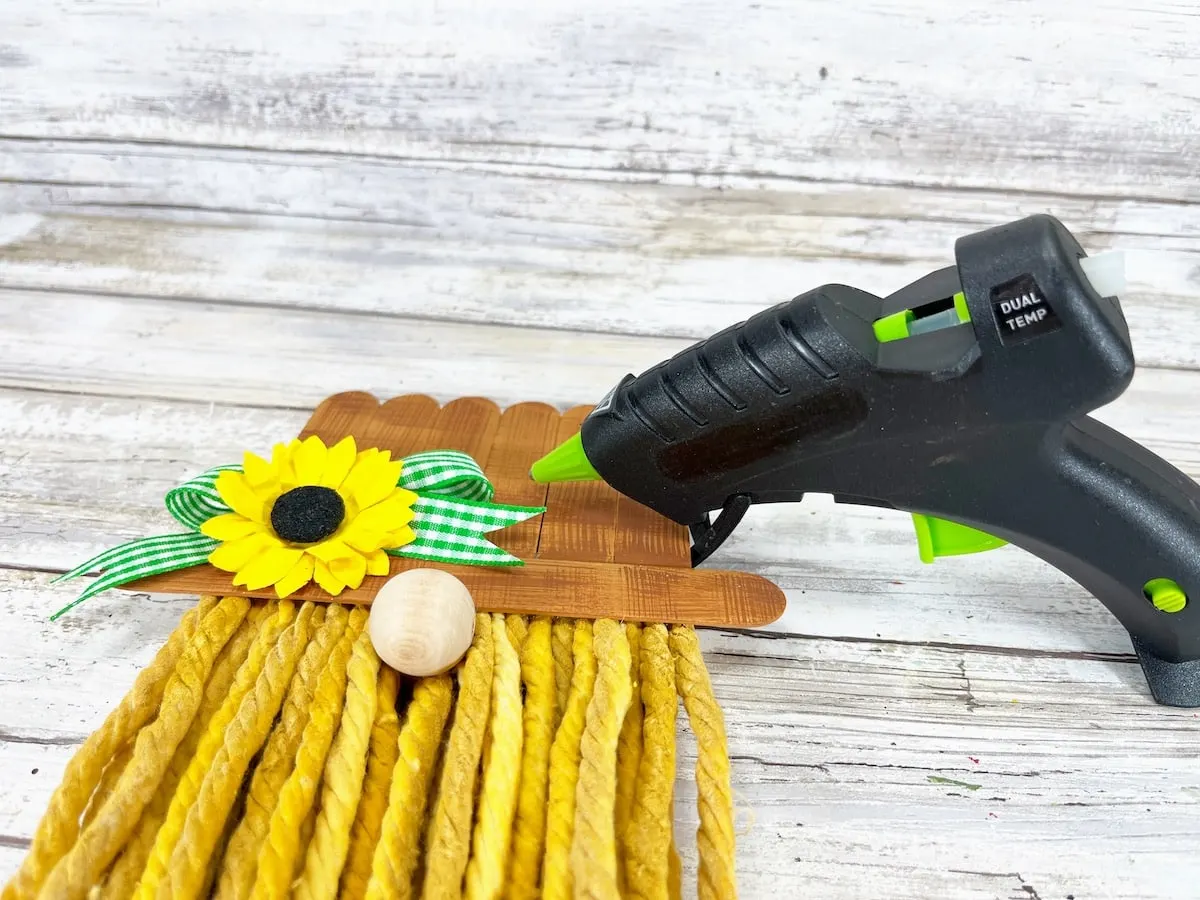
Flip the hat to face forward and glue the wooden ball to the top center of the scarecrow’s beard, just underneath the hat brim.

Step 9
Tie the green gingham ribbon into a small bow. Glue a sunflower to the center of the bow.
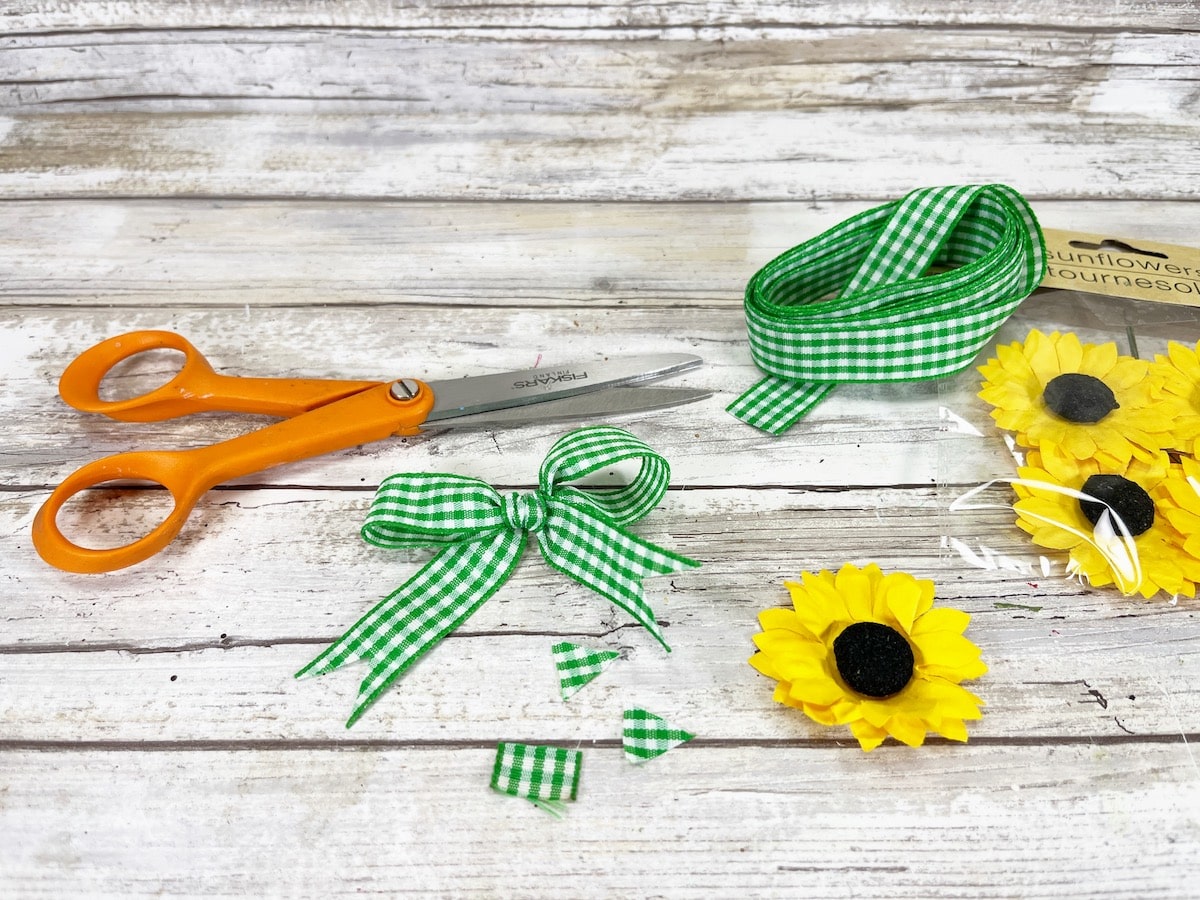

Glue the bow to the scarecrow’s hat.
Step 10
Cut a scrap of orange gingham ribbon in a square. Glue it to the hat and then draw stitches with a black marker over the ribbon and onto the hat.
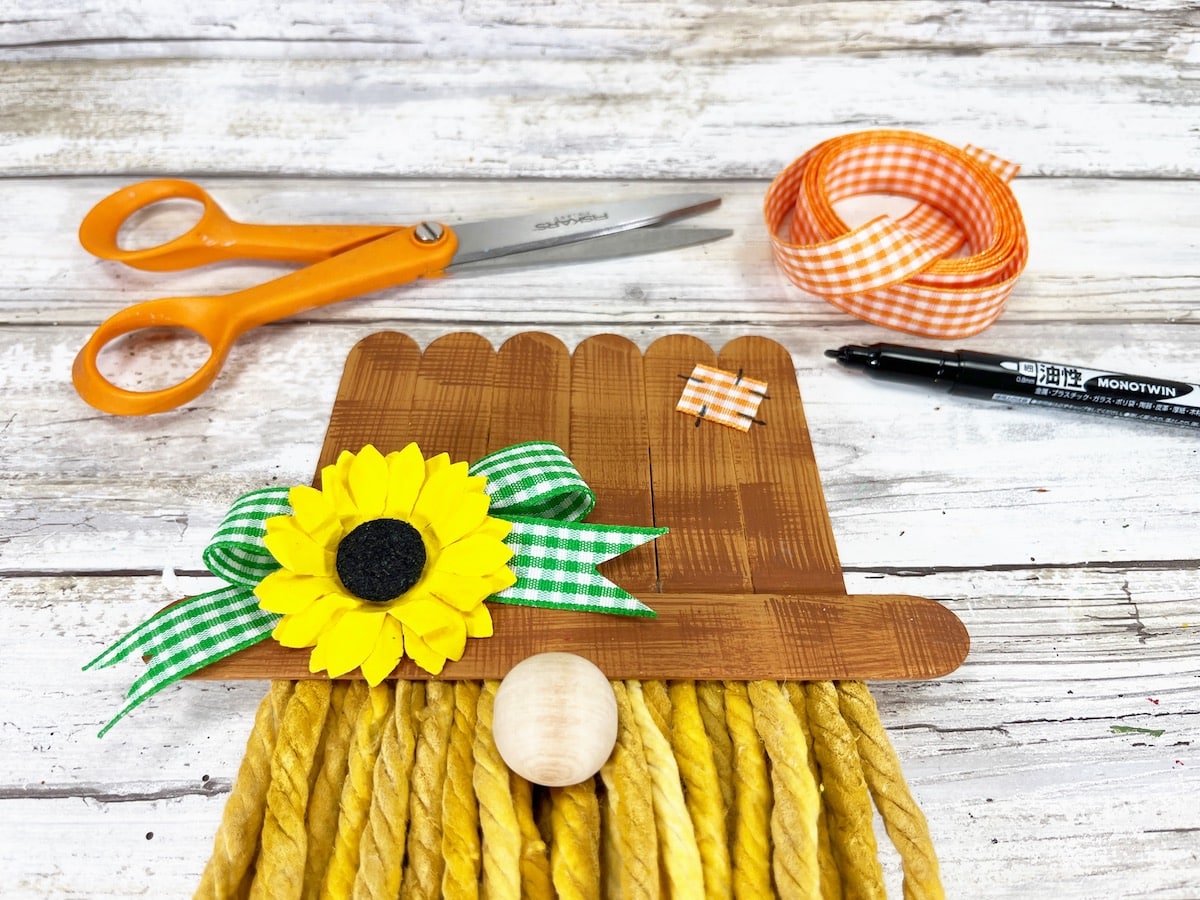

Thread a small piece of natural jute twine through a brown button and tie with a knot in the front.
Glue the button to the scarecrow’s hat.

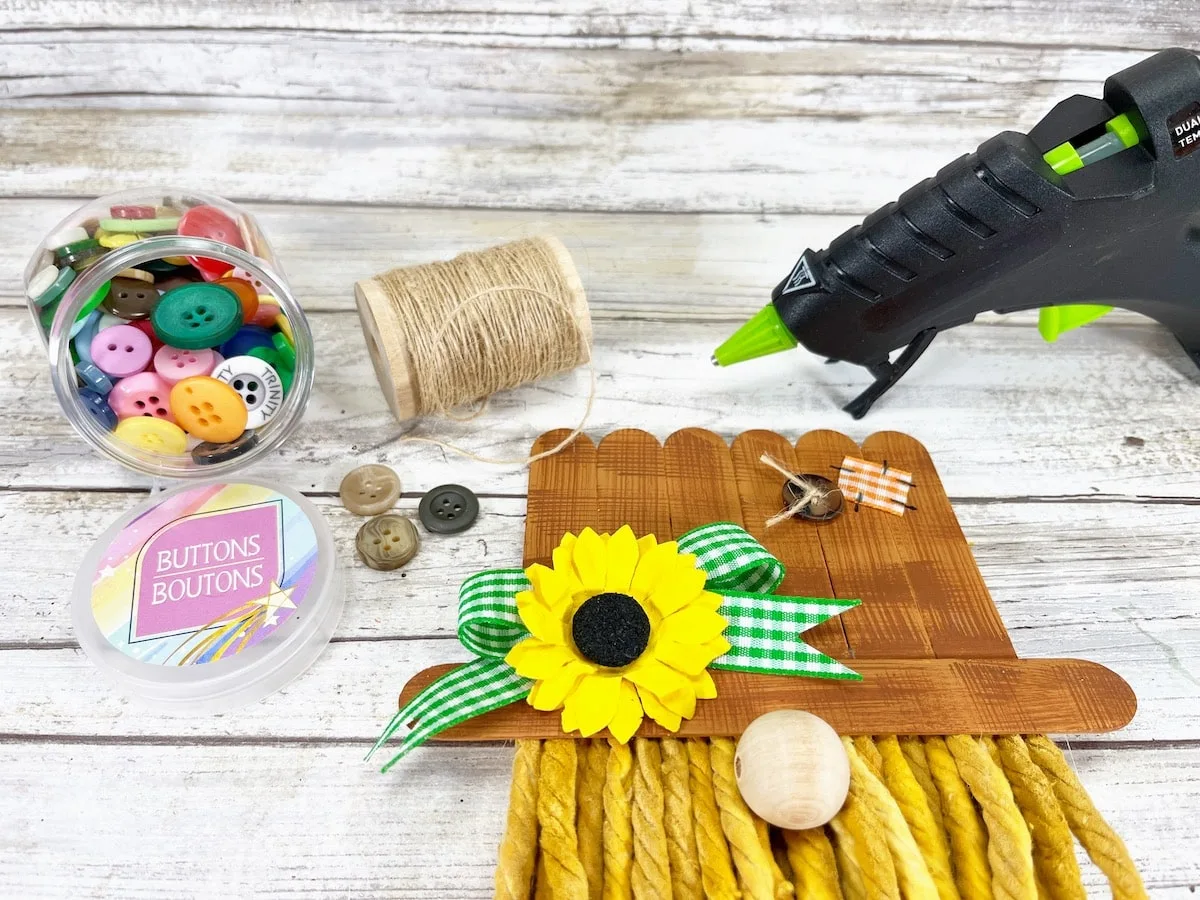
To hang the scarecrow, use another piece of jute twine to make a loop. Glue the loop to the back of the hat and allow to dry completely.
Be sure to Pin This easy Scarecrow Gnome Dollar Tree DIY craft to save for later!
Every time you share our crafts on Pinterest or Facebook it helps us out so much!!! Just use the sharing buttons at the top of the article if you care to share. Thank you!!!
You can also watch our YouTube video about making a scarecrow gnome:
Love gnomes? Make sure you see these cute ideas:
- Candy Corn Gnome
- Witch Paintbrush Gnome
- Fall Gnome with Leaf Beard
- Grinch Gnome
- Easy DIY Gnome Ornaments
- Gnome Wine Bottle Topper
- Mason Jar Gnome
- Vampire Gnomes
Be sure to see all of our easy Fall crafts and Dollar Tree DIY ideas!
