


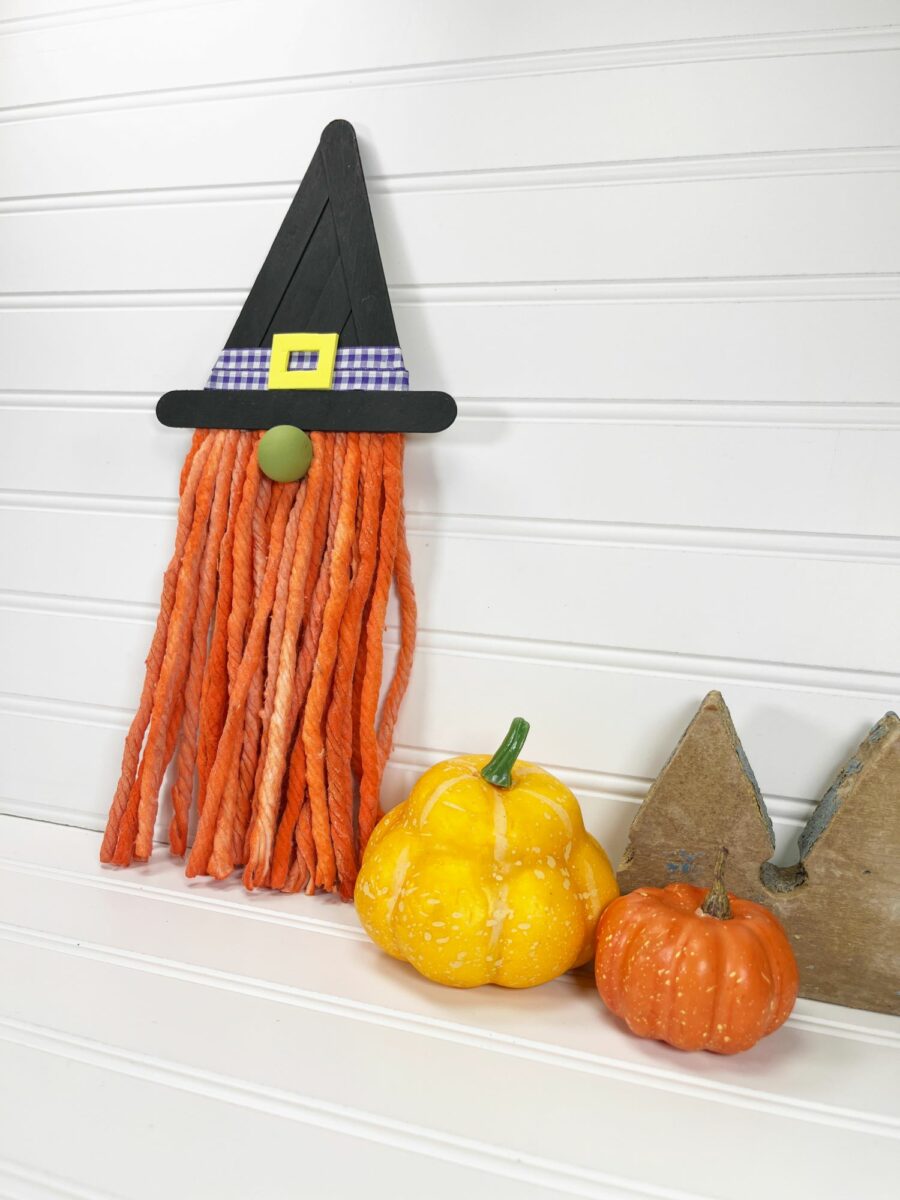
This DIY witch gnome is a fun Halloween decoration. Use dollar store supplies, including a cotton mop, to make this spooky gnome perfect for your front door or hanging on a wall.


This easy witch gnome uses a similar process to our Scarecrow Gnome and Santa Gnome, which also uses a mop head to make the beard.

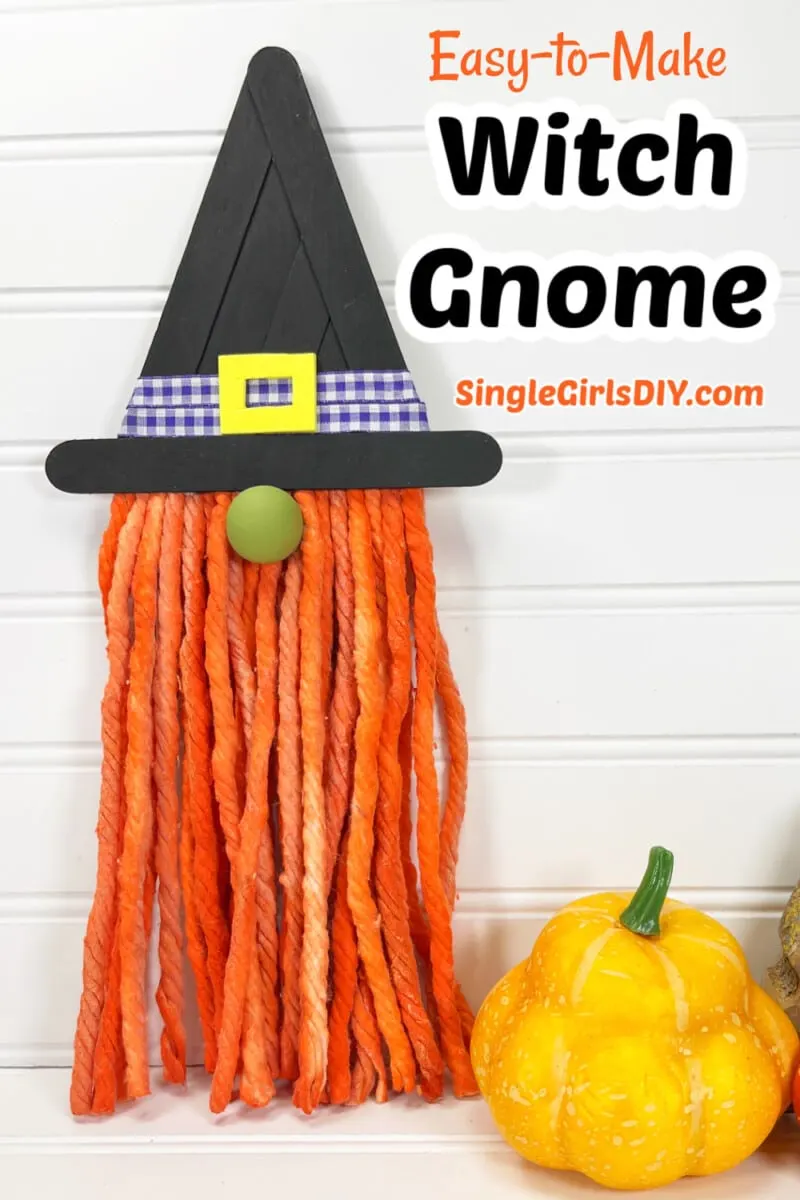
How to Make a Witch Gnome
Most of the supplies were purchased at the Dollar Tree.
Supplies
- Free Witch Gnome Pattern
- Jumbo Craft Sticks
- Cotton Mop Head
- Wooden Ball or Bead
- Yellow Craft Foam
- Purple Gingham Ribbon
- Acrylic Craft Paint (Muted Light Green, Black, Orange)
- Hot Glue Gun or Craft Glue
- Aluminum Foil
- Gallon Zipper Bag
- Paintbrush
Directions
Step 1
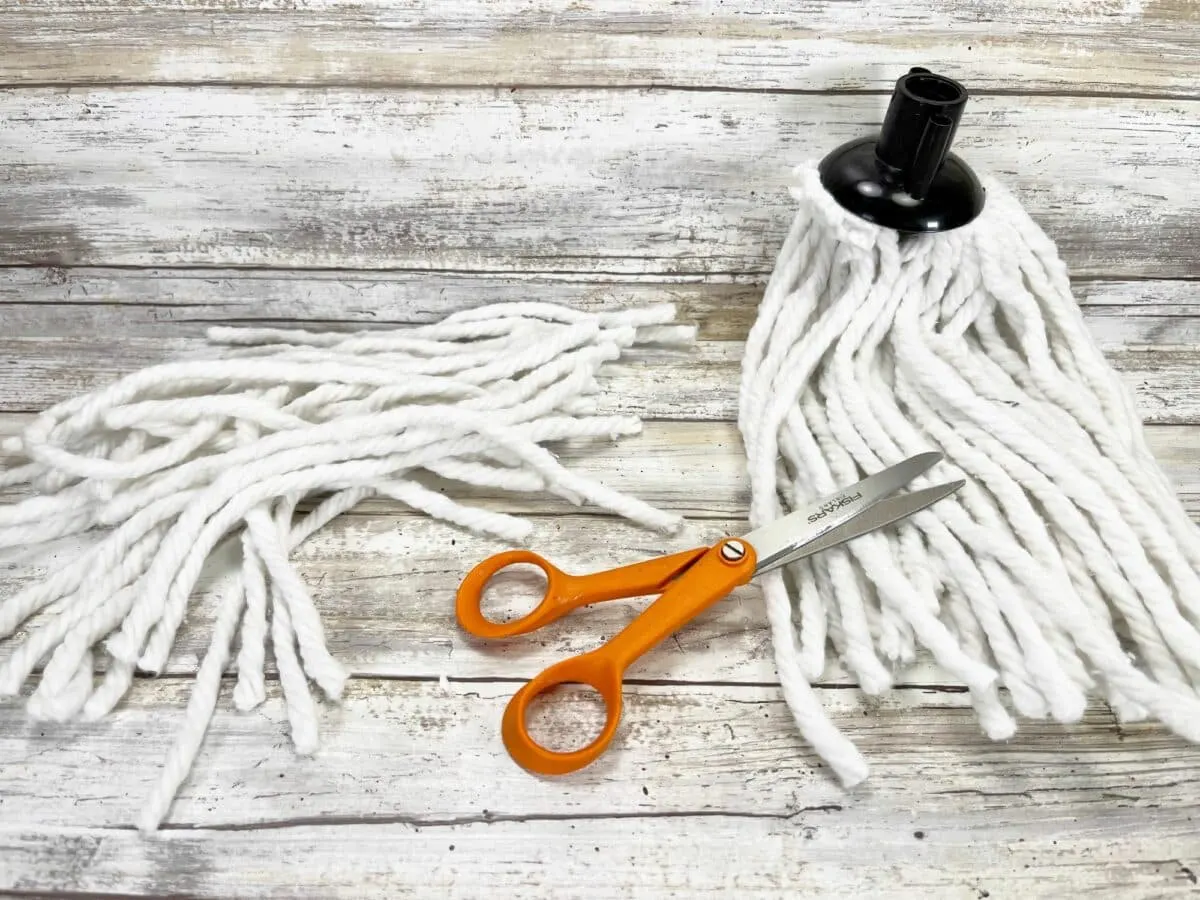
Cut approximately 30 strings from the cotton mop head with scissors, cutting at the base of the black attachment.
Dampen the strings under running water, squeezing the excess water out of the strings and then place in a plastic gallon zip-top bag.

Step 2
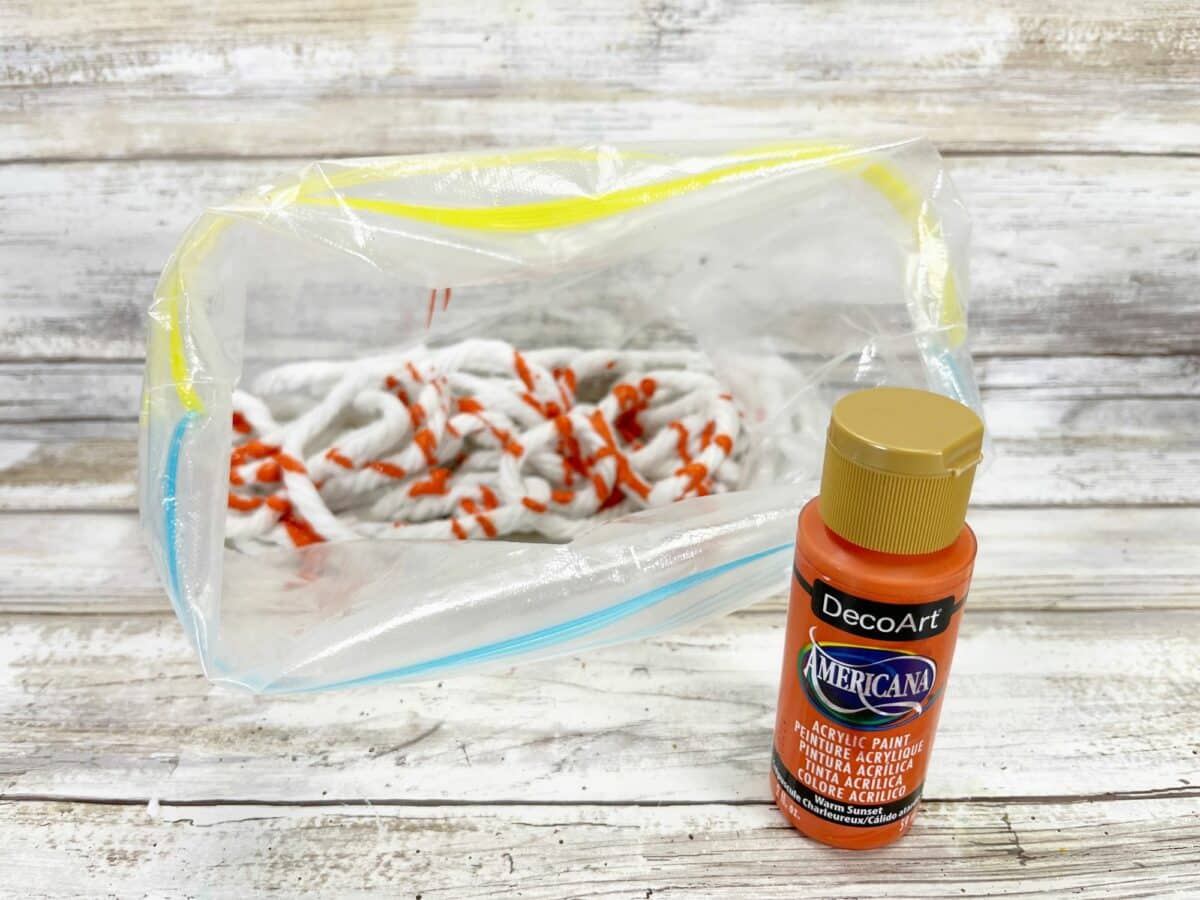
Squeeze orange acrylic craft paint into the bag, then zip it closed.
Squish the paint around into the mop strings until they are all completely coated.


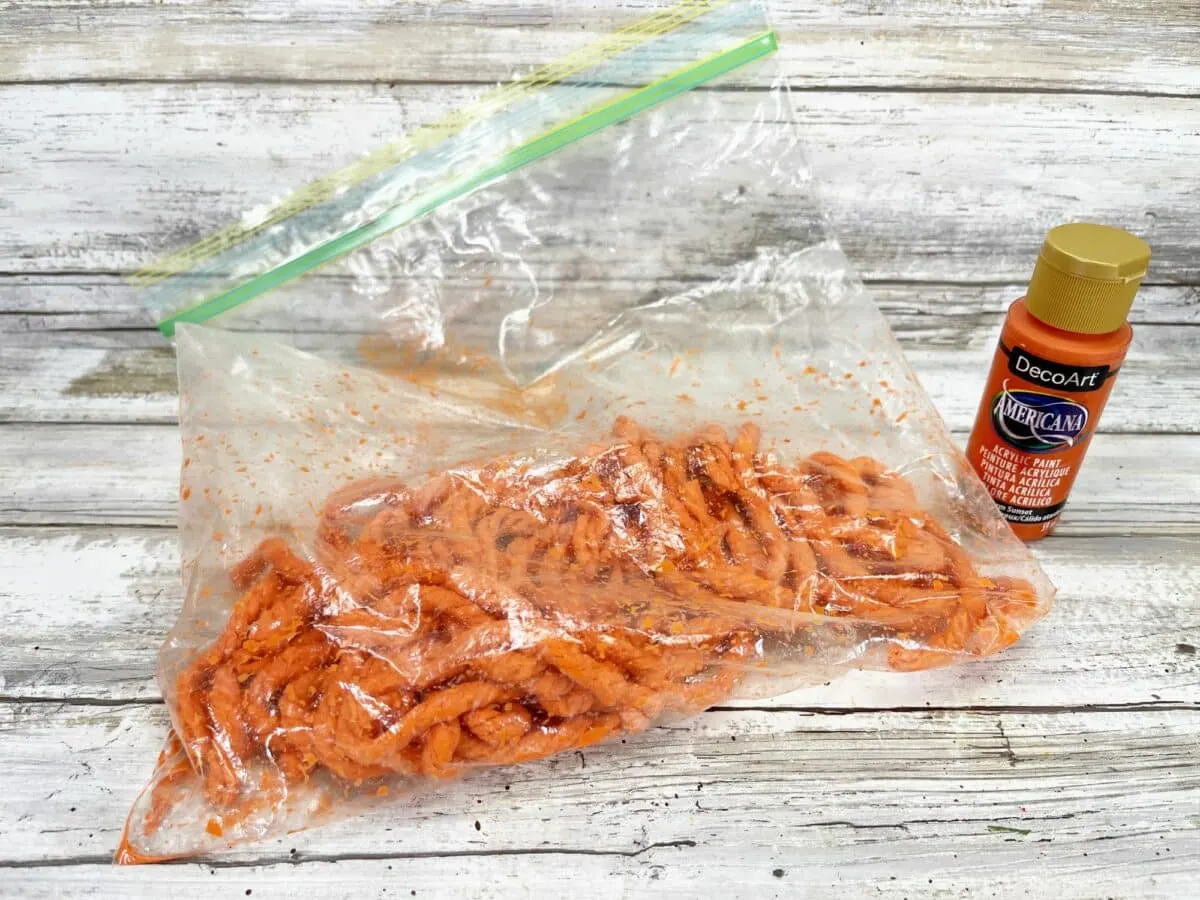
Empty out the mop strings from the plastic bag onto a piece of aluminum foil. Be sure to straighten out each string to be straight, because they will dry in the position that you lay them in!


Allow to dry completely. They will stiffen as they dry.
Step 3
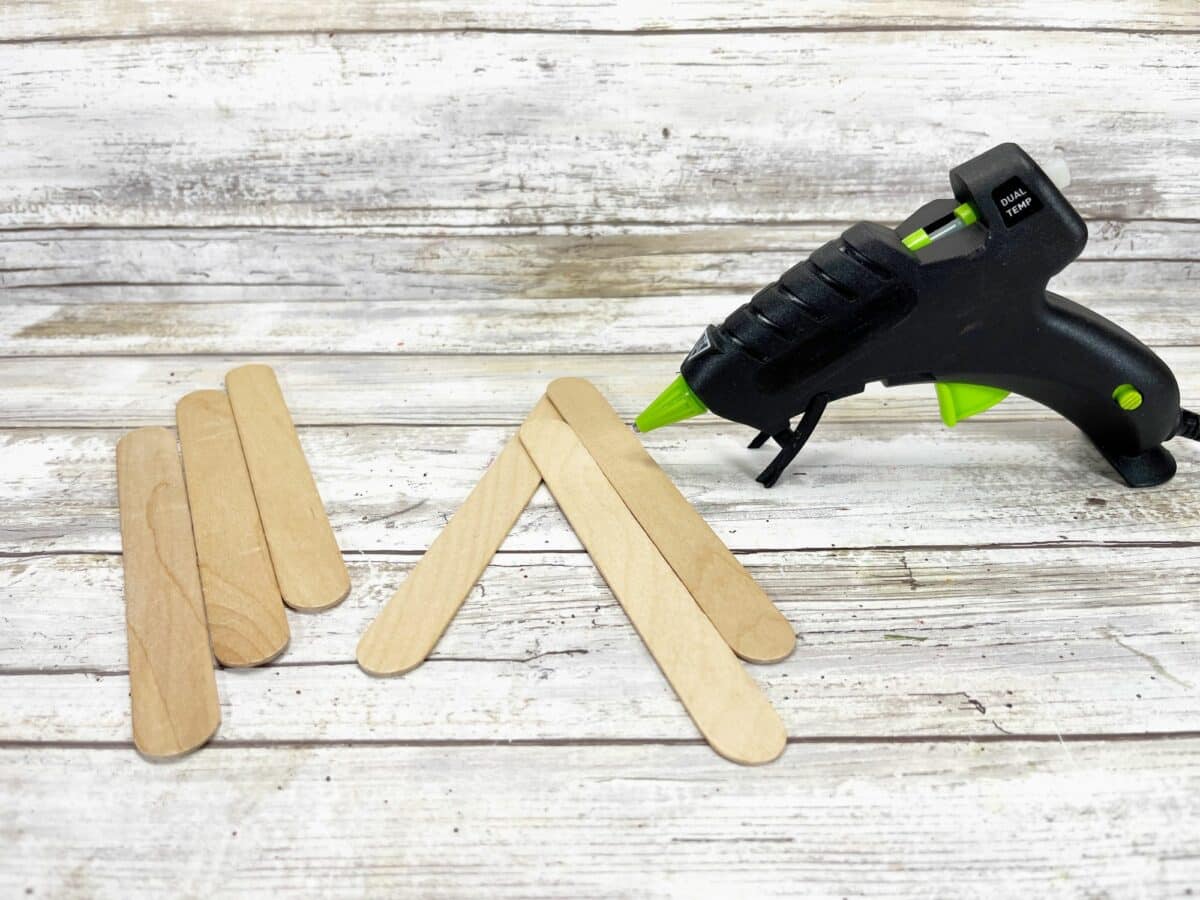
To make the witch’s hat, make an upside down “V” with two jumbo craft sticks. Glue the ends together.
Continue to add more jumbo craft sticks along the length of the hat in the same diagonal pattern, gluing them down side by side.

Then trim the long ends off with scissors to create a triangle-shaped hat.
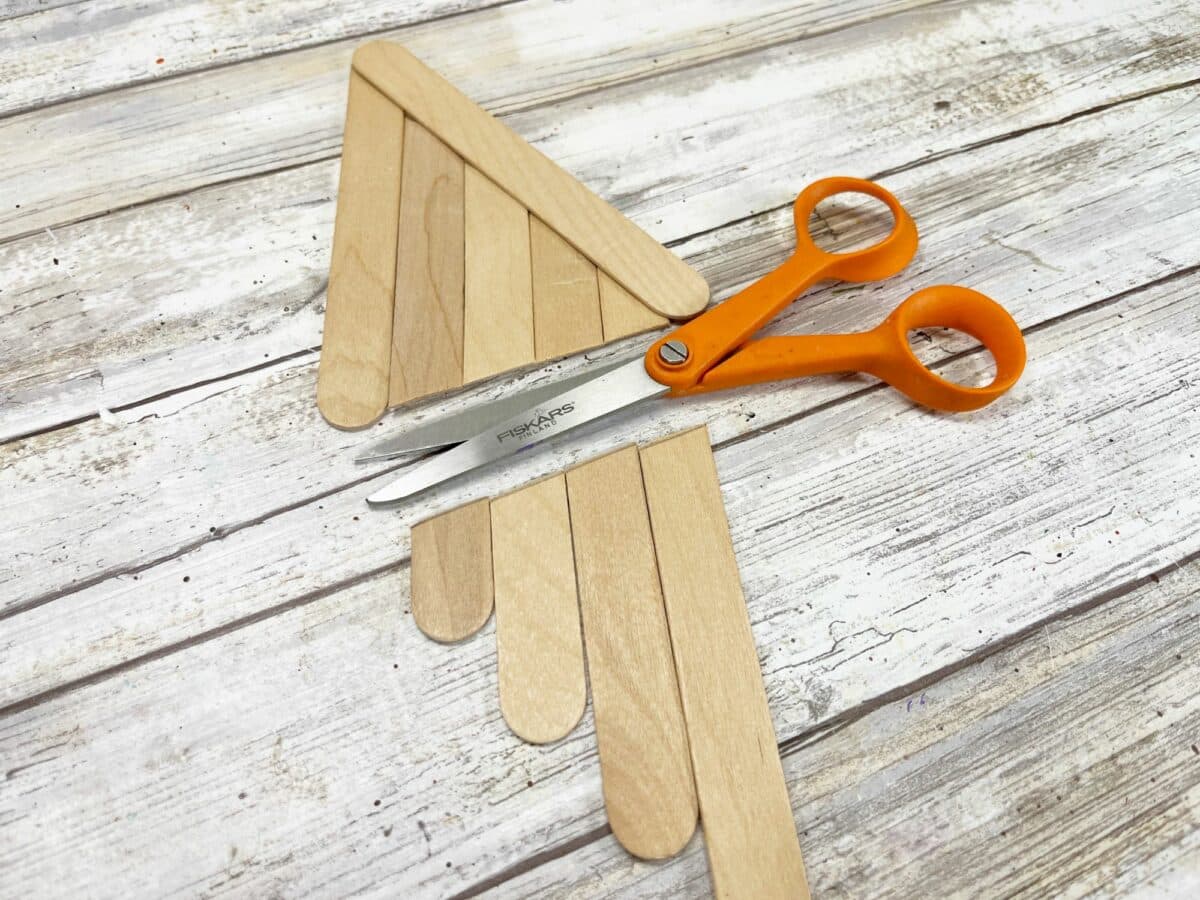

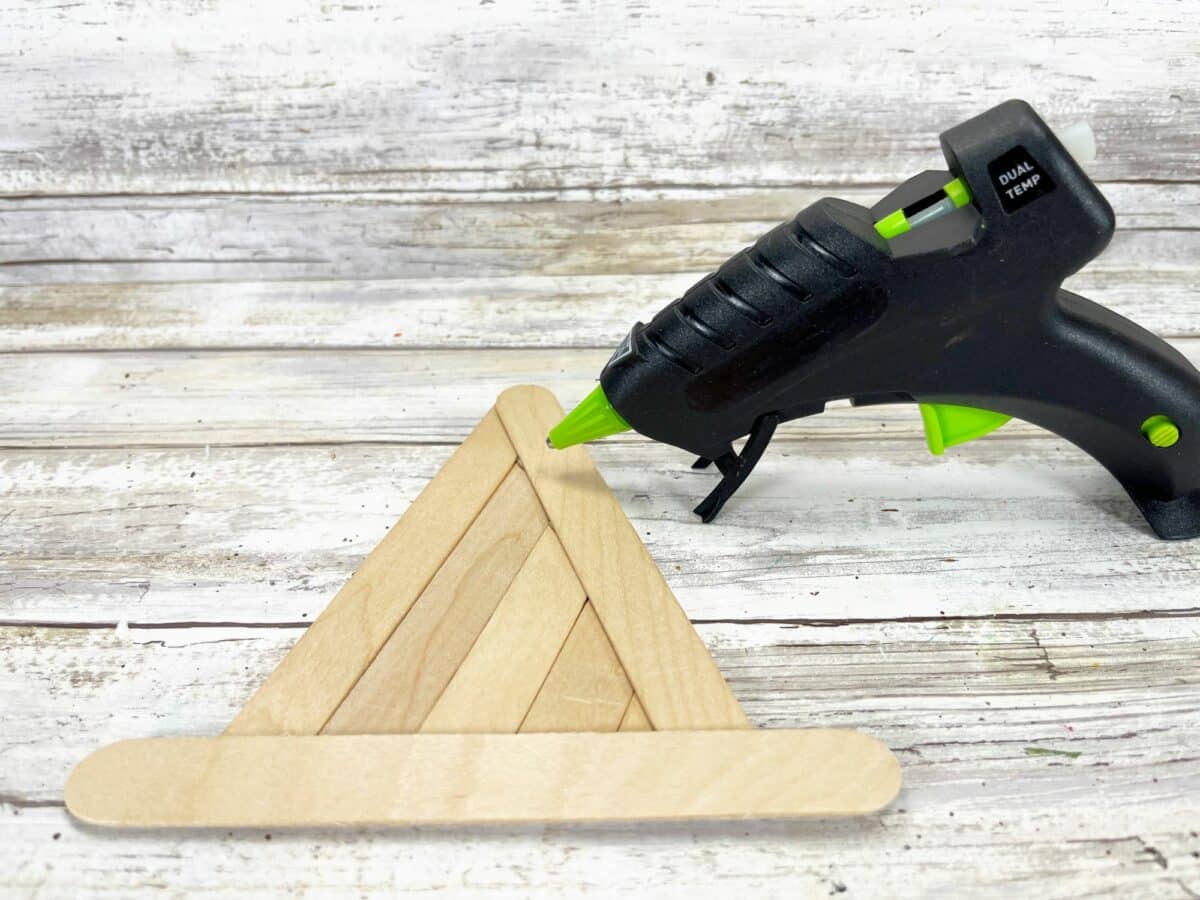
Turn the hat over to the front side and glue one jumbo craft stick across the base of the triangle to create the hat brim.

Step 4
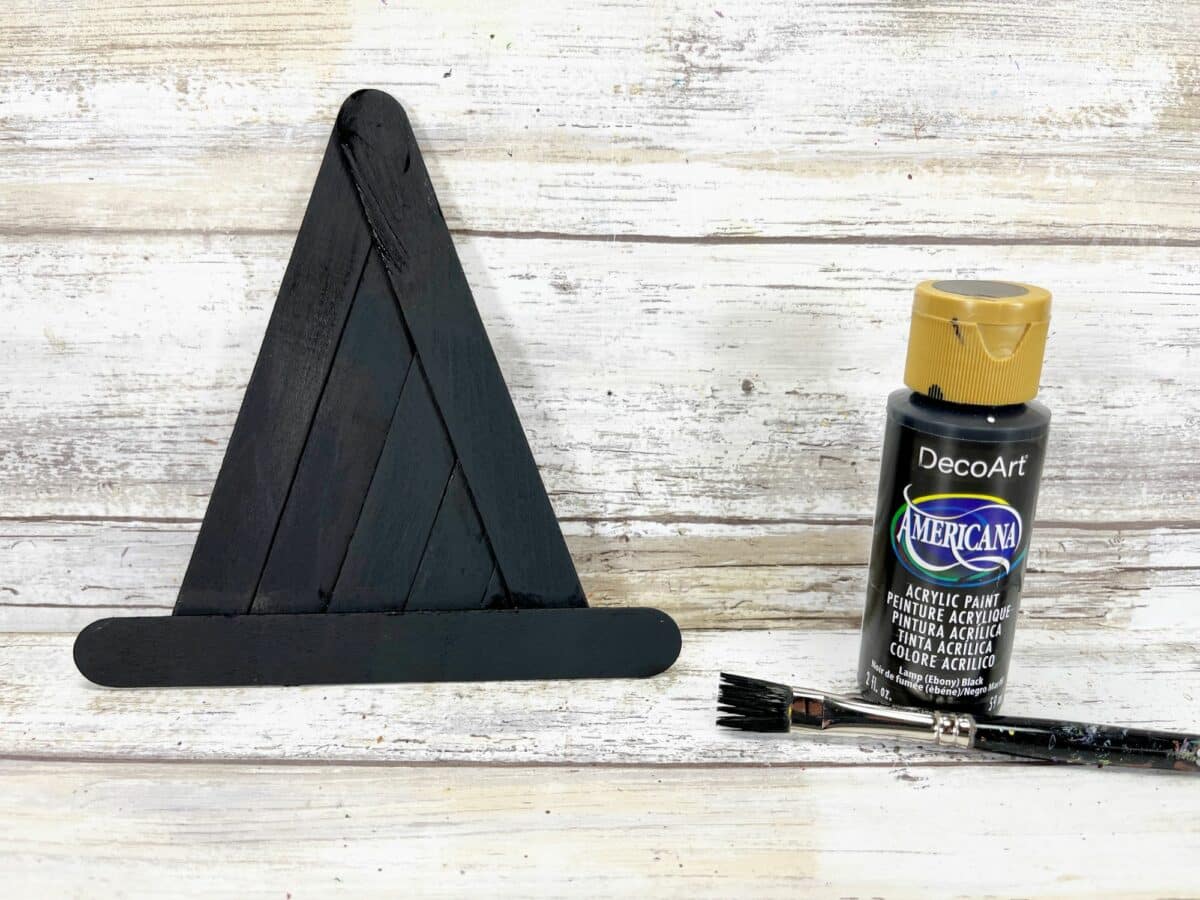
Paint the entire witch’s hat with black acrylic craft paint.
Allow to dry. Apply a second coat, if needed.

Step 5
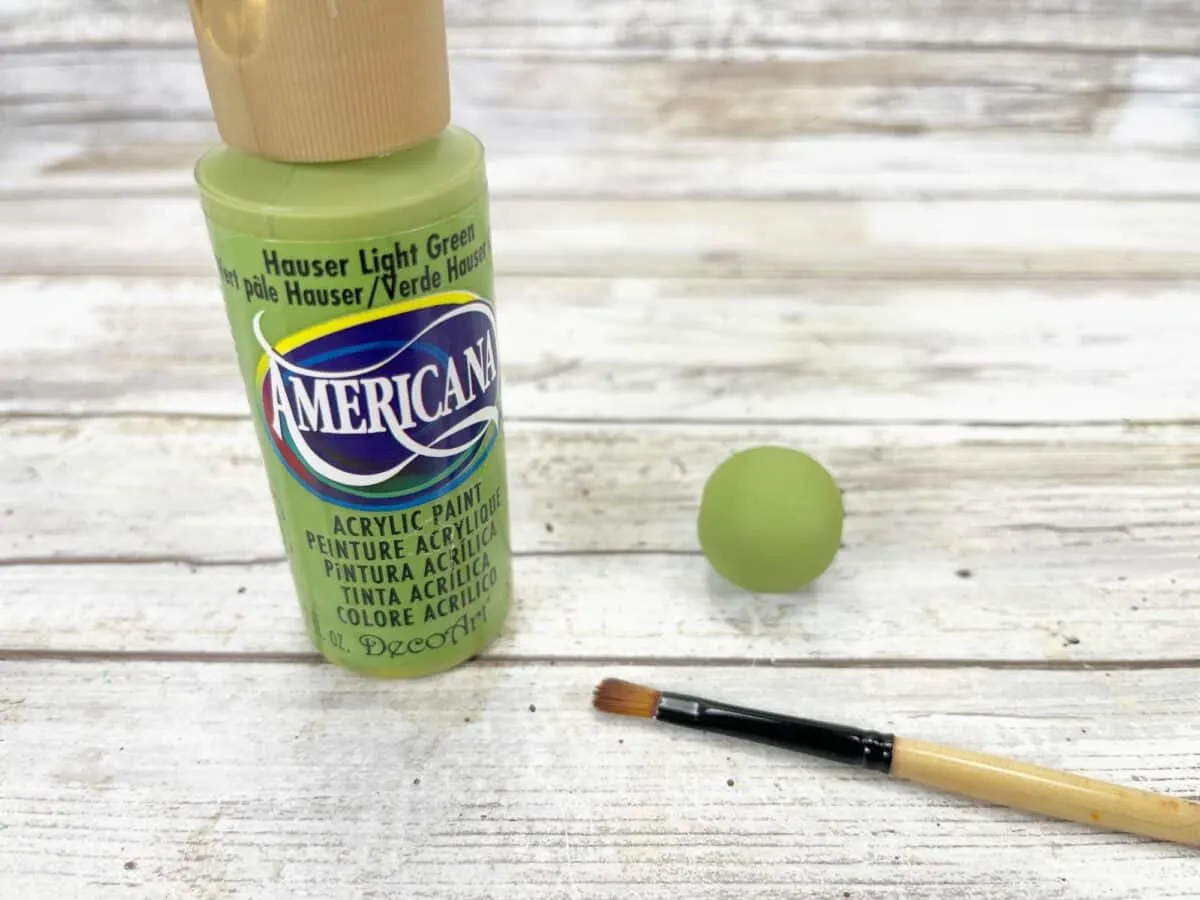
Paint the wooden bead with muted light green acrylic craft paint.

Step 6
Flip the witch hat over to see the back. Glue 15 mop head strings along the base of the bottom wooden craft stick.
Glue the 15 additional mop head strings on a second layer, just slightly above the bottom layer.


Step 7
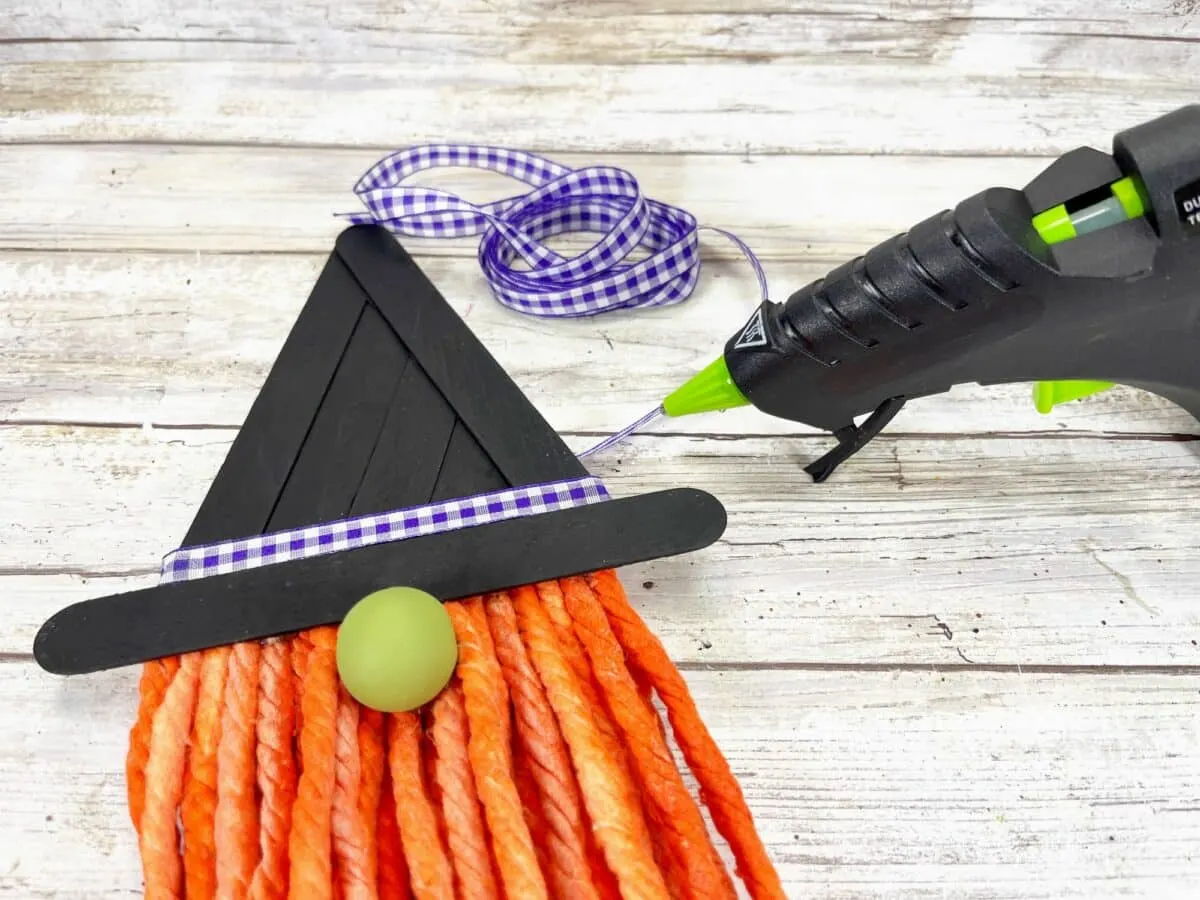
Glue the wooden bead underneath the witch’s hat, in the center of the gnome beard.


Step 8
Glue purple gingham ribbon around the witch’s hat as the hat band just above the hat brim.

Step 9
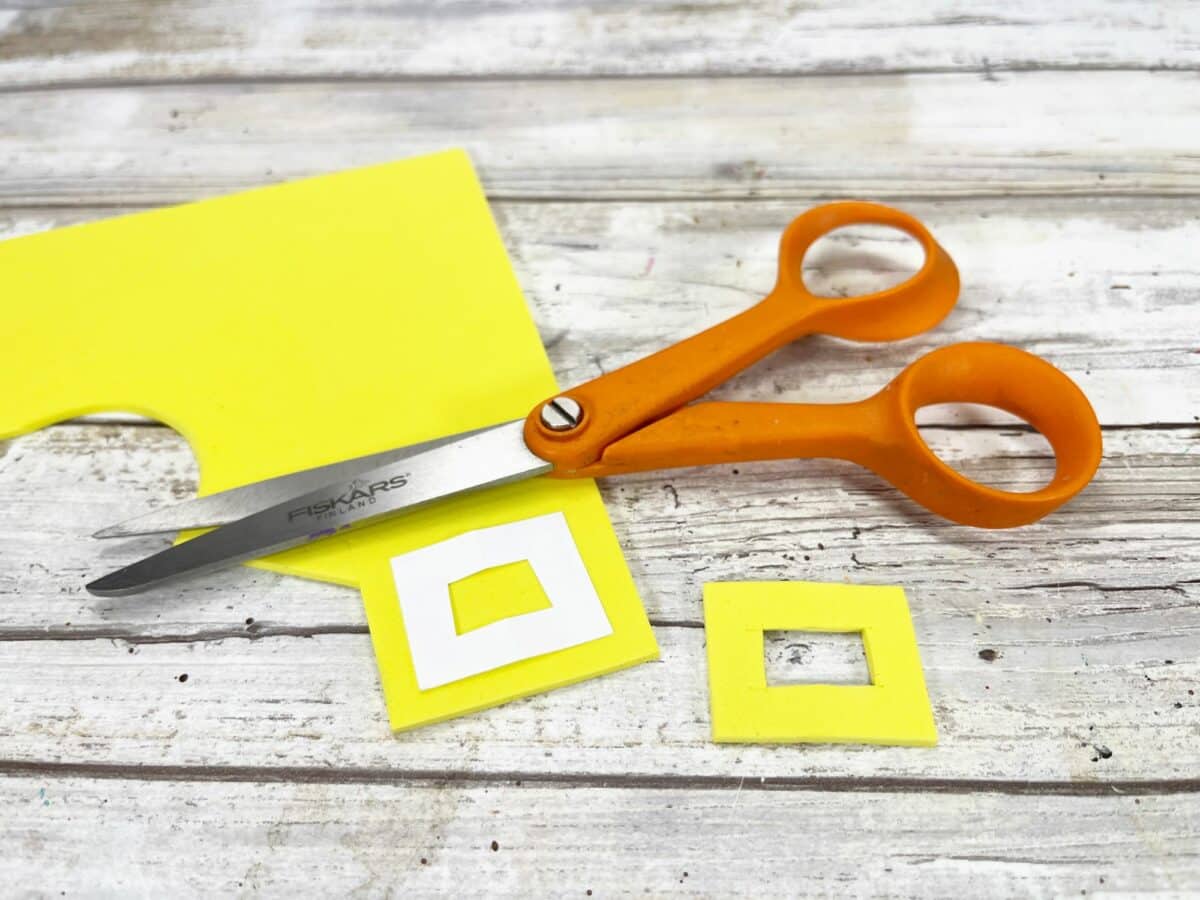
Download, print and cut out the witch gnome pattern. Then trace the pattern onto yellow craft foam and cut out. Be sure to cut out the inside of the square buckle, too.
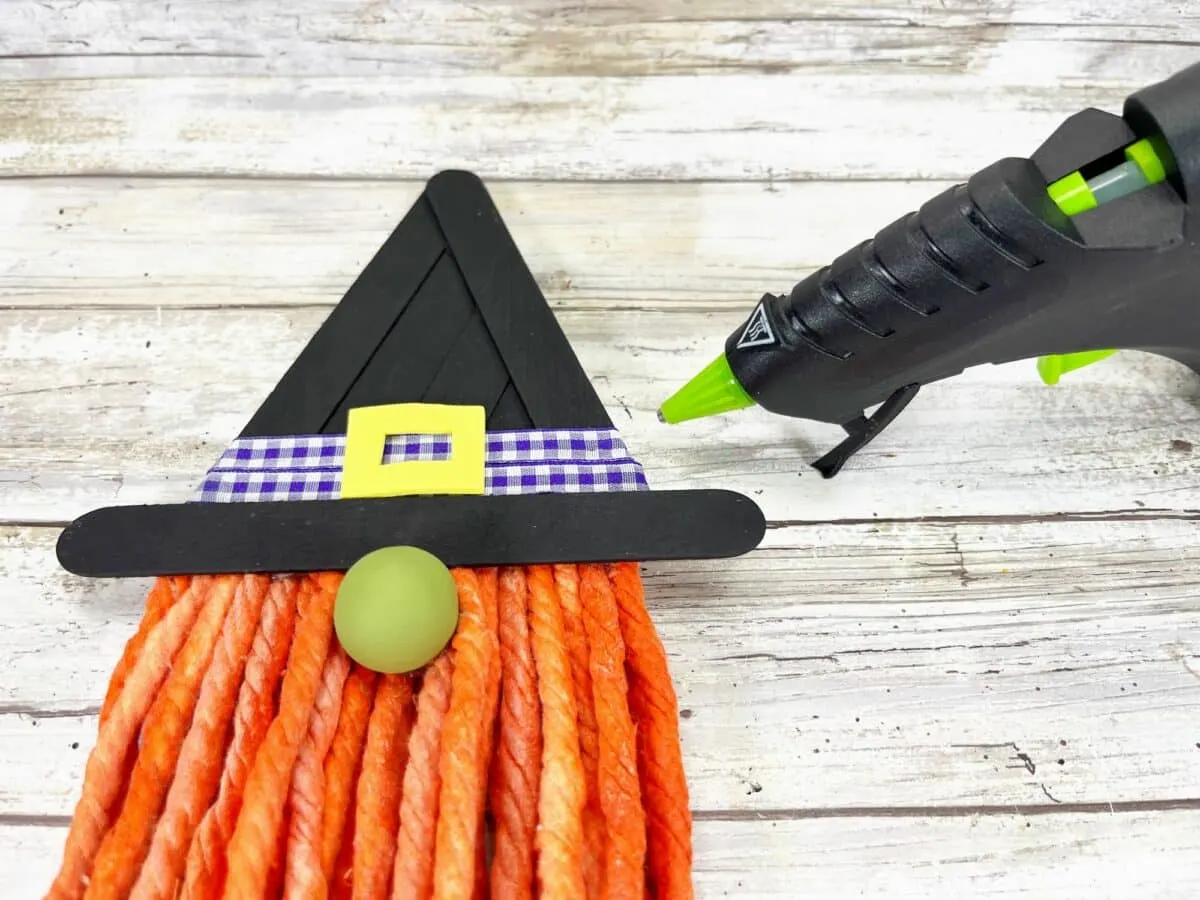
Glue the buckle to the center of the purple gingham ribbon.


Be sure to Pin This easy witch gnome to save for later!

If you like this mop head witch gnome, be sure to see our paintbrush witch gnome, as well.
Love gnomes? Make sure you see these cute ideas:
- Candy Corn Gnome
- Fall Gnome with Leaf Beard
- Grinch Gnome
- Easy DIY Gnome Ornaments
- Gnome Wine Bottle Topper
- Easter Bunny Gnome
- Mason Jar Gnome
- Vampire Gnomes
Be sure to see all of our easy Fall crafts and Dollar Tree DIY ideas!
