

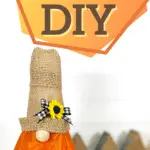
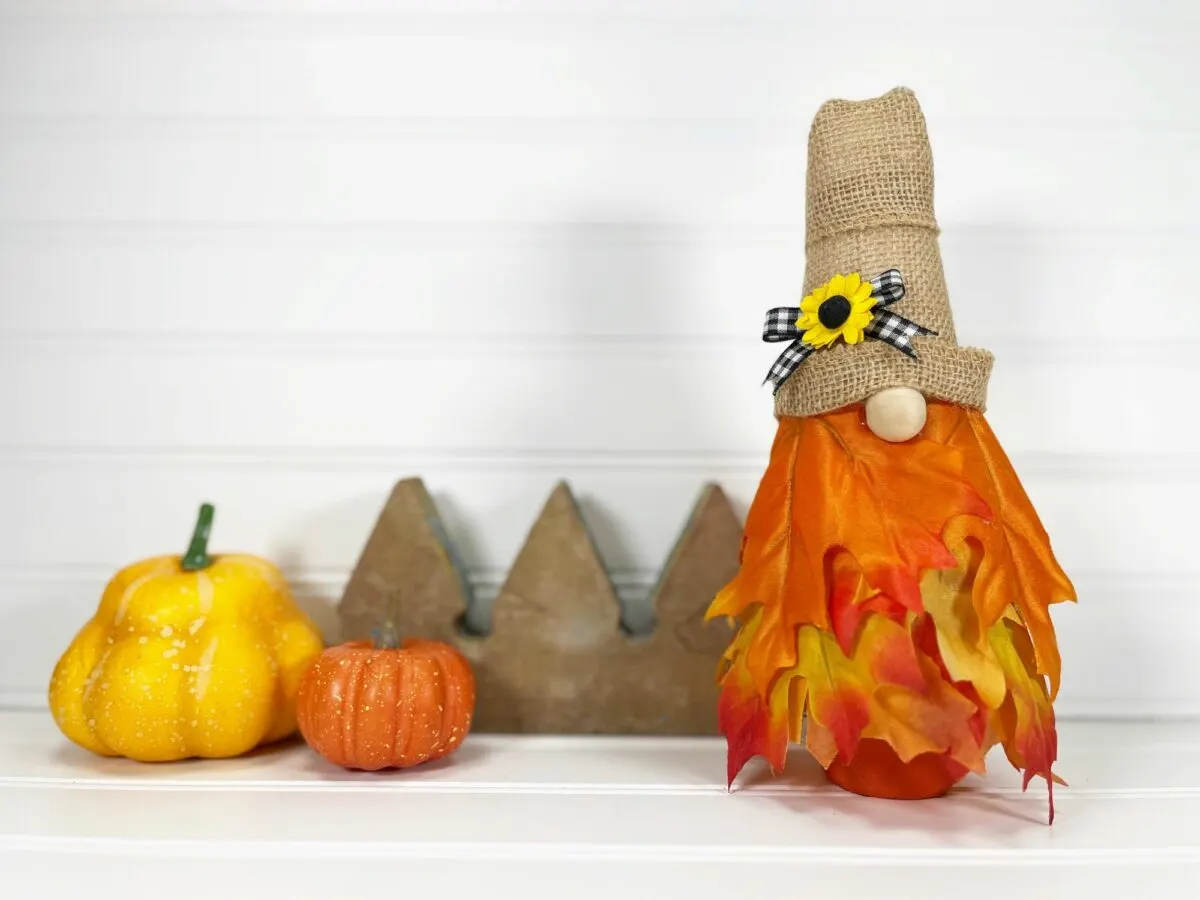
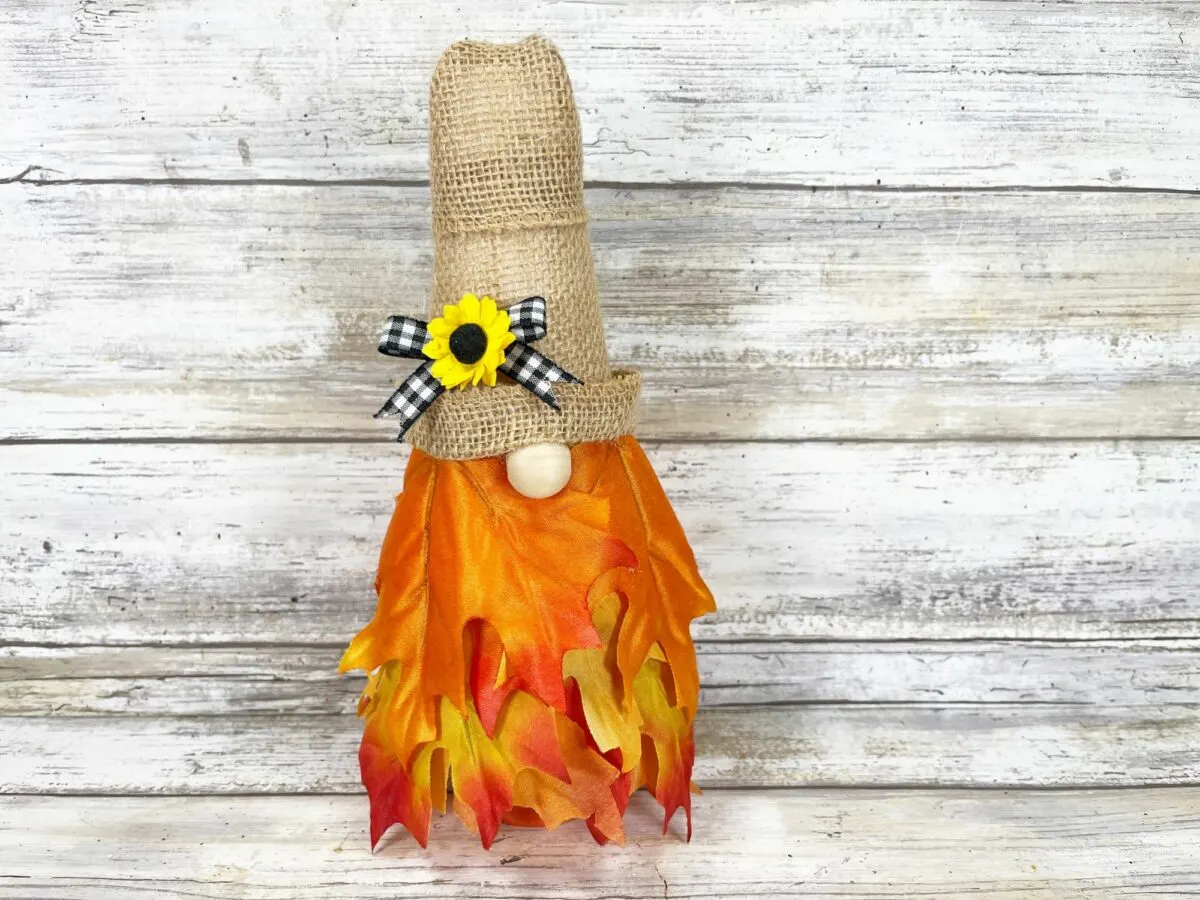
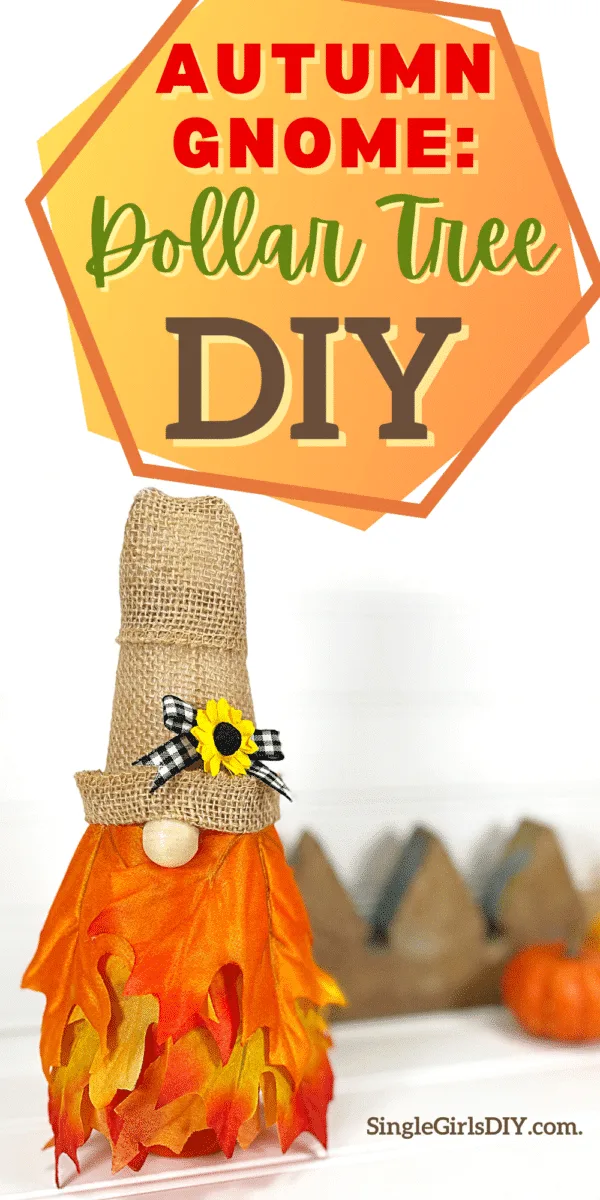
If you love making gnomes, then you will definitely enjoy making this easy fall gnome with leaf beard! This autumn gnome is simple to make and uses common supplies you can find at any dollar store or craft store.
We used a foam cone, burlap ribbon and faux leaves to create a festive gnome that is perfect for autumn decor.

If you cannot find a wooden dice to be used as the base, that’s fine! Just use any type of chunky wood or other item that can be painted orange and glued to the bottom of the cone to elevate the gnome.
This is just one of our many Dollar Tree crafts, so be sure to see them all!
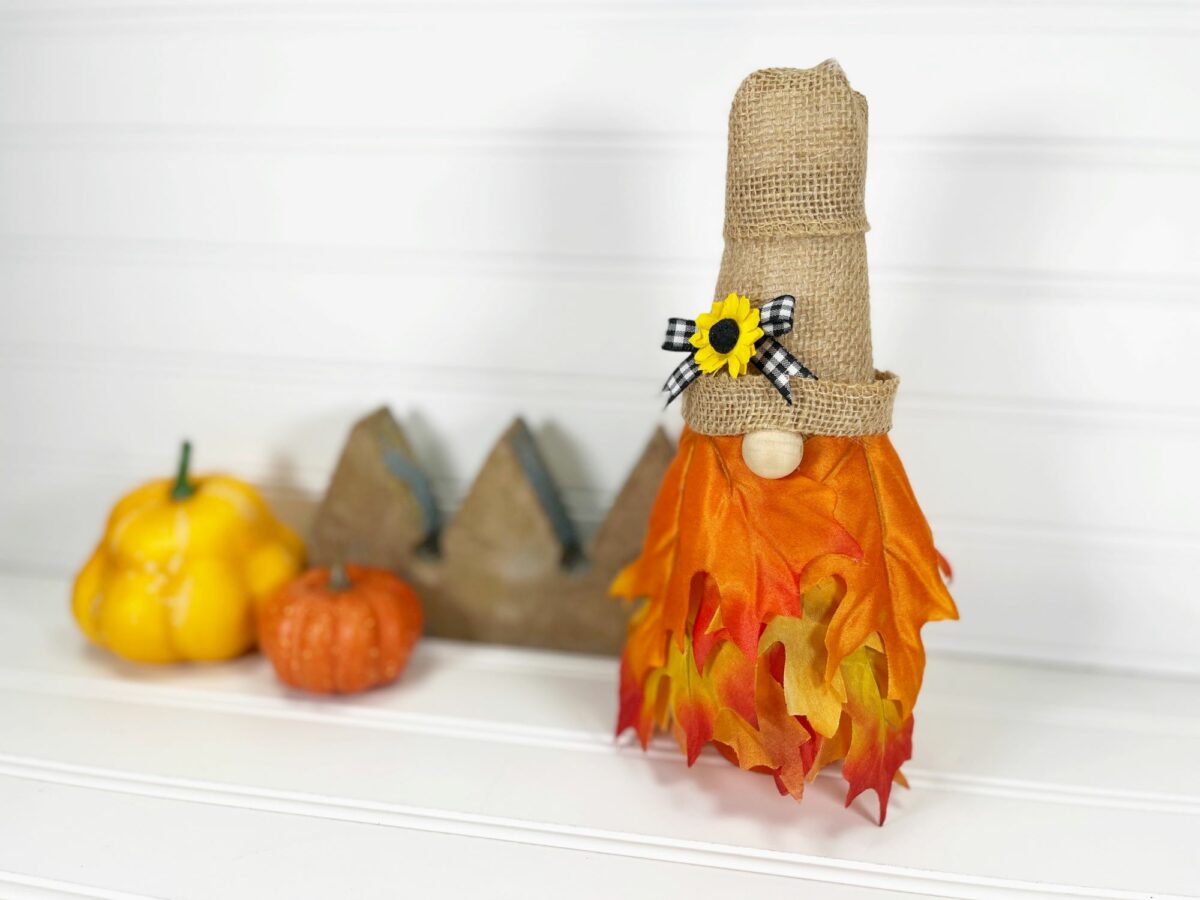

DIY Fall Gnome with Leaf Beard
All supplies were purchased at the Dollar Tree. However, if you are making several of these fall gnomes to make and sell, we suggest the resources below to buy in bulk and save money.
Supplies
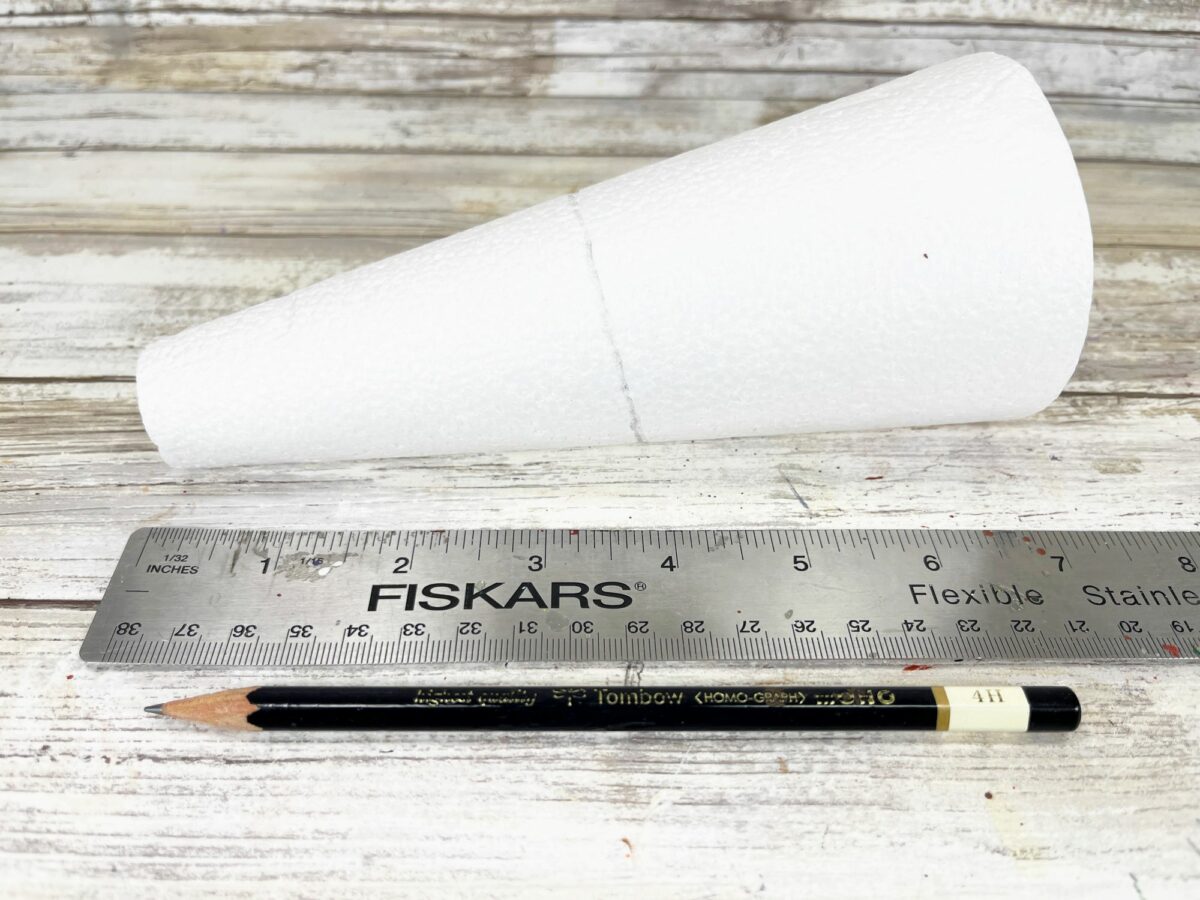
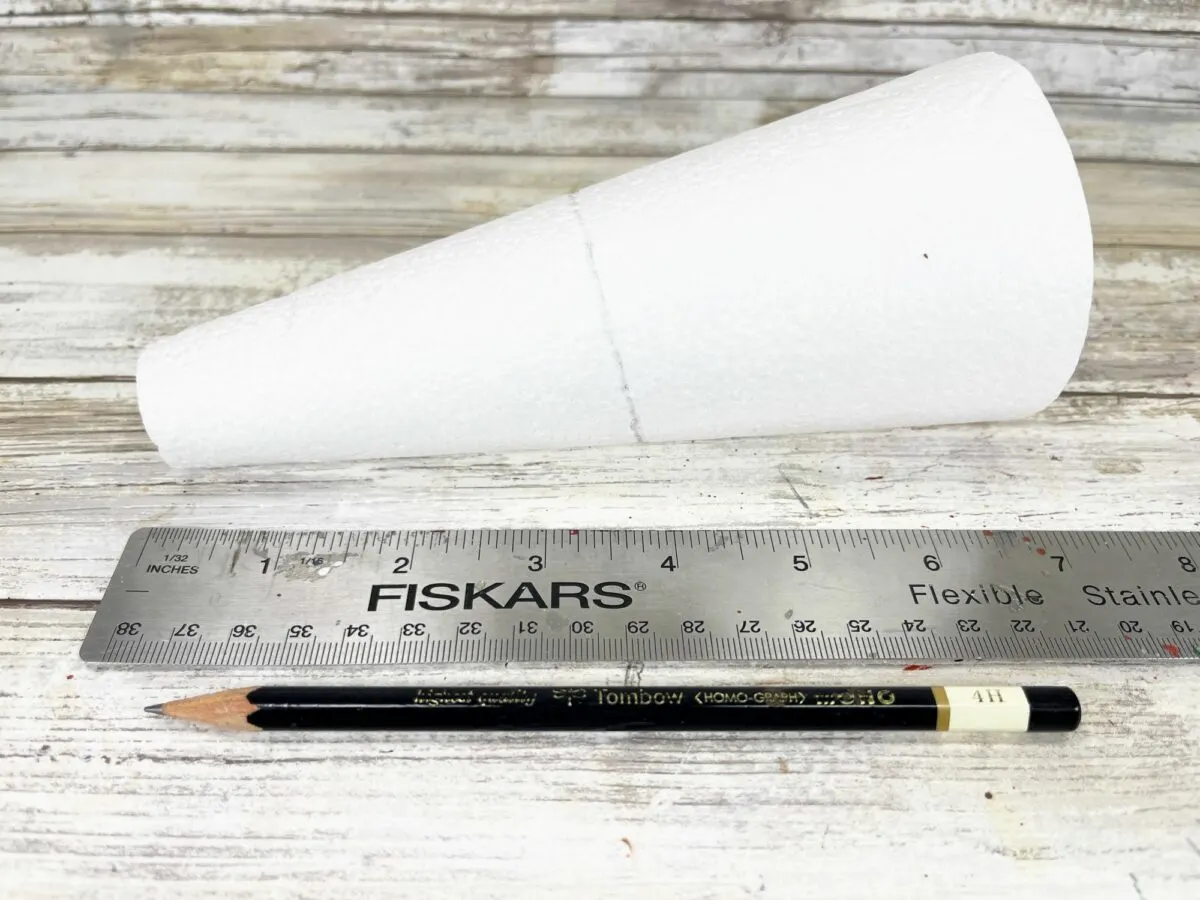
- Foam Cone (I used a 6.9″x 2.9″ styrofoam cone; these cones are comparable in price and size if making a few of these gnomes)
- Large Silk Leaves in Autumn Colors (I used 6 leaves)
- Burlap Ribbon, 2” wide
- Wooden Bead
- Silk Sunflower
- Gingham Ribbon, Black
- One Wooden Dice
- Orange Acrylic Craft Paint (I used DecoArt Americana in Warm Sunset)
- Hot Glue Gun or Craft Glue
- Paintbrush
- Scissors
- Ruler


Directions
Step 1
Measure 3 ½ inches down the cone from the top and draw a circle around the cone.
Step 2
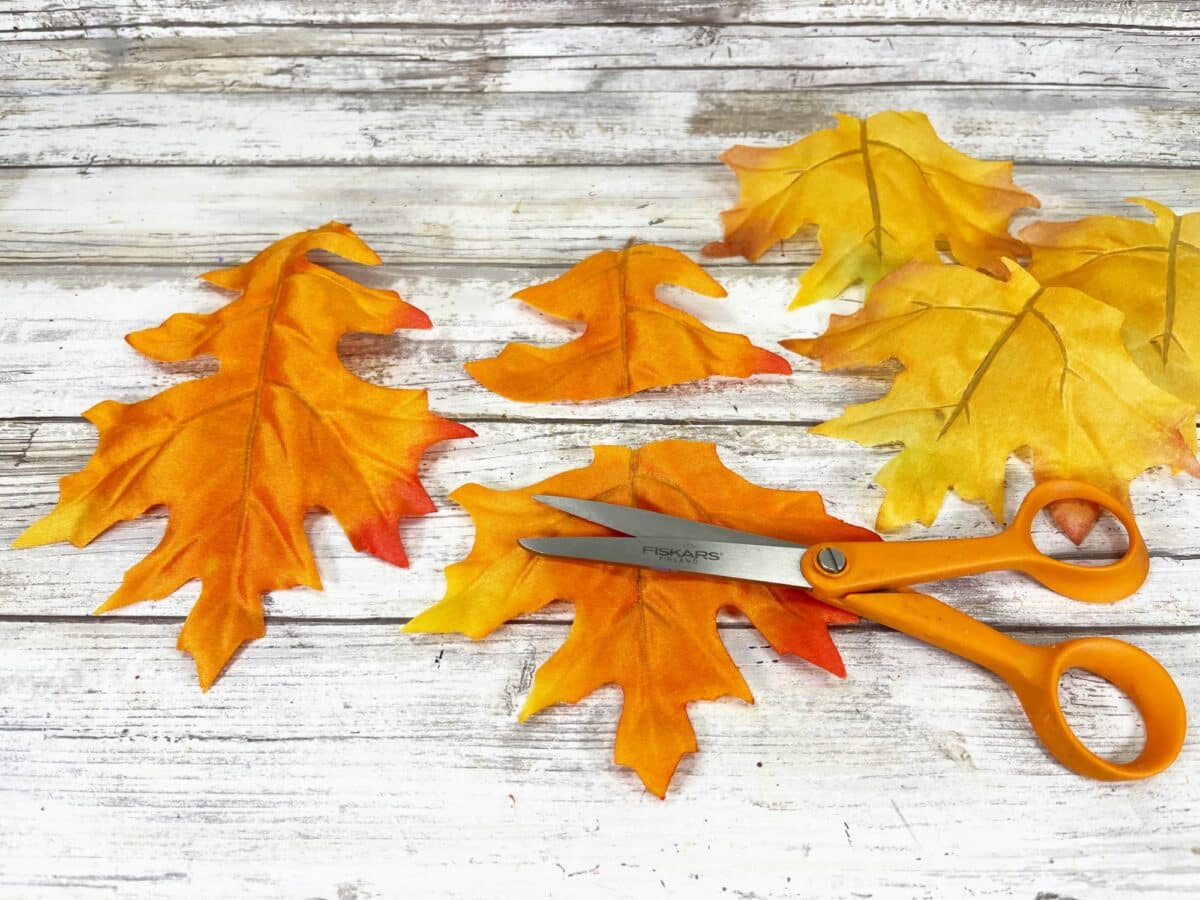
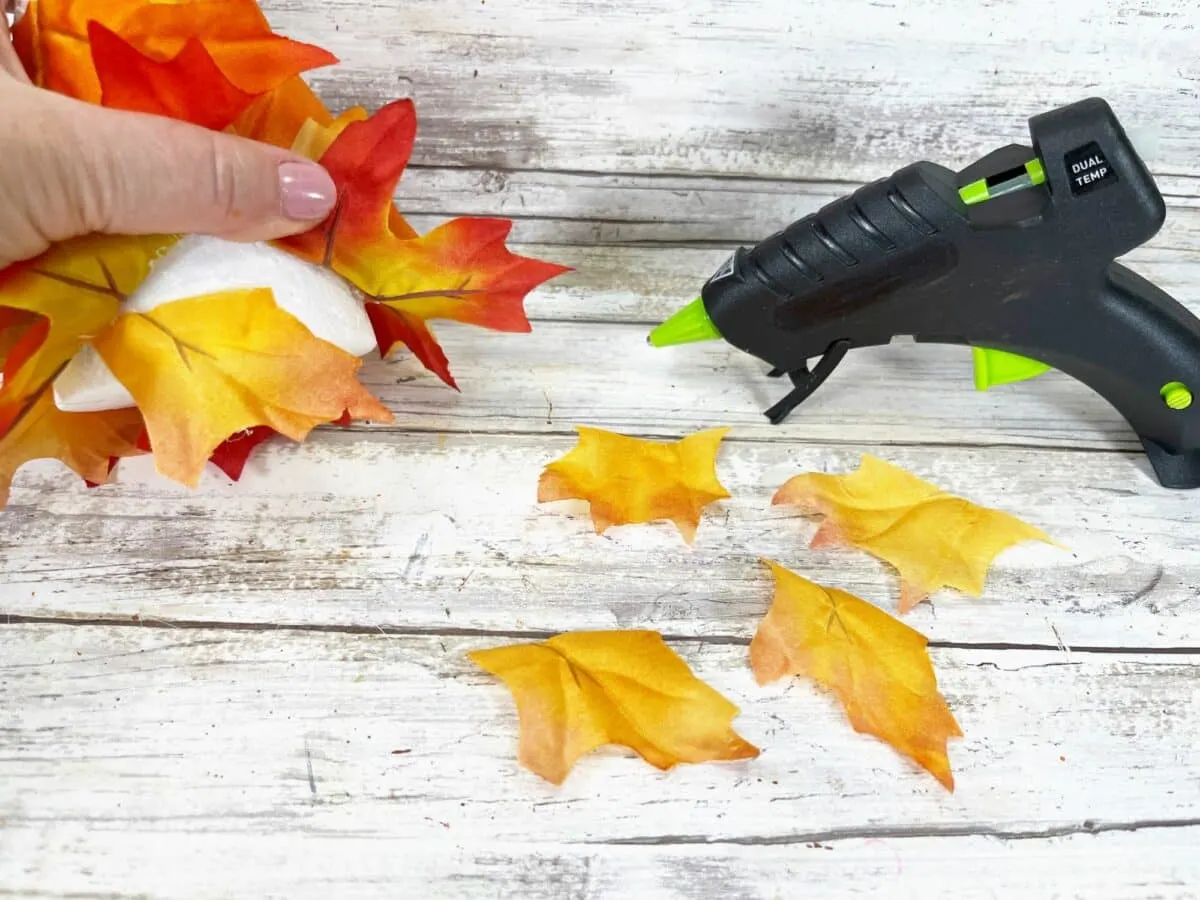
Measure 4” from the tip of a silk oak leaf towards the stem and mark the area. Then cut the leaf in half horizontally, cutting across the leaf. Repeat with 5 additional leaves.
Save the tops of the leaves and set them aside for later.

Step 3
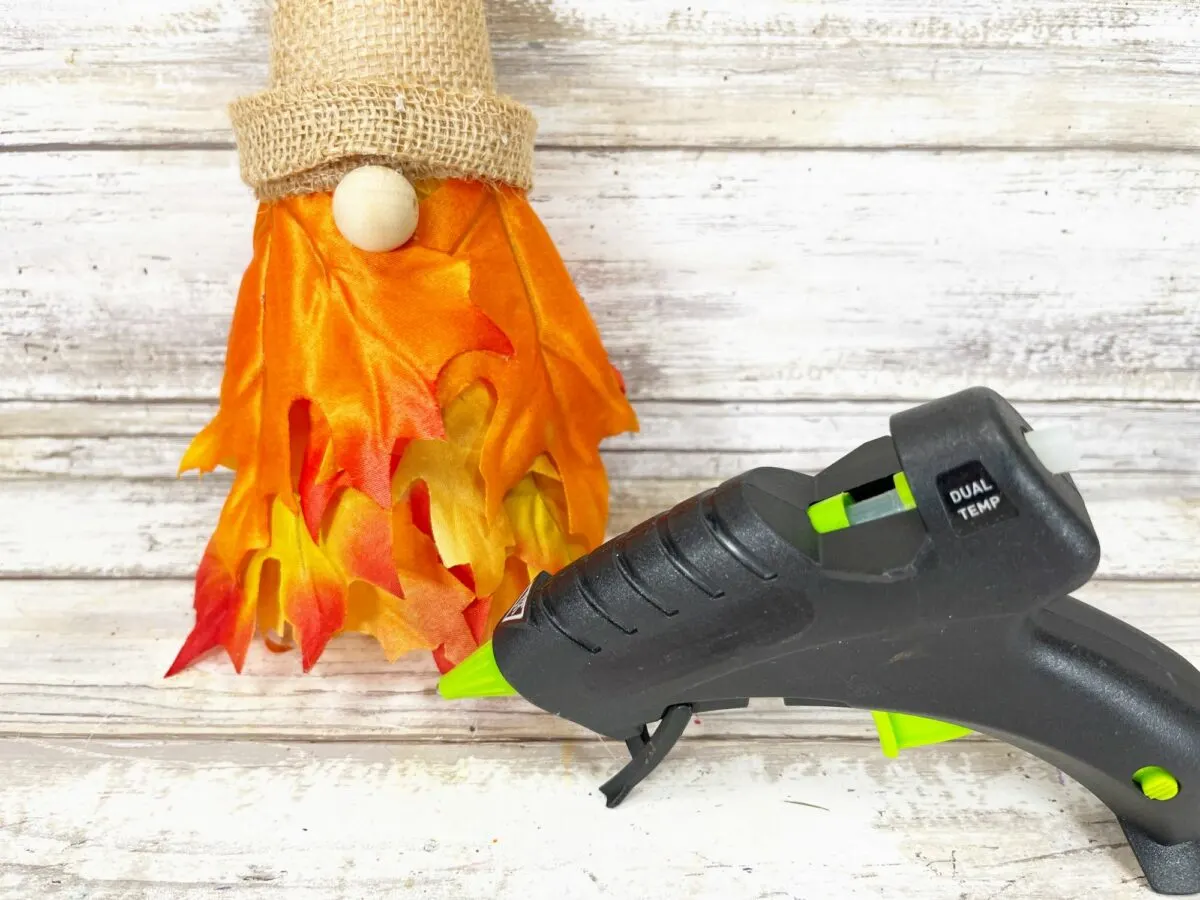
Glue the bottom half of the fall leaves around the base of the foam at the 3 ½″ line you made previously.
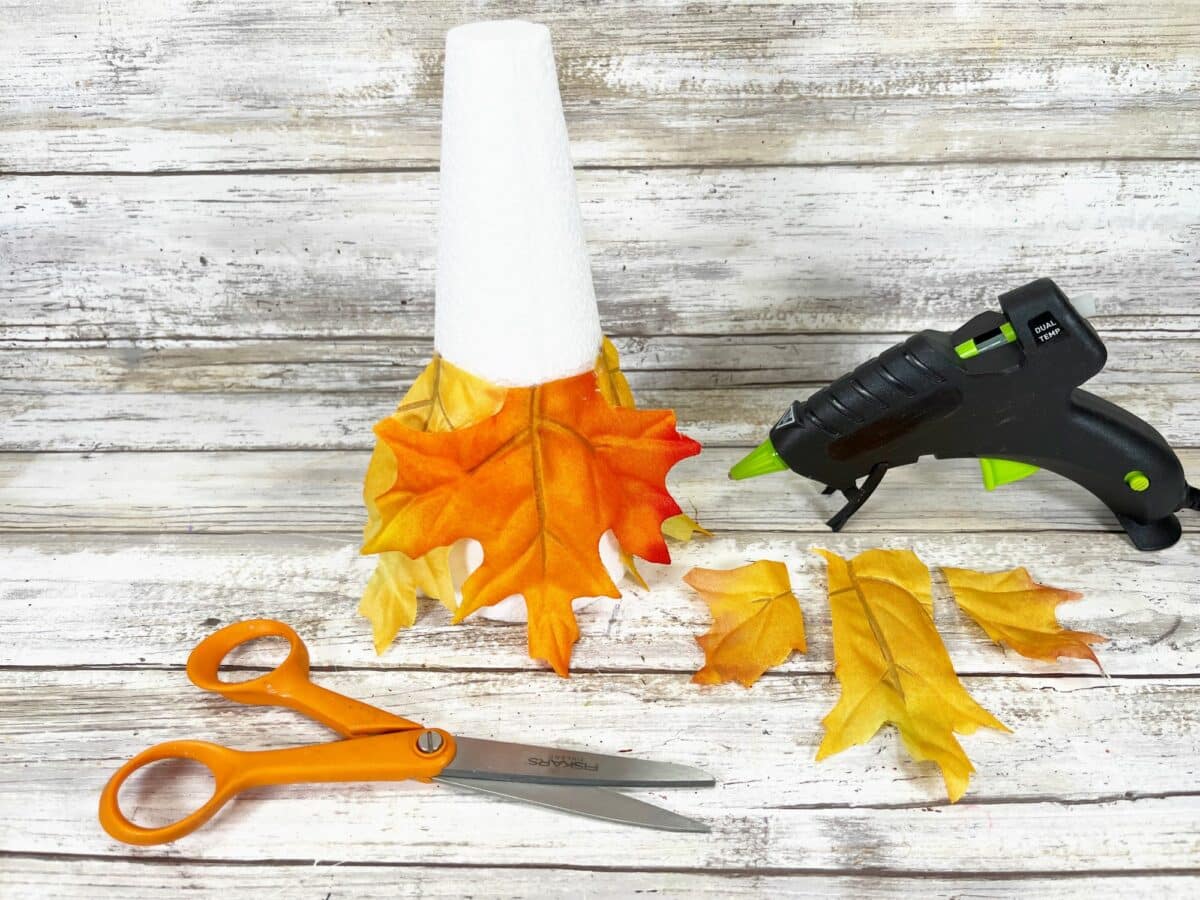

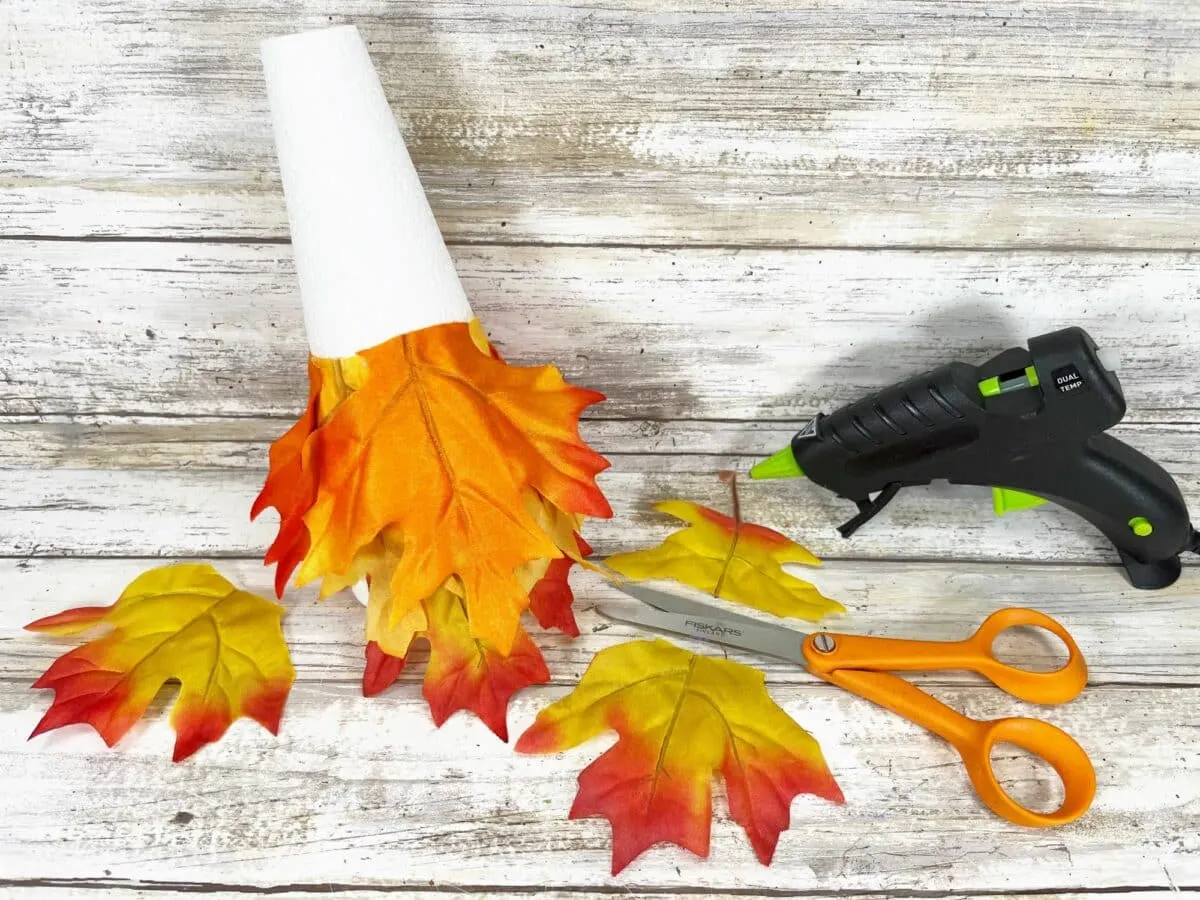
Trim the stems off of the fall leaf tops that were set aside.
Tuck these pieces in between the large leaves on the gnome beard, filling in all of the gaps and gluing in place.


Alternatively, you could use straight pins to keep the leaves attached to the cone.
Step 4
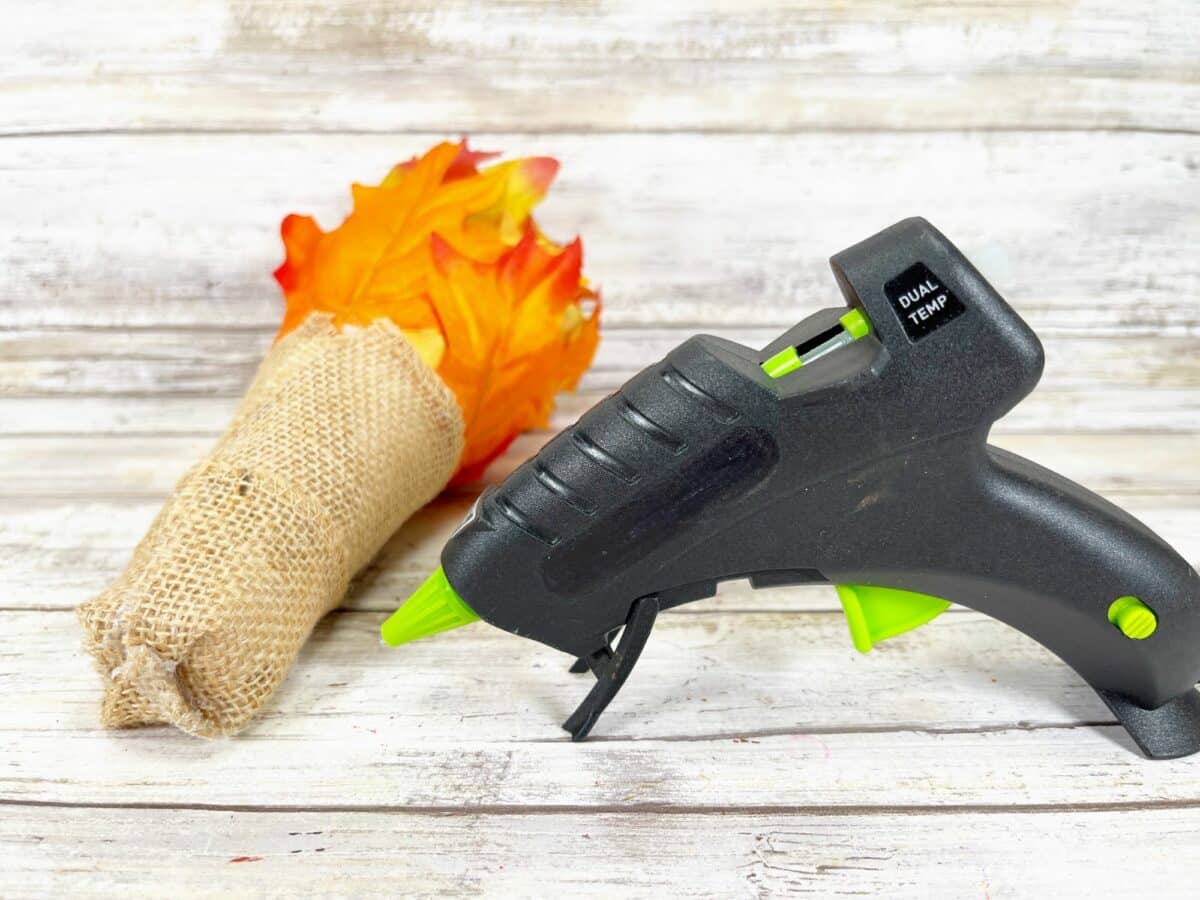
Wrap small pieces of the burlap ribbon around the cone. Wrap the ribbon around the cone where the leaves are glued so that it overlaps the leaves just a little bit. Cut a section that will just cover the cone, then glue it in place.
Add a second layer of burlap ribbon above that piece, overlapping just a little bit and glueing down in the back. You should have around ½″ of ribbon at the top of the foam cone and that is okay.


Tuck the excess ribbon down on the top to create the top of the gnomes hat. Glue down in place.

Step 5
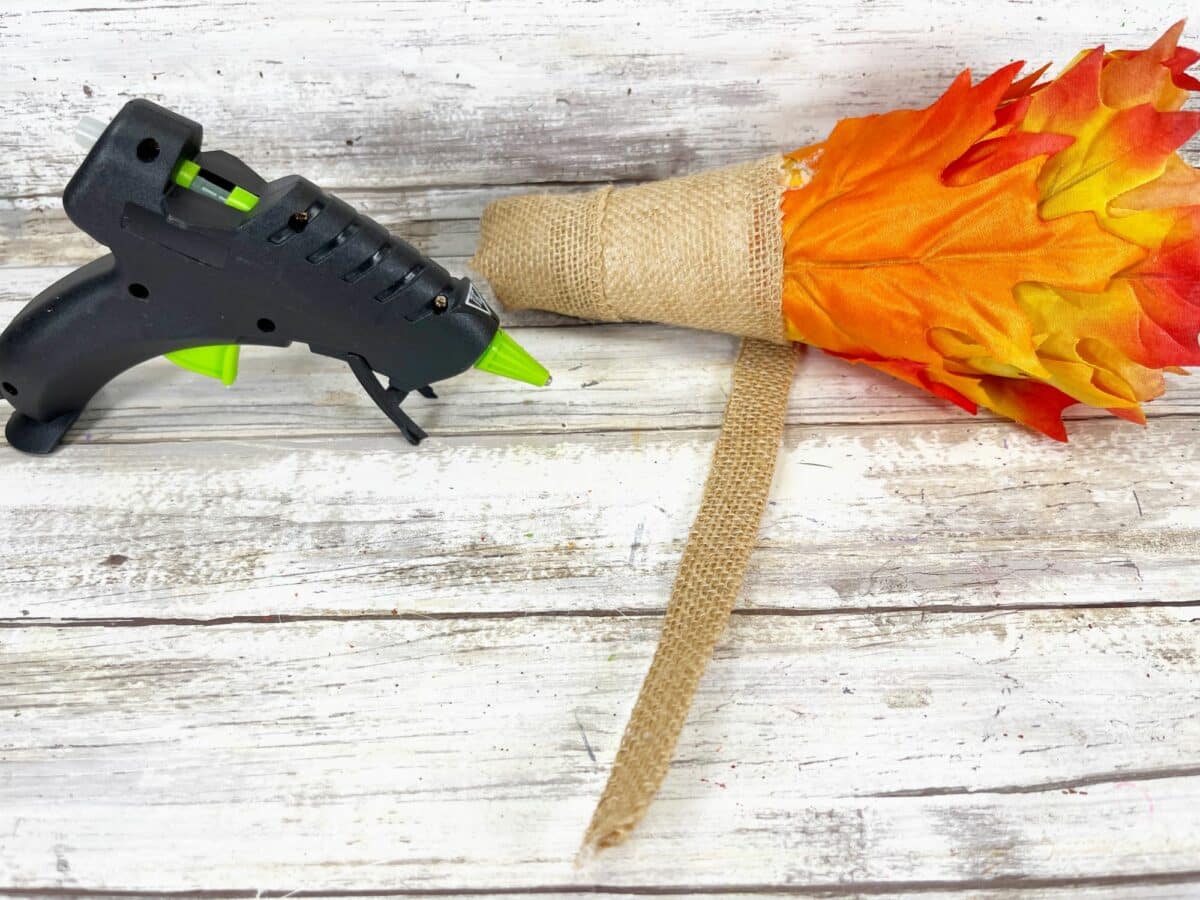
Cut an 8” length of burlap ribbon. Fold in half length-wise and glue together.
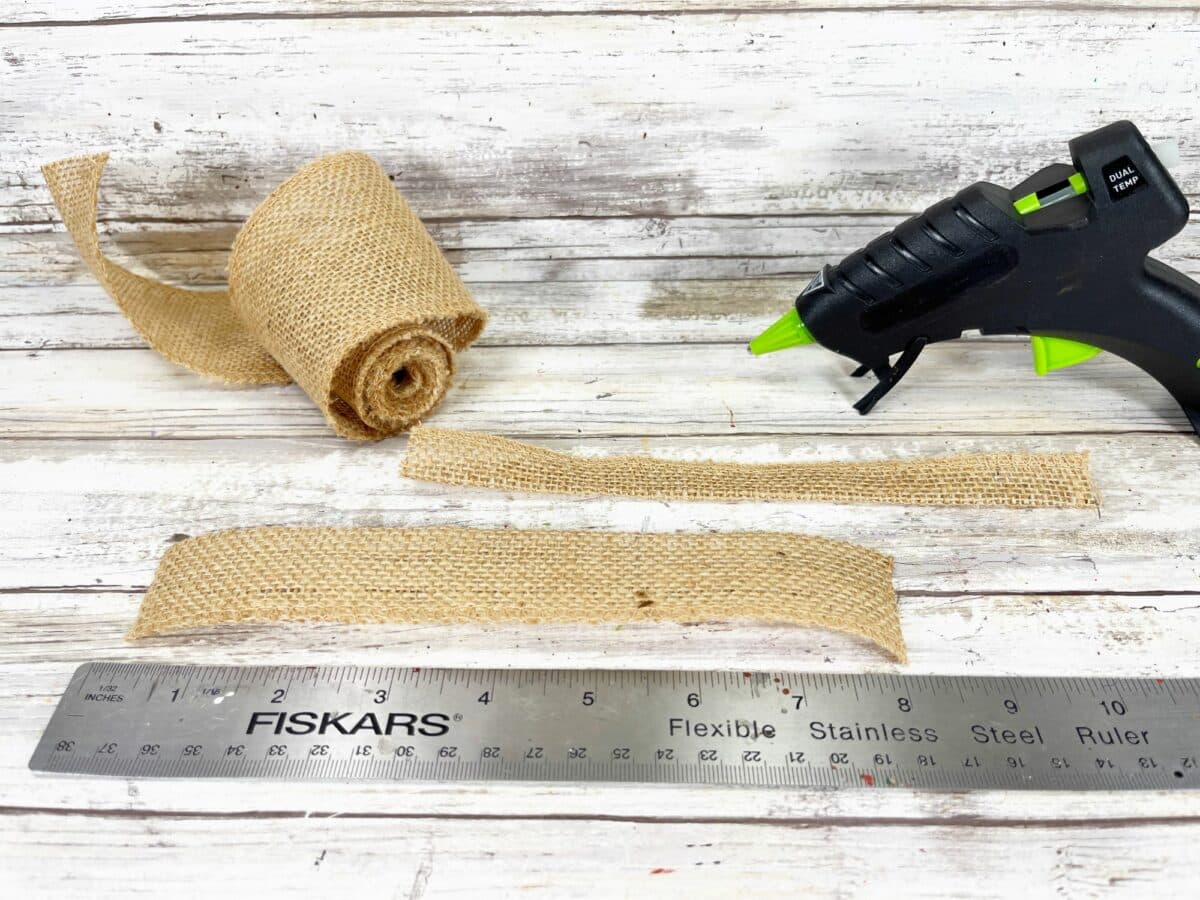

Beginning at the back of the foam cone, glue the hat band to the bottom edge of the gnome’s hat. While you want the hat brim tight on the cone, you may want to leave a slight gap to tuck the nose underneath the brim in the next step.

Step 6
Glue the wooden ball to the front center of the gnome, making sure to tuck the nose under the hat band just a little bit.

Step 7
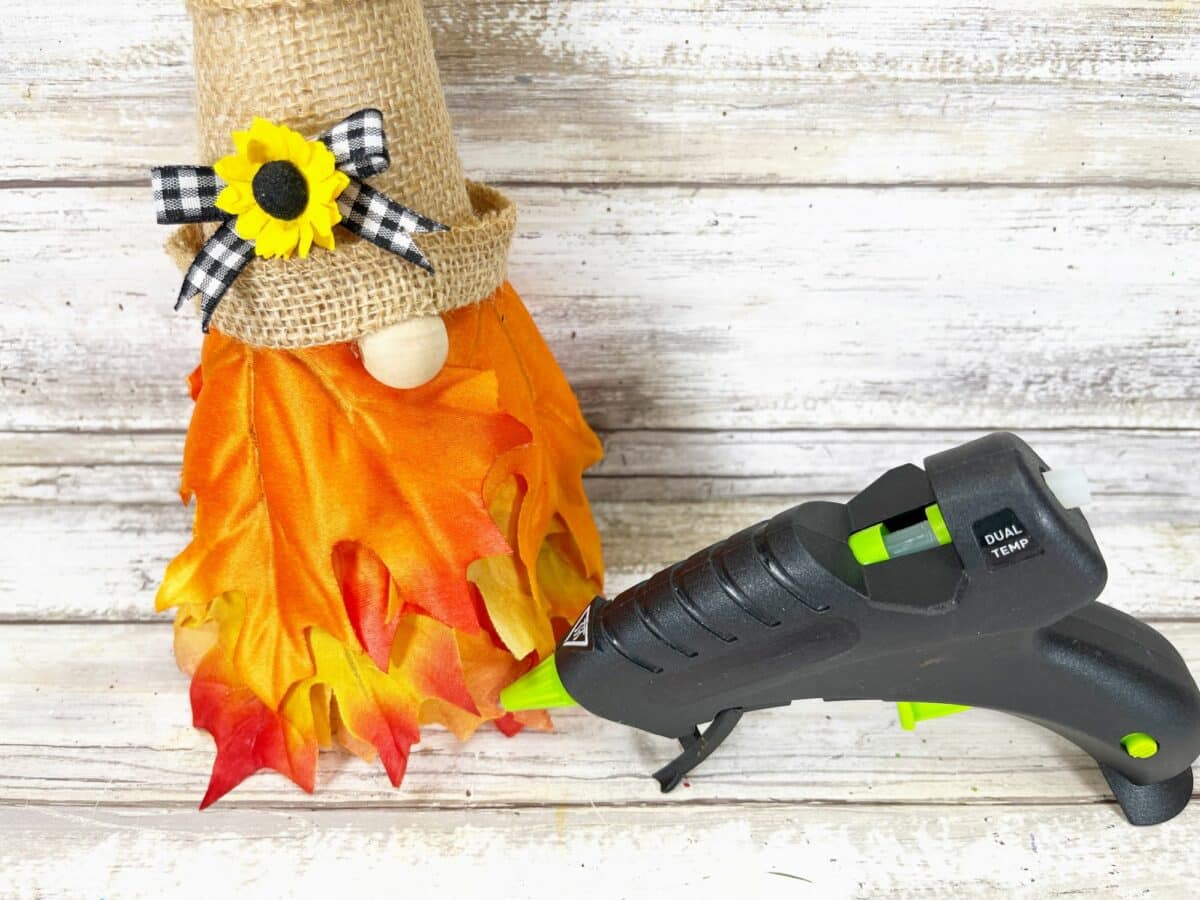
Tie a small bow with the black gingham ribbon.
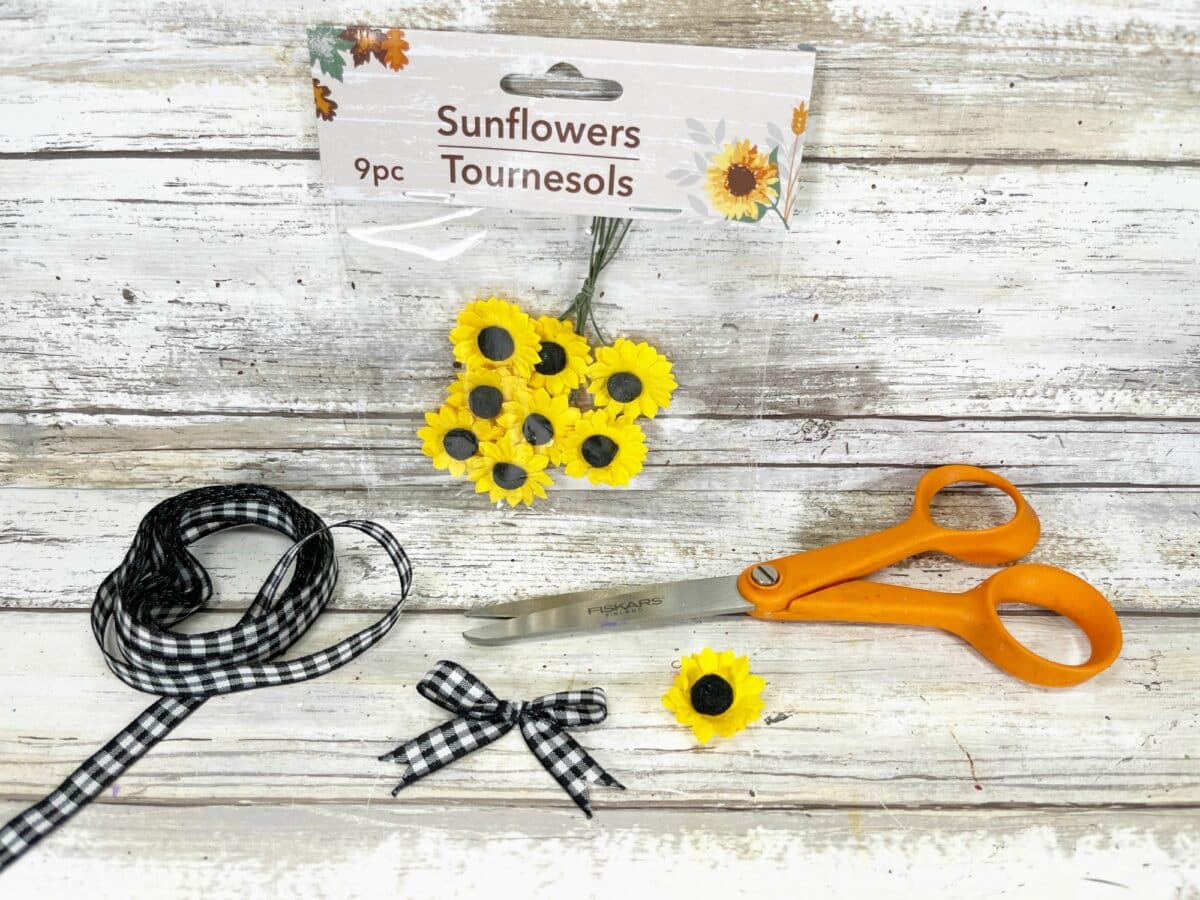

Glue the bow to the gnome hat and then glue a small sunflower over the knot in the bow.

Step 8
Paint one wooden dice with the orange paint. Let dry, and apply a second coat, if needed.

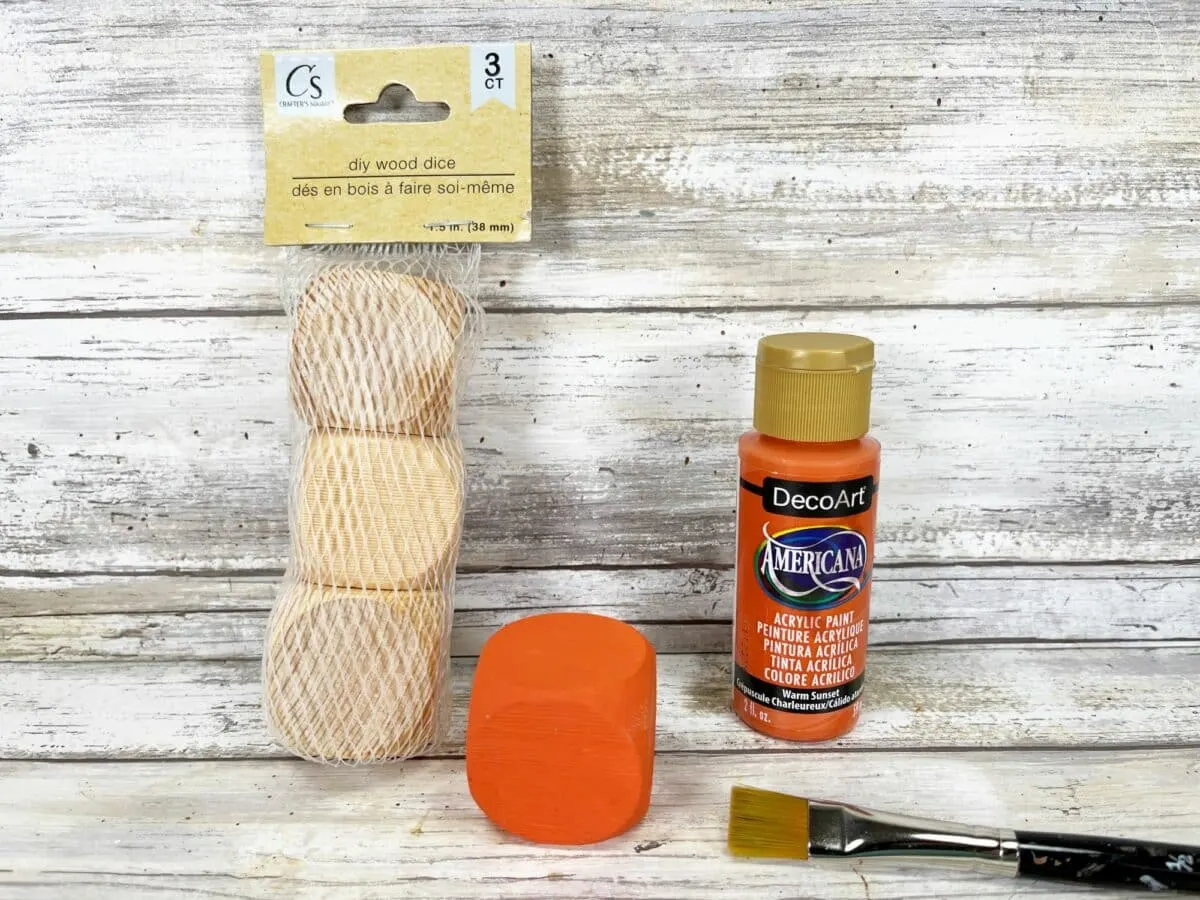
Glue the painted wooden dice to the bottom of the foam cone to be a stand and to elevate the gnome so that the leaves hang down.


If you like these easy fall gnome craft, be sure to Pin It to save for later!

Love gnomes? Make sure you see these cute ideas:
- Paintbrush Witch Gnome
- Candy Corn Gnome
- Witch Mop Gnome
- Scarecrow Mop Gnome
- Grinch Gnome
- Easy DIY Gnome Ornaments
- Gnome Wine Bottle Topper
- Easter Bunny Gnome
- Mason Jar Gnome
- Vampire Gnomes
Be sure to see all of our easy Fall crafts!
