


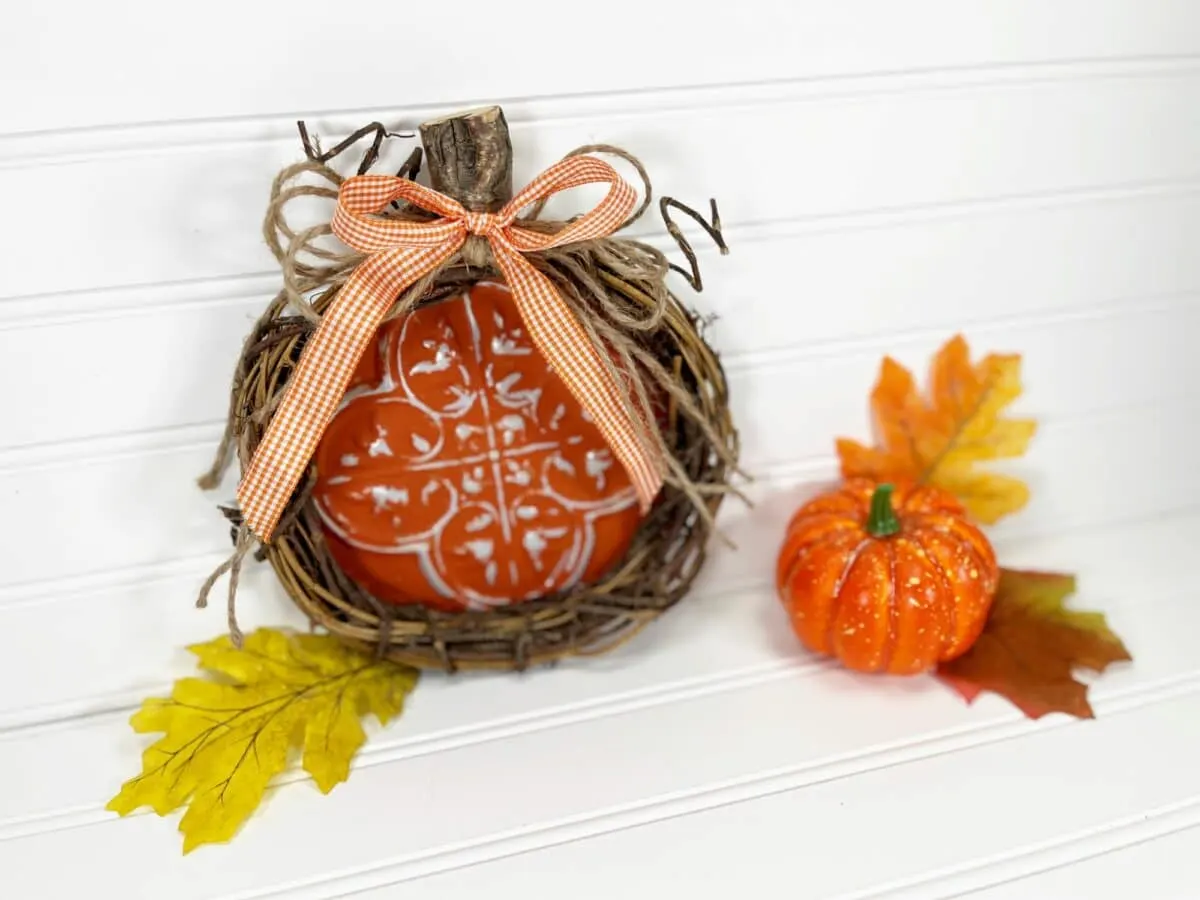
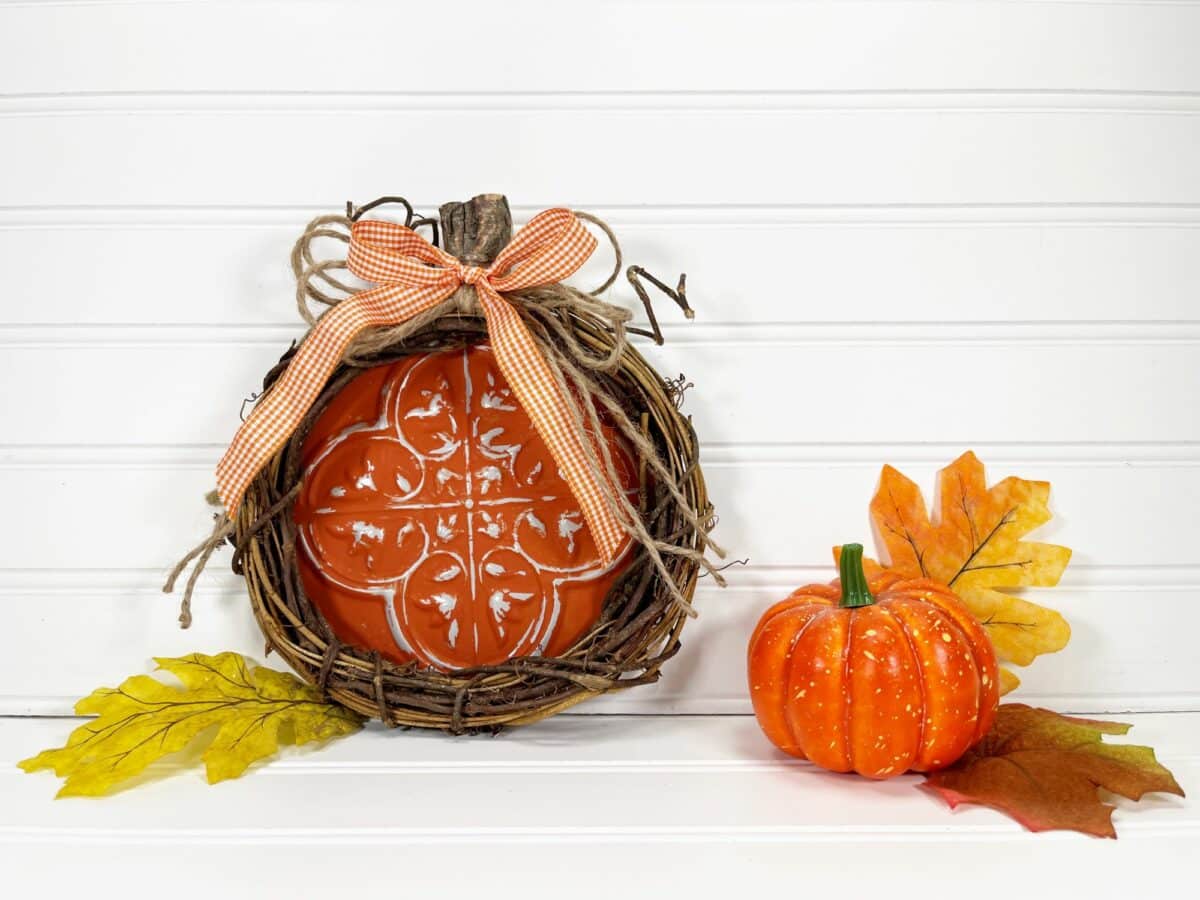
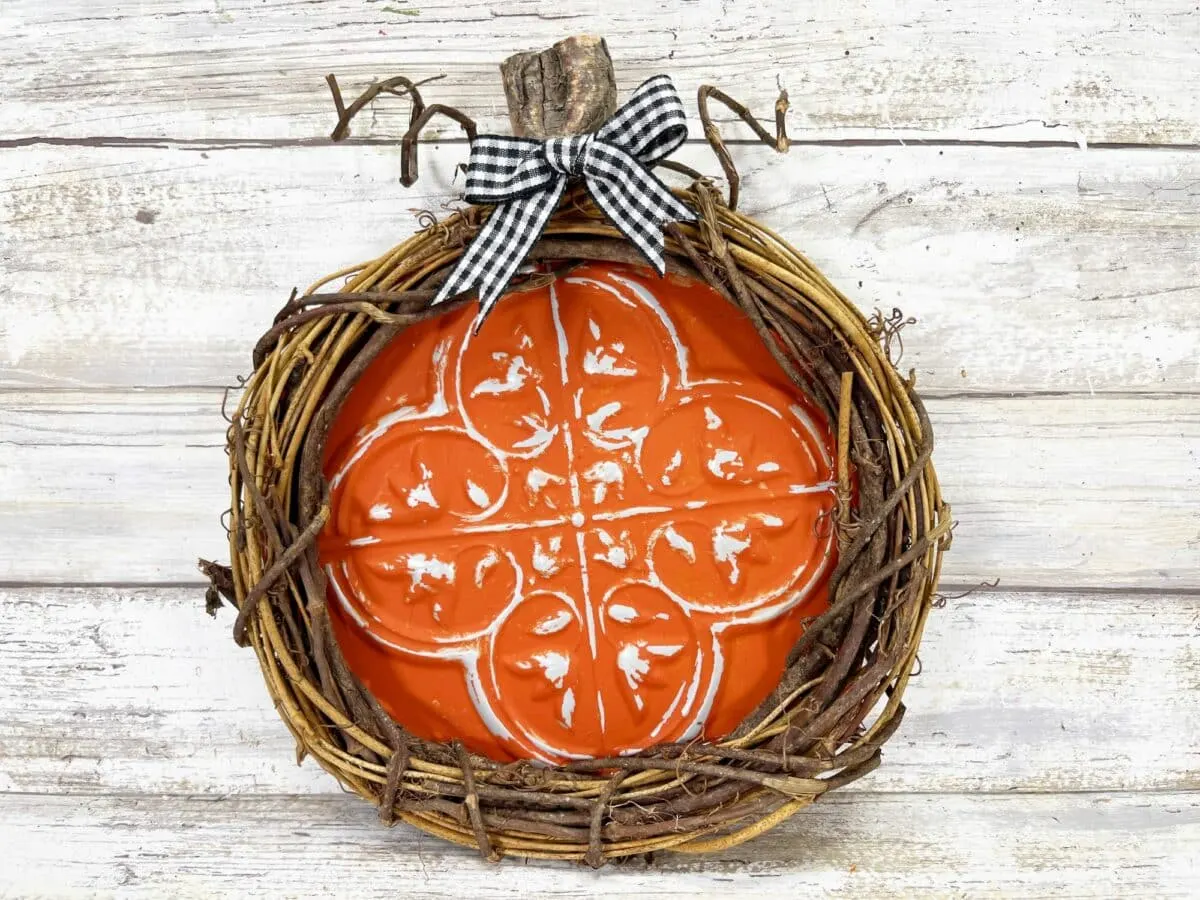
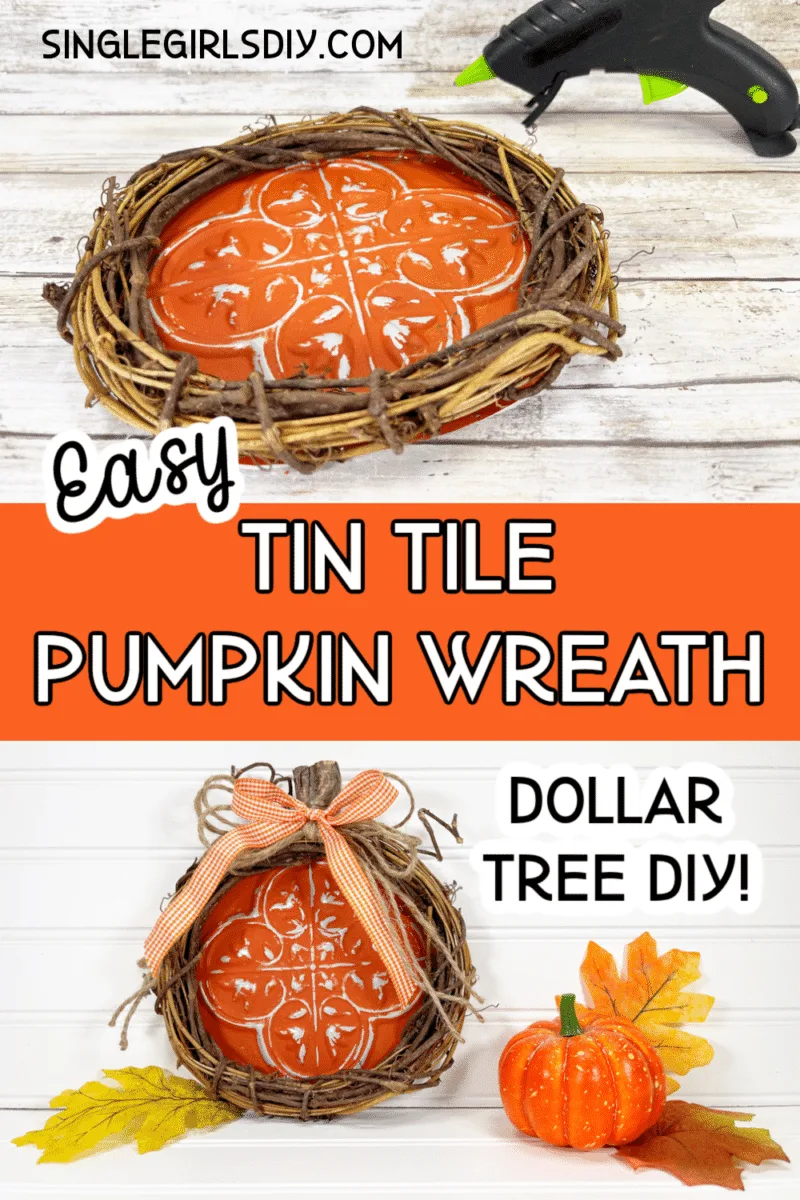
This beautiful tin tile wreath is so easy to make with Dollar Tree supplies! The rustic, farmhouse look and abstract pumpkin design is perfect for your front door or to hang in your home.
The faux tin tile is actually made of plastic, making it affordable and lightweight! We got most of these supplies from the dollar store, which means this wreath cost less than $4 to make.

This is just one of our many Dollar Tree craft ideas!
Helpful Tips
- Any size of grapevine wreath can be used. Just make sure that the tin tile will fit completely in the opening.
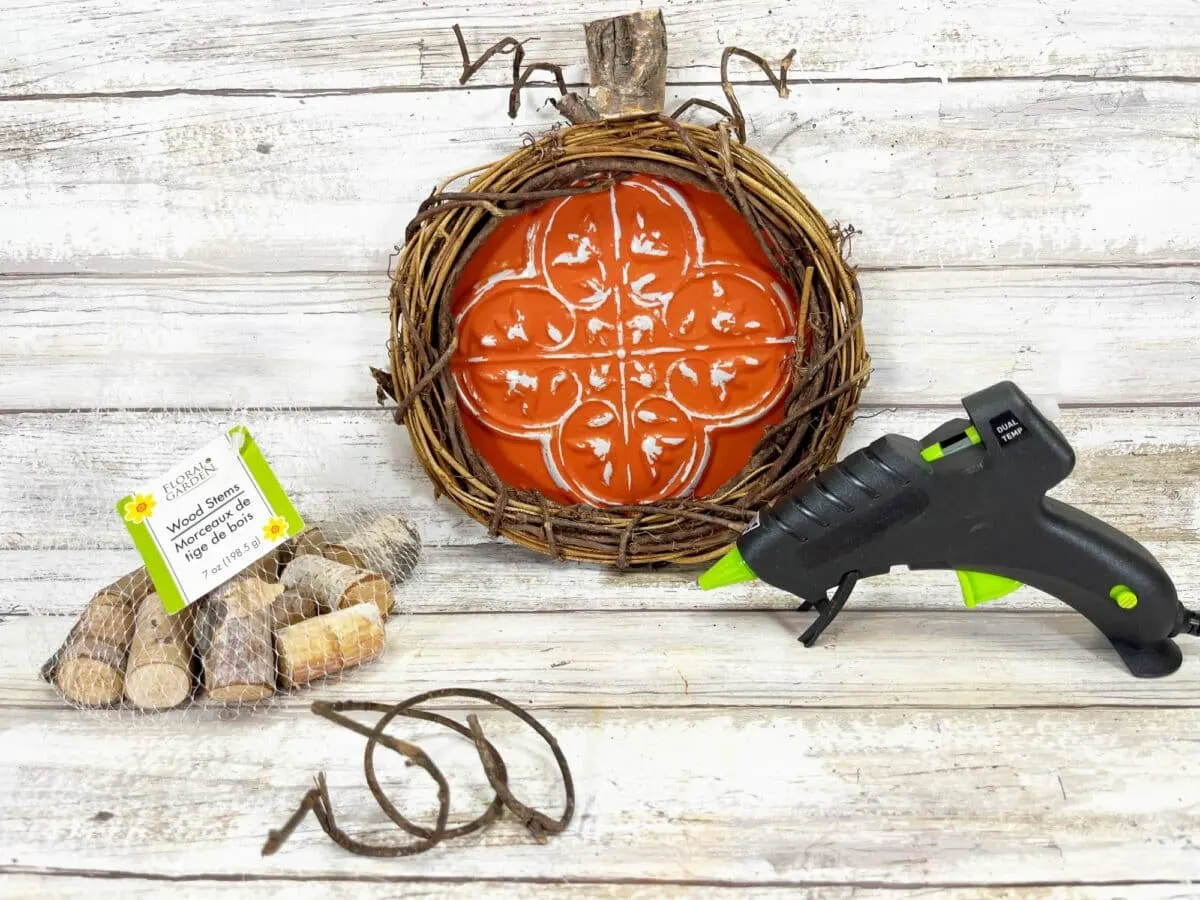
- We used wooden stems that come in a pack from the Dollar Tree. These stems are also used in our canning lid pumpkin and canning ring pumpkin.
- Use a stem from your yard instead of the wooden stem if you’d like.
- Any type of ribbon would work, or use twine or raffia.

This is just one of our many holiday wreaths you want to see! Be sure to see our pumpkin bundt pan wreath and plastic bag wreath, too.
How to Make a Tin Tile Wreath
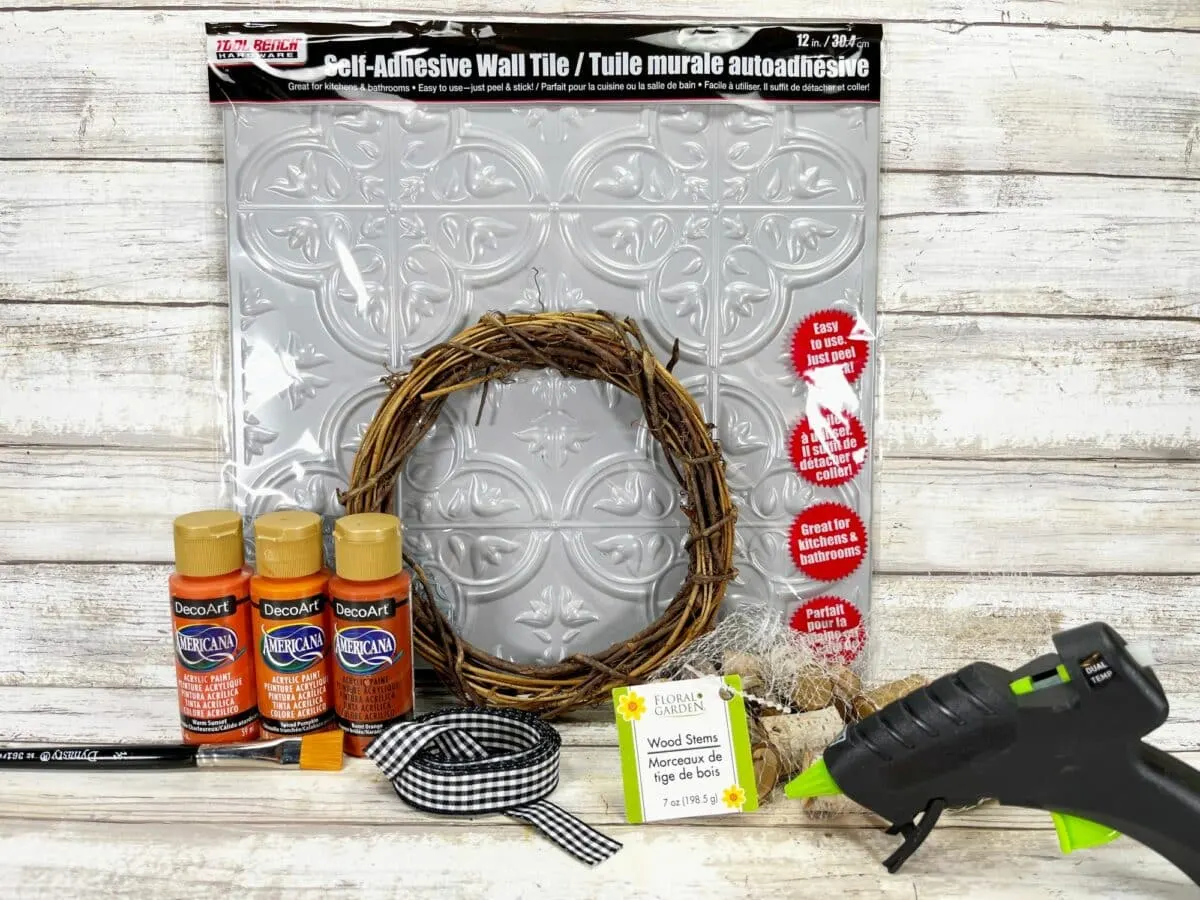
All supplies other than the paint was bought at the Dollar Tree.
Supplies
- Self-Adhesive Faux Tin Wall Tile
- 8-inch Grapevine Wreath
- Gingham Ribbon
- Twine (optional)
- Wood Stems
- Hot Glue Gun
- Dark Orange Acrylic Craft Paint
- Paintbrush
- Permanent Marker
- Paper Towel or Baby Wipe

Directions
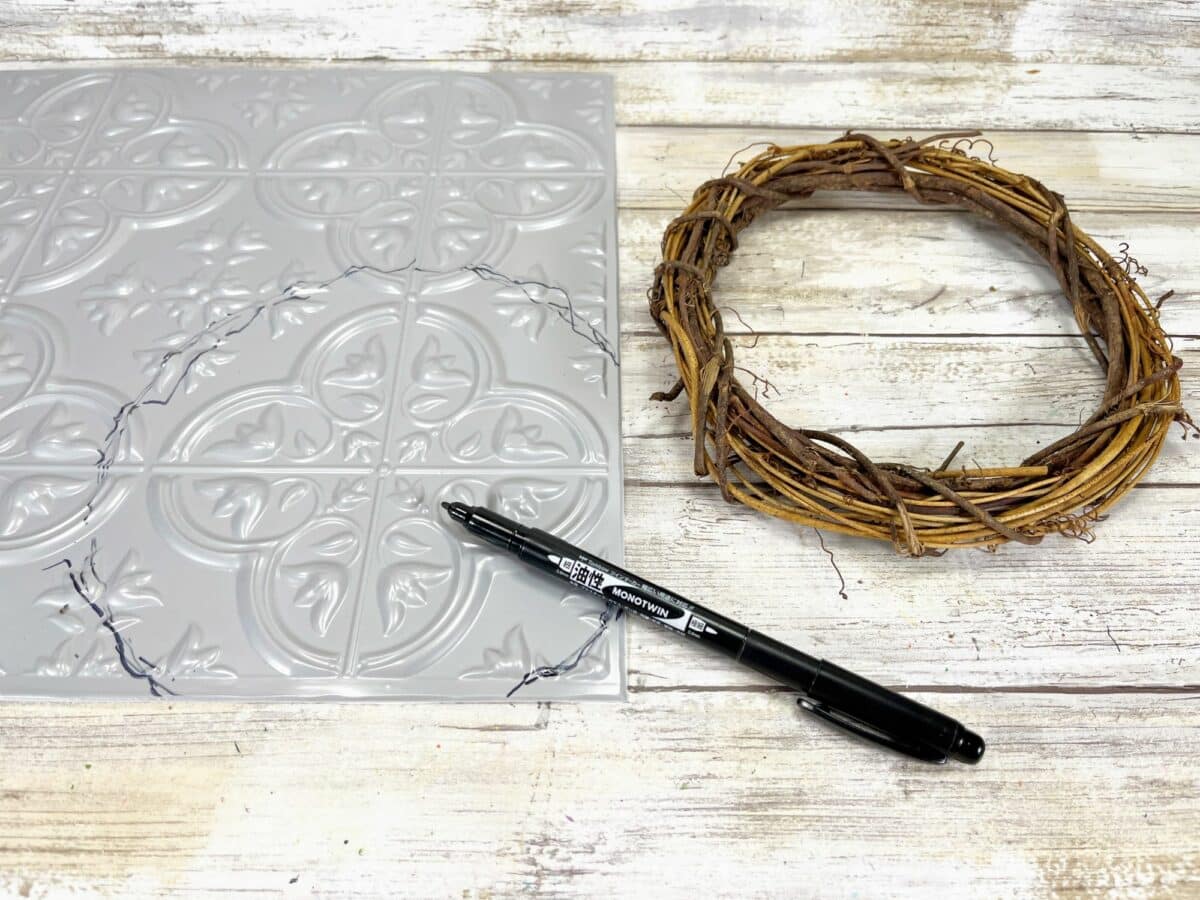
Step 1
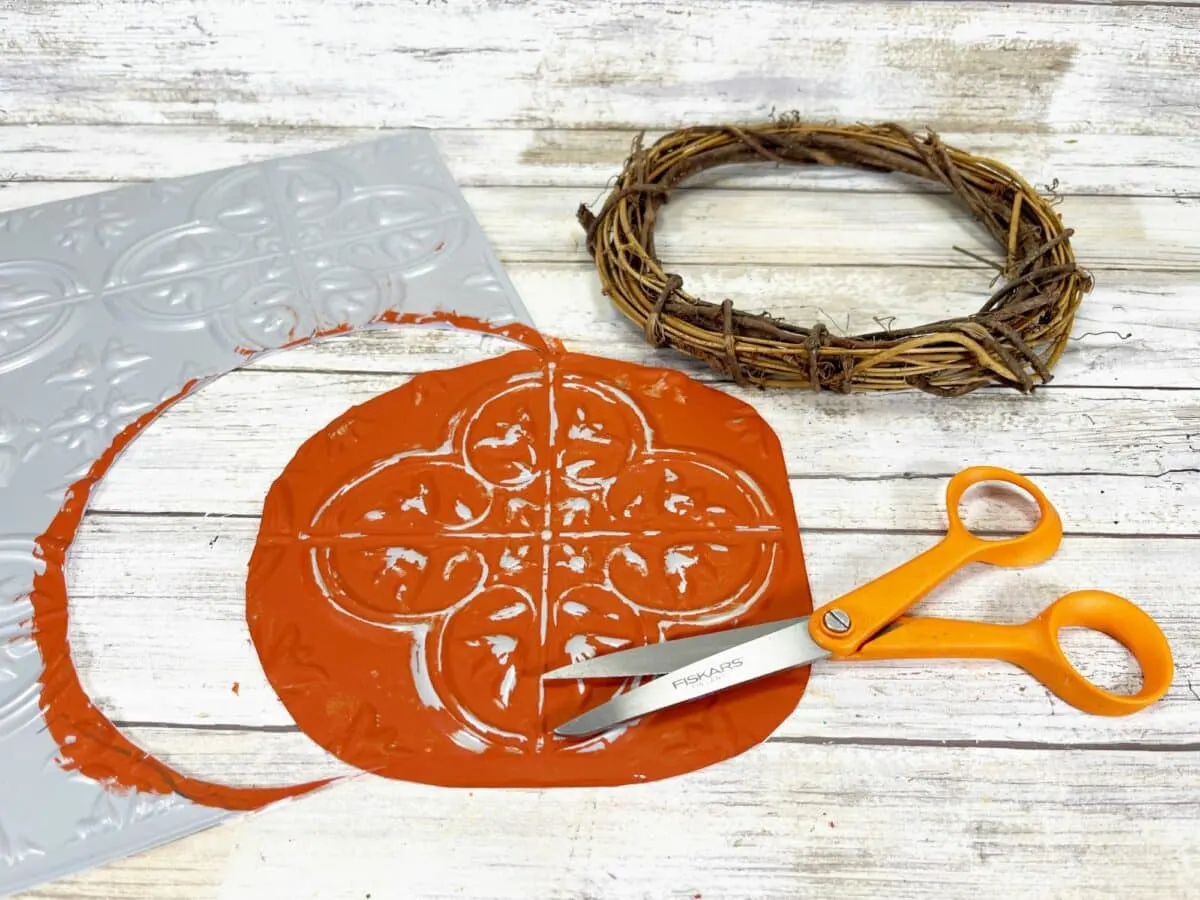
Lay the faux tin tile on your table and trace around the outer perimeter of the grapevine wreath with a permanent marker.

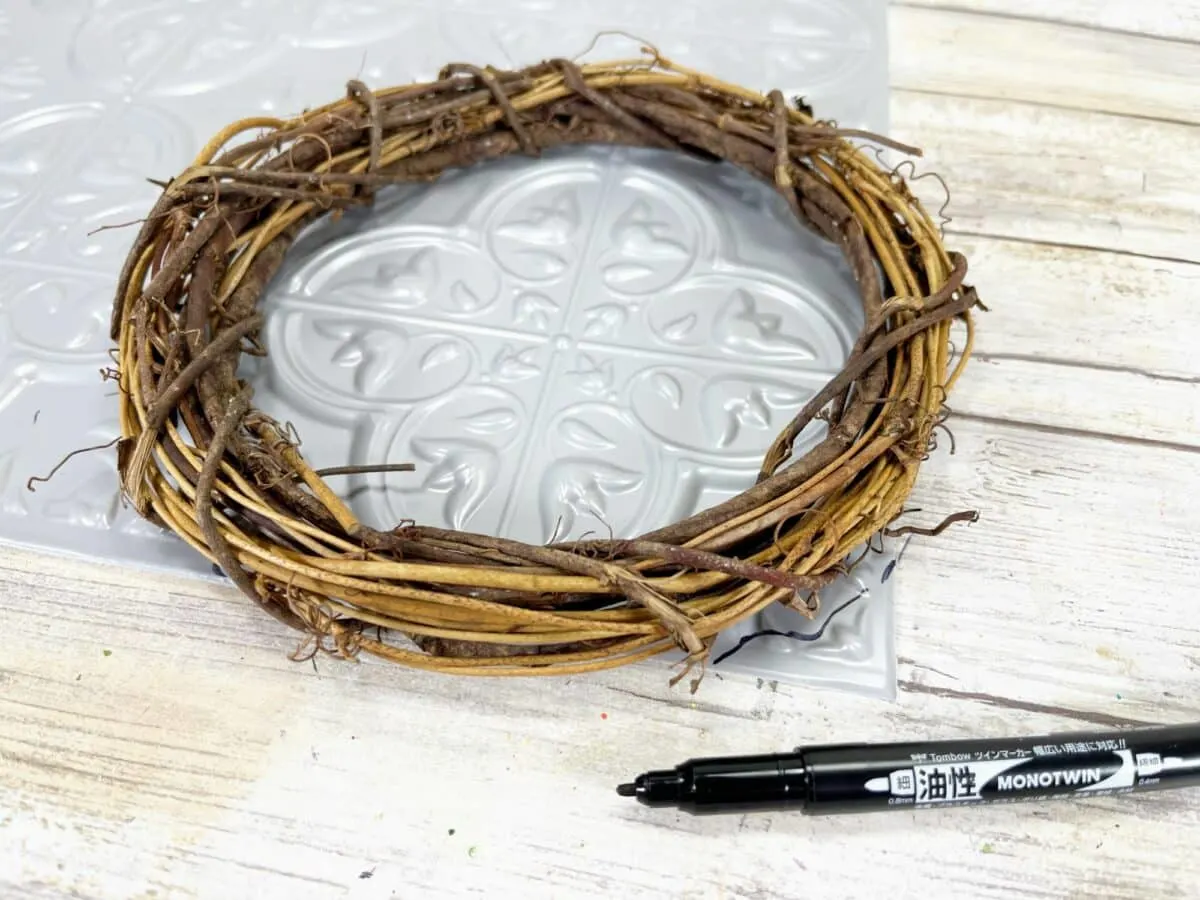
As you can see, it doesn’t have to be a perfect circle. I overlapped my wreath on some of the straight edges because I knew that they wouldn’t show and I didn’t want to waste the tile.

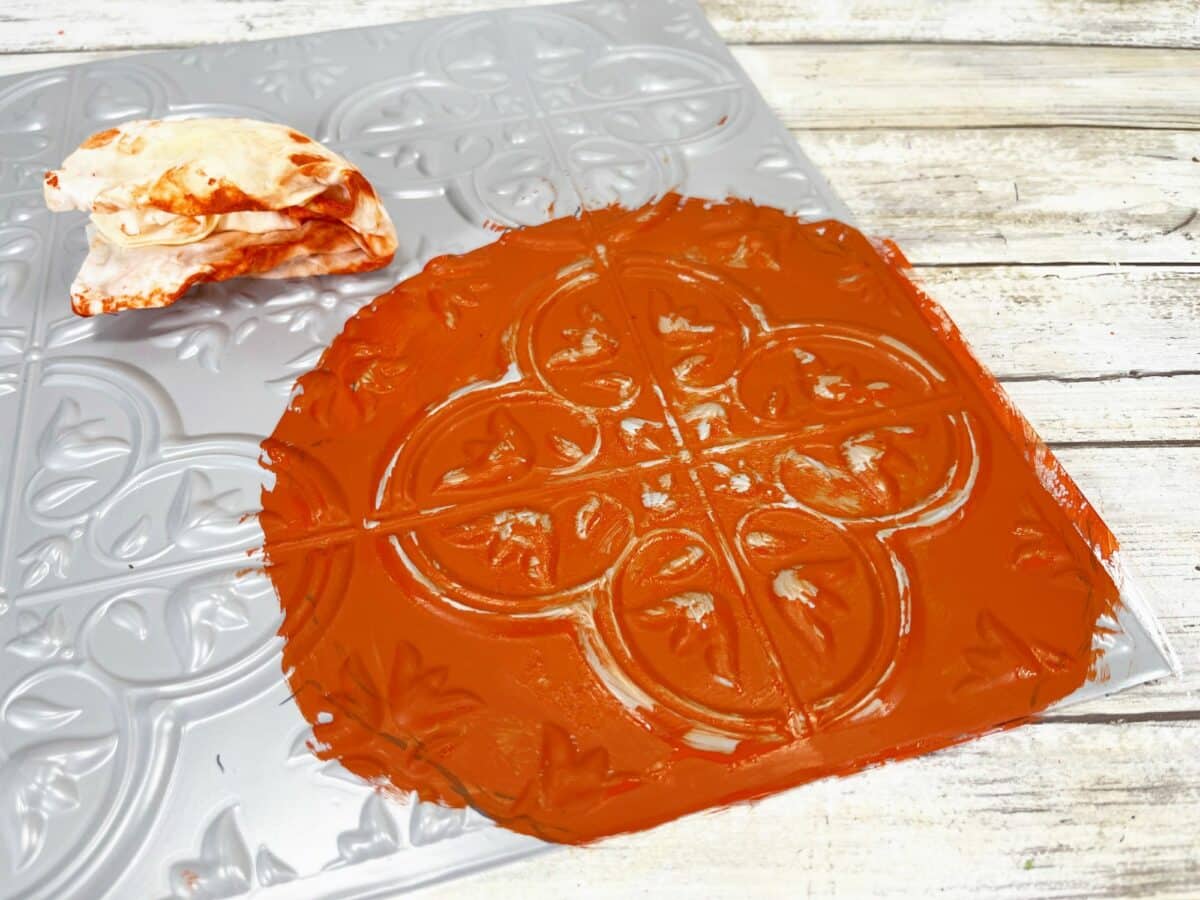
Step 2
Paint inside the traced circle with dark orange acrylic craft paint.
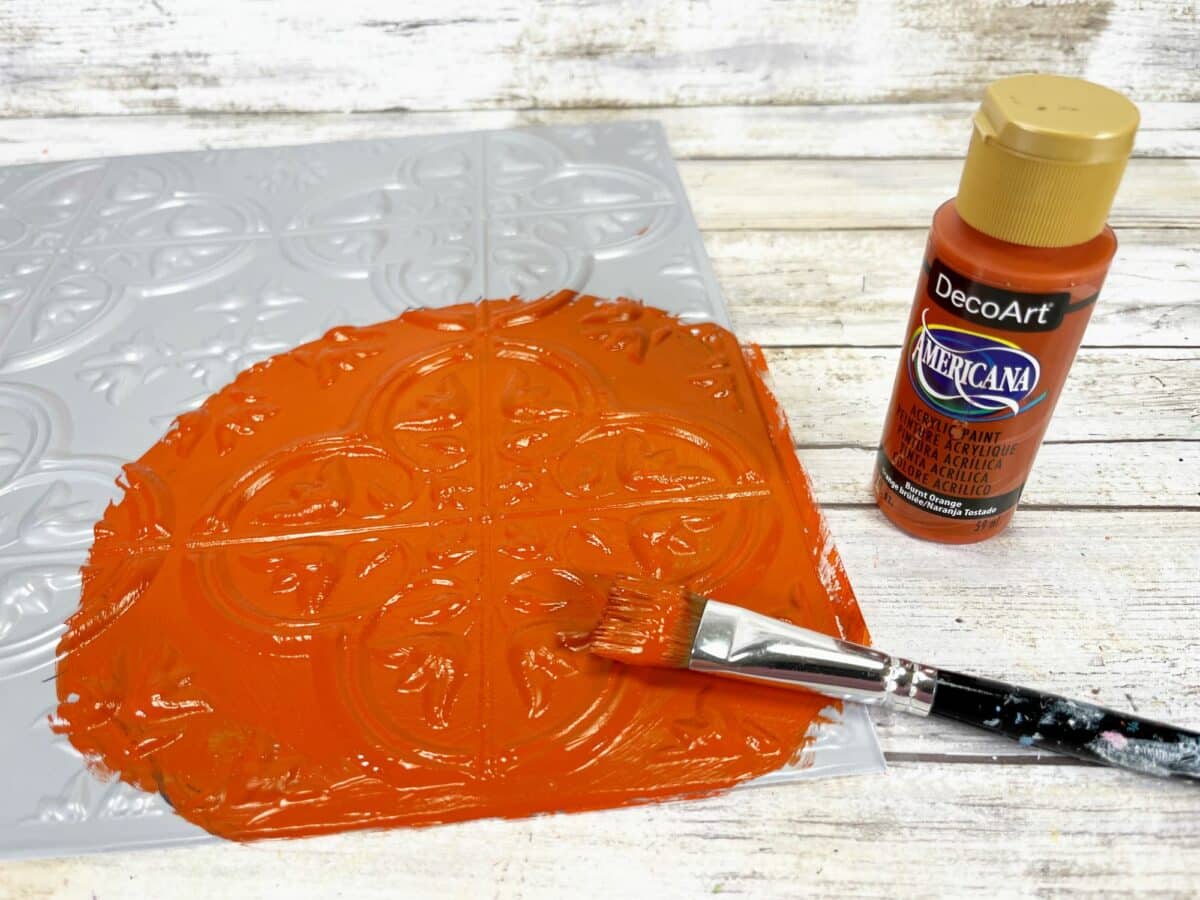

Before the paint has a chance to dry, you will want to distress the tin tile. Using a damp paper towel or a baby wipe, gently wipe away some of the paint from the raised areas to allow a little bit of the grey to show through.

Step 3
Once the tile has dried, cut out the circular shape with scissors.

Step 4
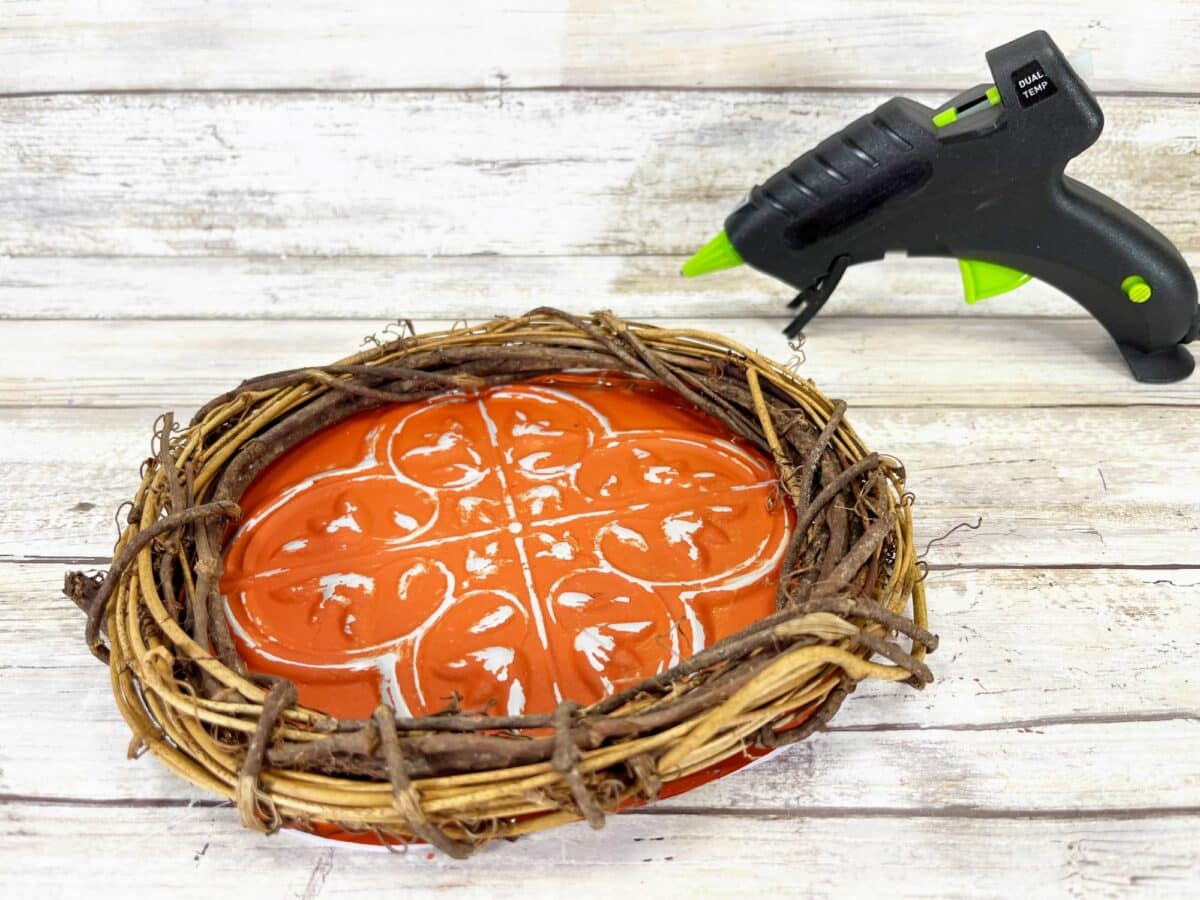
Glue the tin tile piece to the backside of the grapevine wreath. Be sure to keep the pretty finished side showing through the opening of the wreath!

Step 5
Glue a wood stem to the top center of the pumpkin wreath slightly toward the back.
Then, cut two curly grapevine pieces from the wreath. Glue them to the top right and left hand sides of the stem as pumpkin curls.

Step 6
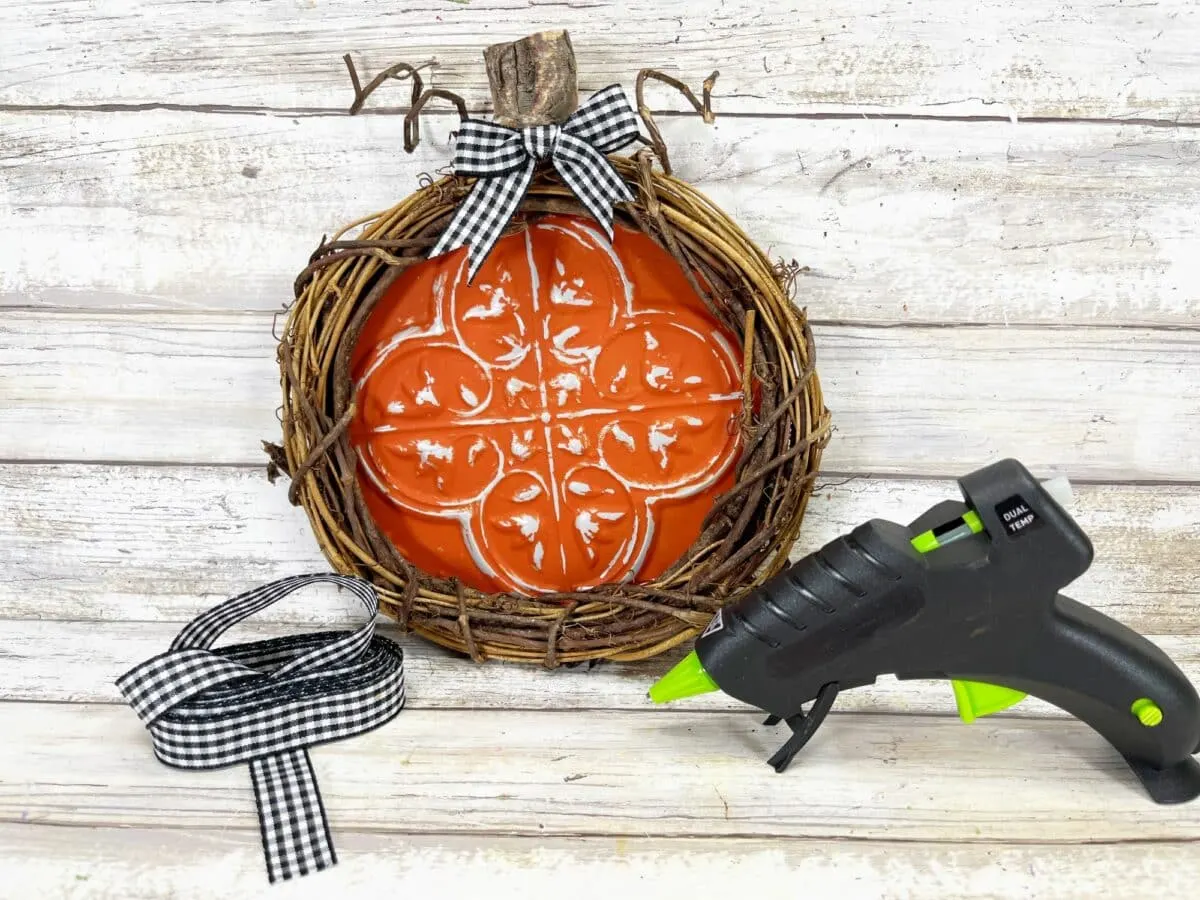
Tie the ribbon into a small bow.
In my final photos with the orange gingham ribbon, you can see a twine bow behind the ribbon bow. This isn’t shown in the photo below. If you would like, you can make a twine bow to glue on the stem first to give extra texture and dimension to the wreath.
Glue the bow to the base of the wood stem. Trim off long ends and notch the ends, if desired.


Be sure to Pin This craft idea to save for later!

Love unusual pumpkin designs? You will want to see these fun DIYs:
