


Do you love adding nostalgic and vintage pieces to your decorations? I know that I do! I find myself adding more old-fashioned things to my decor to remember the times with my grandma and the simple decorations that were popular decades ago.
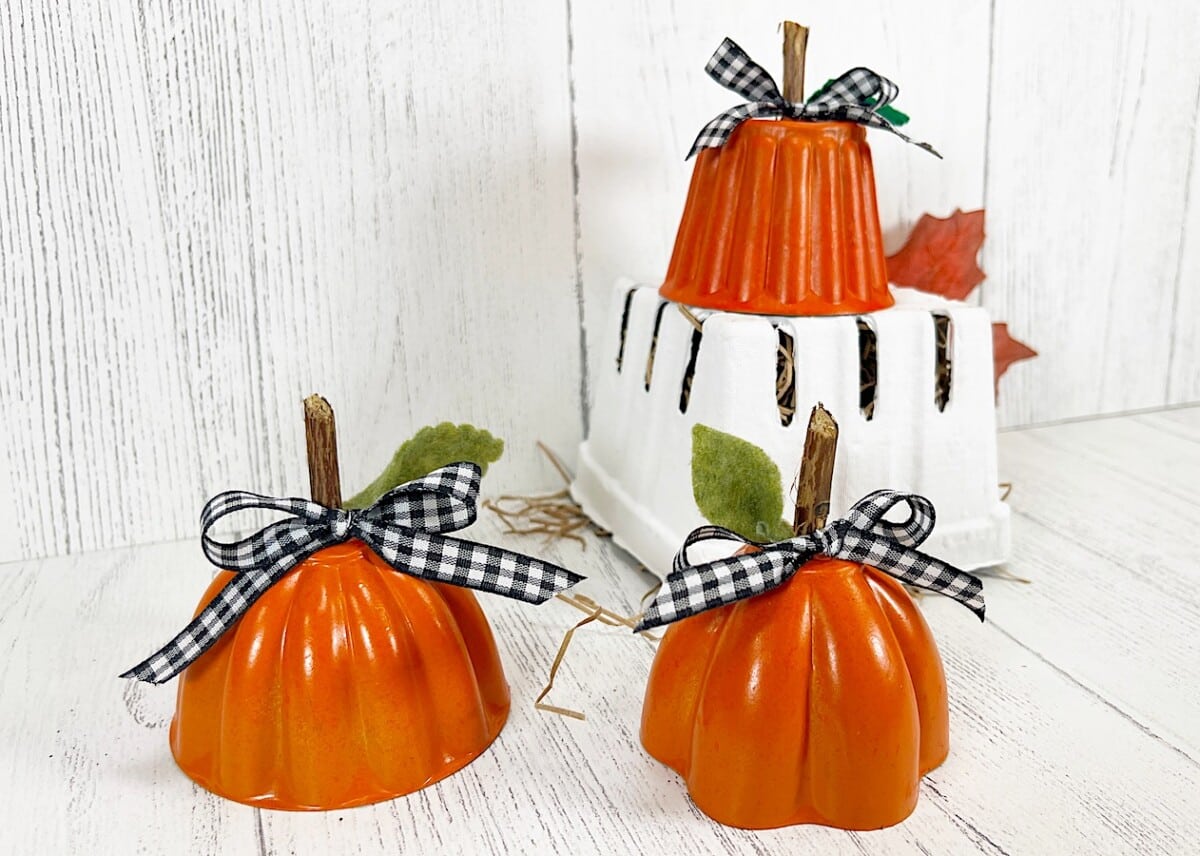
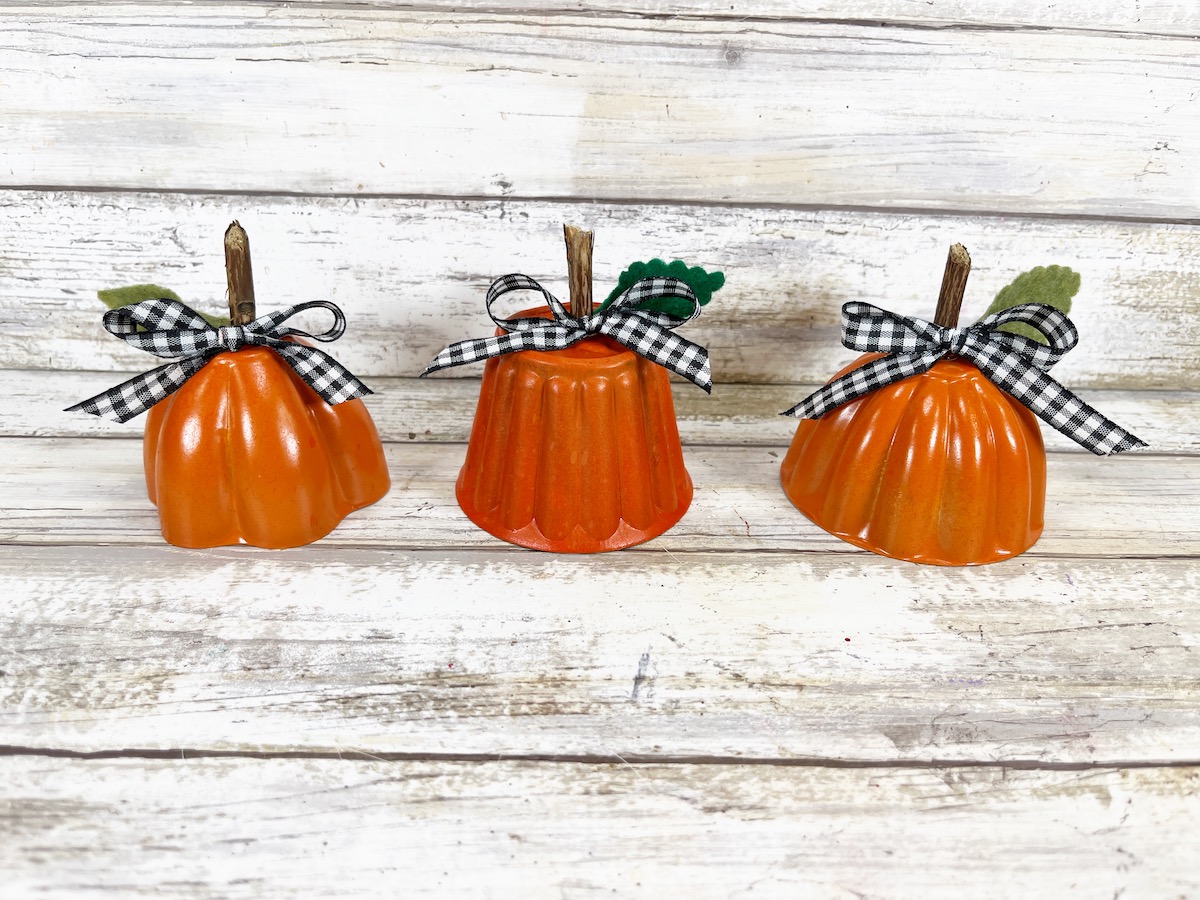
These vintage tin mold pumpkins are one of those nostalgic DIYs that I love making. They remind me of the tin molds that our parents and grandparents used to make Jell-O molds or mini cakes.
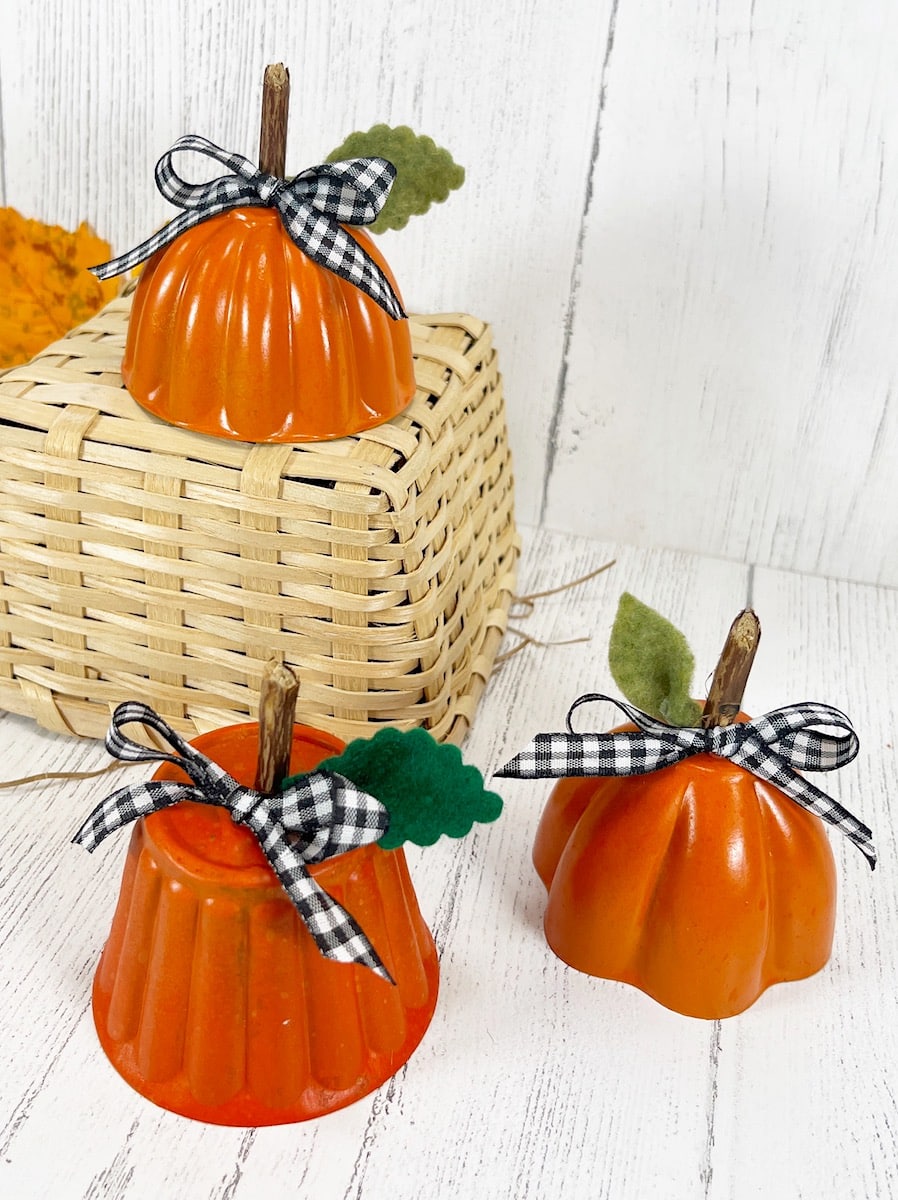

I found these mini tin molds at a thrift store, but you might find some in your kitchen cabinet tucked in the back. Or ask your family if they have tin molds they no longer want. It is a great way to preserve heirloom items.
These cut tin mold pumpkins would look great on a shelf, a table or a tiered tray. When you combine a variety of sizes and shapes they look great gathered together as a display.

Be sure to see all of our easy Fall crafts for more great ideas!
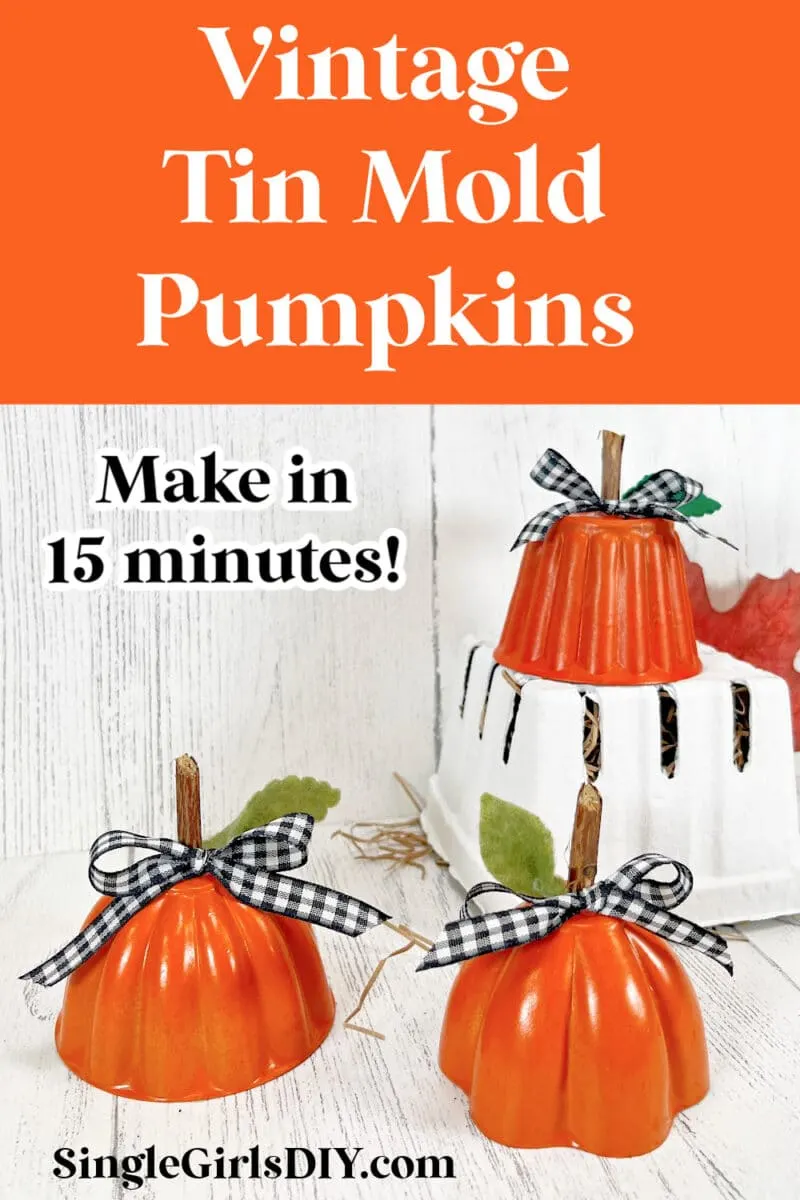
DIY Vintage Tin Mold Pumpkins
Materials
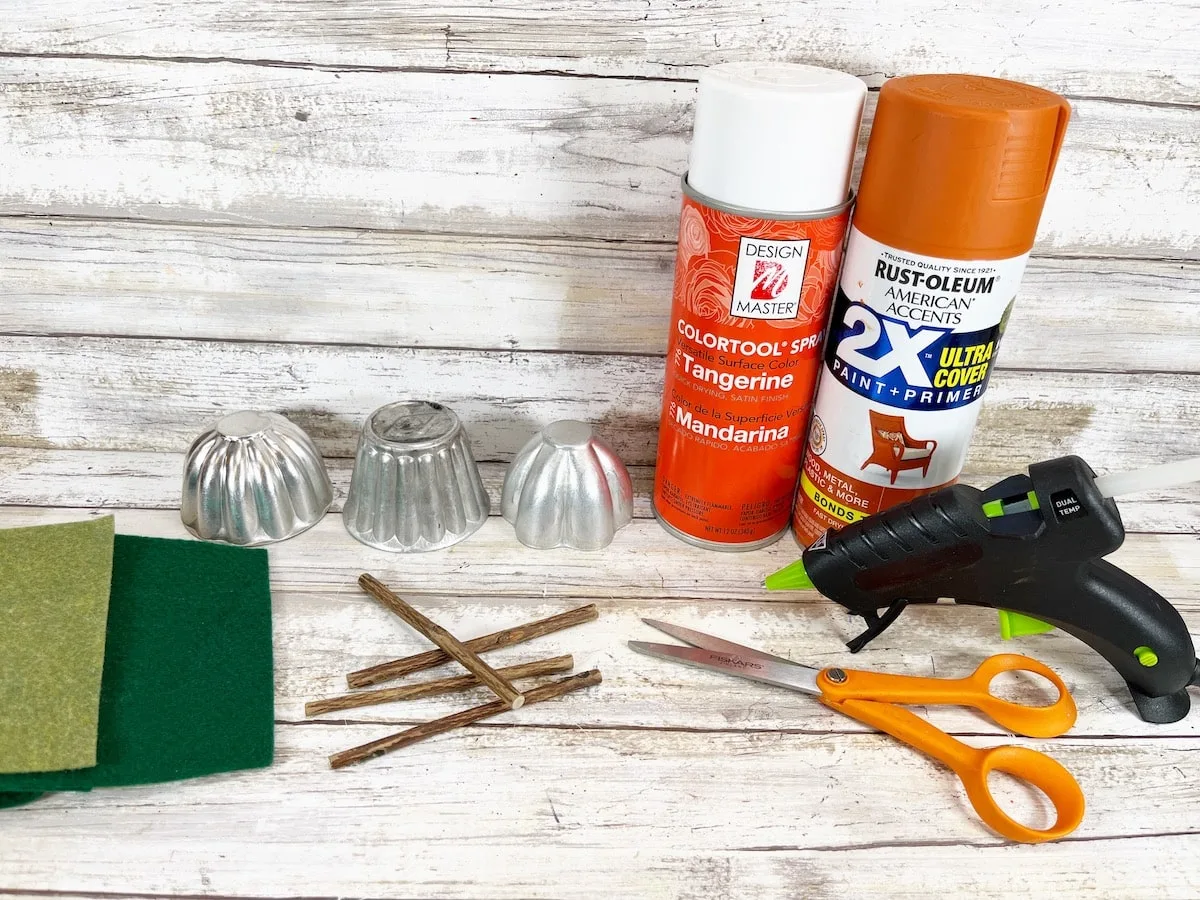
- Mini Tin Molds
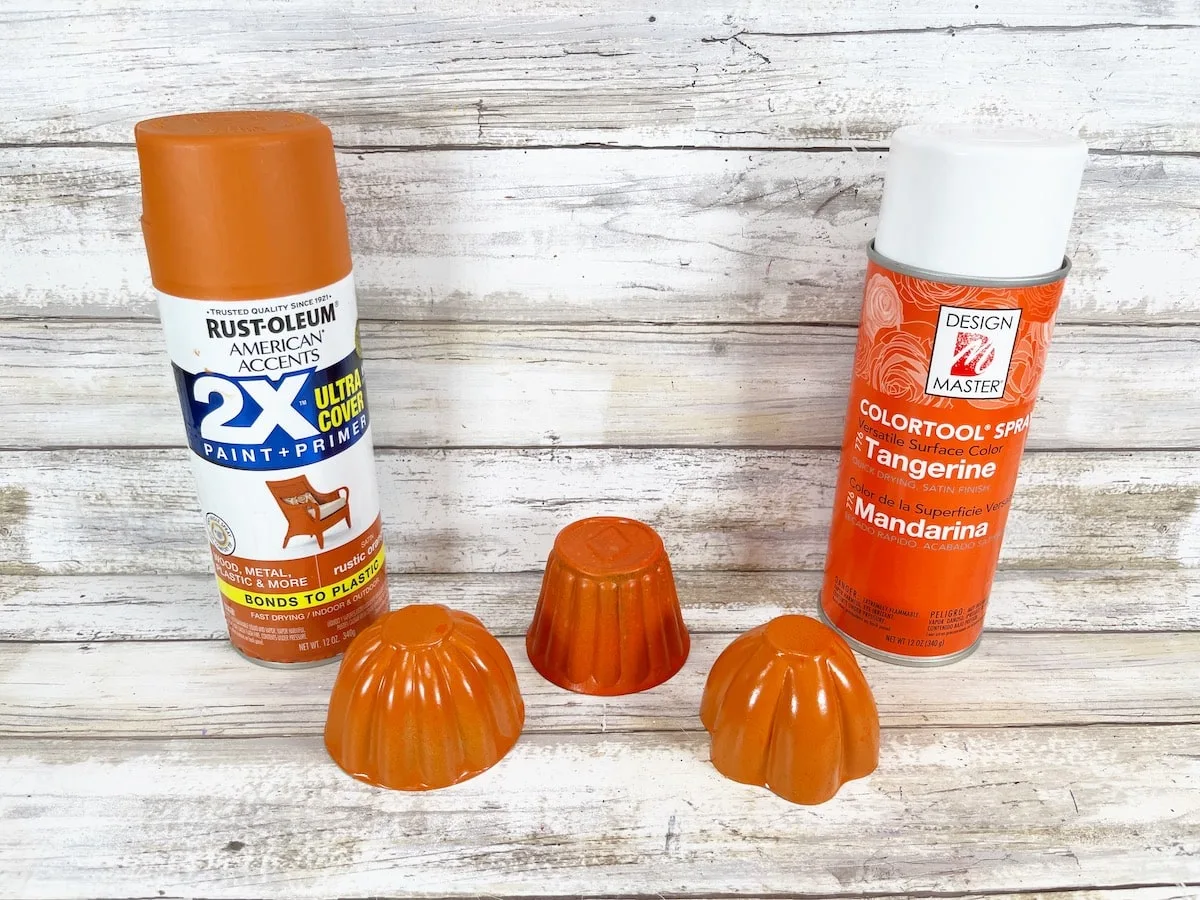
- Spray Paint ( I used a Bright Orange and a Burnt Orange)
- Ribbon
- Felt Scraps
- Glue Gun and Glue Sticks
- Twig or Branch
- Scissors
- Wire Cutters (optional)

Instructions
Step 1
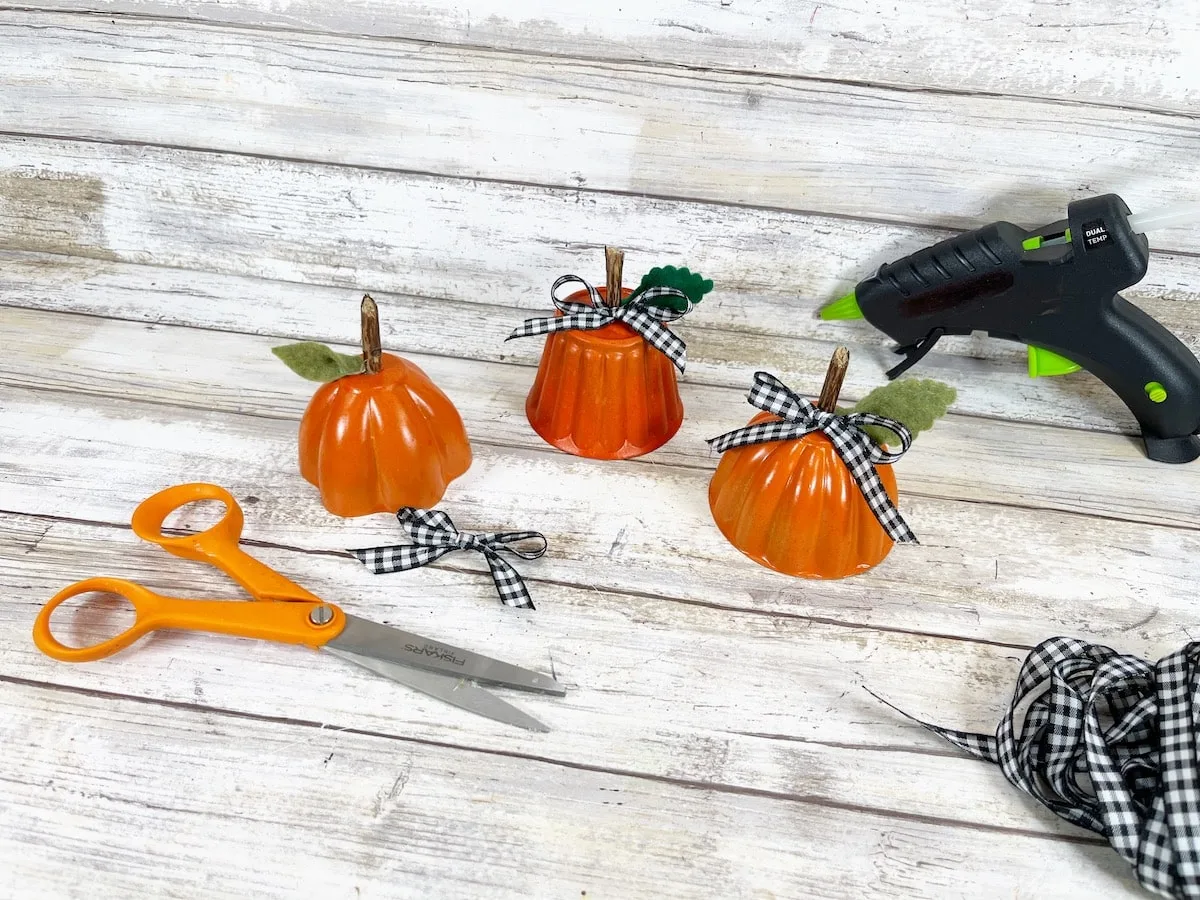
Wash and dry the mini tin molds well. Remove any adhesives or stickers there might be on the molds.
In a well-ventilated area, or outdoors, spray the exterior of the mini tin molds with spray paint.

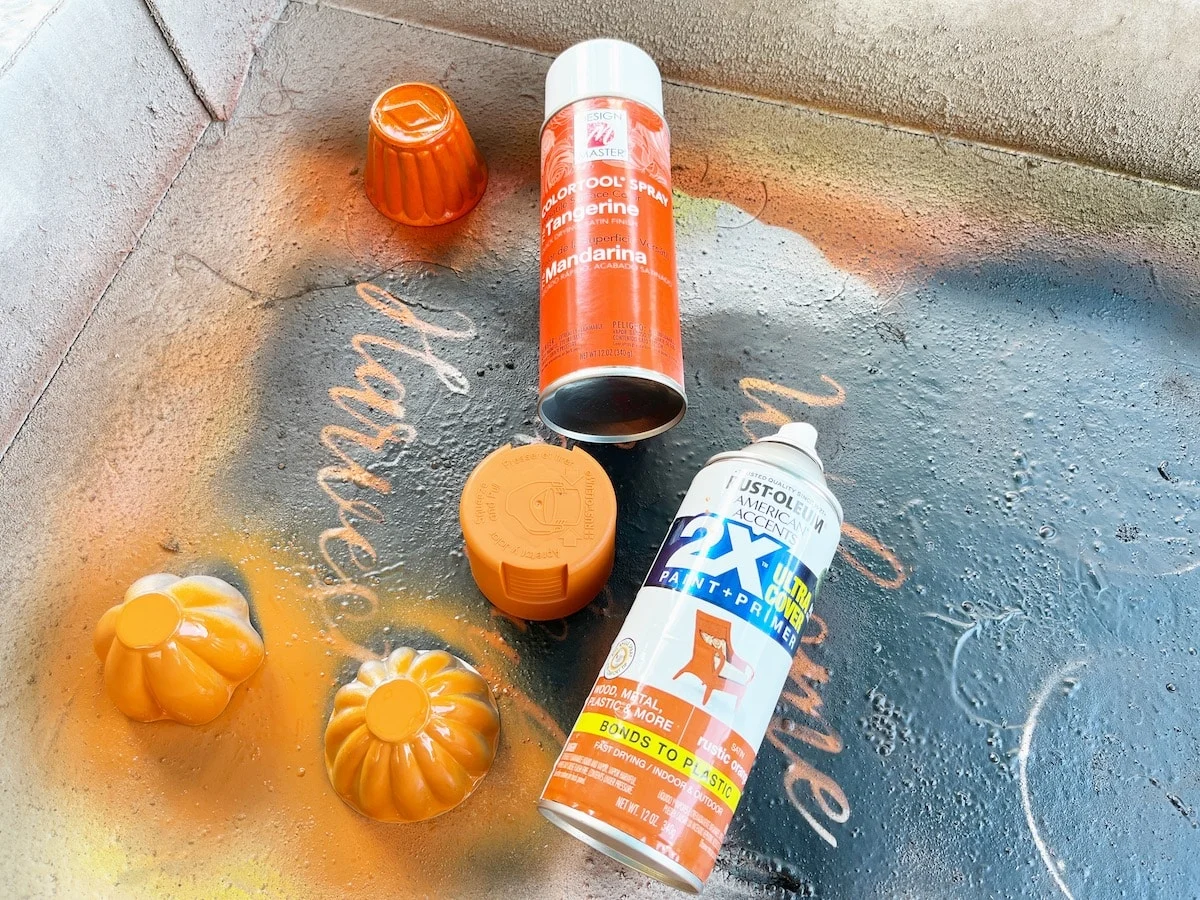
Allow to dry completely. Apply a second coat, if necessary. You can mix the colors and add variation by lightly spraying one color on top of the other, if desired.

Step 2
Cut a small twig or tree branch into one-inch sections with a pair of wire cutters or scissors.
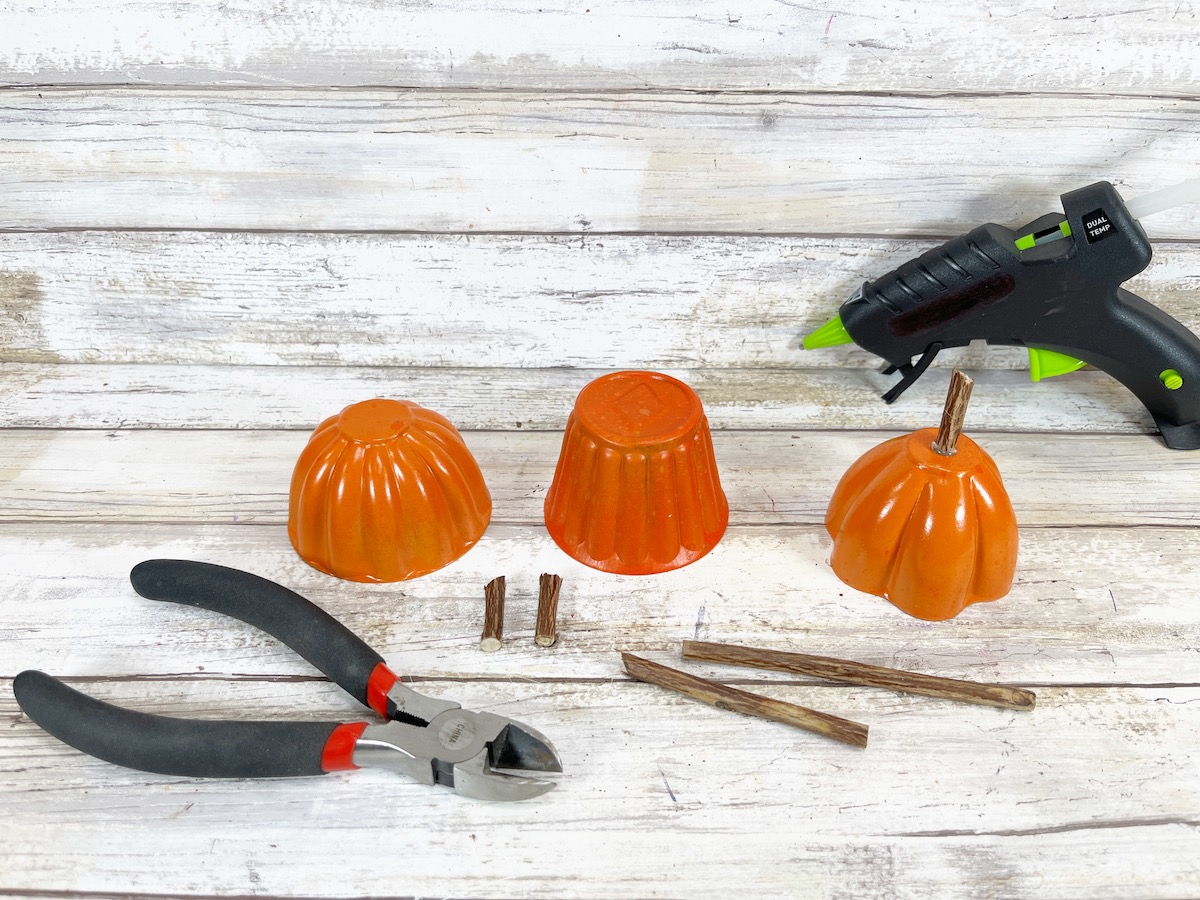

Glue the twig to the top of the mini tin molds. Hold in place until the glue dries completely.
Step 3
Cut small leaf shapes from green felt scraps.
To create dimension in the leaf, apply a dot of glue at the base of each leaf and fold in half to pinch together.

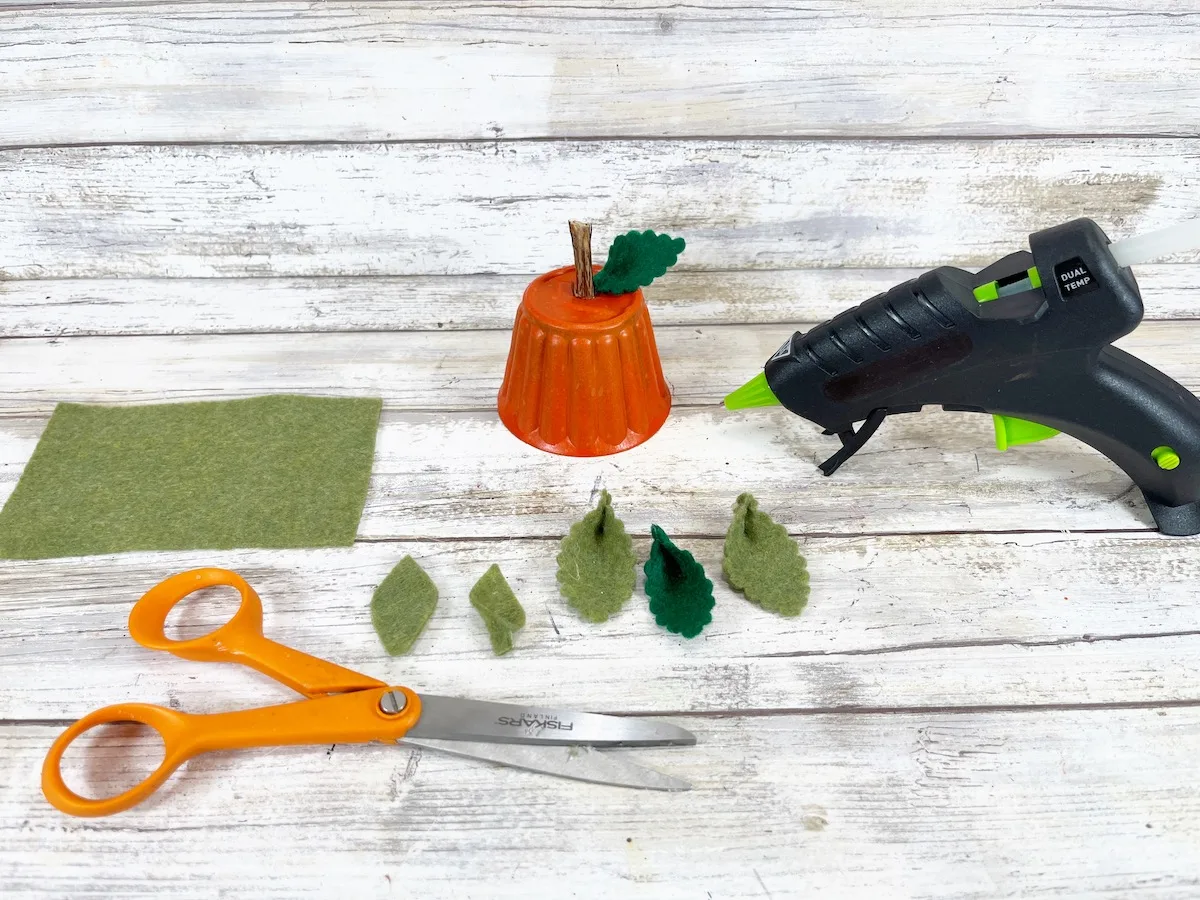
Glue a leaf to the top of the vintage tin mold pumpkin next to the twig stem.
Step 4
Cut an eight-inch length of ribbon for each pumpkin. Tie in a bow, then glue the bow to the base of the twig stem on top of the pumpkin.


Be sure to Pin This cute project to remember for later!

If you like these vintage tin mold pumpkins, you will love these easy and unusual pumpkin ideas, too:
- Foam Dice Pumpkins
- Golf Ball Pumpkins
- Thread Ball Pumpkins
- Jenga Block Pumpkins
- Plastic Basket Pumpkins
