
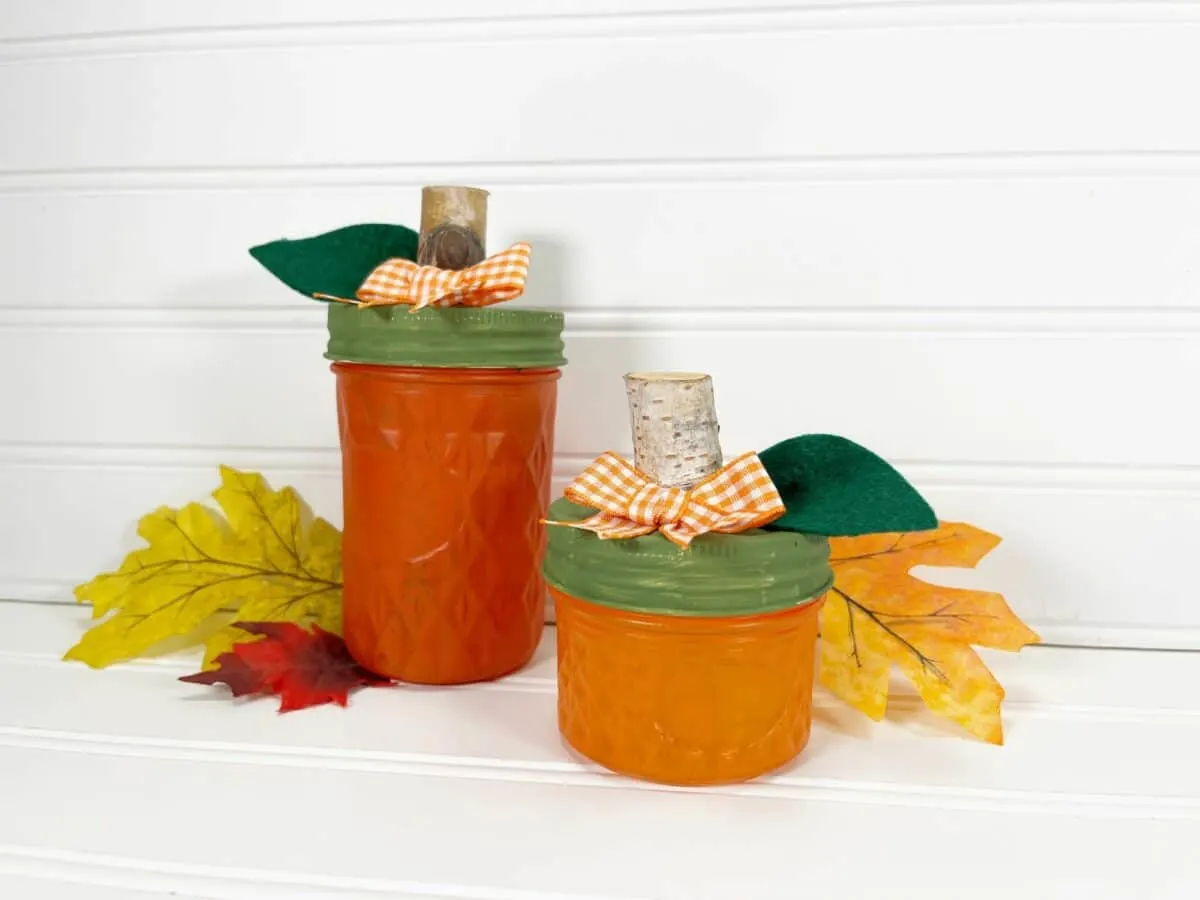
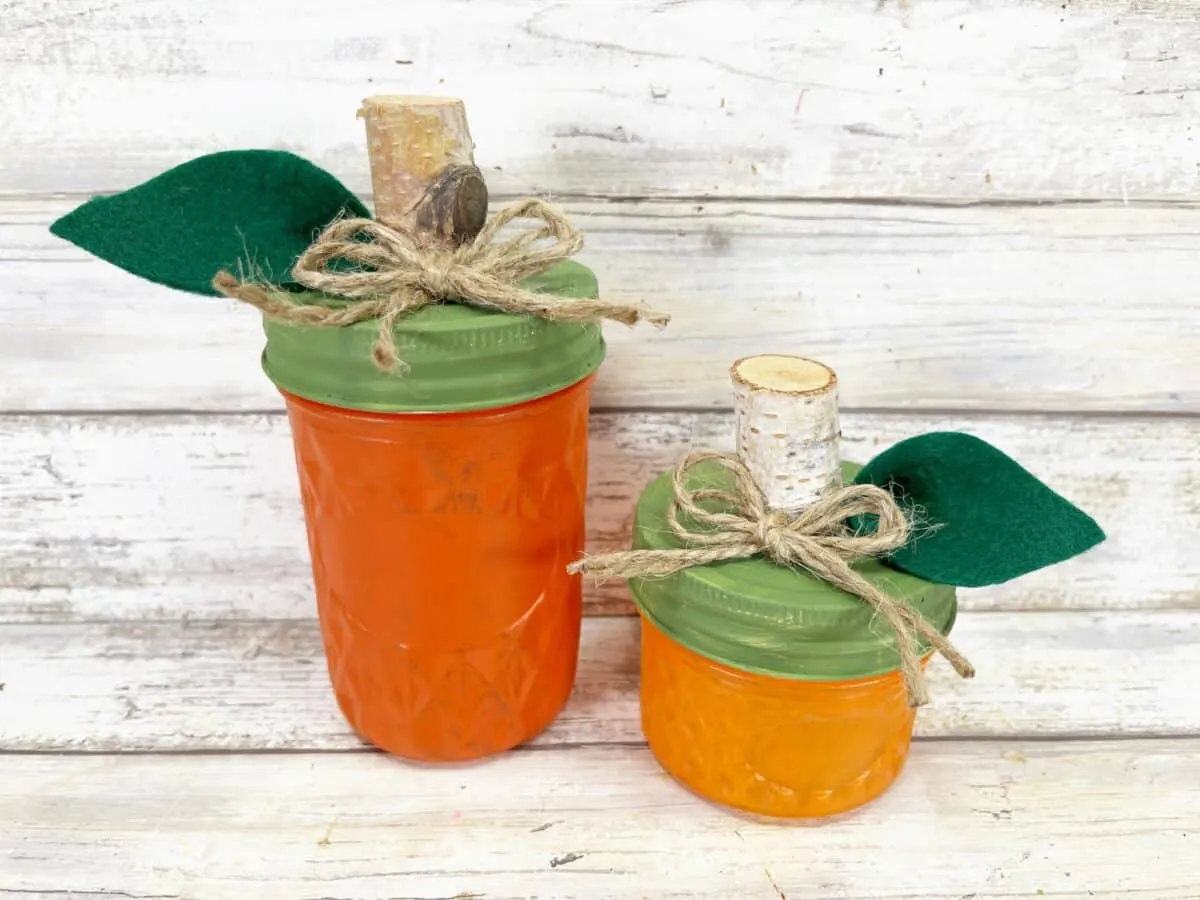
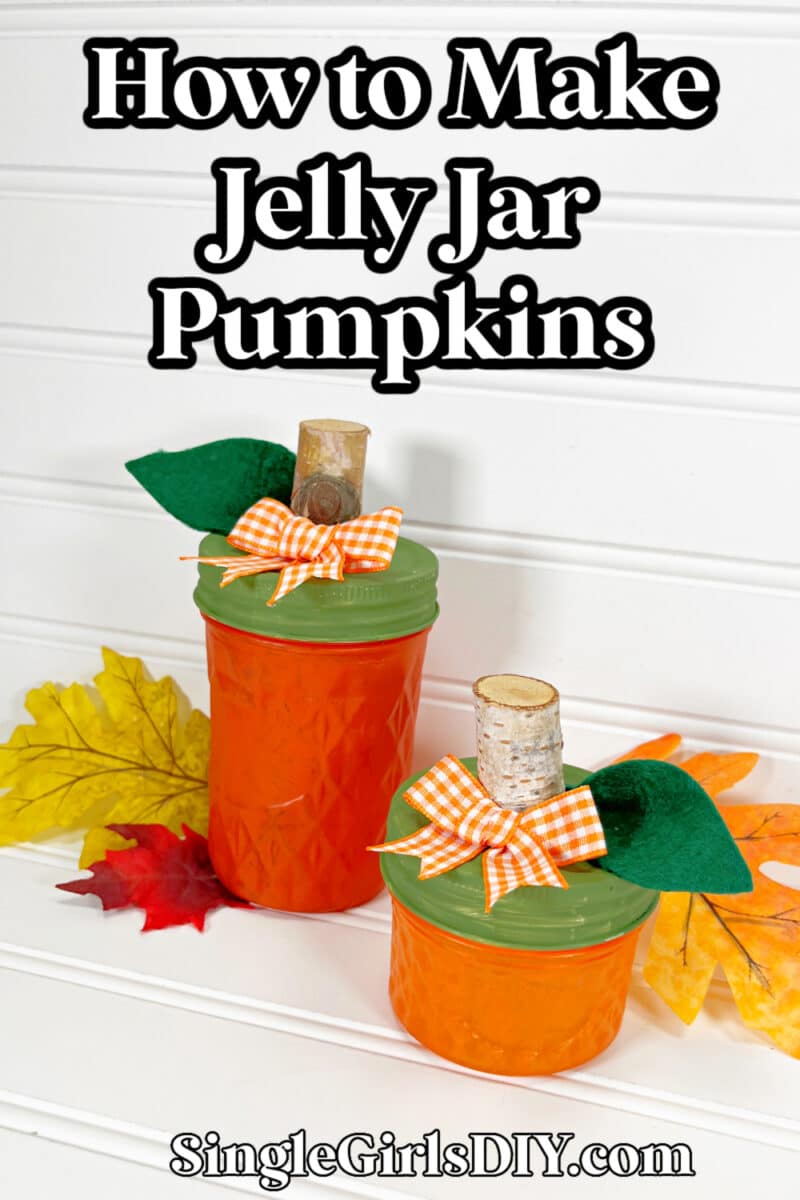
Not only are jelly jars cute for storing jams, they also make the cutest glass pumpkins.
These farmhouse-style pumpkins are also perfect for gifting candies, cookies or other treats!

How to Make Jelly Jar Pumpkins
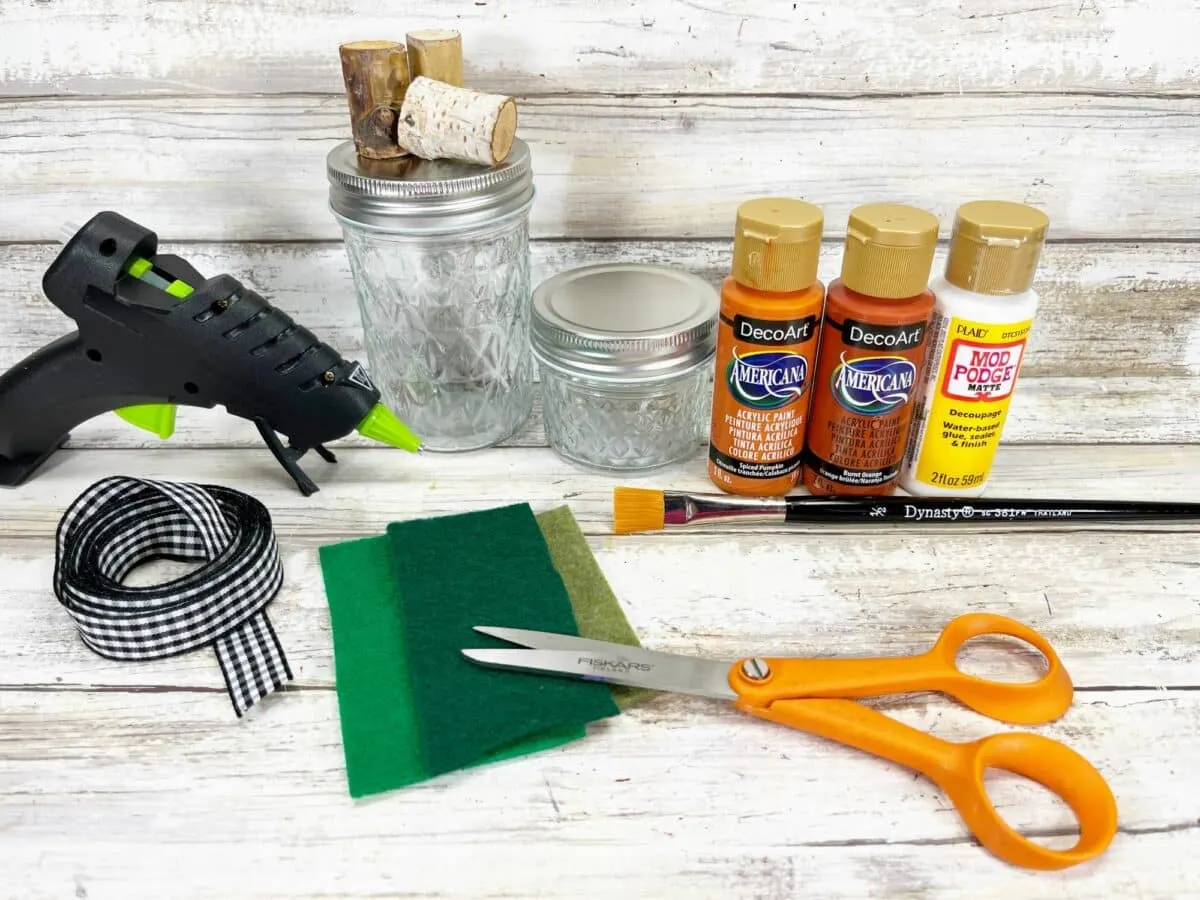
All materials other than paint were purchased at the Dollar Tree.
Supplies
- Jelly Jars (Small and Medium sizes)
- Wooden Stems
- Jute Twine or Ribbon
- Hot Glue Gun or Craft Glue
- Mod Podge
- Craft Paint (Light orange and dark orange)
- Green Acrylic Craft Paint
- Green Felt
- Paintbrush
- Ruler

Directions
Step 1
Remove the sticker tag from the jelly jars. Then wash and dry the jars and lids.
Place a dime size amount of each of the light orange acrylic paint and decoupage medium on a paper plate. Mix together well until fully combined.
Paint a light coat of the paint mixture on the outside of the small jelly jar.

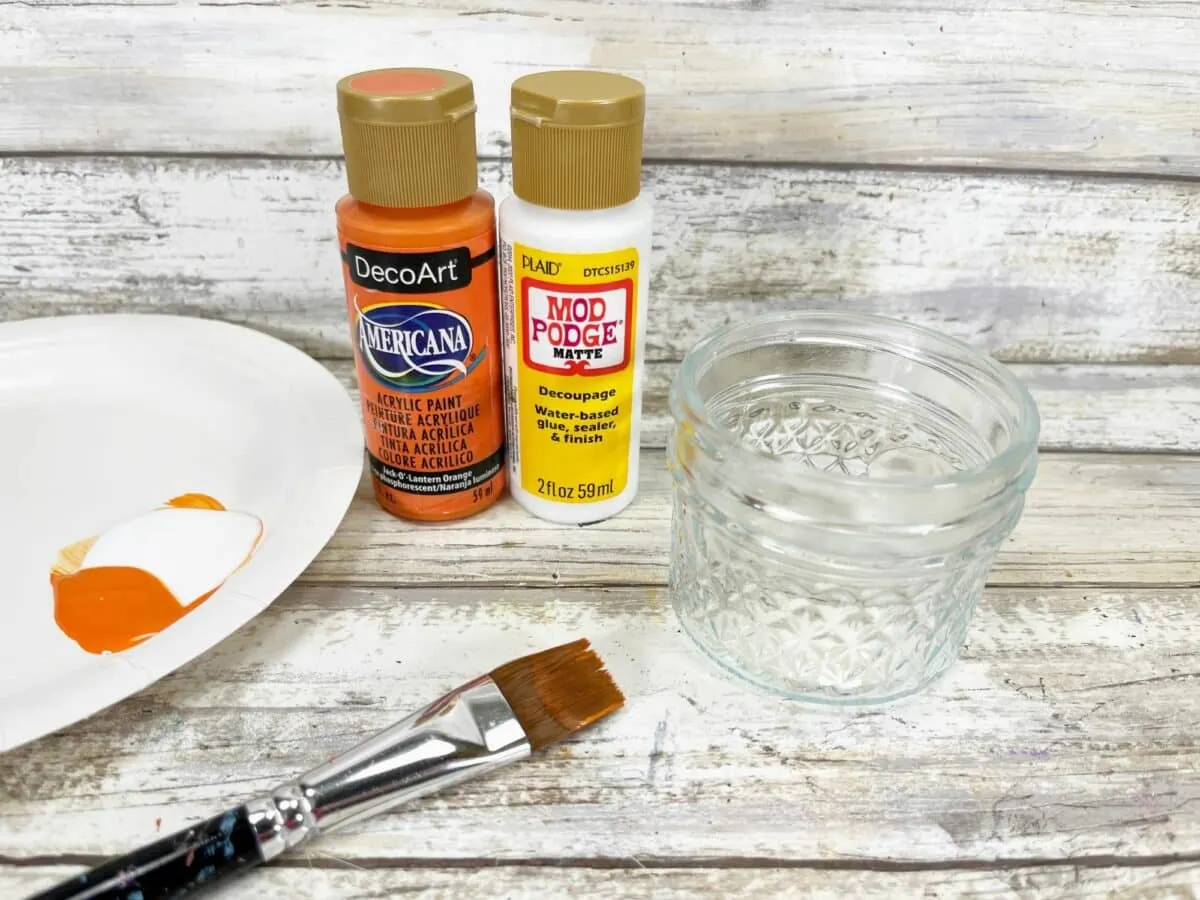
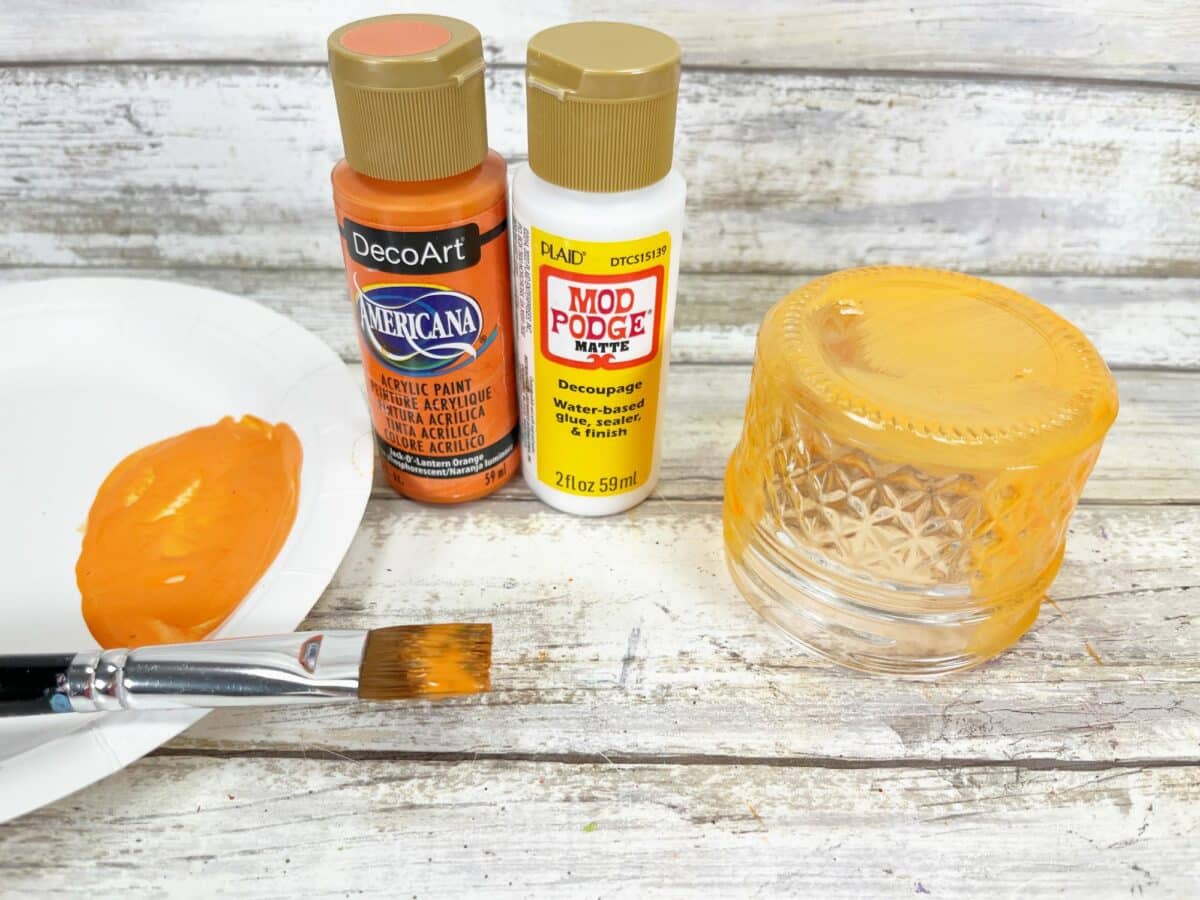

The decoupage medium will make the paint translucent.
Step 2
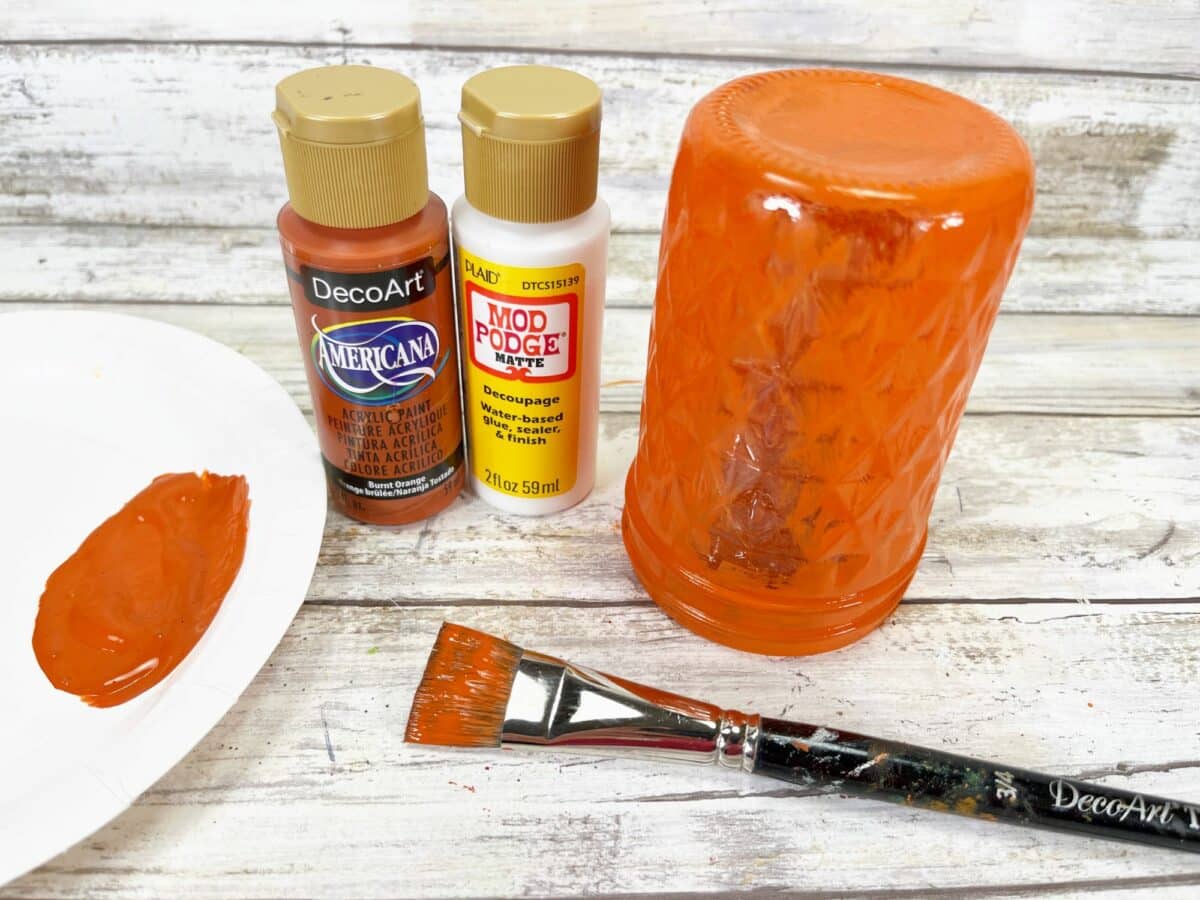
For the larger glass jar, use a quarter-size dollop of each of the dark orange acrylic paint and Mod Lodge on a paper plate. Mix together well until fully combined.
Paint a light coat on the outside of the medium jelly jar, just as you did the small jar.

Step 3
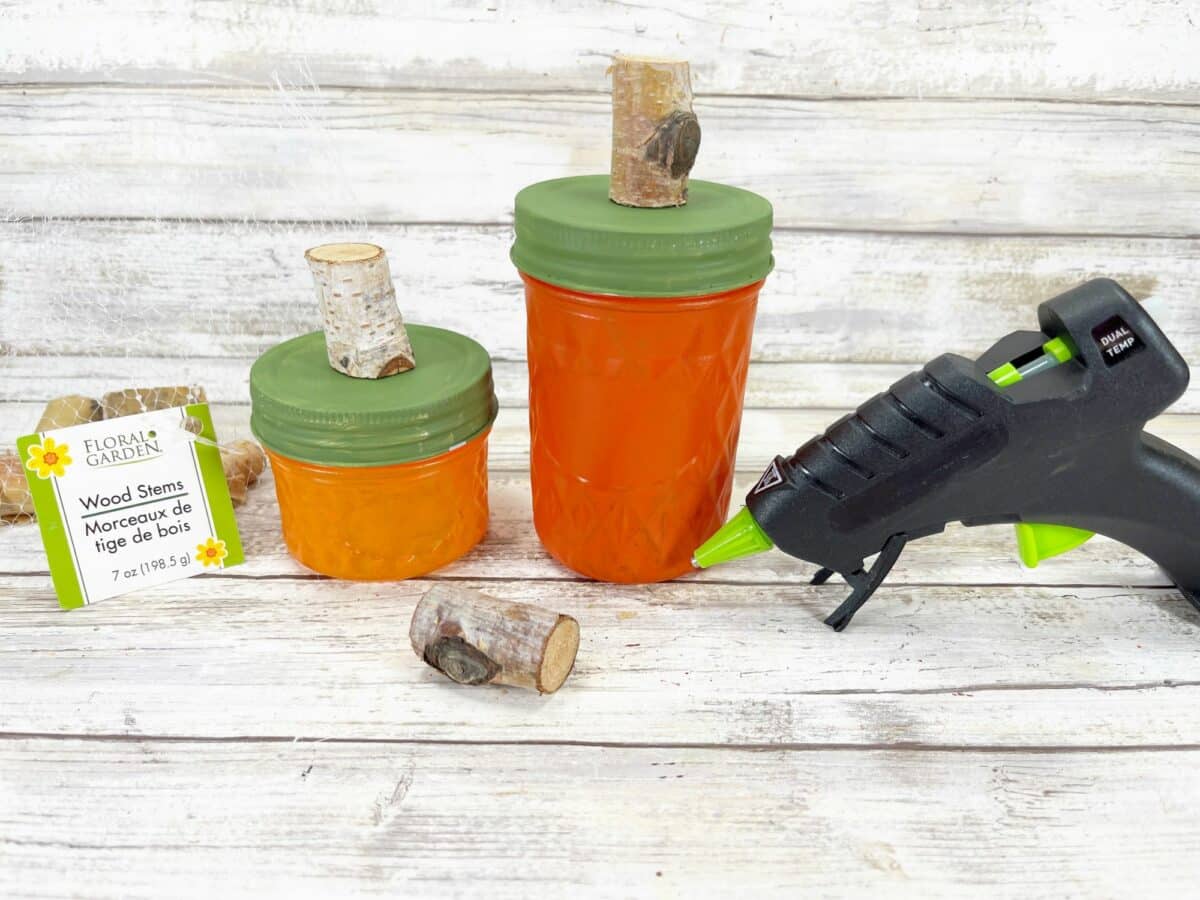
Paint the jelly jar lids with the green paint.
Allow to dry, and then apply a second coat, if necessary.
You can add a layer of Mod Podge over the green paint on the lids for extra protection from paint chips, if you would like. Do not mix the paint and the Mod Podge, though.


Step 4
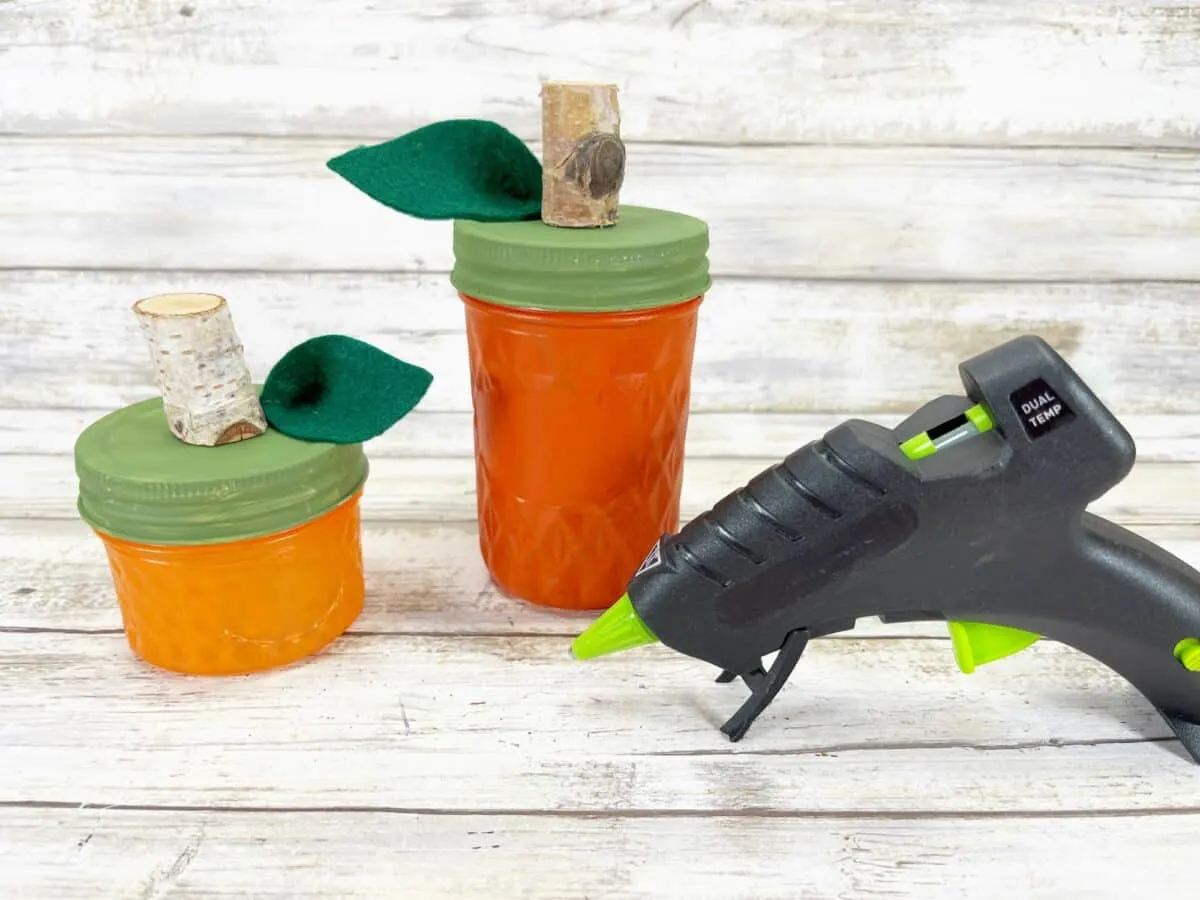
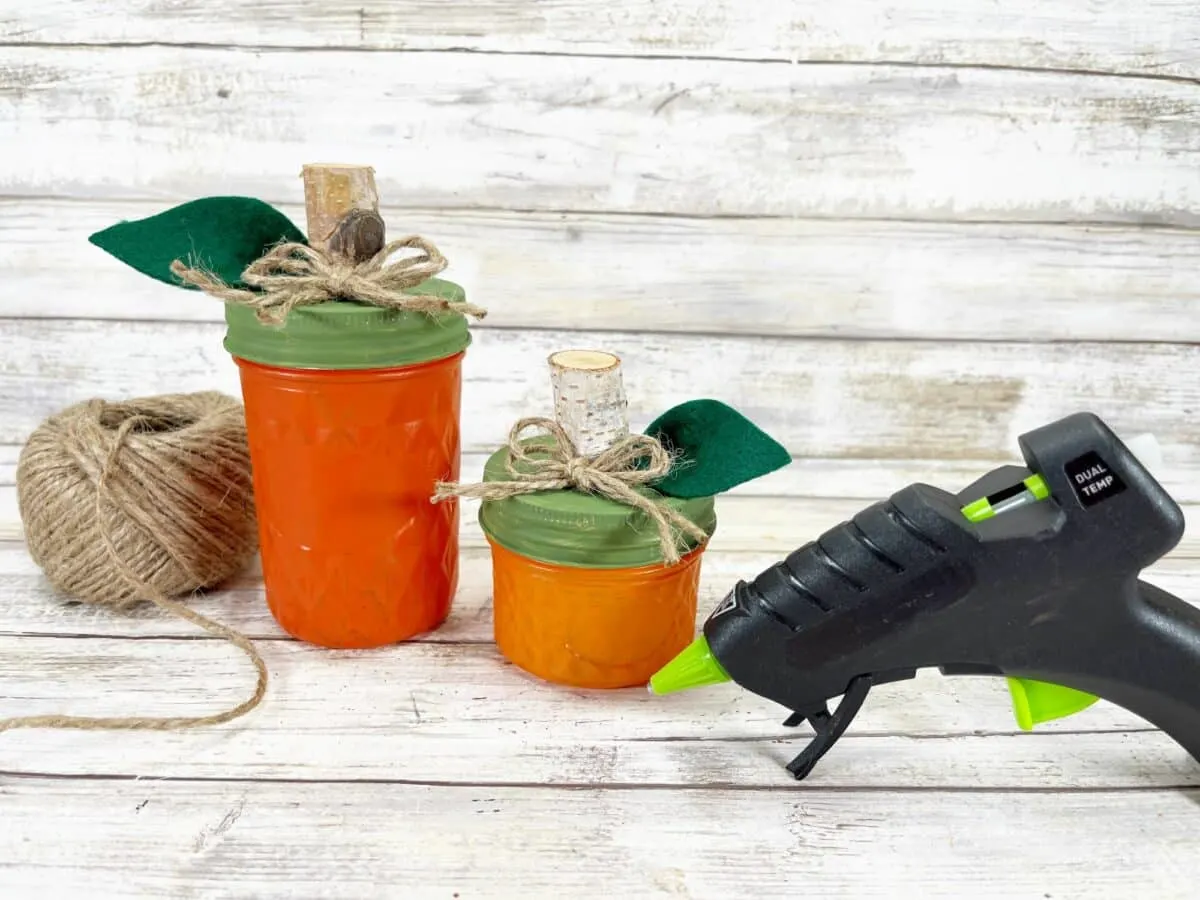
Glue a wooden stem to the top center of each of the jelly jar lids.

Step 5
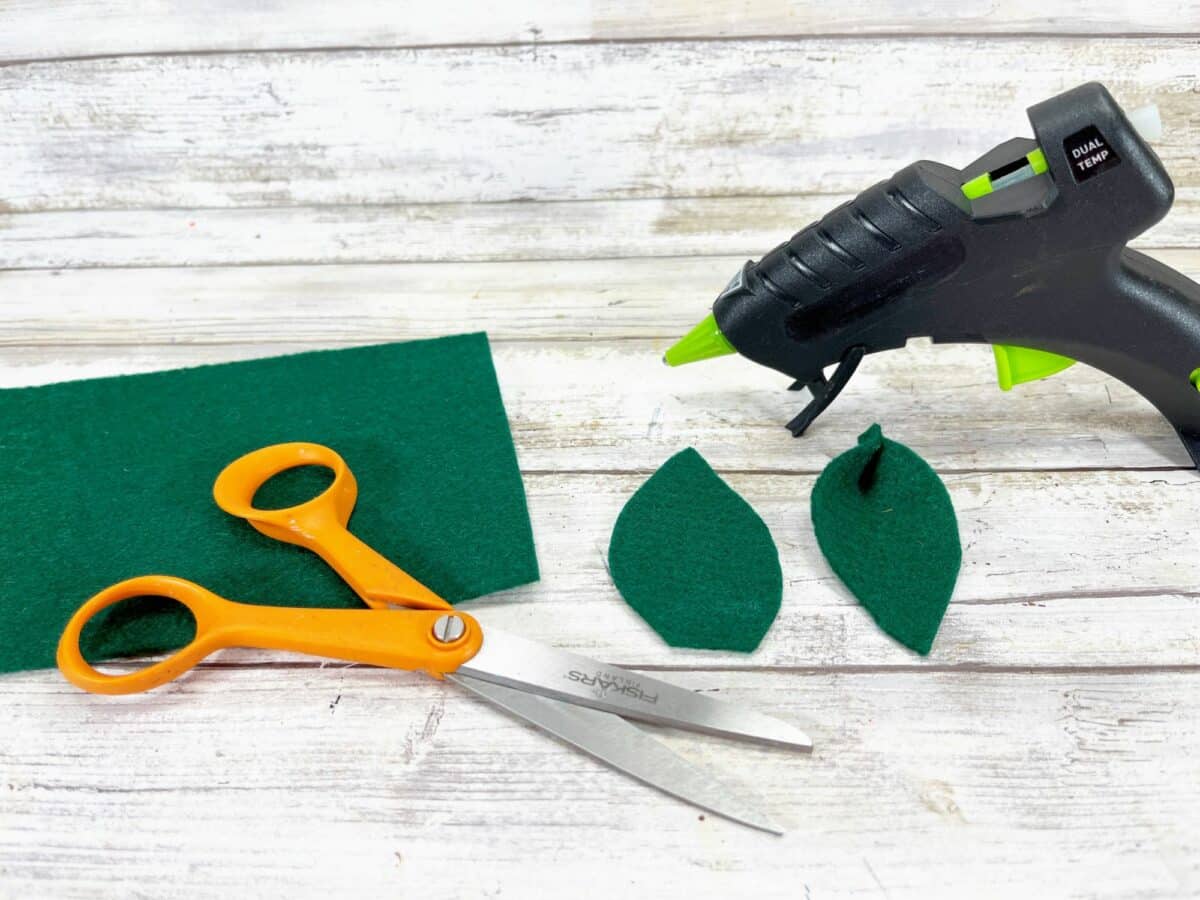
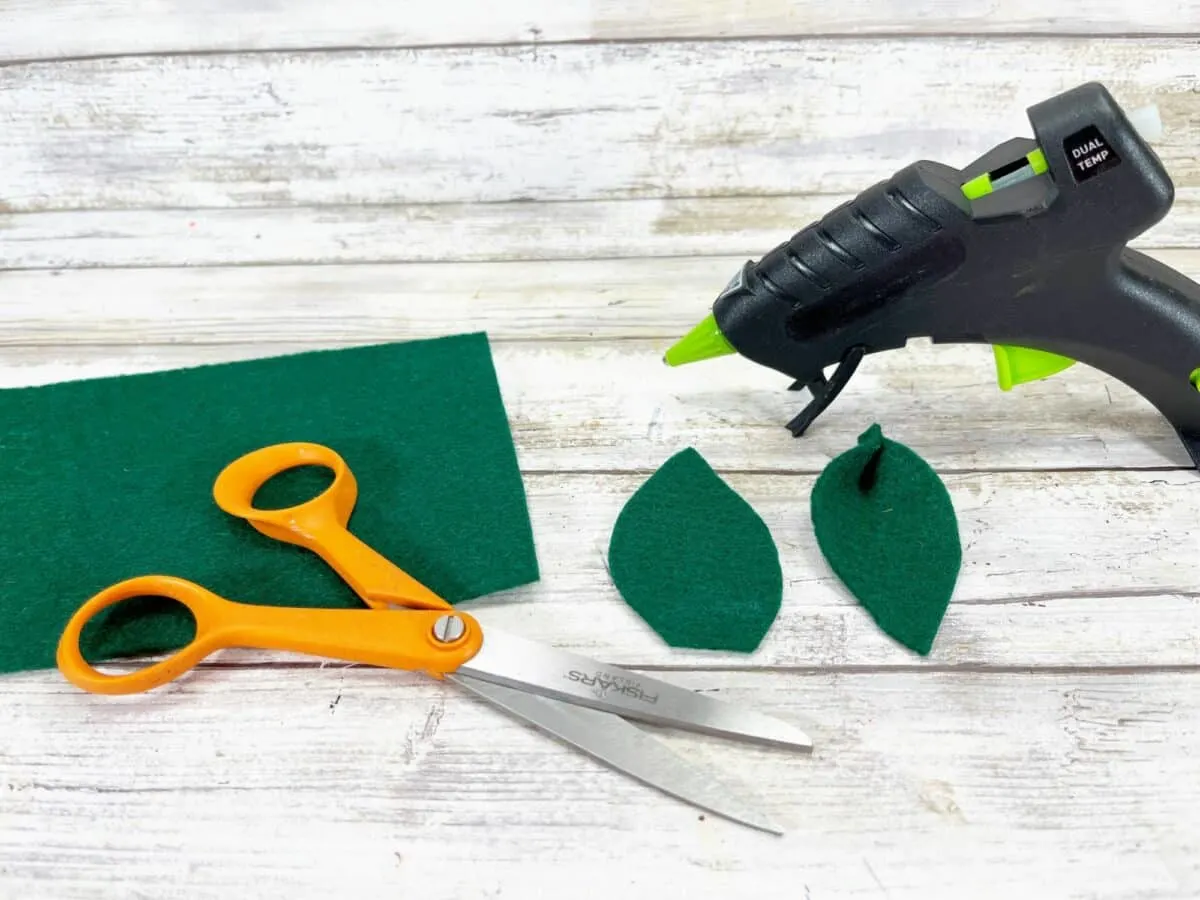
Cut two teardrop shaped leaves from green craft felt.
Pinch the leaves together at the base of the leaf and add a drop of glue in the fold to hold together. This adds a 3D look and extra interest to the glass jar pumpkins.
Step 6
Glue one felt leaf to the base of the wooden stem on each of the jelly jar pumpkin lids.

Step 7
Cut two 8” lengths of twine. Tie the twine into small bows and trim the ends.

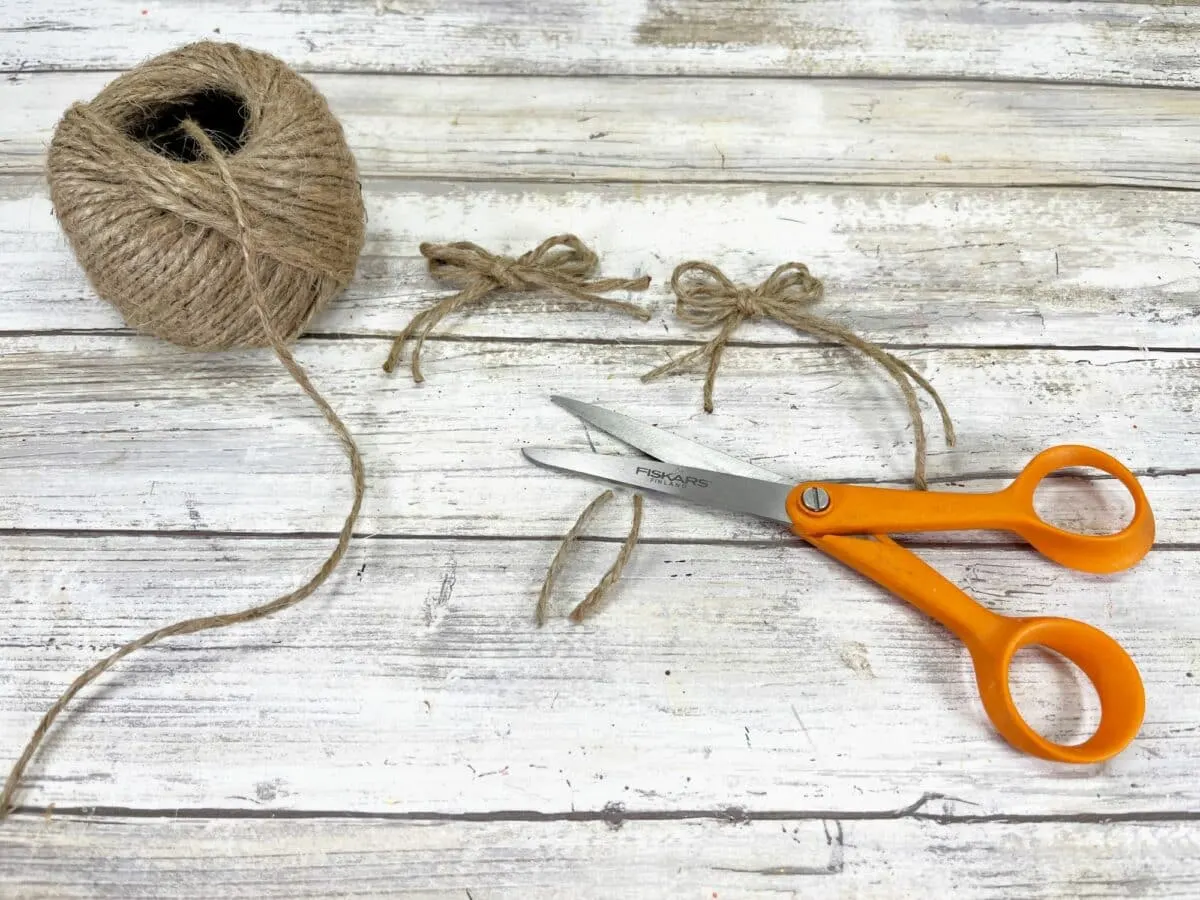
Glue a bow to the base of each wooden stem.

Alternatively, you could use ribbon instead of twine to make the bows.

Helpful Tips
- You can use any size of glass jar to make these pumpkins. Mason jars will work, as well.
- I used wooden stems bought at the Dollar Tree for the stems. (I used the stems in my canning ring pumpkin, canning lid pumpkin and tin tile pumpkin wreath, as well.) However, you could use a twig or stem from your yard instead.
Be sure to Pin This DIY project to save for later!

Love unusual pumpkins? Then check out these unique pumpkin crafts:
