


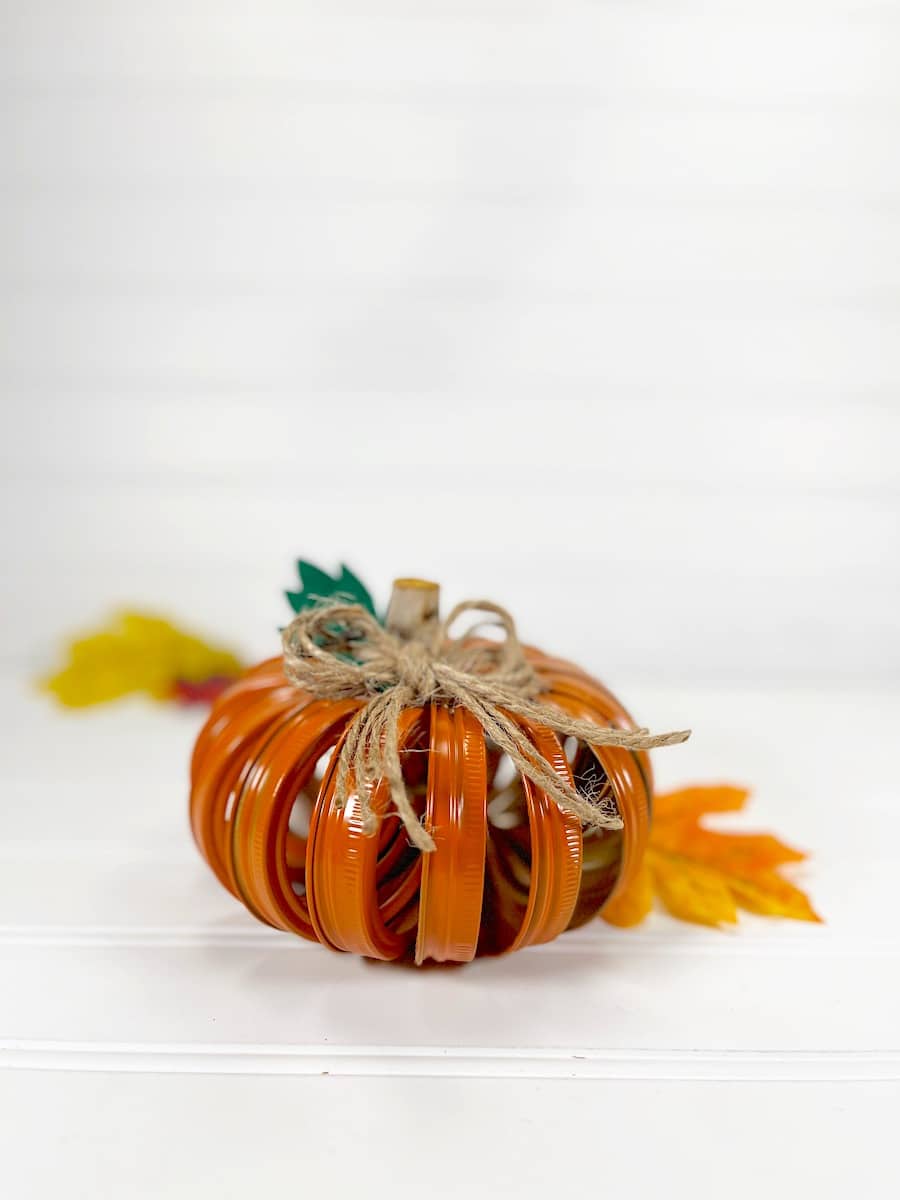
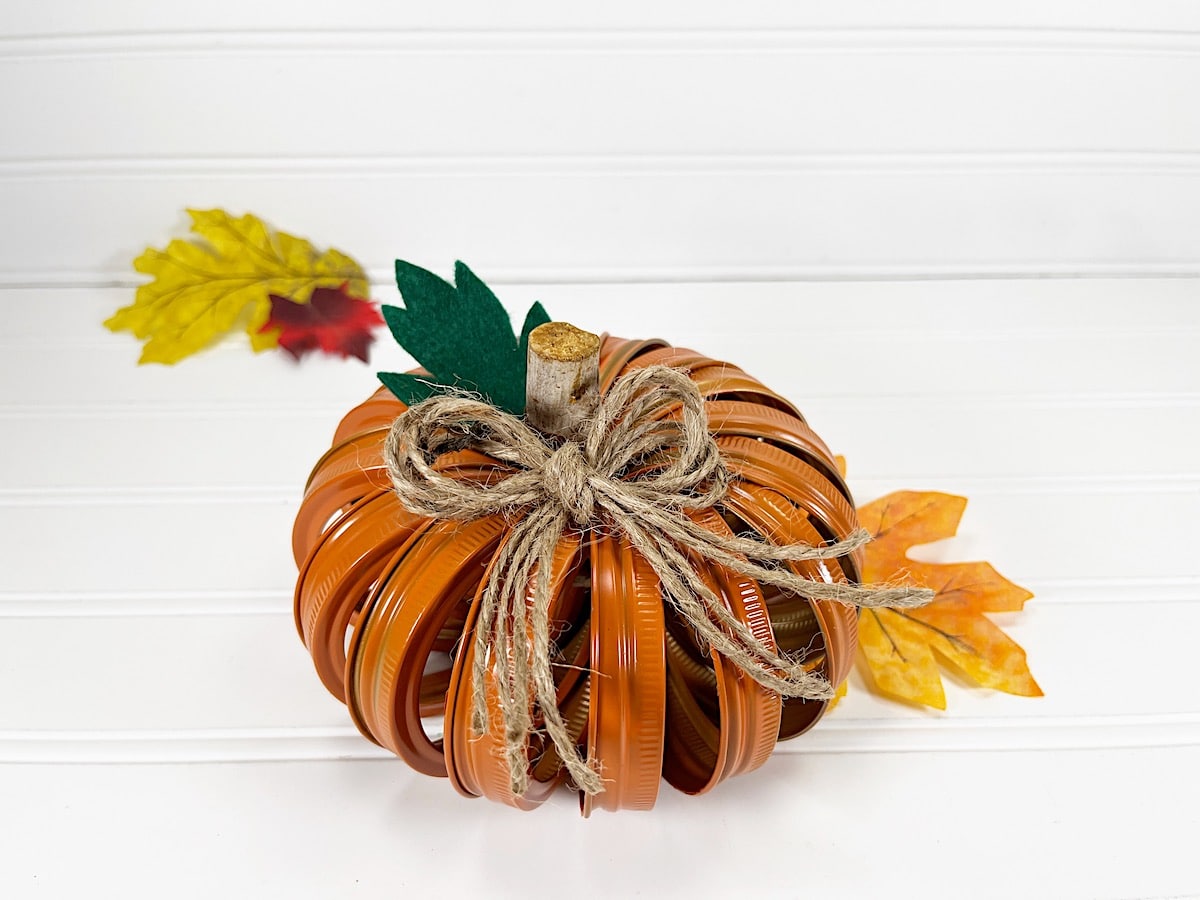
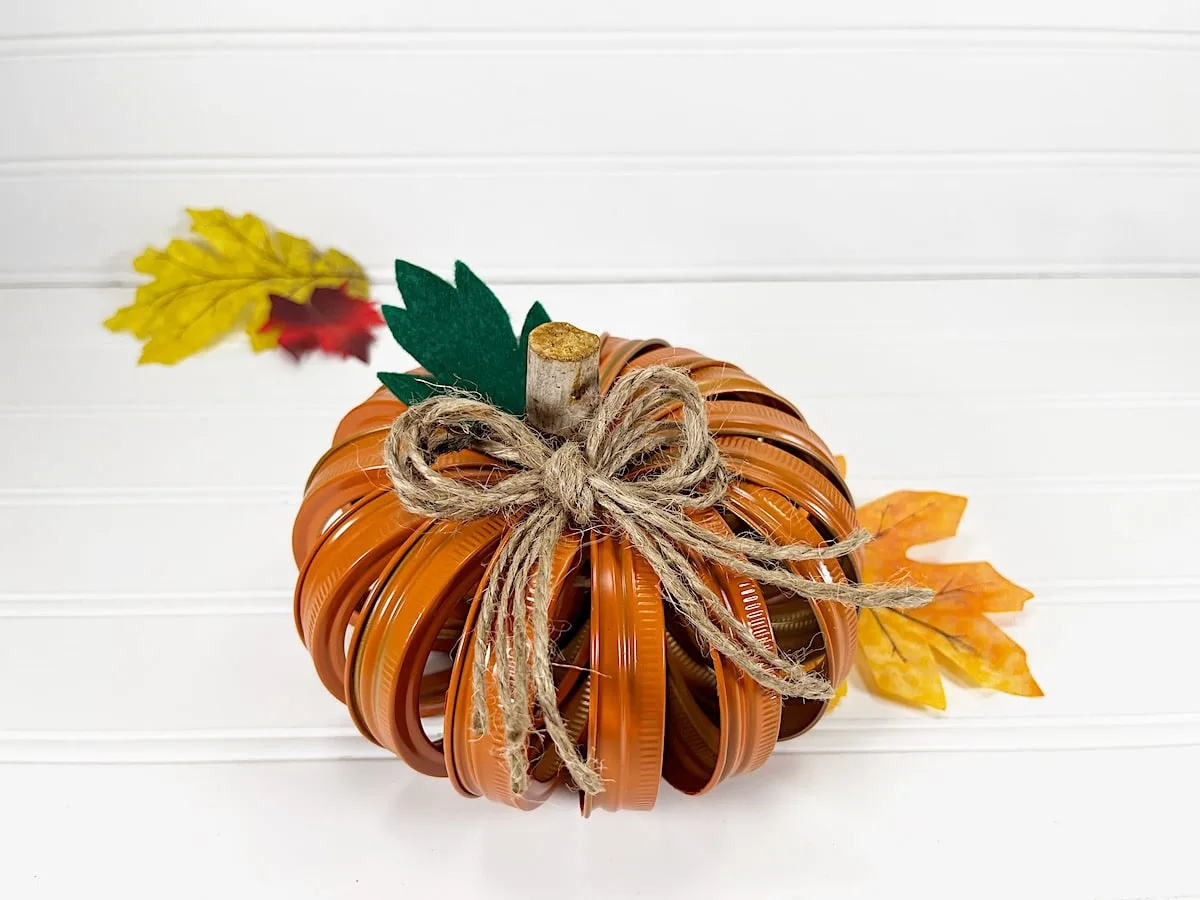
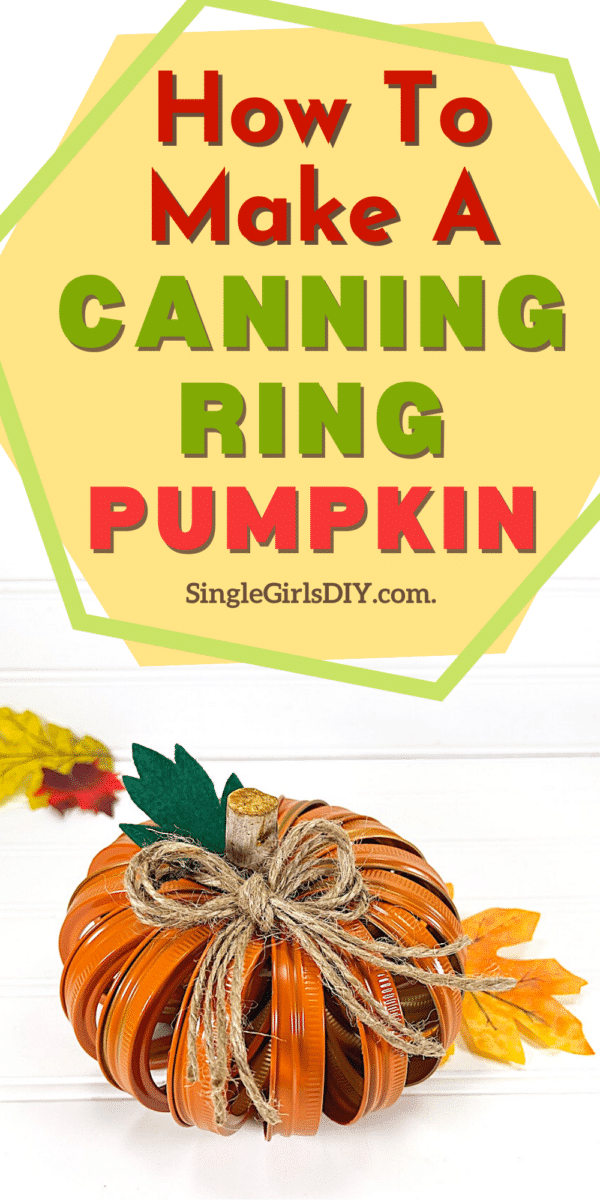
Upcycle canning jar rings to make a cute pumpkin decoration. This farmhouse-style rustic pumpkin can be made in just a few minutes.

Be sure to see our Canning Lid Pumpkin craft! It uses many of the same supplies so you can make them both at the same time!
Check out all of our Fall craft ideas! There are some good ones you won’t want to miss!
DIY Canning Ring Pumpkin Craft
Materials
- 16 Metal Canning Jar Rings
- Orange Spray Paint
- Jute Twine
- Hot Glue or Craft Glue
- Wood Stems
- Green Craft Felt
- Ruler
- Marker


Instructions
Step 1
In a well-ventilated are (or outside), cover the metal canning jar rings with orange spray paint.
Use several light layers of paint instead of one heavy layer. Allow to dry.

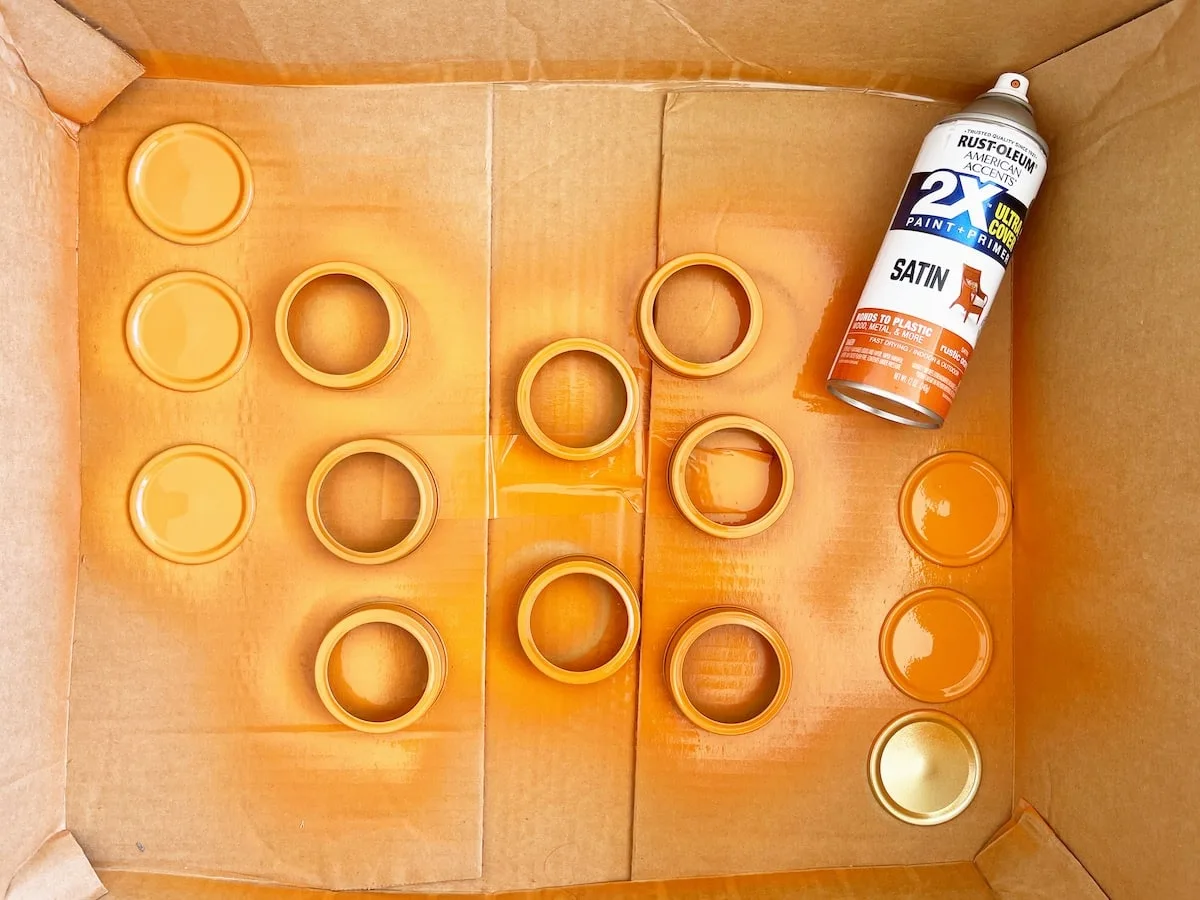
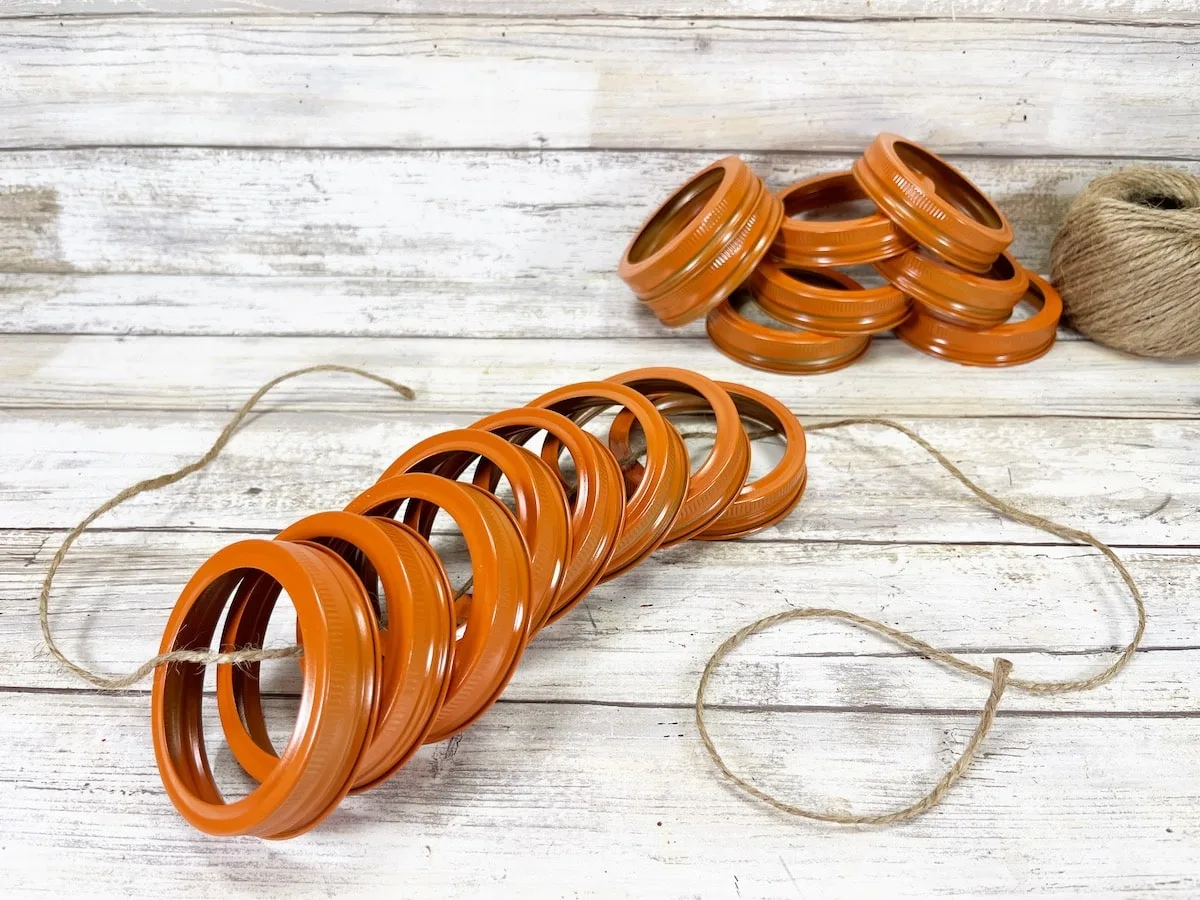
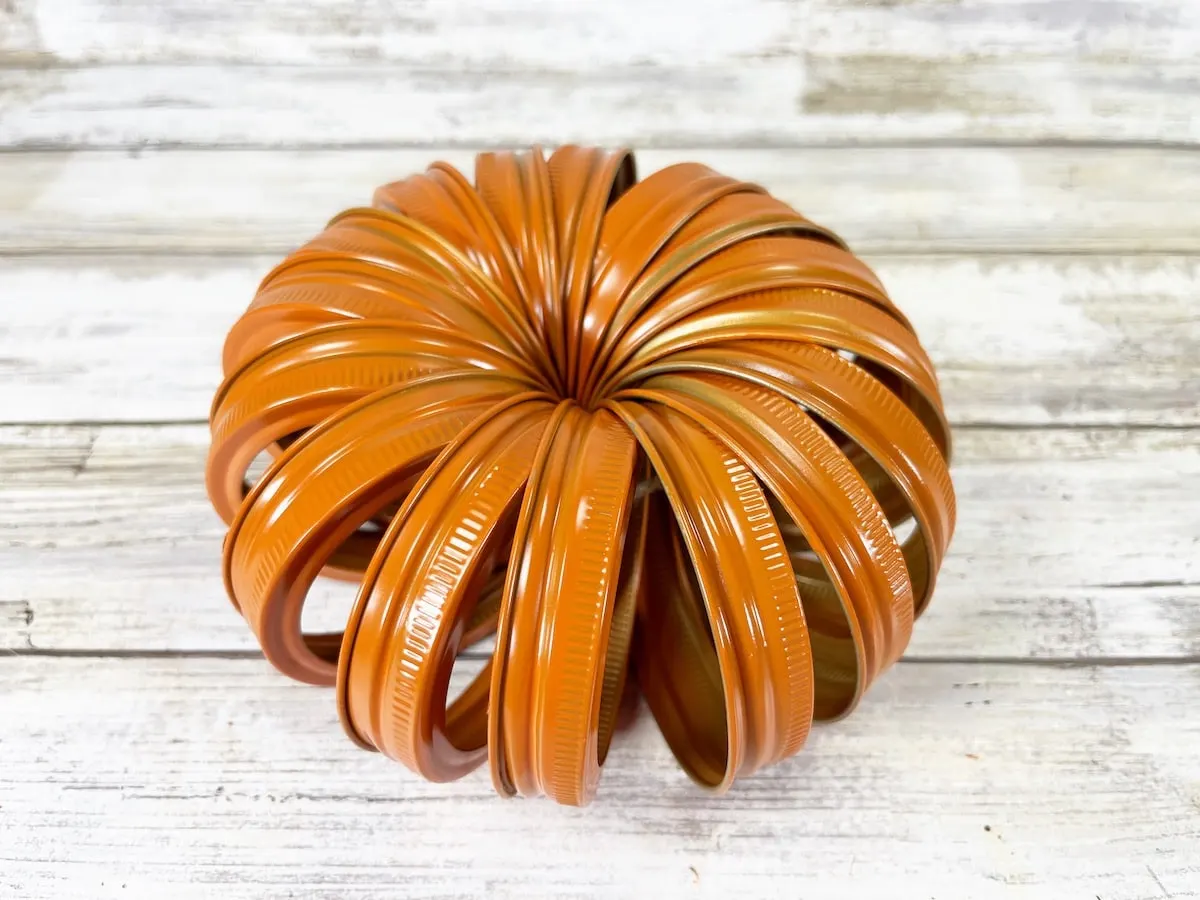
You will need 16 rings for each pumpkin, so if you are buying the rings at Dollar Tree, make sure to get 2 packs for each pumpkin you want to make.
Step 2
Measure and cut a 24” length of twine.
String the twine through the canning jar lids. Make sure that they are all pointed in the same direction!

Step 3
Tie the ends of the twine together with a double knot.
You want to gather the twine ends tightly without a lot of slack in the twine.
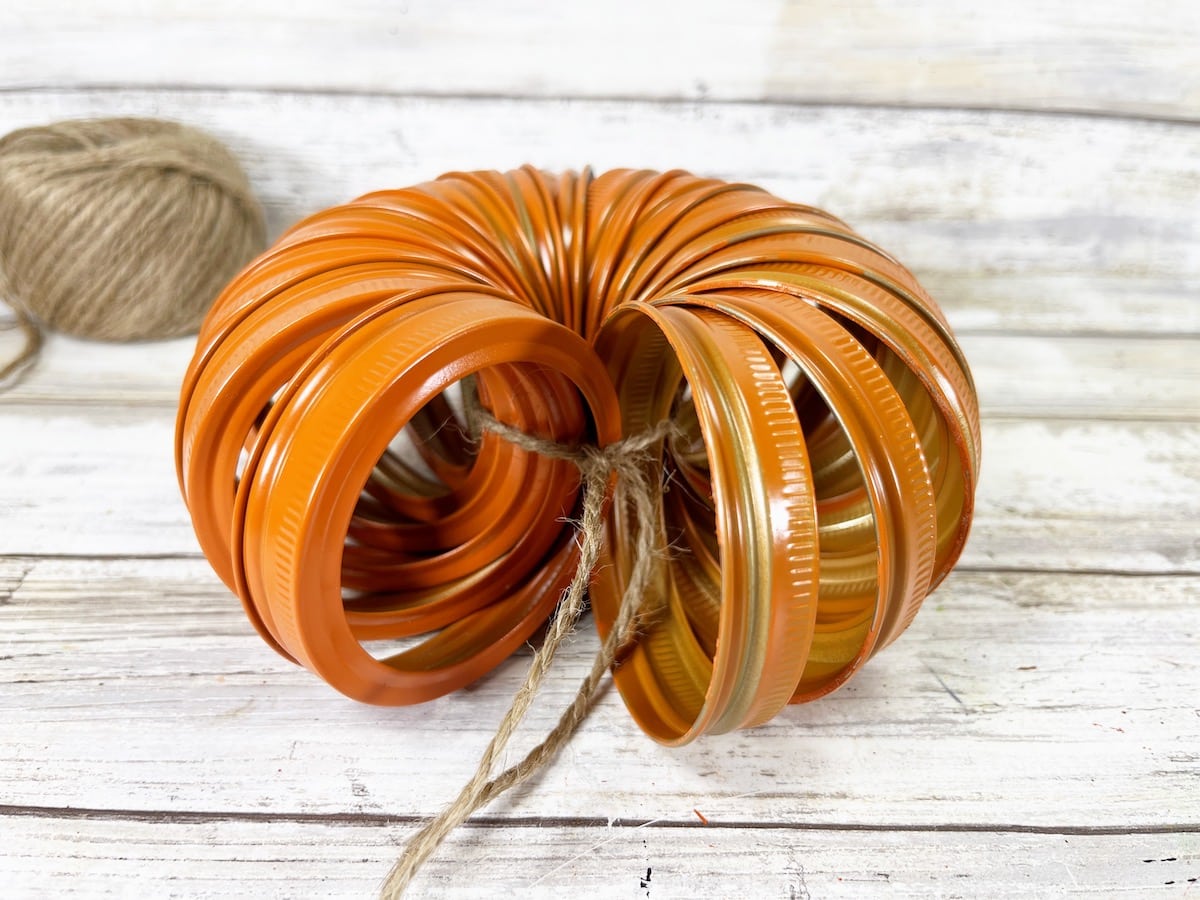

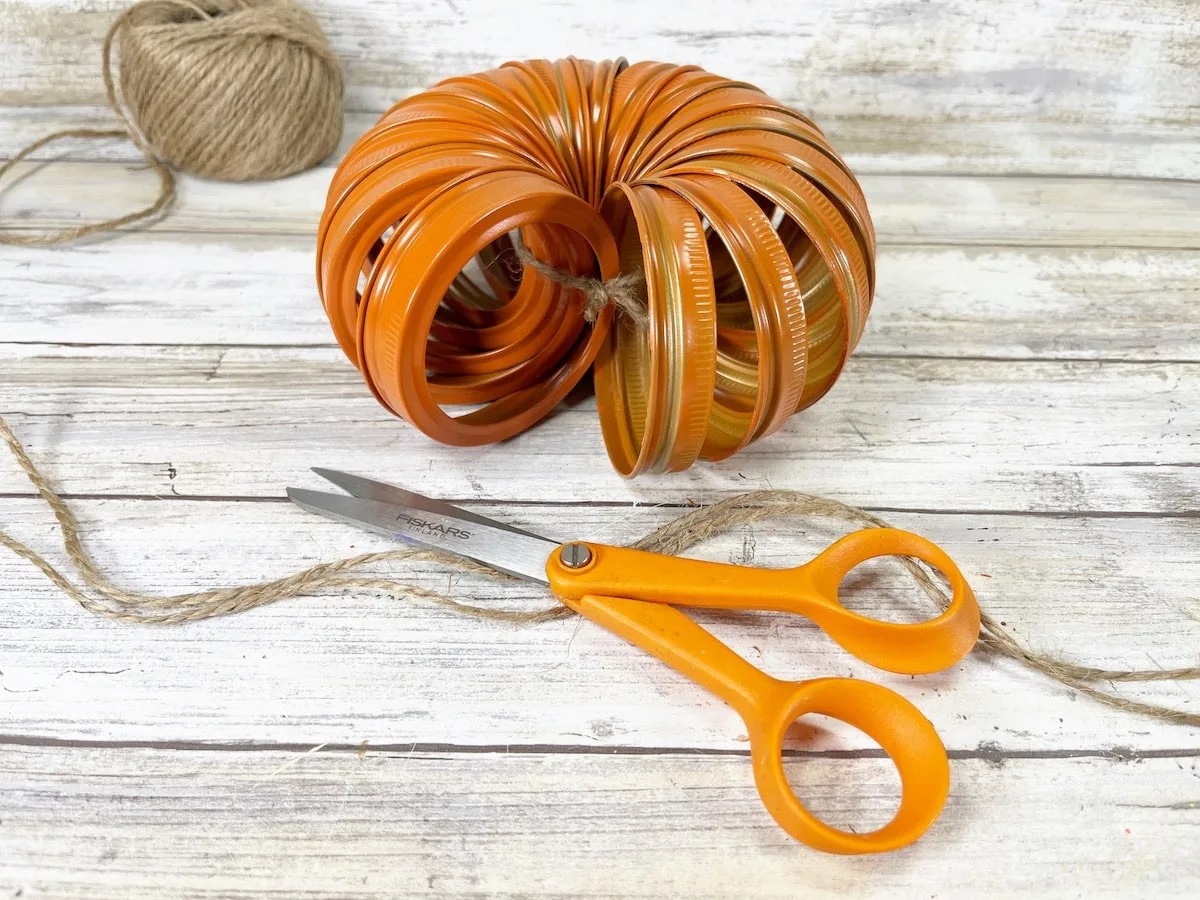
Trim off the long ends of the twine.

Step 4
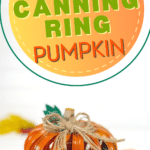
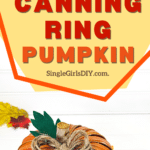
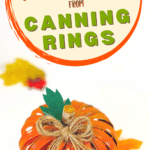
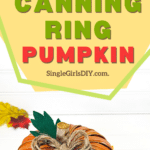
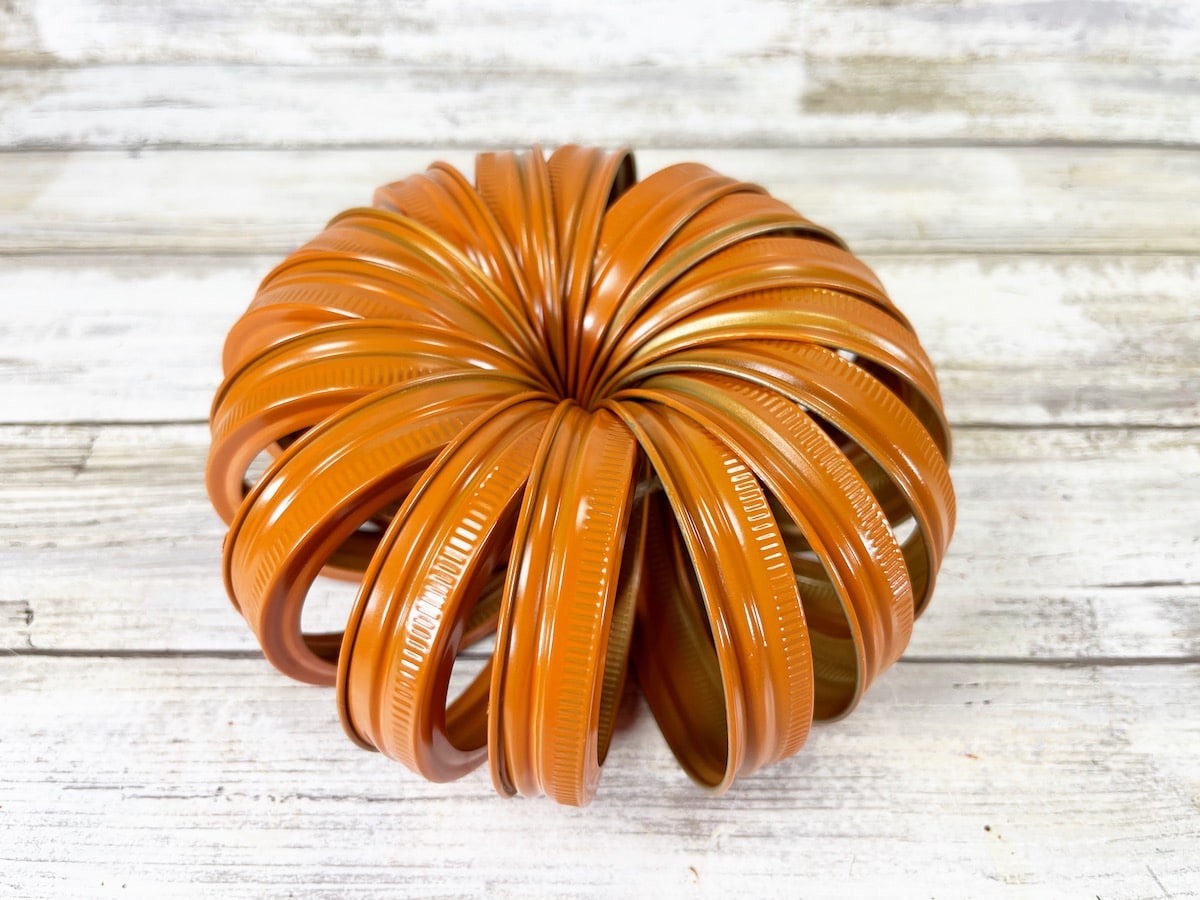
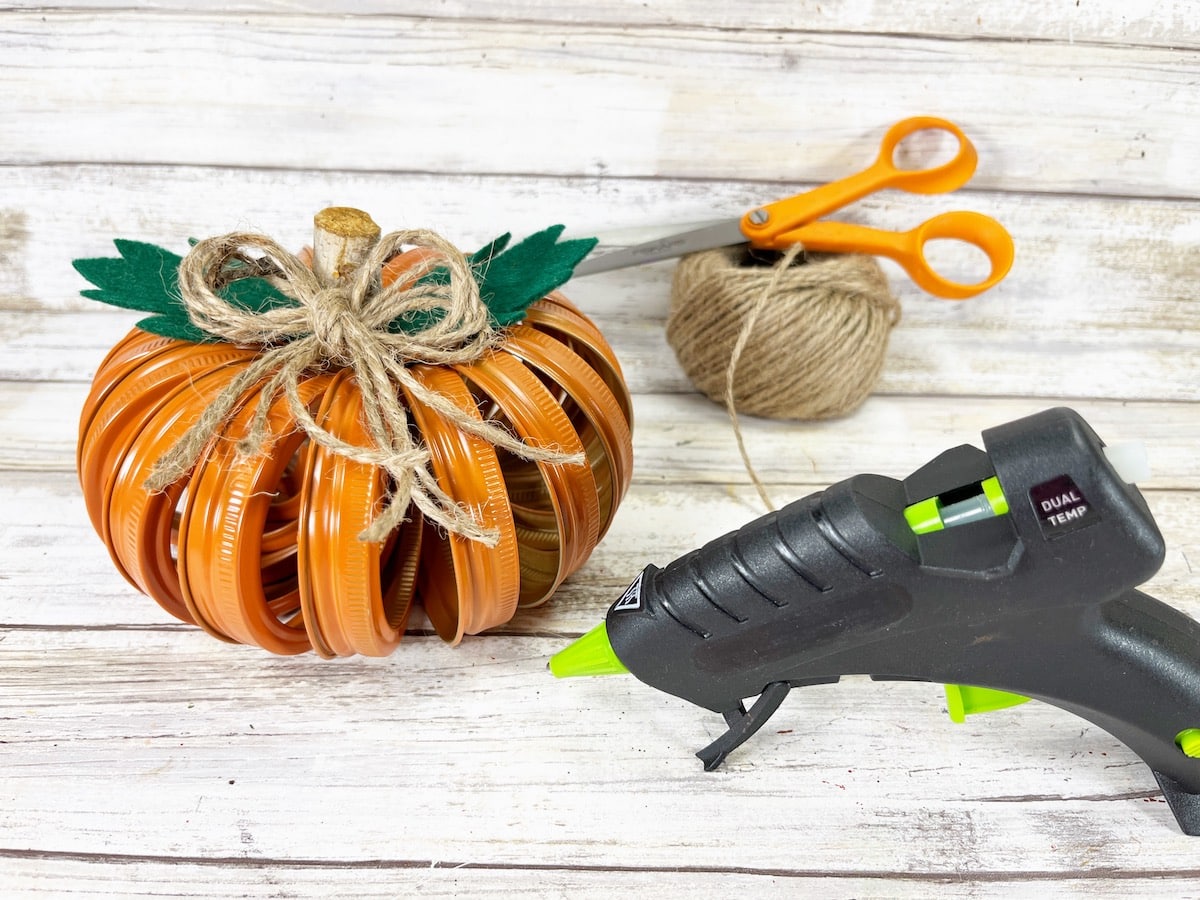
Rearrange the position of the canning rings until they are in a circle that looks like a pumpkin.
Step 5
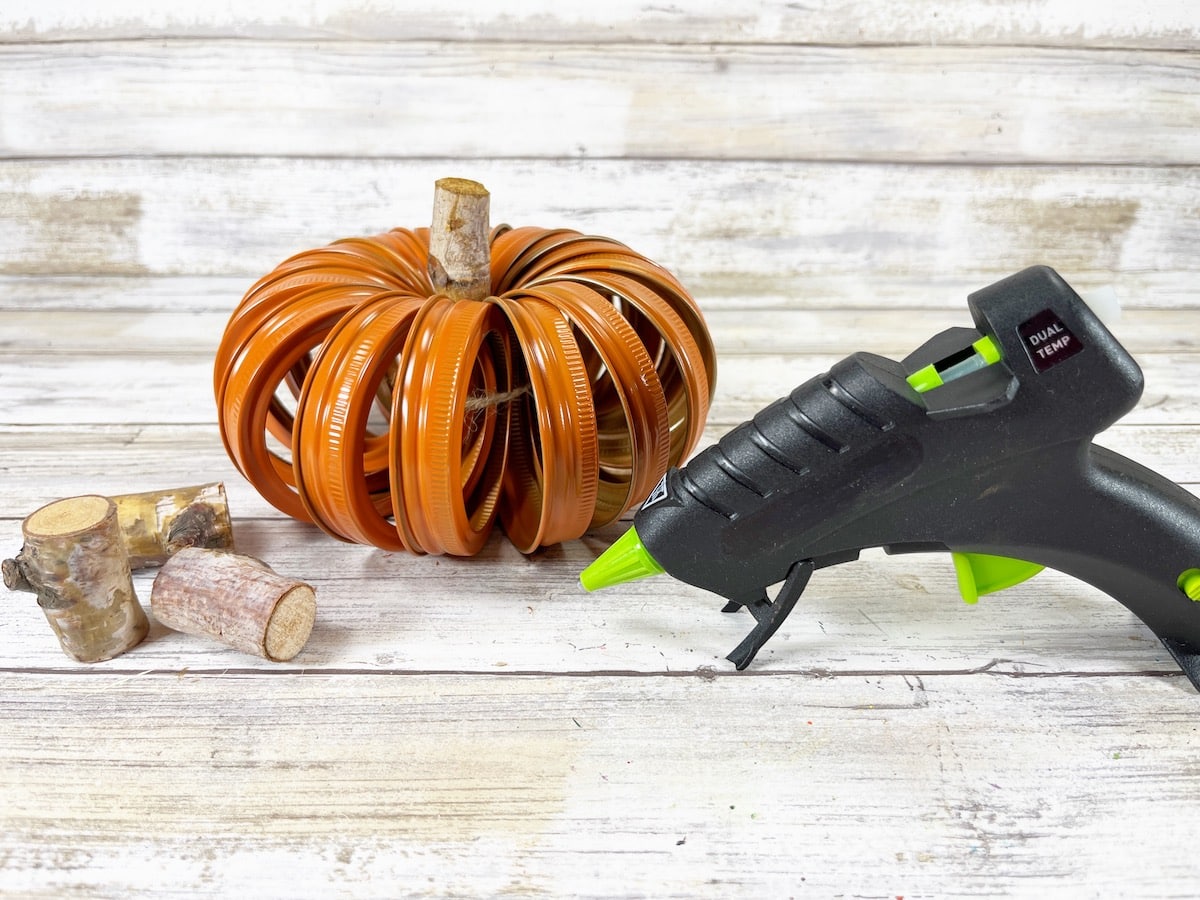
Glue a wooden pumpkin stem in the center of the ring.

Step 6
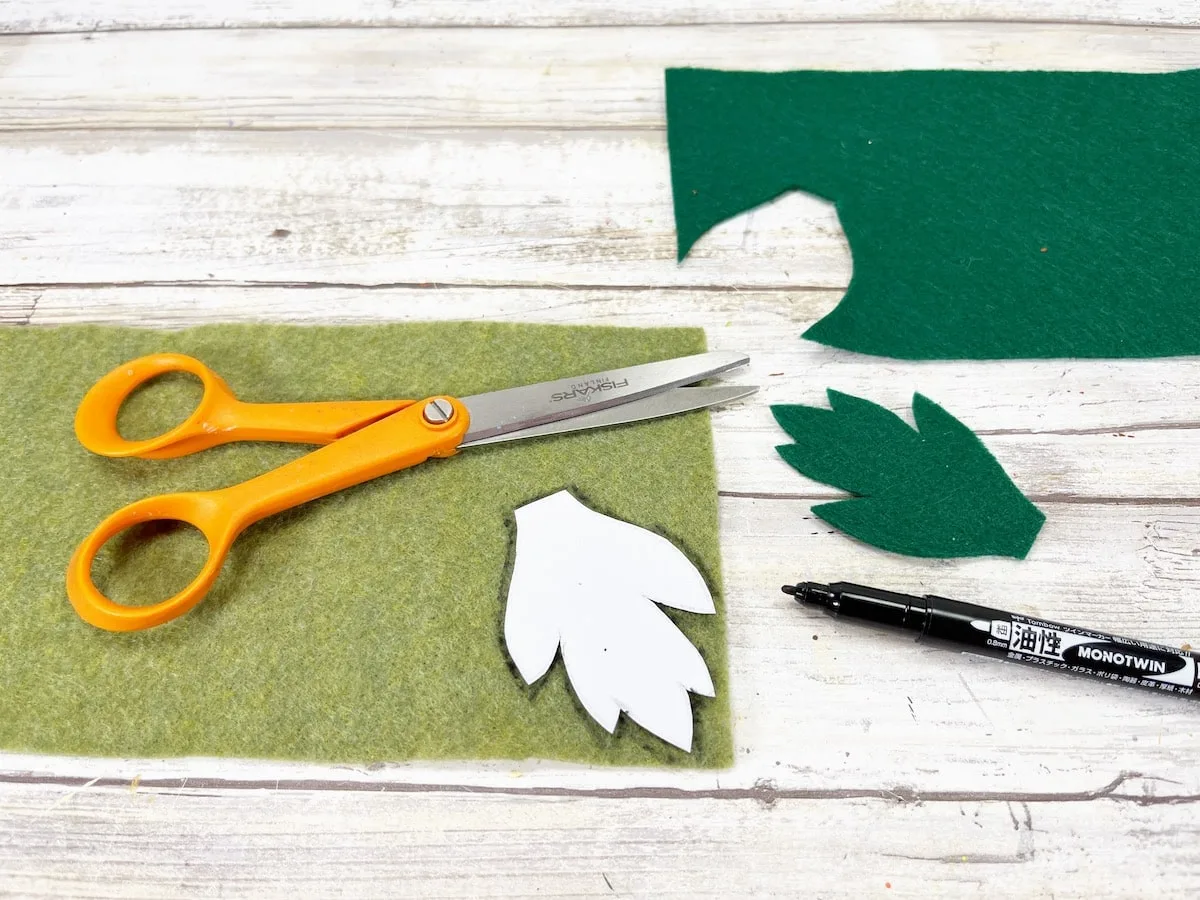
Draw a leaf pattern and cut it out. Trace it on the felt two times and then cut out.

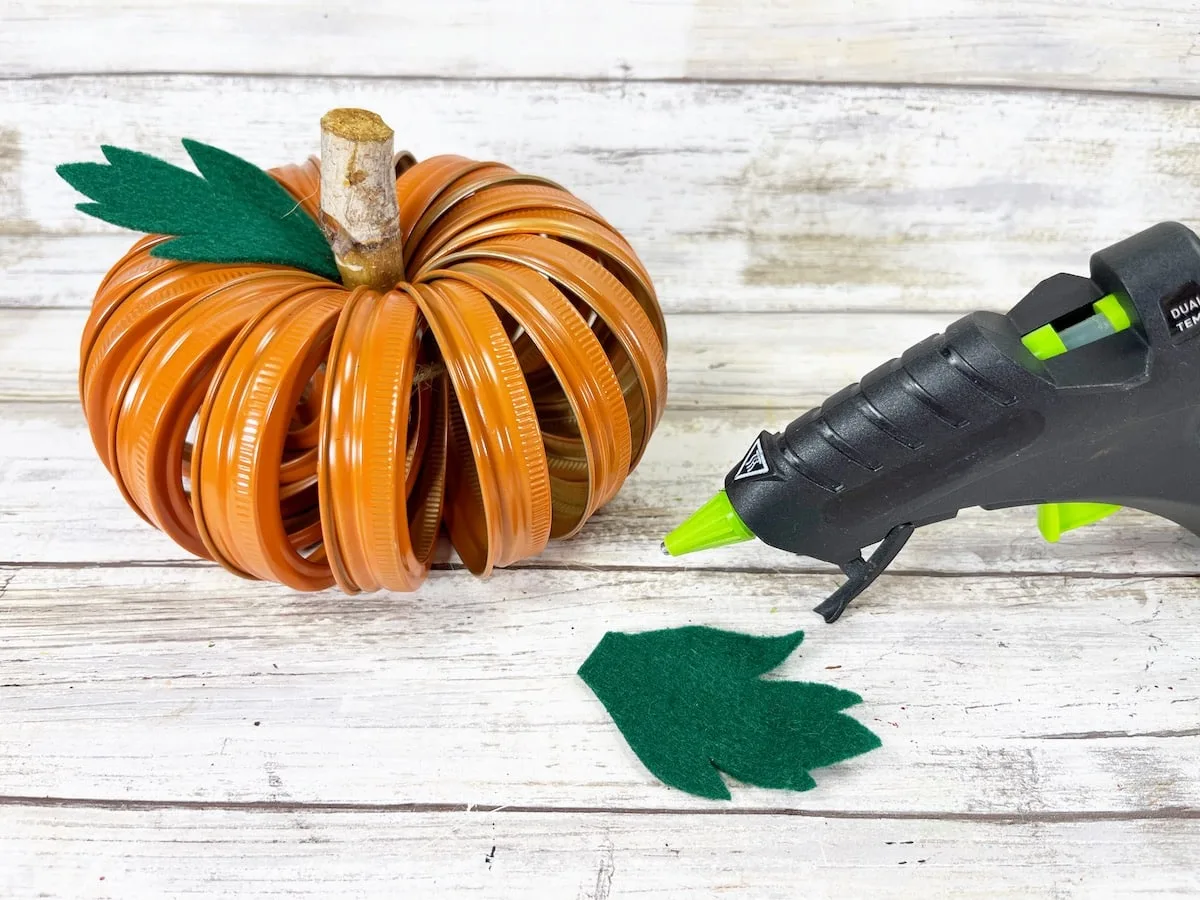
Glue the two leaves to either side of the pumpkin stem.

Step 7
Measure and cut four lengths of twine that are 12” long each. Tie the four pieces of twine together into a bow.
Glue the twine bow to the wooden stem, overlapping the two felt leaves.

Helpful Tips
- I bought canning jar rings at the Dollar Tree. They come in packs of 8, so you will need two packs for each pumpkin.
- You can buy canning jar rings anywhere, including online at Amazon and Walmart. These often come with the lids, as well. You can use the lids for our Canning Jar Lid Pumpkin craft, too.
- If you are using old canning rings, make sure they are clean and dry. If there is rust on the ring, you can sand it off or paint over it.
- I bought the wooden stems at Dollar Tree (and also used them in our tin tile pumpkin wreath). They are also available on Amazon. However, you can use small stems from your yard or park instead.
- Corks would also look cute as a stem.
- I used felt to make the leaves, however you could also use craft foam or fabric for the leaves.
- Instead of twine, you can use ribbon to make a bow. However, I would use twine to tie the rings together because it will blend in and be less noticeable inside the pumpkin.
- With your bottle of orange spray paint, you could also make our fun tin mold pumpkins, bundt pan pumpkin wreath or Halloween tin can lanterns. Ironically, all of these crafts are repurposing kitchen supplies for autumn decor!
Want to save this idea for later? Just Pin This to your Fall, Autumn or Halloween board for future ideas!

If you like this canning ring pumpkin, be sure to see our DIY Jelly Jar Pumpkins, too!
