


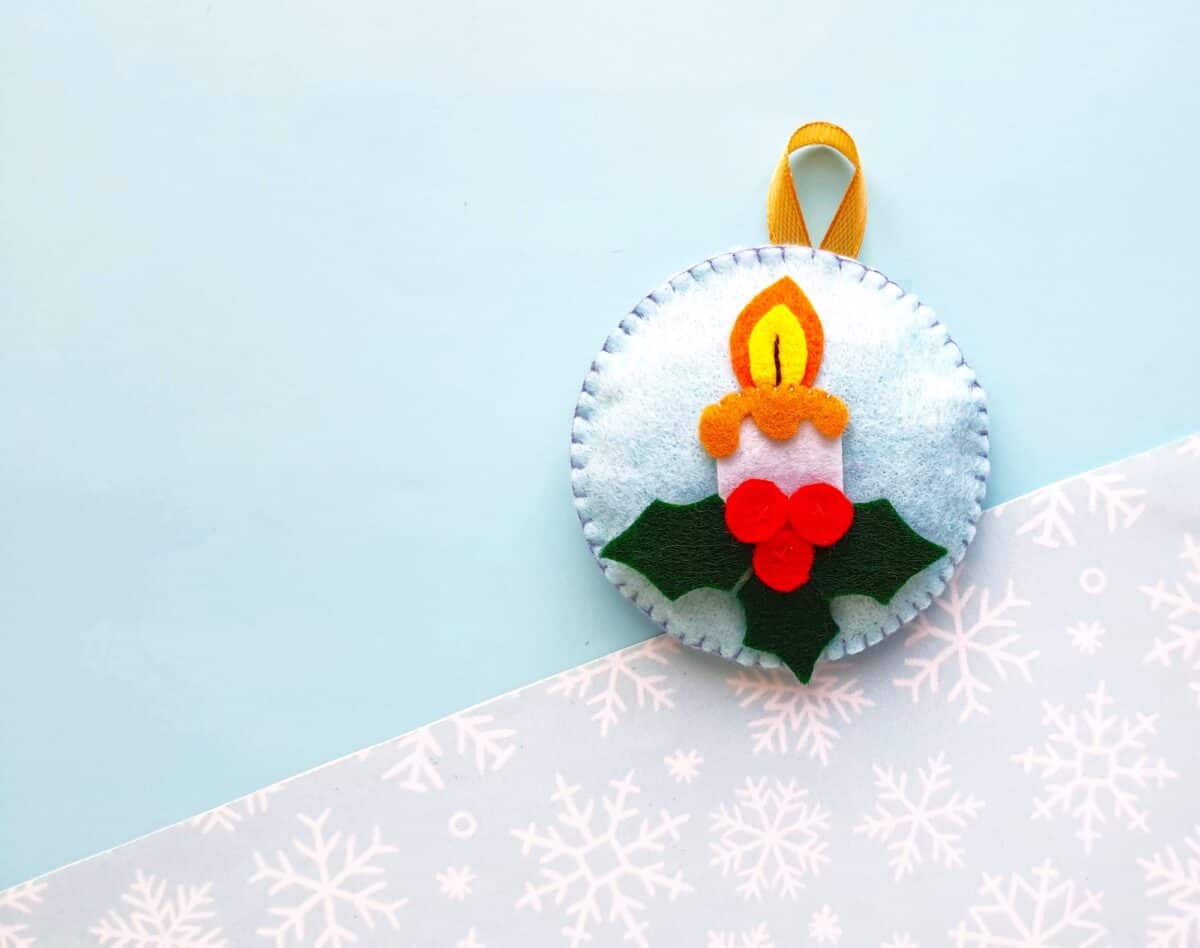
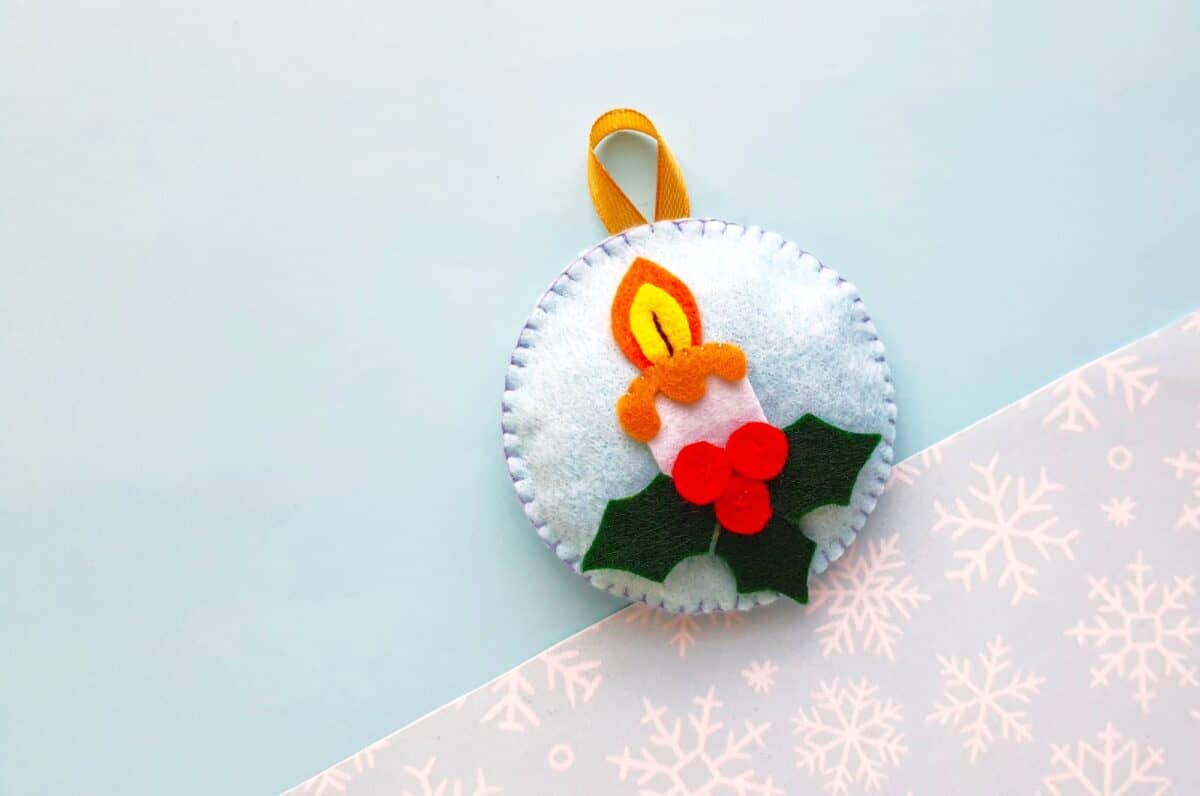
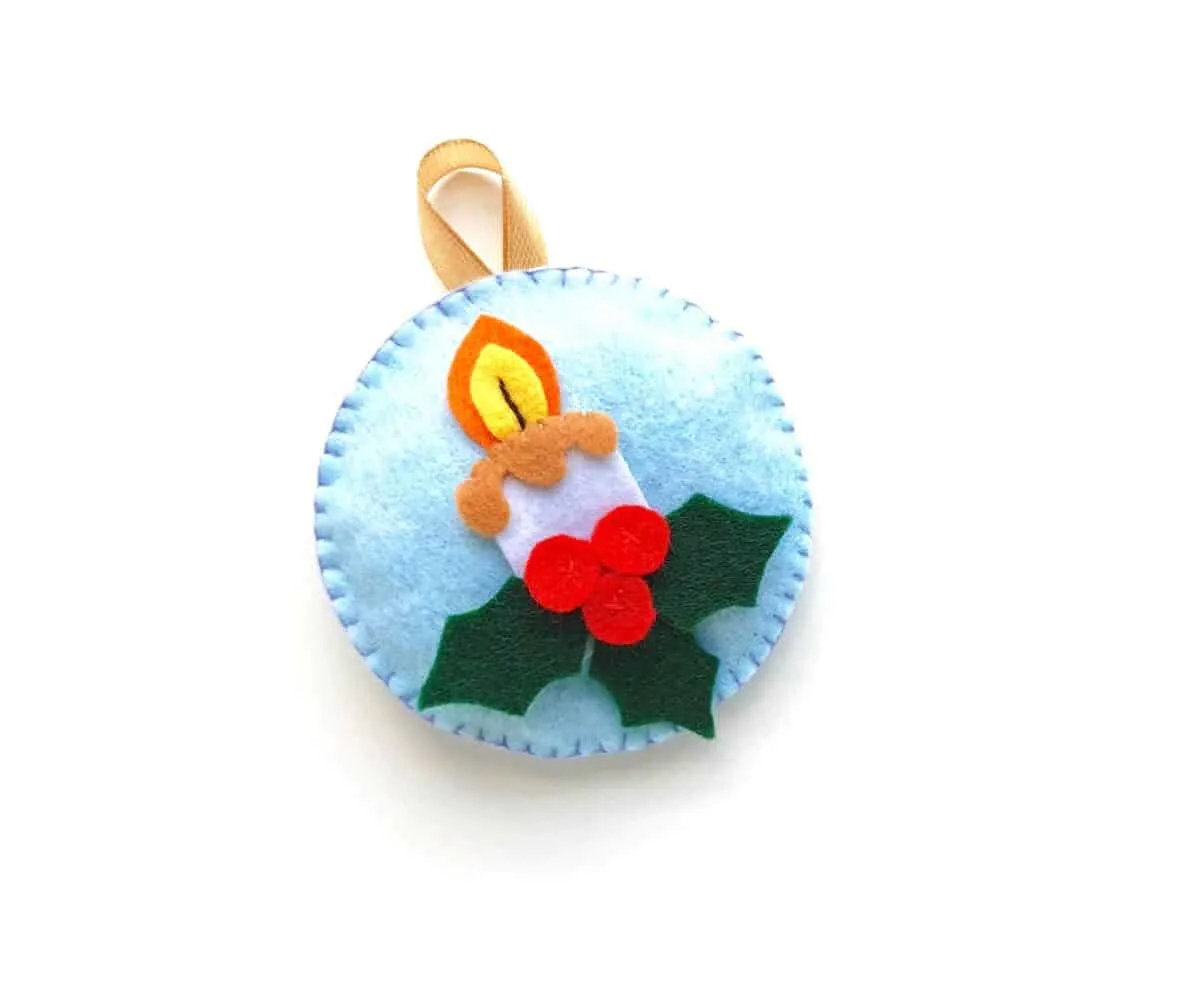
This DIY felt candle Christmas ornament is a vintage-looking ornament that is perfect for an old-fashioned Christmas.
The tradition of Christmas candles is thought to go back to hundreds of years ago when candles were lit to represent the Star of Bethlehem. Jesus is also called the Light of the World, and the candle can symbolize his power and love.
Advent and Hanukkah, known as the Jewish Festival of Light, also use candles symbolically in their celebrations.
Candles are used in the celebration of Kwanzaa, as well as candlelight Christmas services at church.

Winter solstice celebrations also use candles to celebrate the return of longer days of light ahead.
As you can see, the candle is a powerful image for holiday celebrations. This handmade felt candle ornament is a way to honor the meaning of the candle for you.
Related Candle Crafts:
- Holiday Hurricane Lamp
- DIY Snow Globe Candle Holder
- How to Make Hand Poured Soy Candles
- Farmhouse Candle Holder
- Valentine’s Day Candle
- Mini Concrete Candleholders from Egg Shells
If you have some small pieces of felt and basic sewing skills, you can easily make these felt ornaments.


Even if you don’t like to sew, this ornament could also be made by hot gluing the pattern pieces together.
My felt Santa cookie ornament is the same way. I show how to sew it, but you can use the pattern to glue it together, too.
Be sure to see my big list of 72 No-Sew Christmas Ornaments for more holiday ideas!

How to Sew a Felt Christmas Candle Ornament
Supplies
- Free Christmas Candle Ornament Pattern
- Felt in a variety of colors
- Needle
- Thread
- Polyfill stuffing or scrap felt pieces
- Pencil
- Ribbon


Directions
Step 1
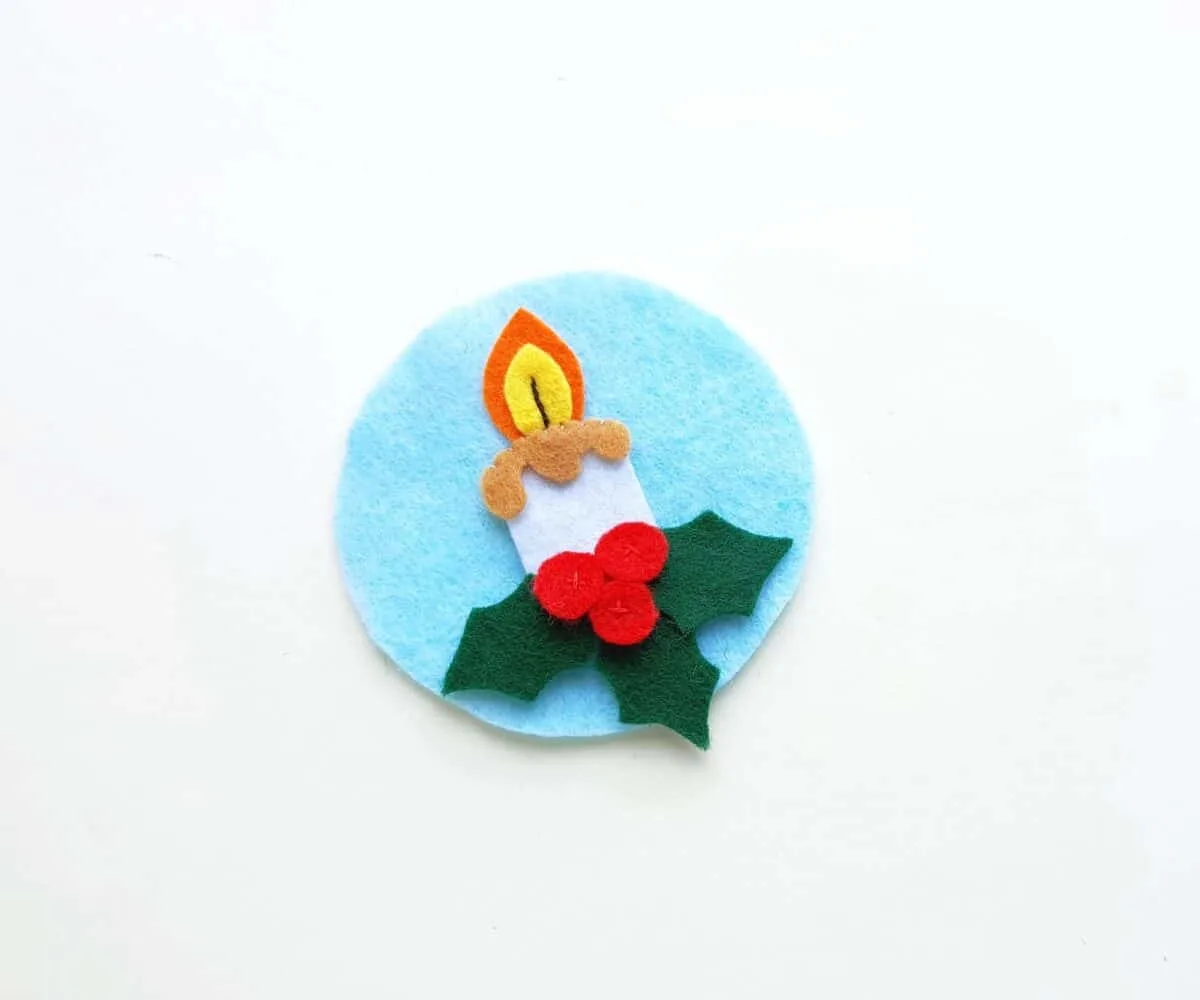
Trace the Christmas candle patterns on different colors of felt. These are the colors that I used:
- Flame – yellow
- Large flame – orange
- Leaves – green
- Berries – red
- Candle – white
- Wax – brown
- Base and Background – blue
When tracing the patterns, cut out two pieces for the base.


Step 2
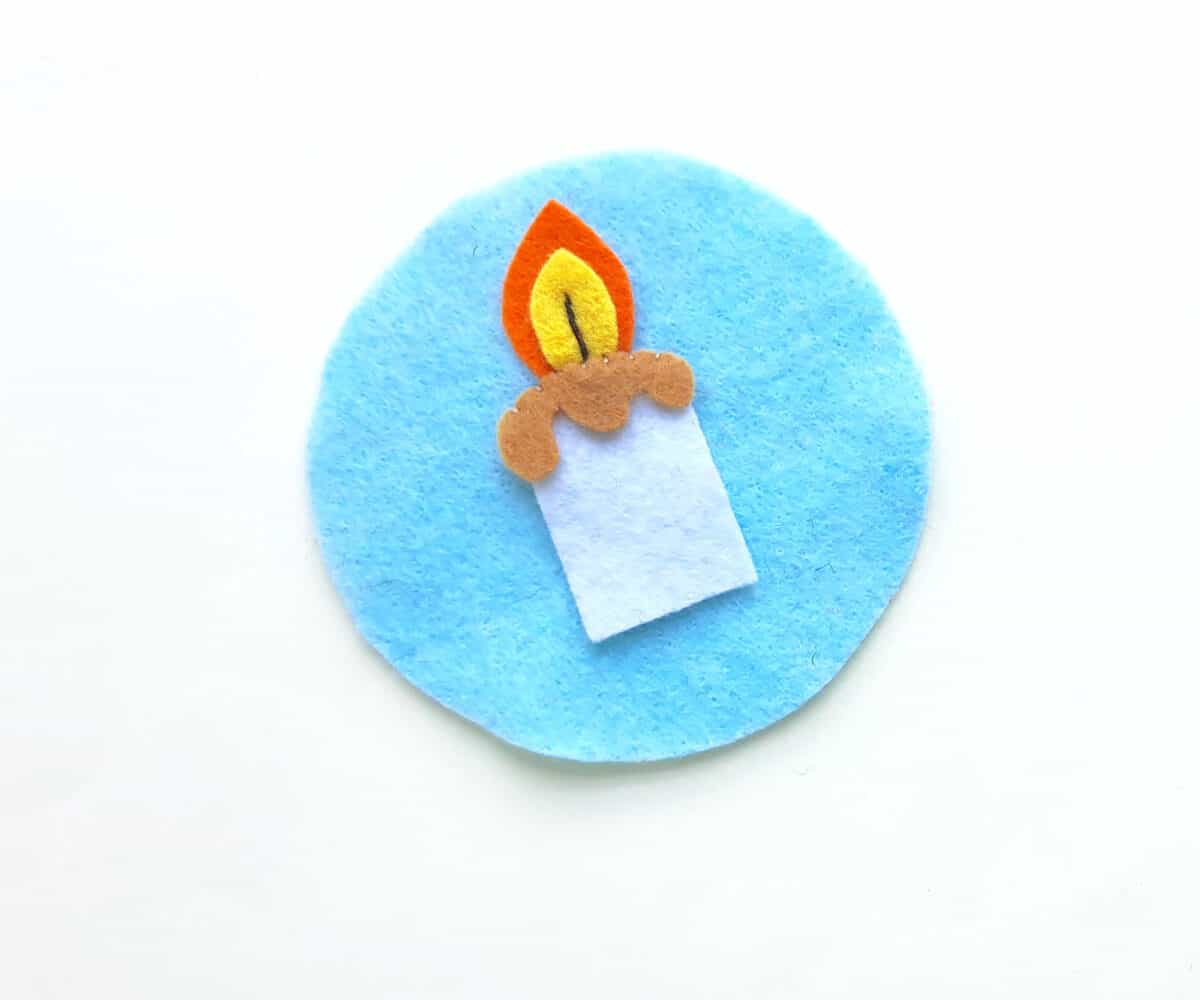
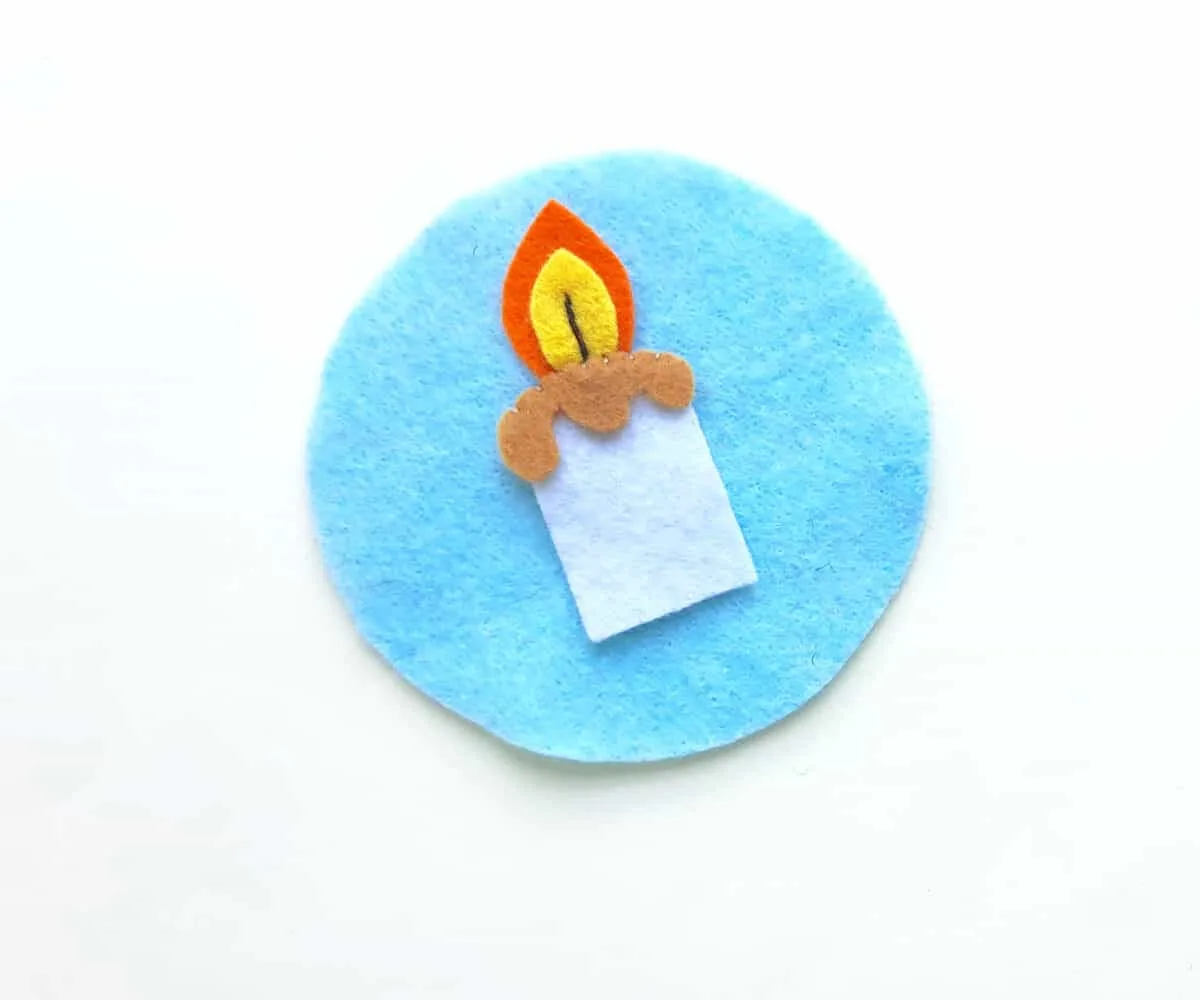
Place the small flame cutout on the large flame cutout. Place towards the top of the base and stitch all three patterns together with a brown or black stitch in the middle of the flames. Use a simple straight stitch to secure.
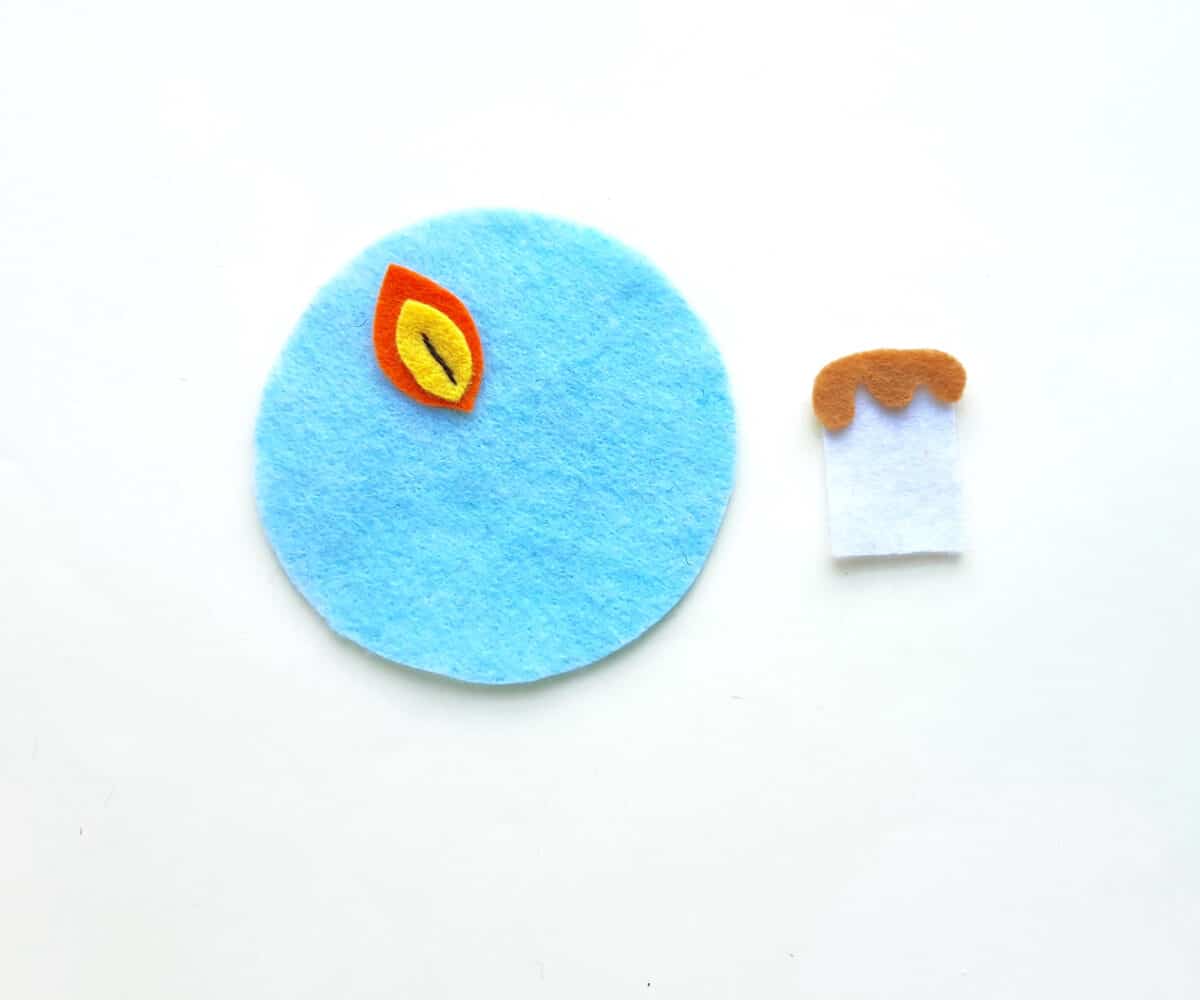
Next, place the melting wax pattern on the top side of the candle.
Step 3
Lay the candle and wax patterns on the base, underneath the flame pattern.
Stitch the candle and the melting wax onto the base with simple stitching along the top of the wax.
Step 4
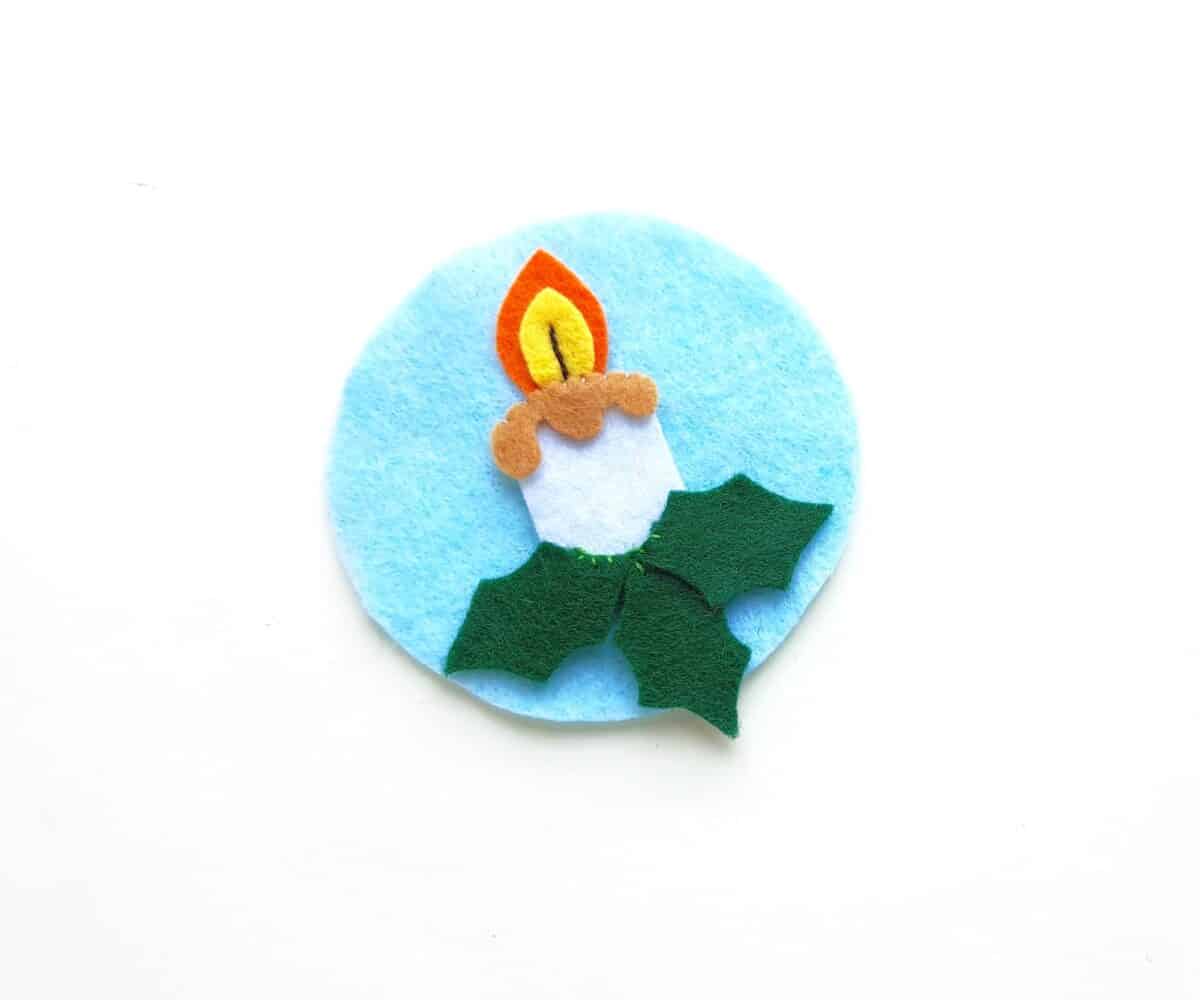
Put the leaf cutouts on the bottom side of the base, overlapping the candle pattern.
Stitch the leaves through the candle and base with a simple straight stitch using green thread.

Step 5
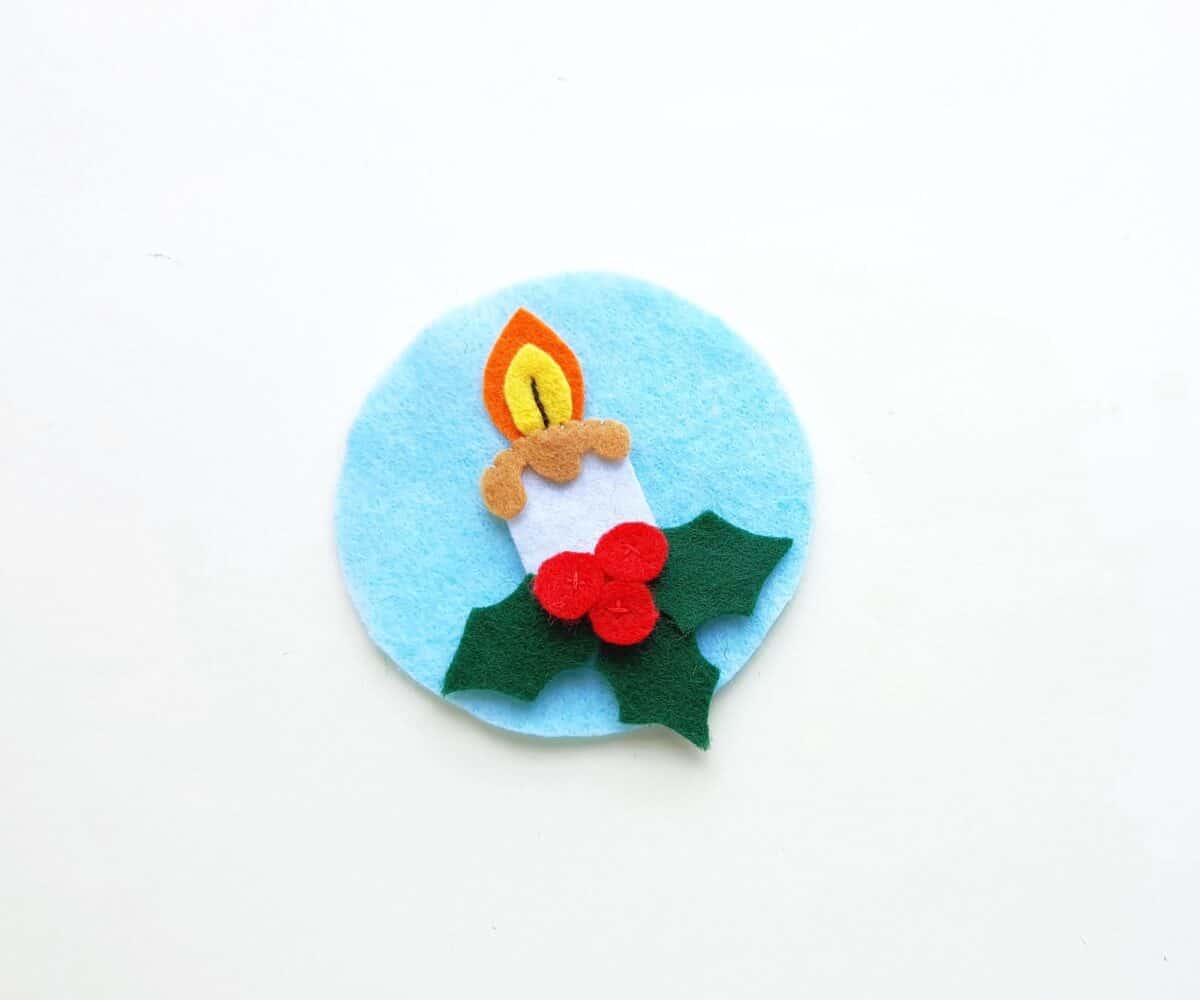
Put the berry cutouts on top side of the leaves.
Sew each berry onto the base by using a cross-stitch in the middle of each berry using red thread. Be sure to go through the berry, leaves, candle and base to secure all layers together.
Step 6
Place the second base pattern underneath the base with the candle stitched on top.
Combine the two circles by stitching around the edges with similar colored thread. Leave a small opening on top to stuff the ornament.
Using scrap felt bits or Polyfill, stuff the ornament until it is as large as you want.


Step 7
Stitch the opening closed. Then, attach a ribbon loop on the backside of the ornament to use as a hanger.


Christmas Patterns and SVGs!
Want more fun holiday SVGs for crafting and creating this season? I’ve got a fun 4-pack of patterns perfect for DIYs!
Visit the Single Girls DIY library for more details and to get your downloads!
If you like this felt Christmas candle ornament pattern, be sure to see our other felt ornament patterns:
