


Learn how to make rustic stars from twigs with easy to follow instructions. These DIY stick crafts make perfect unique home decor.
Don’t you just love crafts you can make for free from things gathered from your yard?!
Get ready to make your own personalized and free home decor with these DIY rustic twig stars. They are perfect for Christmas, the Fourth of July, or decorating your home or garden any time of the year.

I recently hosted a Wine & Craft Night at my house, and it was a blast! I had supplies available for everyone to make one of these rustic stars. It was so inspiring to see everyone’s individual creativity, with each star turning out so differently.
Gather some extra sticks to make this homemade square wreath or this DIY stick frame, too! And while you are in your backyard, look for pinecones to make these wax-dipped fire starter pinecones.
HOW TO MAKE RUSTIC STARS OUT OF TWIGS
Supplies
- Sticks (of course)
- Garden clippers
- Twist ties or thin wire (this wire looks like twine to blend in)
- Twine, string, ribbon, or cord – I like jute twine
- Scissors
- Embellishments – Optional (berries, dried flowers, beads, bells, bows)
Collect Sticks and Branches
Start by gathering a bunch of the straightest sticks you can find. The diameter can range up to about ¼″, depending on the size of the star you want to make.

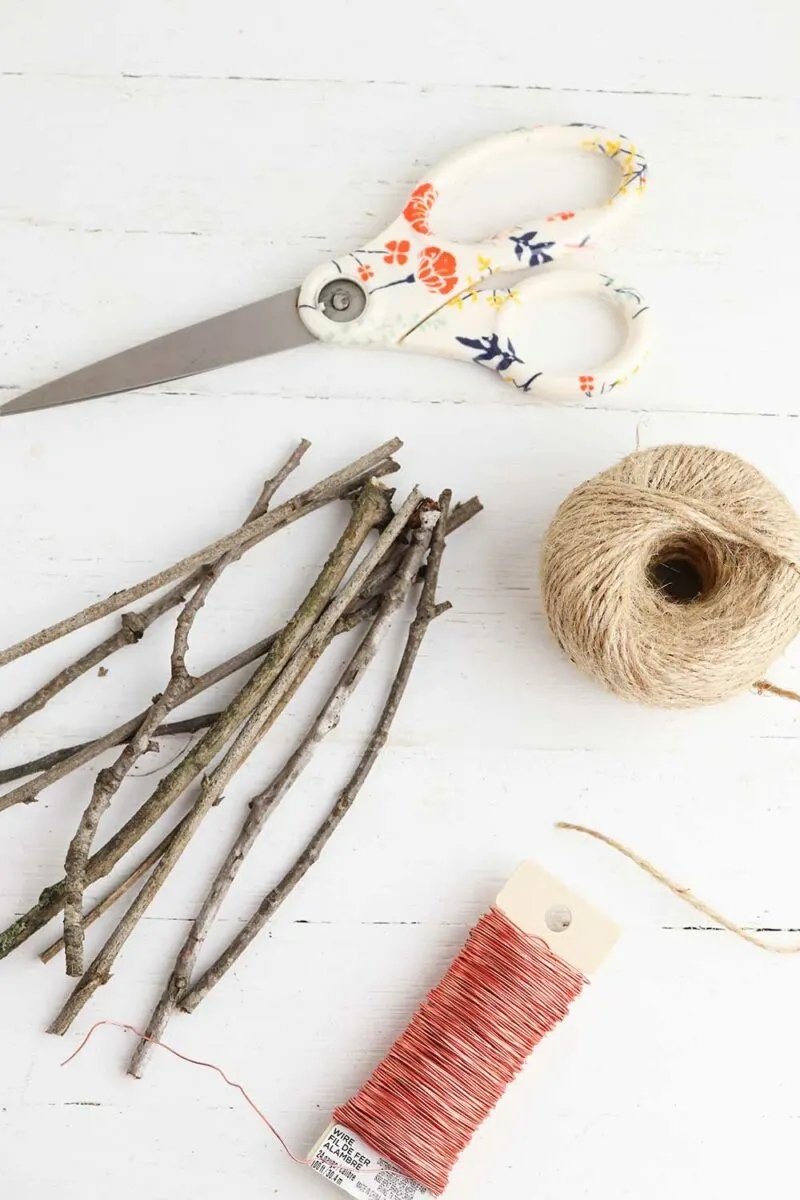
Use your garden clippers to cut them into sections that are all about the same length. For your first try, 10″ – 12″ length is a good size to start with.
Make the Star Shape
To make this star, I used bunches of two sticks for each side of the star. You can use more or less. It’s up to you!
Lay your sticks out into the basic shape of a star.
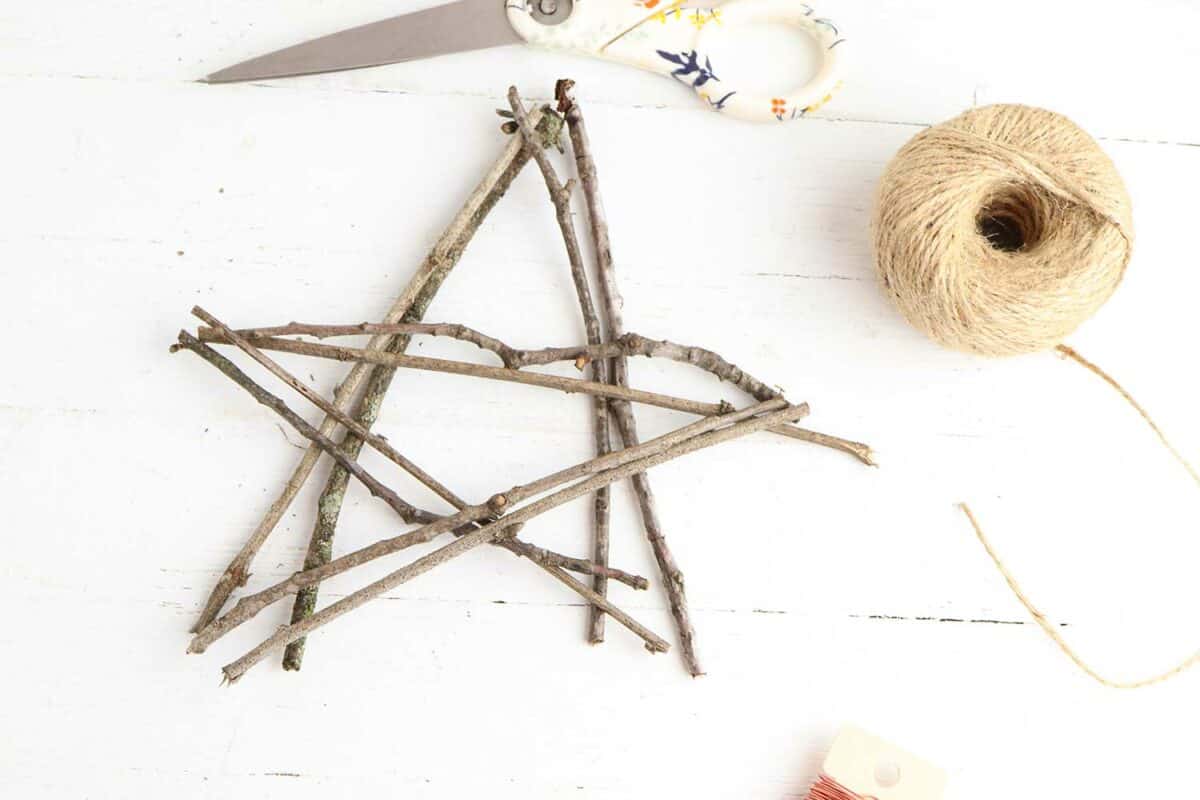

Use twist ties or short pieces of wire to temporarily secure the sticks together where they cross each other.
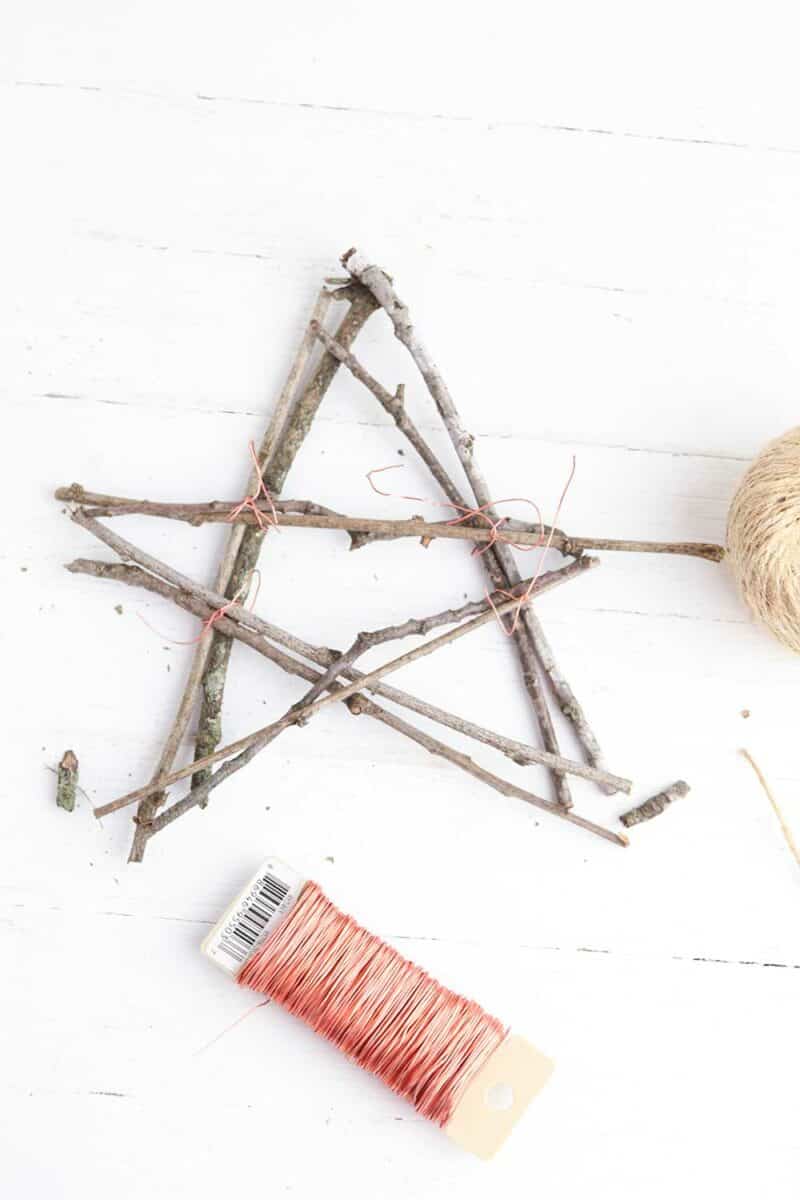
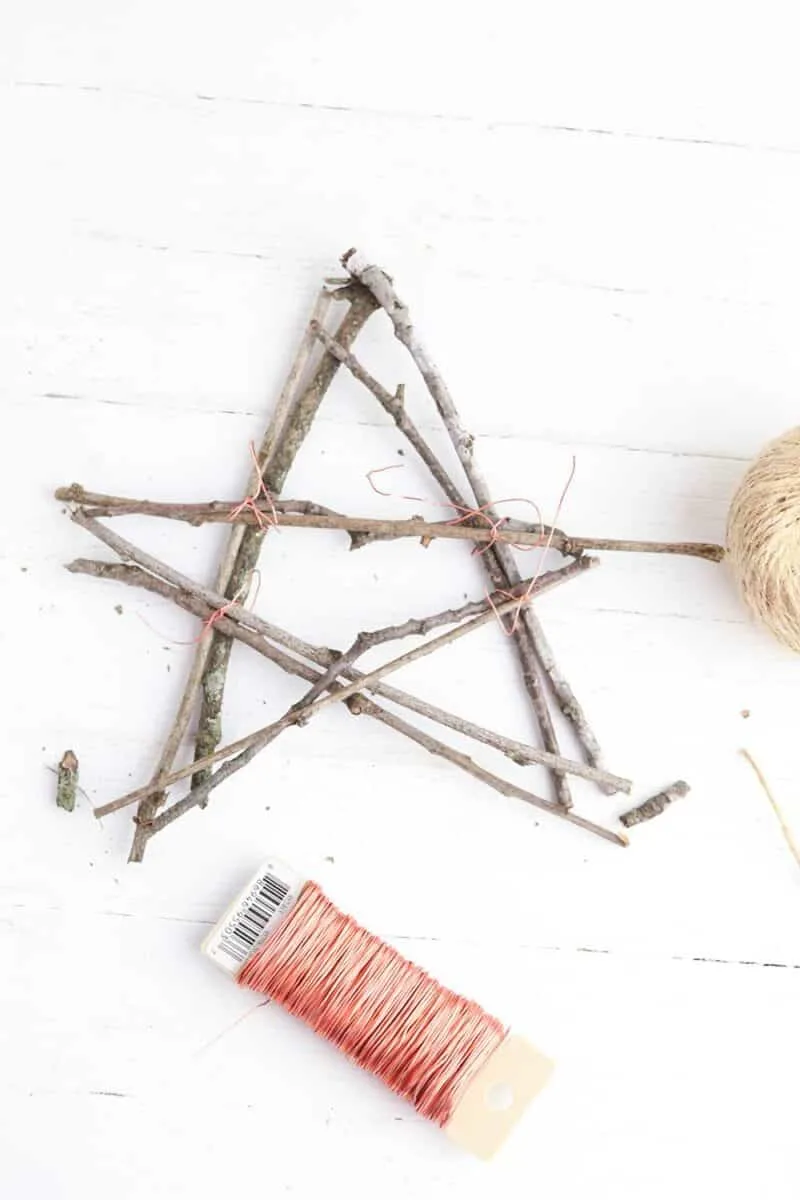
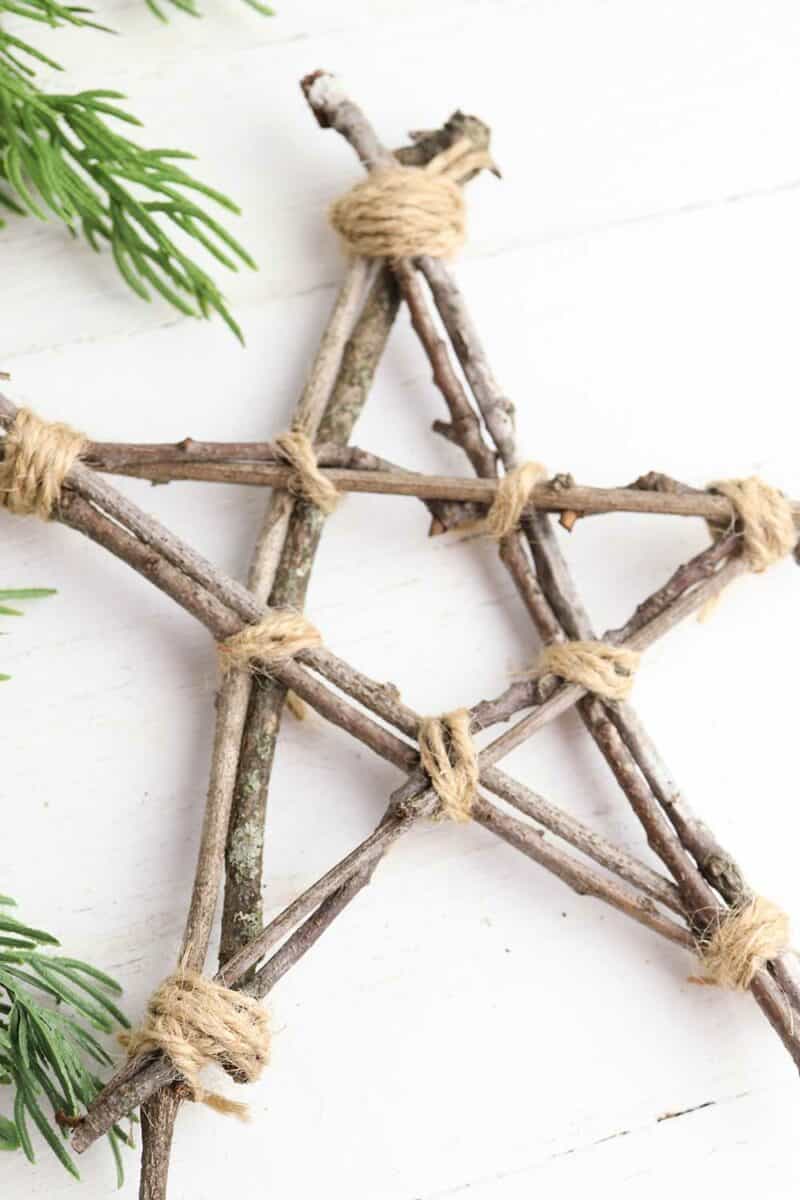
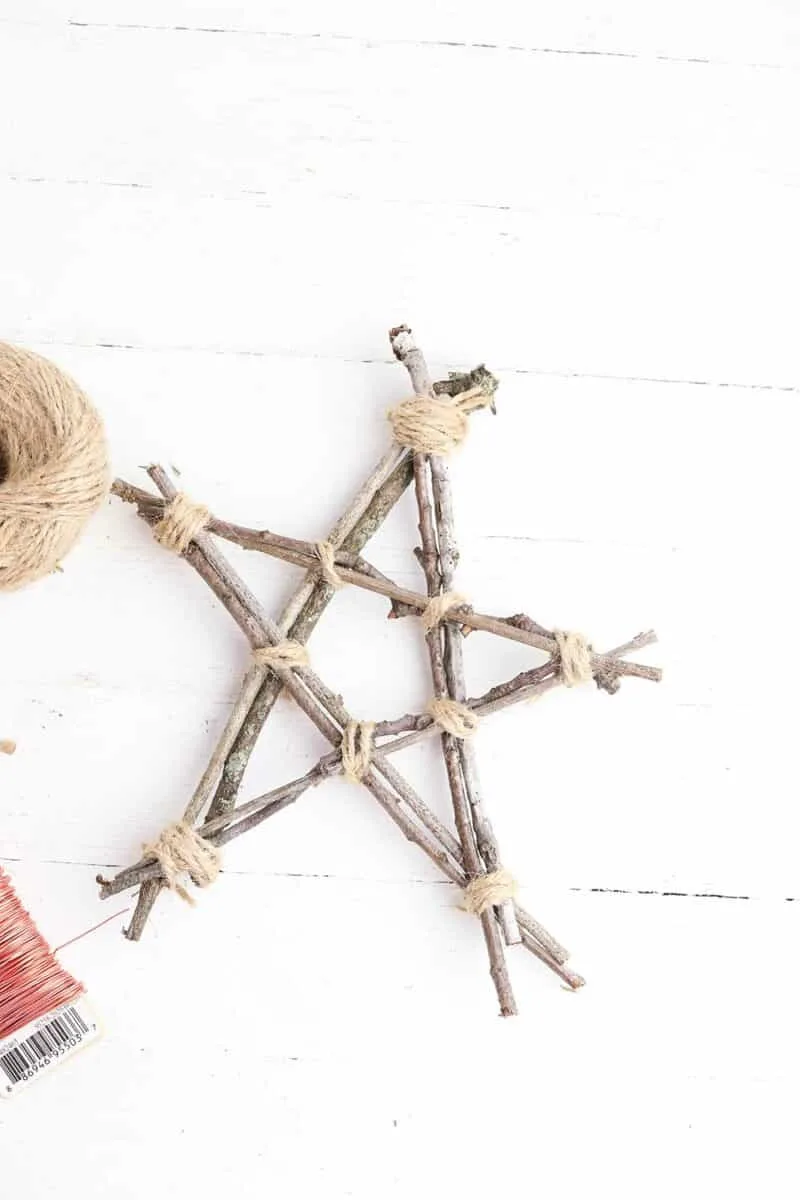
Tie the Points of the Star
Using twine or string, tie the sticks together at each point of the star.
Wrap the twine around all of the sticks at the point several times. Pull it tightly to make sure it holds securely. Tie the ends of the string together with an overhand or square knot.
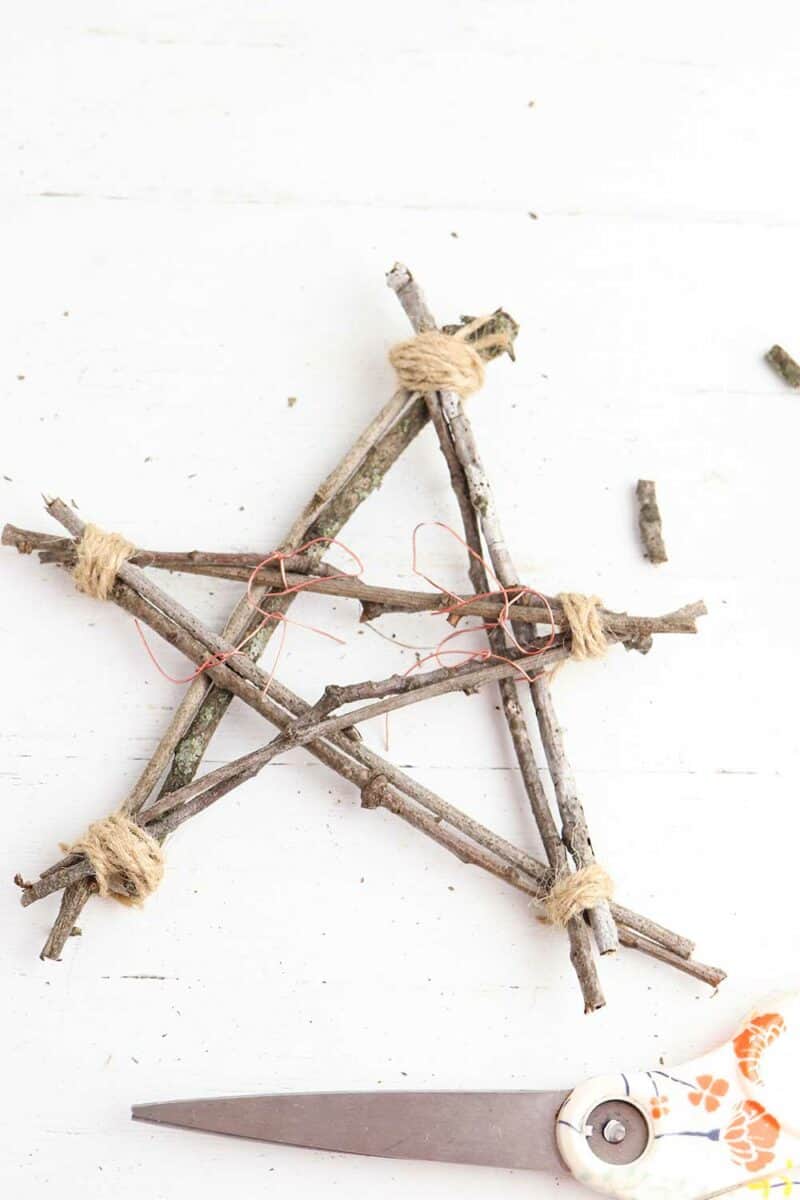

Keep Tying
Once the points are secure, you can remove the twist ties. I then tied more twine around each of the cross points.

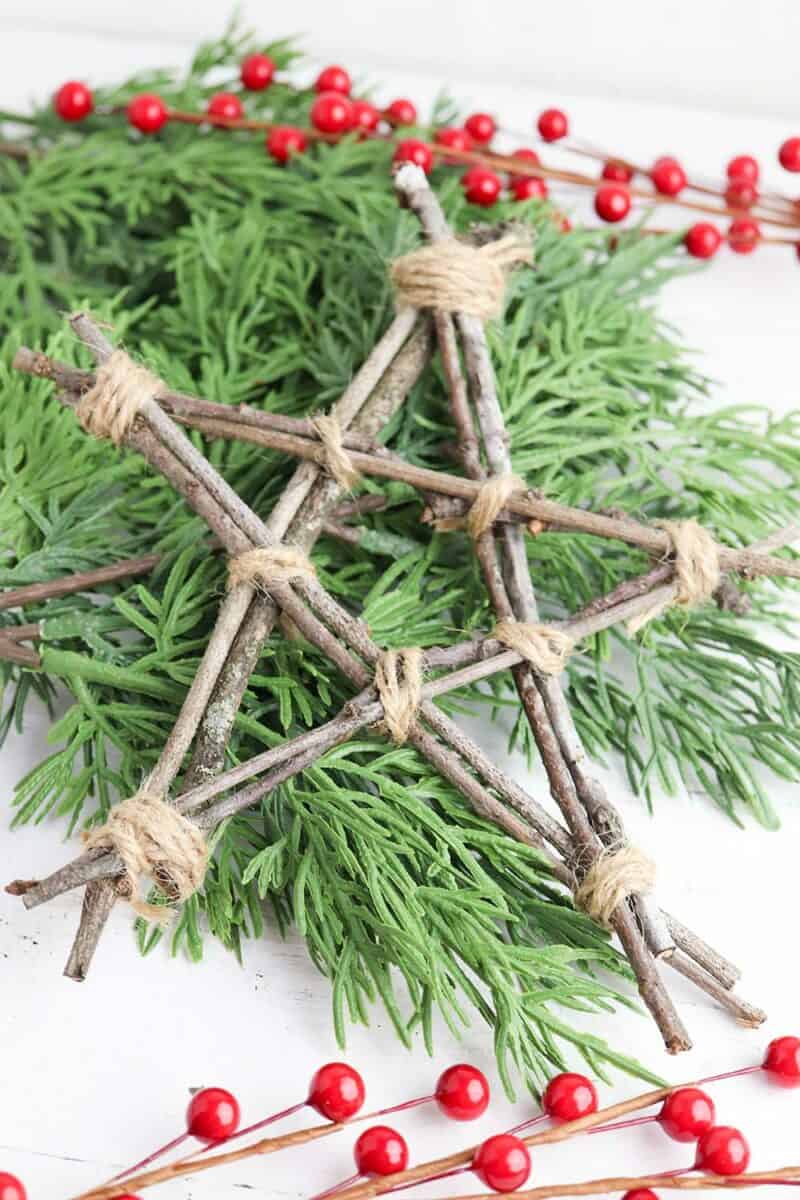
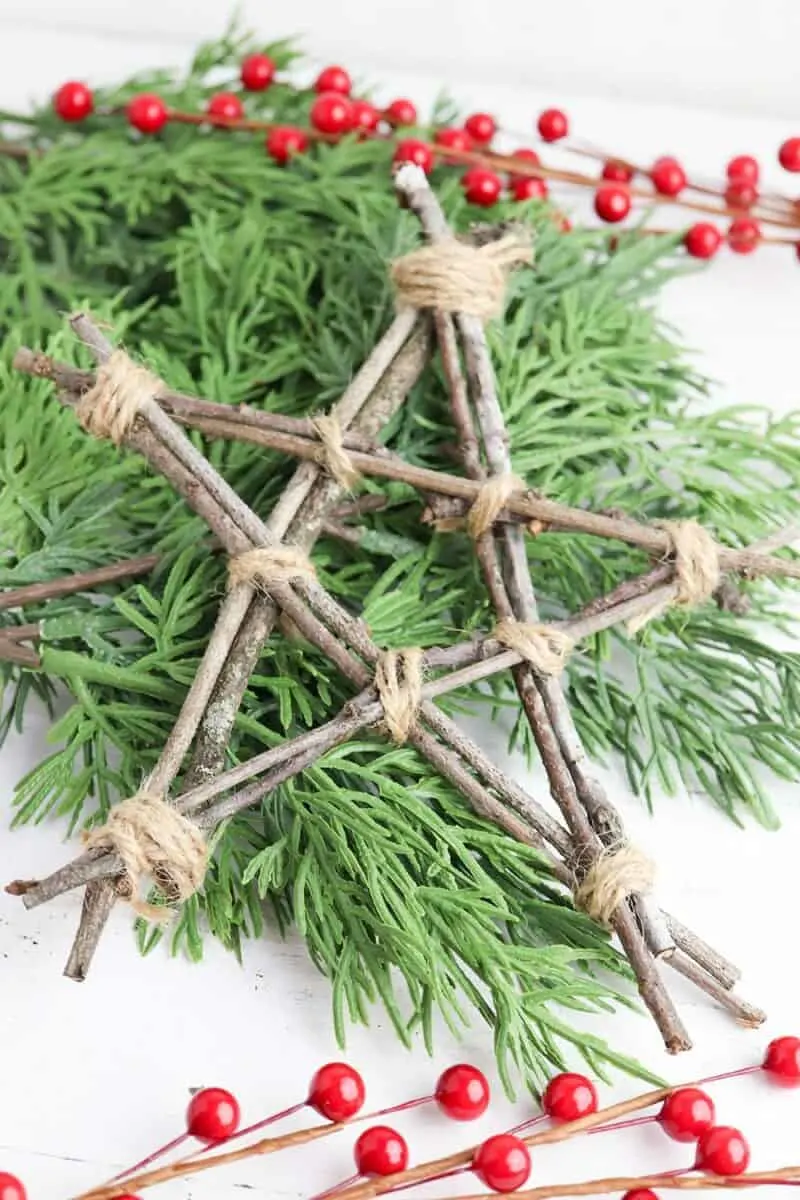
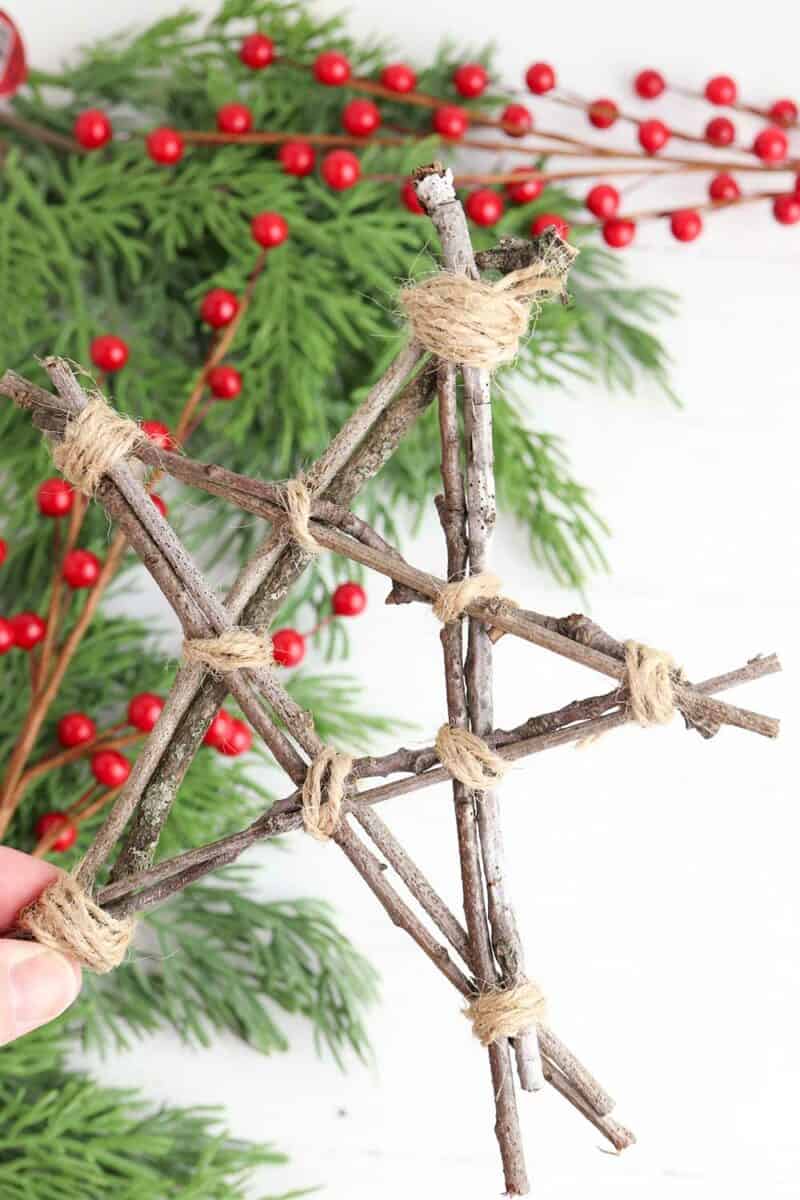
Decorating A DIY Rustic Star
Your rustic star made out of sticks is beautiful as it is completed.
However, you can add decorations and embellishments if you would like.
If you would like to turn it into a Christmas twig star, add a faux sprig of berries, pinecones or pine branches to a point on the star.

Adding a bow to the top point would also be beautiful.
To keep your star out all year long, you might want to wrap a decorative piece of metal cord around the branches for some shimmer. Or hang a bead or crystal from the cross piece to hang in the center of the star.
If you like star-shaped crafts, check out these DIY projects:
Do you love making crafts out of sticks and twigs? Then you will also want to check out my cute twig reindeer. And these tropical placemats are made out of hosta stems!

Sandra L Allen
Tuesday 14th of January 2020
I love the simple ones, but your friends are kind of fun and funky, too! I love stars. I crochet them too, and are so simple. They are great for Christmas Trees, garlands, and especially July 4th!
Jenny
Thursday 16th of January 2020
Crocheted stars sound lovely, Sandra. And it's fun to see all of the different tastes and styles that can come out of the same project, done be different people, isn't it?
janice richter
Thursday 5th of December 2019
I am a do it yourself right, and the stars are different from mine, so I have to get to making new ones. Thanks!
Jenny
Thursday 5th of December 2019
Glad you're feeling inspired, Janice!
Julie
Saturday 10th of November 2018
Love this!
Jenny
Saturday 10th of November 2018
Thanks, Julie! Can't wait to see how your own version turns out!