
See the step by step process for an easy DIY furniture makeover tutorial. Get ideas from this before and after transformation to paint wood furniture, with instructions even a beginner can follow.

Have you ever wanted to try a DIY furniture makeover, but haven’t been brave enough to make an attempt?
Not sure where to start? Worried you’ll invest a lot of time and effort, only to be unhappy with the result? Or worse, never finish it?
Don’t let fear stop you!
Let’s start off easy. Repainting something to give it a fresh look is the easiest furniture makeover there is, and I know you can do this!
Let me show you how.
EASY BEGINNER’S DIY FURNITURE MAKEOVER TUTORIAL
MATERIALS
- Furniture piece in good condition, that just needs a fresh look
- Electric sander
- Spray paint – I used satin black and gunmetal gray in a hammered metal finish
- Disposable gloves
- Newspaper
- Masking tape
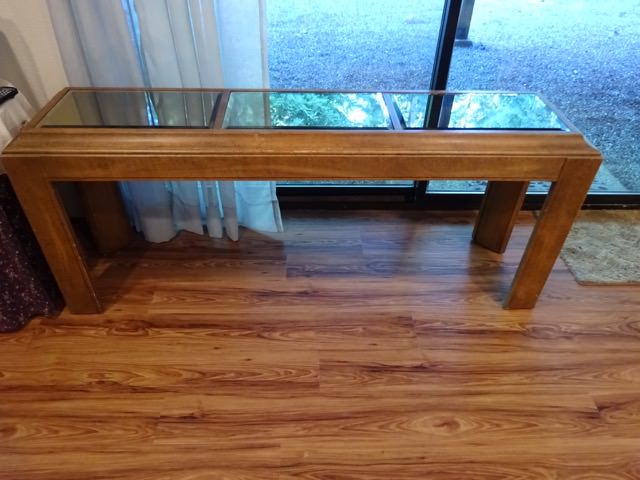
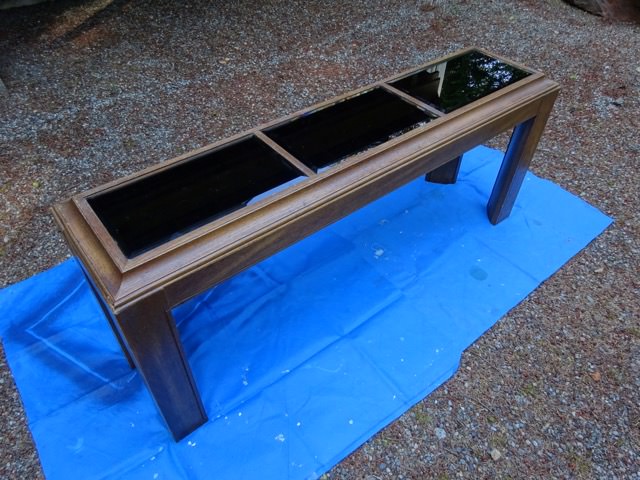
For this easy furniture makeover tutorial, I’m updating a mirrored console table that my mom happened to pick up from the side of the road. It was solid, and in good condition. It just needed some freshening up.
You can use these steps for any piece of wood furniture.
-


- BEFORE: I’m going to give this console table a new look.
-

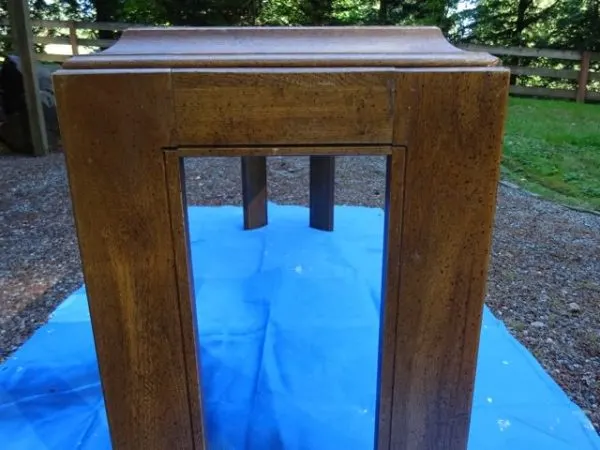
- BEFORE: The finish is outdated, but otherwise the wood is in good condition.

1. Prepare your work area
Before you get started, move your piece outside, or at least into your garage. The furniture makeover process is messy.
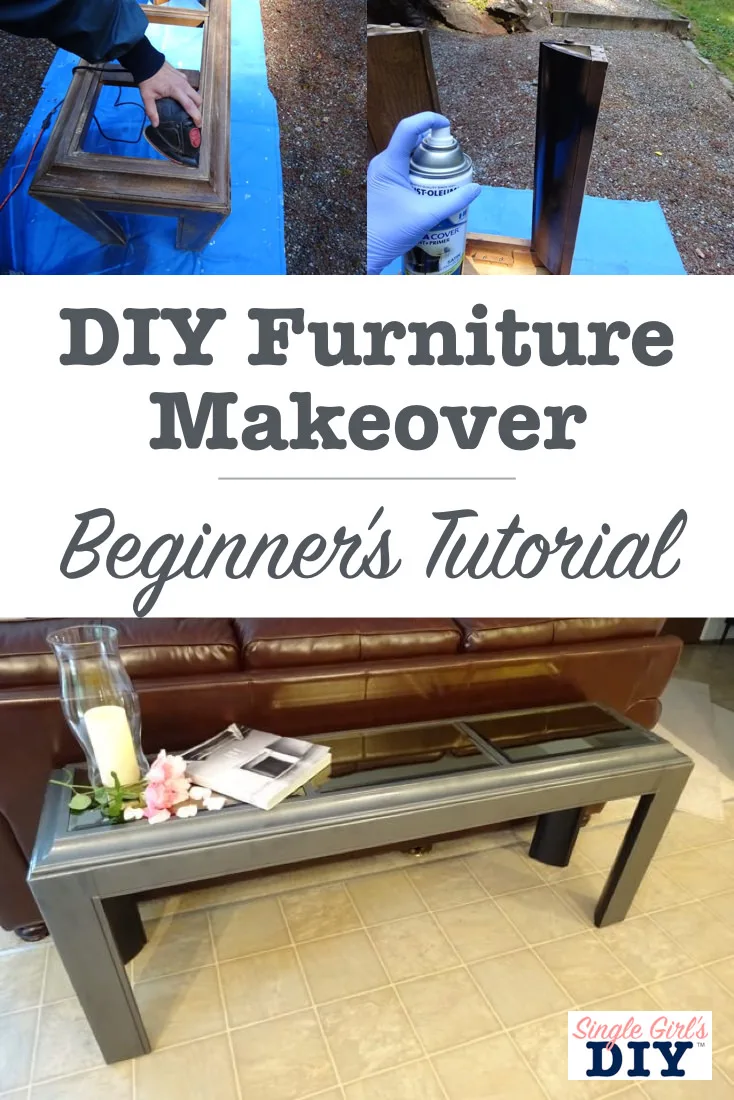
Remove any fragile parts, or hardware. For example, I took out the mirrors and left them inside. You may want to take off drawer pulls, hinges, or other parts, depending on your furniture piece.
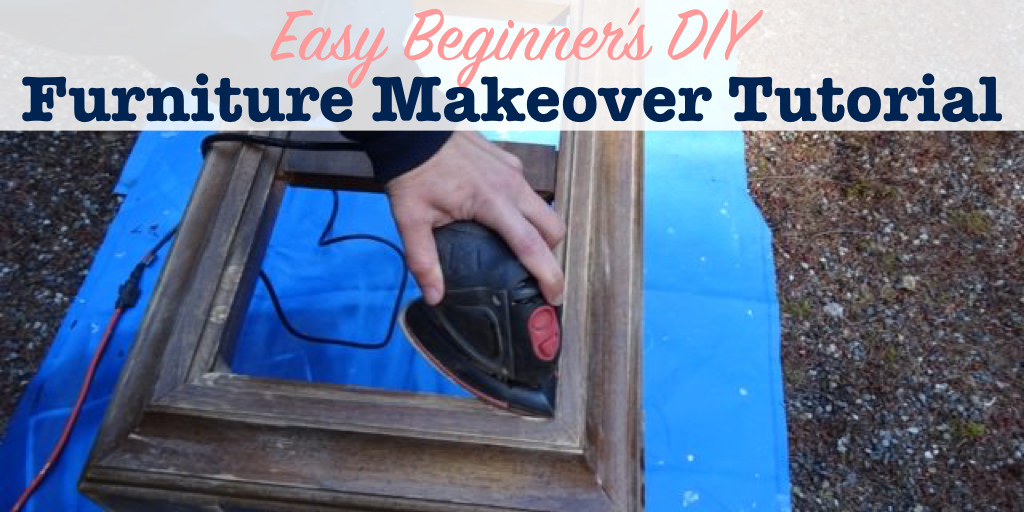
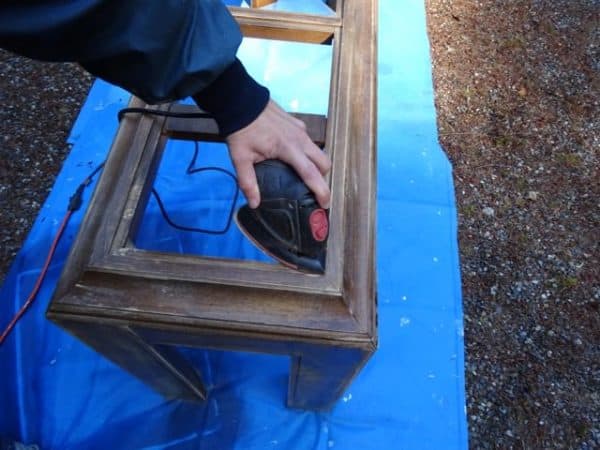
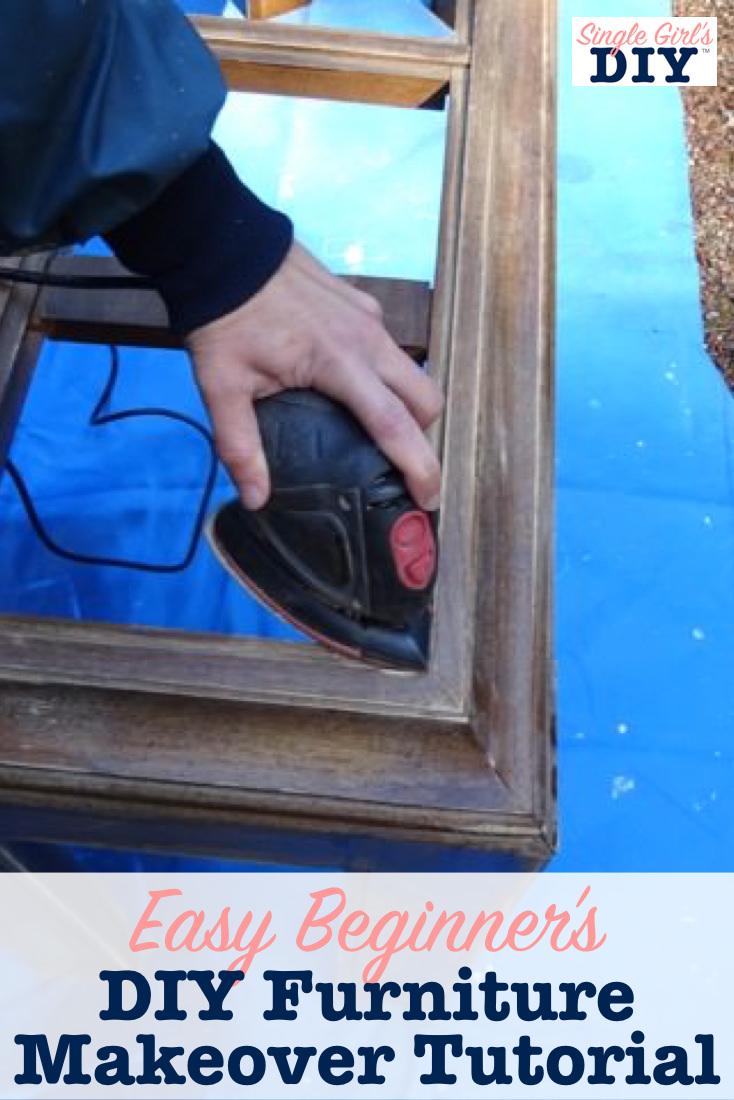
2. Sand the entire surface
I made a quick pass over the entire wood surface with my electric sander to prepare it for painting. Using just a fine 220 grit sand paper, I smoothed out any scratches and rough spots.
Take the time to get into grooves and corner with the sander. Keep it moving, and don’t press too hard while your work. Work gently, or you could accidentally create a flat spot.

When you finish sanding, wipe everything with a damp sponge to remove any dirt and sawdust.
Don’t get it soaking wet, just clean. Make sure it is completely dry before moving on to the next step.
3. Paint your first color
Using a visual trick to make the piece appear less chunky, I painted the underside of my table black. This makes it less noticeable to your eye, making it seem less weighty.
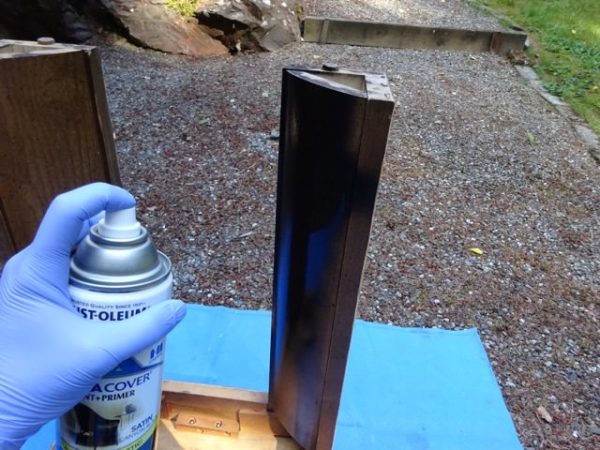

Following the directions on the can, apply one or two thin coats of spray paint to the areas you want to cover. I used a paint + primer in a black satin finish.
I like to wear disposable gloves while I’m painting. Otherwise, I end up covered in paint.
If you’re only using one color on your piece, you’ll still want to work in sections. For example, paint the bottom and sides first and then let it dry before you turn it over to paint the top.
Being patient between coats is the hardest part for me! But it’s important to let it dry properly, or you could create runs or marks in your paint. Then you’ll be sad.
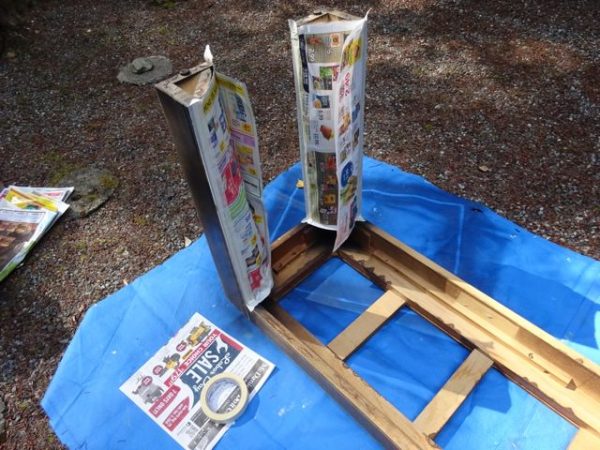
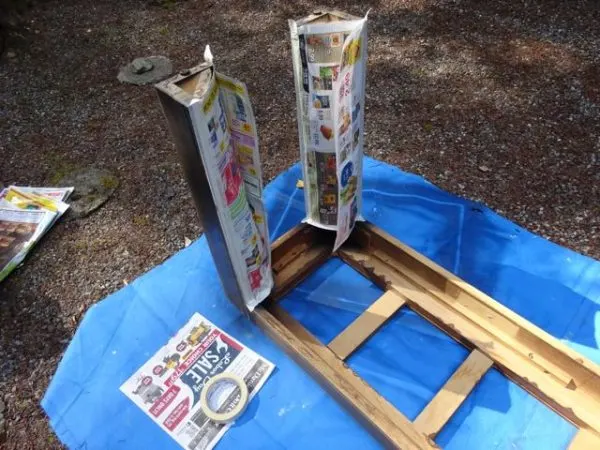
4. Mask the painted areas
If you’re painting your piece more than one color, like I did, you’ll need to protect the first color while you paint the second.
Let the first paint color dry completely as directed on the can. Then cover it up with newspaper and masking tape to protect it from over-spray when you paint the other sections.
5. Paint the second color
Once you’ve got everything masked off, you can spray on the second color. Again, just follow the directions on the can.
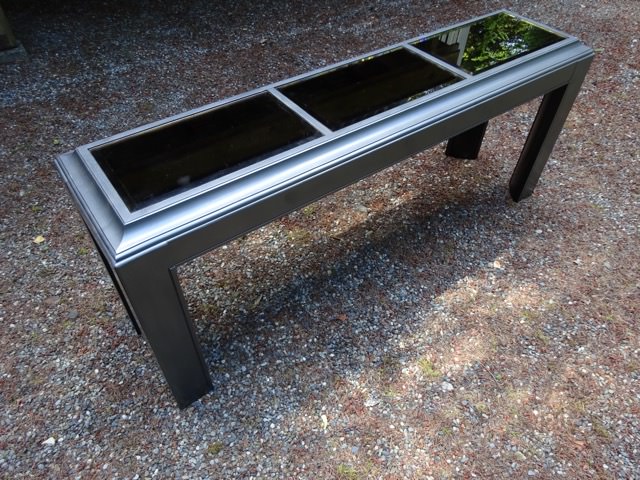
For my project, I chose to use a metallic finish spray paint. This was inspired by mirrored furniture pieces I’ve seen in stores recently.

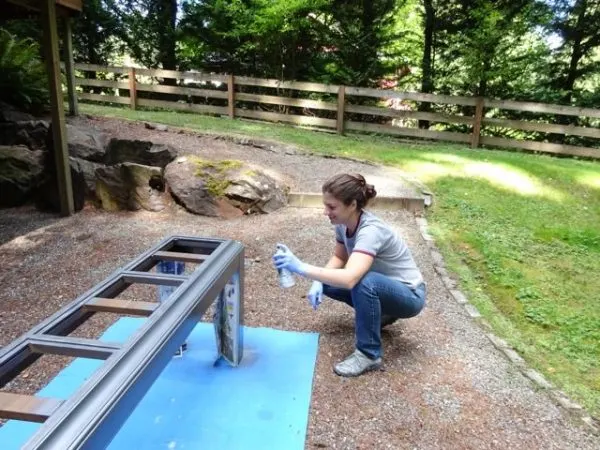
I applied two coats of gunmetal gray spray paint in hammered metal finish.
Finished DIY furniture makeover:
Once the paint is completely dry, put any parts you may have removed back where they belong. (I put the mirrors back in my table.)
Here’s my console table transformation:


Isn’t it amazing what a simple coat of paint can do?
I put this now great looking table behind my couch. You’d think it came right out of a furniture catalog. Not bad for something found on the side of the road.

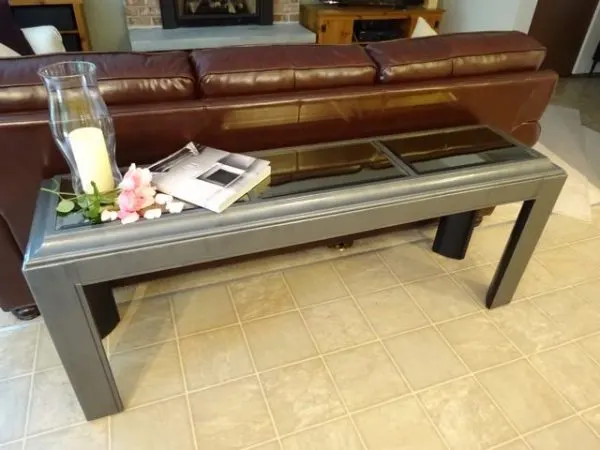
AFTER: With a completely updated look, this console table looks great behind my couch.
I’ve refinished a lot of furniture! Check out my other tutorials:
- How to Distress Furniture with Chalk Paint
- Adding Legs to Cube Storage Shelves: IKEA Hack
- How to Paint Furniture without Sanding or Priming
- 7 Things You Must Know Before Buying Used Furniture
- How to Antique Furniture with Vaseline and Paint


Girlfriends Wine and Craft Night Party Ideas! | Single Girl's DIY
Thursday 9th of July 2020
[…] (P.S. Recognize this console table? It’s the one I showed in this thrifty makeover!) […]