


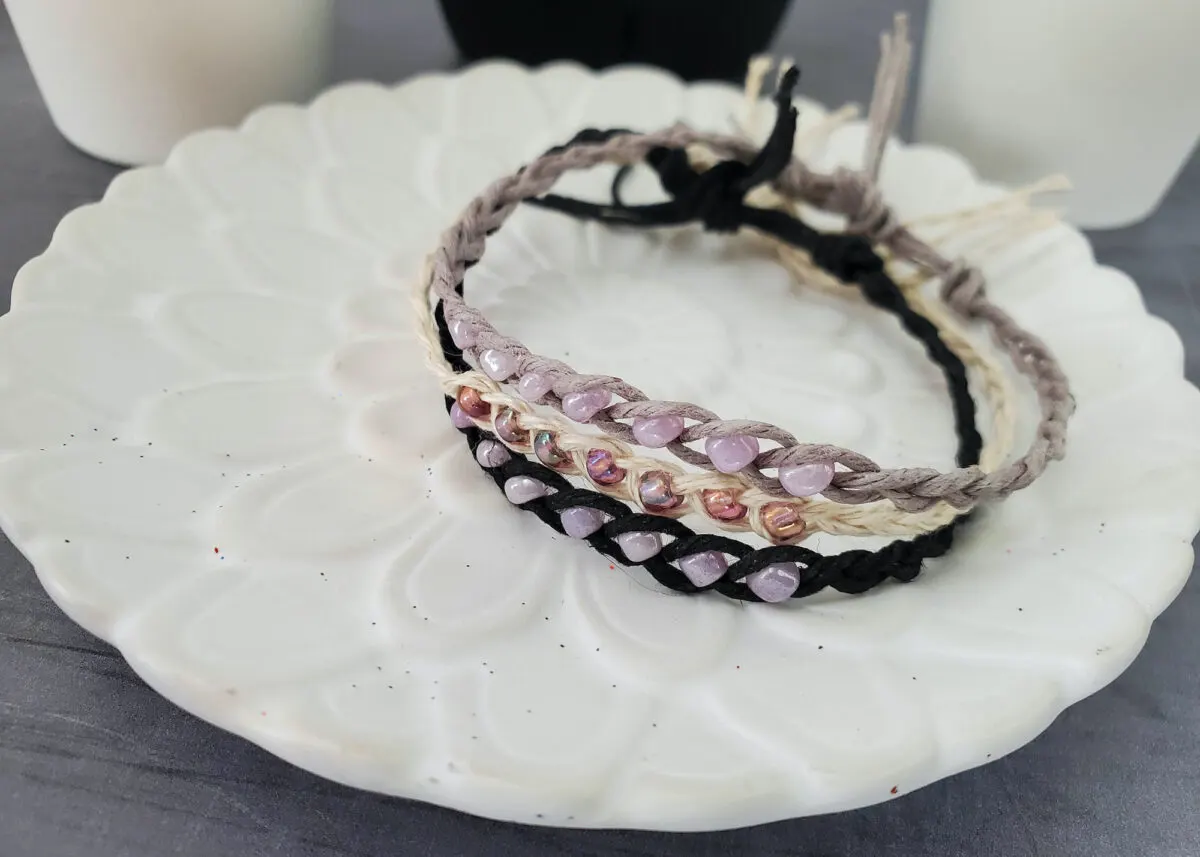
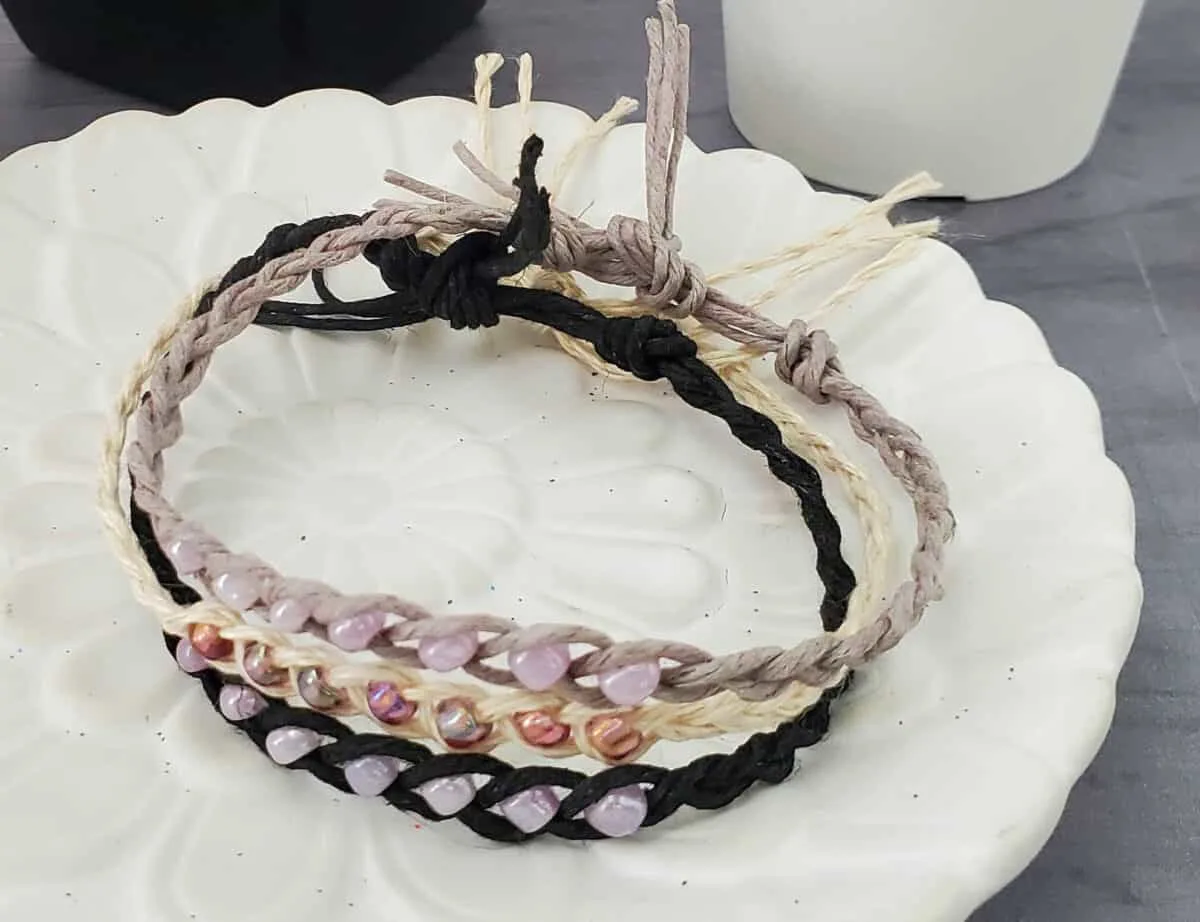
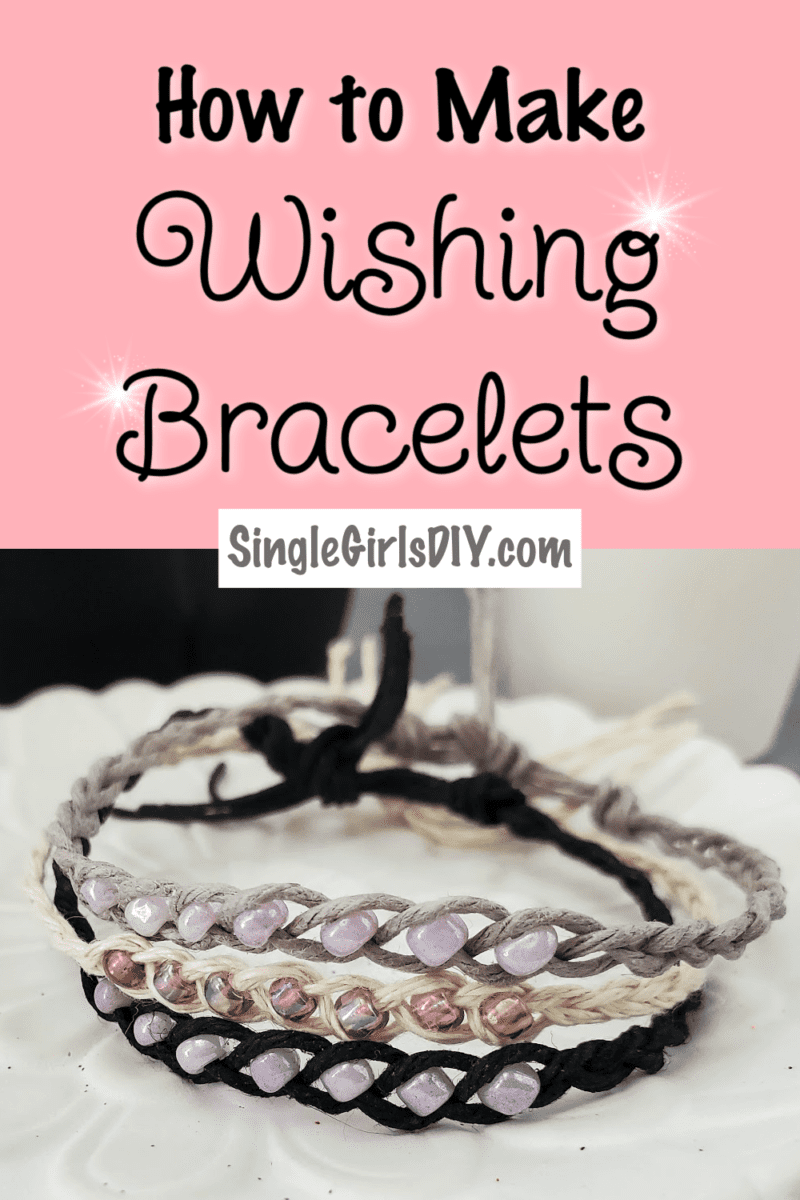
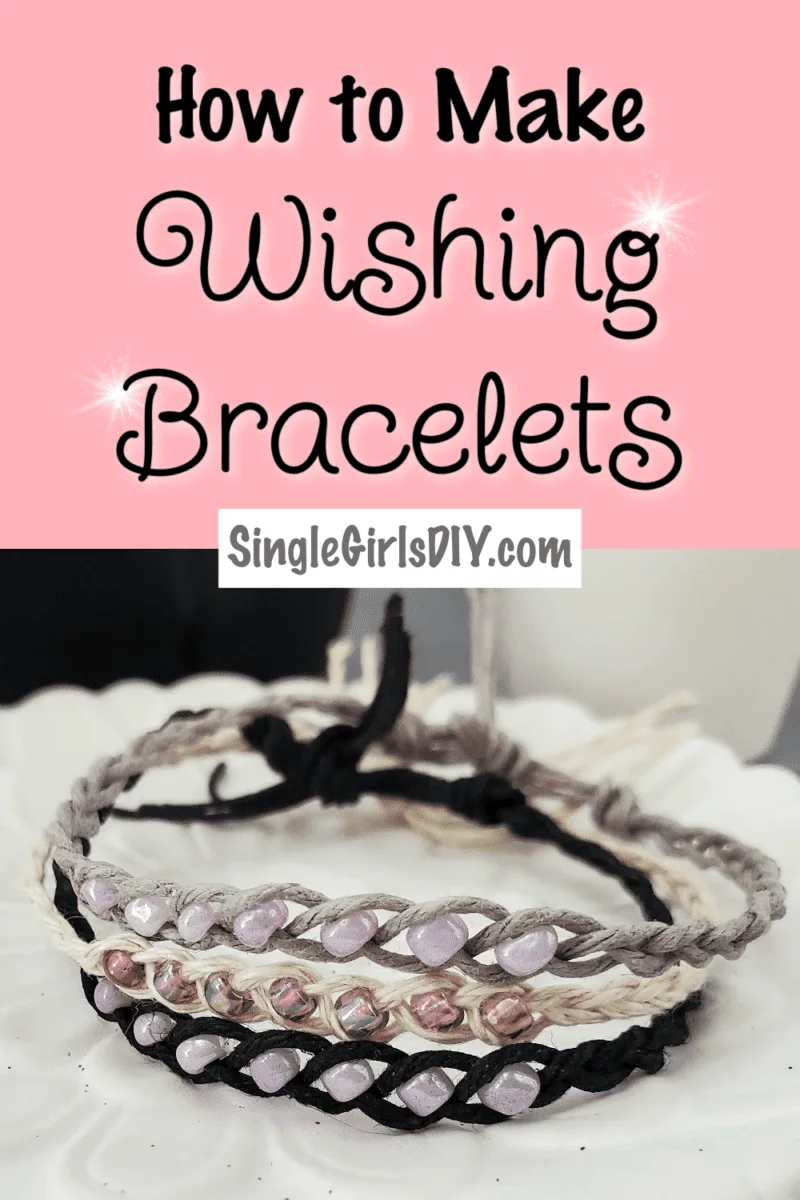
Have you seen wish bracelets for sale in shops but didn’t like the price? Our easy DIY tutorial shows you how to make a wish bracelet to give to friends and family as a gift at a fraction of the price!
Making wish bracelets is actually very easy. All you need to do is braid cord and add beads.
You can easily make several of these wishing bracelets in 30 minutes or less!
These bracelets are a perfect craft to make and sell at craft fairs, fundraisers and online shops.
Our wish bracelets DIY project is also great for group crafting, such as at camps, birthday parties or crafting bees.
Be sure to see our other DIY bracelets:
What is Used to Make Wish Bracelets?
Wish bracelets are made of hemp cord, which will slowly decompose over time and eventually fall off. You want to use a biodegradable cord that will wear out over time because your wishes are said to come true when the bracelet falls off.
Beads are also used in a wishing bracelet. The beads represent the wishes that you are hoping for.
See how easy it is to make a clay jewelry dish.
Wish Bracelet Rules
Wondering how does a wish bracelet work? These are the wish bracelet rules:
- Make a wish when you tie a wishing bracelet on your wrist or ankle.
- Wear the bracelet all the time without taking it off.
- Once the bracelet has worn out and falls off your wishes will come true!

How to Tie a Wish Bracelet
Wrap the beaded bracelet around your wrist, leaving a little bit of room for it to fit comfortably but snug.
Tie a double knot with the ends the bracelet. Pull the knot tightly, but make sure you don’t make the bracelet too tight around your wrist.

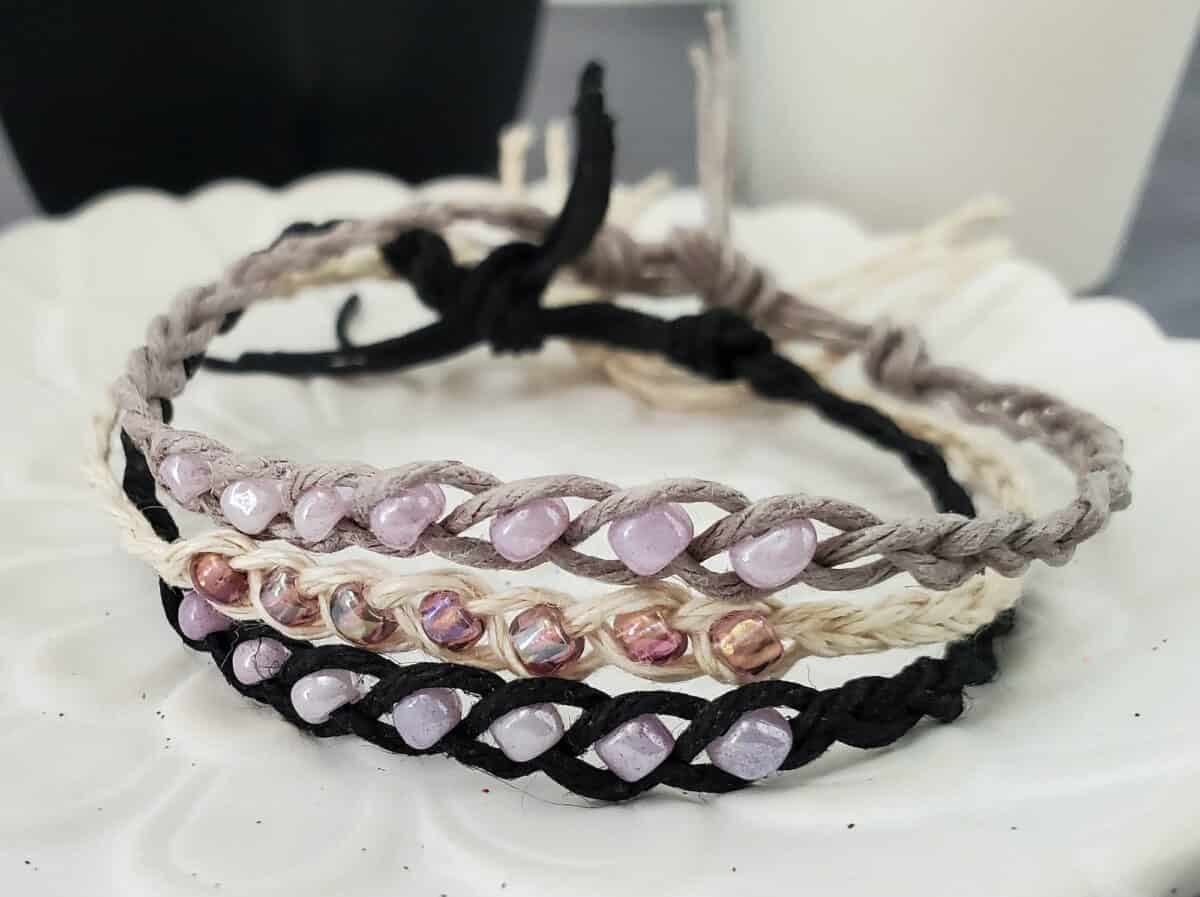
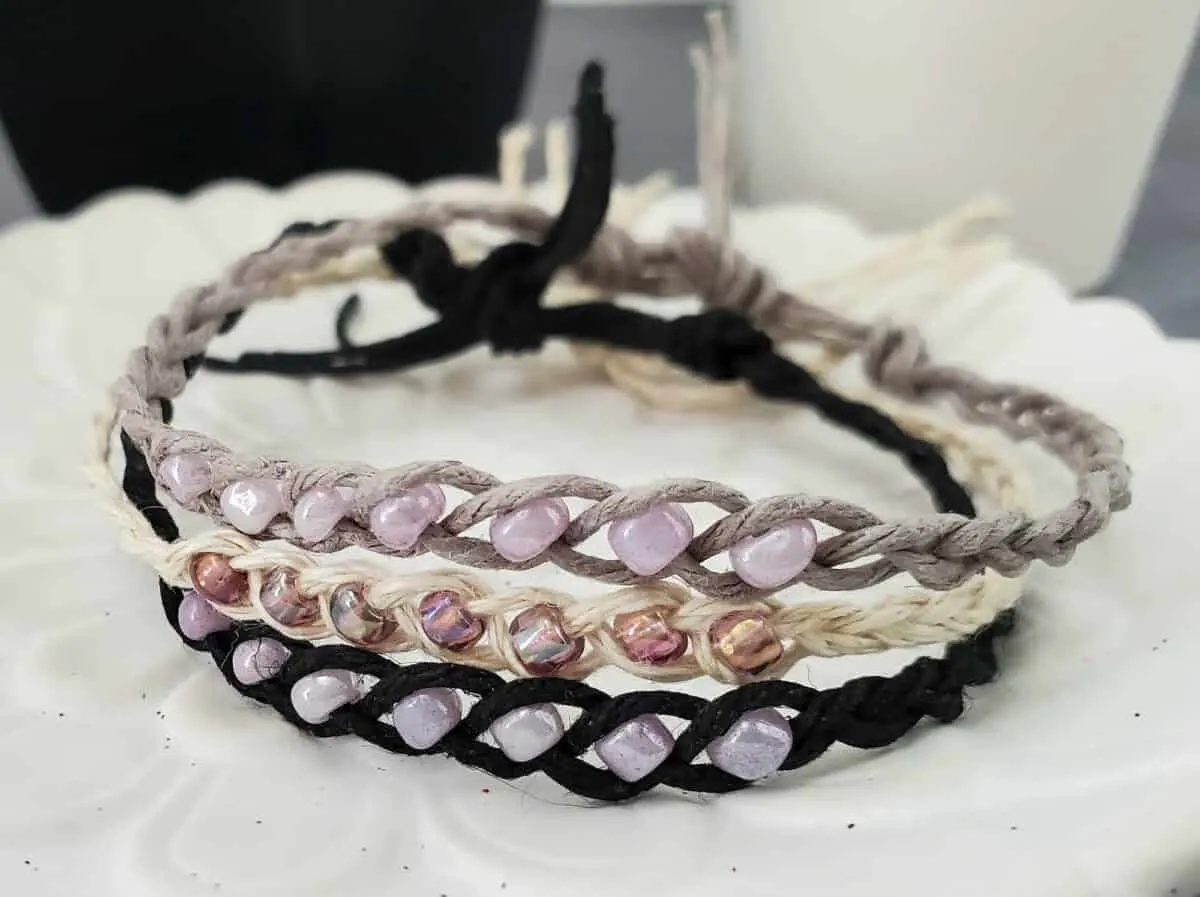
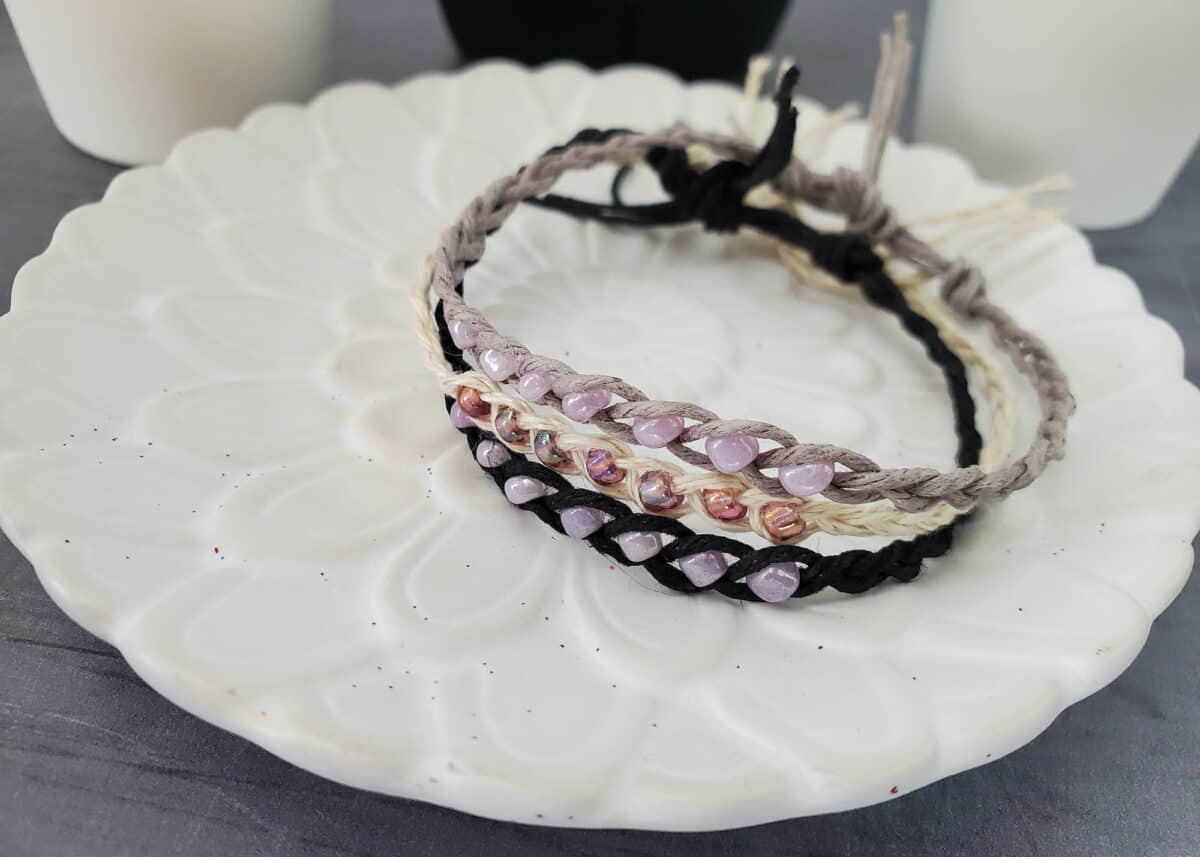
How to Make a Wish Bracelet
This tutorial makes one bracelet.
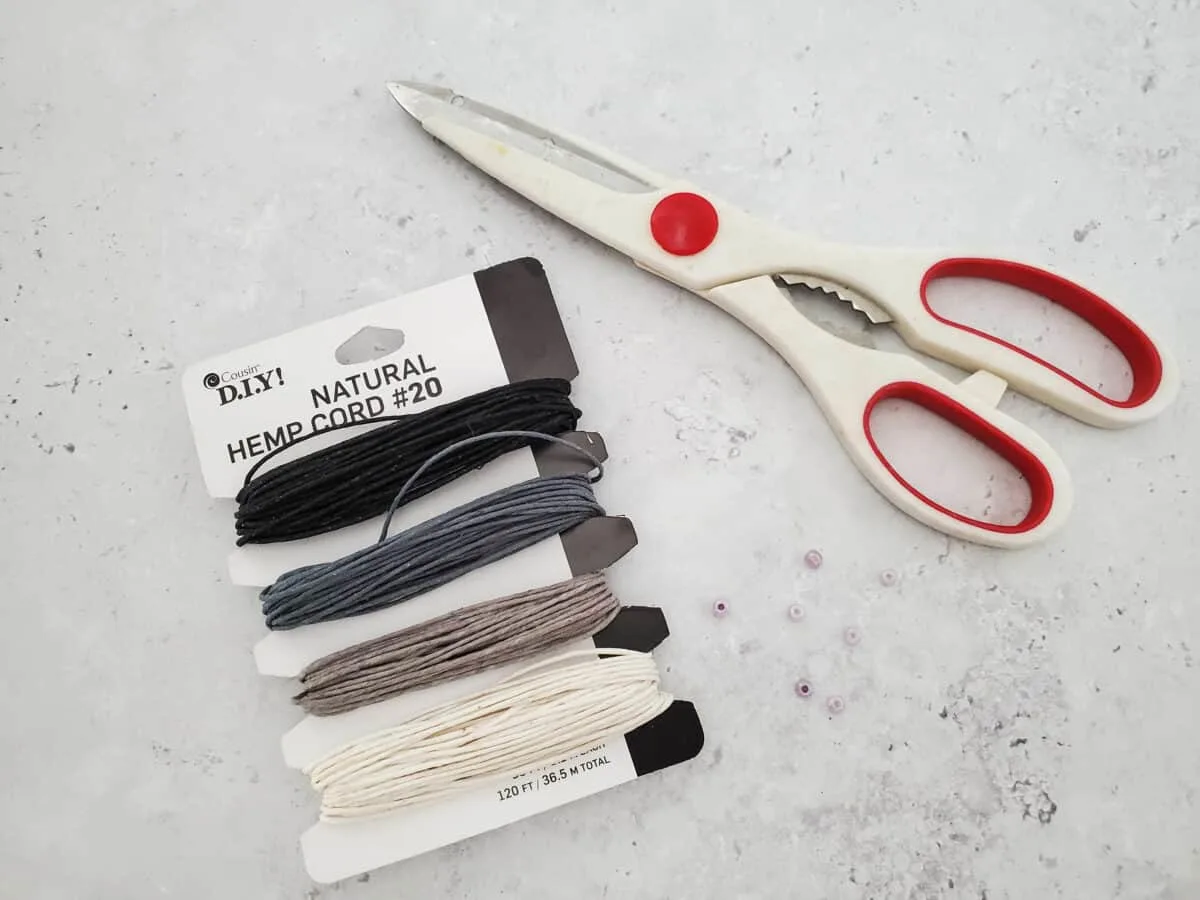
Materials
- Hemp cord (I used #20, 1mm thickness) (If you prefer more color, this multi-color hemp pack is perfect)
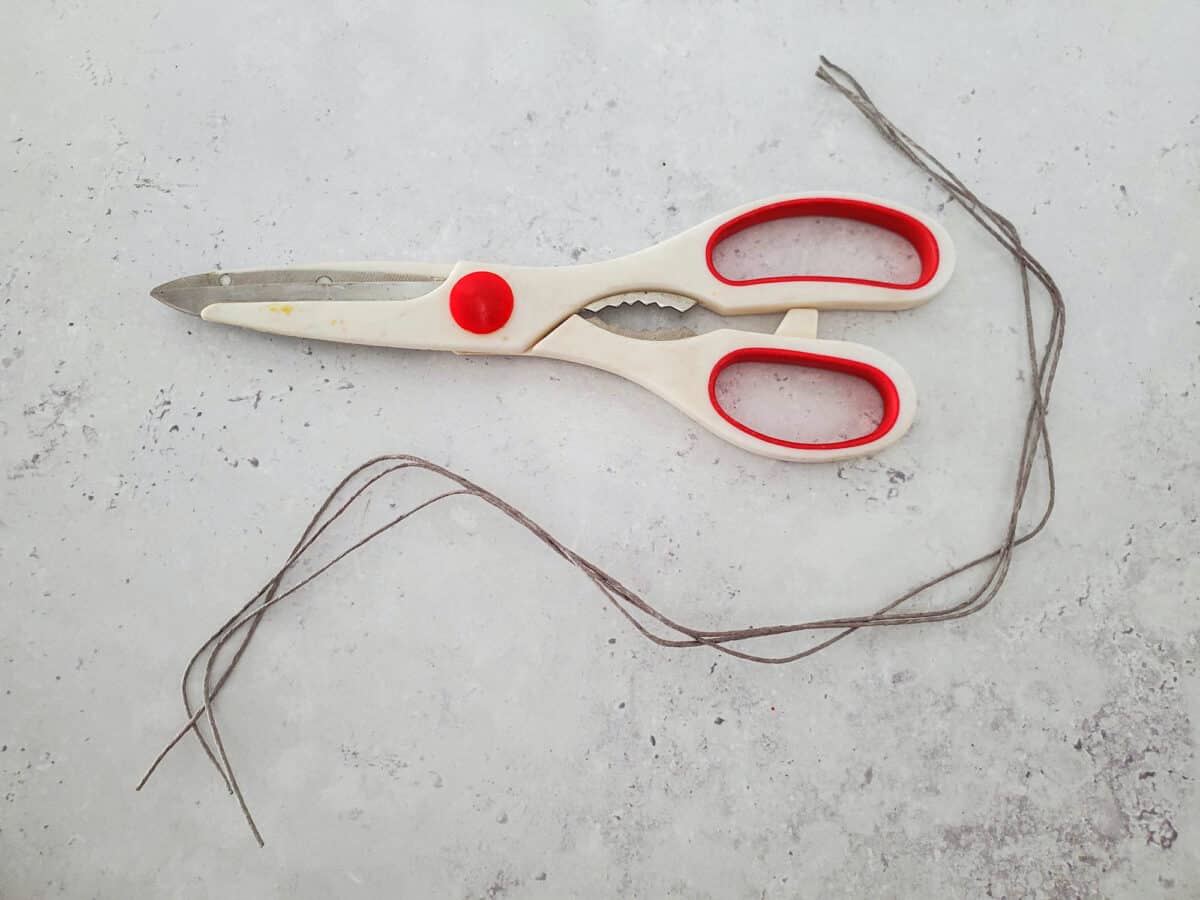
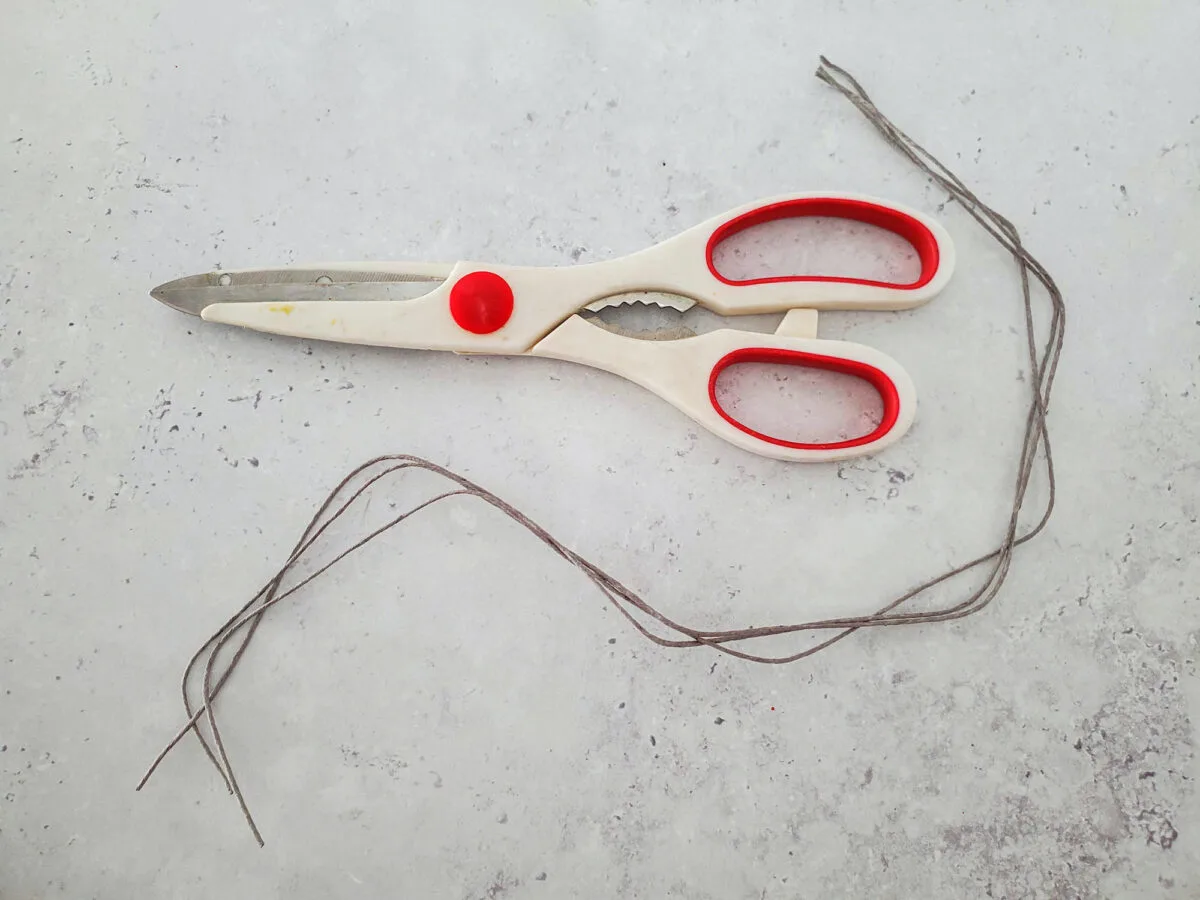
- Scissors
- 7 seed beads (you will want to use the medium or large ones, not the really tiny ones)

Directions
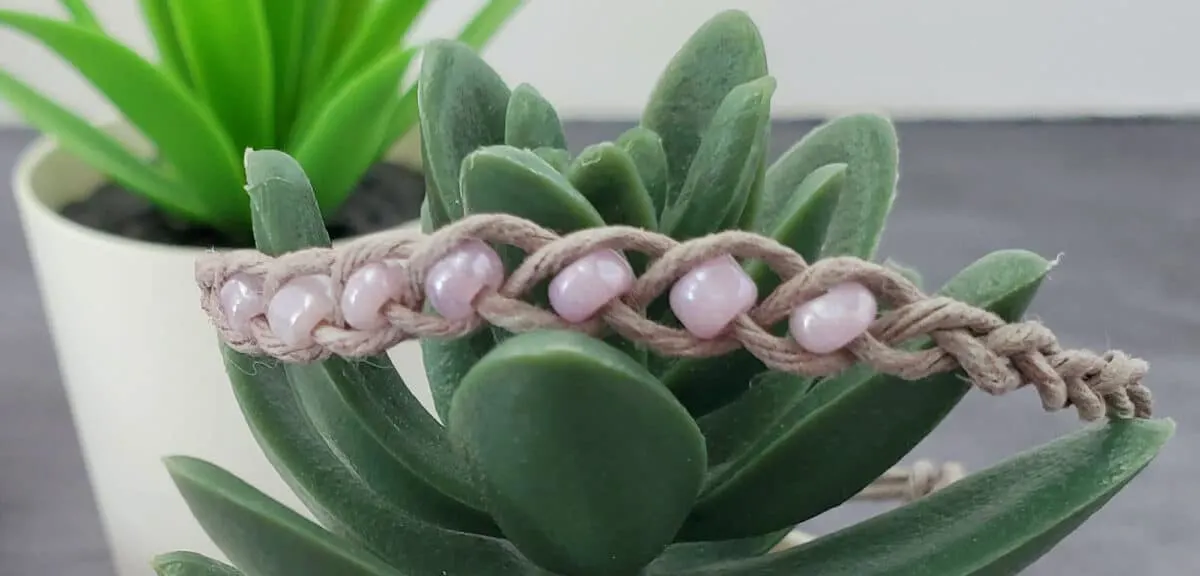
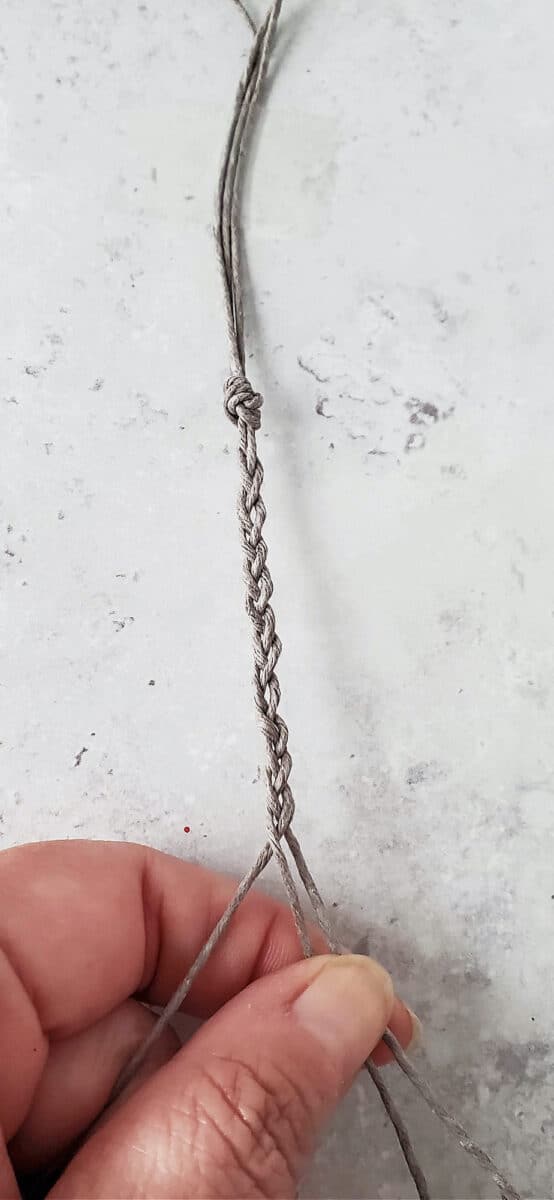
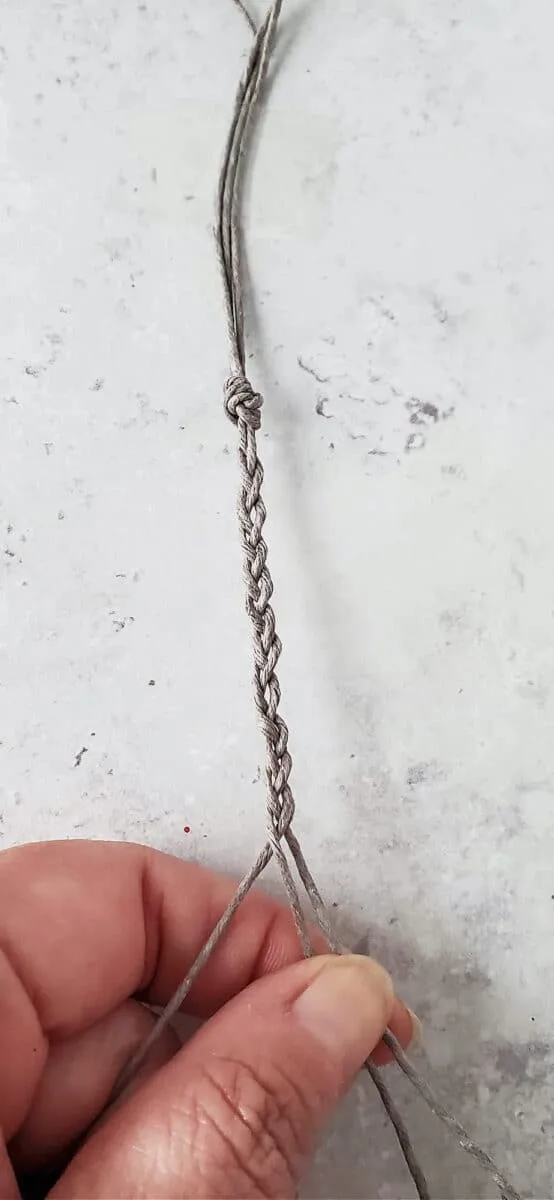
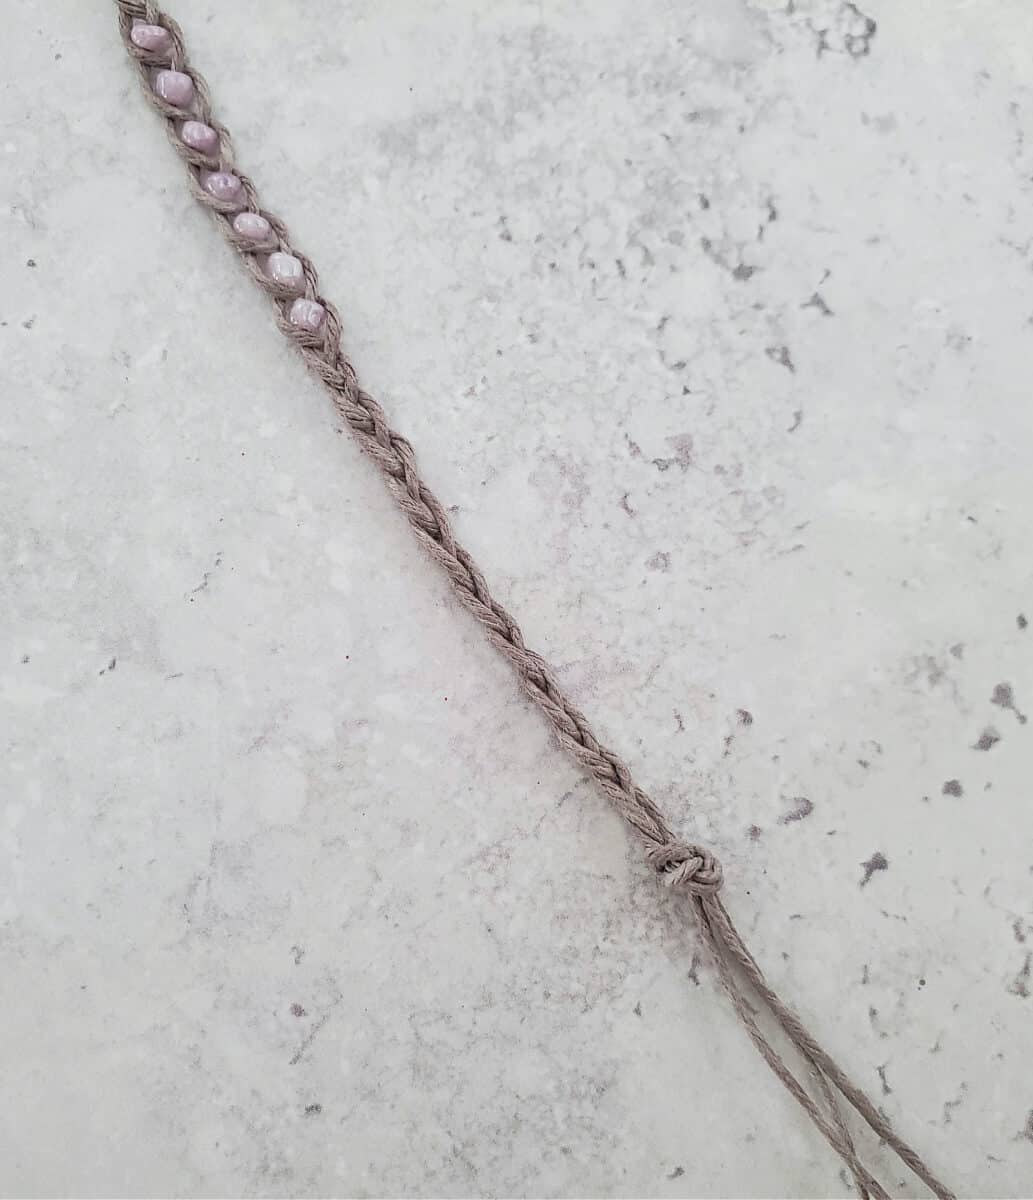
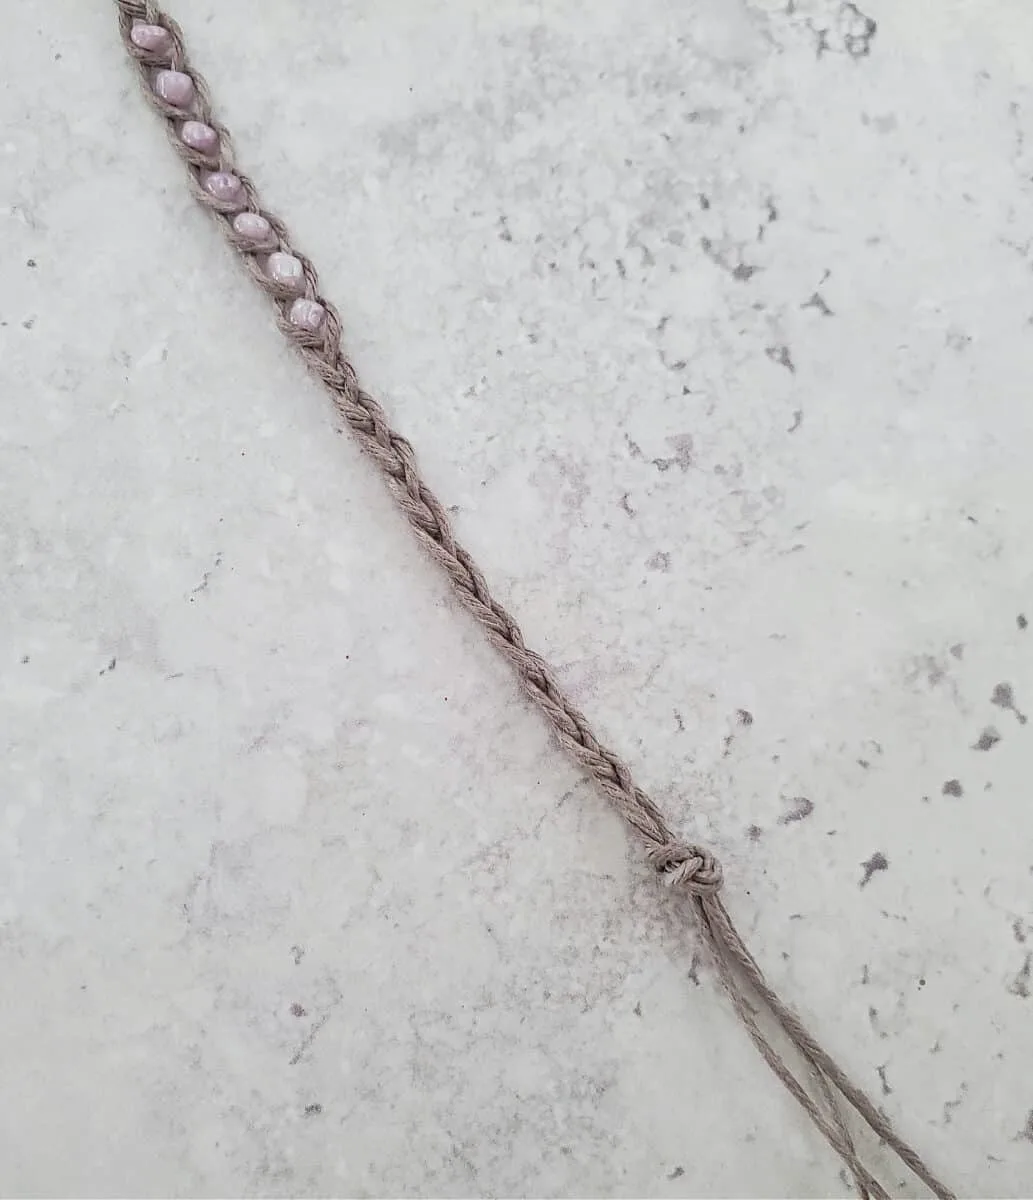
Cut 3 pieces of hemp cord in 15″ lengths.
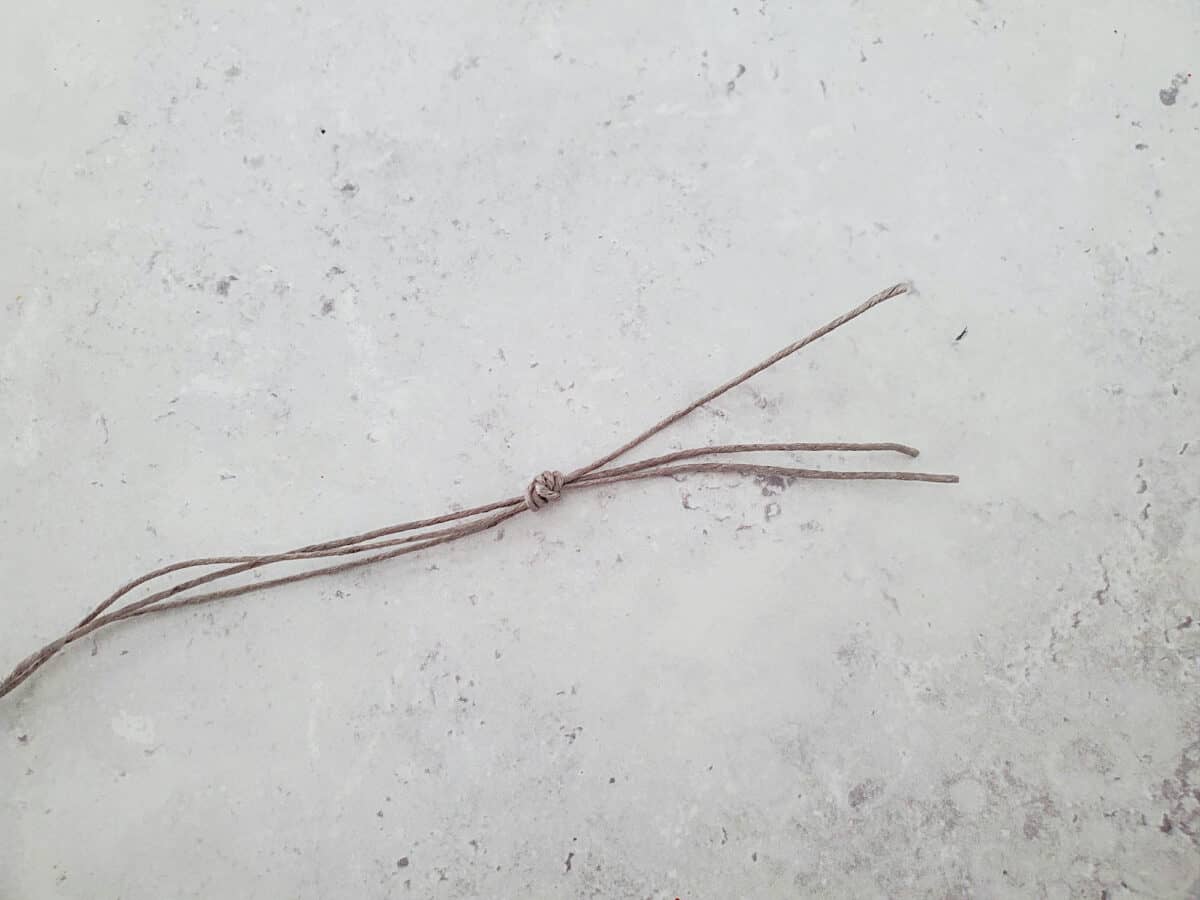
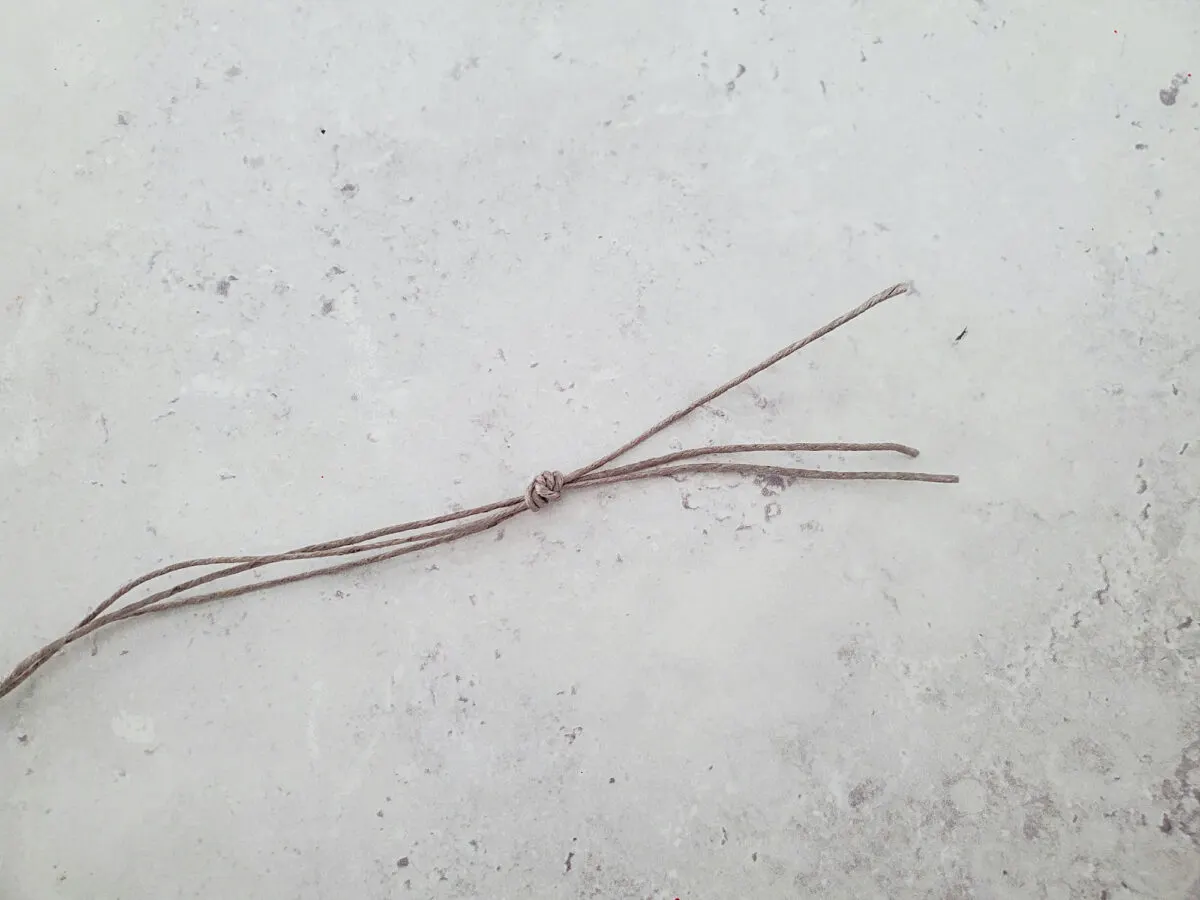
Gather the ends of the 3 pieces of cord together and make a double knot. Leave about 2-3 inches of extra cord at the end.
Braid the 3 cords together for around 2 ½ inches.
Add a bead to the cord on the right, then bring it over the middle cord. Bring the left cord over, under the bead. See the pictures below for a photo tutorial.
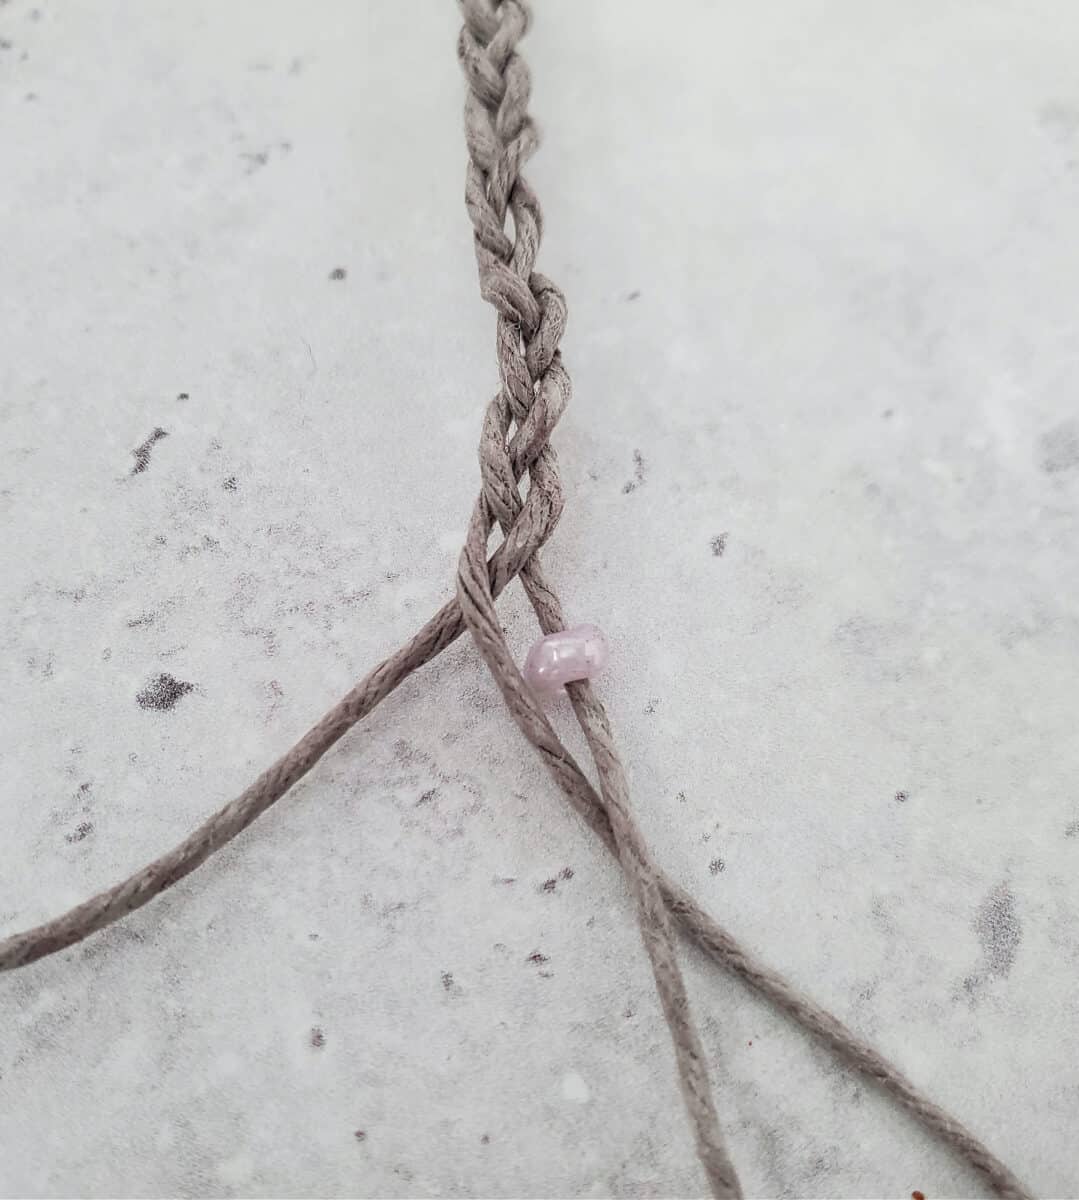
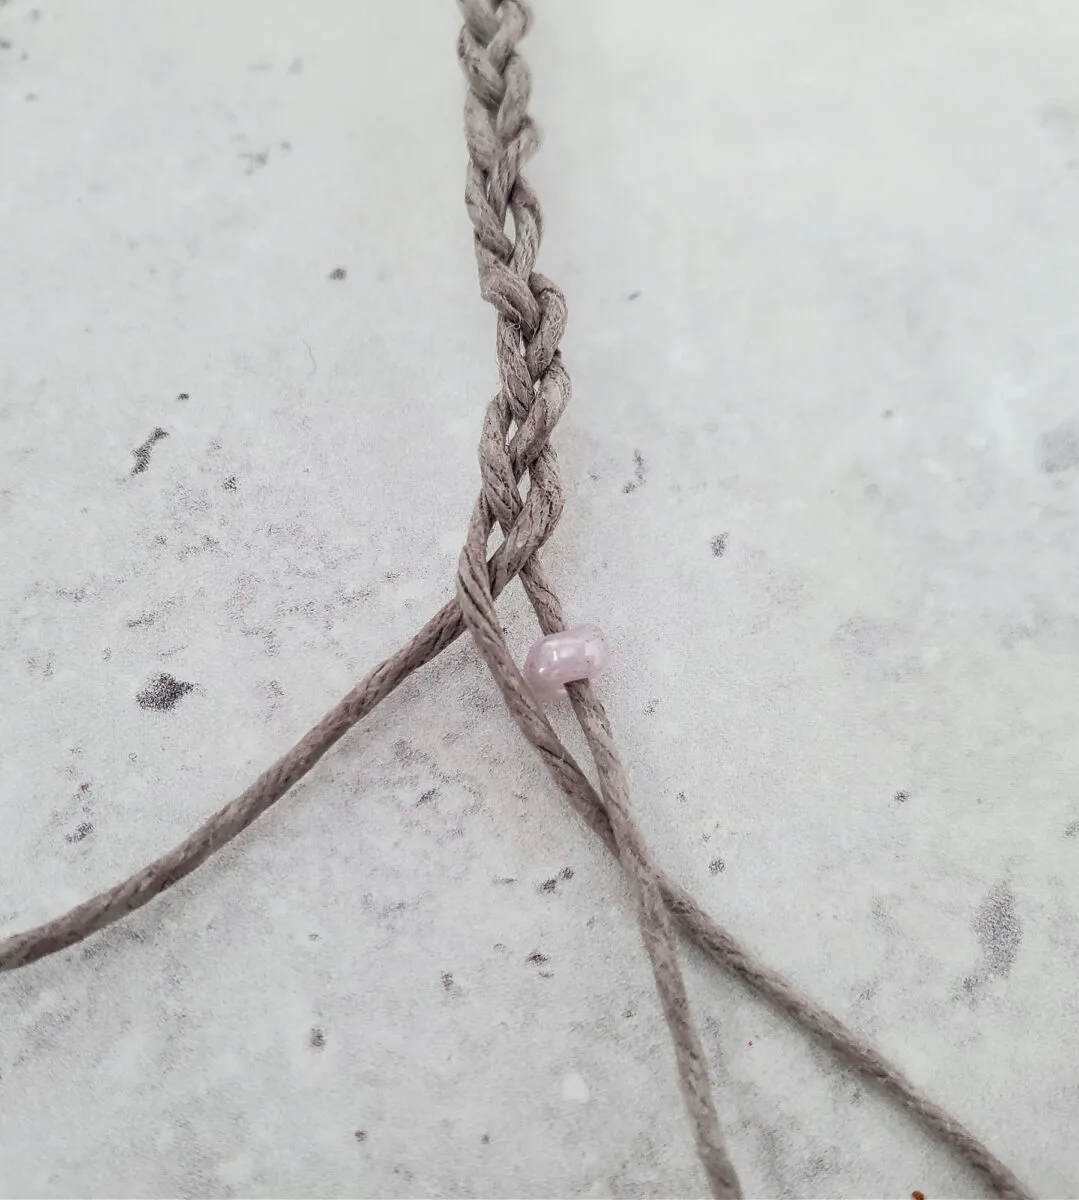
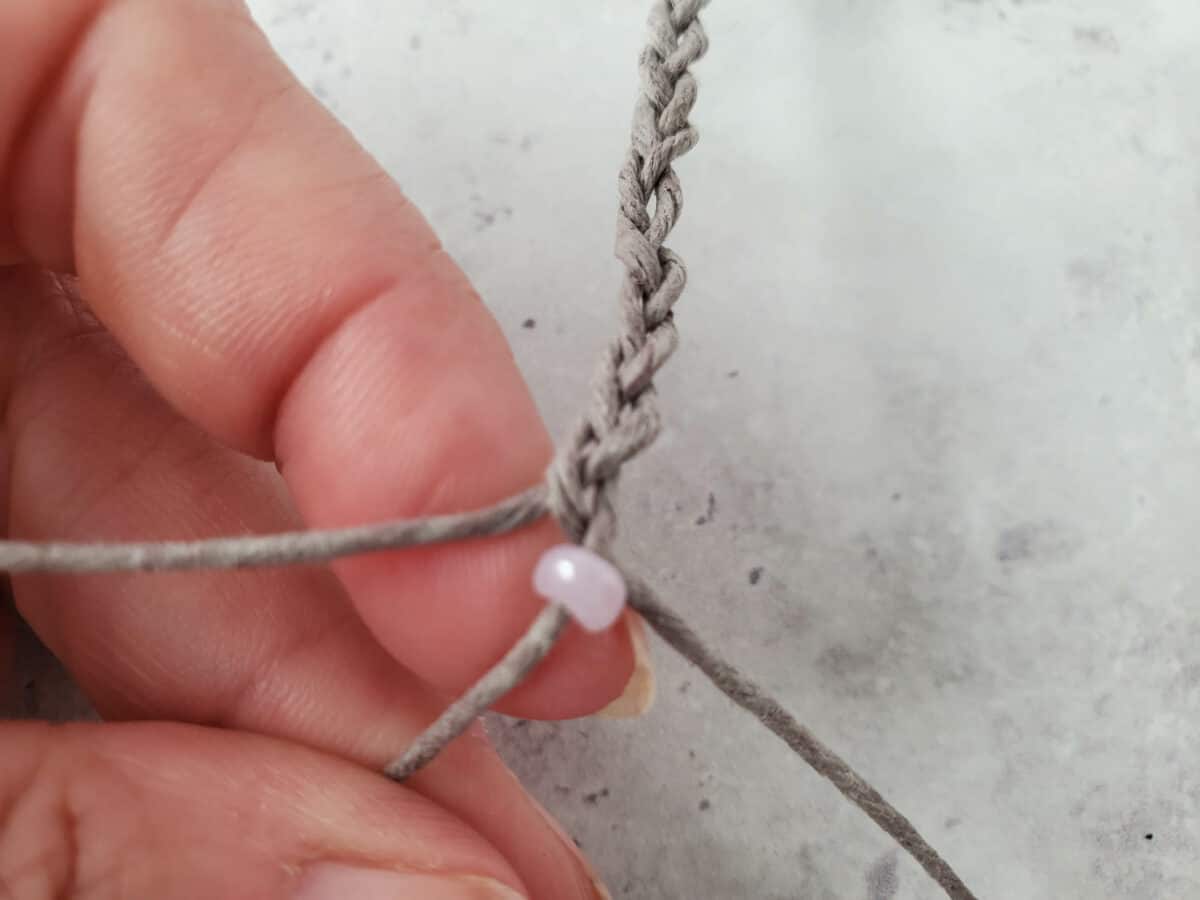
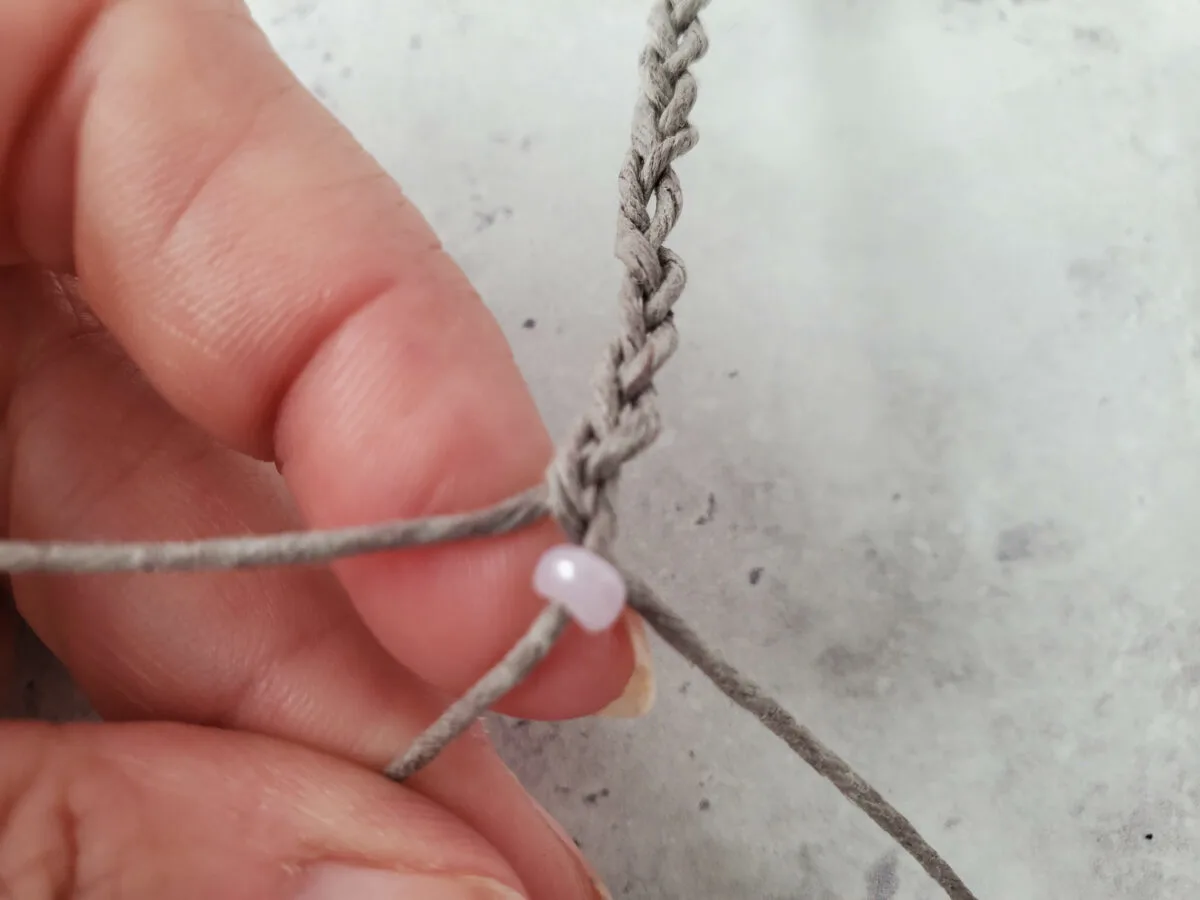
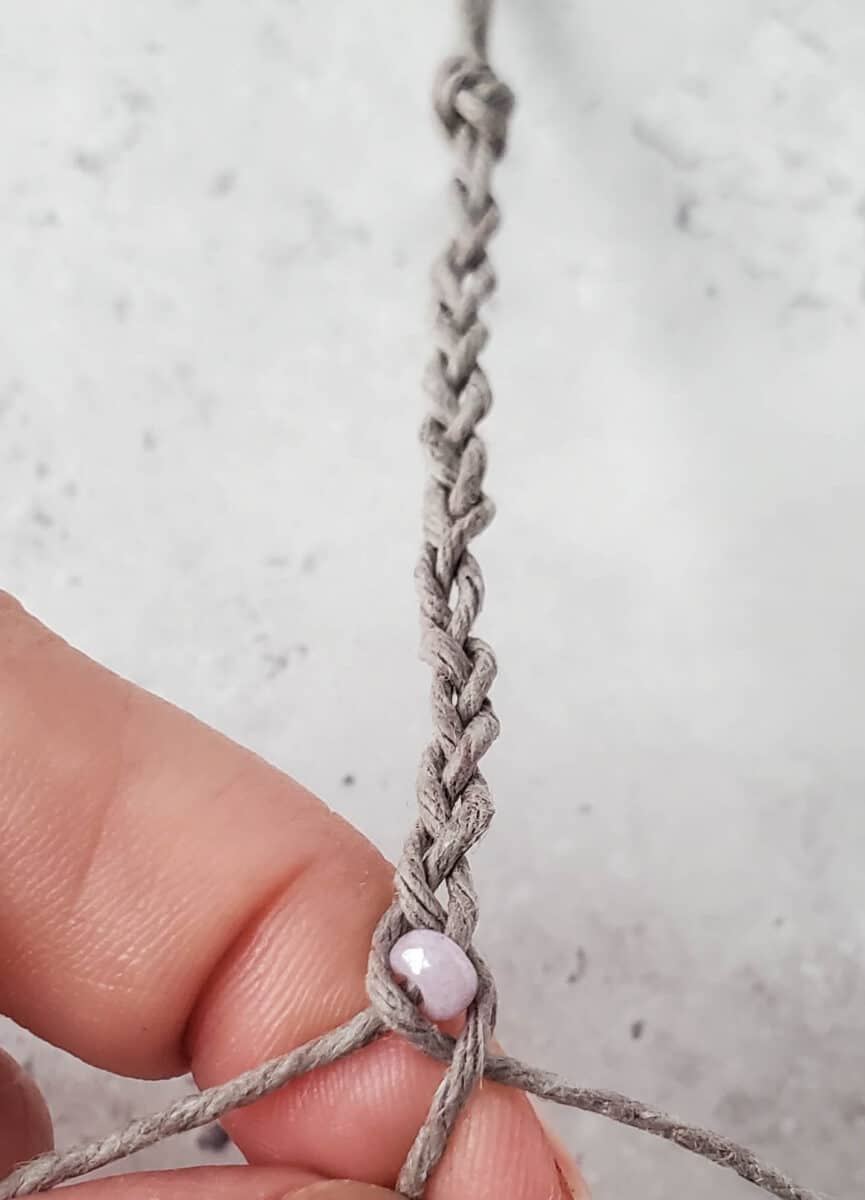
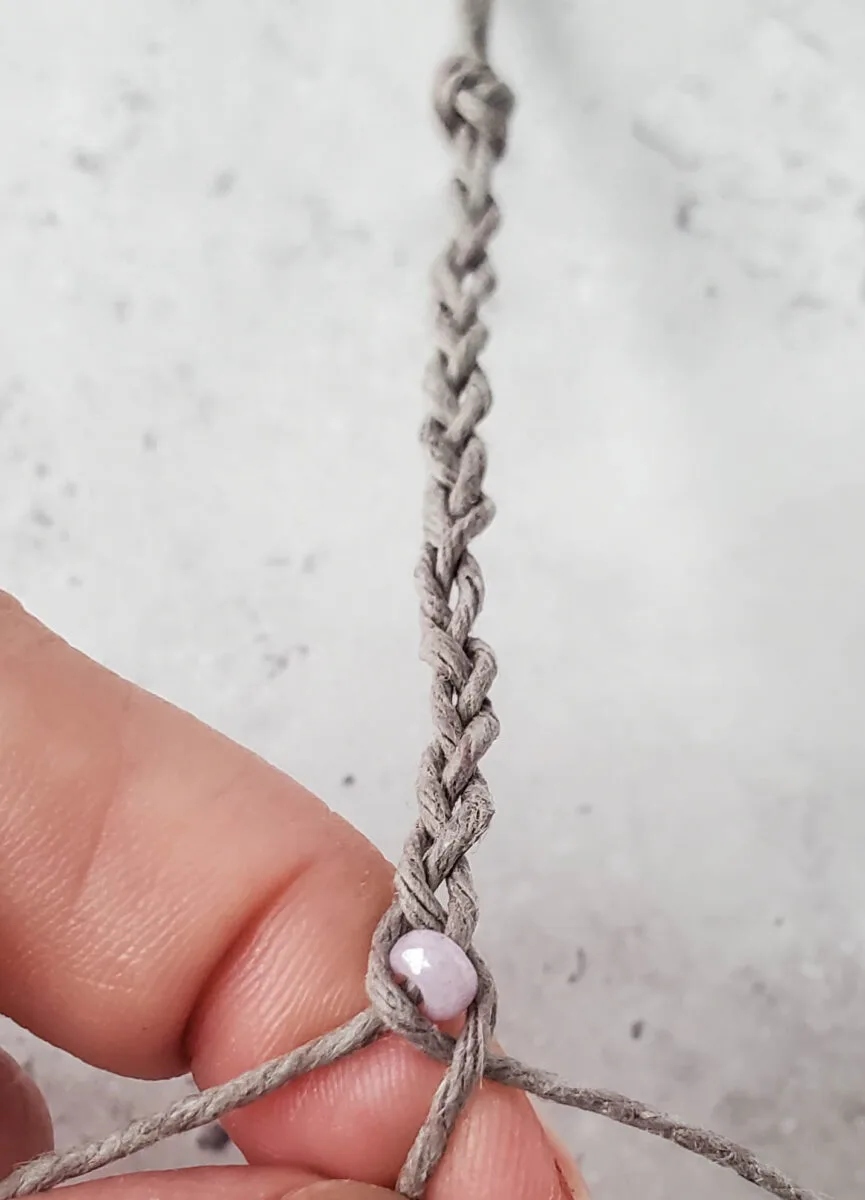
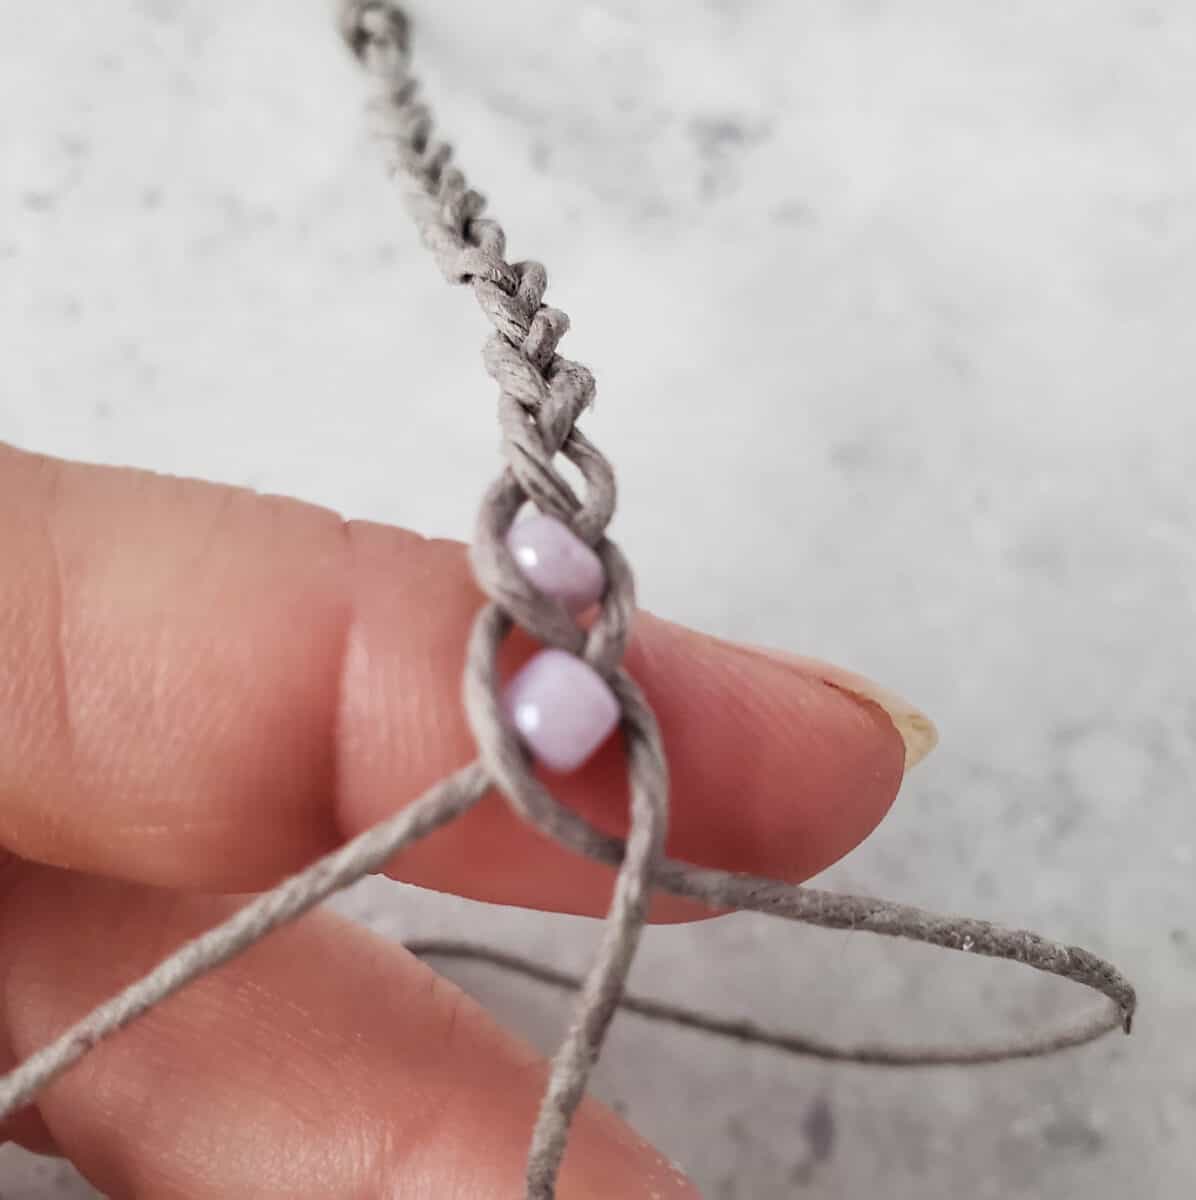
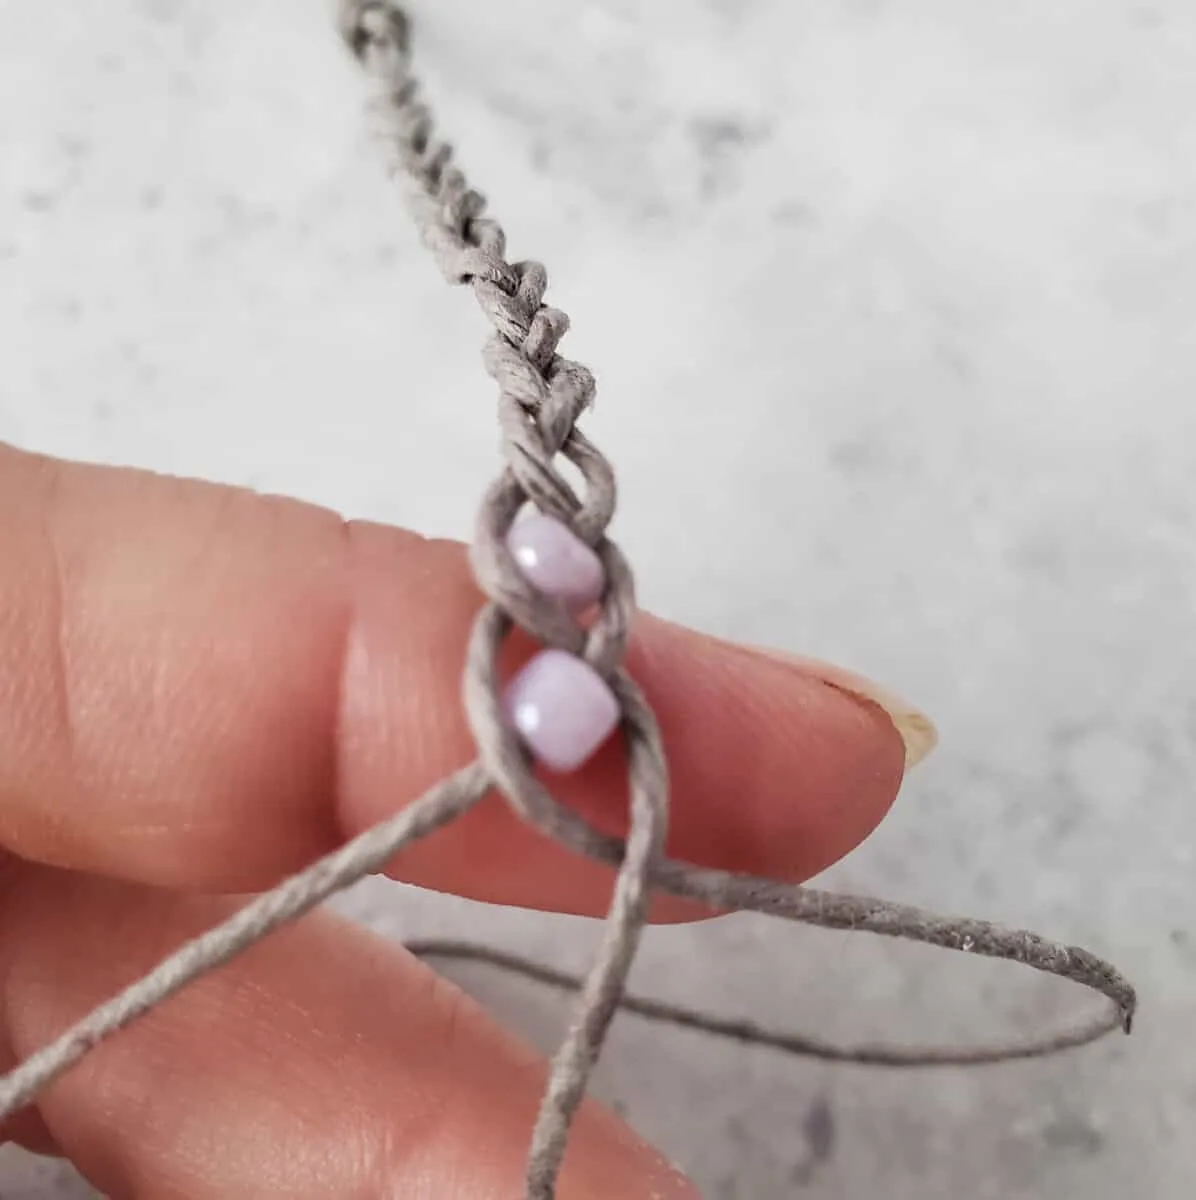
Repeat this step above until all seven beads have been added.
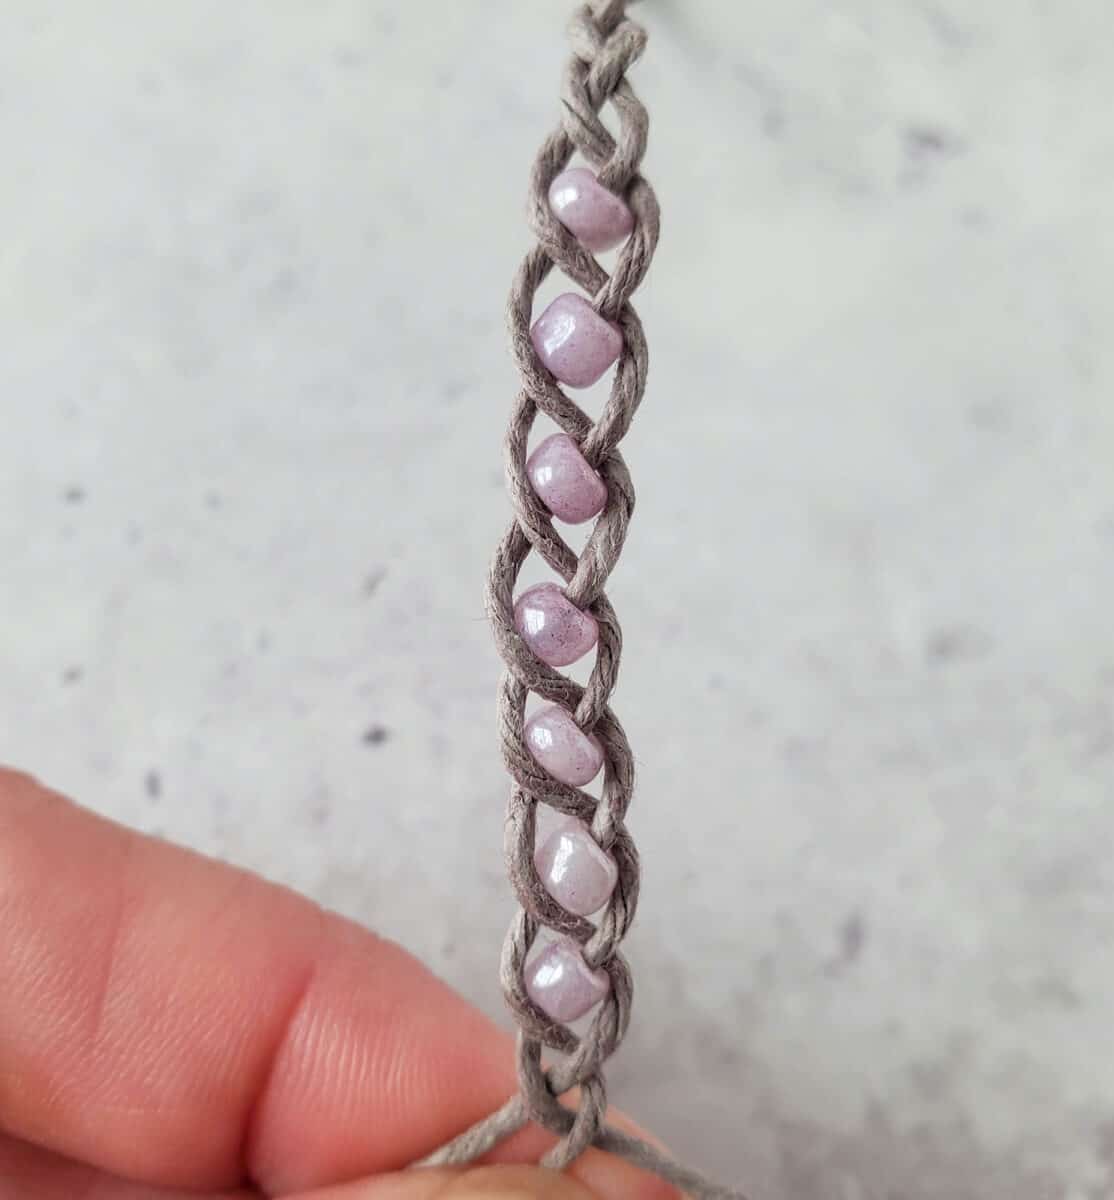
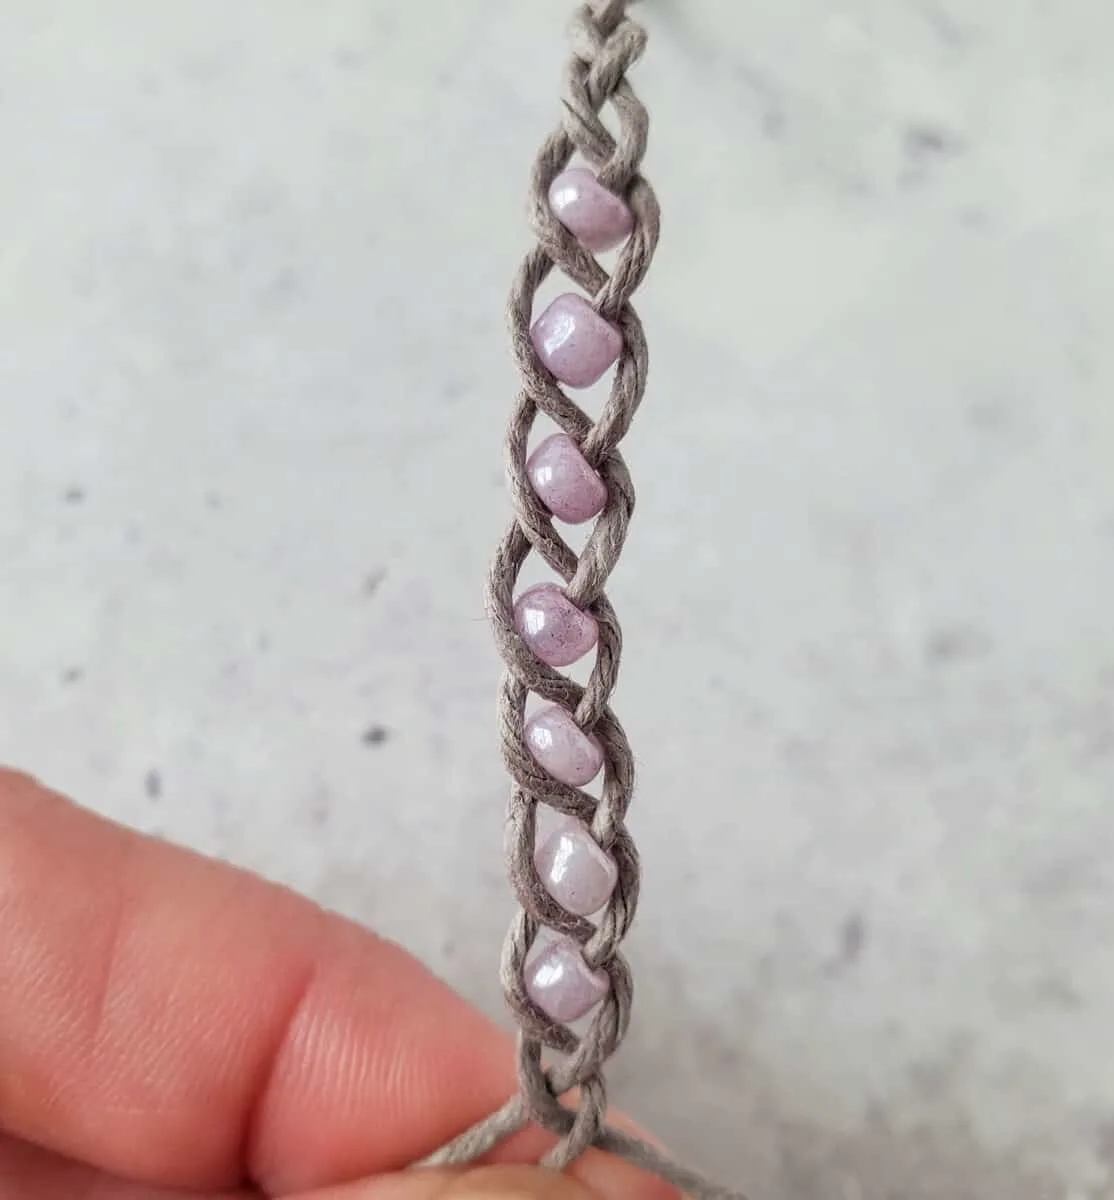
After adding all of the beads, continue braiding the three cords together for another 2 ½ inches, then add a double knot at the end.
Now you know how easy it is to make a wish bracelet! Make several for yourself or your friends to make your wishes coming true!
Save this idea for later by Pinning It to a craft board!
Want to keep your jewelry neat and organized? Our DIY Jewelry Organizer uses Dollar Tree supplies and is so easy to make!
Or use these helpful tips and tricks for organizing your jewelry and accessories.

Patricia
Thursday 24th of July 2025
That is a really cool idea on how to make them. I learned in girl Scouts by timing a not for each wish. But I like the beads better. It makes it look so much adult looking
Kimberly
Saturday 26th of July 2025
It is perfect for adults! Glad you like it this way!!!
Lisa
Sunday 22nd of December 2024
Is there a link for the beads? I have a hard time finding beads that will stay in place and are not too small the thread the hemp.
Kimberly
Friday 27th of December 2024
Hi Lisa, I don't have a link to the beads that I used. Good luck in finding some, I'd try Hobby Lobby if you have one nearby.
Faith Landsburgh-Young
Tuesday 1st of August 2023
Absolutely love the Wish Bracelet idea,and the instructions and photos make it super clear how to make them,can't wait to start. Thank you so much for sharing. Mua.xc 😊❤️🏴
Kimberly
Tuesday 1st of August 2023
Thank you, Faith!!! Enjoy :)