
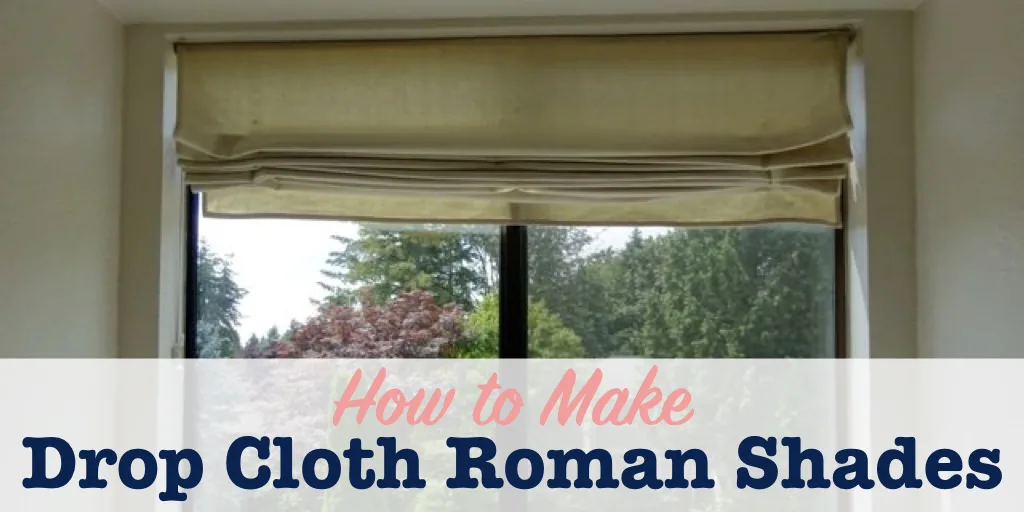
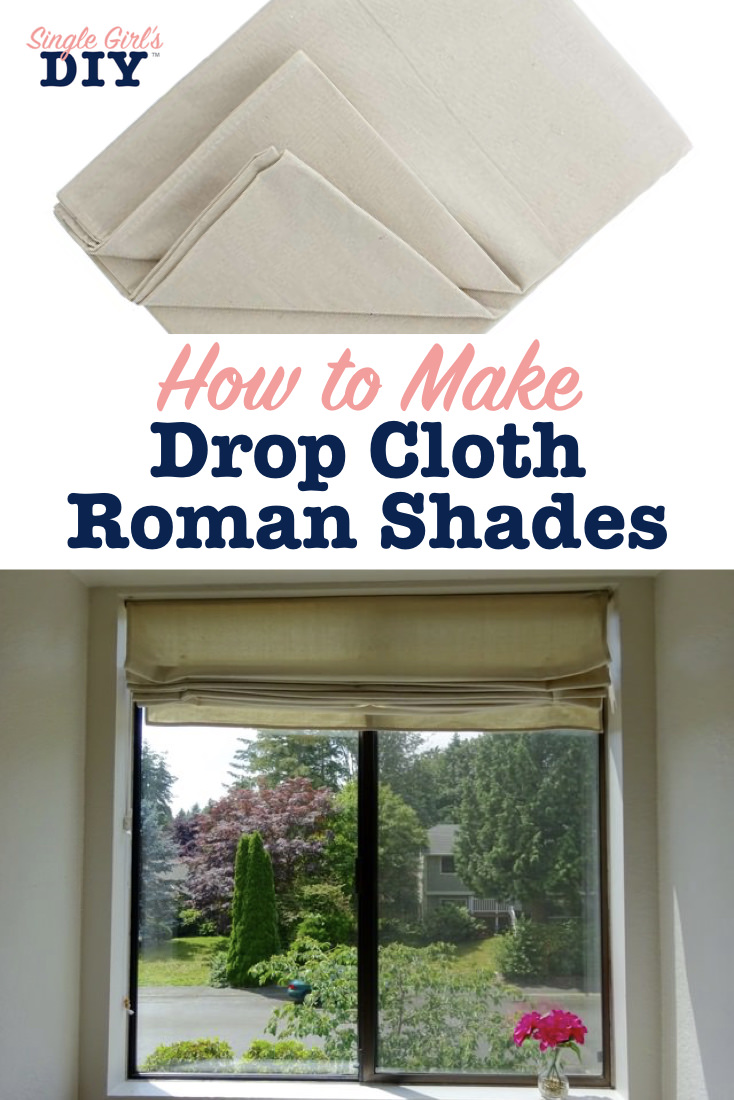
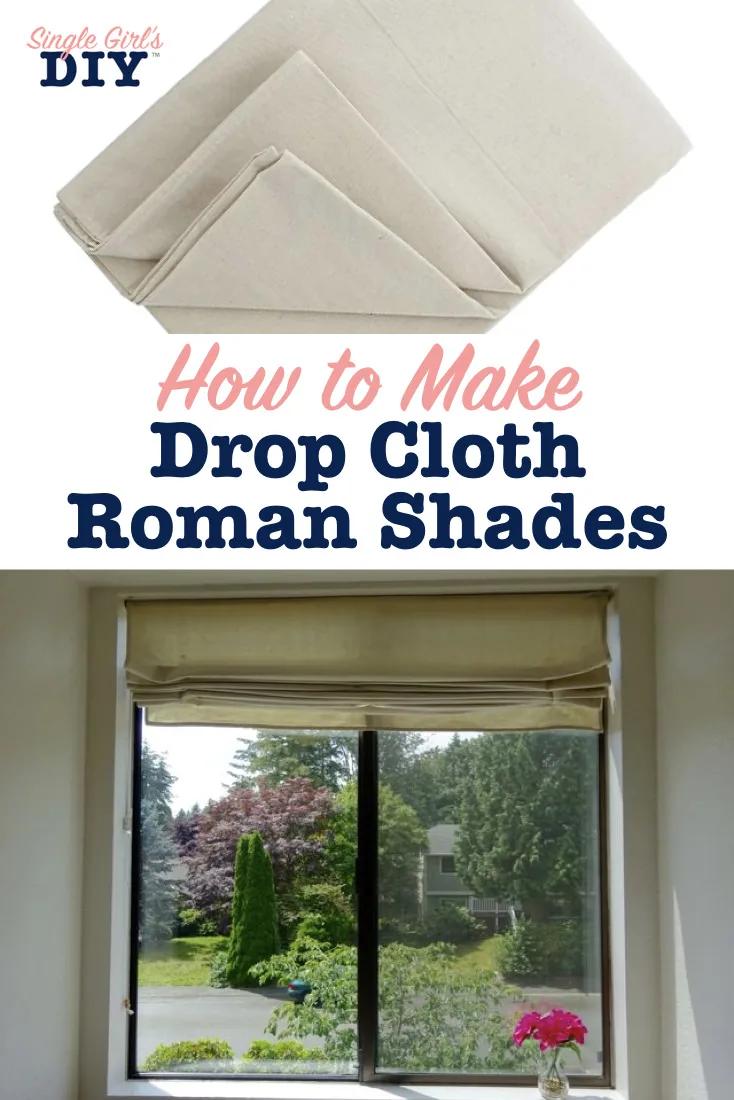
In this post: How to make drop cloth Roman shades with full tutorial.

Need some privacy, but don’t have much money to spend on expensive shades, blinds, or draperies? You’re going to love this super-cheap DIY fix.
DIY drop cloth Roman shades are a super inexpensive way to make your own stylish window coverings, and create privacy. And it’s something anyone can do, I promise.


Learn how to make Roman shades from a painter’s drop cloth.
[disclaim]
MATERIALS NEEDED FOR DIY DROP CLOTH ROMAN SHADES
- Canvas painter’s drop cloth (Be sure to measure your windows before you purchase your materials, so you know what size drop cloth to buy. They come in lots of sizes.)
- Board the width of your window (I used ⅝″ x 1.5″)
- Plastic rings
- Shade pull cord
- Eye screws
- 5/16″ wood dowel rod the width of your shade
- Cord cleat
Tools
- Sewing machine
- Scissors
- Needle & thread
- Staple gun
[/disclaim]
How to Make Drop Cloth Roman Shades
I truly believe that everyone deserves to have a beautiful home, no matter their budget. I know what it’s like when money is tight. Parts of my house were literally rotting off when I bought it, but I had no money for updates. So, I got creative with thrifty DIY updates like this one.
I’m excited to show you how you can make your own Roman shades for just a few dollars. Let’s get started!


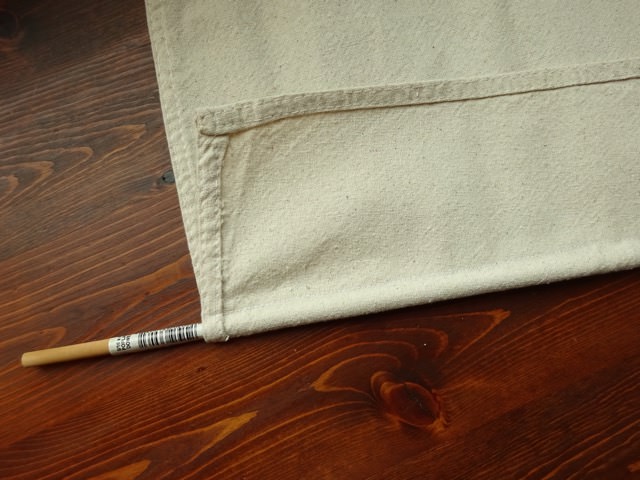
1. Cut the fabric to size
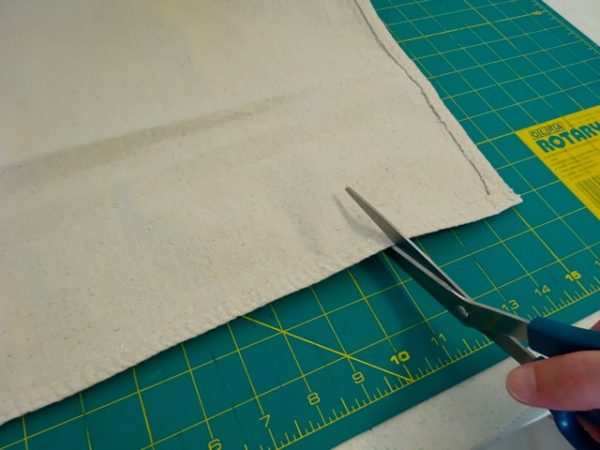

When you cut the drop cloth to size, keep the hems on two sides, to save yourself some work.
Drop cloths come with hemmed edges. You can use at least two of these edges for your shade. Then you’ll just have to sew one edge.
Measuring from the hems on two sides, cut the drop cloth to size:
- Width = Window width + ½″
- Length = Window height + 3.5″ (Though you might want to give yourself a little extra. You can trim the length correctly when you’re nearly done.)
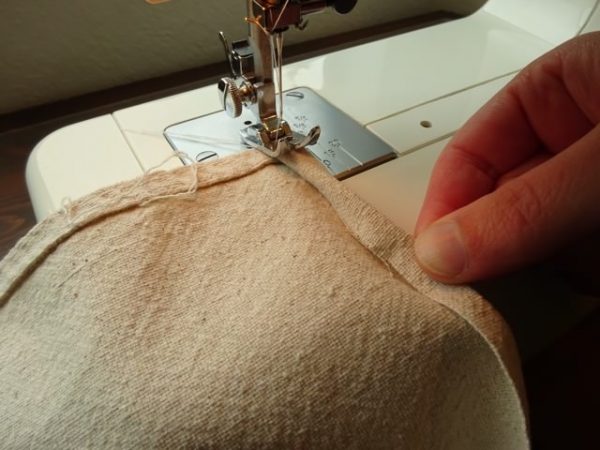
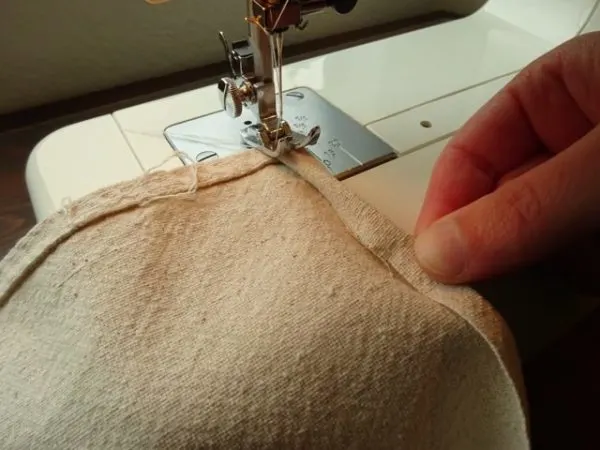
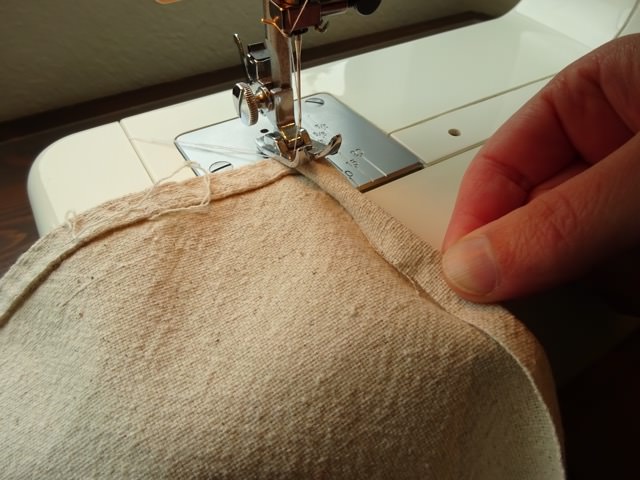
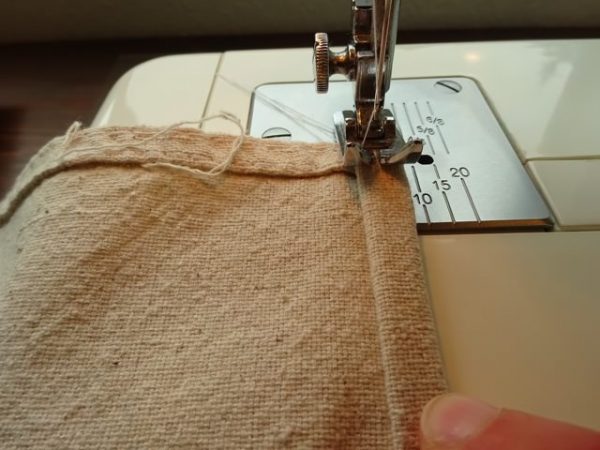
2. Hem the raw side
Hem the cut side of your shade by folding ~¼″ from the edge toward the back side of the fabric. Fold it under again to make a finished edge.
Now stitch close to the inner fold to finish the edge.
-
- Fold under ~¼″ twice, to create a finished edge.
-

- Stitch close to the inner fold to hem the shade.

You only have to do this on the side of the shade. Don’t bother finishing the top cut edge. You’ll see why when we assemble the shade.
3. Stitch a bottom pocket
You’re going to sew a small pocket near the bottom of the shade to insert a 5/16″ wood dowel. The dowel helps the shade keep its shape, and open smoothly.
-

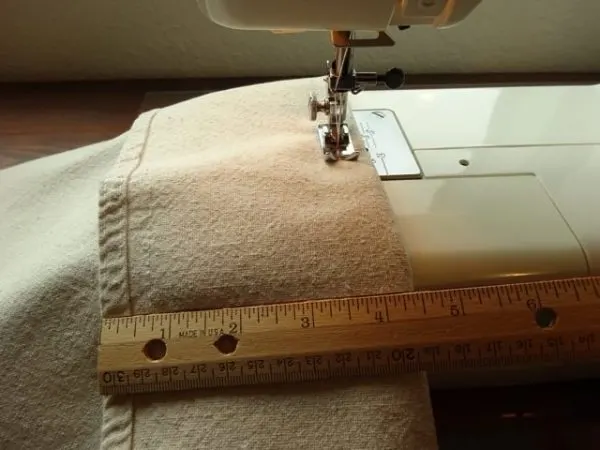
- Stitch a pocket 4.5″ from the bottom.

-

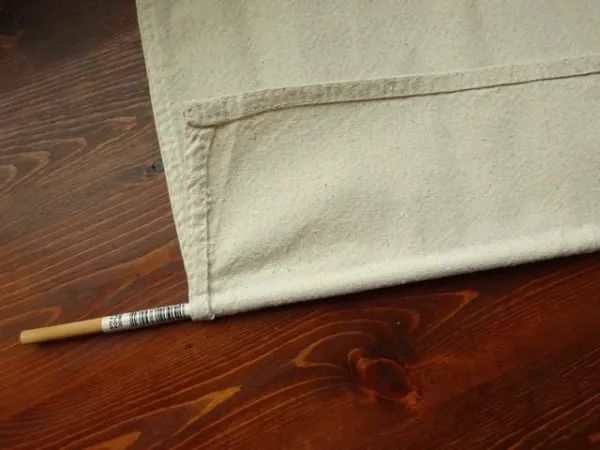
- Slide a dowel into the pocket.
To make this pocket, fold up the fabric 4.5″ from the bottom hem. Be sure to fold the front sides together, so the pocket will be on the back of your shade.
Now, sew a straight seam, ¾″ from the fold. When the shade is finished, you will slide your dowel into the pocket.
4. Mark the lifting points
You’ll need to mark where the shade will fold up on itself when you open it. Mark these points on the center, and both sides of the drop cloth.
First, fold the shade in half to find the center.
Measuring up from the pocket seam you just stitched, use a pencil to mark the back side of the shade along this center fold every 5″.
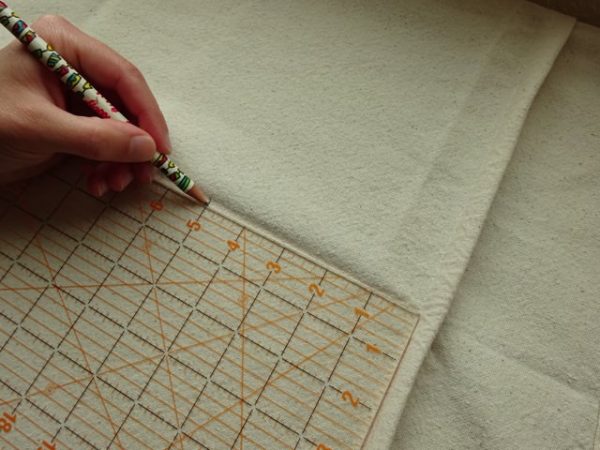
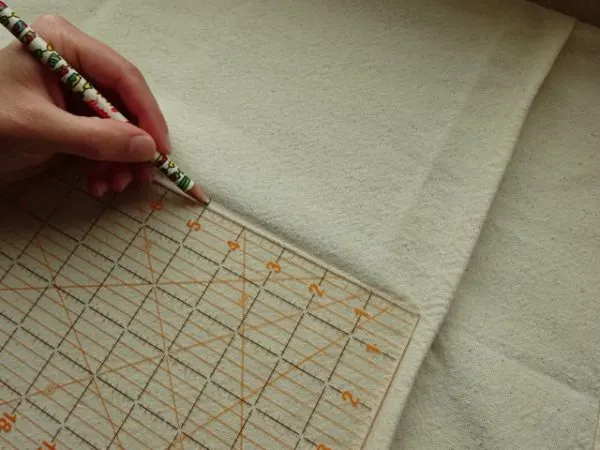
Make small marks every 5″ up from the pocket.
Now measure in 5″ from each side of the shade, and repeat this marking process up each side.
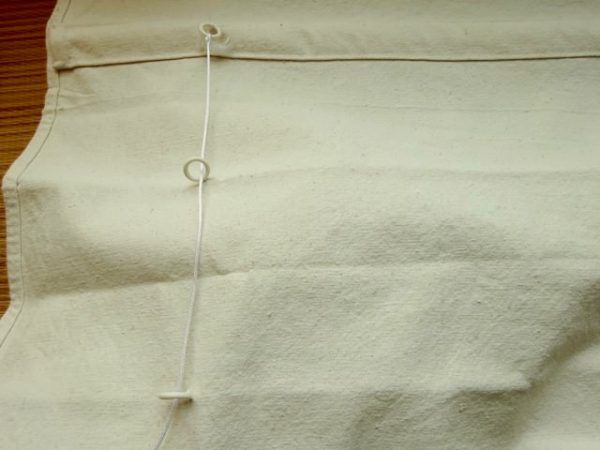
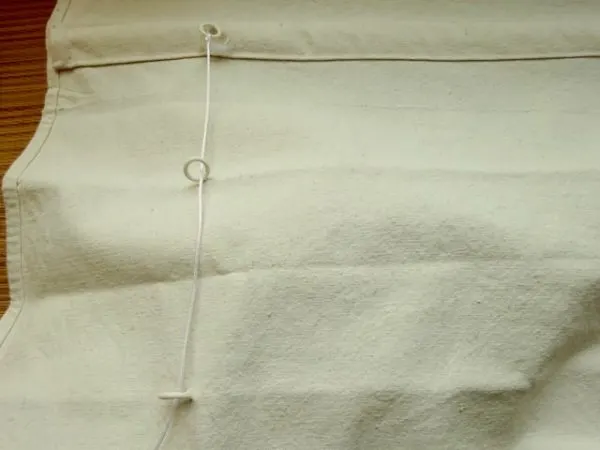
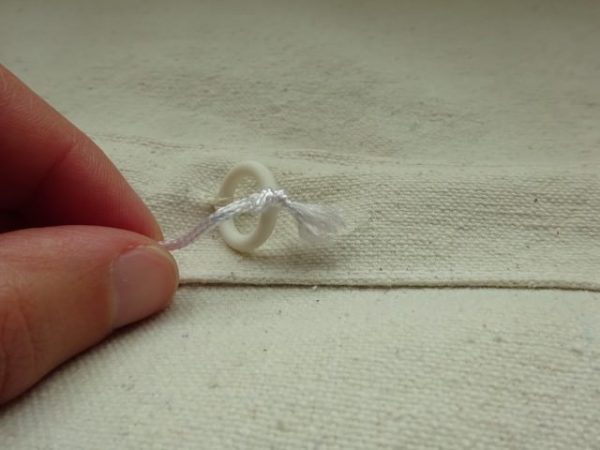
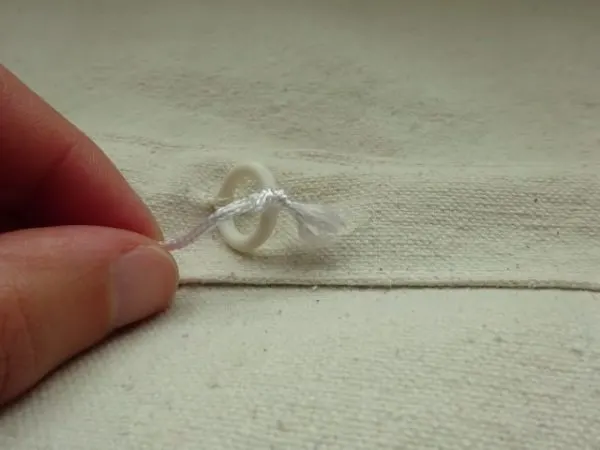
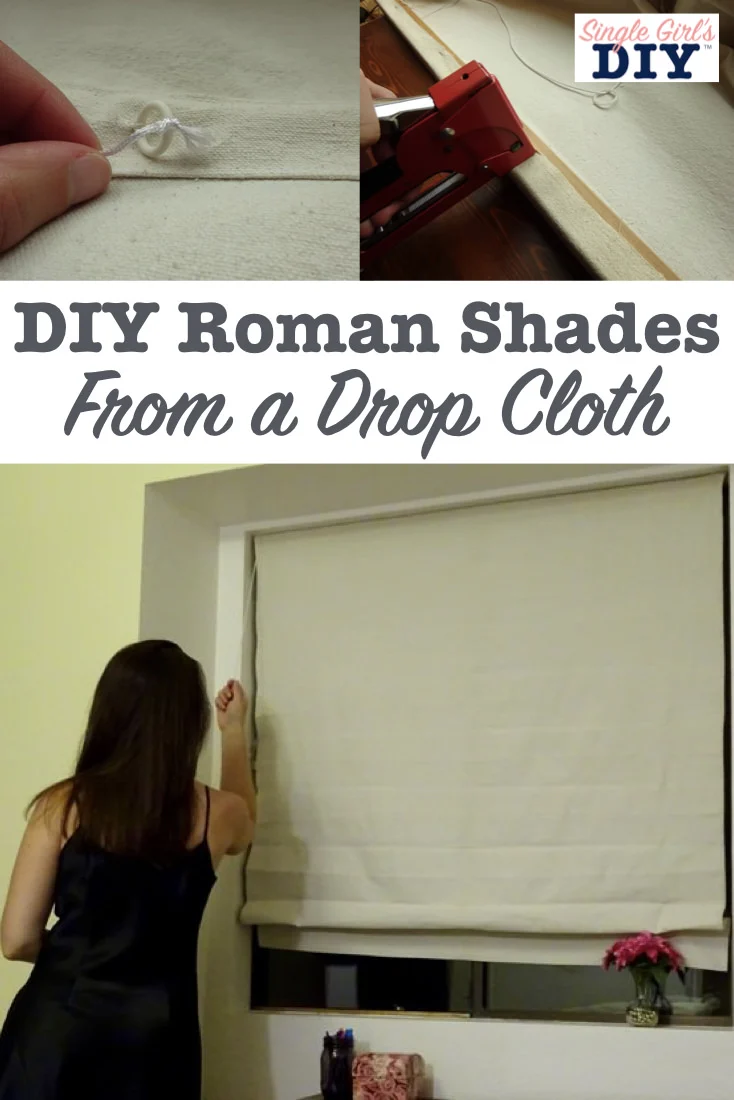
5. Attach the guide rings
You’ll run drapery cord through small guide rings on the back of the shade. This is how the shade will open and close.
Attach rings at each of the marks you just made down the center, and both sides of the shade. Don’t forget to also attach rings to the bottom pocket.
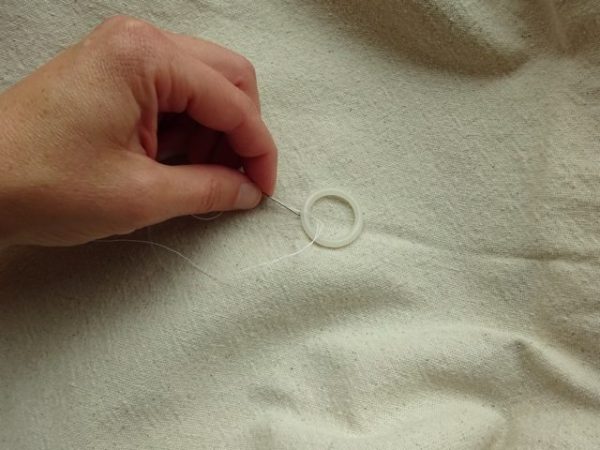

Stitch small rings to the back of the shade for drapery cord guides.
Stitch these by hand, catching just a few threads of the canvas with your needle each time you pass the thread through the ring. Use a thick thread, and make several passes to secure the ring.
6. Run the drapery cord
Be sure you have lots of length of drapery cord to work with. You’ll need it to be the length of the shade, plus enough to run across the top of the window, and have extra to create a pull cord when the shade is closed.
The best way to make sure you have a long enough cord is to run it through the shade first, and then cut it.
Start from the top of the shade and thread the cord down through each ring. When you get to the bottom ring on the dowel pocket, tie the cord to the ring.
-
- Thread the drapery cord through each ring, from top to bottom.

-
- Tie the cord securely to the bottom ring.

Remember to leave yourself lots of extra cord on each run. We’ll finish up with these later.
7. Attach the mounting bar
If you left your shade a little long in the cutting step, now is the time to verify the length, and cut it off. Make sure the shade is the length of your window, plus enough to fold over the board.
Get the ⅝″ x 1.5″ board, and your staple gun.
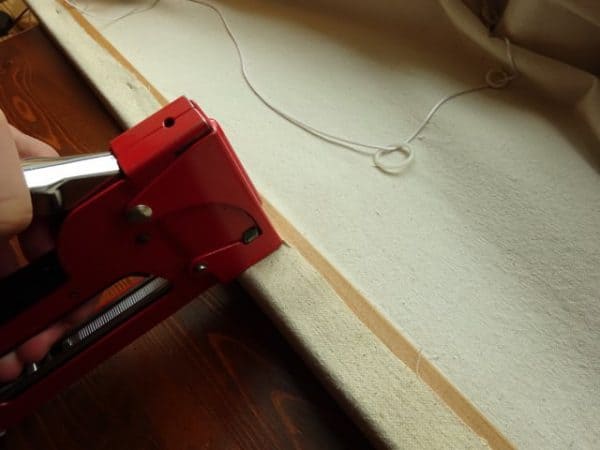
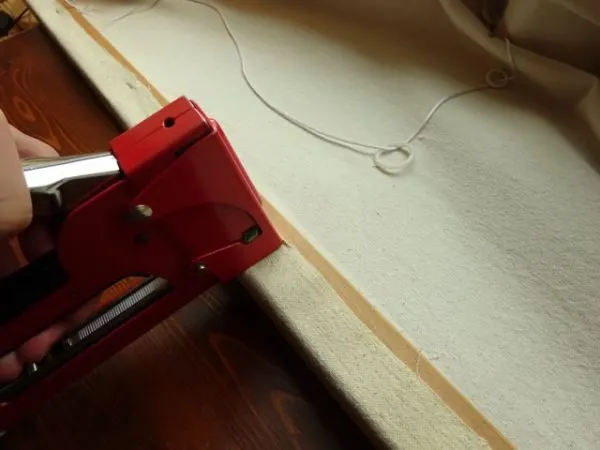
Fold the top of the shade over the board, and staple it in place.
Triple check your shade length! Then, wrap the top of the shade onto a wide side of the board, and staple it in place.
8. Attach eye screws
On the under side of your board, above each row of rings, screw in a small eye screw. Also add one to the end of the board on the side where your pull cord will be. Run your drapery cords through the eyes.
-
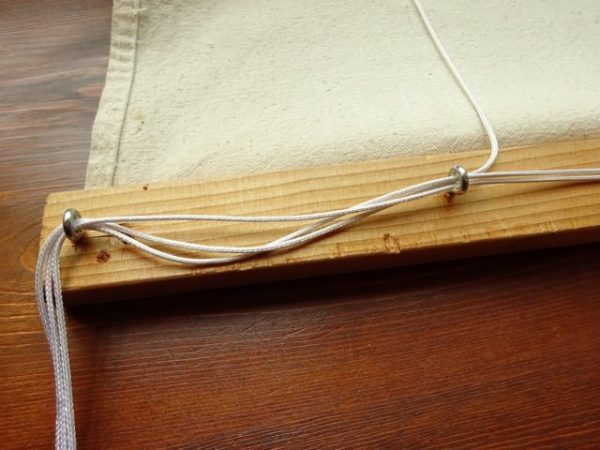
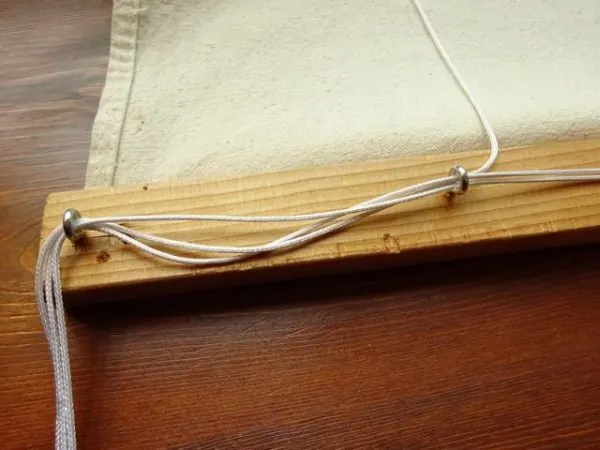
- Run the drapery cord through eye screws.

-
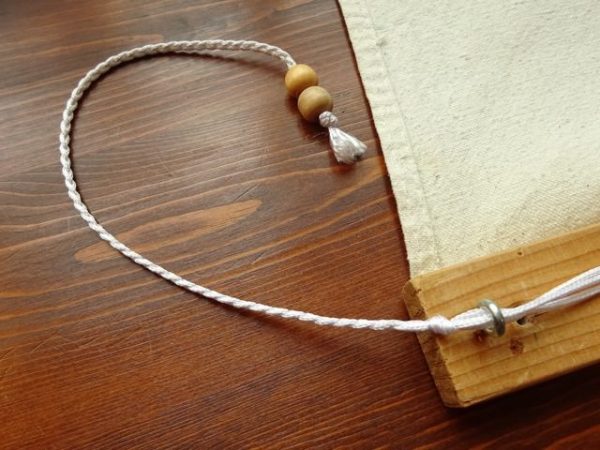
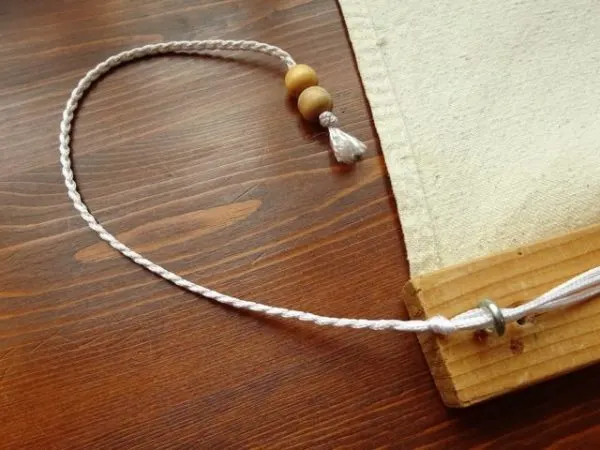
- Braid the strands together to make a pull cord.

Stretch your shade out to its full length to determine how long your cords need to be. Then tie a knot close to the end screw. The remaining tail is your pull cord. I braided my three strands together and added beads.
9. Hang the shade
Pre-drill holes through your top board that are just bigger than the hanging screws you want to use. Then mount the shade by screwing it directly into the window frame.

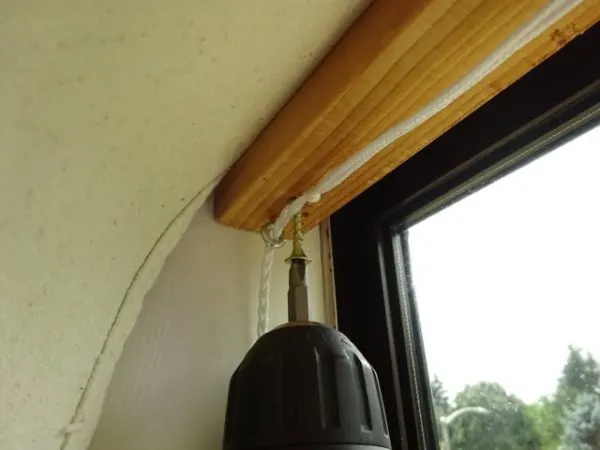
Screw through the top board into the window frame to hang your shade.
10. Install the cord cleat
Pull your draw string to open the shade. You’ll need to wrap this around something in order to hold the shade open.
Select a spot on the side of the window frame that you can easily reach, and that will allow you enough cord length to wrap around a cord cleat. Mark the spot, and install your cleat here by screwing it into the window frame.

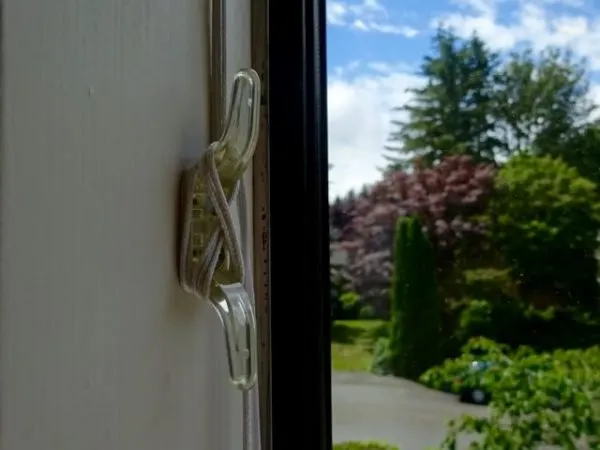
Install your cleat where you can reach it, and have enough cord to wrap around.
Now you can wrap your pull cord around the cleat to hold the shade open.
DIY Roman Shade in 10 Easy Steps
And that’s it! Now you know how to make drop cloth Roman shades.
I made these for my master bedroom as well as my guest room back in 2008, and I still haven’t replaced them with something more expensive. They still look great!
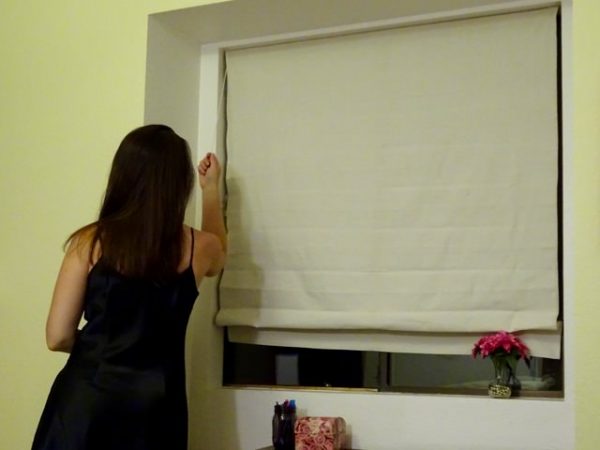
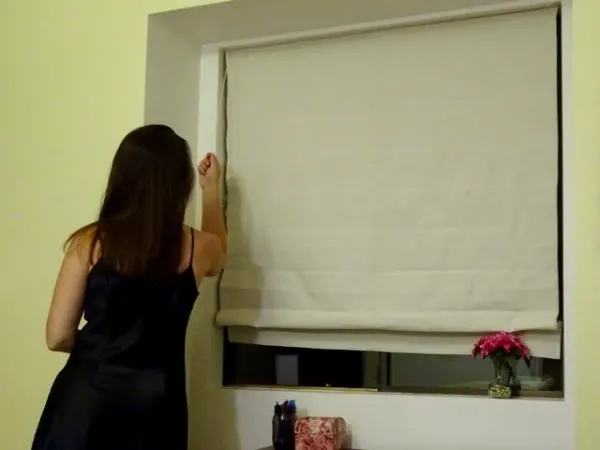
I love my drop cloth Roman shades!
Other Budget-Friendly Drop Cloth Projects You’ll Love
Depending on how many window shades you need to make, you’ll probably have some drop cloth material left over. Don’t let it go to waste!
Here’s how to make pot holders from drop cloth scraps.
You could even use drop cloth fabric to slipcover a chair.
Check out this post for more inspiration:
4 STYLISH DROP CLOTH HOME DECOR PROJECTS YOU CAN MAKE FOR CHEAP
And don’t forget to sign up for our mailing list below, to get more ideas and inspiration like this delivered to your inbox every week!

C. Blinds
Monday 7th of September 2020
This is a great post; I will share as much as I can.
Happy Reader
Friday 28th of August 2020
I loved reading this article.The article is much informative regarding work as well.
Trilby
Sunday 16th of February 2020
I'm definitely making these. Thank you so much for the clear and precise directions! I work with 100% linen a lot. I will probably use canvas-weight linen, even though I will have to hem more edges. Thanks!!!!
Jenny
Sunday 16th of February 2020
Can't wait to learn how yours turn out! Let me know how it goes.
5 Low-Lift Projects That Make Your Home Look Way More Expensive - E-Home Buyer
Friday 14th of February 2020
[…] and affordable to add drop cloth shades like these to your space thanks to tutorial by Jenny of Single Girl’s DIY. Your space will feel that much more cozy and complete with this easy […]
Shirley
Thursday 7th of February 2019
This is without a doubt the easiest Roman shade I have found online! Love the way it looks and I will be making a few!
Jenny
Sunday 10th of February 2019
Thanks, Shirley! It is so easy. Let me know how yours turns out!