
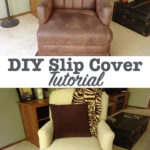
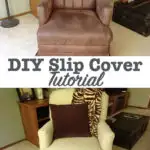


Here are the easy steps for how to make a slipcover for a chair without a pattern. Plus, the best fabrics to choose for a chair cover.
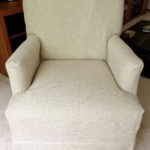
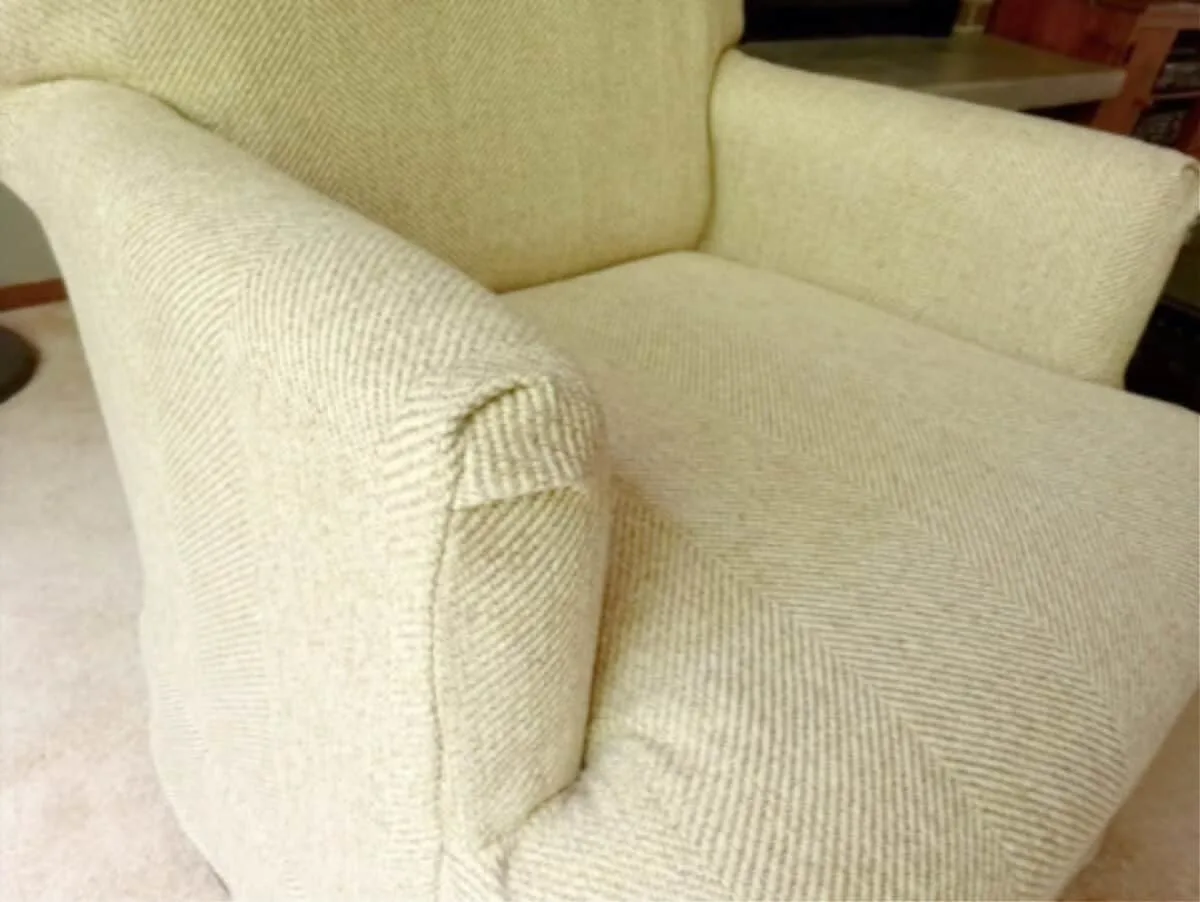
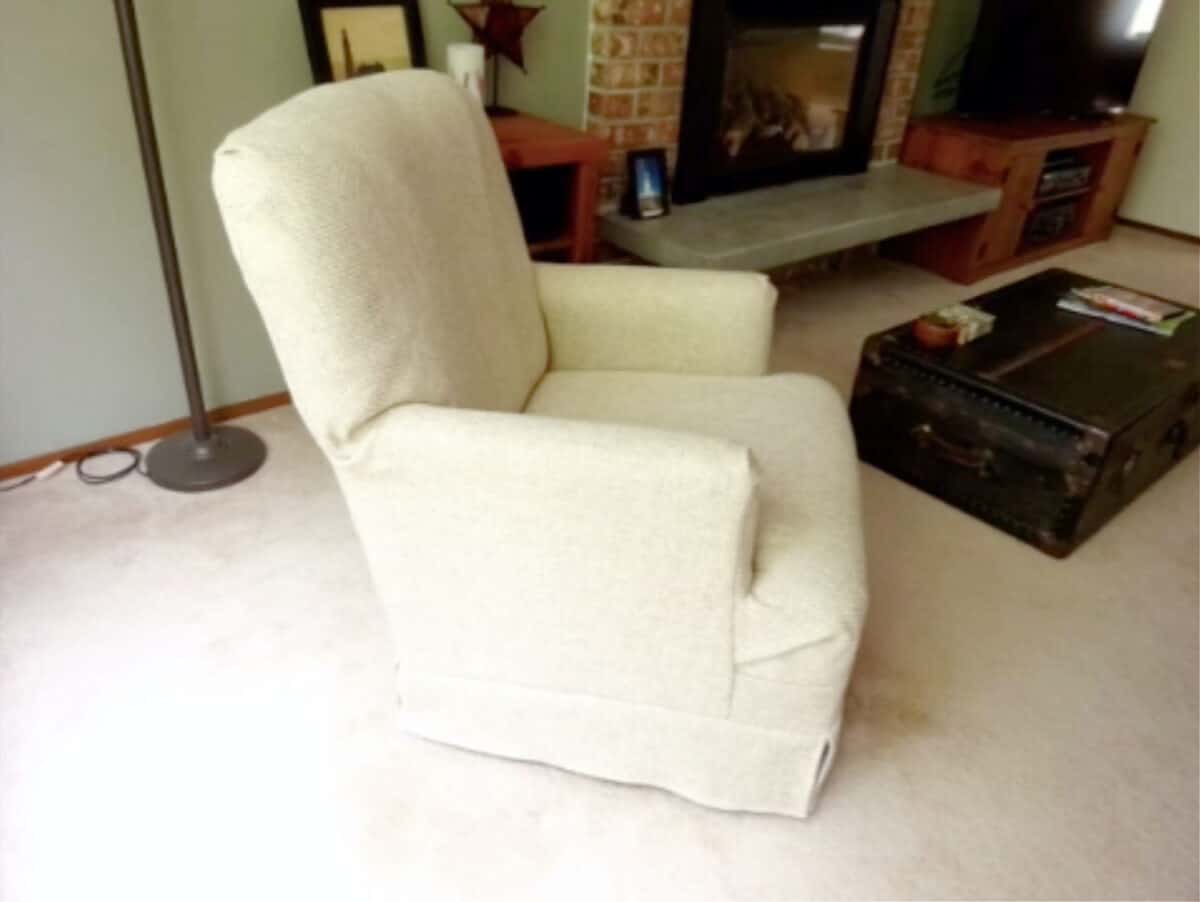
Believe it or not, I picked up this chair at a thrift store for $3. That is one amazing bargain and I couldn’t resist a great thrift store makeover!
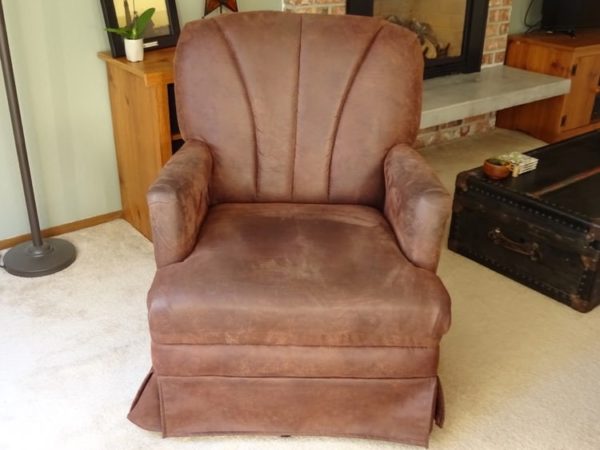

The chair was still in great shape, but I wanted to make a slip cover for it because I didn’t like the look of it in my living room.
And it was embarrassing to sit on the microfiber fabric and leave a butt imprint when I stood up!
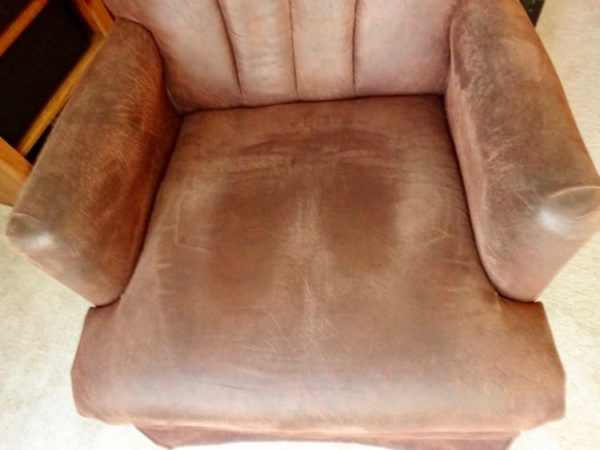

First, I considered painting the upholstery. But I didn’t like the microfiber fabric and I didn’t think I’d like the texture.
So, even though I’ve never tried anything like this before, I decided to make a fabric slip cover. And it wasn’t that hard! But I had some old-fashioned help.
Years ago, my mom gave me a home decorating book written in the 1940’s. It has lots of interesting tips, methods, and ideas from another era.

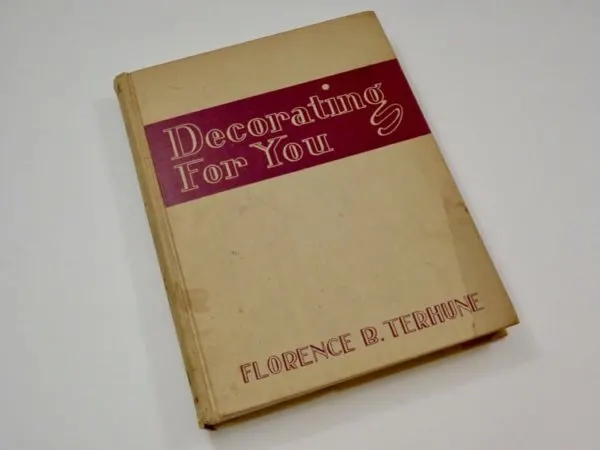
I never thought I’d actually use anything from this book, but it came in handy when I discovered there’s a whole section on how to make slip covers. (It’s titled Slip Cover Enchantment. Yes, apparently it was truly magical to cover chairs back then! LOL!)
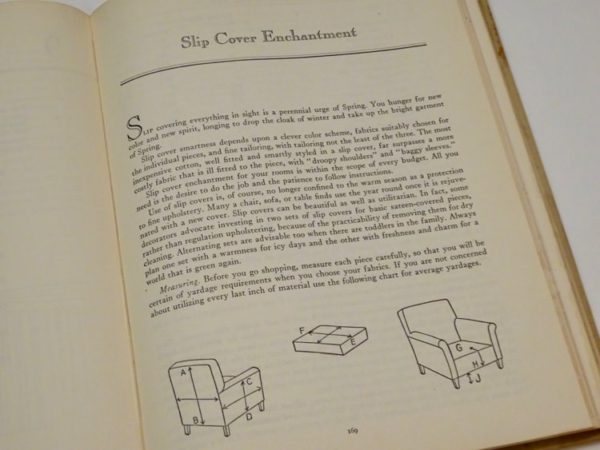
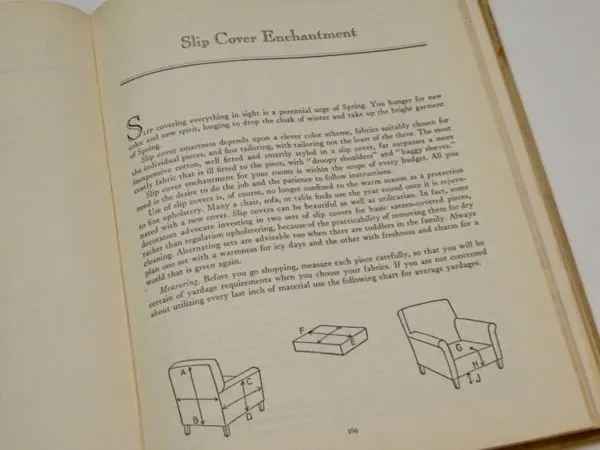
I followed the diagrams and descriptions in this book and they worked! Basically it’s just draping the fabric over the chair and pinning where needed. It’s not hard, it just does take time.
I’ll show you how I did it for my chair in the tutorial below.
Best Material to Cover Chairs
You want a sturdy, thick fabric that can withstand constant wear and tear from sitting on it. The material should be easy to clean and strong enough to hold seams stitched together.
Upholstery fabric is made specifically to withstand wear and tear. It is strong enough to keep seams together even under the pressure of people sitting on the covers. The material is also wider than other fabric so that you can cover more surface.
Great fabric choices for covering chairs are:
- Upholstery fabric (Etsy has some wonderful choices!)
- Denim
- Canvas
- Drop cloth fabric
Do not use the pretty quilting fabrics that take up most of the fabric store. They are smaller in width, and they are much thinner in weight.
I would NOT choose a fabric with stripes or any sort of print that you have to match up. This would be too hard for a beginner upholsterer. You would need to line up the pattern with every piece of the slip cover you make, and it could result in you needing more fabric.
Choose something with no visible pattern, or such a busy pattern (like a floral) that it doesn’t matter if each piece matches up or not.


How to Make Chair Covers
Materials
- Upholstery Fabric (The amount you need will depend on the size of your chairs. I needed a little less than 4 yards of 57″ wide fabric.)
- Long straight pins (a LOT of them)
- Fabric scissors (not scissors you cut paper with)
- Sewing machine
- Heavy duty thread for upholstery (in a color that matches your fabric)
- Iron
Directions
Important Tip: Make sure to work with the wrong side of the fabric facing out. That way, after you sew everything and turn it around, the right side of the fabric will be on the outside.
If you like the look of my fireplace in the photos below, I did it myself without any demolition! Check out my DIY of how to update a fireplace hearth.
In a hurry? You can Pin This Tutorial so that you have it for later.
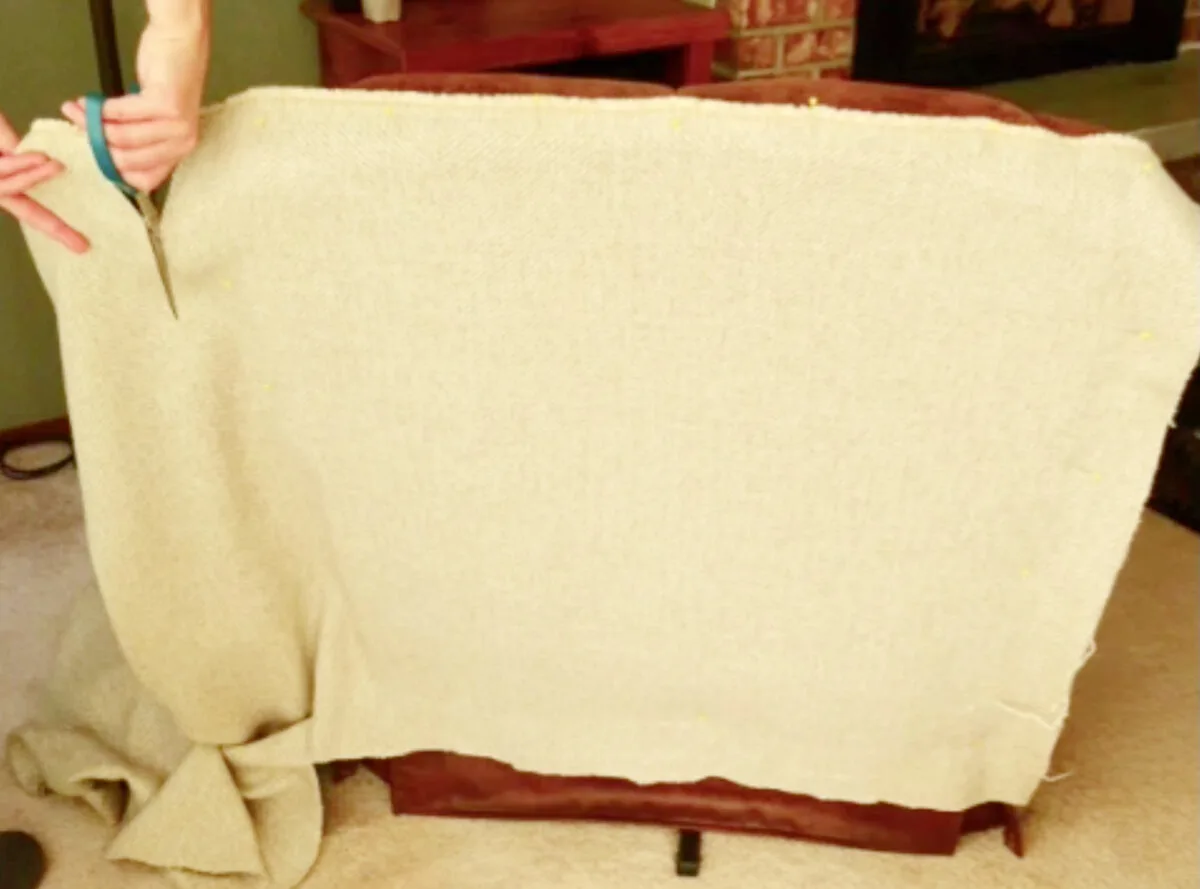
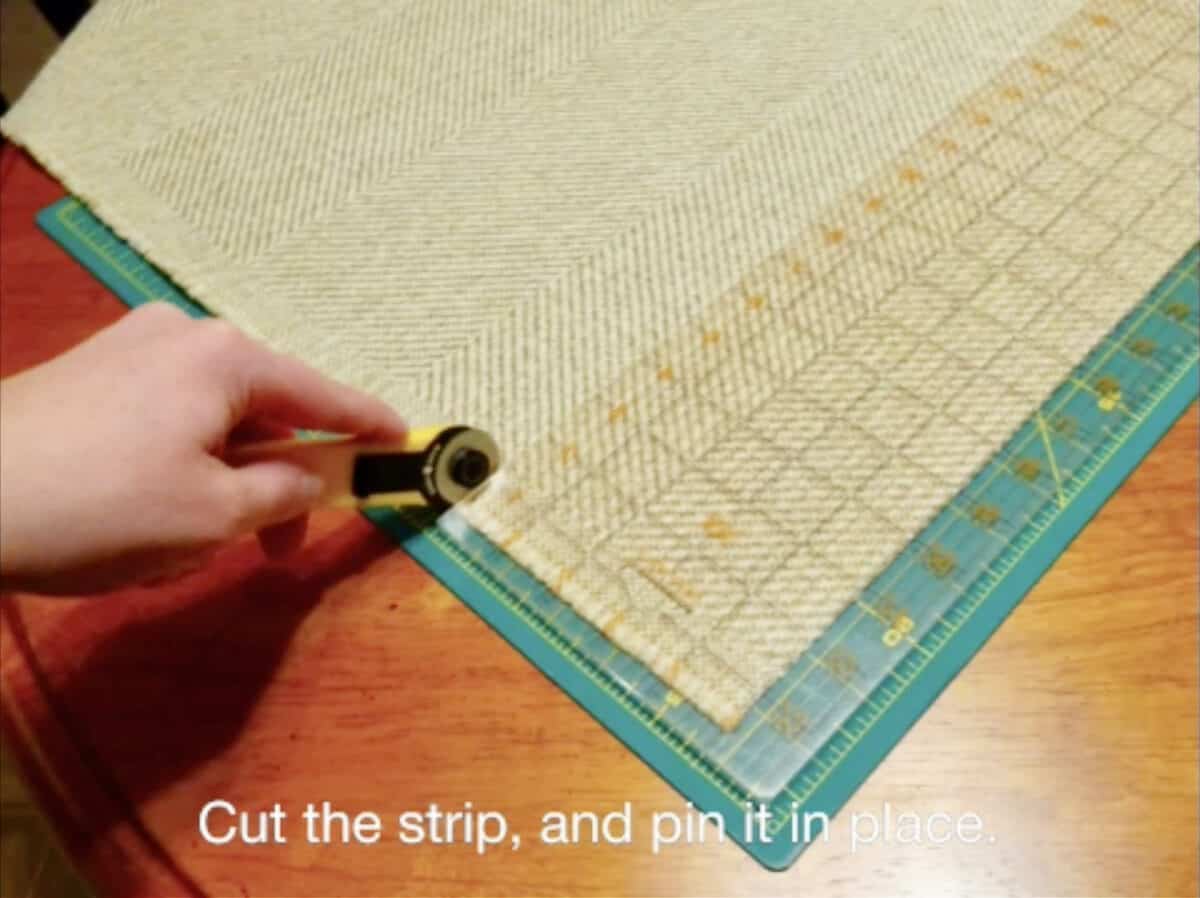
1. Lay the fabric (with the right side laying on the chair and the wrong side facing out towards you) on the back side of the chair. Pin the fabric to the chair itself to keep it on there.
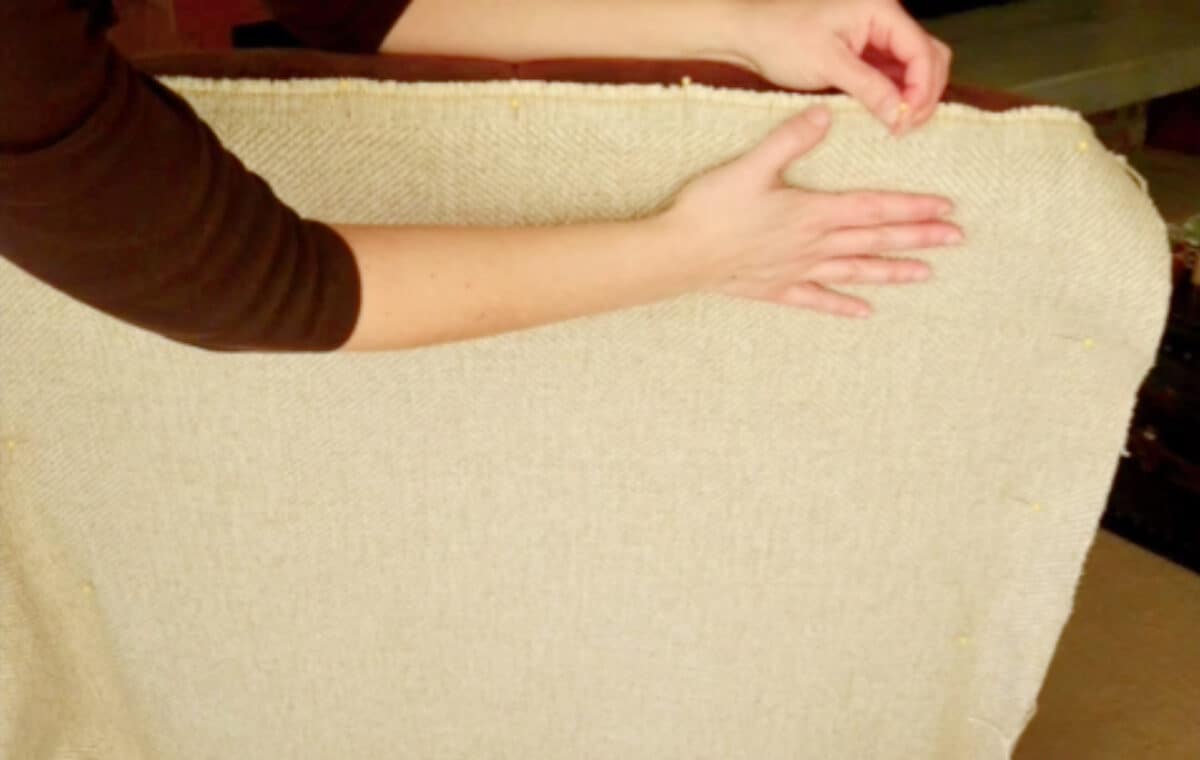

Then, cut the fabric to make that piece. You will want to cut leaving generous seam allowances. For instance, cut about 2 inches wider than the length and height of the back of the chair around all sides. That way, you’ll have plenty to make seams.

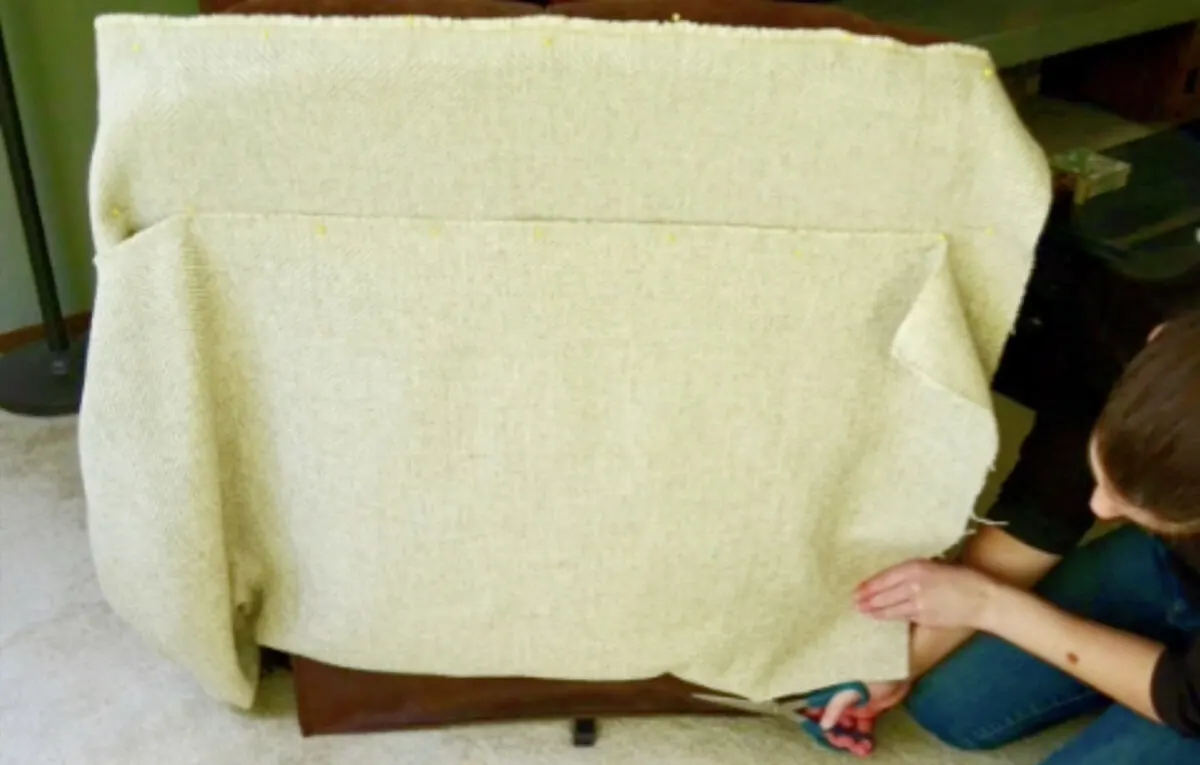
2. Now, drape fabric across the front of the chair. Be sure that the wrong side of the fabric is facing towards you, with the right side facing towards the chair.
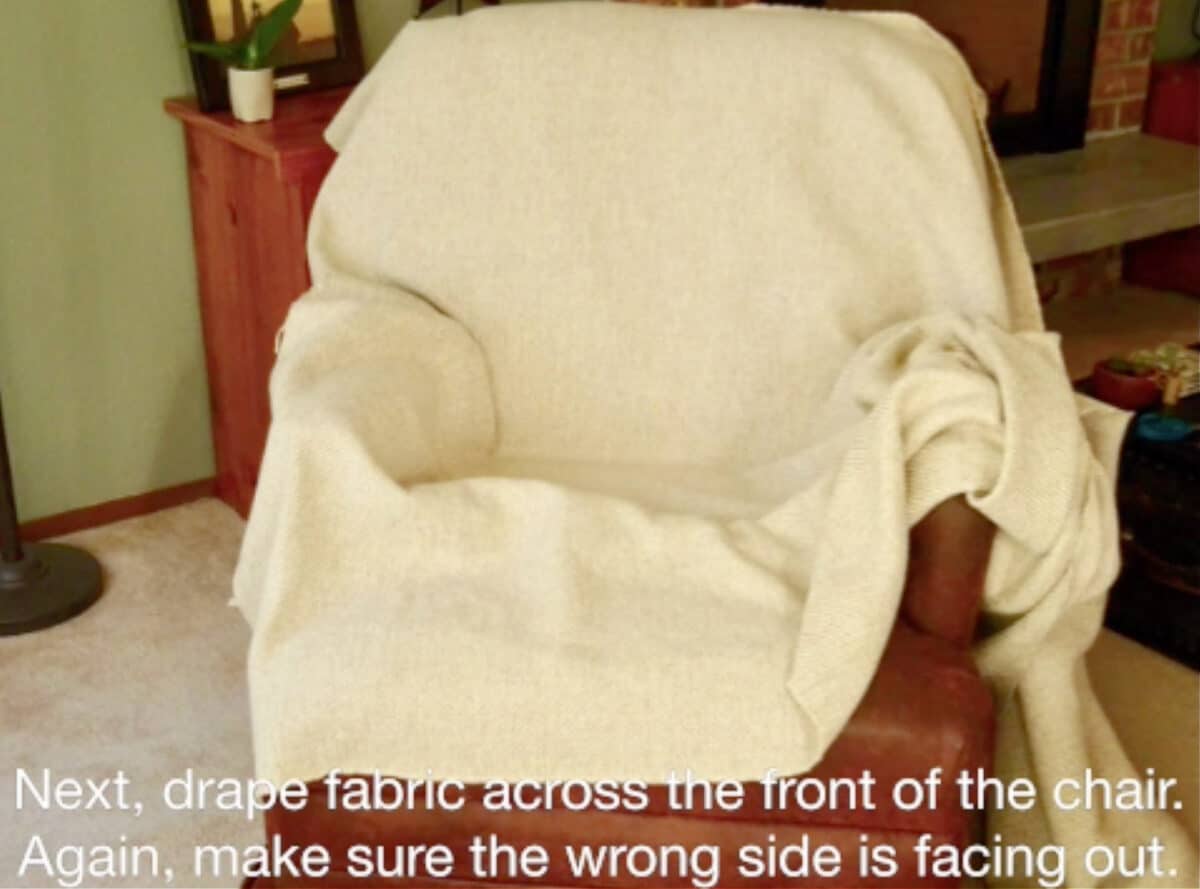
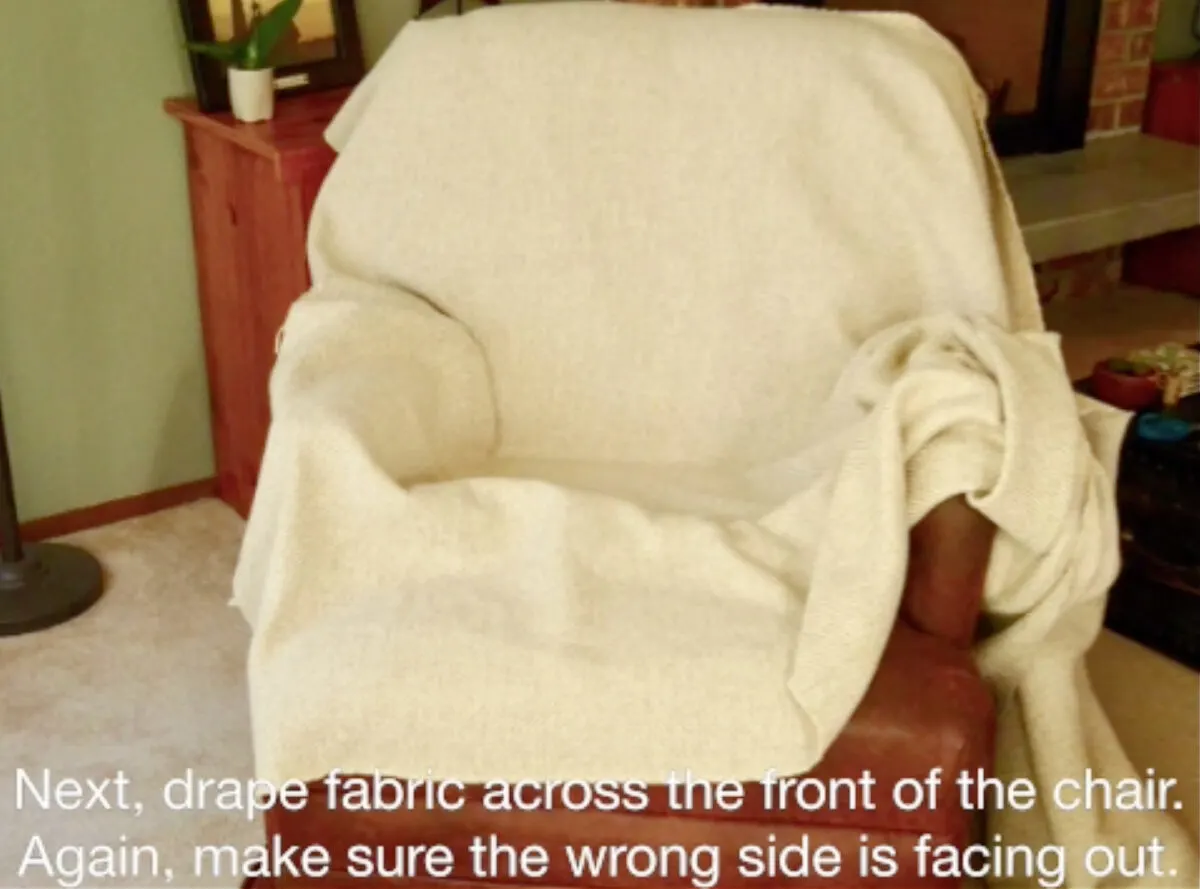
Pin the fabric on the front to the back pattern piece which should still be attached to the back of the chair.

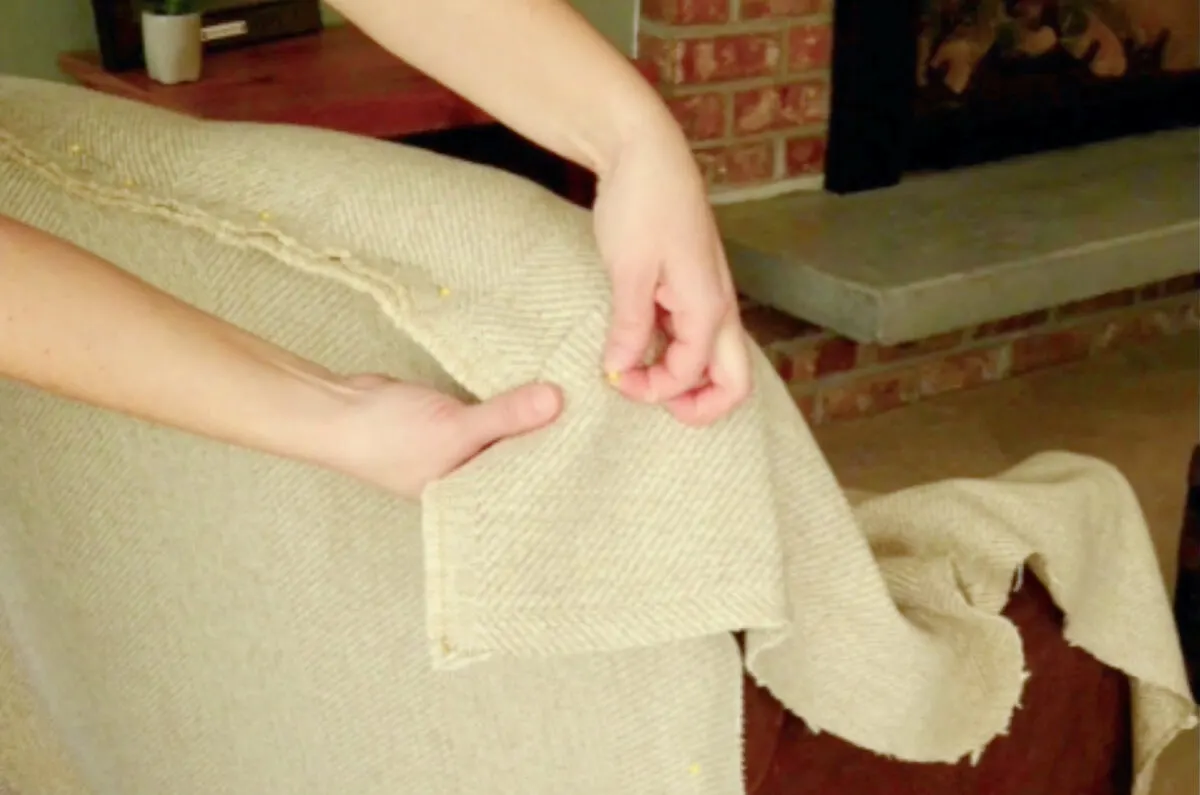
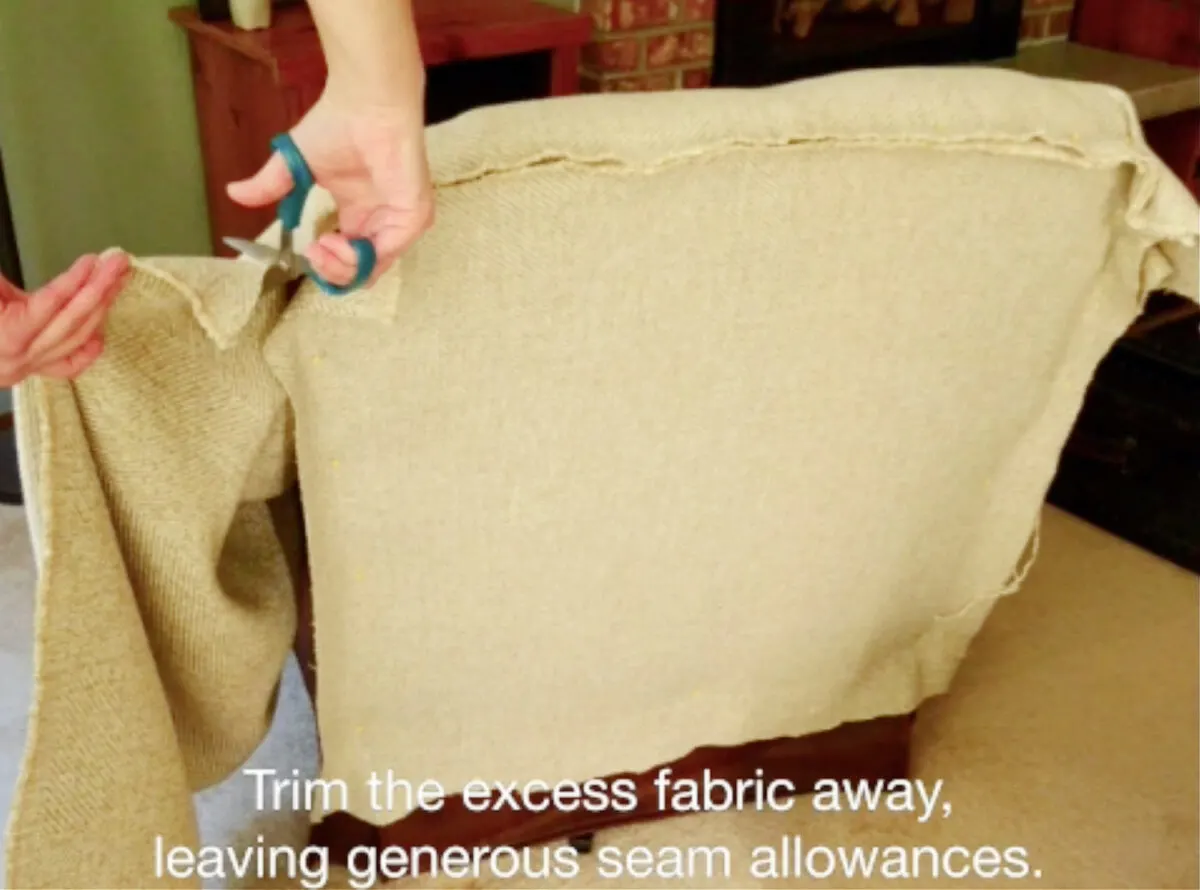
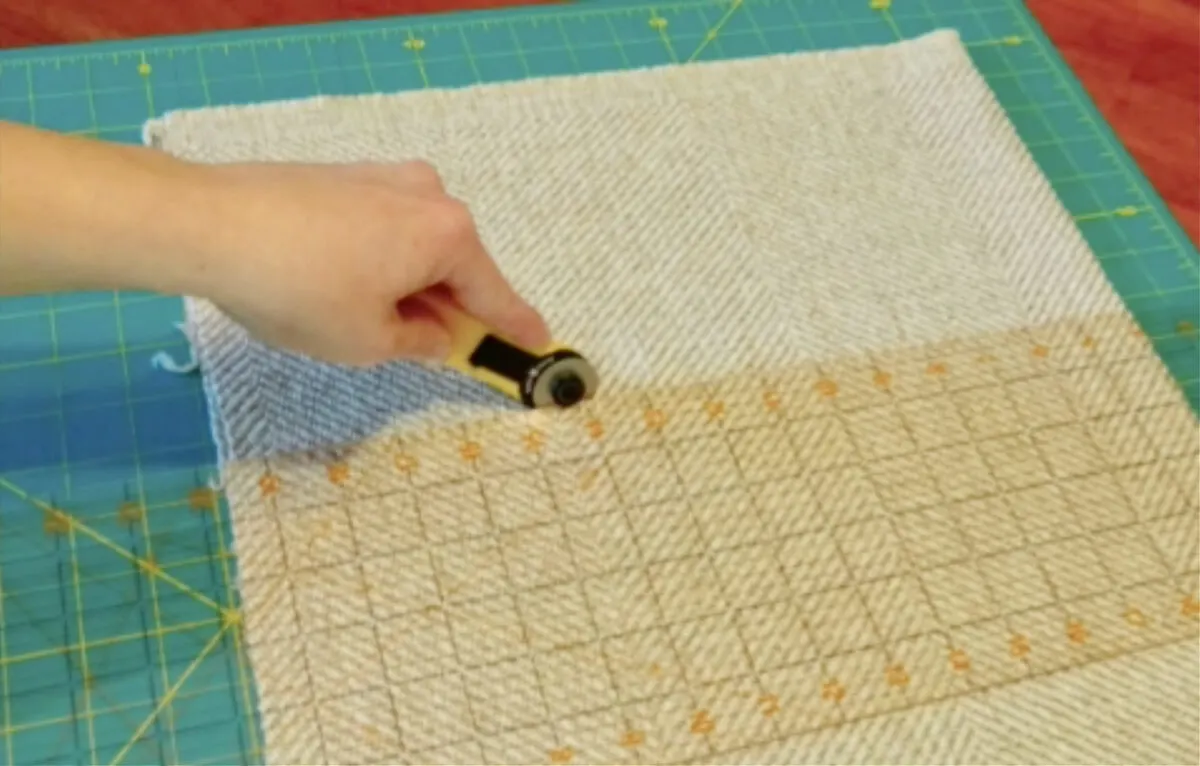
3. Trim the excess fabric away, leaving generous seam allowances.

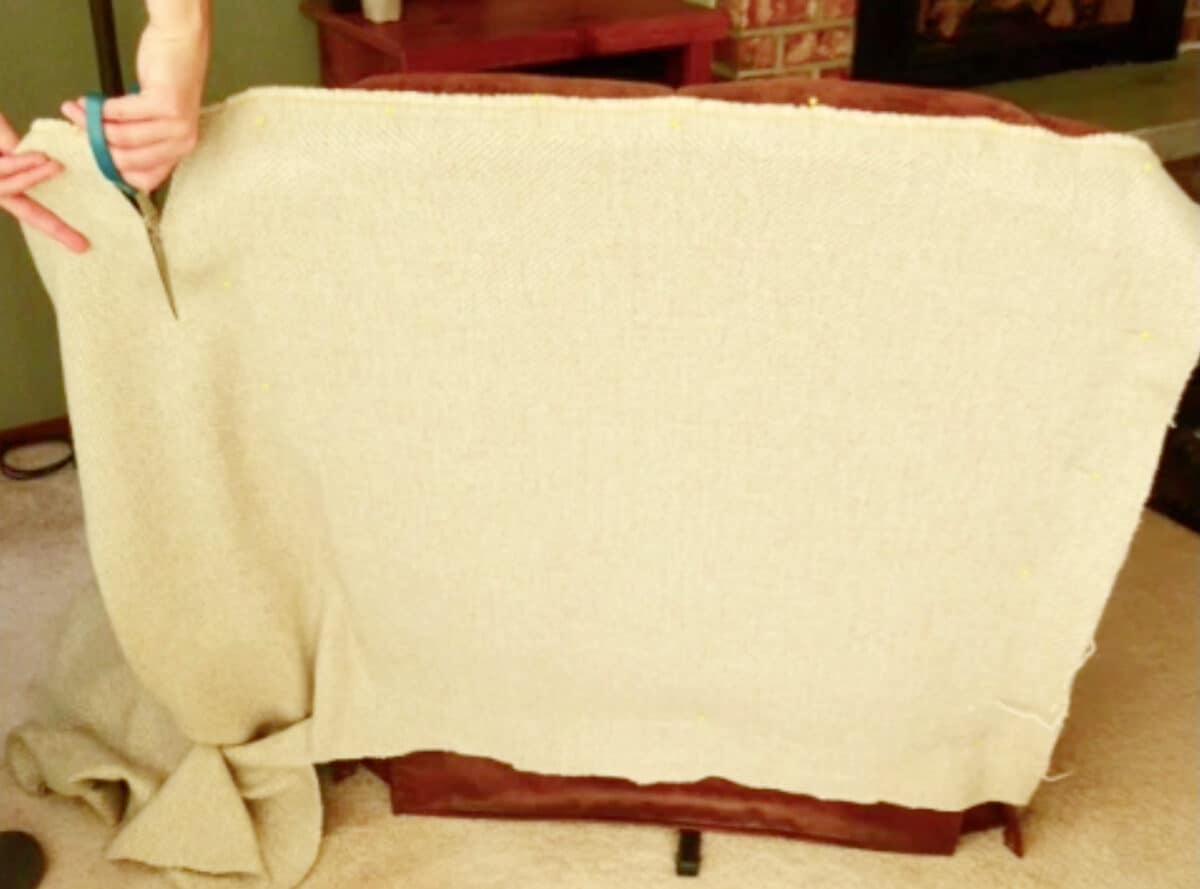
4. Pin the edges together on all of the sides.
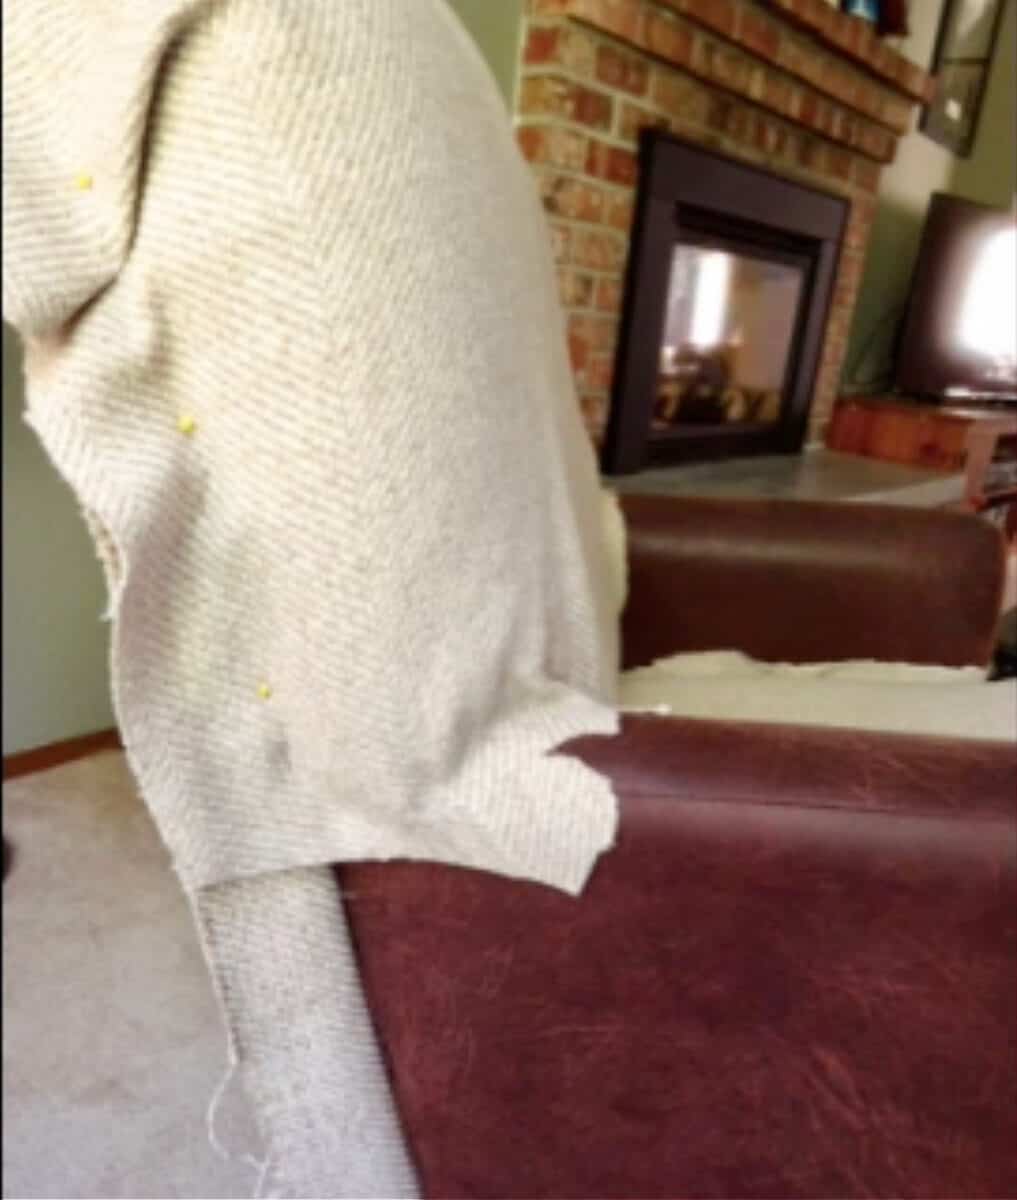

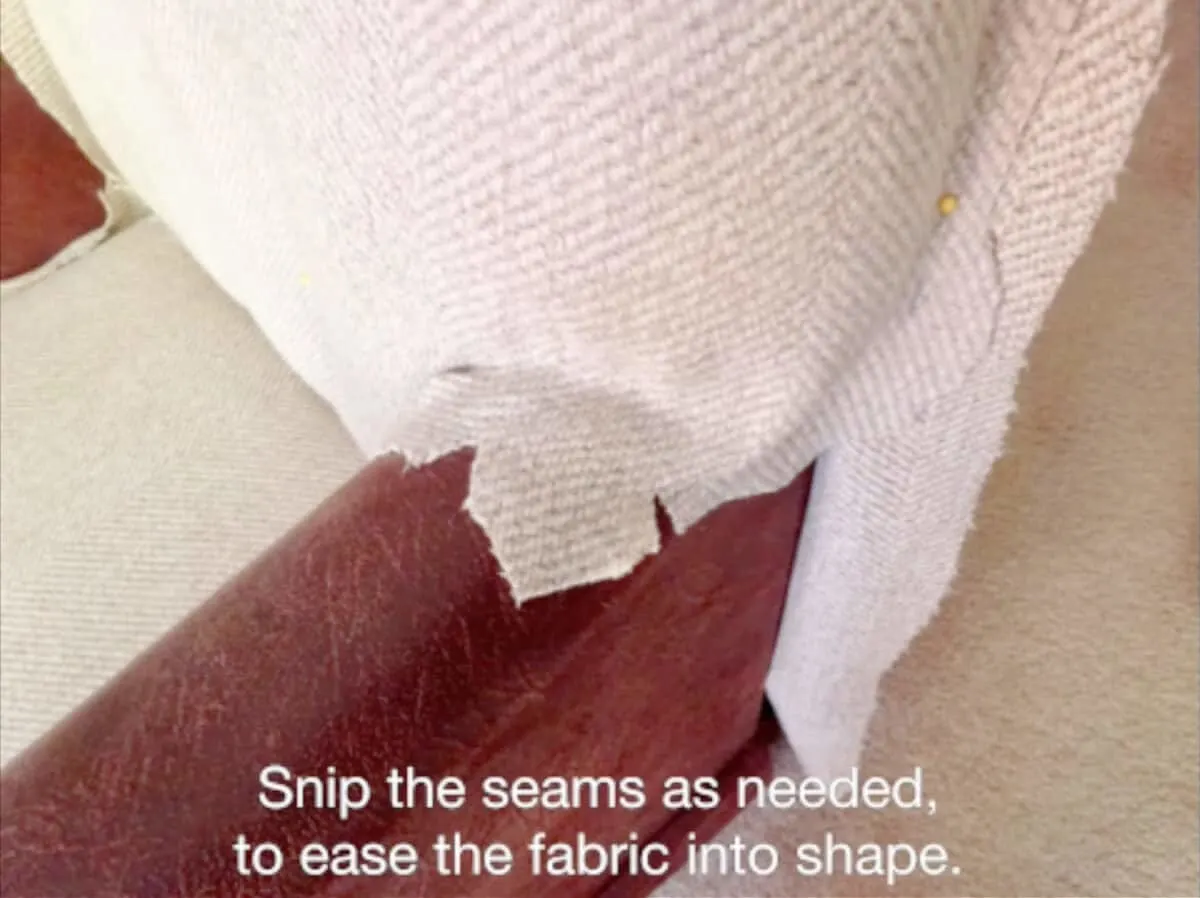
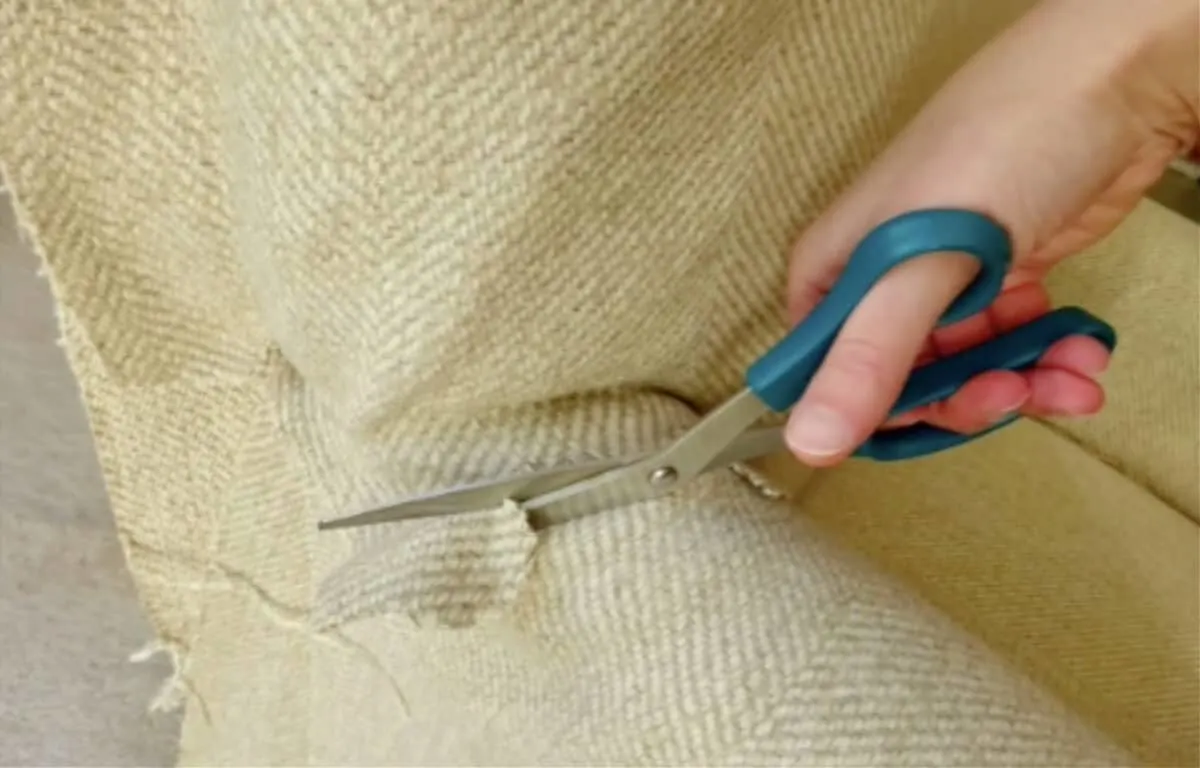
5. You might need to snip some seams as necessary to fit around the curved edges of an upholstered chair.

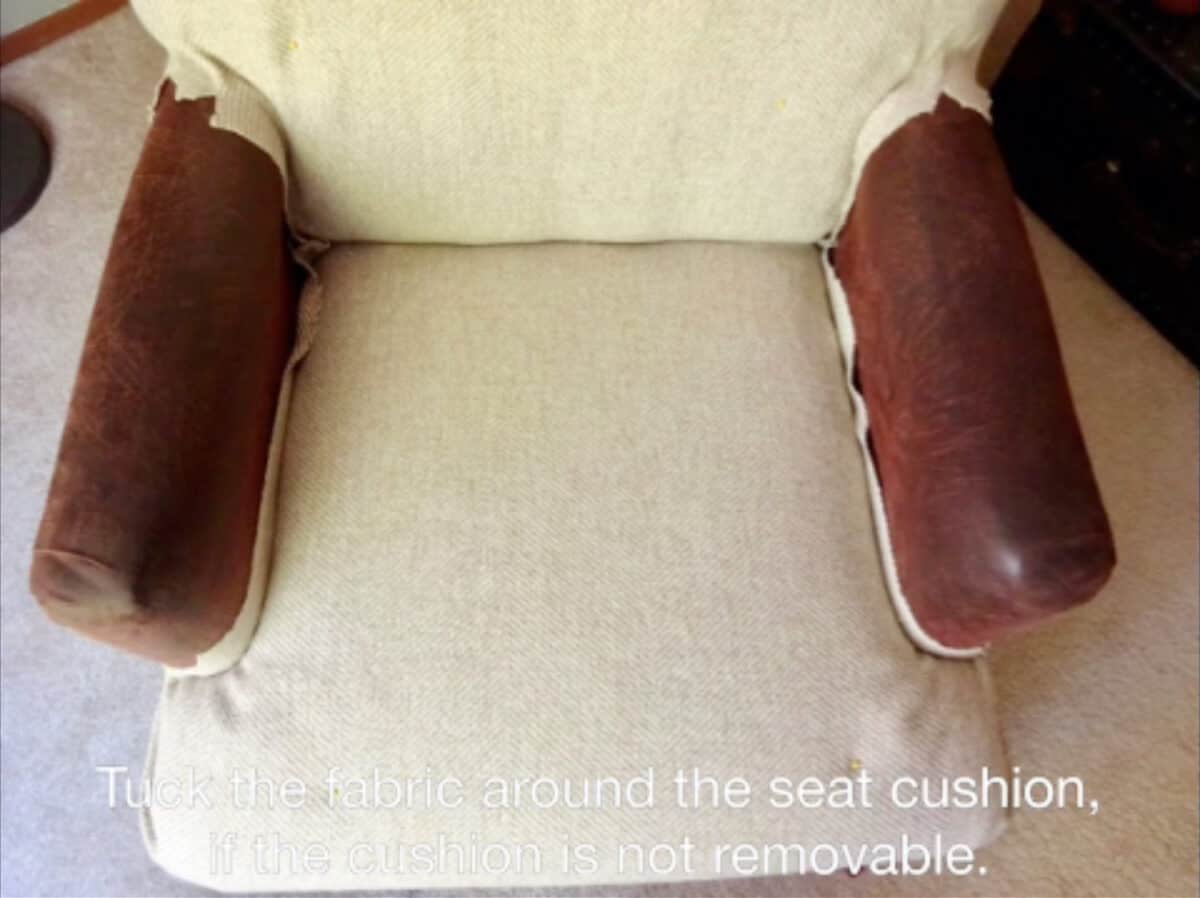
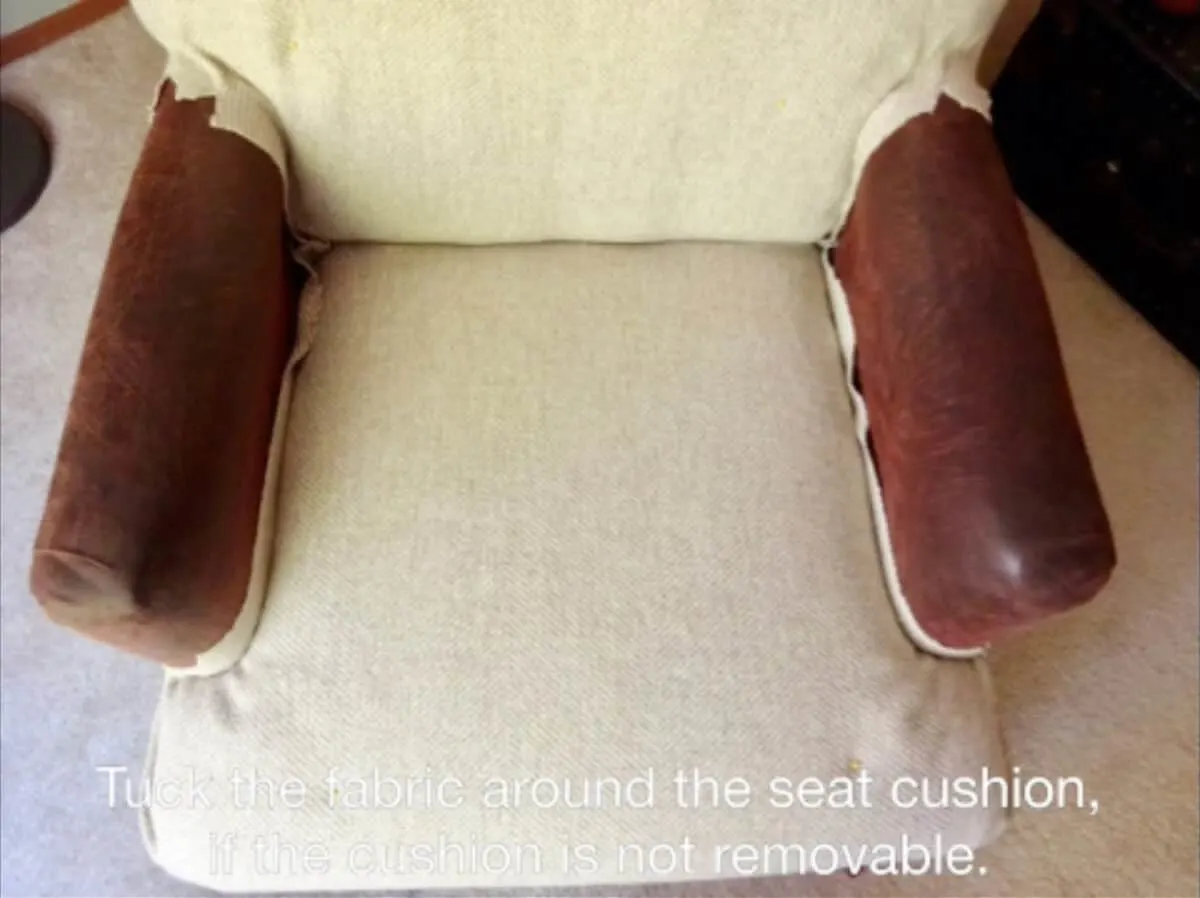
6. Now it’s time to make the cover for the seat part of the chair. Place the fabric over the seat and tuck it into the edges to be pulled tight and smooth. You will need to do this if you have a seat cushion that cannot be removed.
Otherwise, you can make a separate seat cushion cover. However, you probably still want to follow this step if you want a covered removable seat cushion to sit on top of this one-piece chair slip cover. If you can remove the seat cushion, then just lay fabric over the base below and measure and cut in the same way.
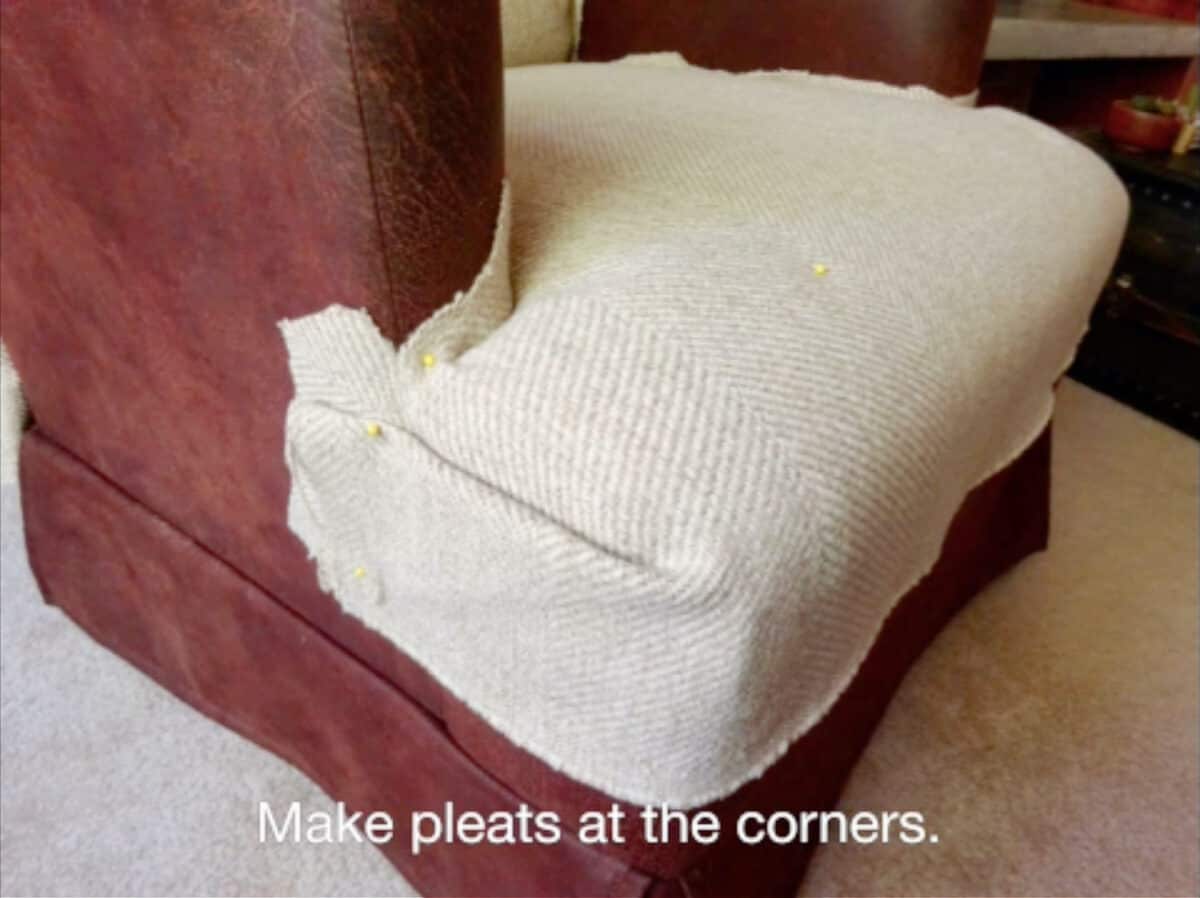
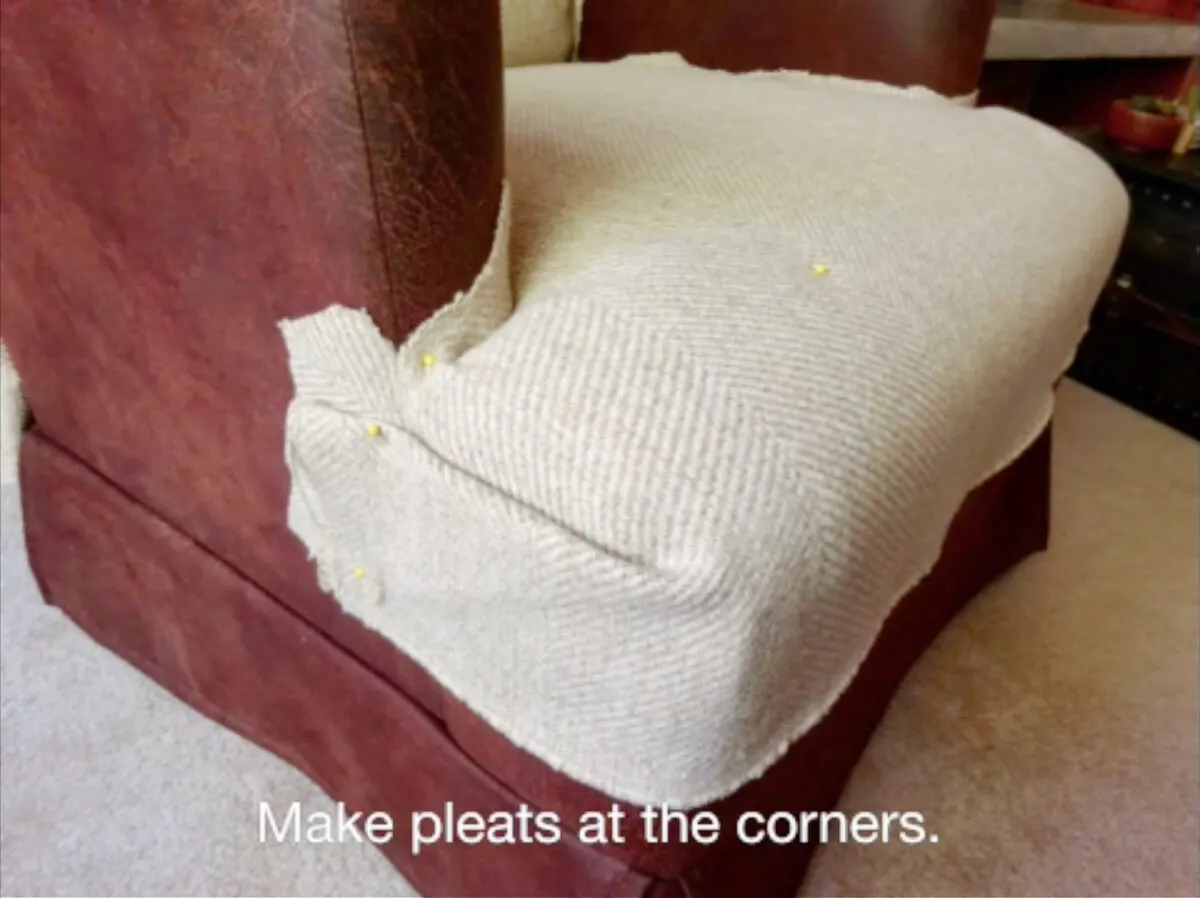
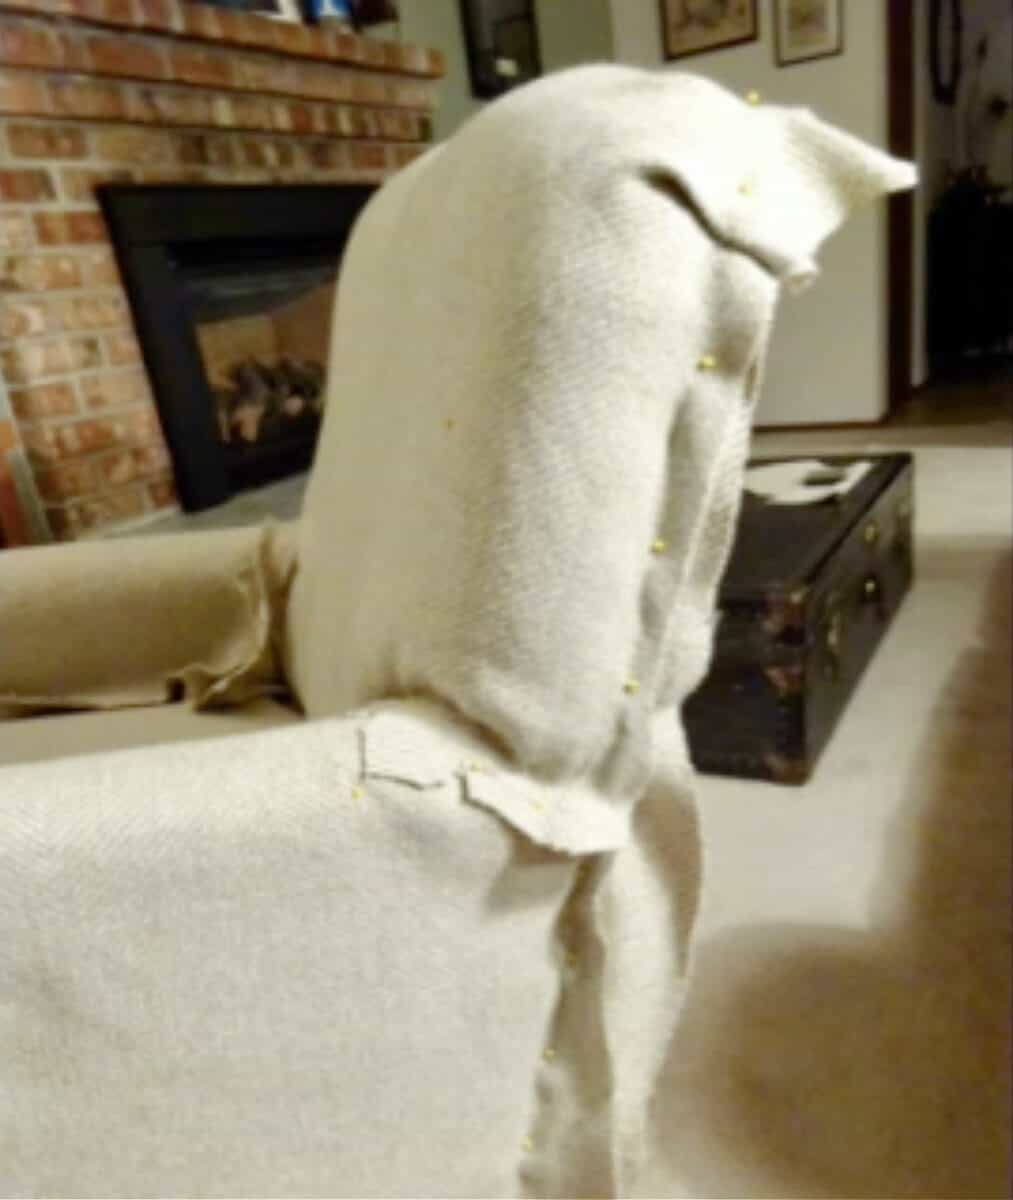
7. To have the fabric go around the curved edges of the chair, make pleats in the corners. You will do this by folding the fabric over on itself until you have a snug, smooth look.
8. Now you’re going to want to add the length of fabric that will cover the front of the chair. Measure how much the distance is from the seat cushion cover to the bottom of the base of the chair. For my chair, there was a “skirt” or fabric flounce from the base of the chair to the floor. So I measured just the amount to the large seam, where there was no upholstery and it went to just a fabric skirt. Remember to allow for extra fabric for the seam allowances.
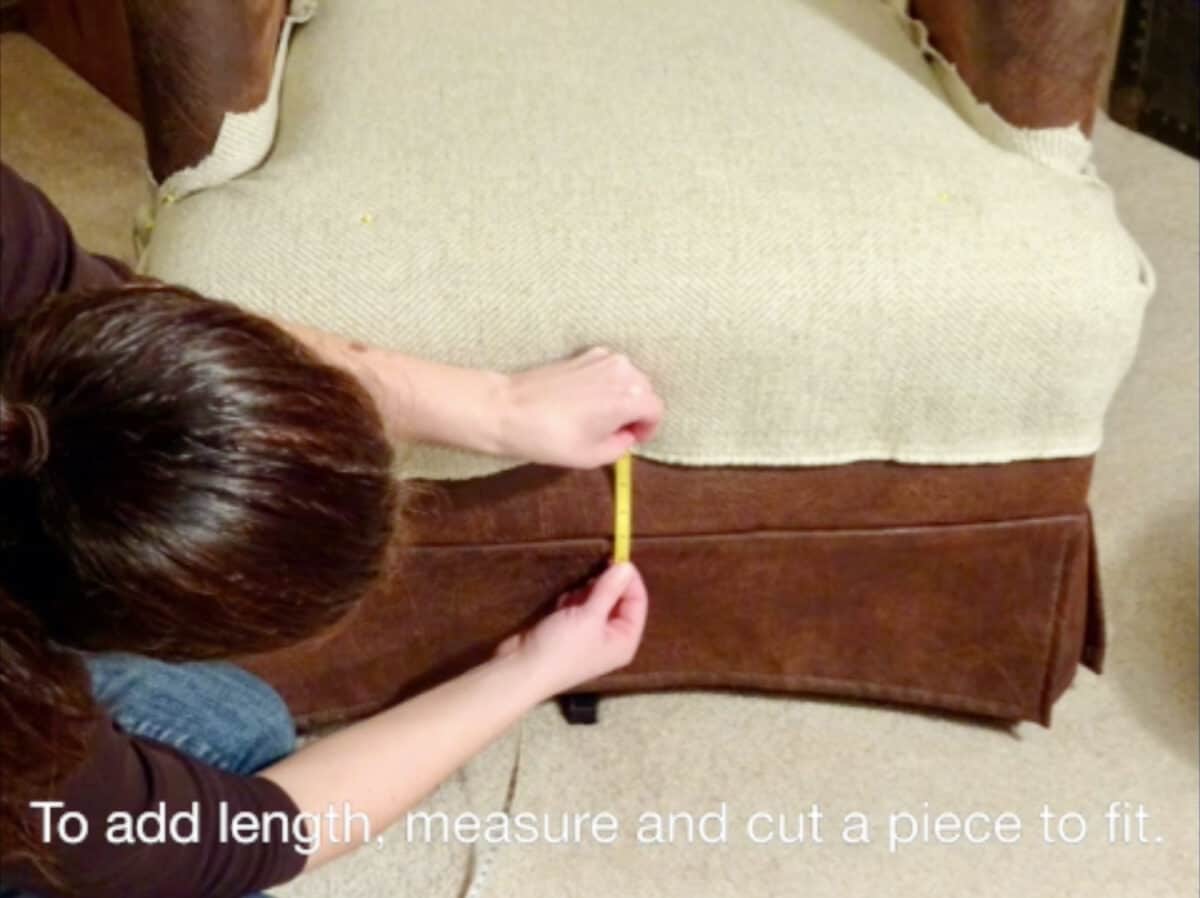

9. Cut that piece of fabric out. Pin it to the base of the seat cushion cover.

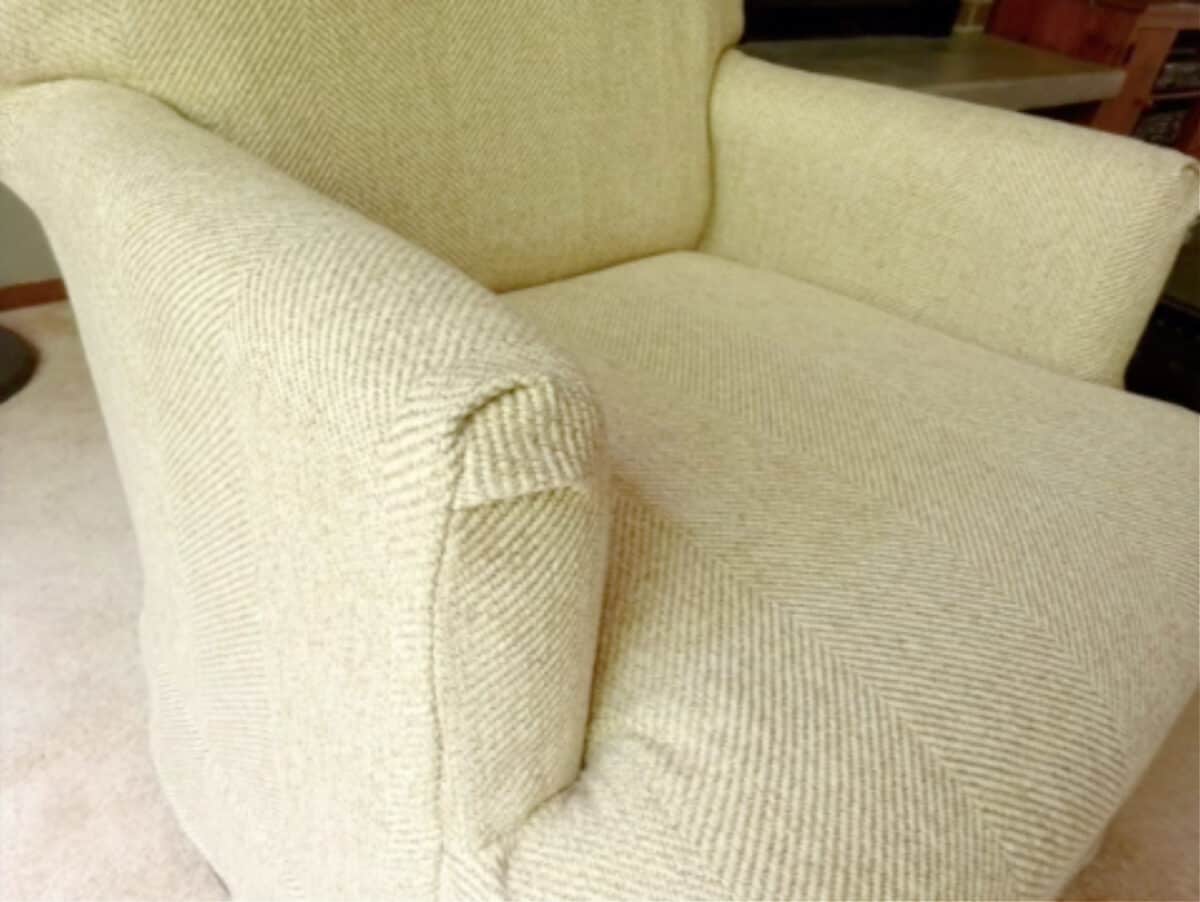
10. Continue making pieces for your slipcover by draping fabric over the arms and cutting the pieces. You will need to add in some pleats, like you did for the seat cushion, if there are curves.
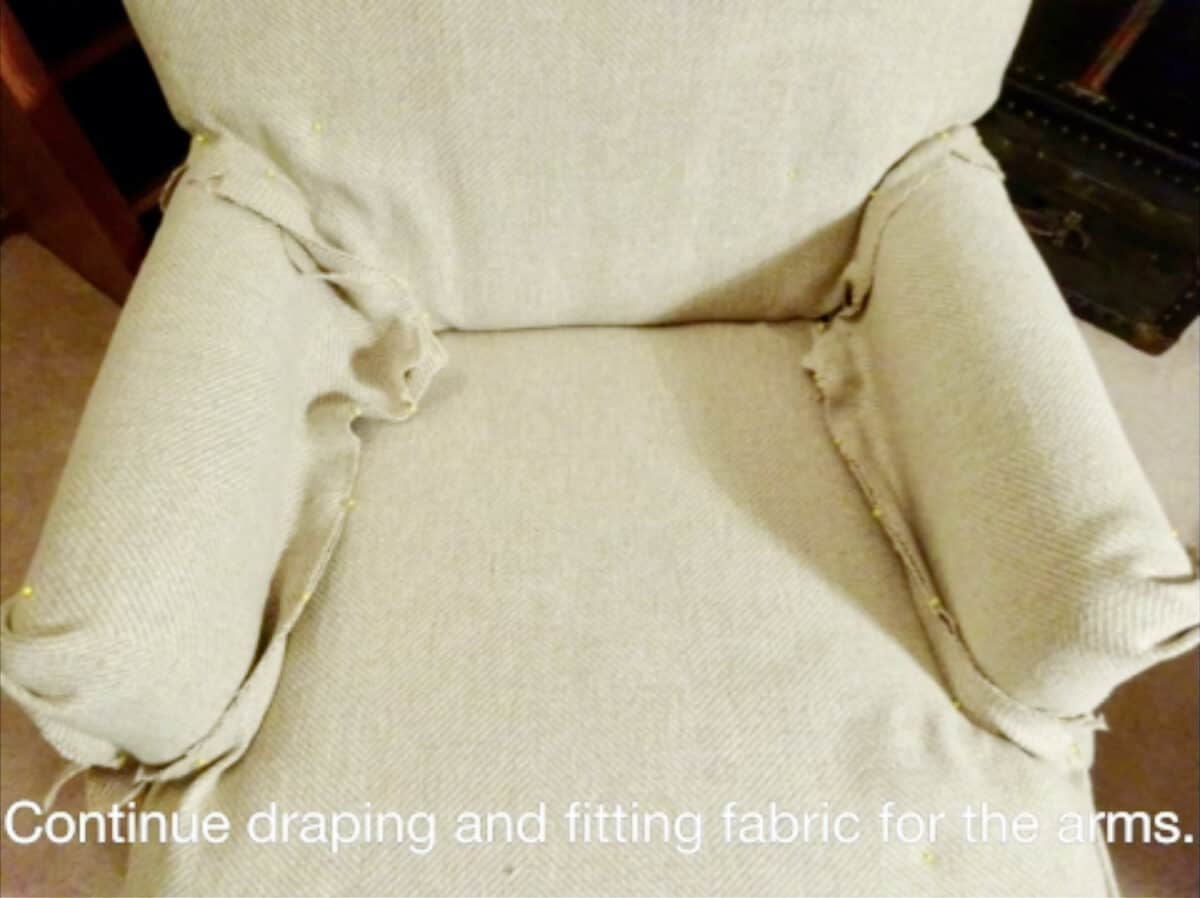

11. Now it’s time to assemble your chair cover. Pin all of the pieces together around the chair. Tuck and make pleats where needed to ensure a snug, smooth fit. Make sure that all pieces are wrong sides facing inwards.


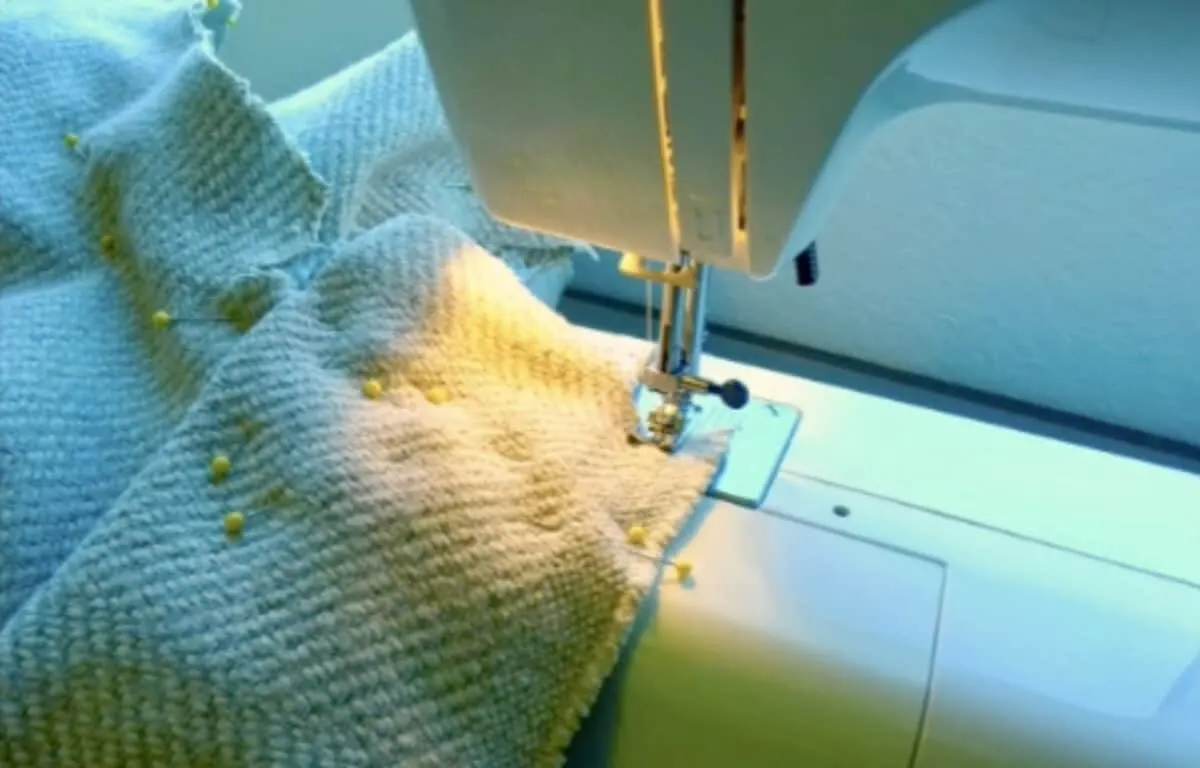
12. Now it’s time to sew everything together. Gently remove the slipcover from the chair, being careful of all the pins. Sew seams together.

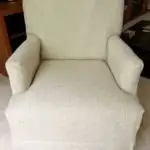
13. Once all of the seams have been sewn, place the slip cover back on the chair. You want the wrong side of the fabric still facing out, with all of the seams outside. This is your time to make sure that everything fits well.

It’s also the time to start trimming off excess fabric from the seams so that they don’t bunch or have lumps underneath the finished chair cover.
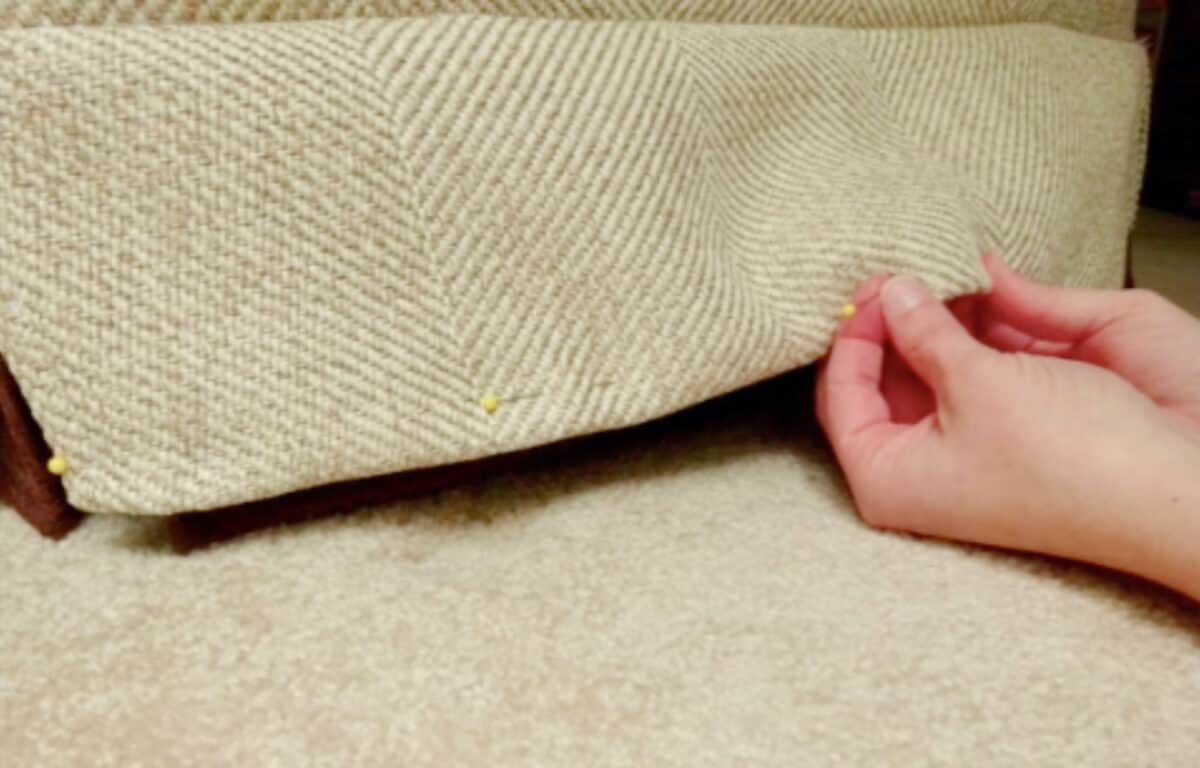
14. Now it’s time to cut the fabric for the flounce, or you might also call it a ruffle or kick plate. Cut a piece of fabric the width of the flounce, but make it a little bit wider and taller to accommodate seams. You will want to do this will all sides of the fabric skirt.

Hem the sides of the skirt to be the exact width that you want on the chair. Don’t hem the bottom yet.
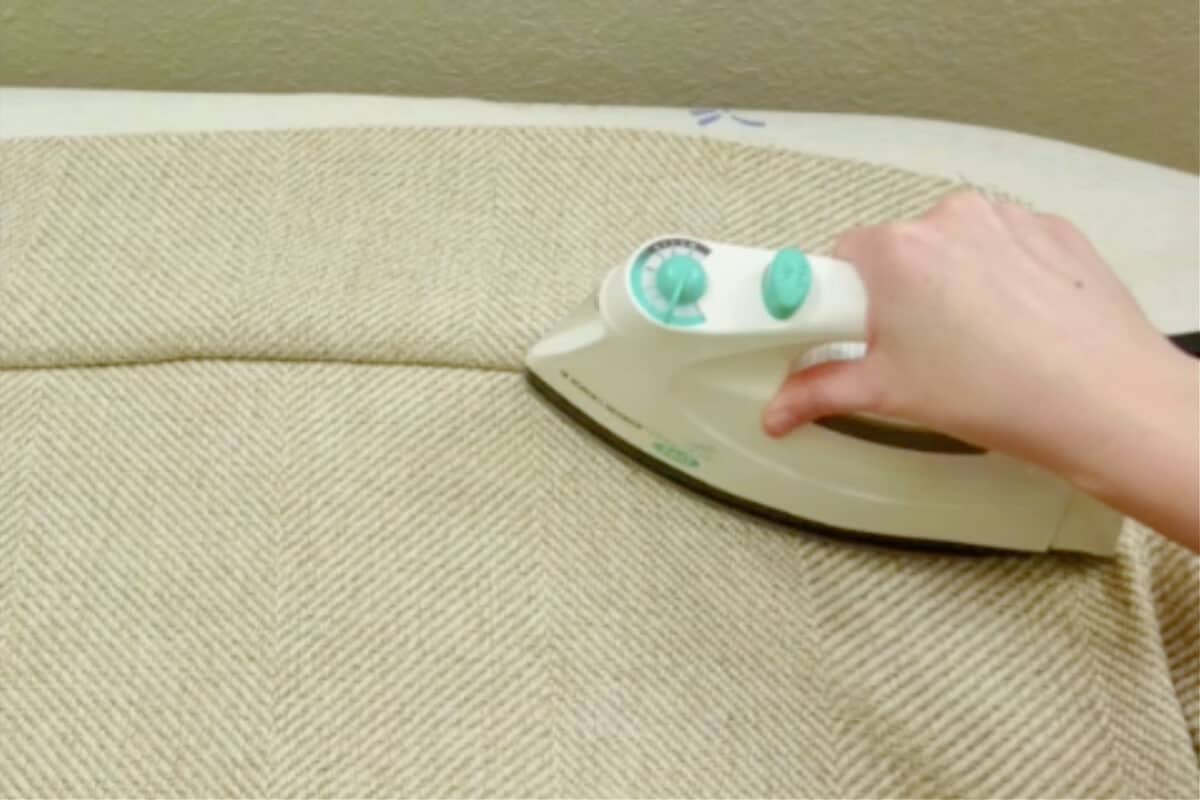
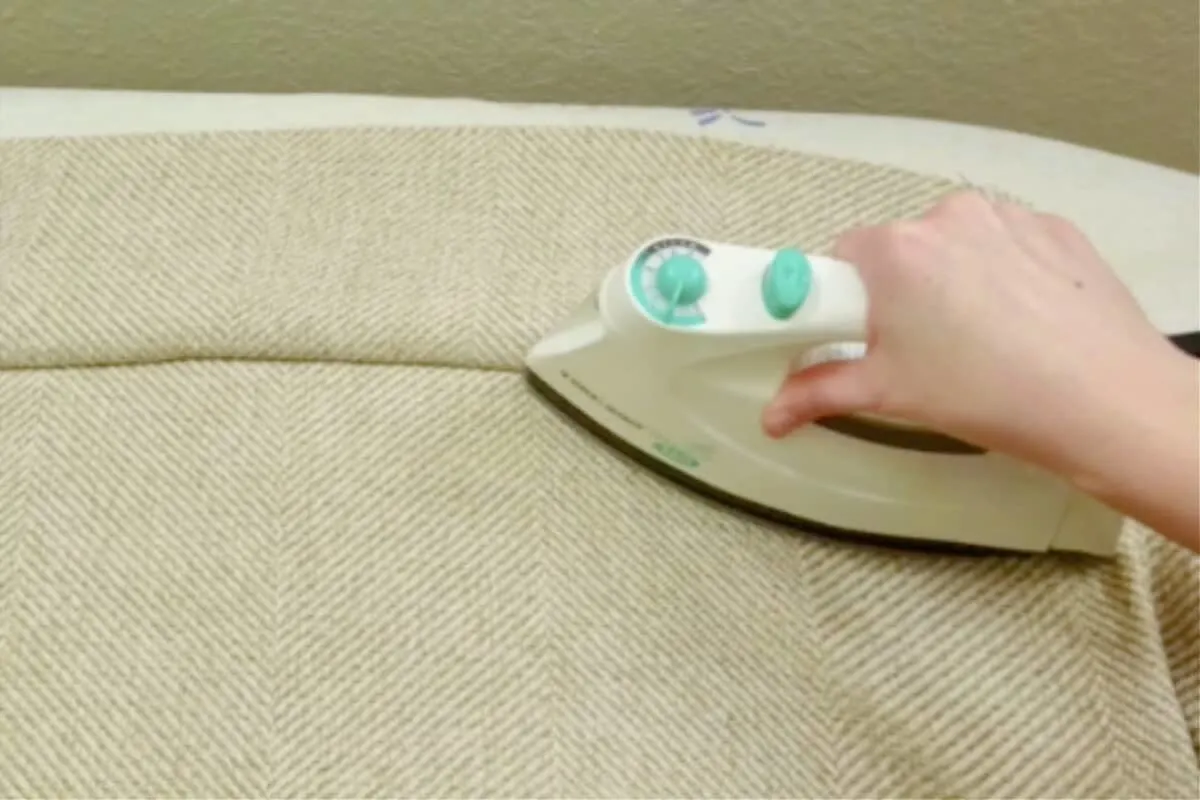
15. Stitch the skirt pieces to the slip cover and iron it flat. The edges might overlap at the corners right now.
16. Now you want to hem the chair skirt. Put the slip cover back on the chair. You can put the slipcover on right side out now.
Pin the skirt so that it just touches the floor. Then sew the seam.

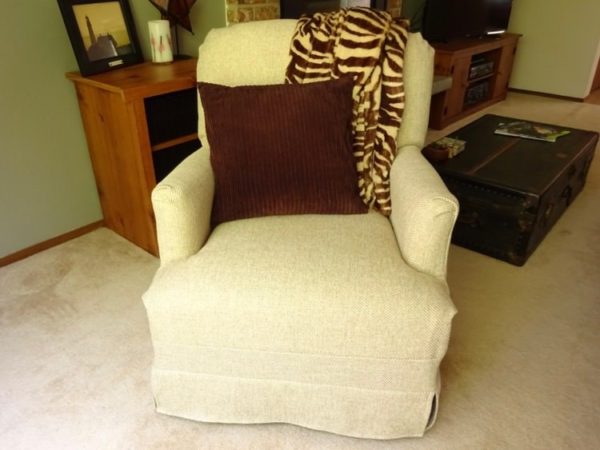
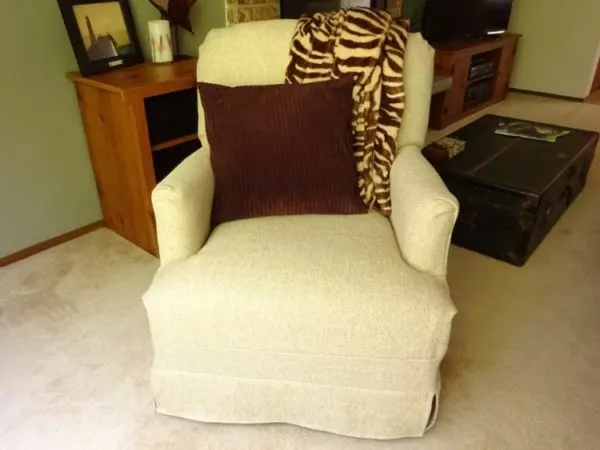
My DIY Fabric Slip Cover
Making this slip cover took me about eight hours total. I spent a lot of time thinking about how to shape the fabric before actually making any cuts.

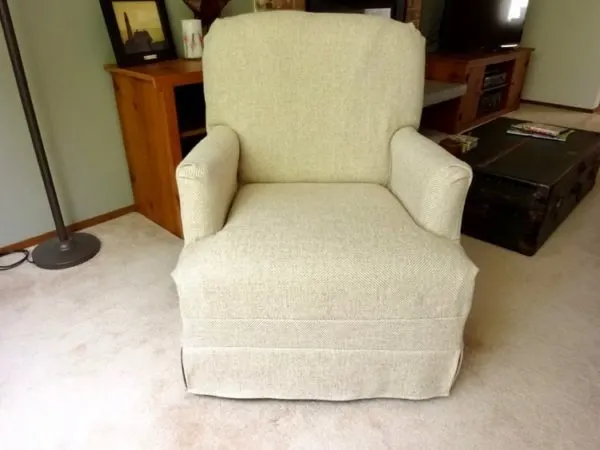
Honestly, I was pretty impressed that it turned out as good as it did as a first attempt. Making a slip cover is time consuming, but not that hard.

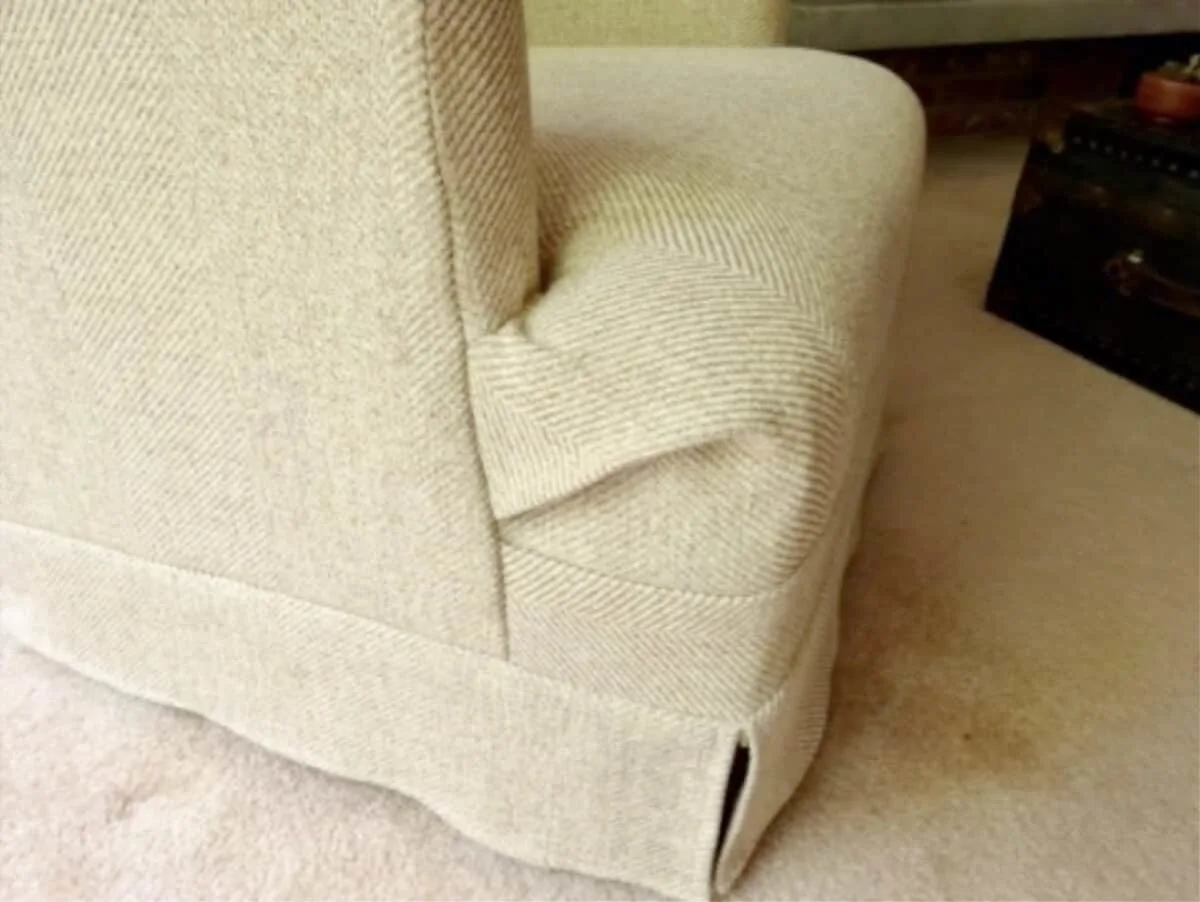

My one goof was cutting the fabric too short in one of the corners. I had to fudge it a bit to make it work.


But, as my mom says, “That’s where the throw pillow goes!” And it’s easy to sew matching throw pillow covers!
If you love great thrift store makeovers, you’ll want to check out how I refinished this damaged wooden table.
You can transform old furniture, too. Here’s how to paint furniture without priming or sanding.

Kathryn
Tuesday 27th of February 2024
Love this! I don't really sew, but I have a sewing machine and know how to use it! Lol! I'm about to recover two sets of chairs my mom gave me. The upholsterer was going to charge more than a new custom chair would have cost, plus fabric! I knew I could figure it out, and your tutorial has confirmed the process (and pitfalls!) for me! Thank you!!
Kimberly
Thursday 14th of March 2024
Thank you, Kathryn! I'm sure you'll be able to cover them and it will mean more!
Karen Boyd
Friday 17th of January 2020
You did a great job for a first try. I what to mention that if the chair had a separate seat cushion it would look best to do the chair and the cushion separately. However these days it seems chairs are unlikely to come that way. If I have a choice (and I often don't) I often choose furniture with separate or detached cushions. One reason is that if there is damage to one side I can turn it. Another is that it is easier to make a slip cover or reupholster. Anyway thanks for provided this information for single women and others who want to do things for themselves, affordably.
Jenny
Friday 17th of January 2020
Great point about the cushion. This one is attached, but I wasn't going to pass up a $3 chair! Thanks for your tips, and encouragement to others!