
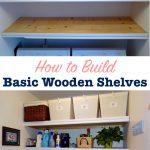
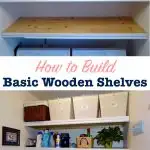
An easy way for making wood shelves to put up in an alcove or closet using furring strips.
If your home is short on storage space, try going vertical! Or use the space in an overlooked alcove or closet. Either way, wood shelves are easy to build. And they add a lot more storage room to your home.
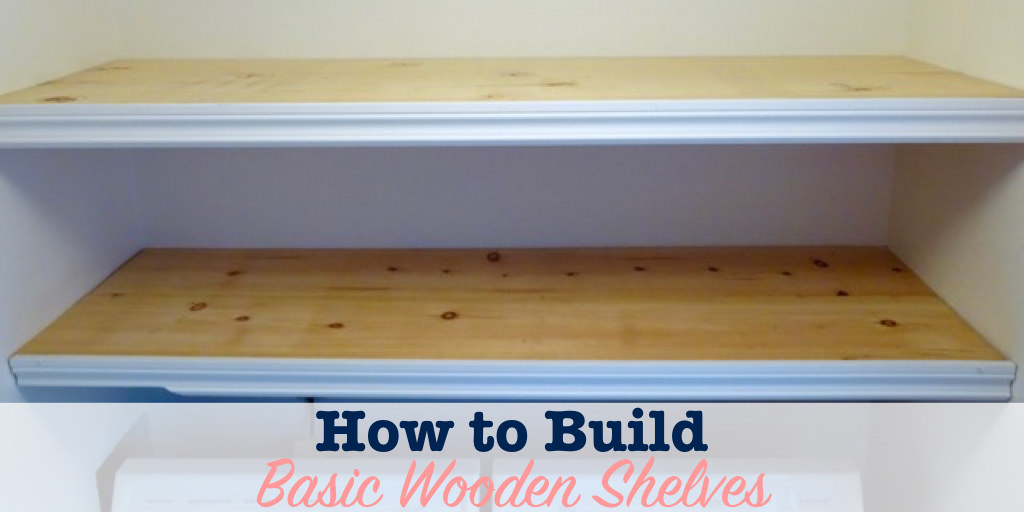
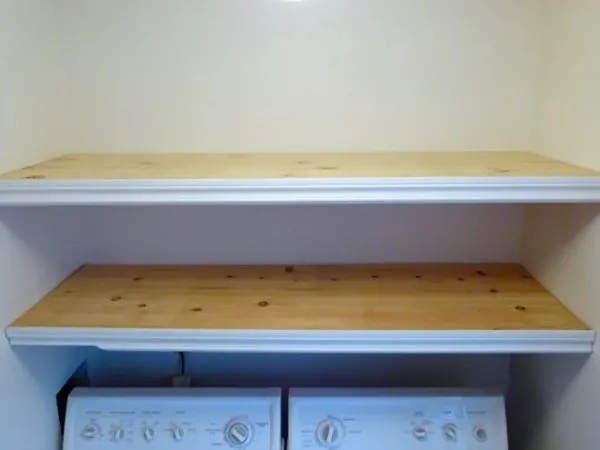
Here’s how to put up shelves in an alcove. My wood shelves happen to be in the my laundry room, but they would also work great in a closet, or a nook by your fireplace.
What Are Furring Strip Boards?
This DIY project uses furring strips to easily hang the shelves in an alcove. But what are furring strips?
Furring strips are long, thin pieces of metal or wood. Common lengths are 1″ X 2″ or 1″ X 3″.
They are used to create a solid framework to attach wood, paneling or plaster. In our case, we are using furring strips to be the alcove shelf supports so that we don’t have to drill the wood shelves into the wall.
So, we are adding furring strips to the wall easily. Then sliding the wood shelves on top. It’s possible because we’re using three walls in the alcove for support.
How To Make Wood Shelves Using Furring Strips
Materials
- 1″ x 10″ wood boards, cut to length
- 1″ x 2″ furring strip (length of shelf + 2x depth + 2ft.)
- Decorative molding cut to length
- Screws
- Cordless drill with screwdriver bit
- Hammer
- Wire nails
- Measuring tape
- Bubble level
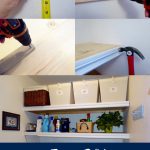
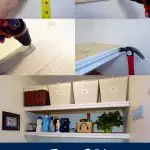
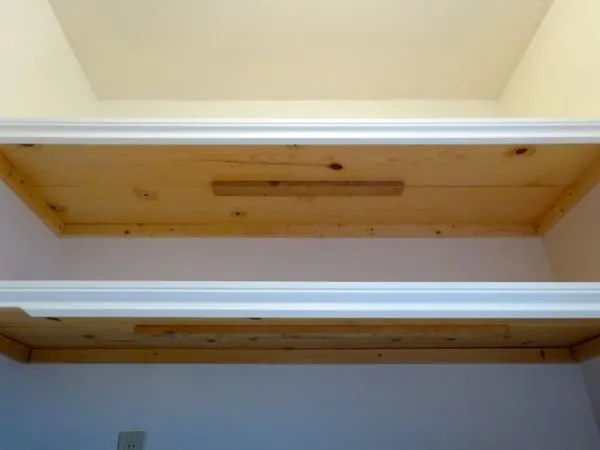
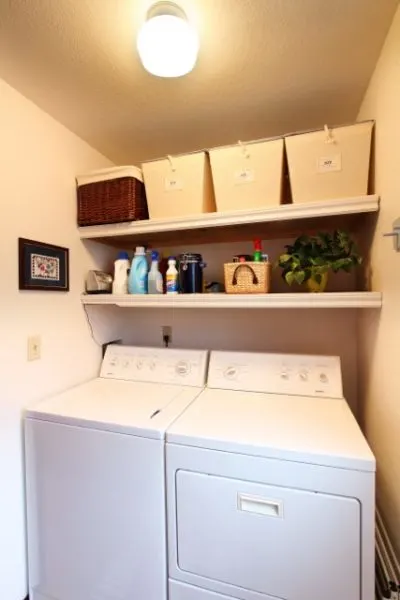
This shelf building method is specifically for alcoves, or areas with walls on three sides. Here’s what they’ll look like finished:

Directions
1. Measure the Wood Size for Shelves Before Shopping
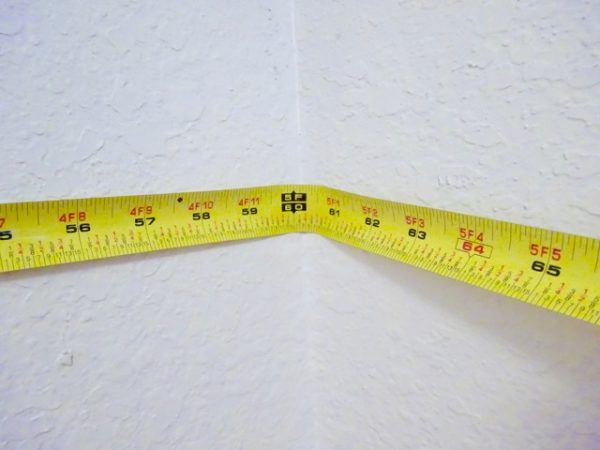
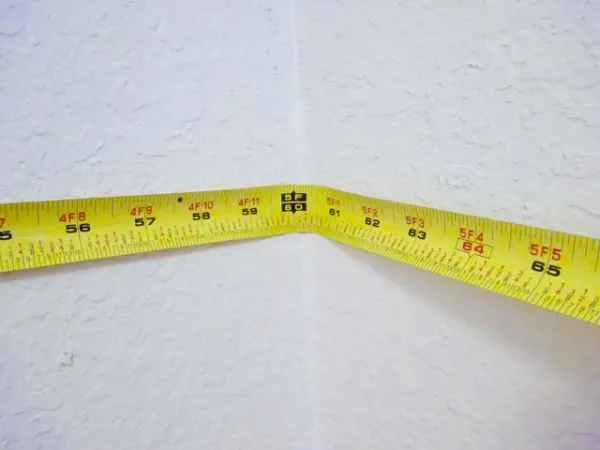
It should go without saying, but you’ll definitely need to take a careful measurement of your alcove or closet before you go to the store. Measure the length and the depth. Then write down the exact measurements and take it with you.
You might want to get my Project Planning Workbook to help you keep track of measurements.
Why is this so important?
The obvious answer is that you’ll need to know how much material to buy. But there’s also a better reason!
Most stores will cut wood boards for free. You can save yourself the effort of getting out your saw and making the cuts. Just tell a clerk at the store how long you want the boards to be, and let them do the work.
2. Gather your materials
Wood Boards
For each shelf, I used two 1″ x 10″ boards. You may need to adjust the width of board you choose, based on the depth of your space. Have the store cut the boards to the right length.
Furring Strips
- Cut one piece to the same length as your entire alcove
- Cut two more pieces that are about two inches shorter than the width of your two shelf boards. (This will make sense when you see the installation picture below.)
- You’ll need another foot or two to tie shelf boards together.
Decorative Molding
- Cut this to length at the store. You only have to buy as much as you need.
3. Choose shelf height
Decide where you want the top of your shelf to be, and mark the height on the wall with a pencil. This will be your reference.
Helpful Tip: Don’t make the same mistake I did when deciding on shelf height. For my laundry room shelves, I placed the shelf high enough to allow the lid of the washing machine to open, but I didn’t account for the trim. I had to cut a notch out of the trim to allow the lid to open.

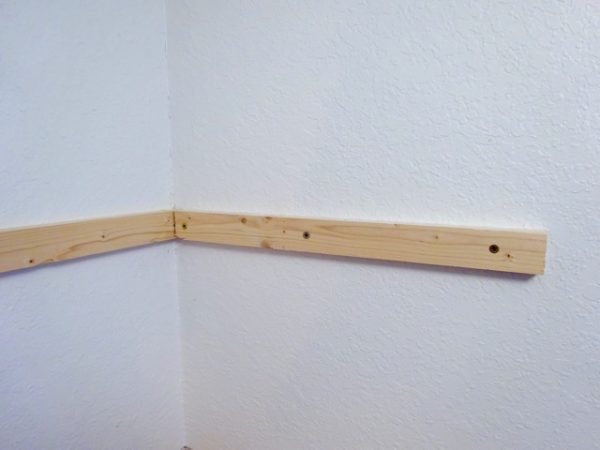
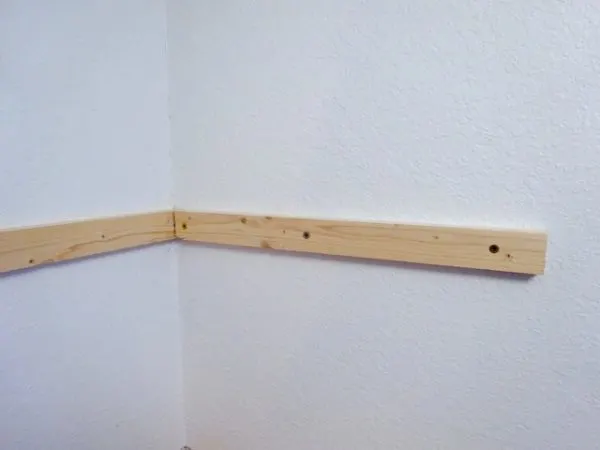
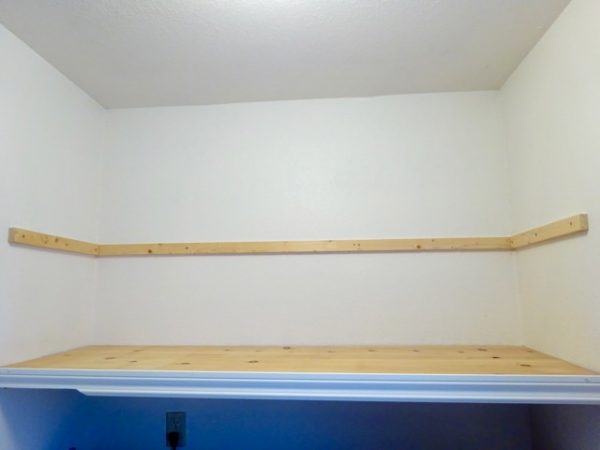
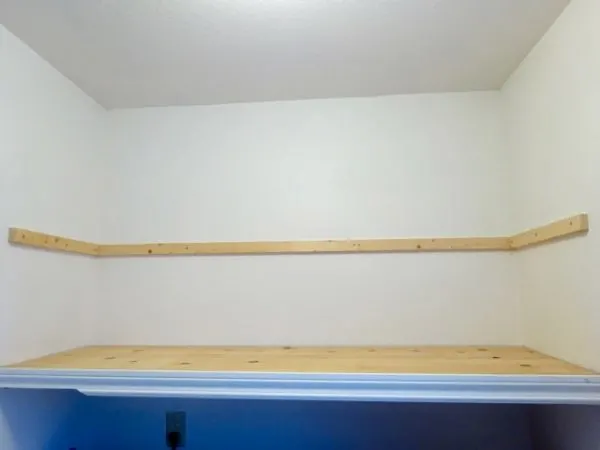
4. Install the furring strip
Intall the furring strip along the back wall first. Put the top of the board on your pencil mark. Use a bubble level to make it straight, and then use a drill to screw it into the studs.

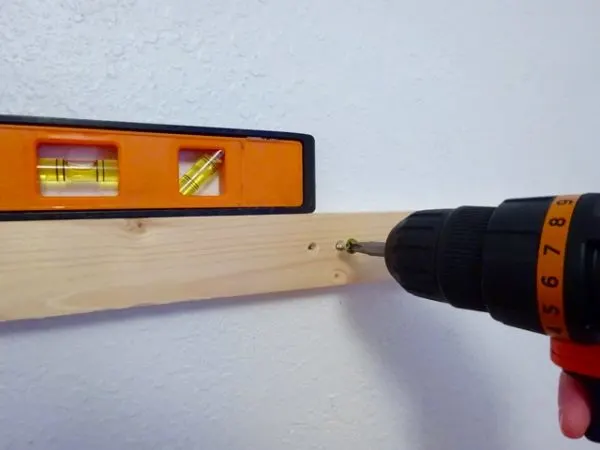
Helpful Tip: You can usually knock on the wall and listen for the sound to change when you’re in the general vicinity of a stud. Then you can tap a small nail into the wall to see if it hits anything to help you pinpoint the exact location of the stud.
Next, install the furring strips along the side walls. These may not be long enough to reach to a stud, so you can put in a few extra screws to help keep it secure.
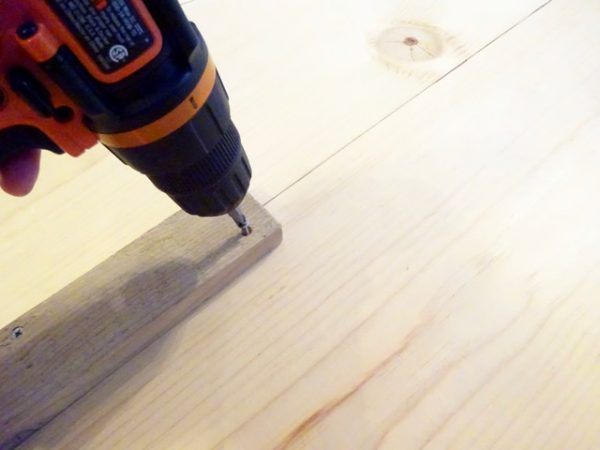
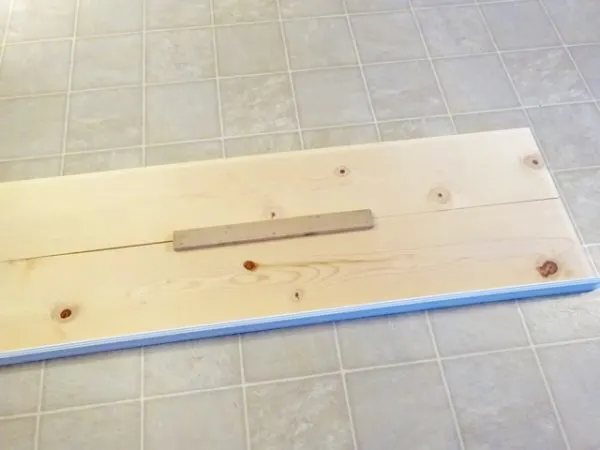
5. Tie the shelf boards together
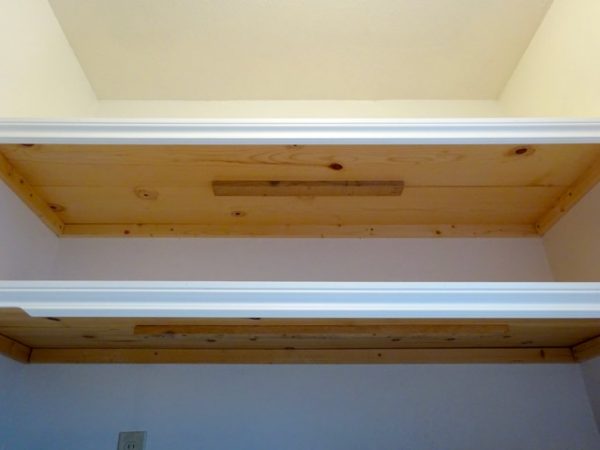
Attaching the shelf boards to each other adds rigidity and strength to your shelf. You can do this with another piece of furring strip on the bottom side of the shelf.
Turn the two shelf boards upside down, and push them together, making sure the ends are aligned.
Center the furring strip between the two boards, and screw it into each board. (Be sure your screws aren’t so long that they might go through the top of the shelf.)


6. Put the shelf in place
Your shelf boards are now ready to put in place. You may have to tip them at an angle to get them into the alcove, but they will sit on top of the wood pieces attached to the wall.
You can secure the shelves to the wood underneath if you want to, but it’s not necessary.
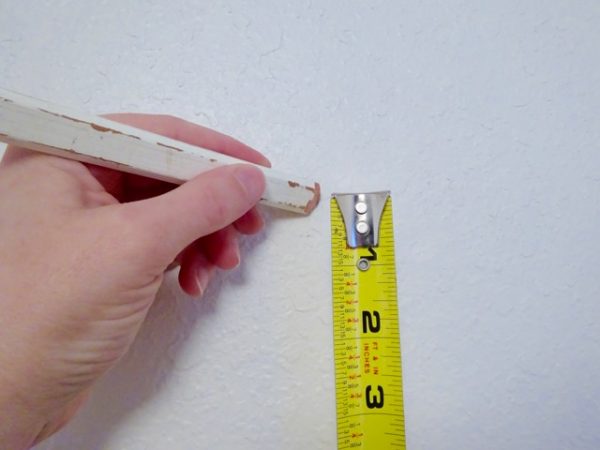
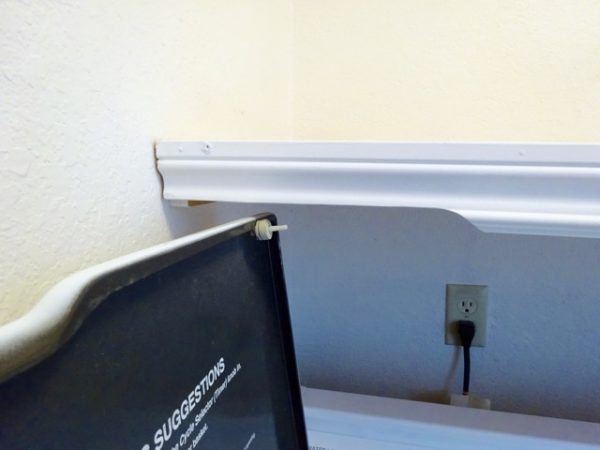
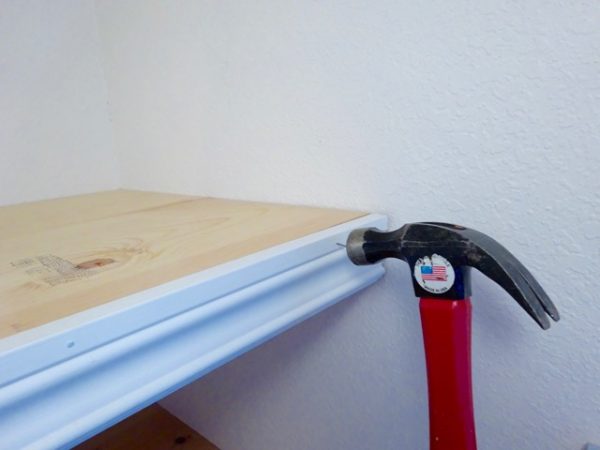
7. Install trim
The decorative molding I purchased came pre-finished, so I didn’t have to do any painting. You may want to paint your trim before you install it.
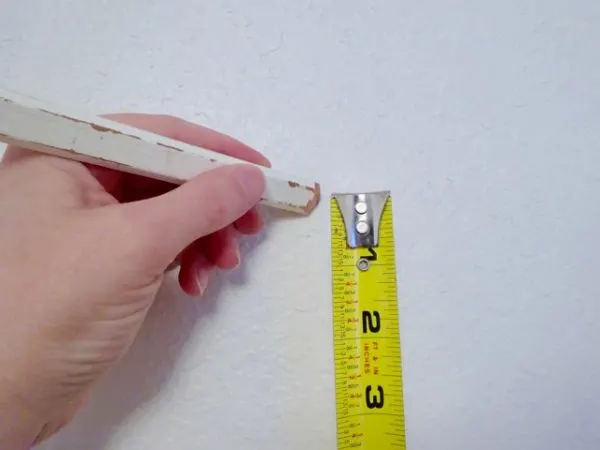
Align the top of the molding with the top of the shelf. Tack it in place with small wire nails. I painted the tops of the nails to match the trim when I was finished.

I filled mine up with my laundry supplies, and bins to organize the room. These DIY straw hat baskets and upcycled cardboard box bins are perfect for using as decorative storage on the shelves.

Want more DIY projects? Here’s how I built my own pergola without any plans.
And I built my own wood post and rail fence, too.

John W
Wednesday 5th of August 2020
Thank you for the great article! Your project is exactly what I needed guidance on. I’m putting up shelves and clothes rods in a small closet and wasn’t sure if using just furring strips would hold the shelf. I thought it would and you basically have confirmed that. My length is only 35” and depth is 12” so I’m using just one white particle board / melamine. I think I will screw in the shelf to the furring strips and also use drywall anchors if I cannot find a stud to attach to. The strips will be attached via screws also. Thanks again for such a fine diy article.
Terri
Wednesday 8th of April 2020
If the shelf expanse is longer (mine is 62") do I need to add a brace at mid point? If so, how to do that since the furring strip would not allow a bracket to sit flush up against the shelf board? (or are the back and side furring strips strong enough in themselves?) Thanks so much for this blog! Super helpful!
Jenny
Thursday 9th of April 2020
Hi, Terri. I'm so glad you found this helpful. My shelves span 60" and are solid without a center support. At 62", you should still be OK without it. Let us know how your project turns out!
Wancharida
Tuesday 3rd of March 2020
Ok, have we mentioned that we absolutely adore pallets? We do! One of the reasons that we love them is because they are so versatile. You can build just about anything with an old pallet. And, they’re cheap. In fact, some companies give them away just to be rid of them. With that in mind, you can create a beautiful shelf with an old pallet that’s both frugal and functional. Use your little shelf for holding wine bottles, books, or anything else. The rustic look of a pallet shelf is gorgeous and you can build more than one with a single pallet so this may be the most frugal way to add shelving yet.
Jenny
Tuesday 3rd of March 2020
Interesting idea to make shelves out of pallets. I'll keep that one in mind. Thanks for sharing!
Karen Dance
Monday 25th of March 2019
Is there a reason I shouldn't use one single board for the shelf rather than two connected together? I love this and am happy to see something easy for Seniors.
Jenny
Tuesday 26th of March 2019
You could certainly use a single board, Karen. I used two to create a deeper shelf. Good luck with your project!
Joan
Monday 25th of March 2019
What I am waiting for is— someone to discover a way to make use of all that ceiling space!
Jenny
Monday 25th of March 2019
Wouldn't that be nice, Joan!