

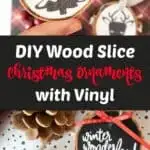
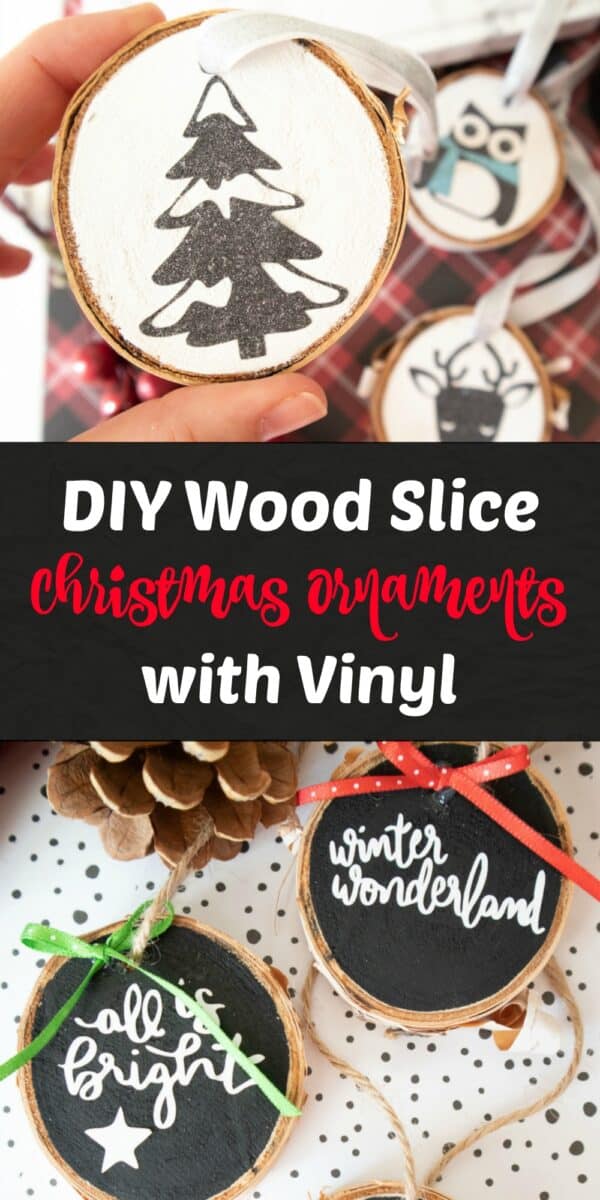
How to Make DIY Vinyl Wood Slice Ornaments – 2 different ways! Make reversible ornaments with holiday phrases or glittery woodland animals. Both come with a downloadable SVG file.


Making ornaments with Cricut vinyl is so easy I did it twice! This DIY ornament technique really is addicting, because you can make so many cute designs!
When I realized that both of these ornaments – glittery woodland animals and reversible holiday ornaments – had just about the same instructions, I figured it would be easier to just put them both in one tutorial.
Really, the process is so simple. And it works with just about any design that you can fit on your wood slice.
These are perhaps one of the easiest DIY wood slice ornament crafts, because you don’t have to paint the wood with an intricate design! The Cricut machine takes care of that!
If you have a Cricut Joy, you can easily make ornaments beautiful enough to give friends and family. Or, of course, decorate your own tree.
Related Post: How to Make Balsa Wood Ornaments with Cricut
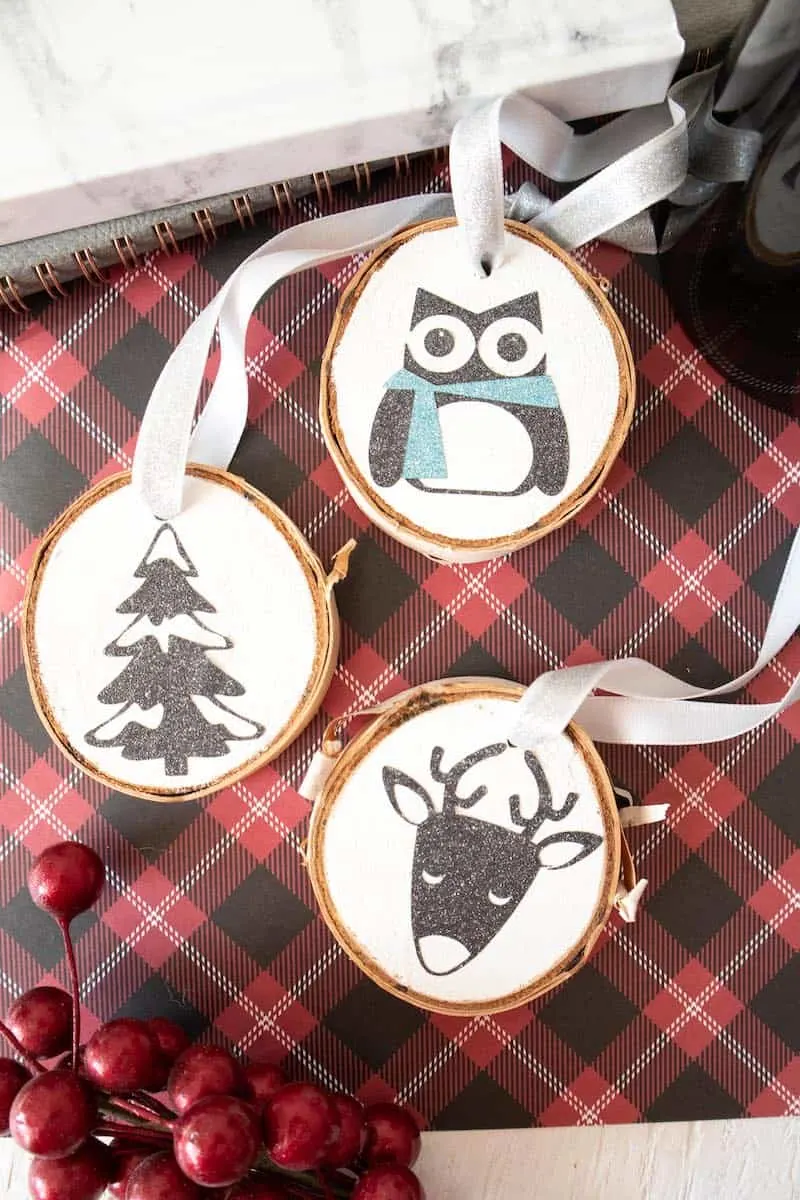
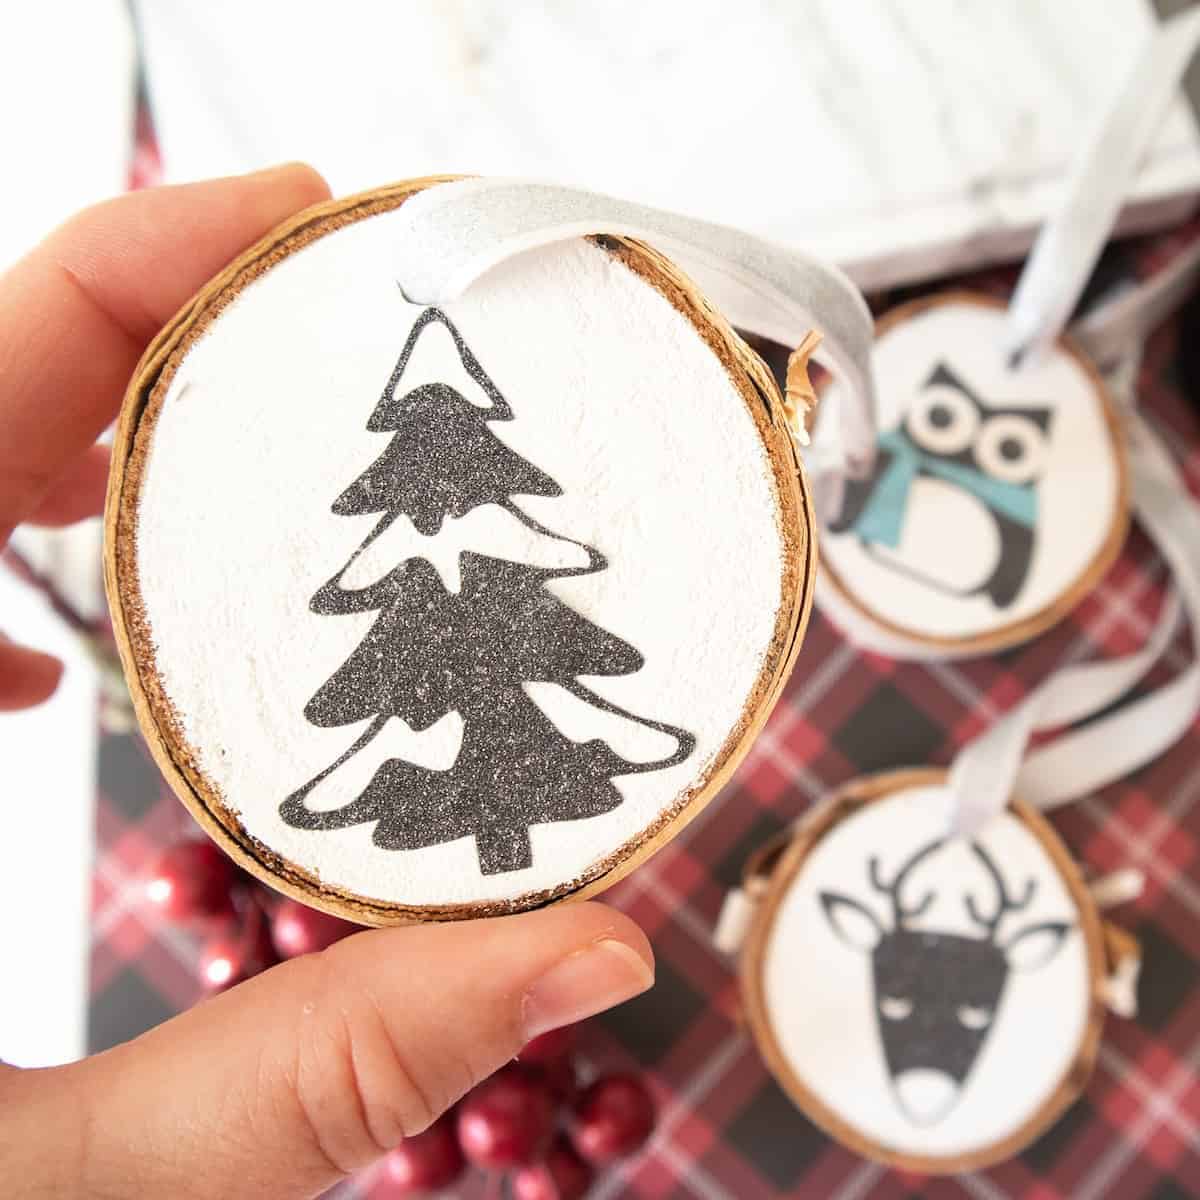
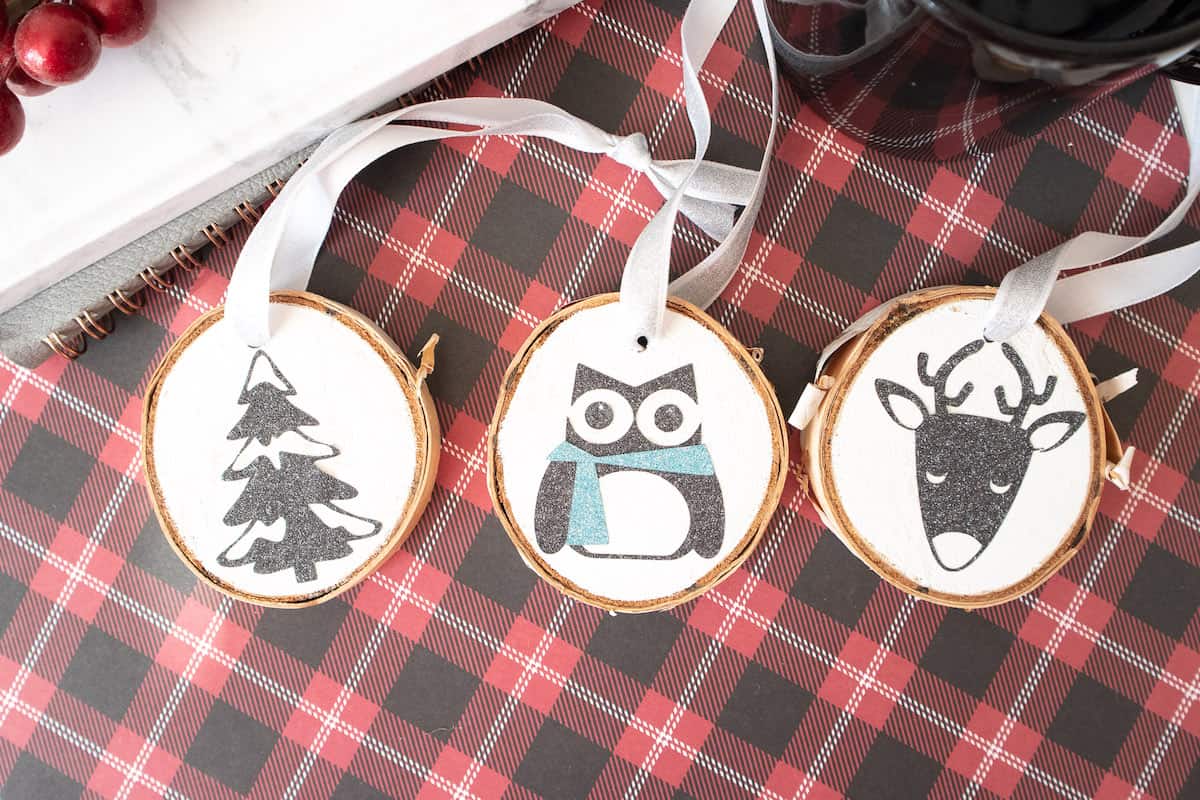
Glittery Woodland Animal Ornaments
Everything is better with glitter, right? Well at least during the holidays! Glittering vinyl is the answer to make these sparkly ornaments without a lot of mess (and glitter EVERYWHERE)!
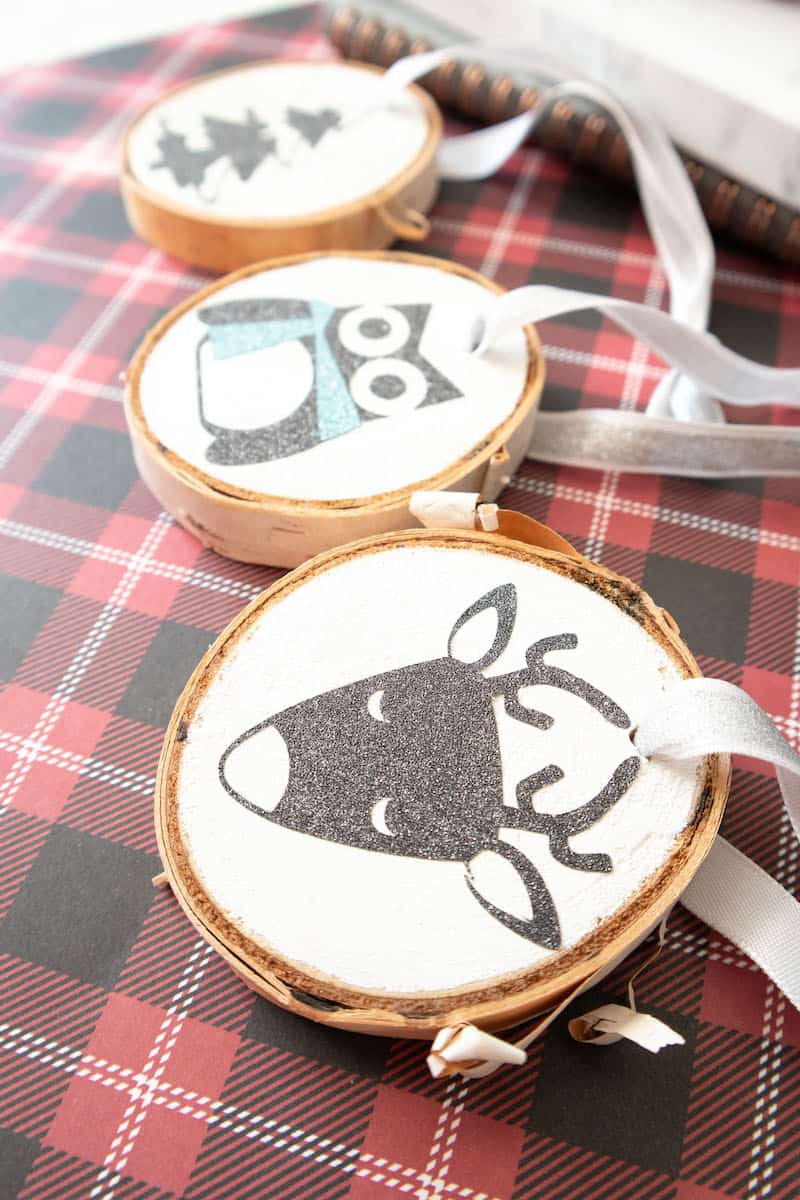

I really like the woodsy, simple feel of the woodland ornaments used in the Cricut SVG. Using glitter vinyl gives it a bit of a glam rustic feel.

If you like these ornaments, be sure to see my easy Woodland Animals Wreath made out of paper.
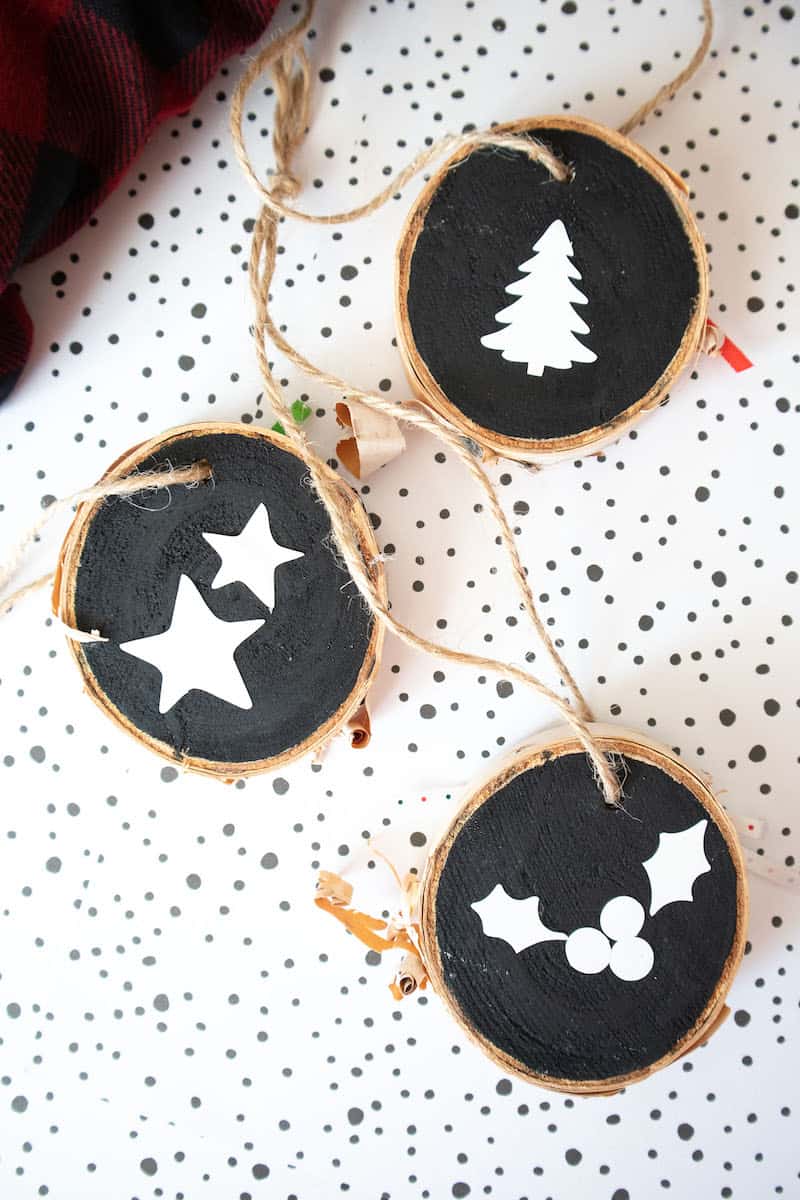
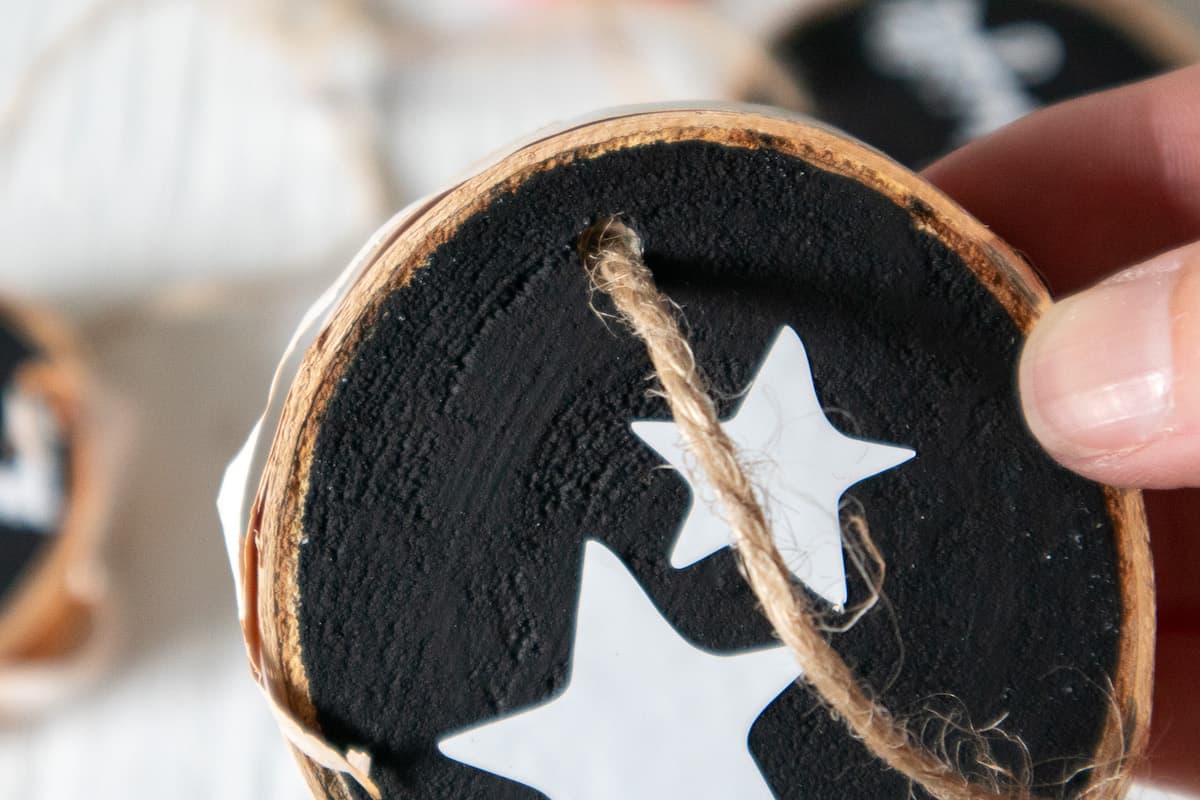
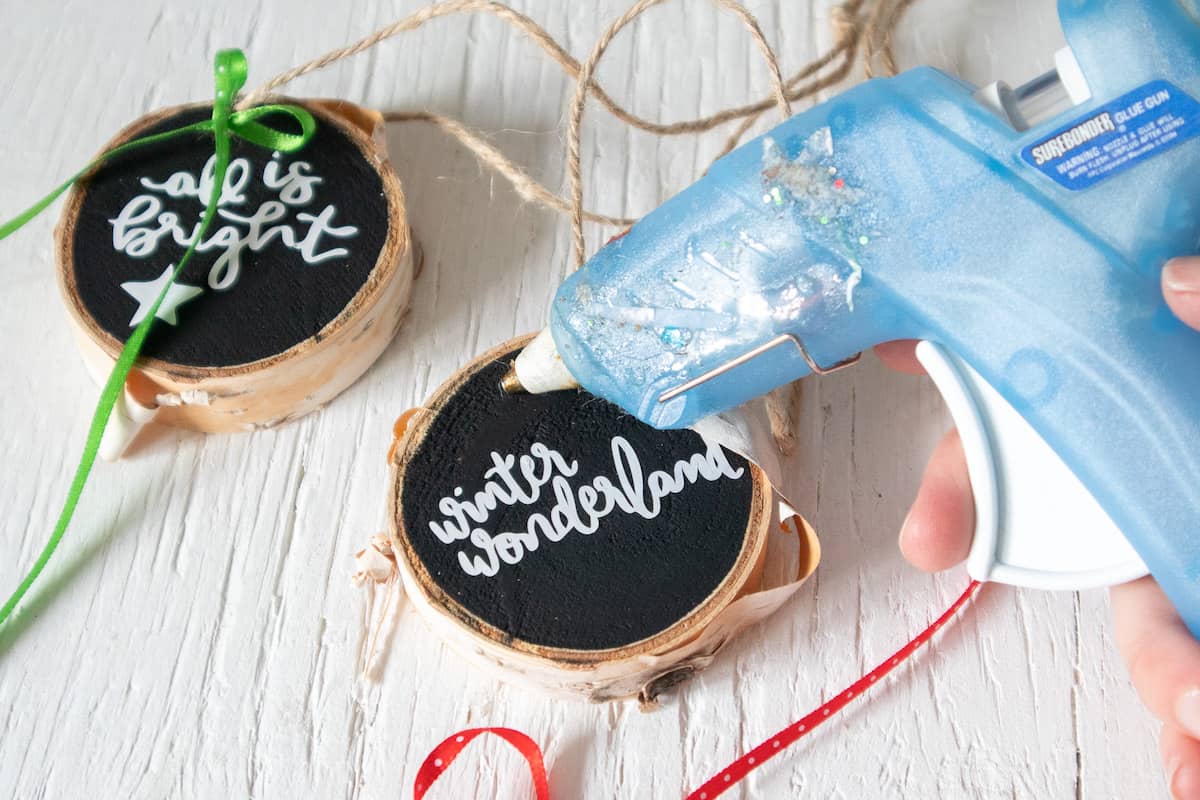
Reversible Chalkboard Holiday Ornaments
Painting these wood slices with simple black and white creates a farmhouse ornament look. While it looks like a chalkboard ornament, you don’t actually use chalkboard paint. Just simple acrylic paint.
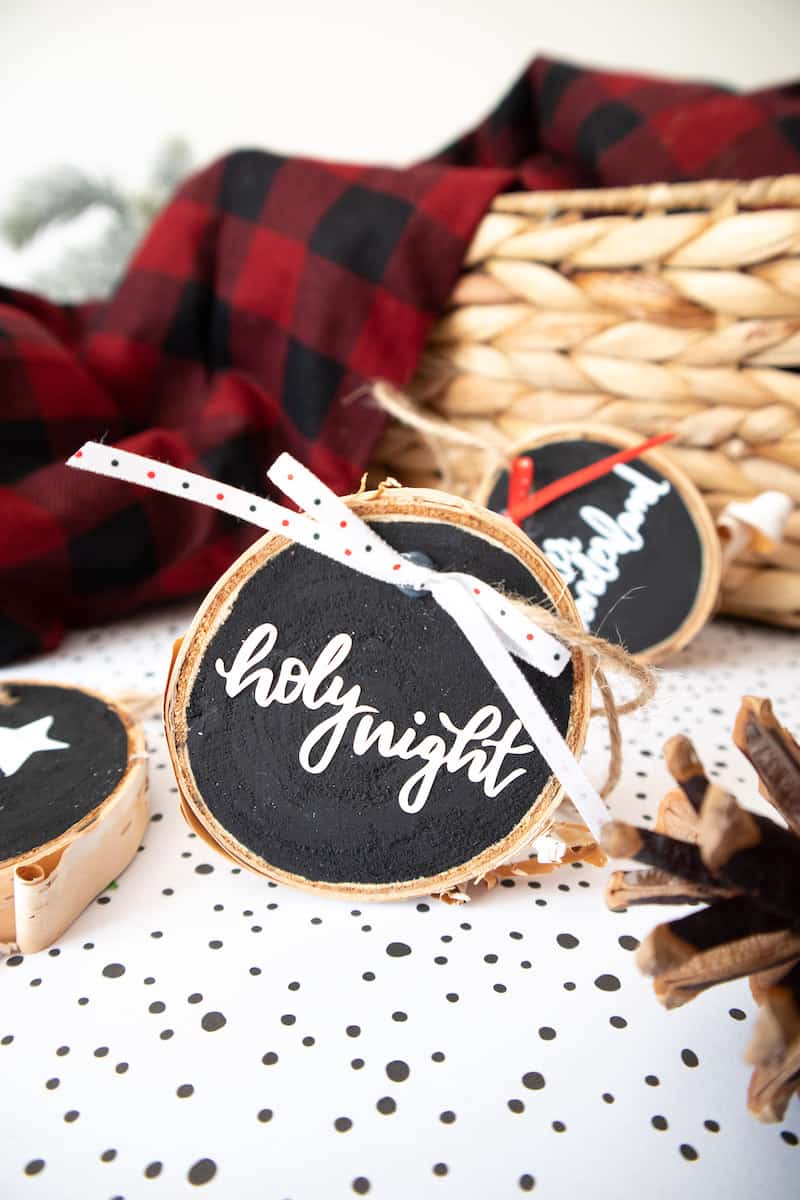
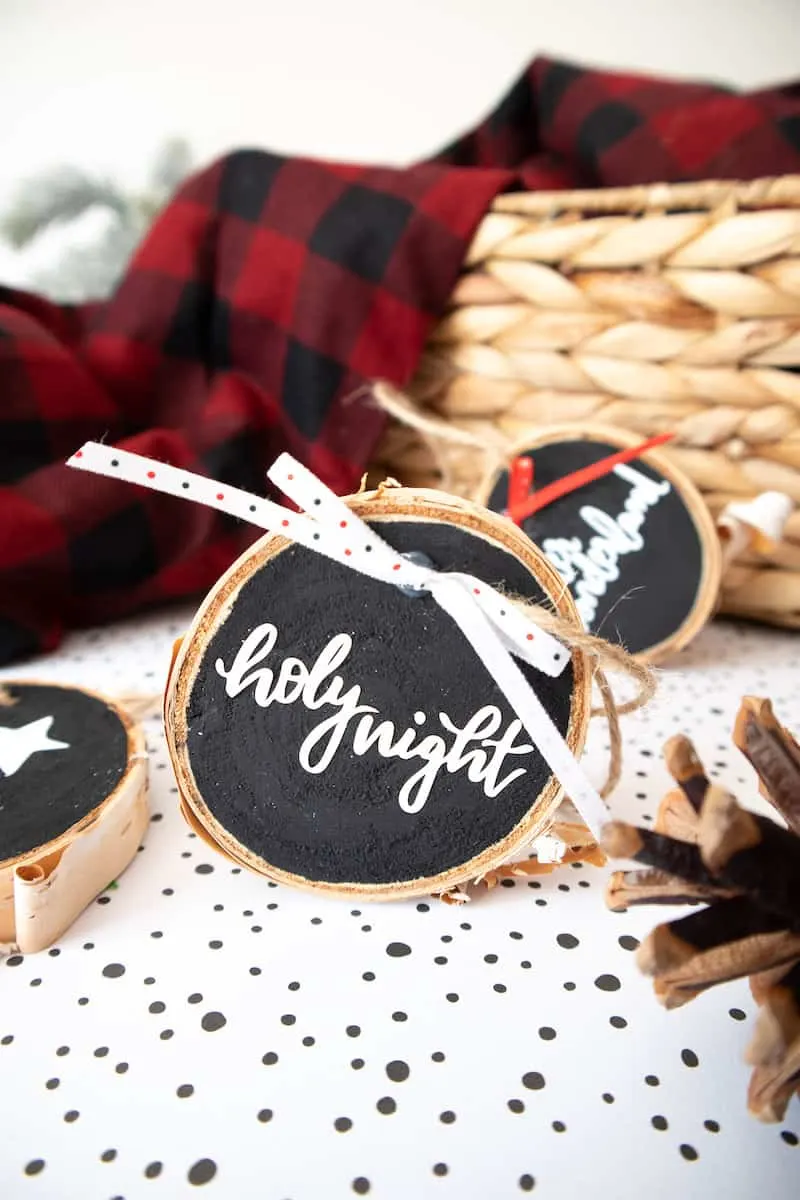


These are great because it doesn’t matter where the ornaments hang in the tree or if they turn around while on the tree branches. There’s pretty holiday images and sayings on both sides.
In a hurry? Pin this craft to your Christmas board or craft board so that you’ll remember it!

DIY Vinyl Wood Slice Ornaments
Regardless of which type of these ornaments you want to make, the process and materials are very much the same. I’ve included the materials and instructions for the glittery woodland animals ornaments below. When appropriate, I’ve mentioned any changes to create the reversible holiday sayings ornaments.
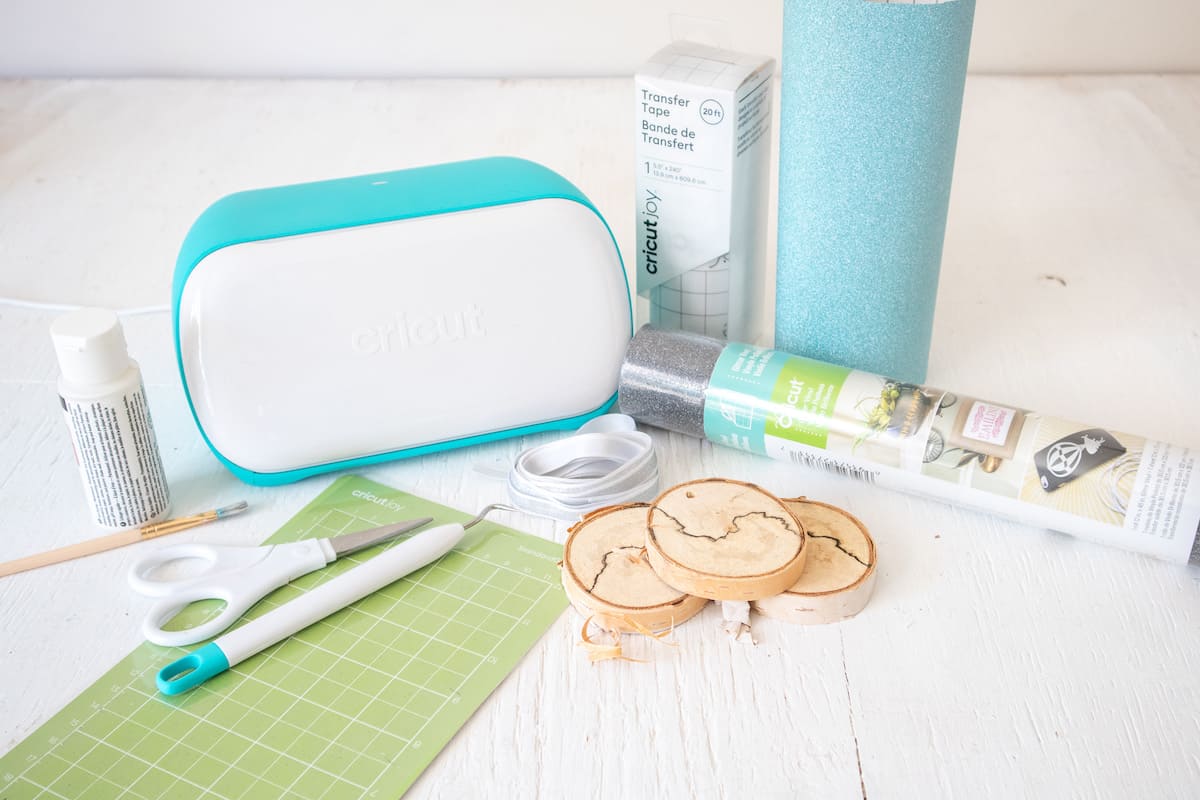
Materials
- 3 birch wood slices, 2.25” diameter x ⅜” thick
- White acrylic paint (Reversible Ornaments: Black paint)
- Paintbrush
- Cricut Joy
- Cricut Joy Standard Grip Mat (not necessary for Reversible Ornaments)
- Glitter Vinyl in black and blue (Reversible Ornaments: Smart Vinyl, Permanent in White)
- Woodland Animals SVG file (or Reversible Ornaments SVG file)
- Weeder
- Scissors
- Cricut transfer tape
- Decorative glitter ribbon, ¼” wide (Reversible Ornaments: Twine, and ⅛ inch wide decorative ribbon, along with glue)
Instructions
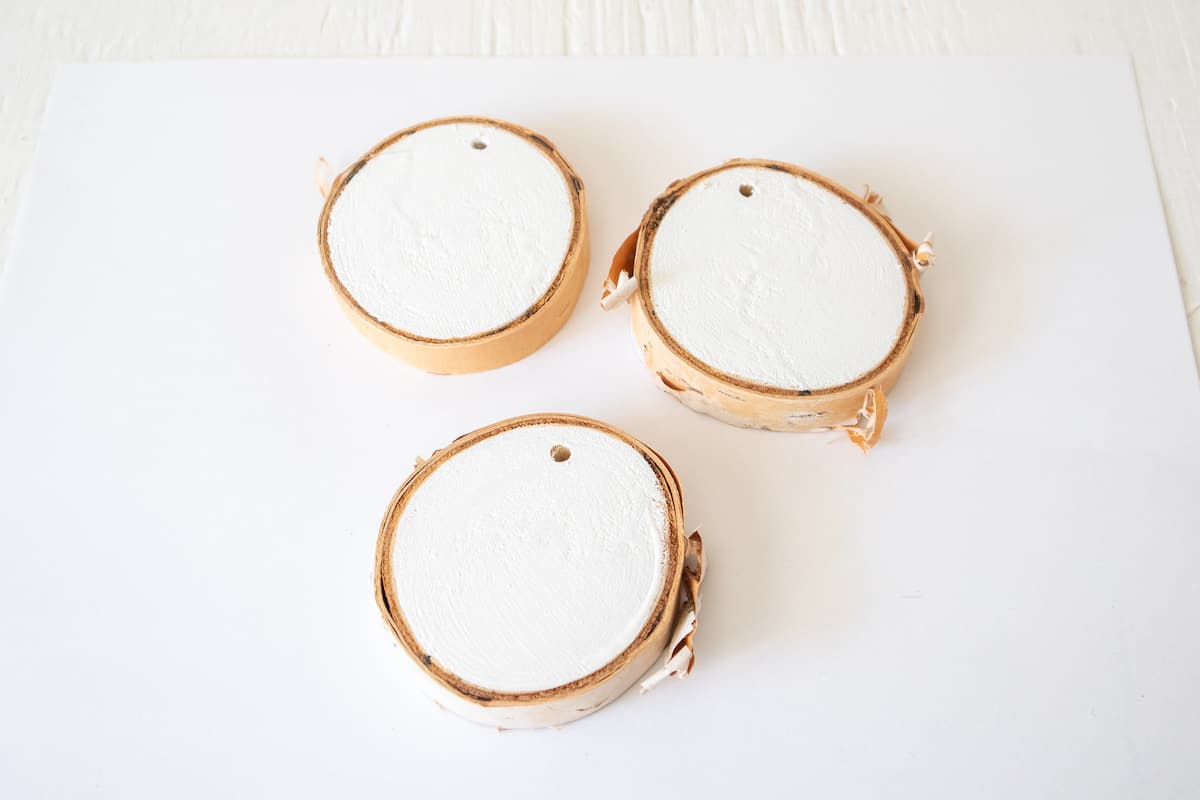
Paint both sides of the wood slices. Do not paint the outside bark. Let dry completely.

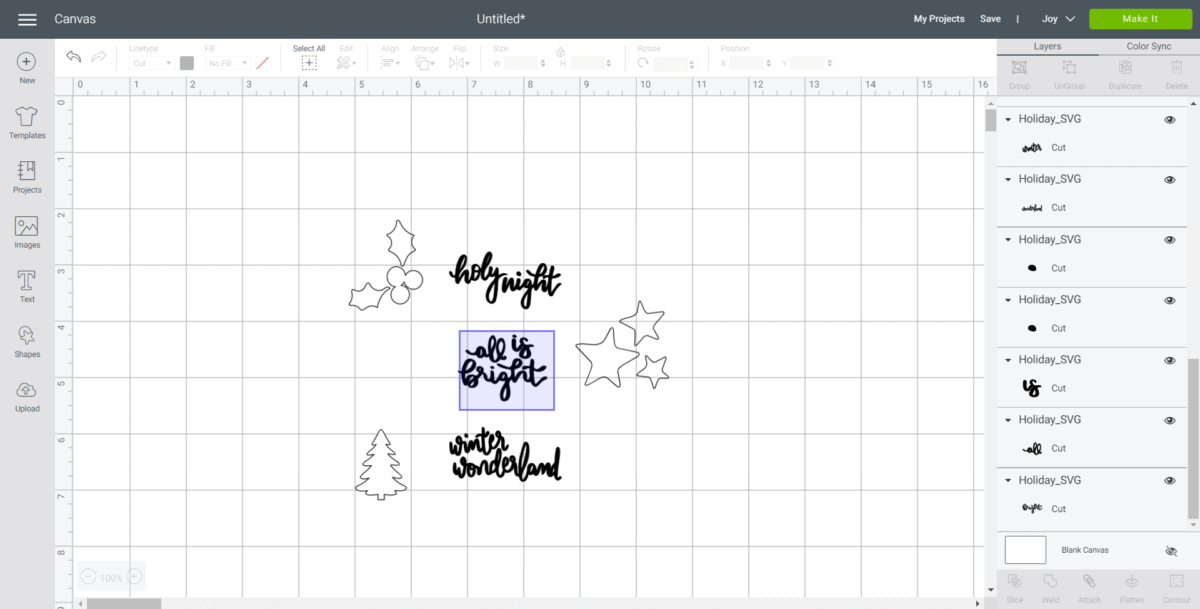
Upload the SVG File into Design Space.
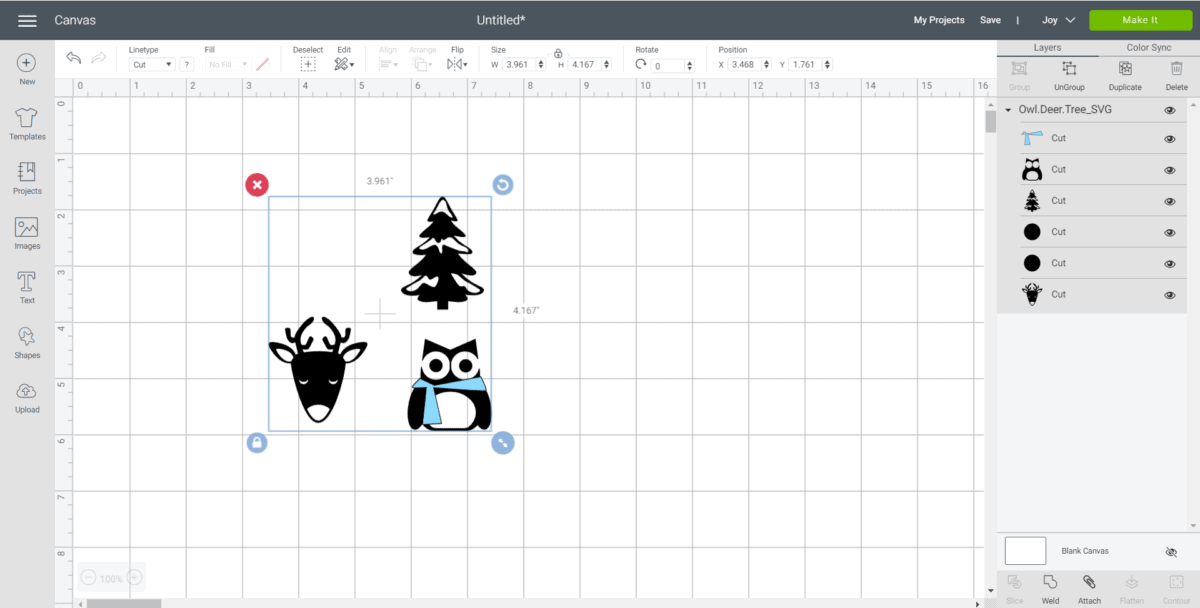

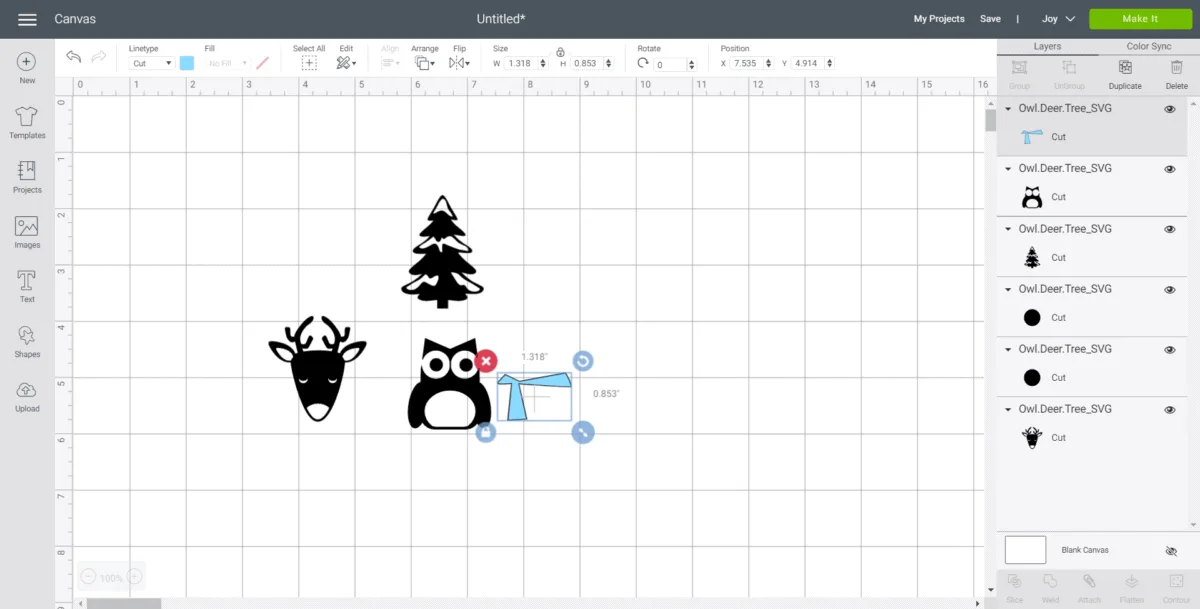
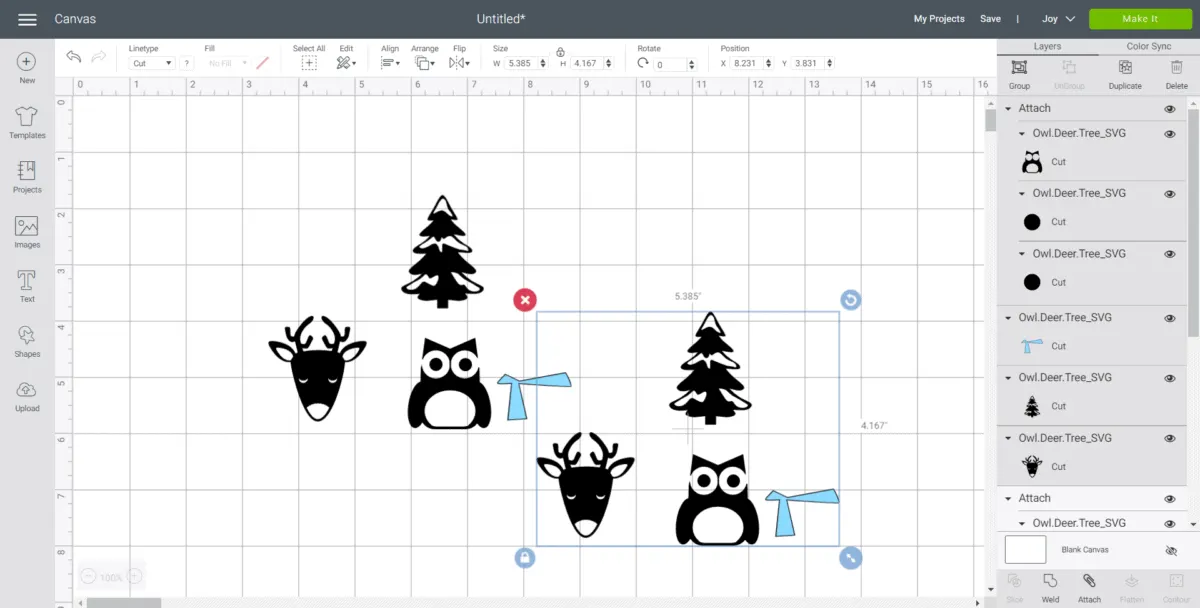
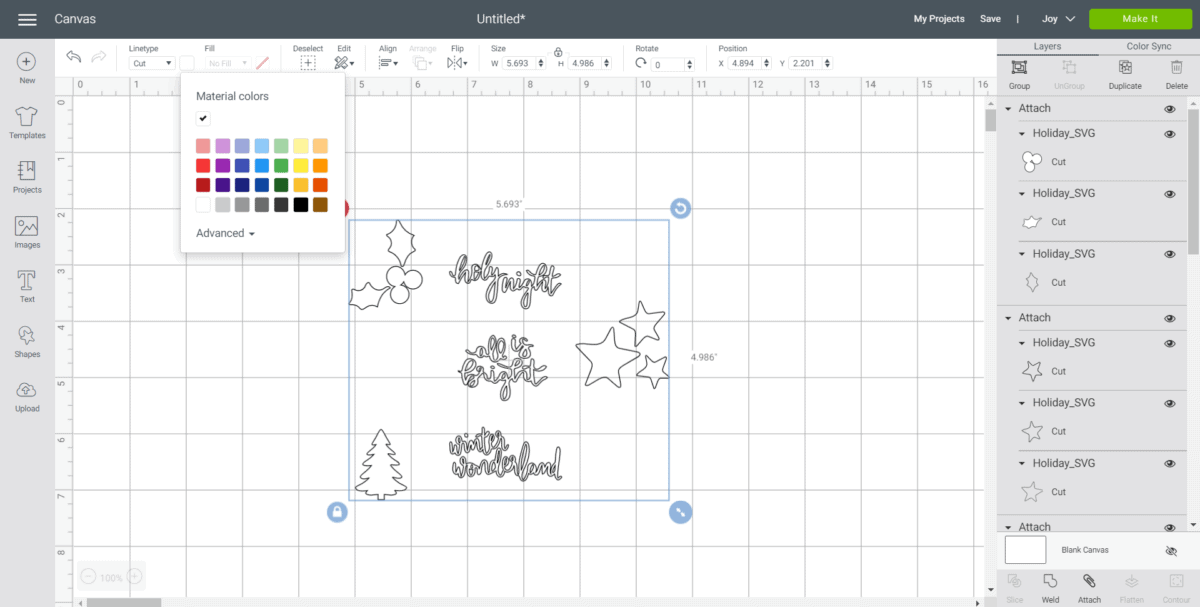
With the image highlighted, click on “Ungroup” to separate the images.
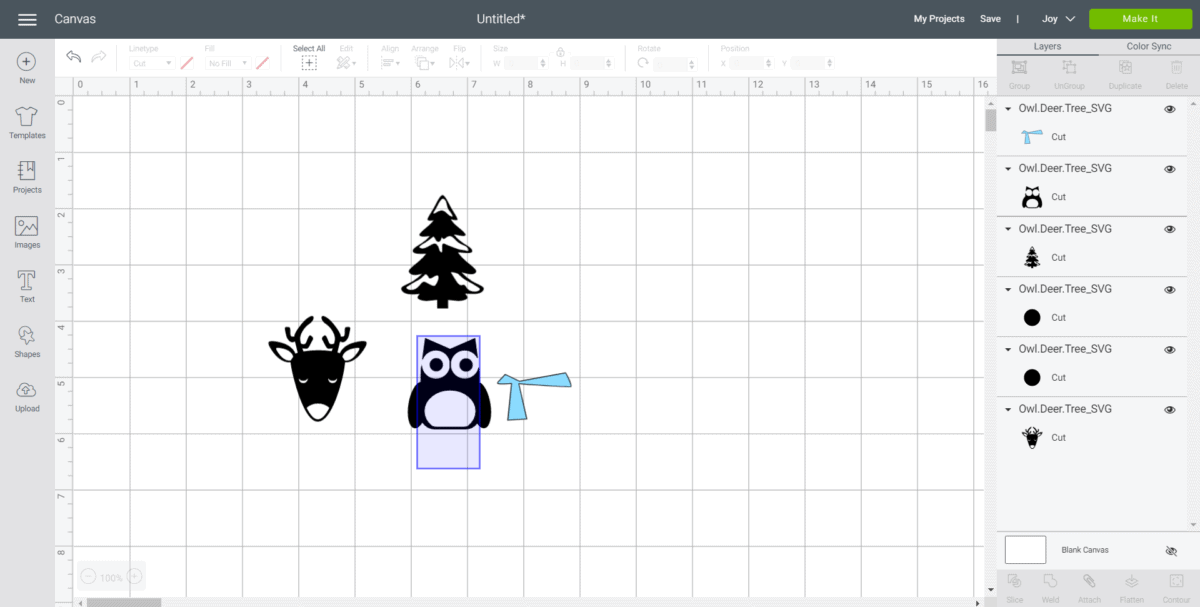
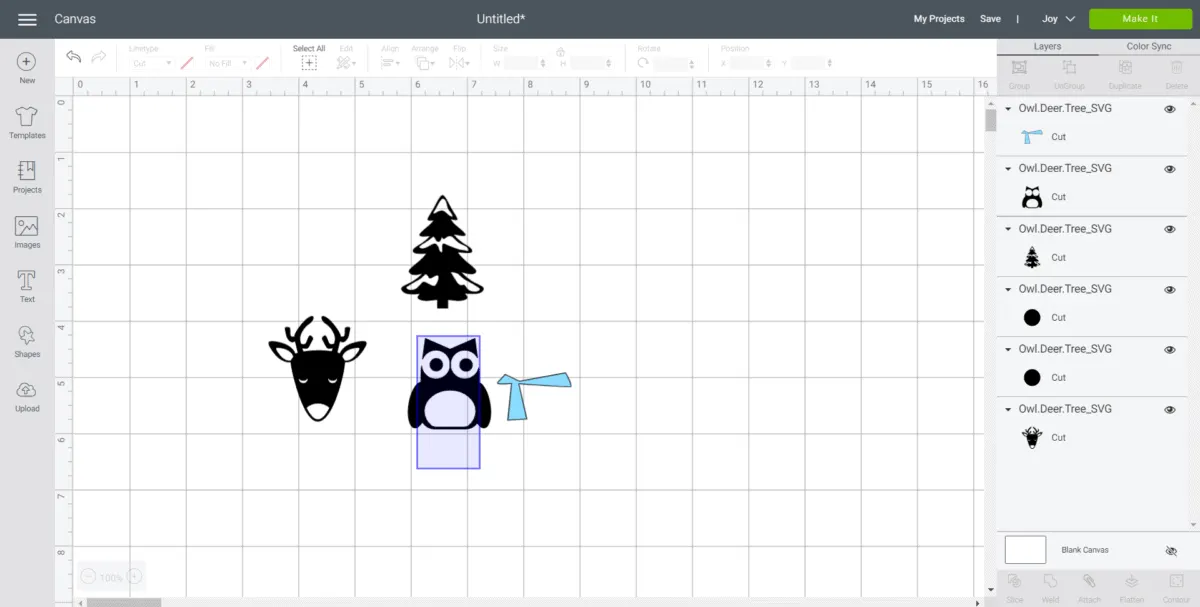
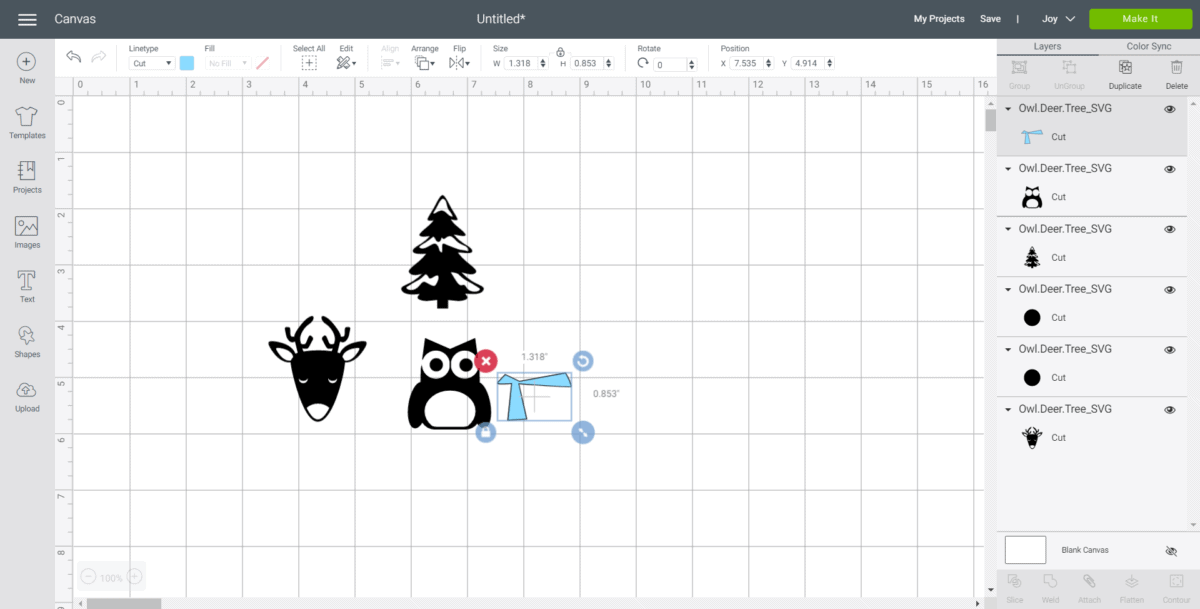
Adjust image sizes to fit your wood slices accordingly or keep the size (2 inches wide) as is.
***This is where the only major difference between the two types of ornaments occurs. Refer to the directions below for screenshots of the reversible holiday sayings ornaments and how to cut the vinyl. Then come back to these directions for how to apply the vinyl.***
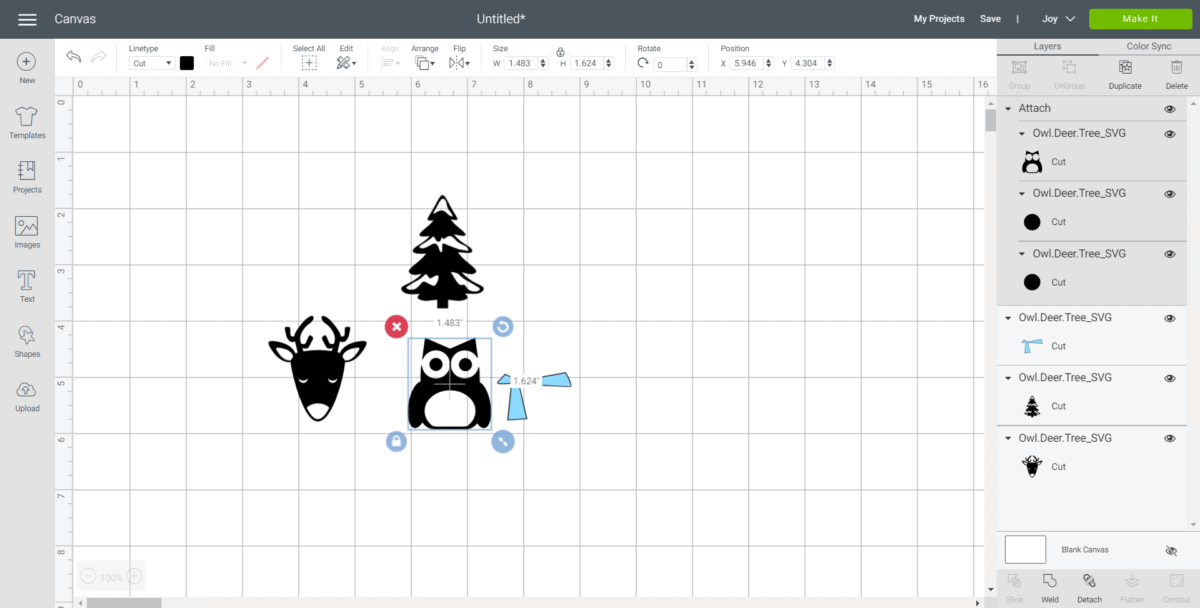
Highlight the owl and click on “Attach”.
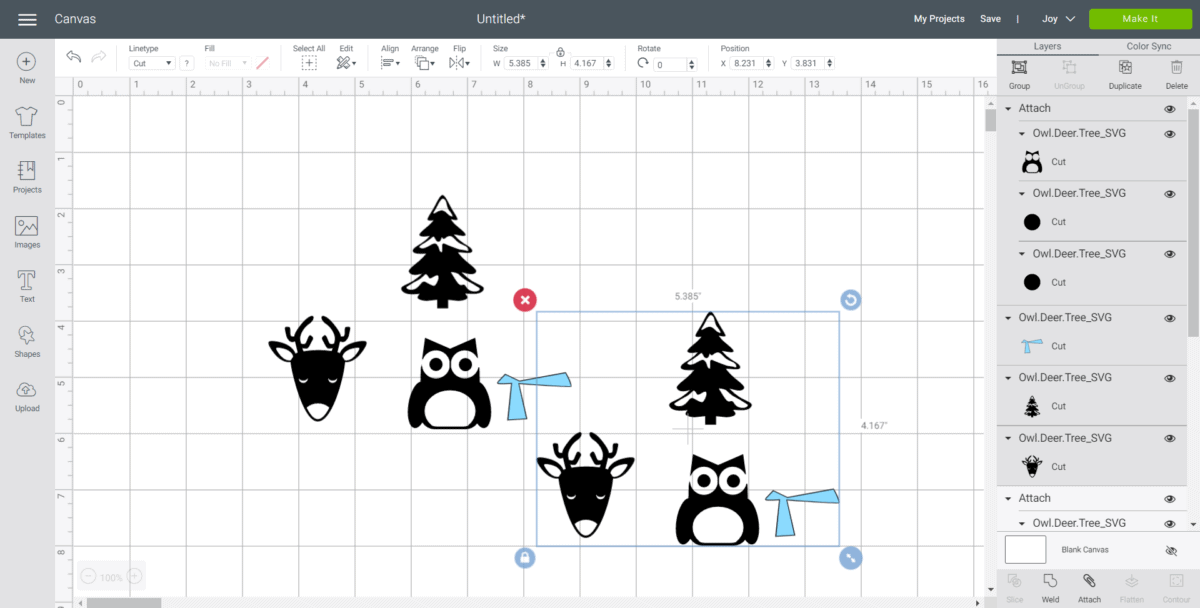
Duplicate the images to have for both sides of the wood slice.
Make sure the machine is set to Cricut Joy and select “Make It” in Design Space.
Choose “With Mat” as the option for cutting when using regular Cricut Vinyl.
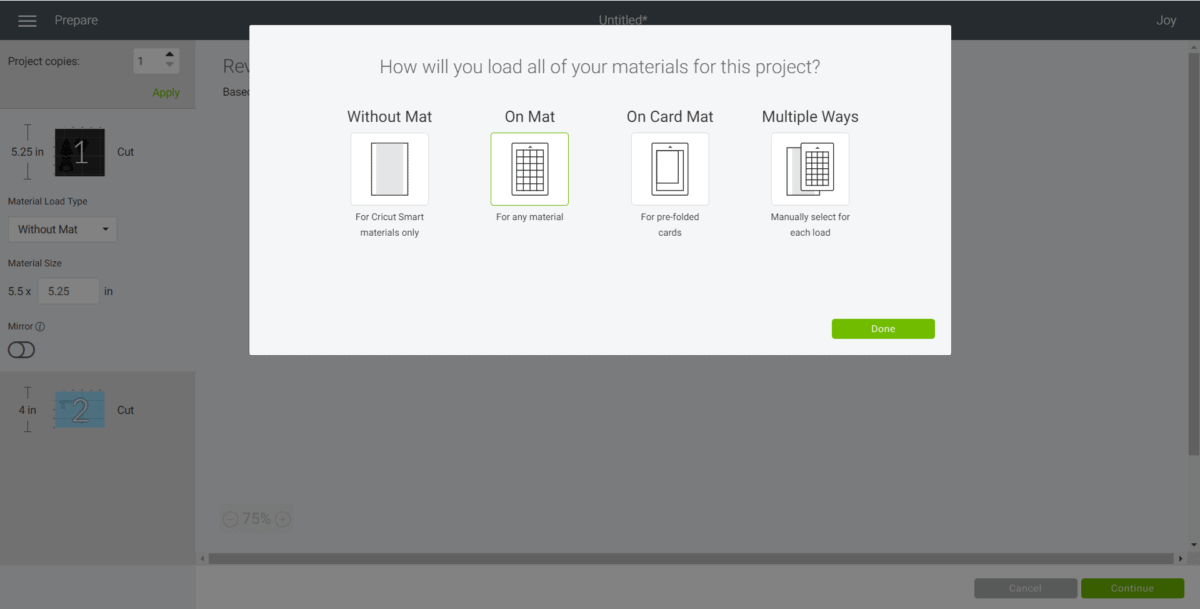
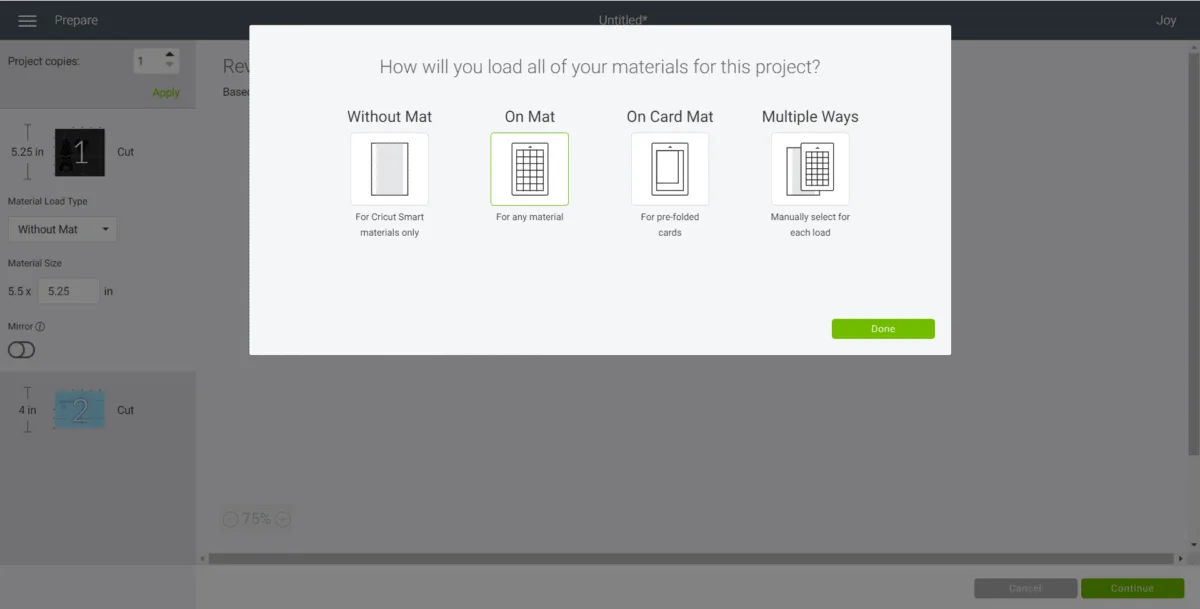
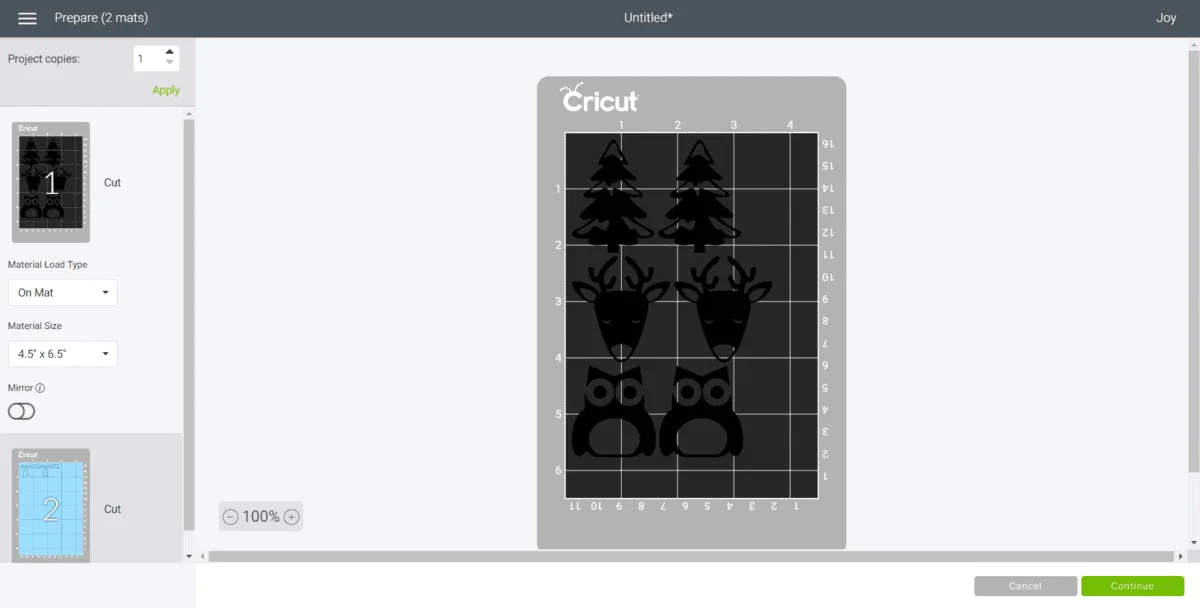
Set material type to Glitter Vinyl.
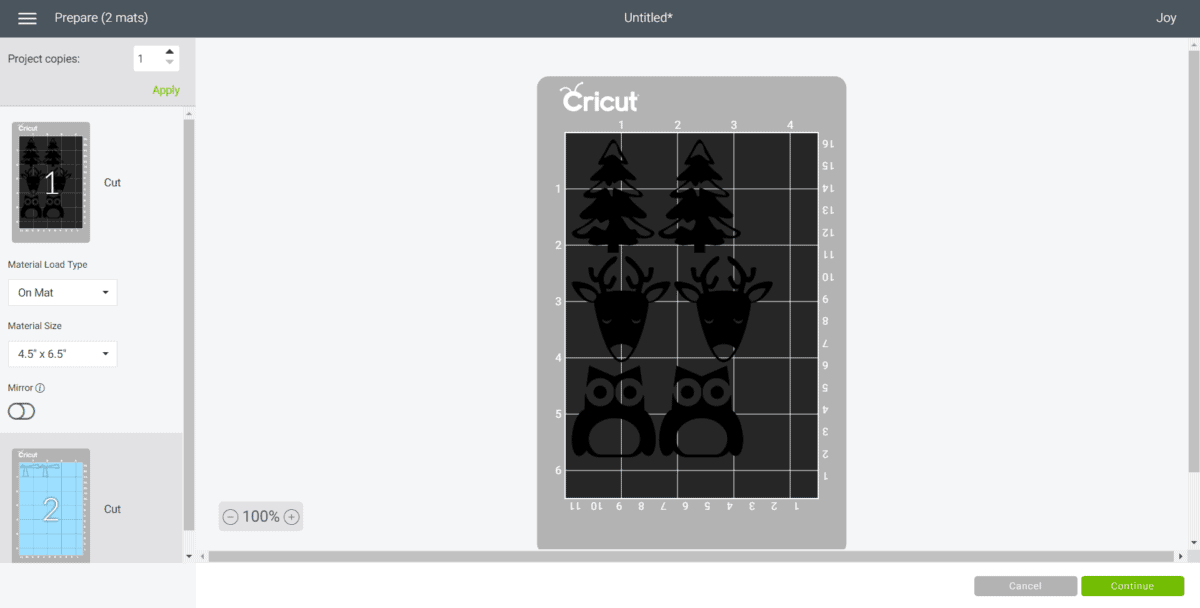
Follow prompts for loading the mat into the Cricut Joy and cutting the Glitter Vinyl. When prompted, unload the vinyl from the cutting machine.


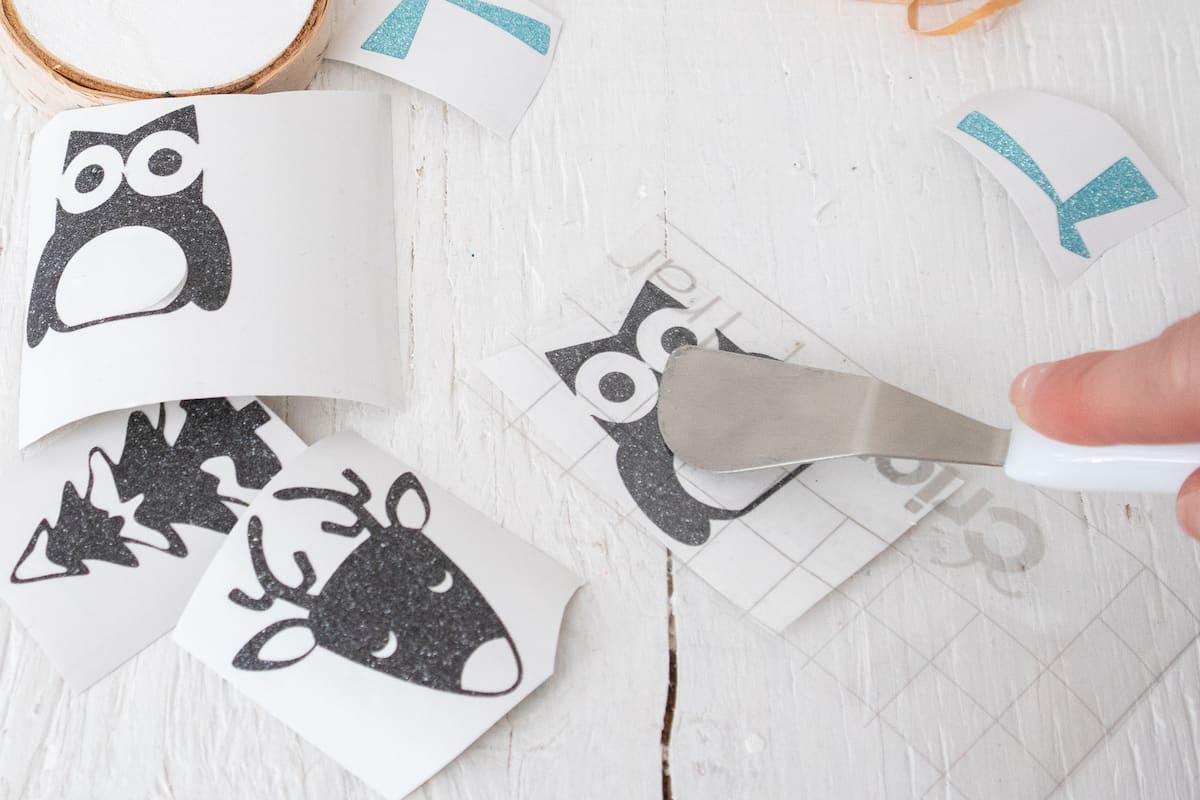
Cut around each image with a pair of scissors.
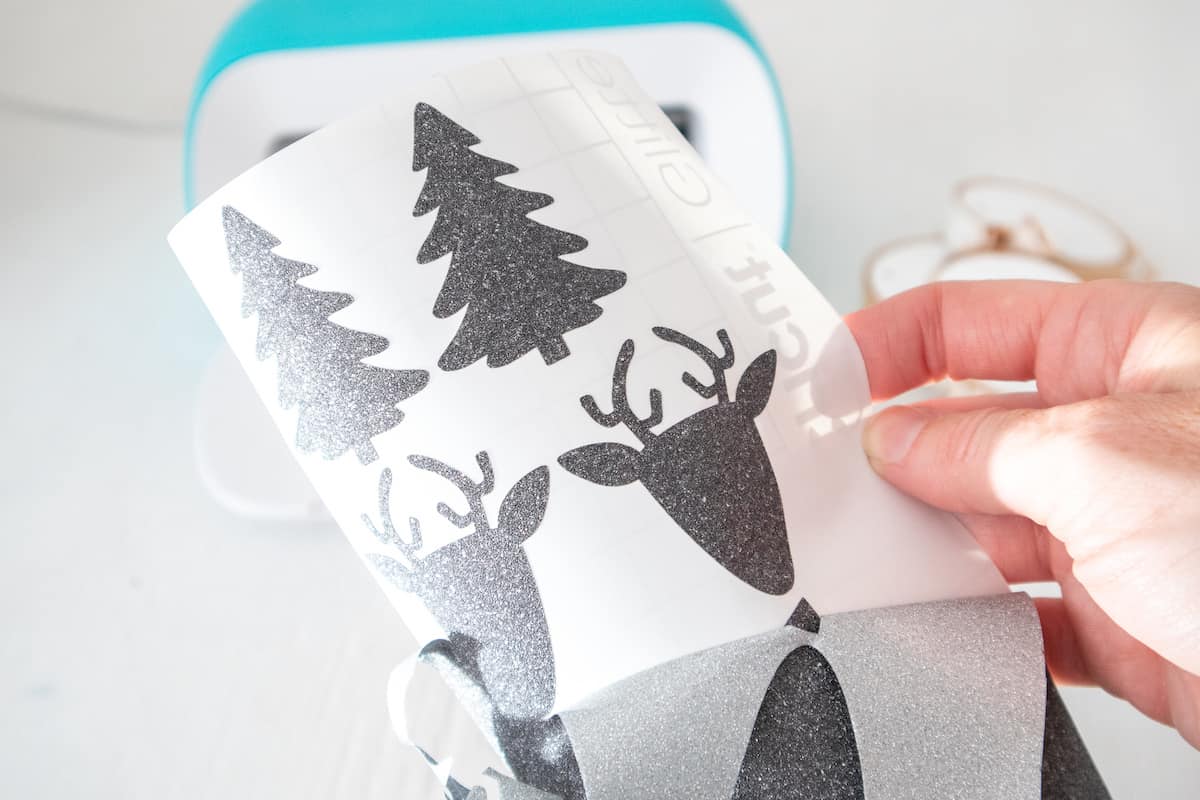
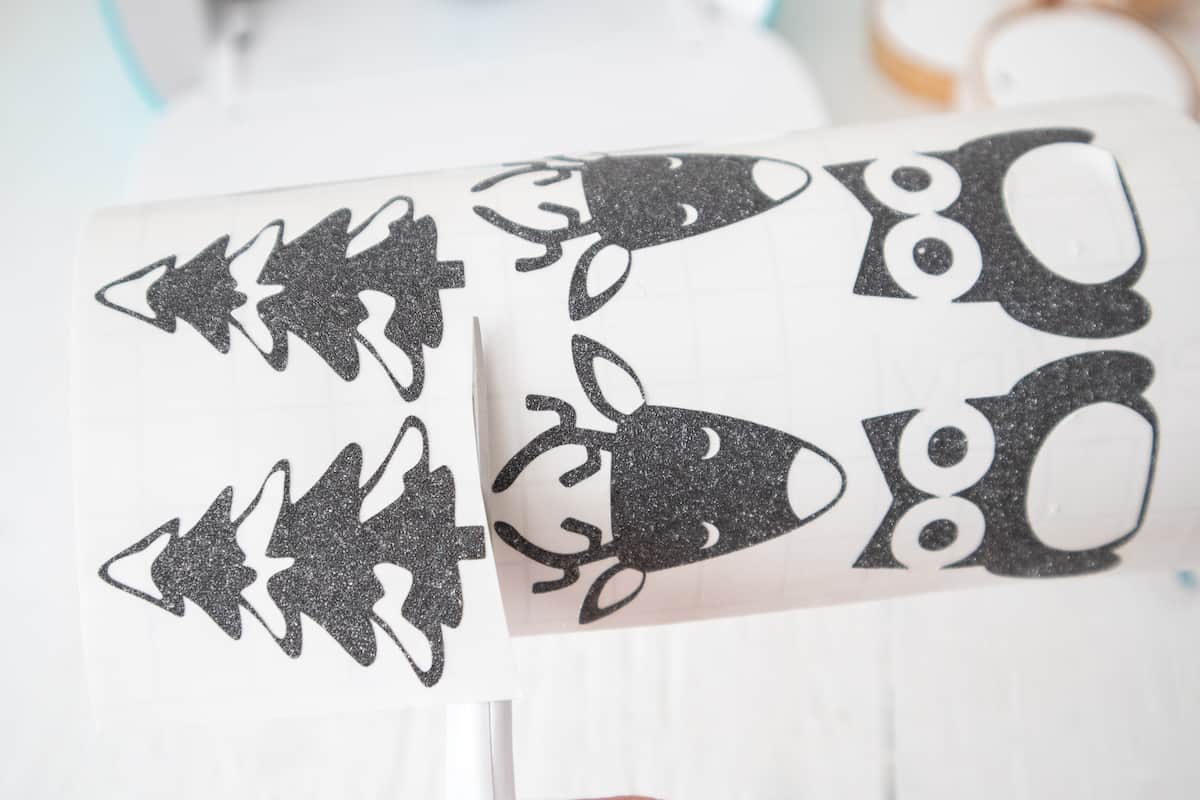
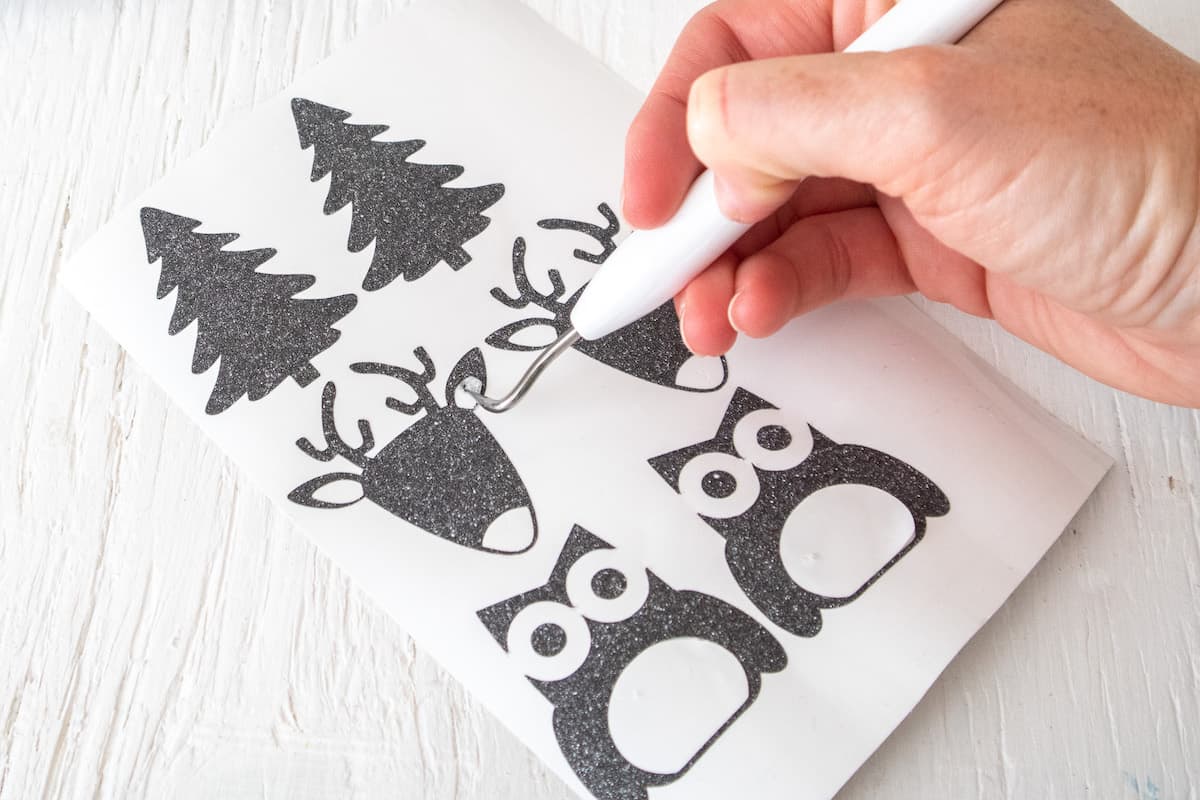
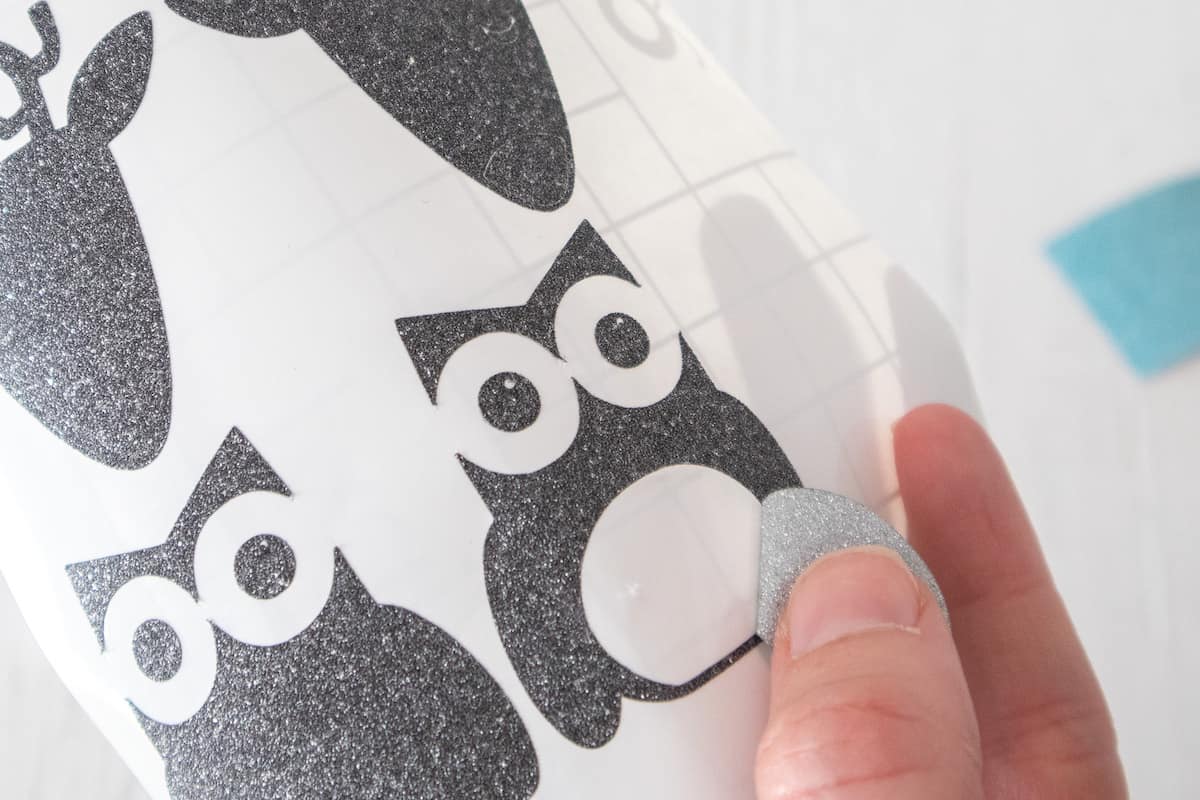
Using the weeding tool, peel away the excess vinyl and remove.

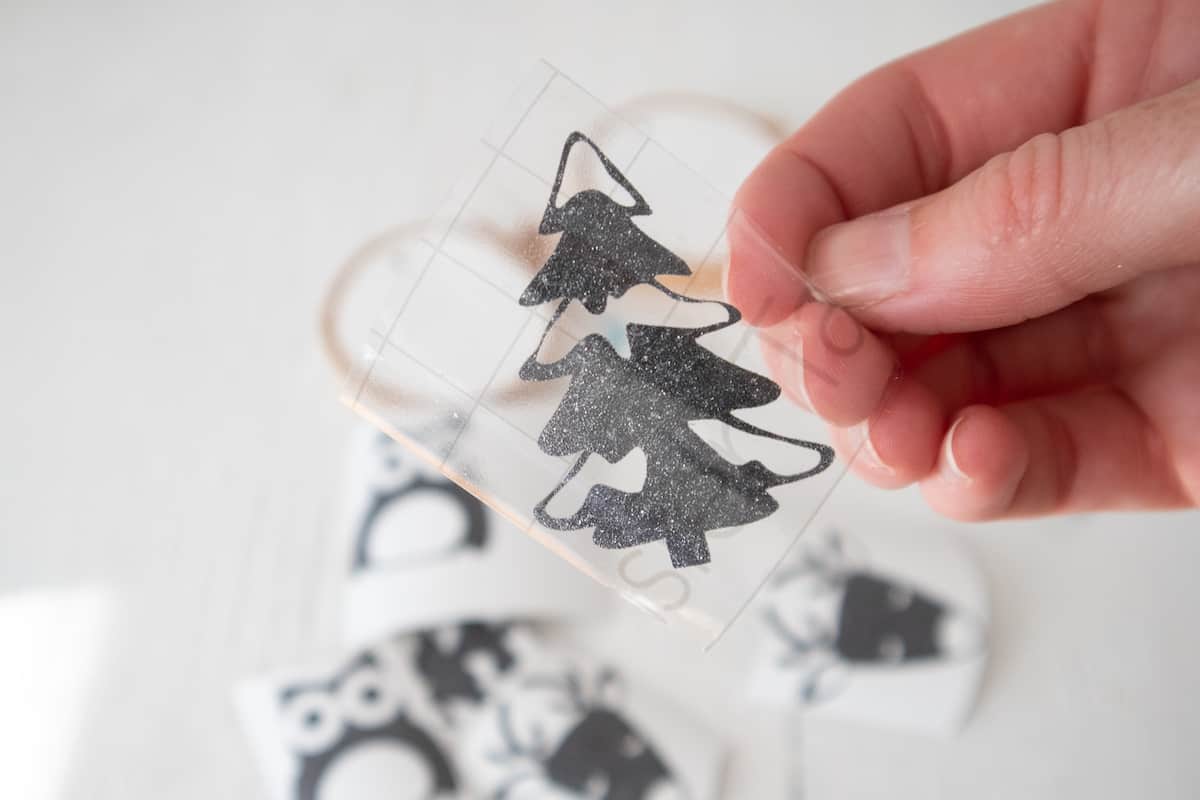
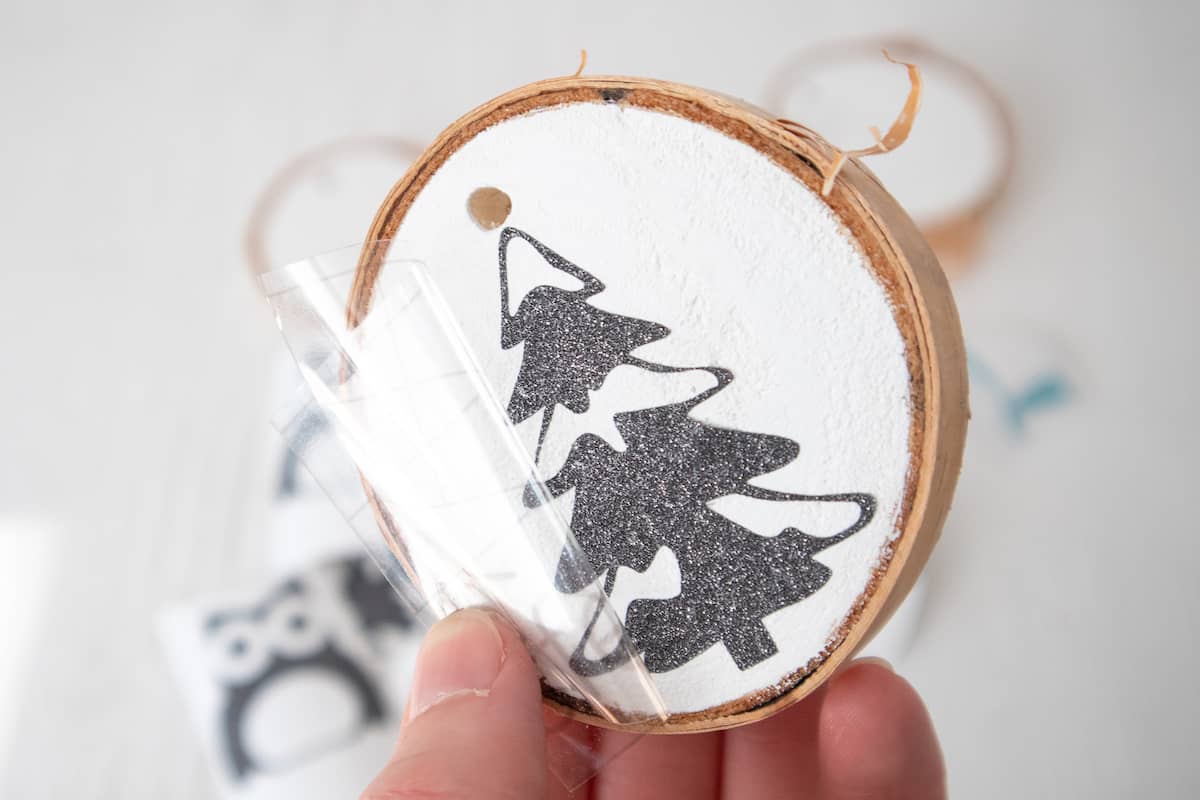
Cut a piece of transfer tape a bit larger than the size of the image.

Peel away the transfer tape backing and place the transfer tape over the cut image. Gently rub the vinyl to help it stick to the transfer tape.
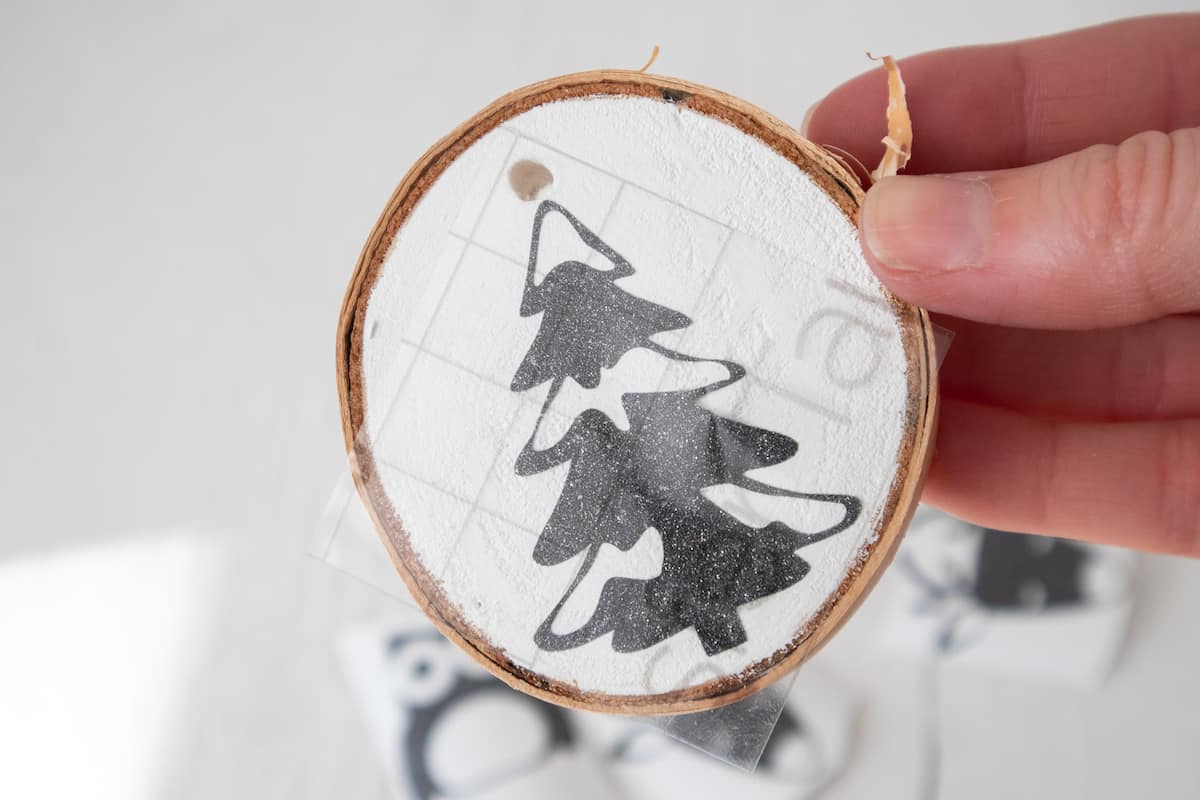
Peel away the vinyl backing and place the image on one side of the wood slice. Gently rub the vinyl to help it stick to the wood slice. You can use a Cricut scraper tool for this, if you would like.
Slowly peel away the transfer tape.
*Or, peel the glitter vinyl image off of the backing and place directly on to the wood slice without using the transfer tape.
Repeat for the other wood slices.
For the woodland owl ornament, place the body of the owl on to the wood slice first, then stick the scarf piece over top.
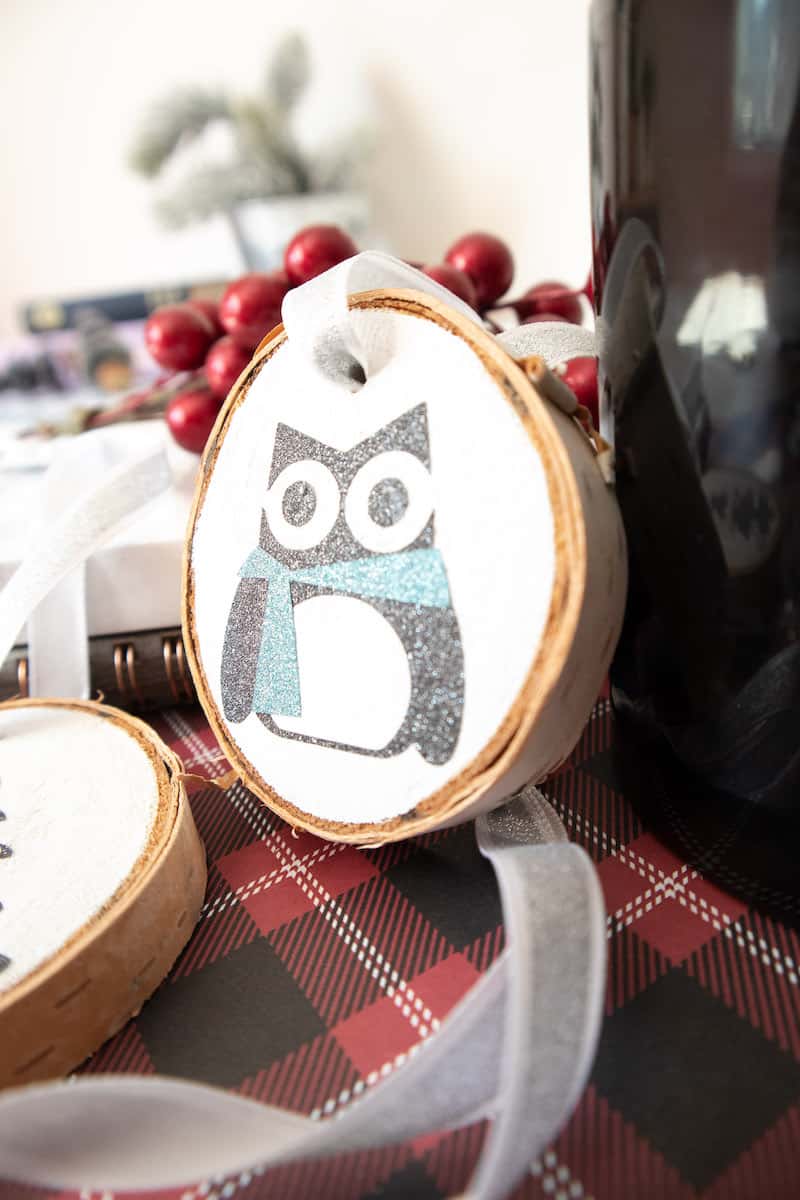
Cut three pieces of ribbon (or twine) 9” long. Insert the end of the ribbon through the hole at the top of the wood slice and tie ends together.
For the holiday sayings ornaments, cut three pieces of decorative ribbon 6 inches long. Tie into a small bow and glue on the top of ornament.
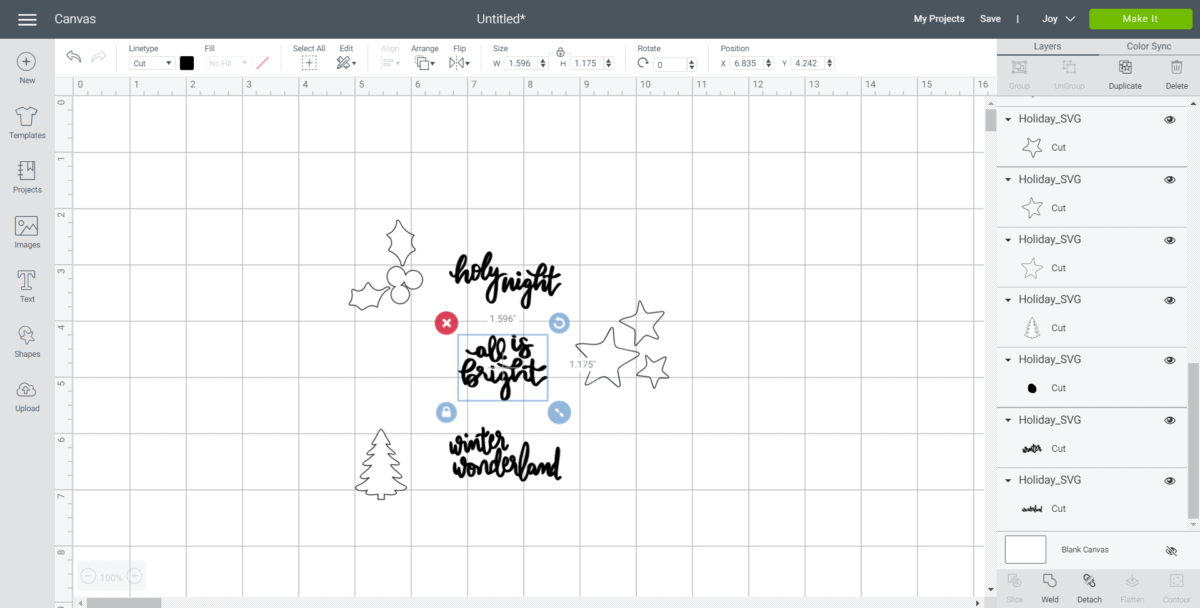
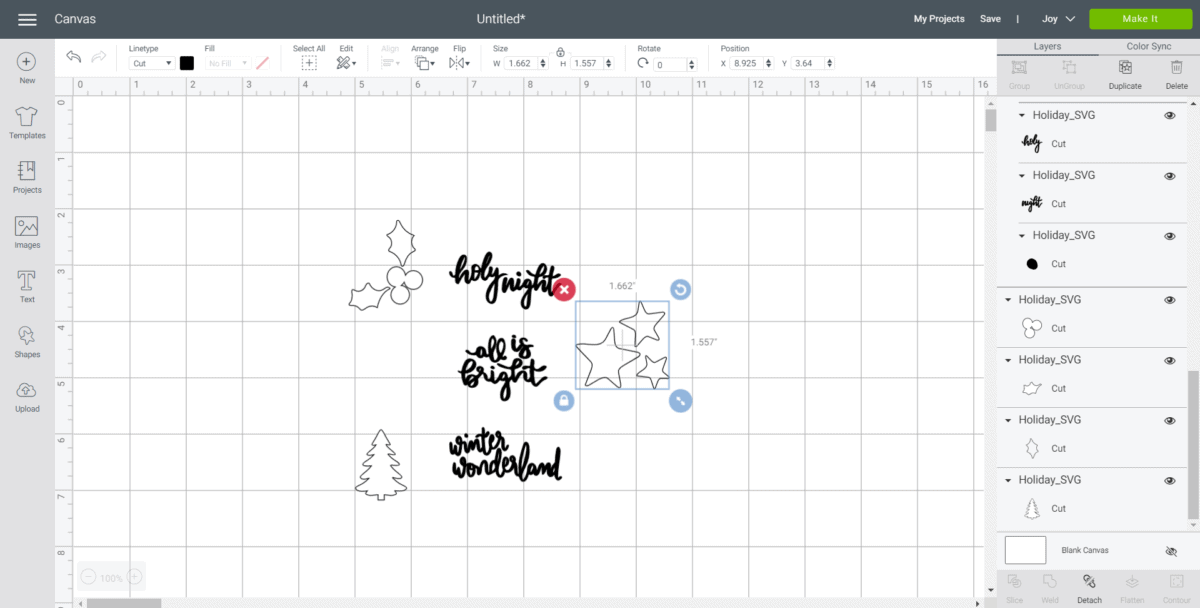
***Reversible Holiday Ornaments Directions
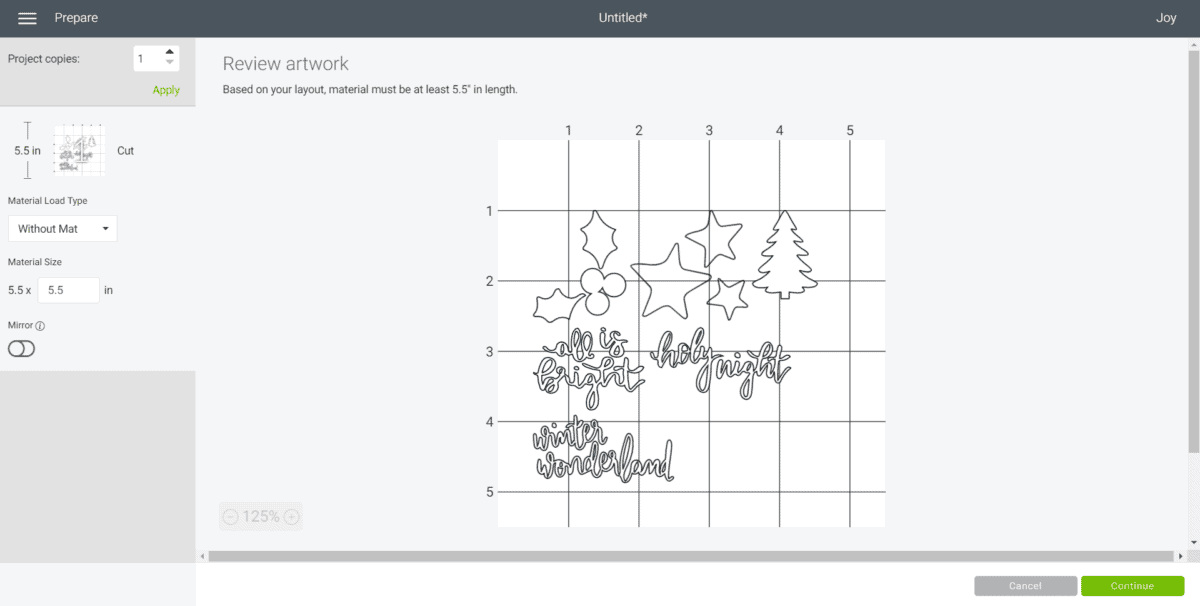
Highlight one phrase at a time and click on “Attach.” Highlight each individual set of images (for example, the 3 stars) and click on “Attach.”
Cutting the Vinyl
Make sure the machine is set to Cricut Joy and select “Make It” in Design Space.
Choose “Without Mat” as the option for cutting when using Smart Vinyl.
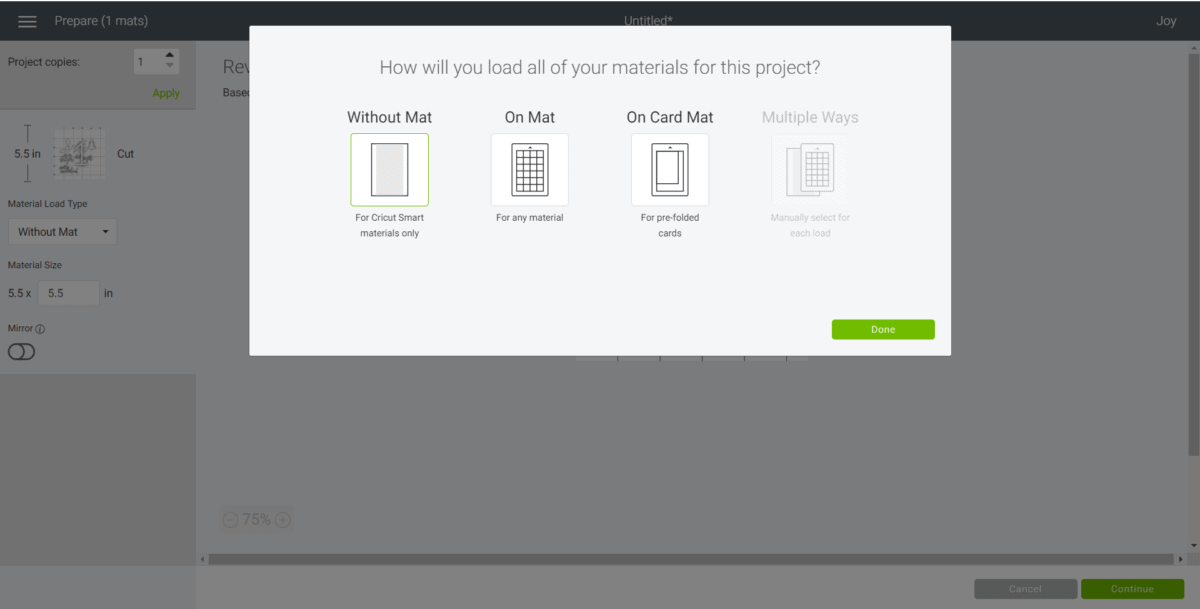
Set material type to Smart Vinyl.
Follow prompts for loading the mat into the Cricut Joy and cutting the Smart Vinyl. When prompted, unload the vinyl from the cutting machine


Christmas Patterns and SVGs!
Want more fun holiday SVGs for crafting and creating this season? I’ve got a fun 4-pack of patterns perfect for DIYs!
Visit the Single Girls DIY library for more details and to get your downloads!
Want more Christmas Cricut crafts? You can make these Scandinavian Felt Christmas trees with a Cricut (or hand cut them).
Use Cricut to add a winter saying to these reversible wooden snowman blocks.
Our joyful rainbow ornament is made with glitter and Cricut vinyl!
Check out my big list of Quick and Easy DIY Christmas crafts, too!
