

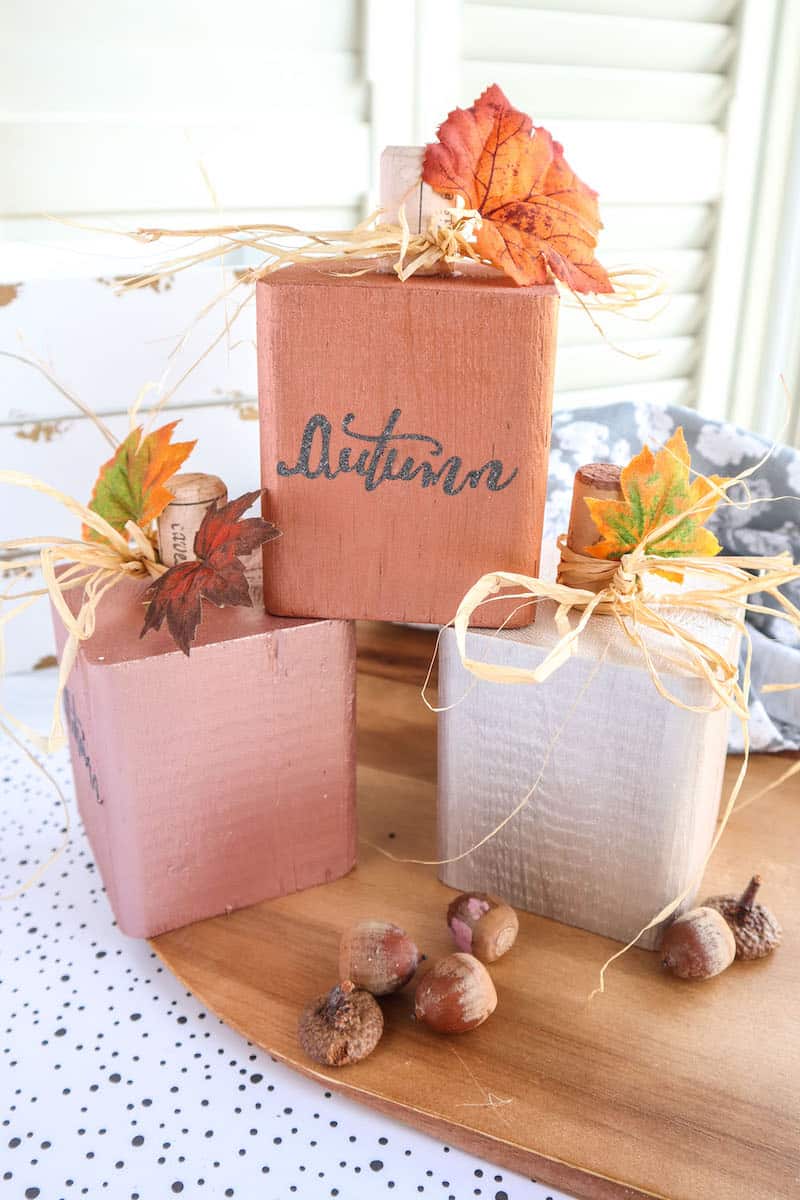
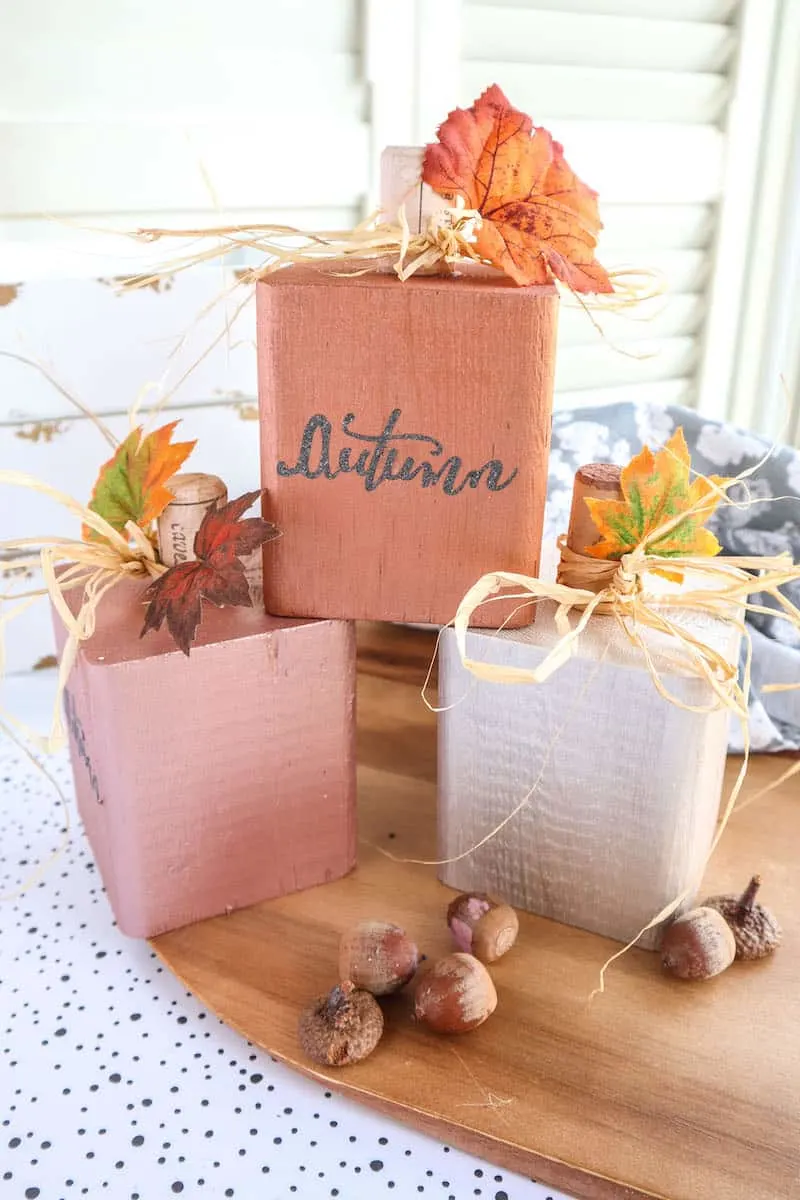
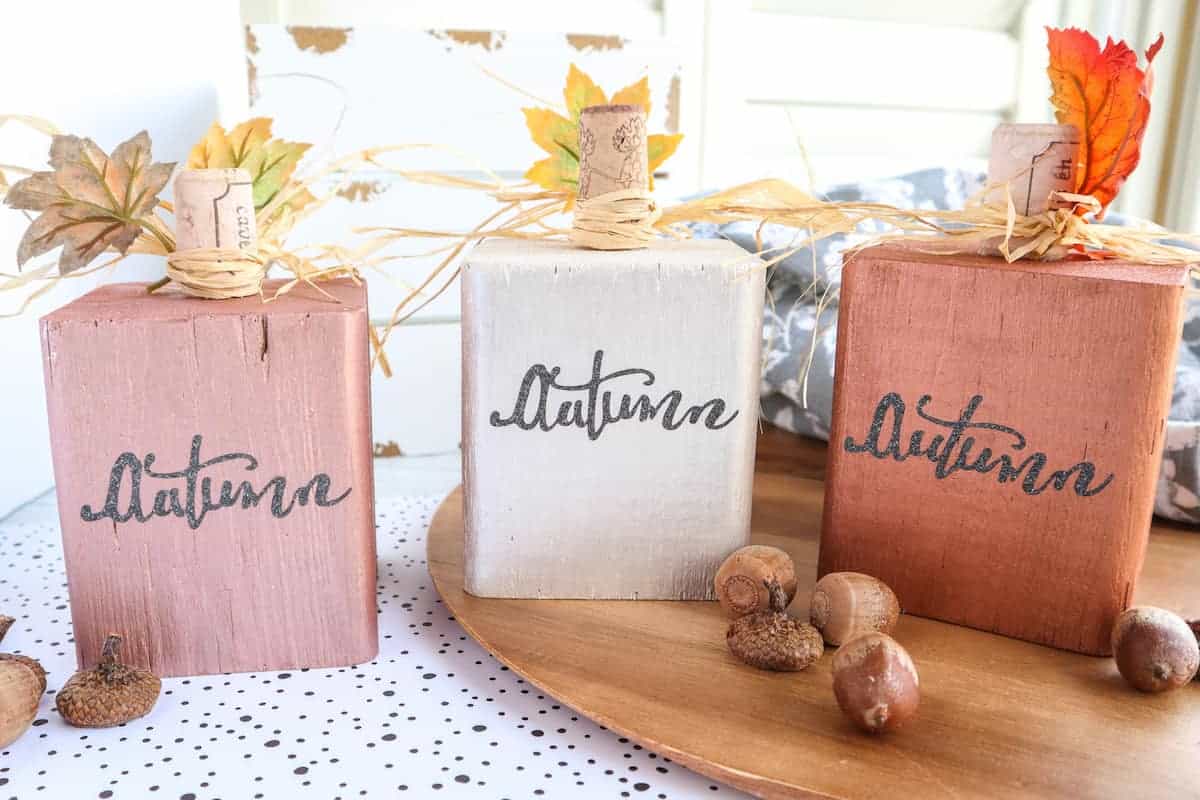
These DIY wood block pumpkins are simple to make with 4X4 wood blocks. The metallic paint and Cricut vinyl words create upscale fall decor that’s budget friendly.
I love the rustic simplicity of wood block pumpkins. Plus, I love how easy and inexpensive they are to make!!!
While this tutorial uses vinyl words made with Cricut, you could just as easily skip applying words and just make solid color pumpkins. Or, hand letter the words with a permanent marker or paint pen.
You could also order Fall word stickers like these to apply.
These DIY wood pumpkin blocks are perfect inside or outside the home. I personally love them as a festive table centerpiece for Fall or Thanksgiving. Pair them with my easy DIY pumpkin napkin rings and DIY place card holders for a beautiful table setting.

They’re so easy to make that you can make a few batches for friends, or sell them online or at craft fairs.
If you’re going to start cutting a 4 X 4 wood post, might I suggest you cut another one in the same dimensions for this cute reversible wood block snowman craft? The instructions are just about the same, and you’ll have winter decorations after autumn.
How to Make Wood Block Pumpkins with Words

Materials
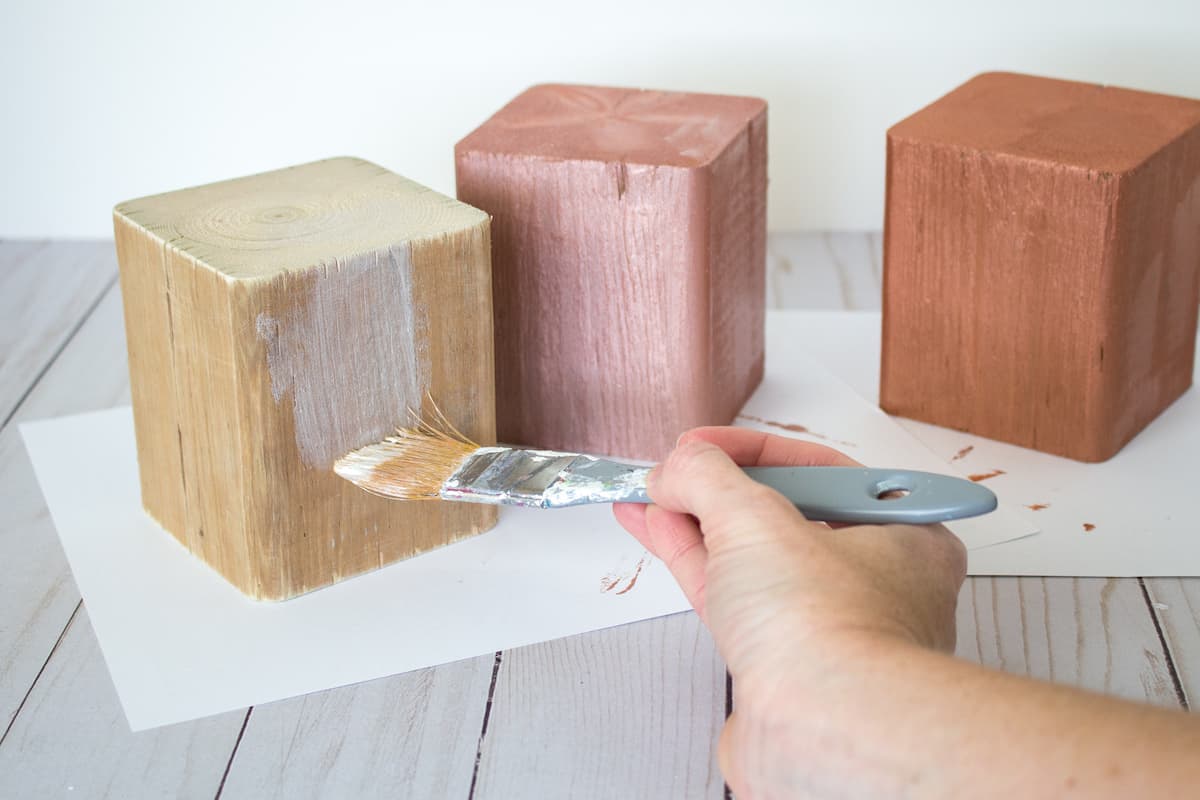
- 4×4 post cut into 3 pieces, each 4 ½” high
- Matte Metallics Paint: Rose Gold, Ivory Pearl and Champagne
- Paintbrushes, fine tip and medium flat brush
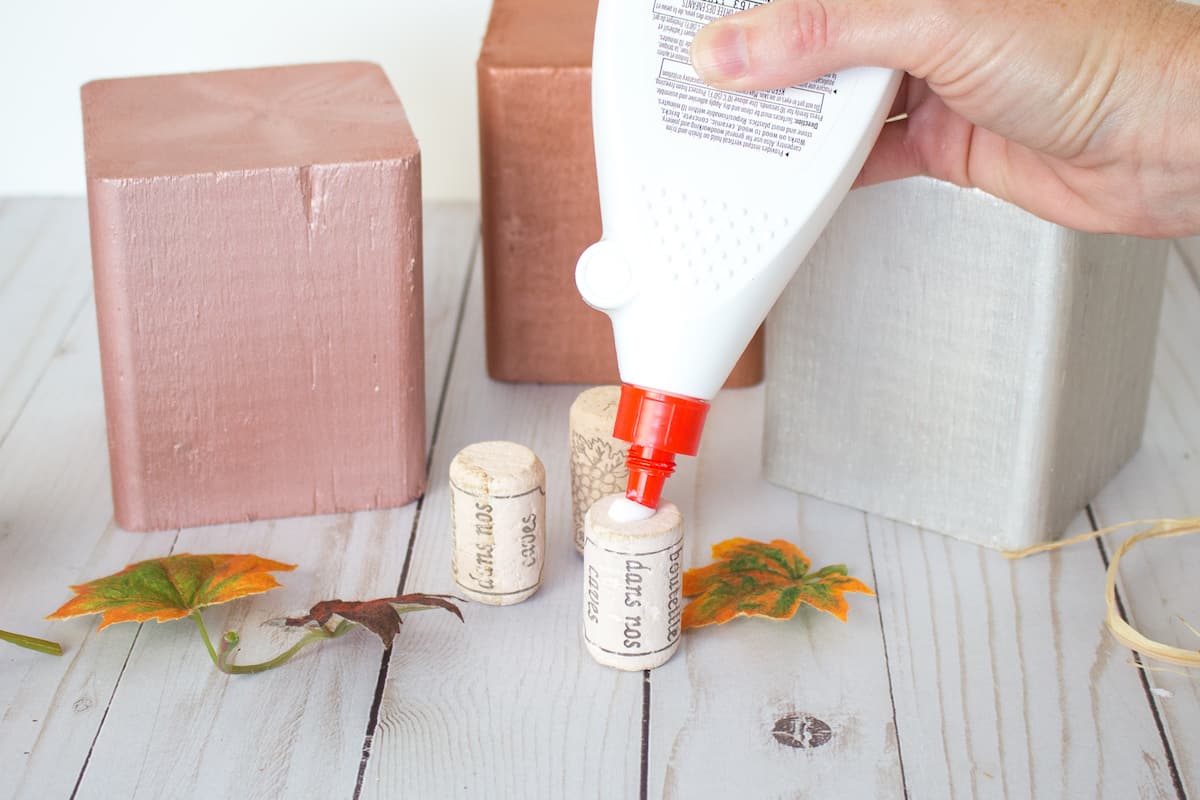
- 3 Wine Corks
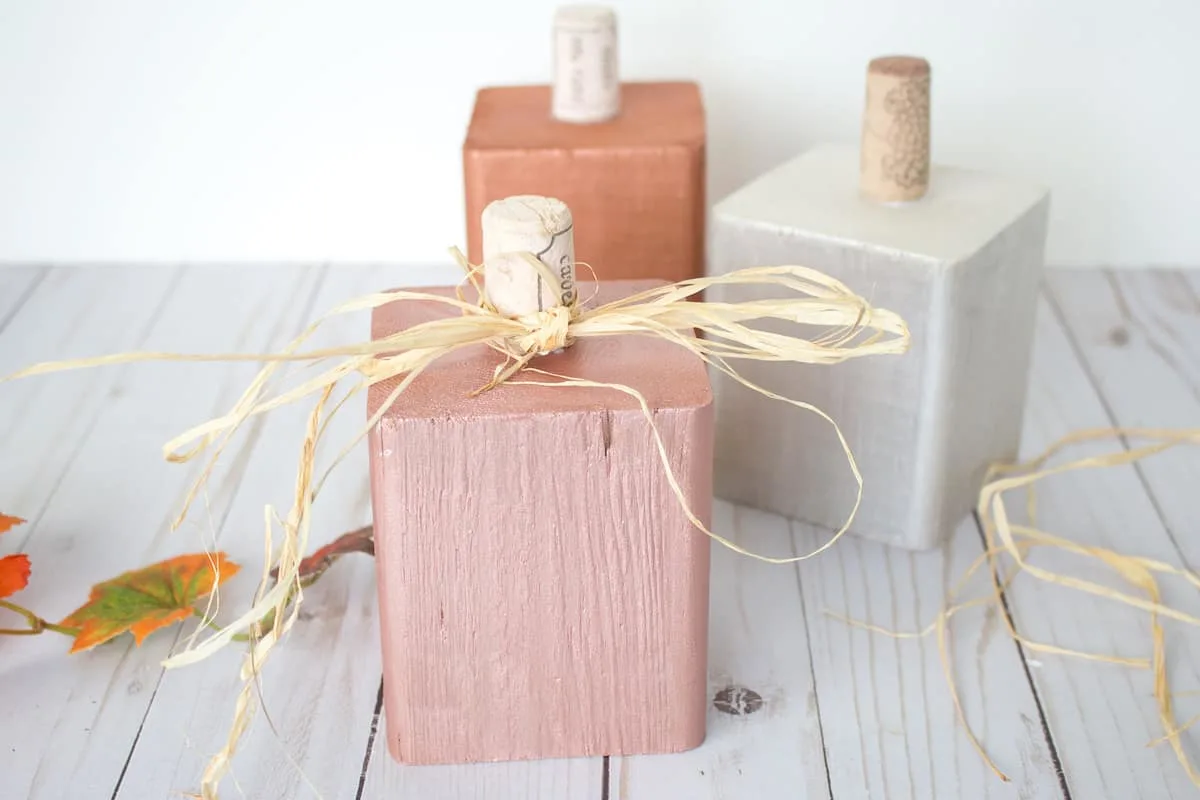
- Raffia
- Faux Leaves
- Wood Glue
- Free Autumn SVG file
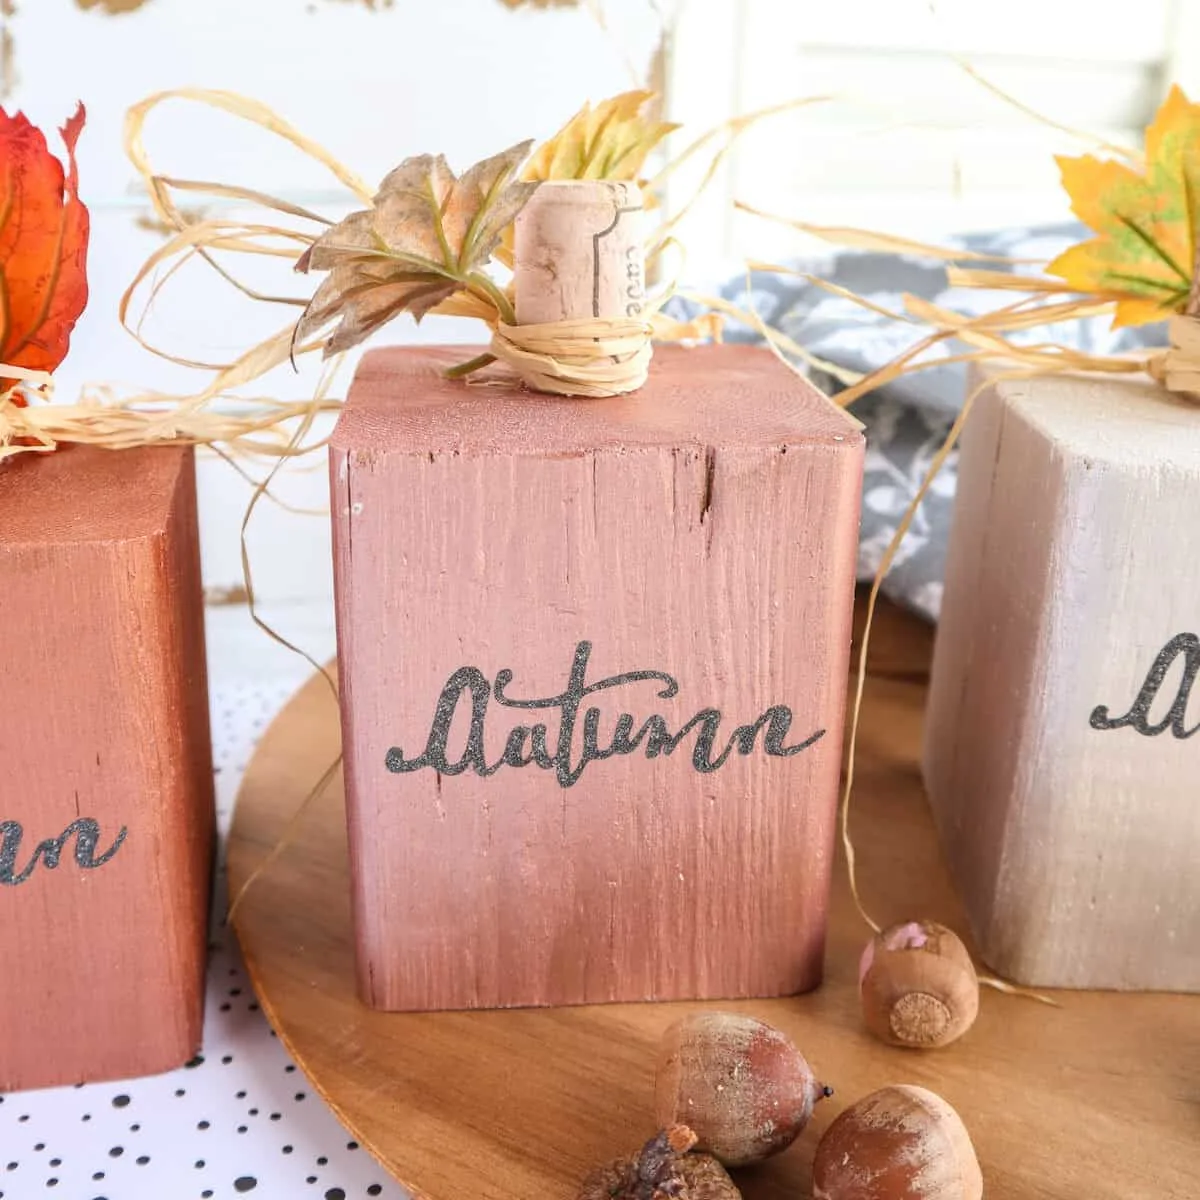
- Cricut Joy
- Cricut Glitter Vinyl in black
- Cricut Joy Standard Grip Mat
- Weeder
- Cricut Transfer Tape
Instructions
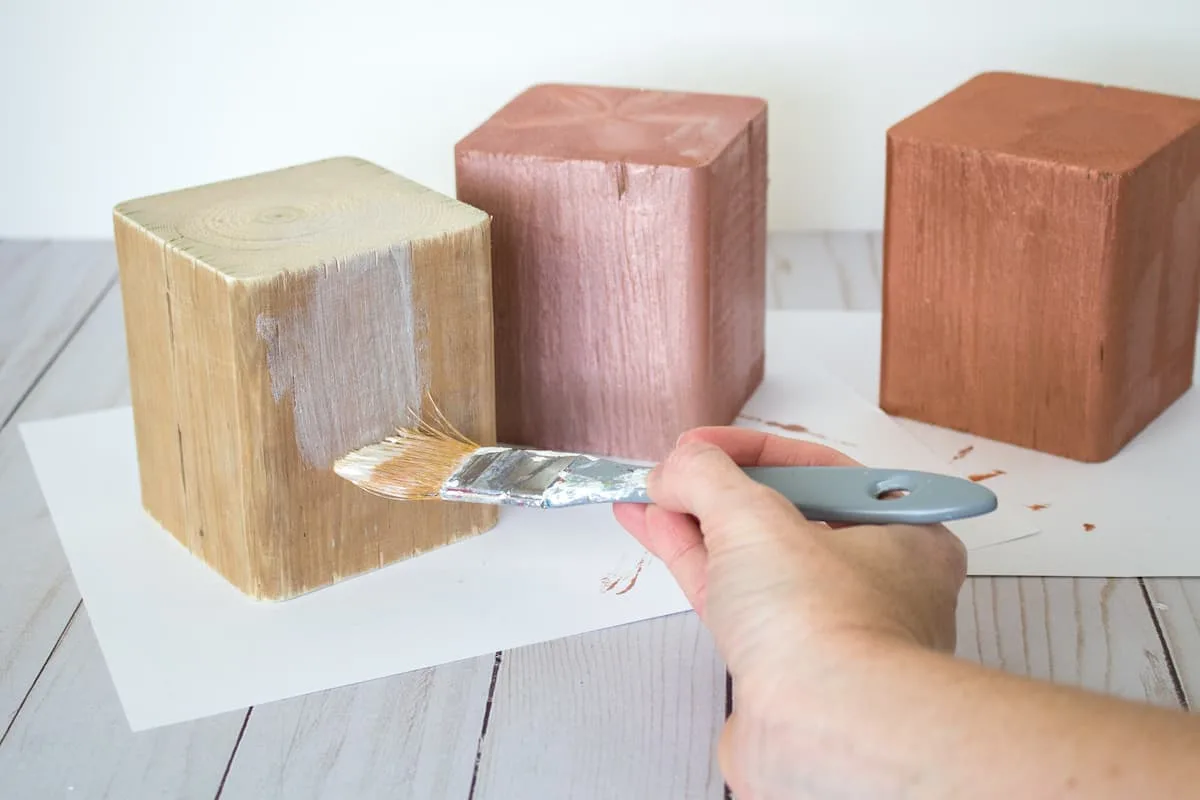
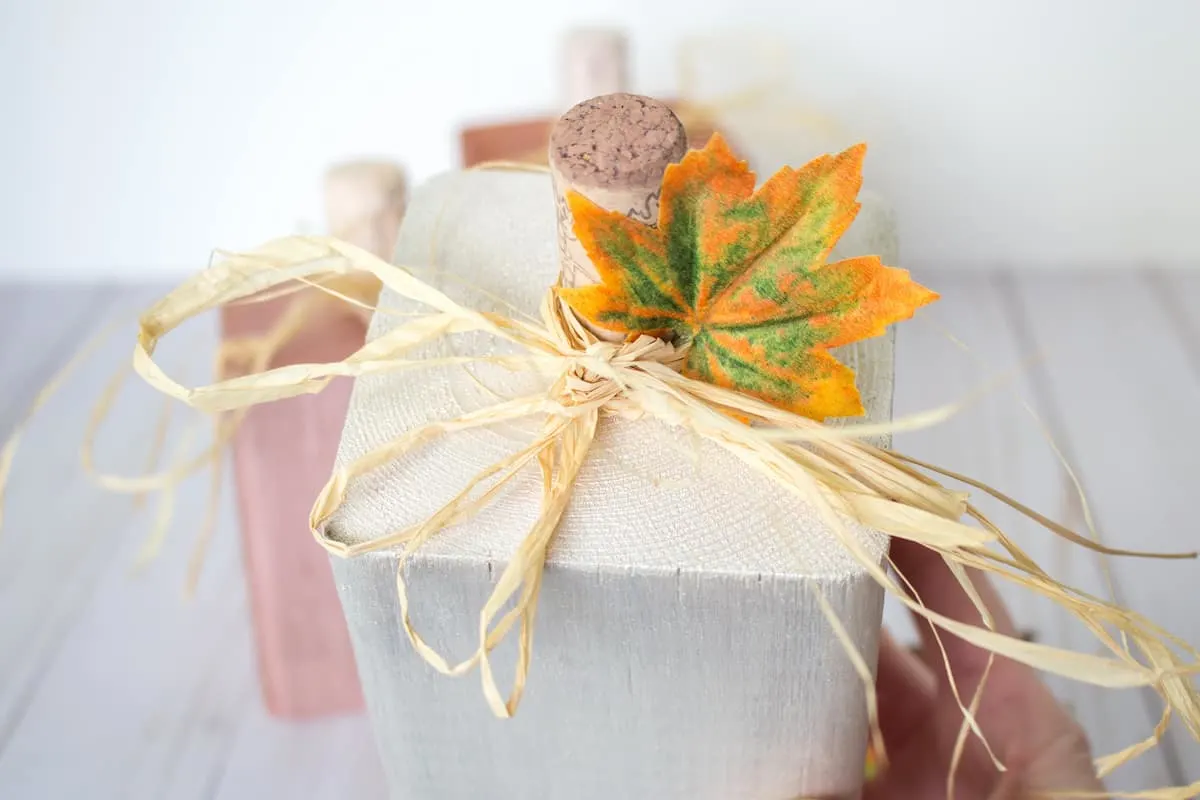
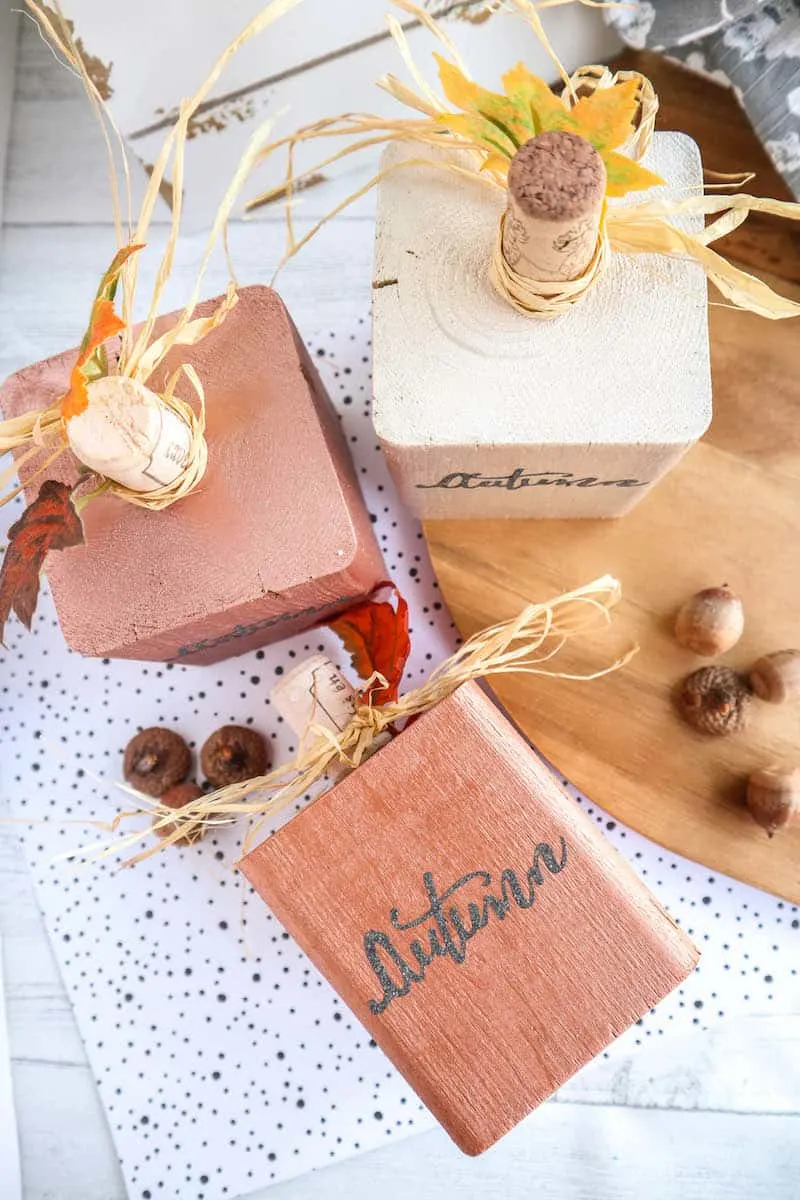
Paint the surface of each of the wood blocks in a different Matte Metallics color. Let the paint dry and paint an additional coat as needed for full coverage.
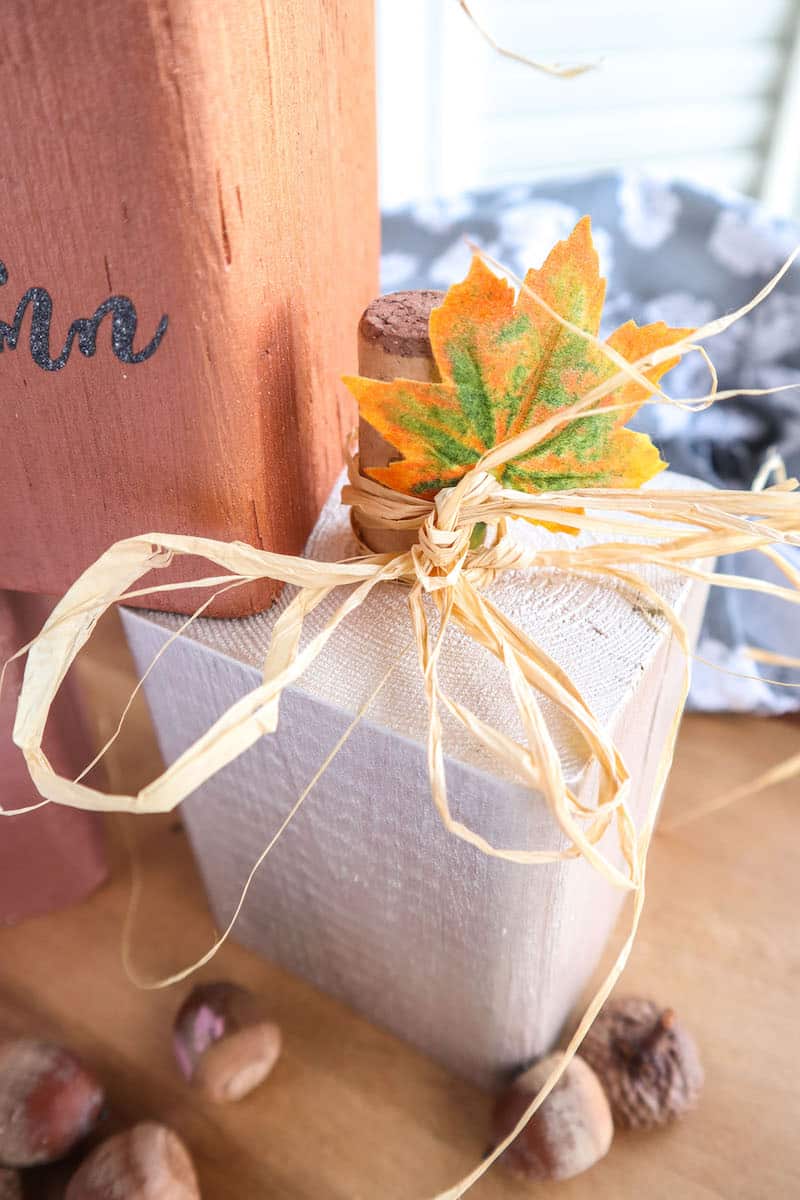
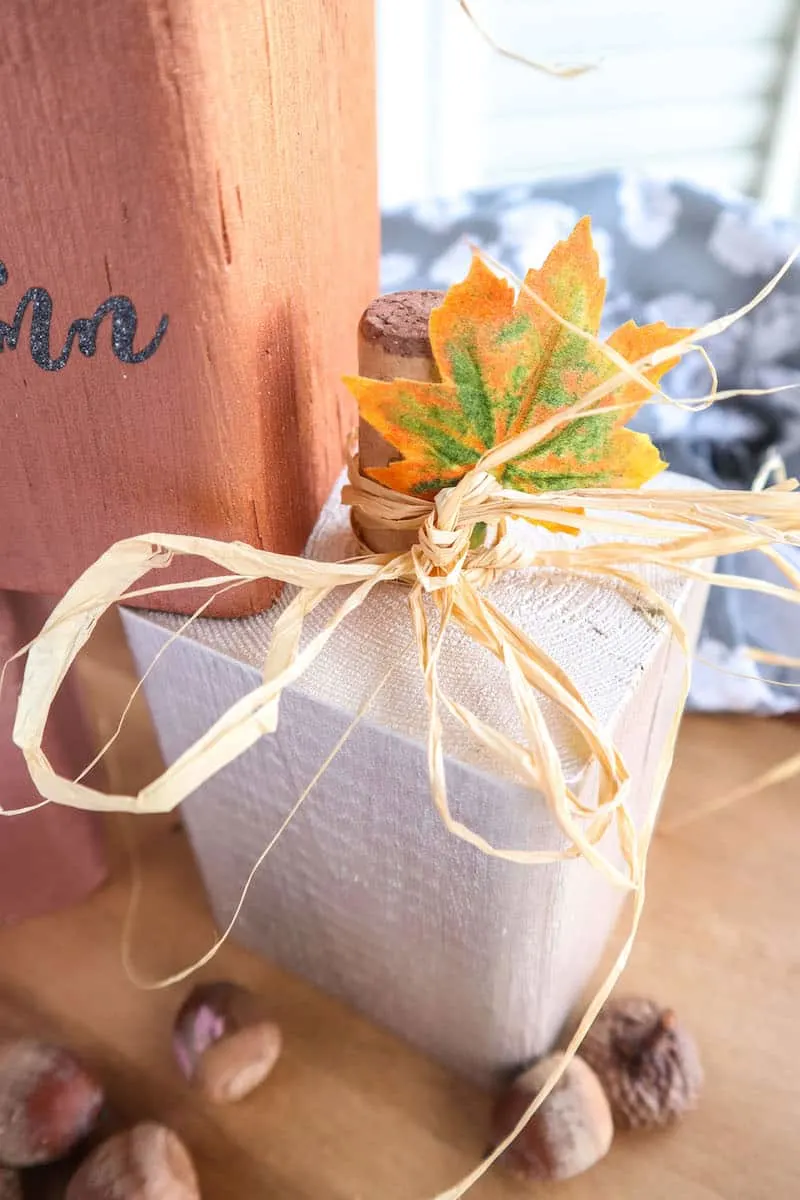
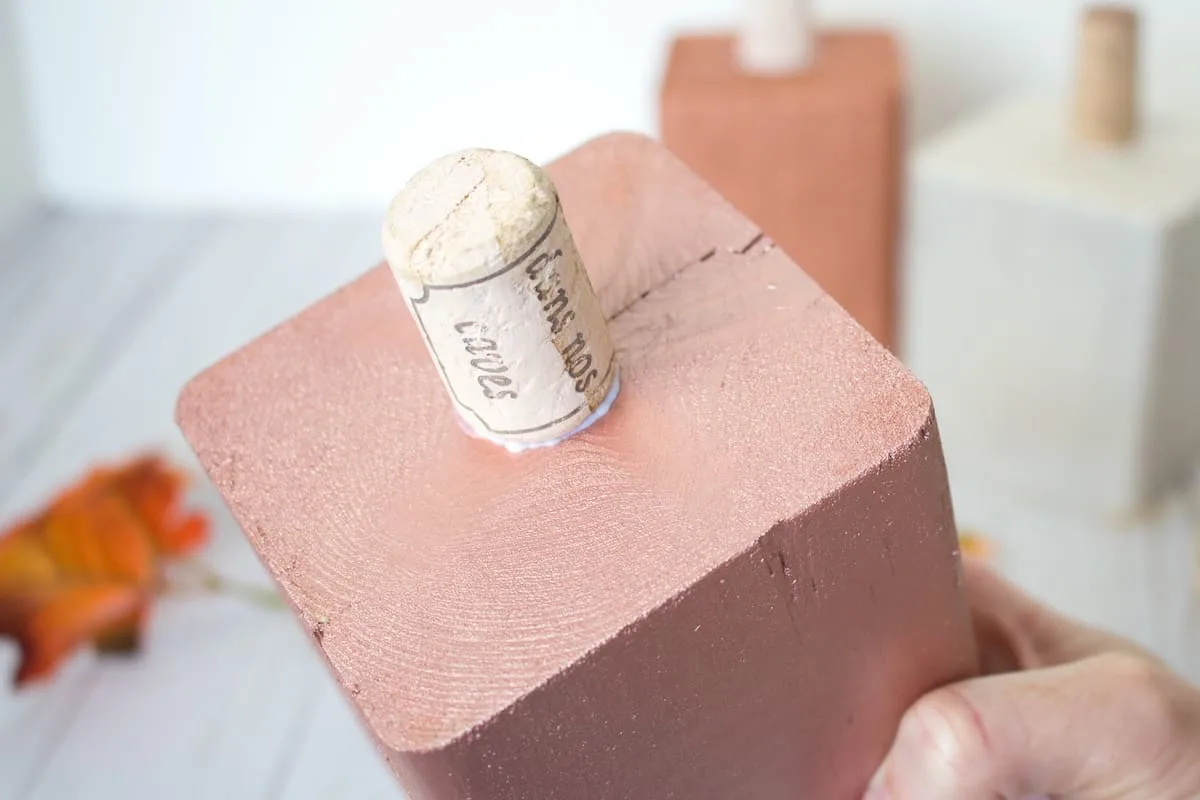
Apply a dab of glue to the flat end of the cork and press one cork to the center top of each painted wood block pumpkin. Let glue dry completely.


Tie a few strands of raffia around the cork and then insert and glue a few faux leaves to the top.


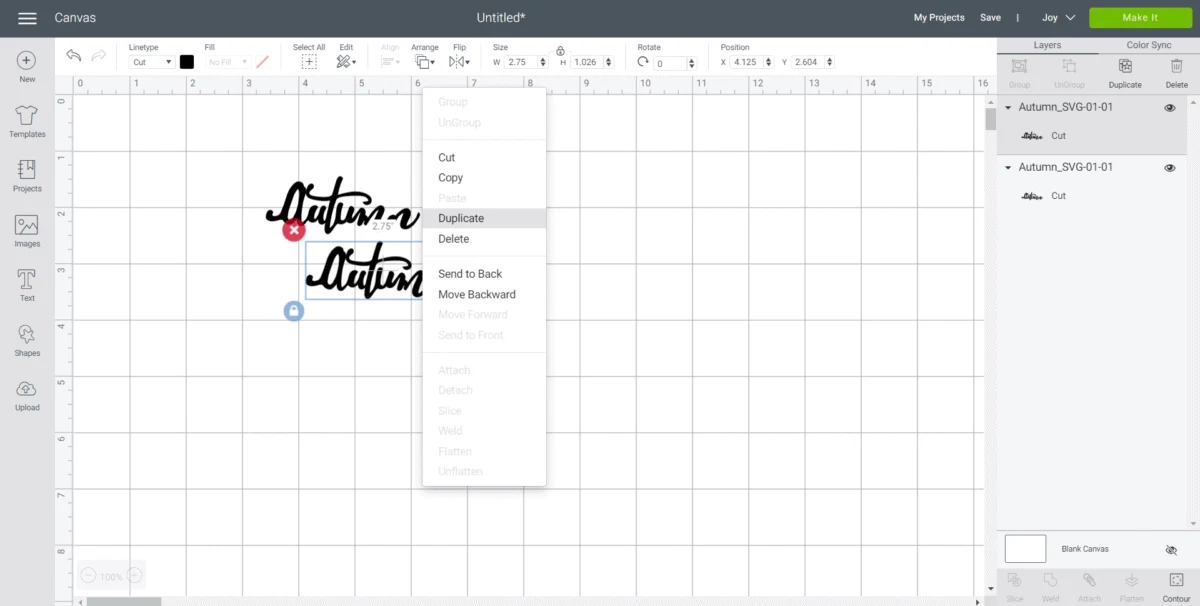
Open a blank canvas in Design Space.
Upload the Autumn SVG file.
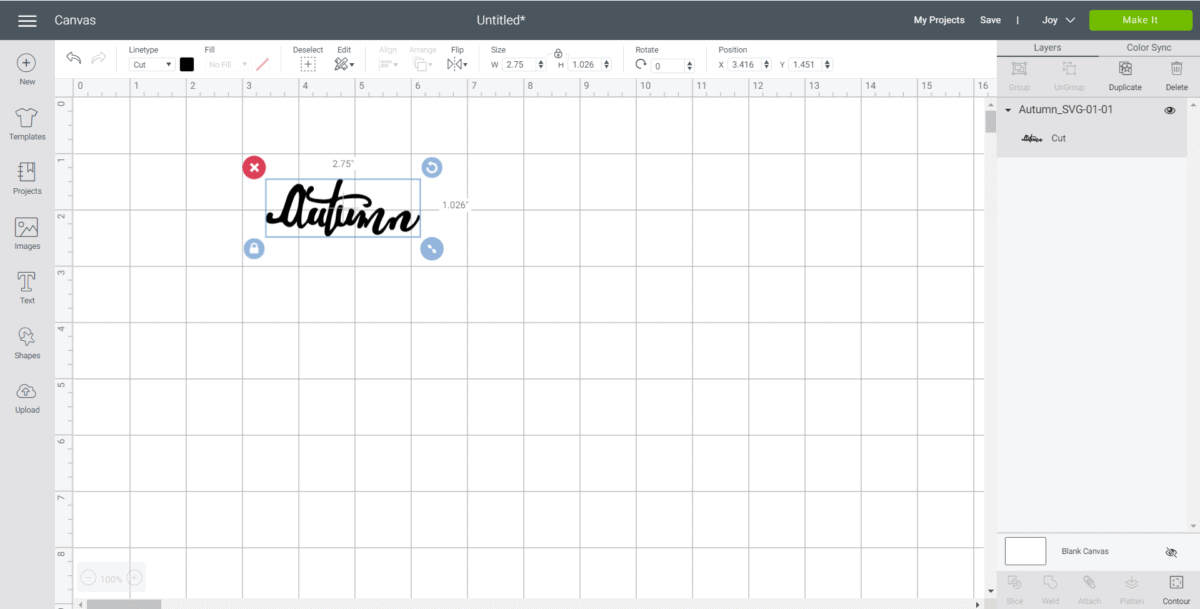
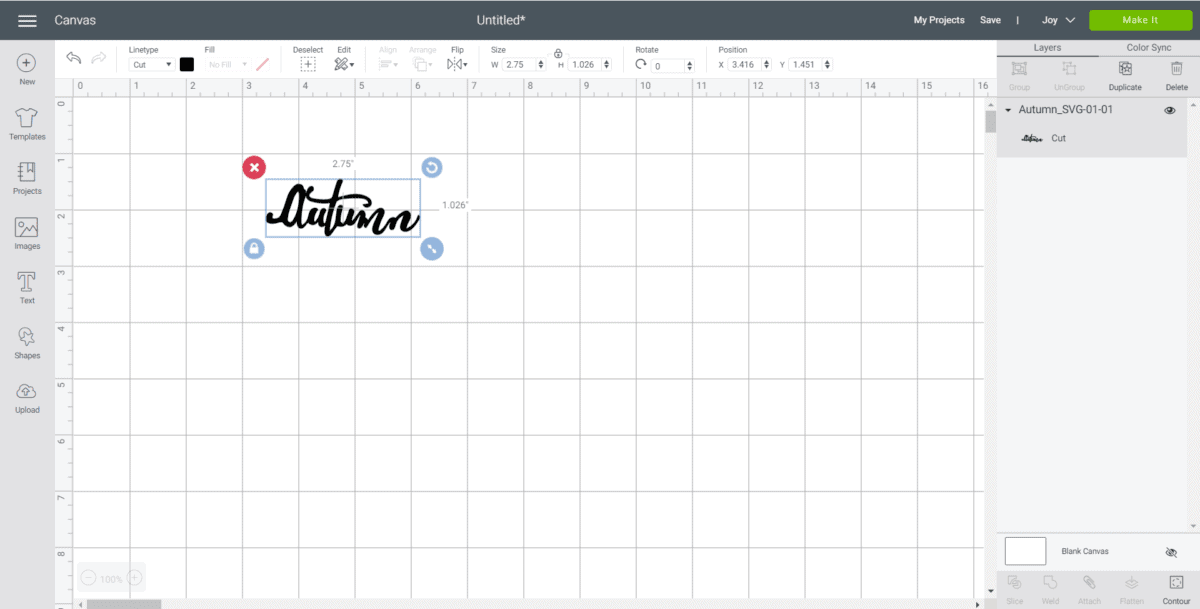
Maintain the size at 2.75” or adjust if needed.
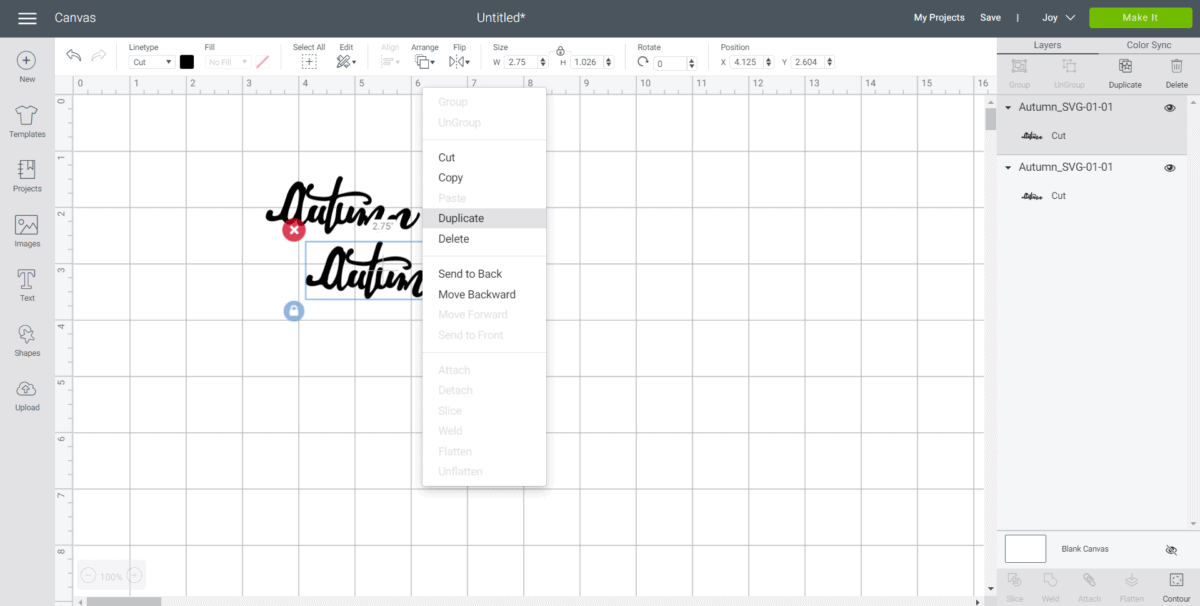
Right click on the word to duplicate.
With the machine set to Joy, select “Make It” in Design Space.
Choose “On Mat” to cut vinyl using a standard grip mat.

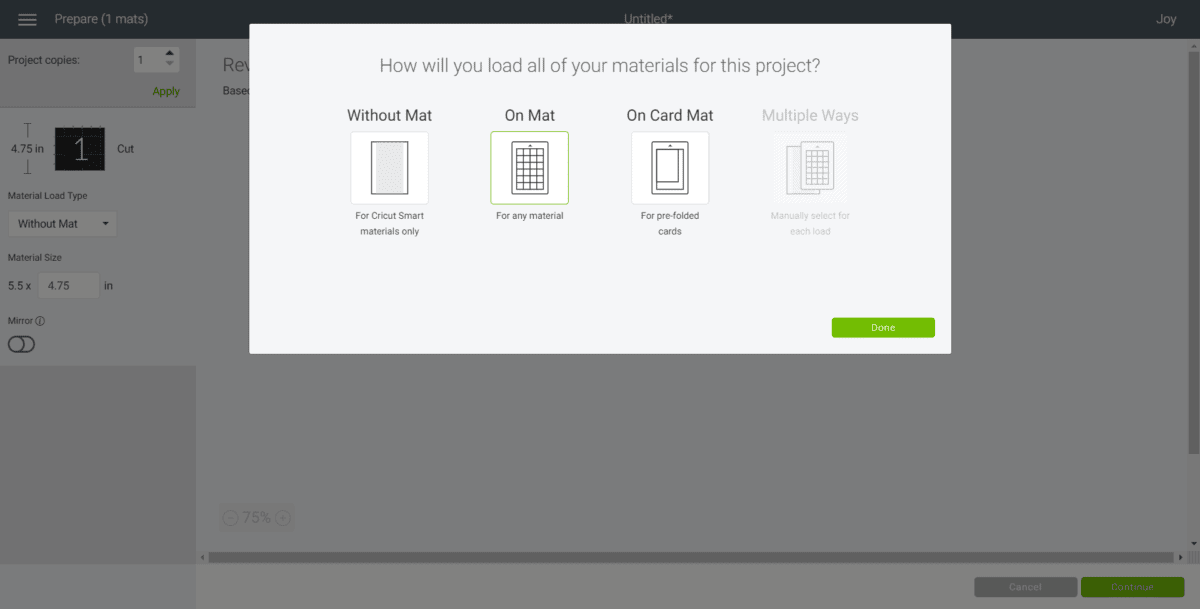
Set the material type to Vinyl – Shimmer.
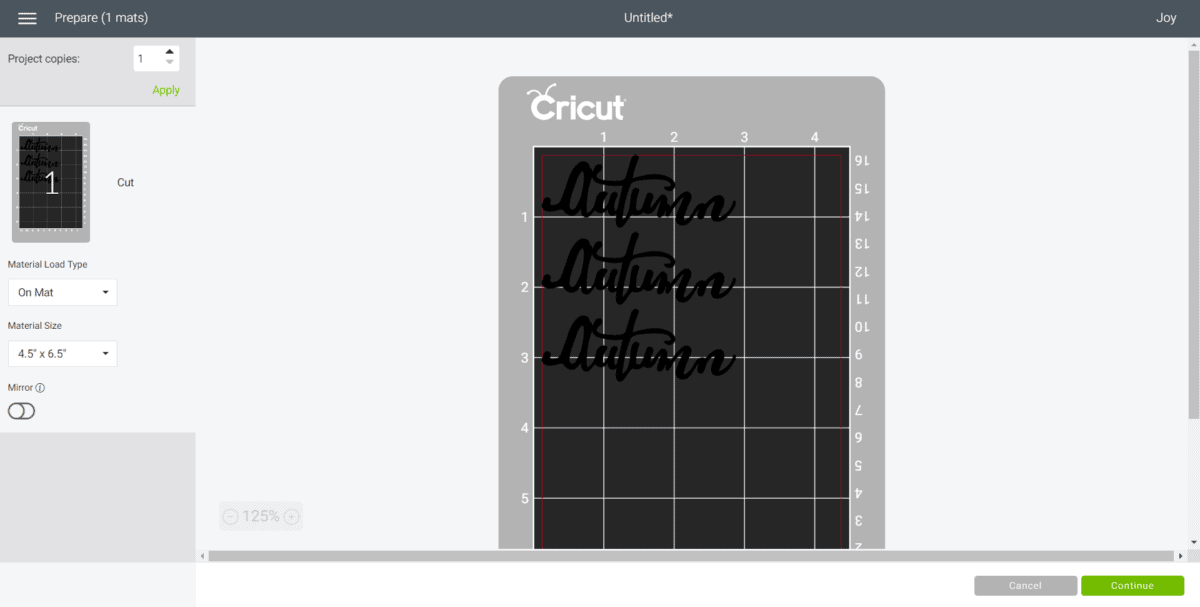
Follow prompts for loading the Glitter Vinyl into the Cricut Joy and cutting. When prompted, unload the mat from the cutting machine and peel off the vinyl.

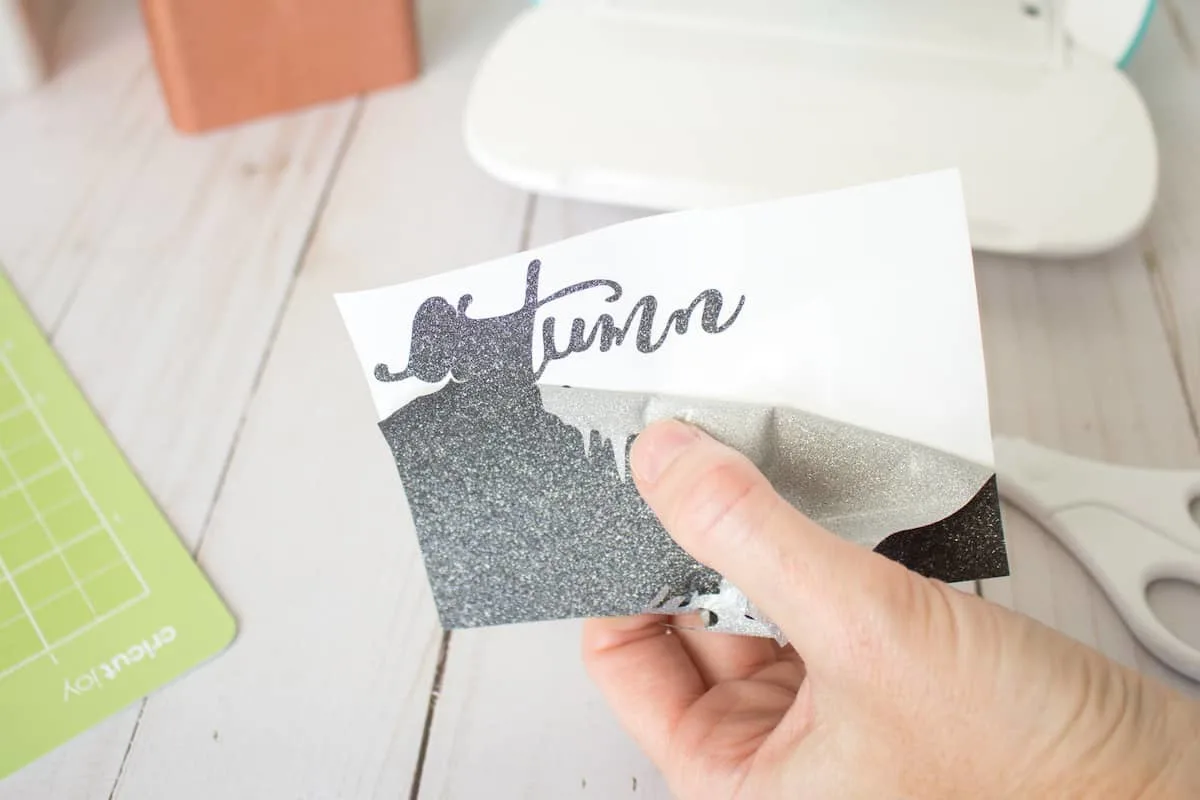
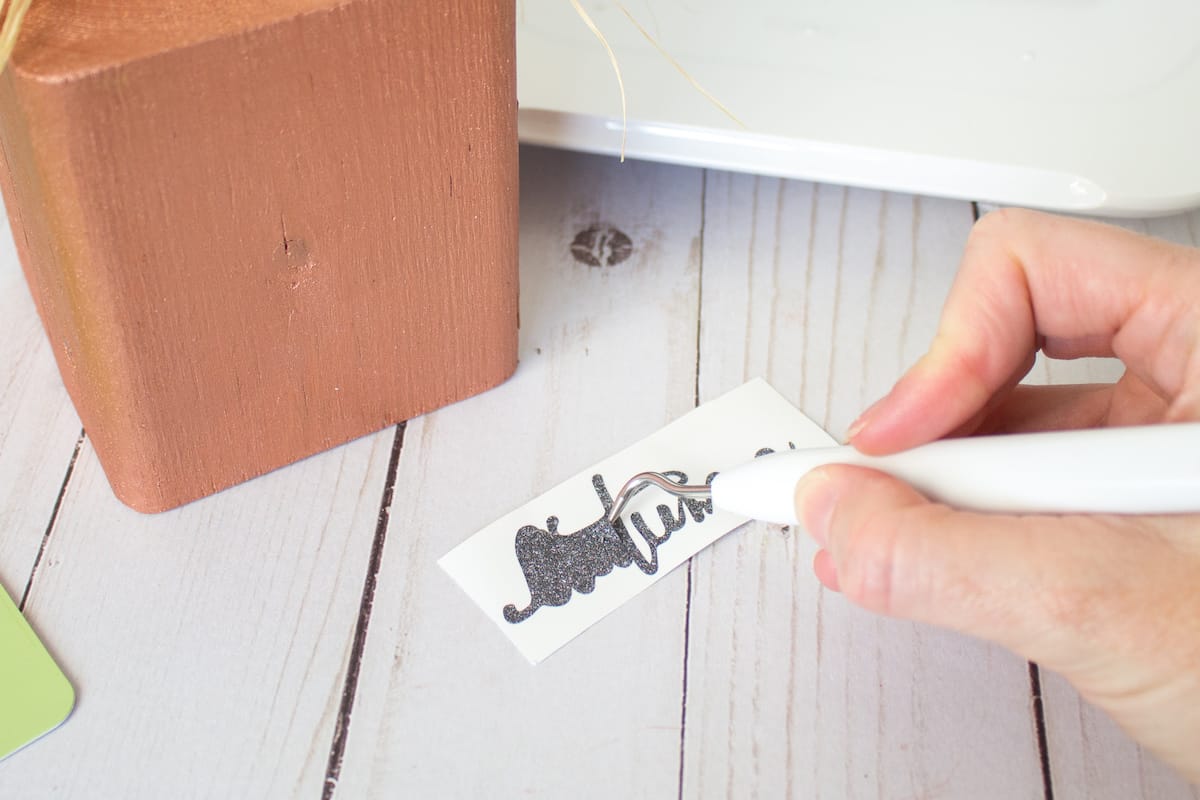
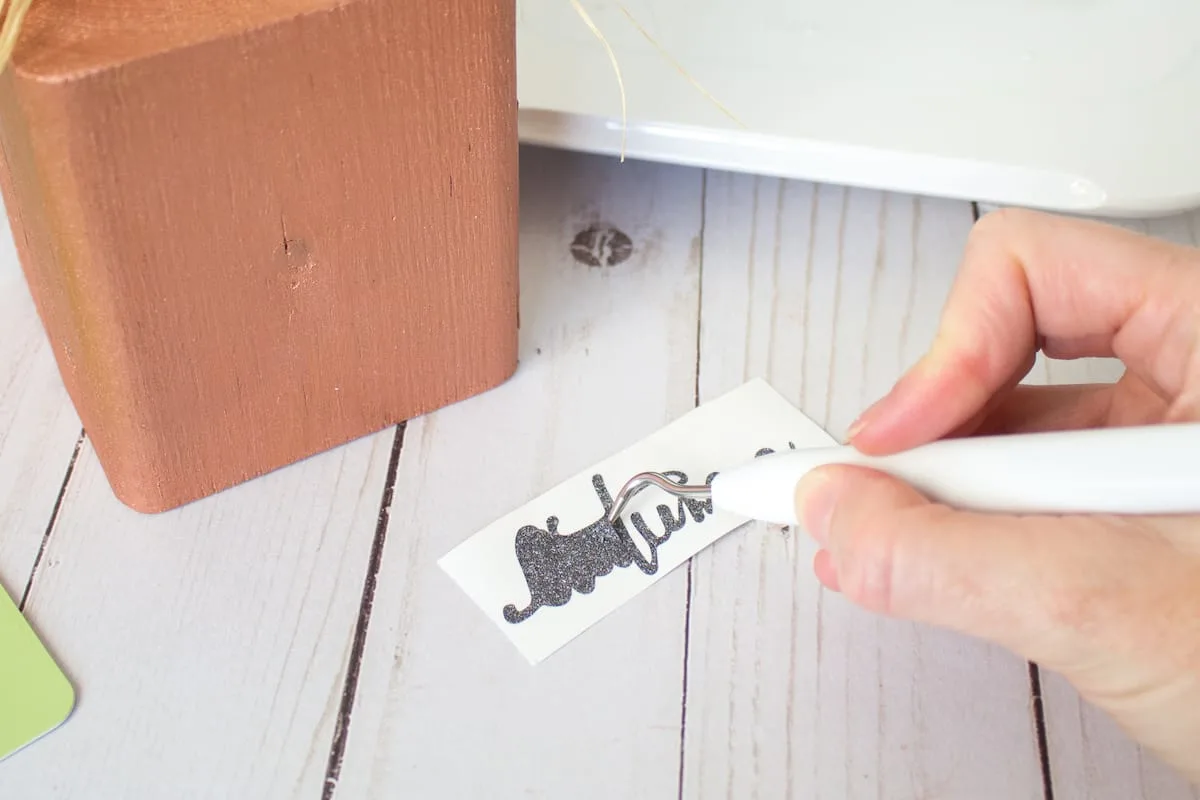
Cut around the phrase with a pair of scissors.
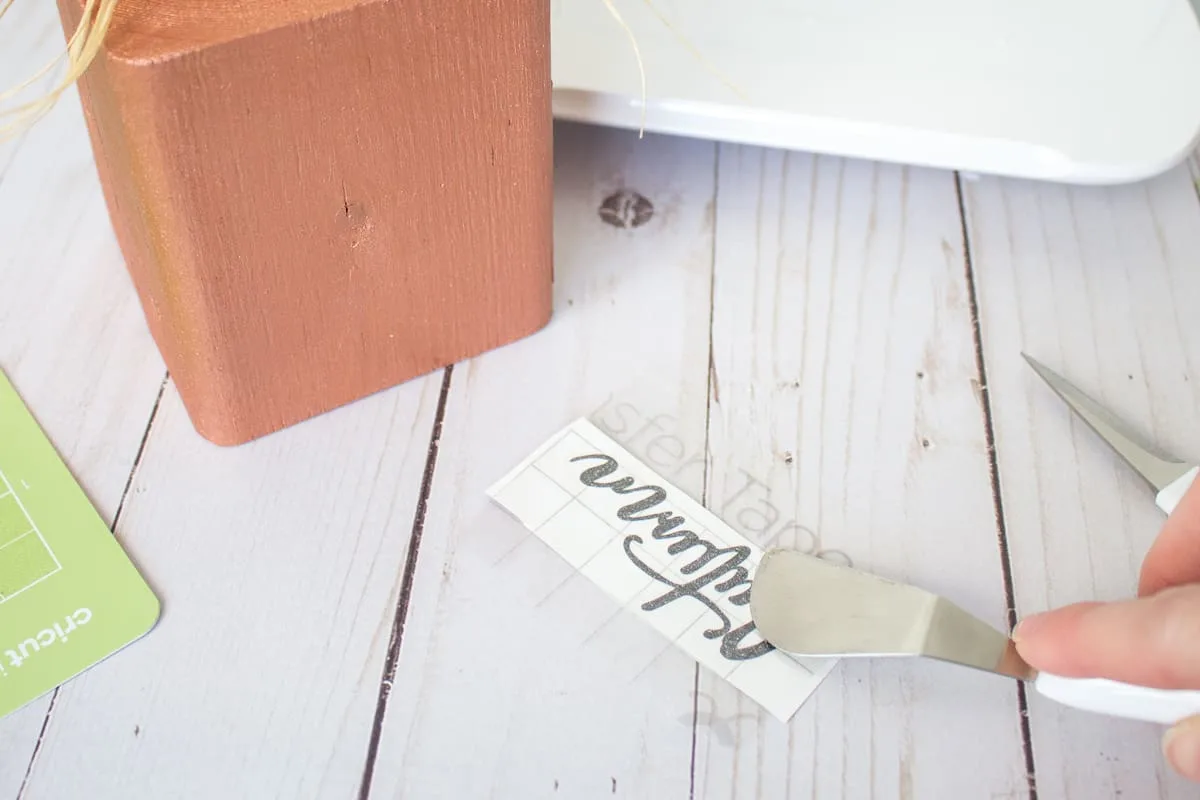
Peel away the excess vinyl and discard. Use a weeding tool to pick off any other excess vinyl.

Cut a piece of transfer tape a bit larger than the image and peel away the transfer tape backing.
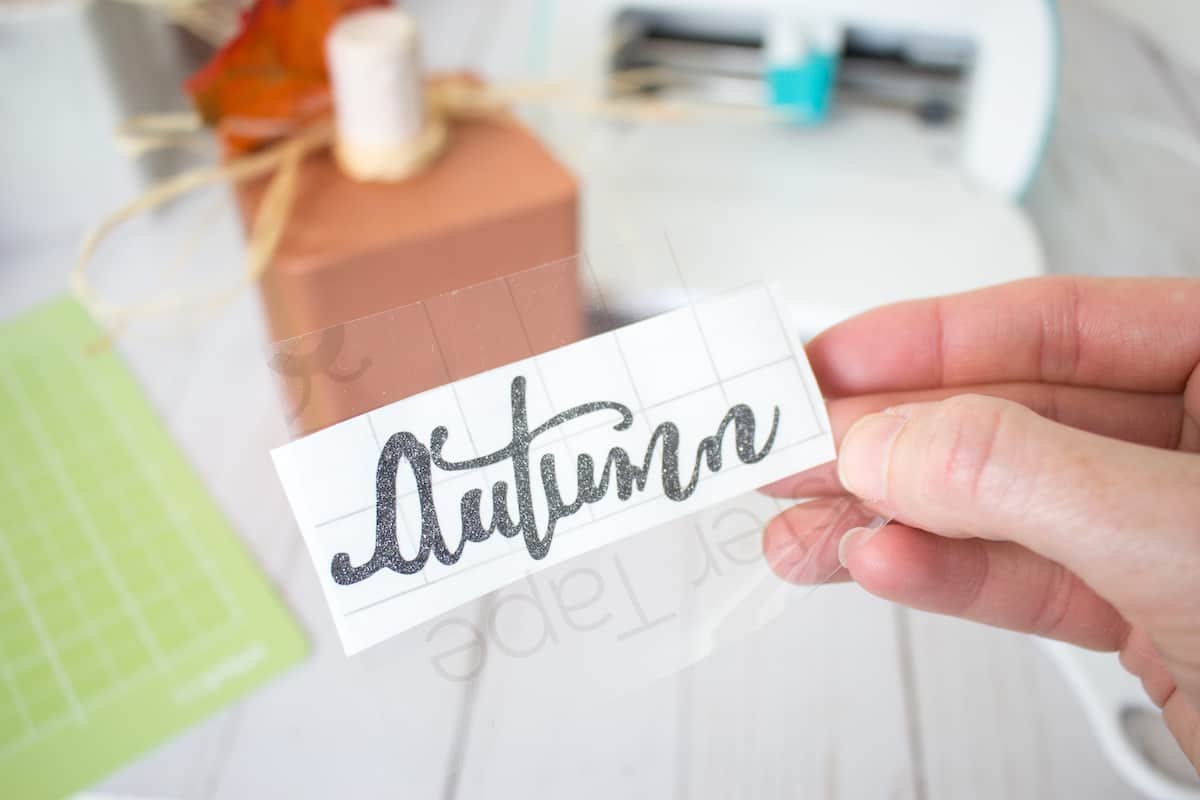
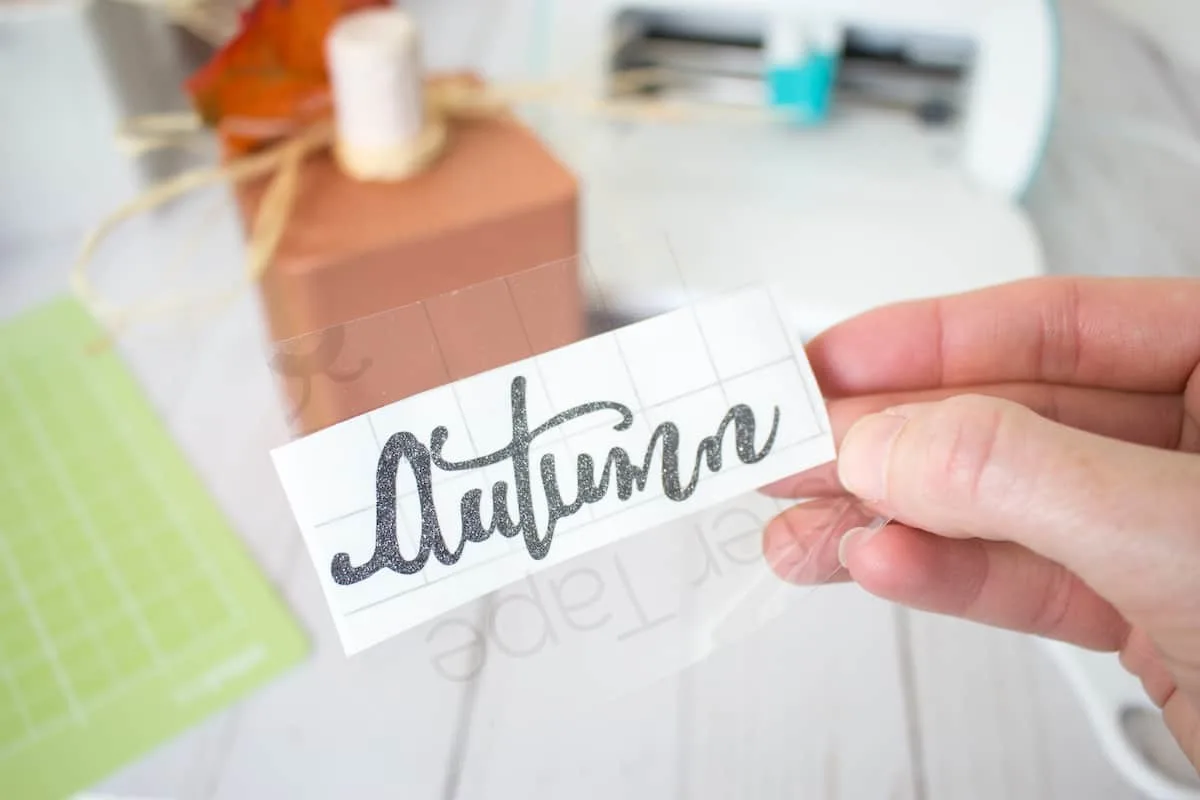
Place the transfer tape overtop of the word. Gently rub the vinyl to help it stick to the transfer tape. Peel away the vinyl backing, leaving just the image adhered to the transfer tape.

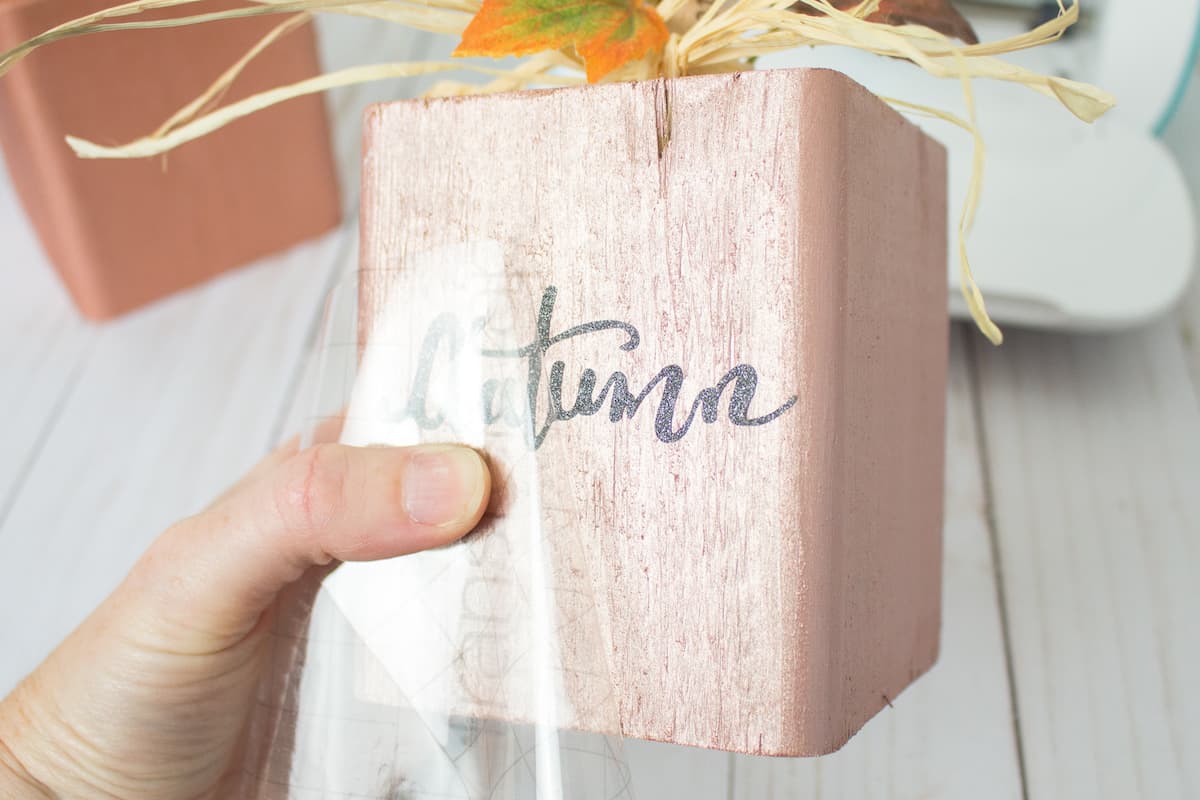
Position the image with the transfer tape on to one side of the painted wooden block. Press the vinyl word down with your fingers to help it to stick to the block. Slowly and carefully remove the transfer tape leaving the vinyl image on the block.

Arrange and stack however you’d like.

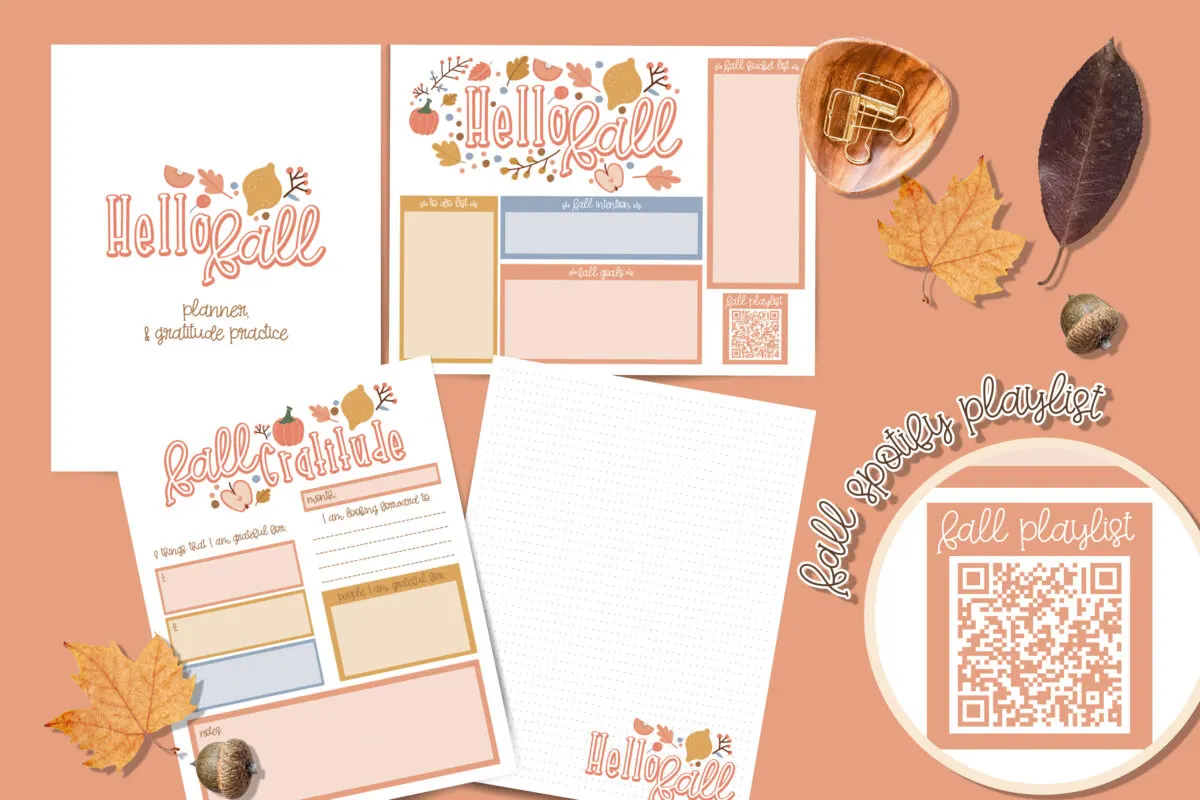
Get Your Fall Gratitude Journal Now!
Fall is a time to rest, reflect and be grateful. This printable planner and journal pack will help you capture your memories, and plan for the busy season ahead.
If you like these DIY wood block pumpkins, be sure to check out more of our Fall crafts, such as:
- Cricut Tea Towel with Autumn sayings
- Spider Web Hoop
- Trick or Treat Stacked Pumpkins
- Rae Dunn-inspired pumpkins
- DIY pumpkin vases
- 3D felt pumpkins
