

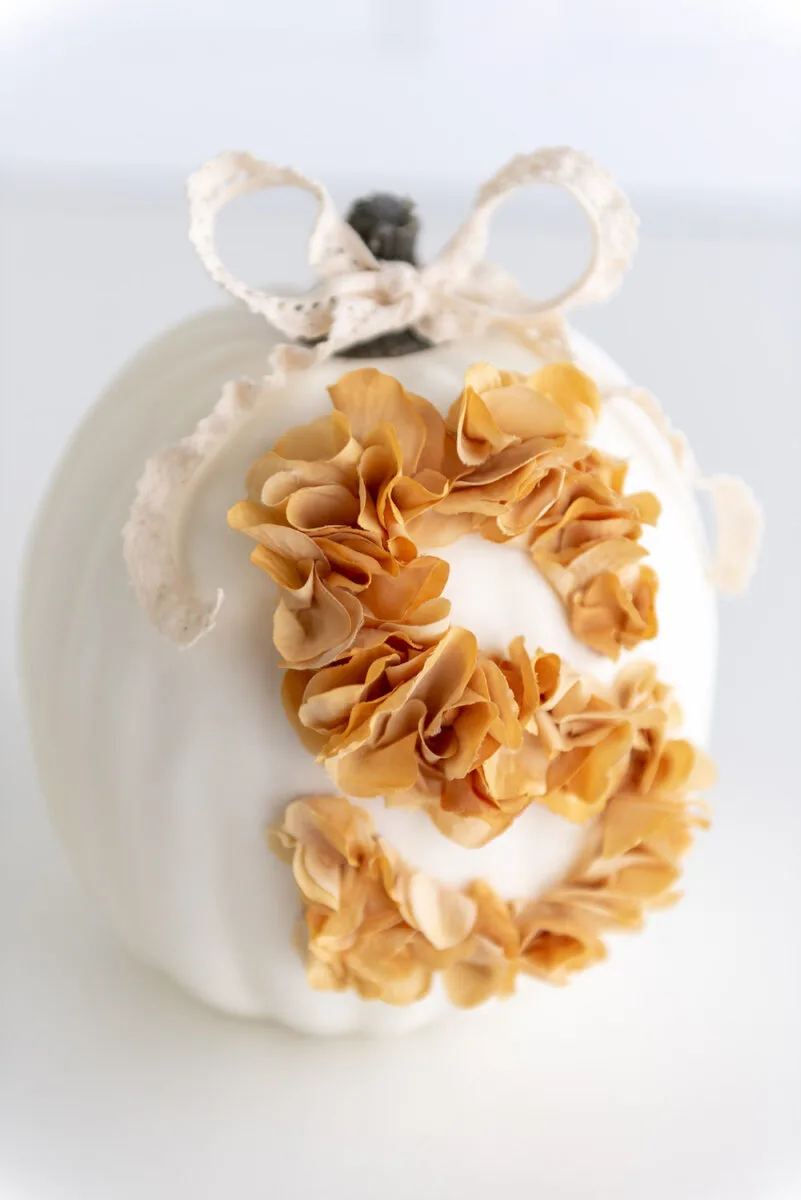
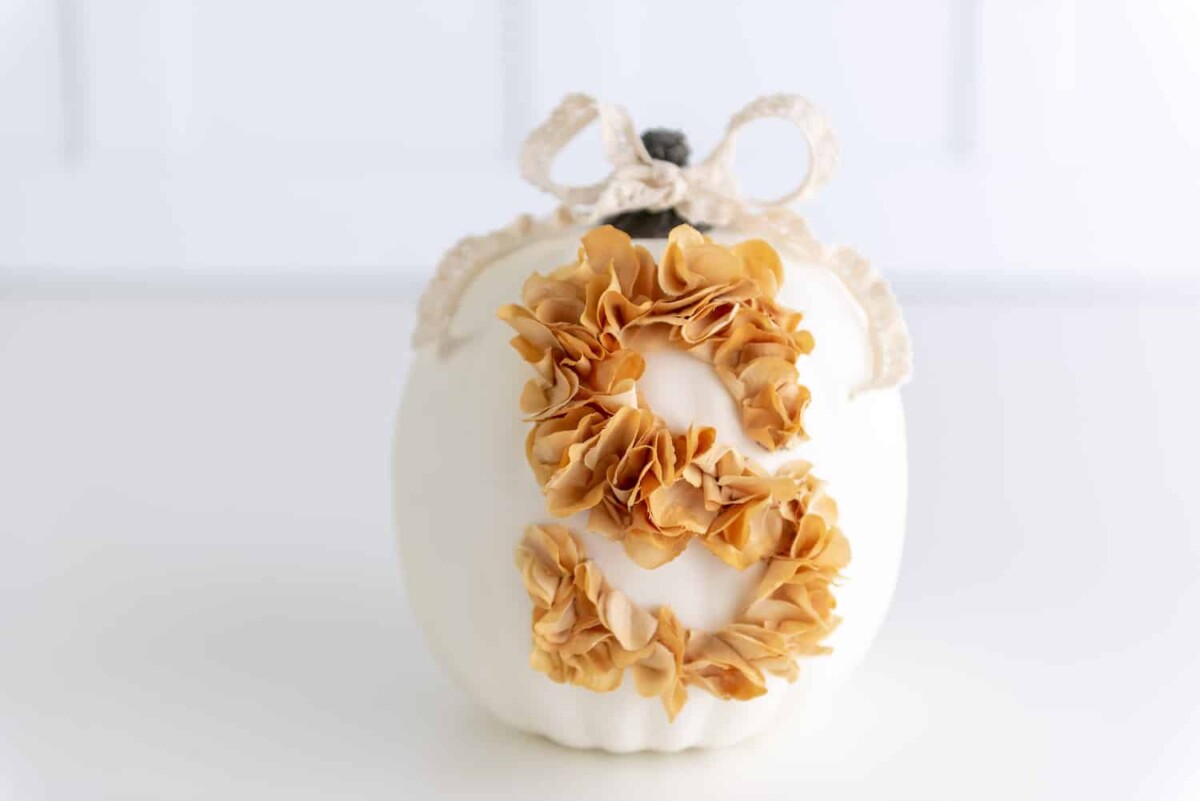
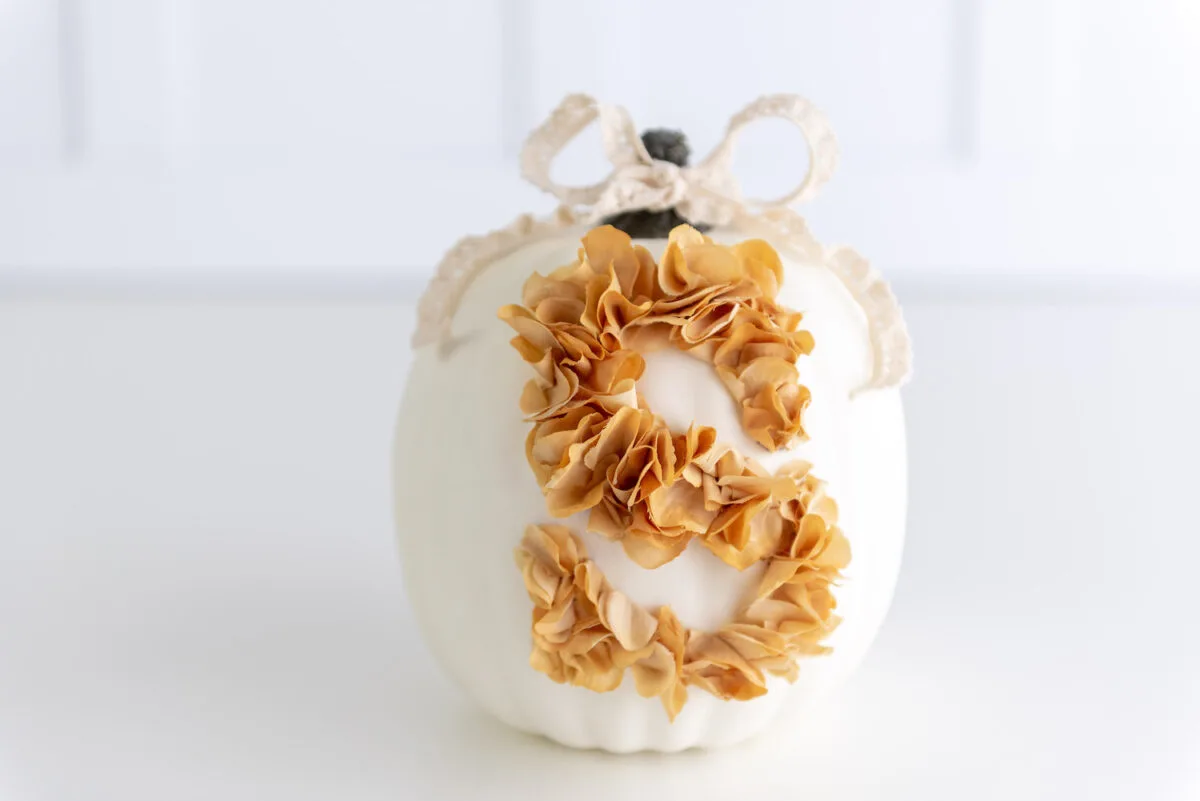
Pretty monogram letter pumpkins are easy to make to decorate your front porch, or inside your home. While these unusual pumpkins just look difficult to make, they are pretty simple. In fact, it just takes three easy steps!
These DIY monogram pumpkins are perfect as front porch pumpkins because they are actually fake craft pumpkins. You can take time to create a beautiful decoration to welcome your guests, and then reuse it year after year.
While I used a neutral cream color faux foam pumpkin to keep a farmhouse look, you could use any color you’d like. Mix and match with colors of the fake pumpkins and fake flowers to get a combination that matches your front porch decor for fall.

These monogrammed pumpkins are also perfect for fall weddings. Or to display in your home. They could even be great table centerpieces for autumn or Thanksgiving.
Be sure to check out my matching farmhouse-style DIY Pumpkin Napkin Rings and DIY Pumpkin Place Card Holders for a festive table setting.
And these fresh floral pumpkin arrangements also make great table settings, too. They would look great alongside these faux pumpkins.
How to Make a Monogram Letter Pumpkin
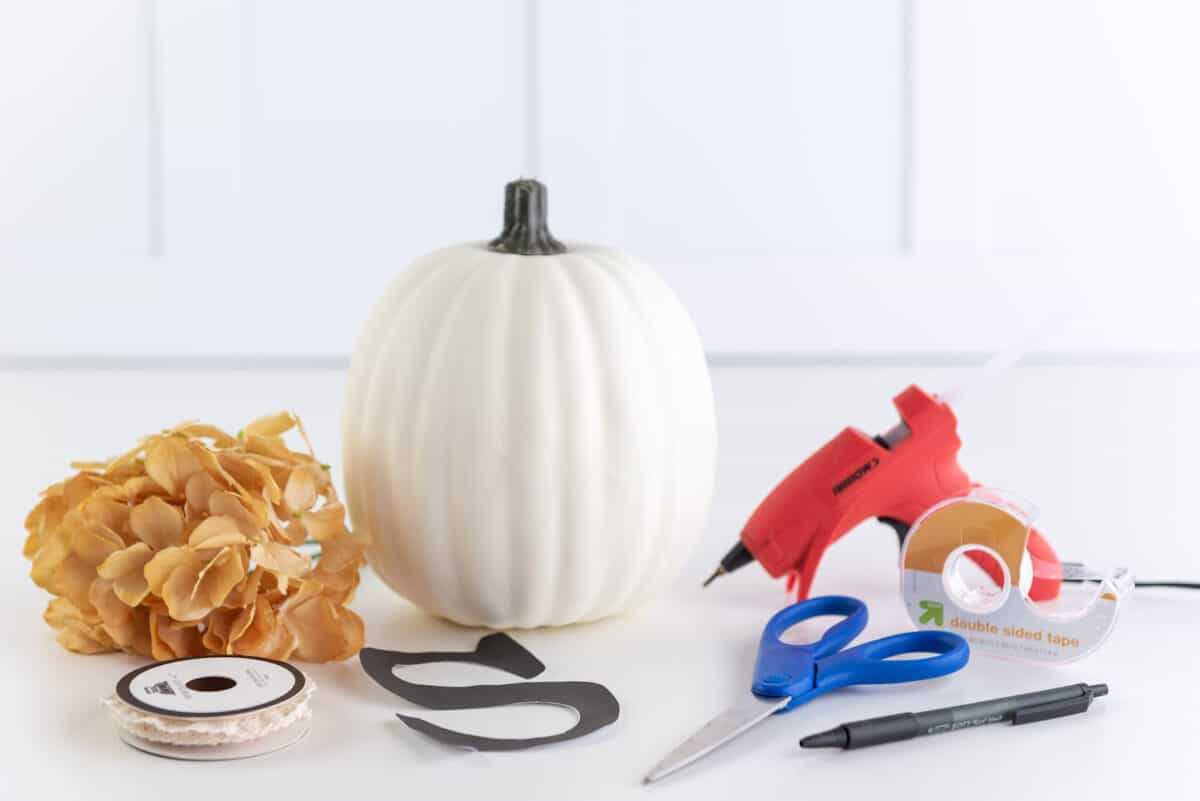
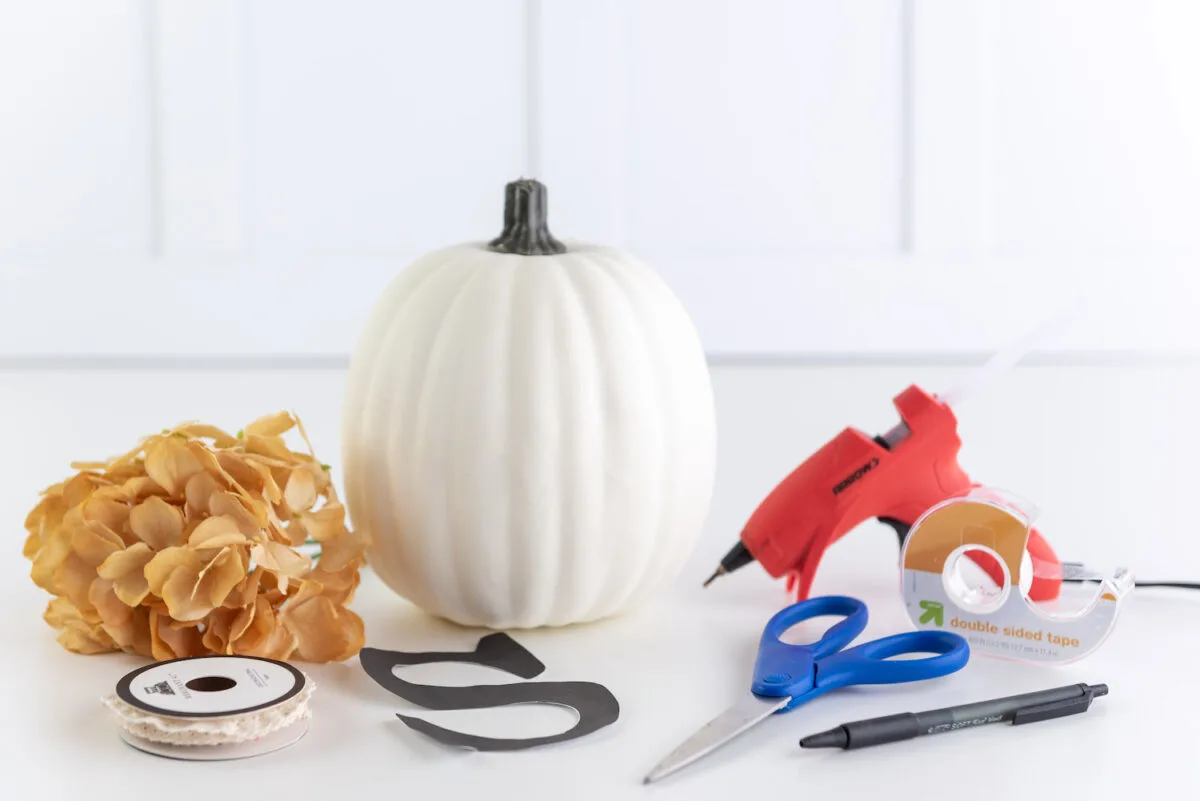
Supplies
- Foam Craft pumpkin
- Faux flowers (smaller petals work the best; remove them from the stems)
- Hot glue gun
- Pen or pencil
- Scissors
- Tape
- Printer and copy paper
- Ribbon (optional)
Instructions
Step 1
Print out a letter using any font you like. You can find different styles of fonts in programs such as Canvas, PicMonkey, Microsoft Word, or any word processing program.
You will need to size the letter to fit your pumpkin. Measure the middle, flatter part of the pumpkin to get an estimate of size. Then, increase the font size in the computer program to be big enough to fit the space.
I used EB Garamond font in Bold. I made my monogram initial about 4 ½ inches tall. This fit the flattest part of my 9 inch foam pumpkin I used.
Step 2
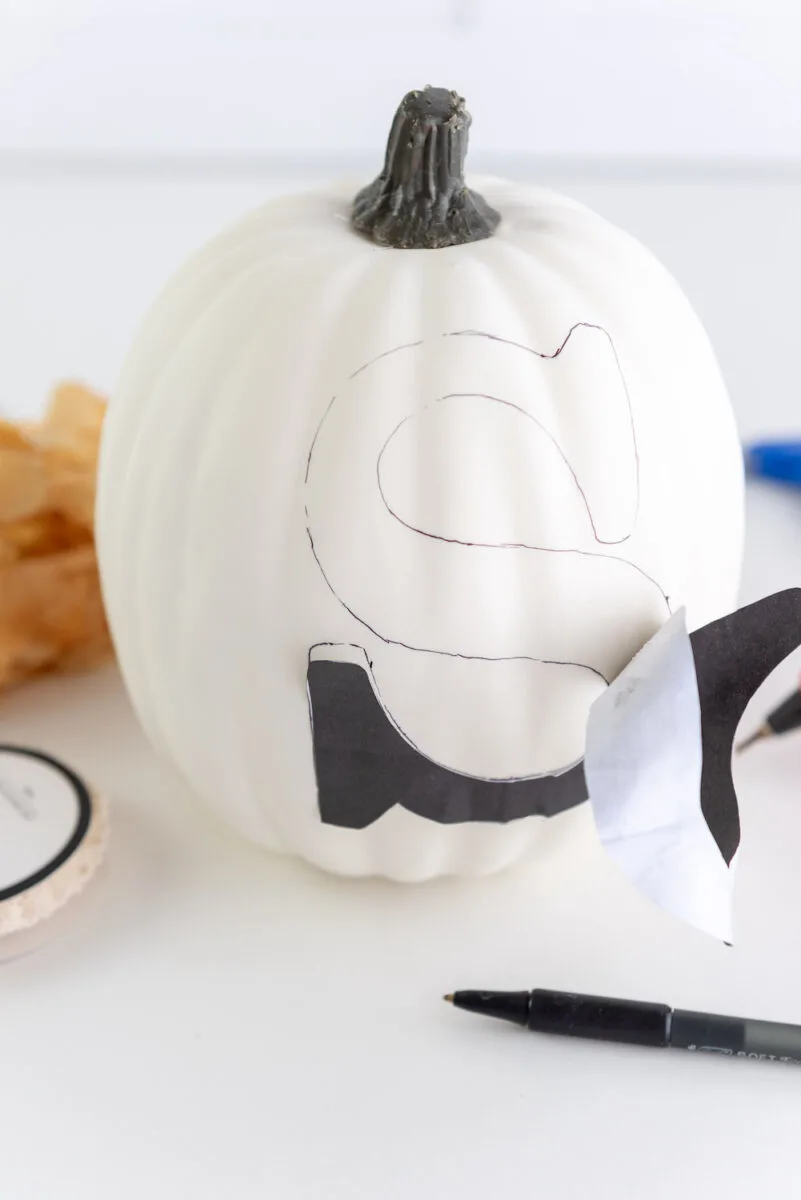
Cut out the letter to make a stencil to follow. Tape the stencil down on the pumpkin where you want your monogram to be.
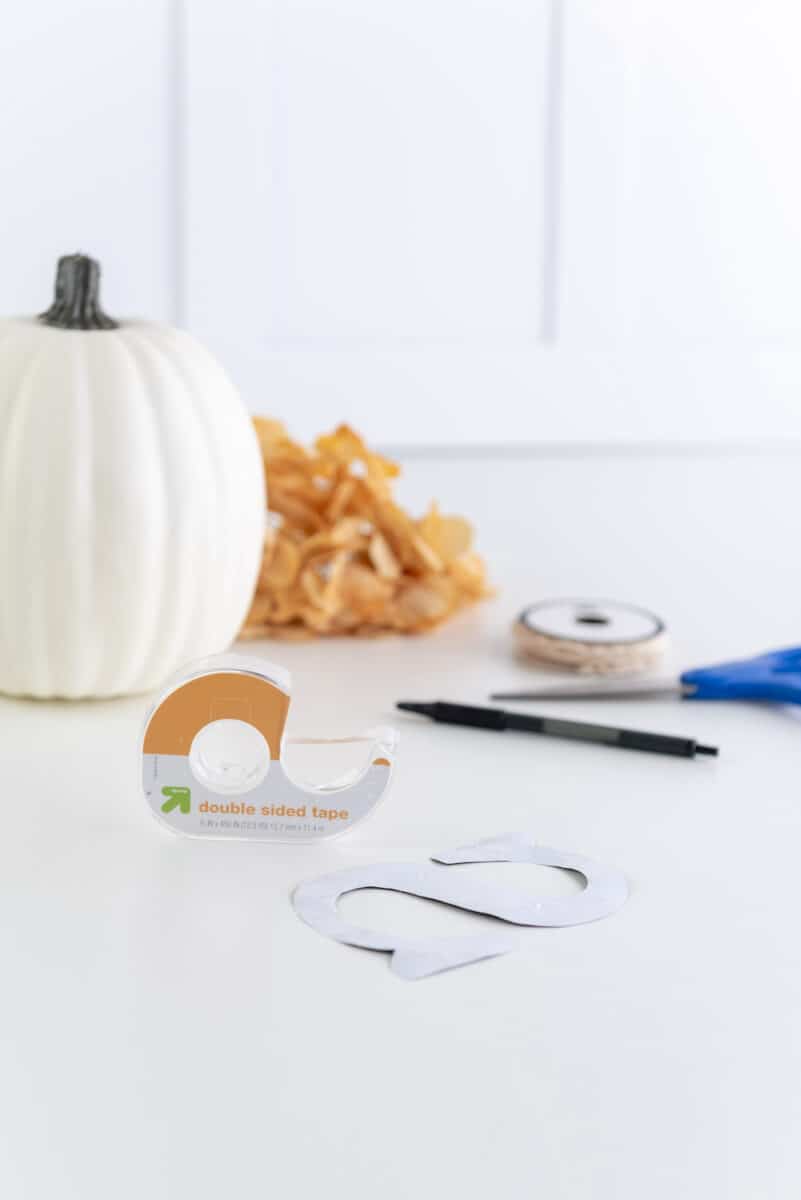
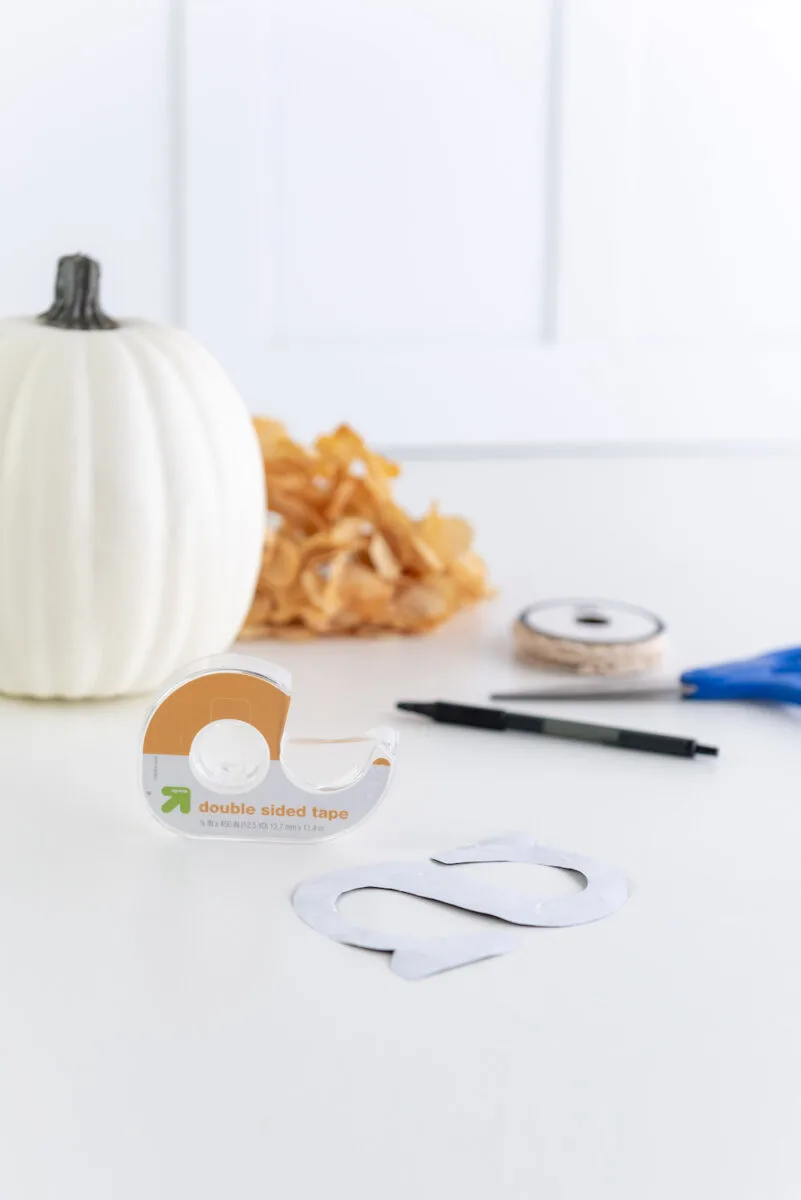
Trace around the stencil with your pen or pencil. Remove the stencil.

Step 3
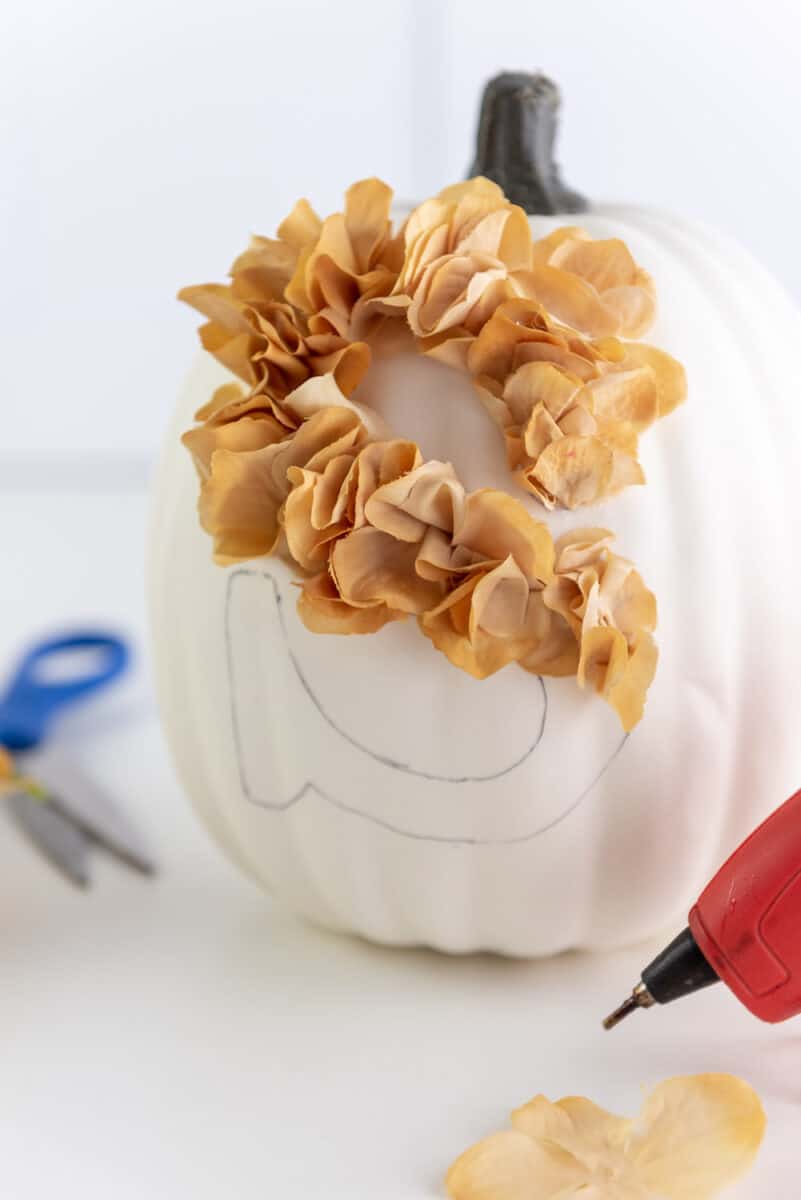
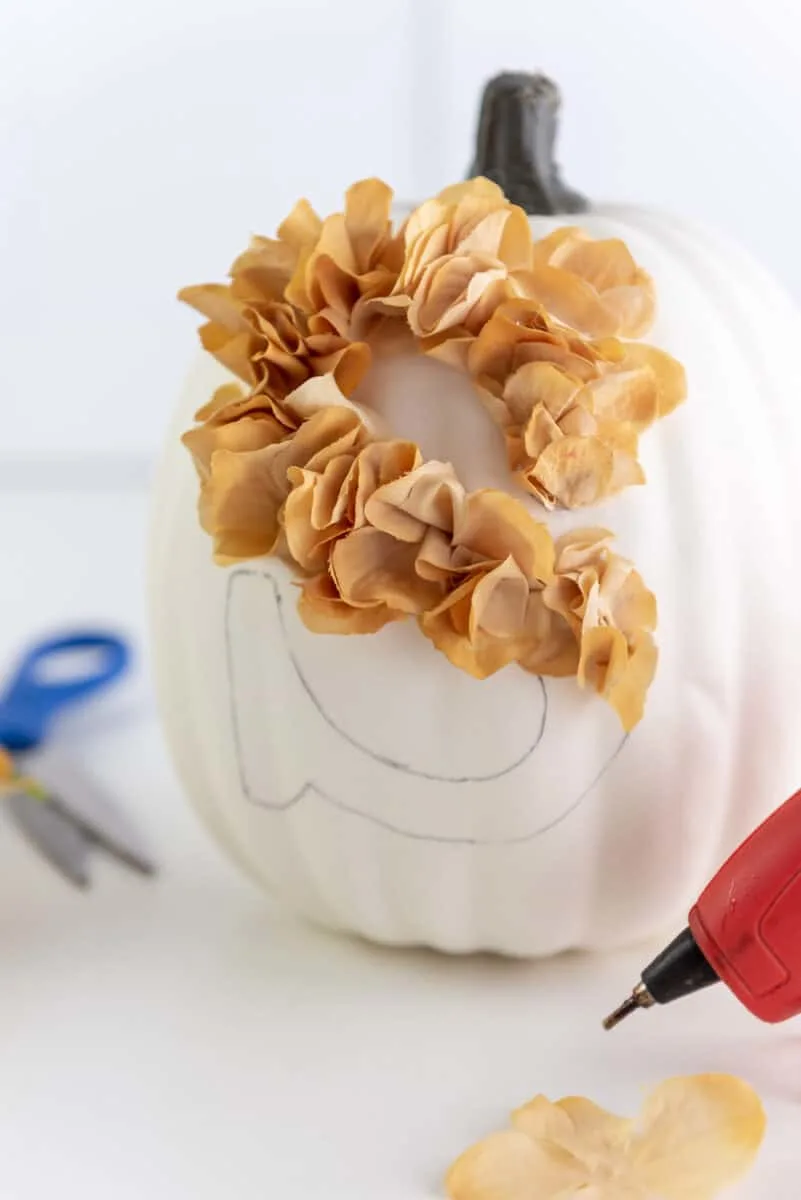
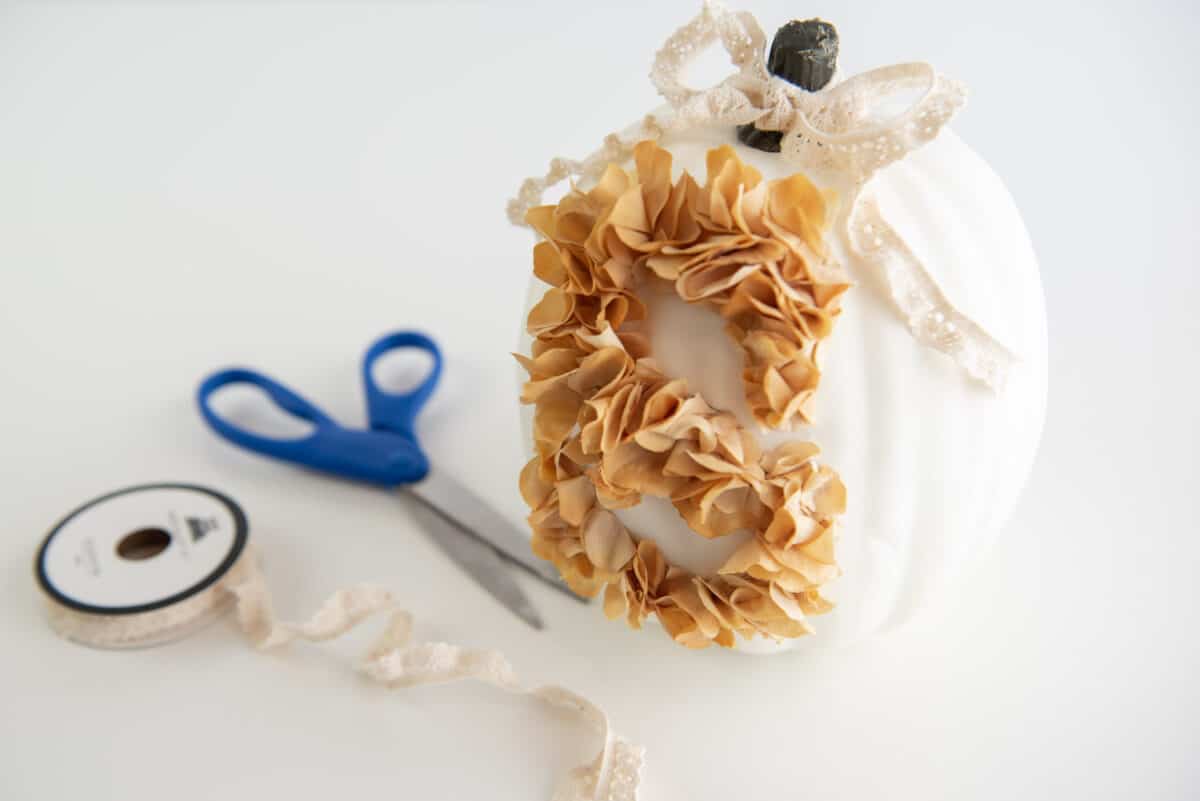
With your flower petals, start hot gluing inside the stencil pattern on the pumpkin. Fill in all of the space inside the pumpkin, and be sure to cover any pencil or pen lines that you see.
If you’d like, tie a ribbon around the stem of the pumpkin when you are finished.

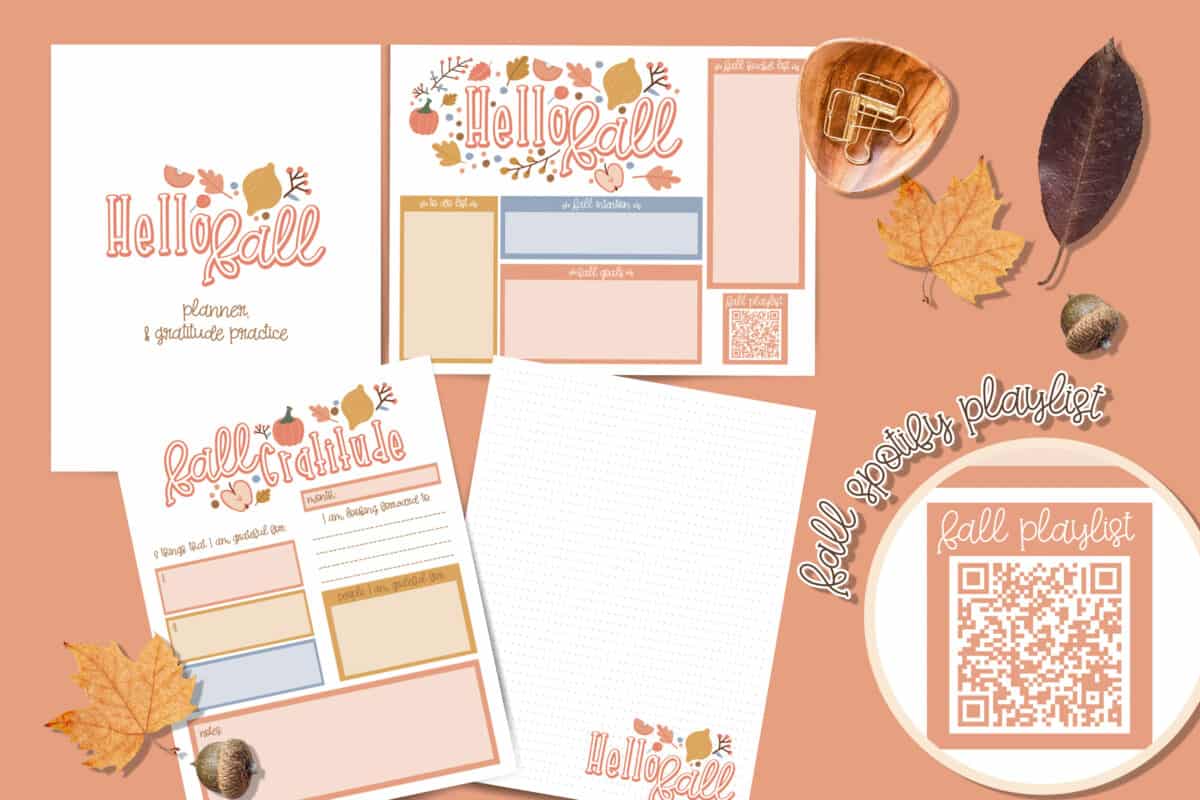
Get Your Fall Gratitude Journal Now!
Fall is a time to rest, reflect and be grateful. This printable planner and journal pack will help you capture your memories, and plan for the busy season ahead.
If you like this initial pumpkin, then I have so many more fun fall crafts you will like!
This square autumn wreath or my pumpkin bundt pan wreath would also look great on your front porch to welcome guests.
