
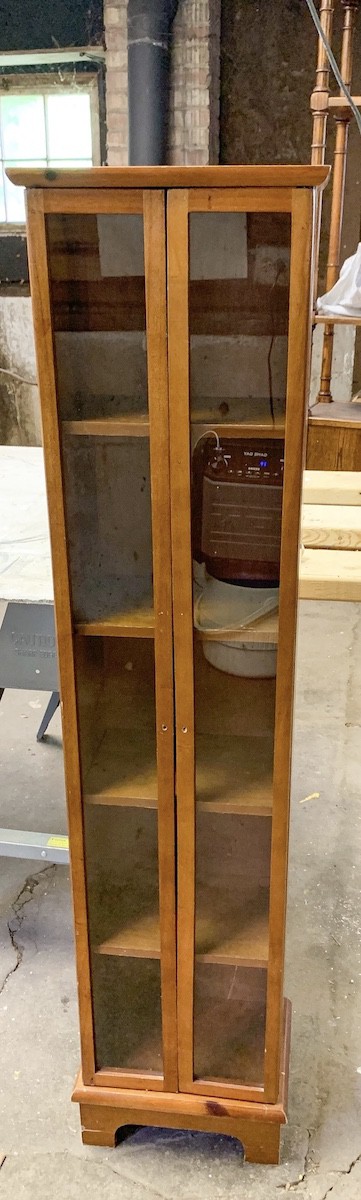
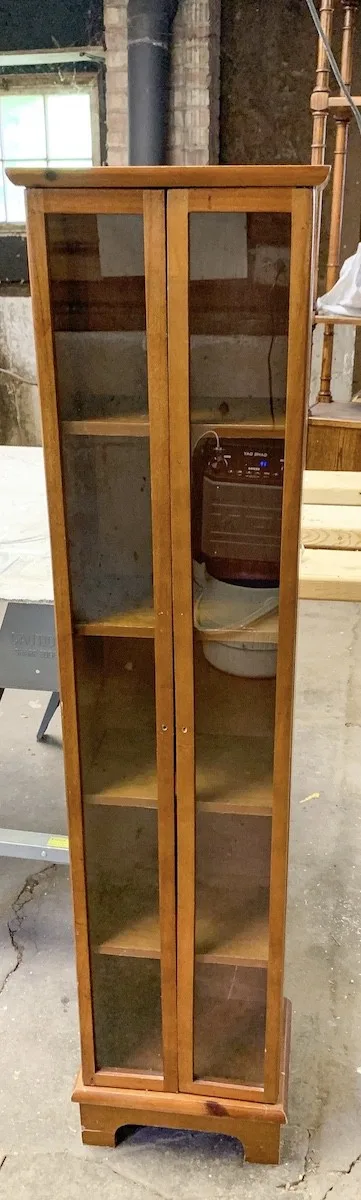
If you love antique furniture with a chipped and aged finish, you will be happy to know that you can easily recreate the farmhouse look with modern day pieces. I’m sharing my simple tips of how to distress furniture with vaseline.
These tricks are great for a thrift store furniture makeover!


If you are willing to use a little bit of elbow grease, along with chalk paint and vaseline, you can make a custom furniture piece that looks like it came from a vintage farm house centuries ago.

Why Use Vaseline to Distress Furniture?
Distressing furniture with vaseline might sound weird. But it gives you results you can reproduce with just sand paper.
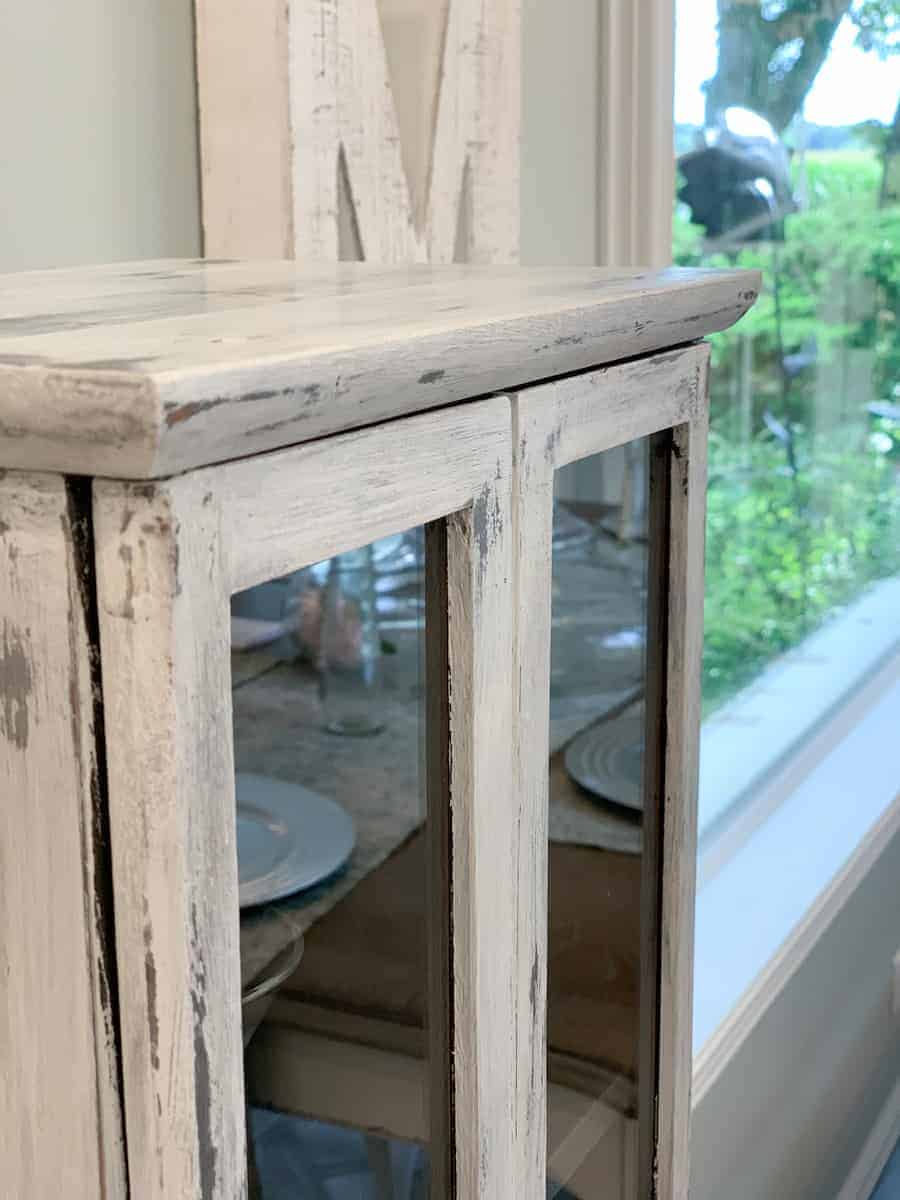
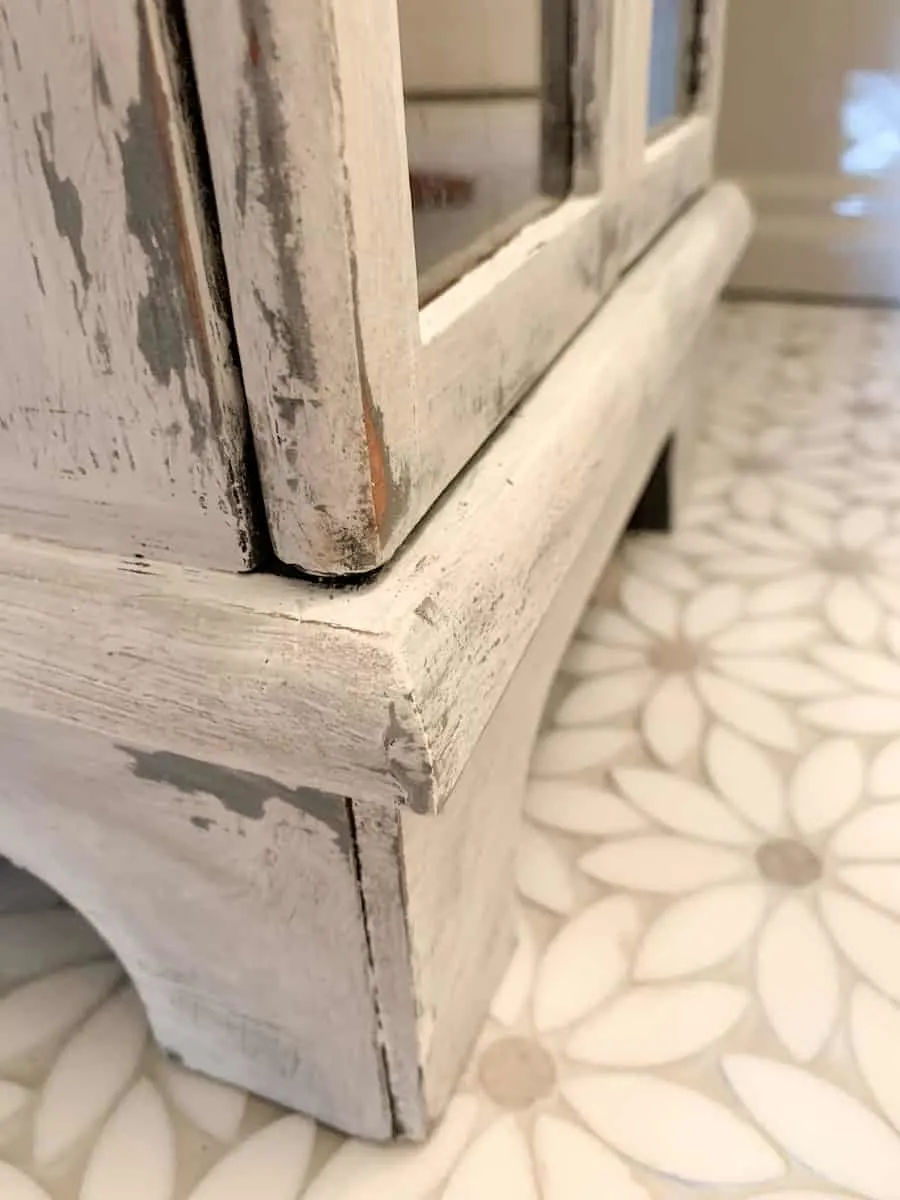
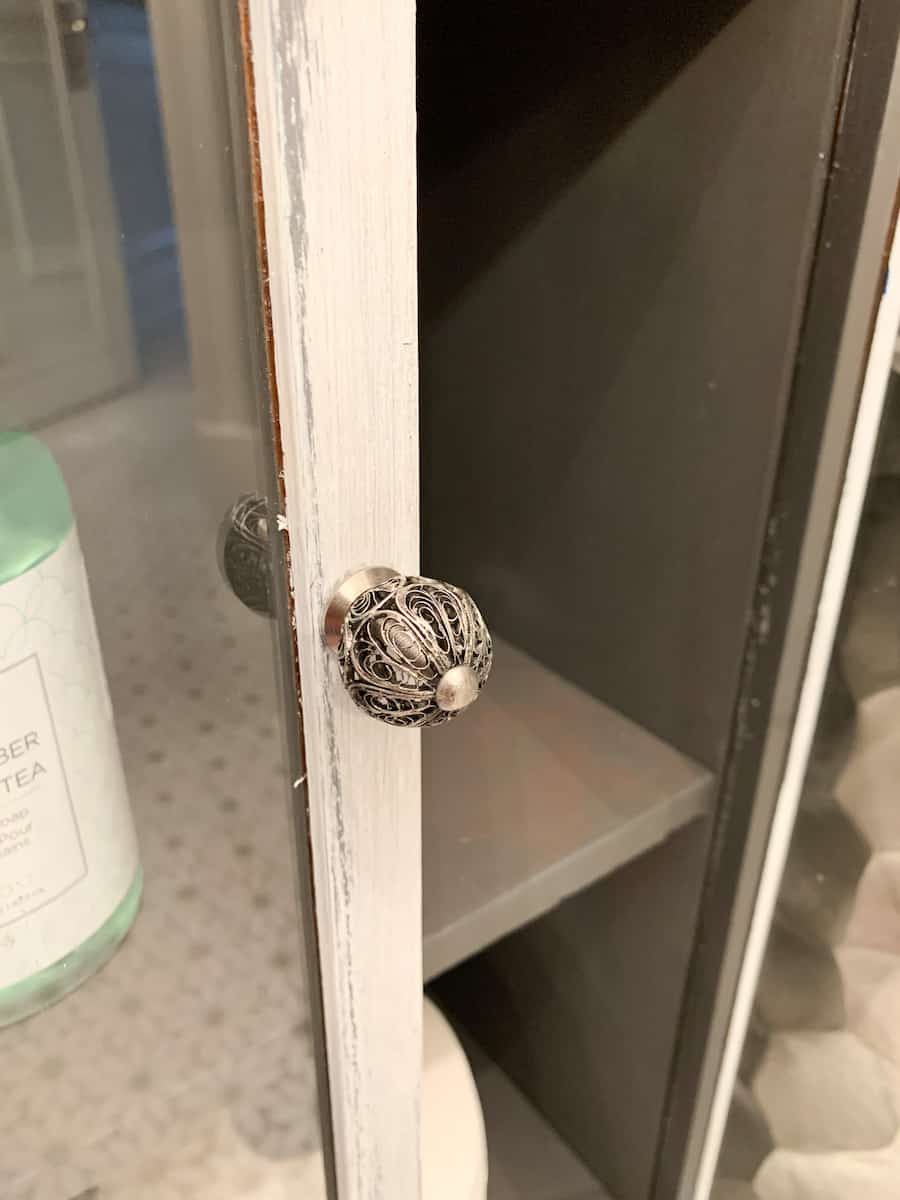
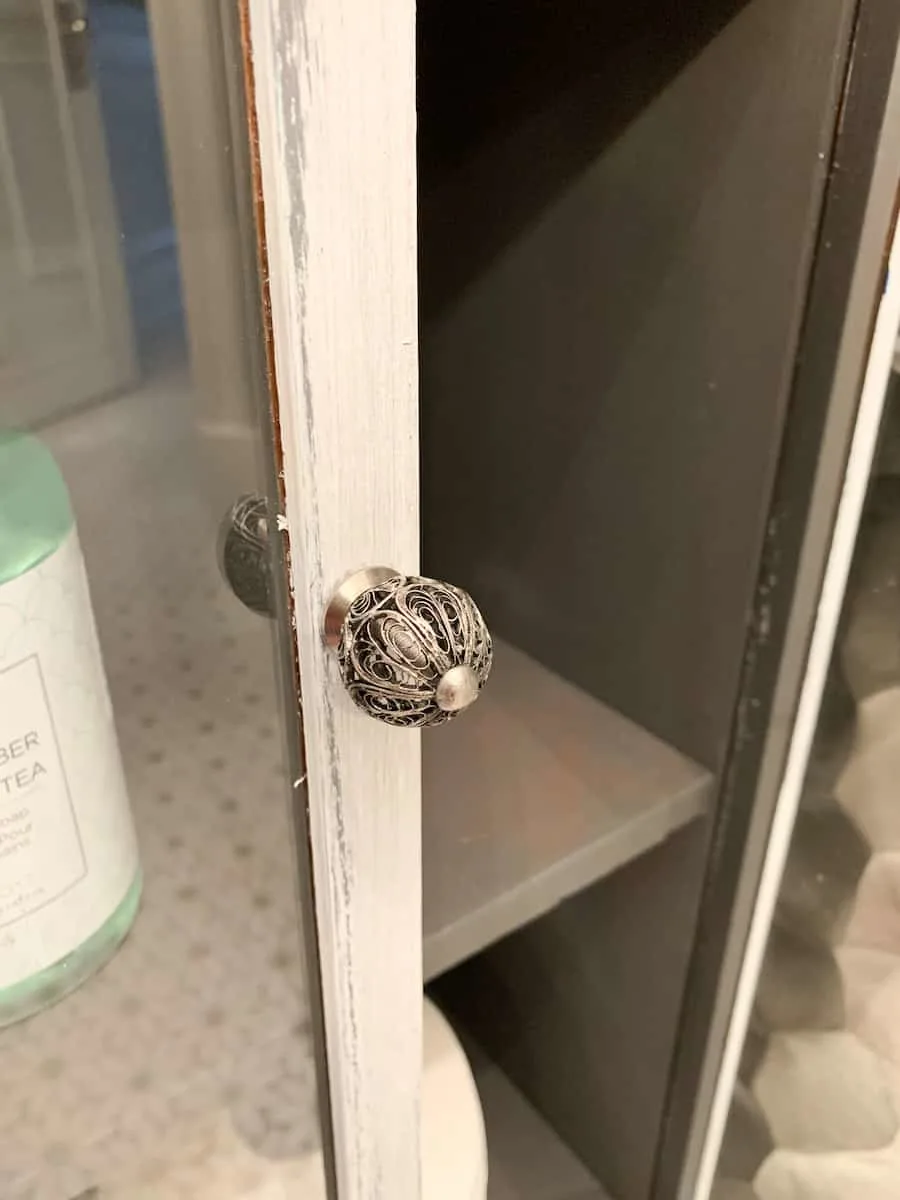
Petroleum jelly gives a “chippy” look which is irregular. It will look like the paint has naturally chipped off over time from the elements. Sanding just gives a smooth, worn look which is different.

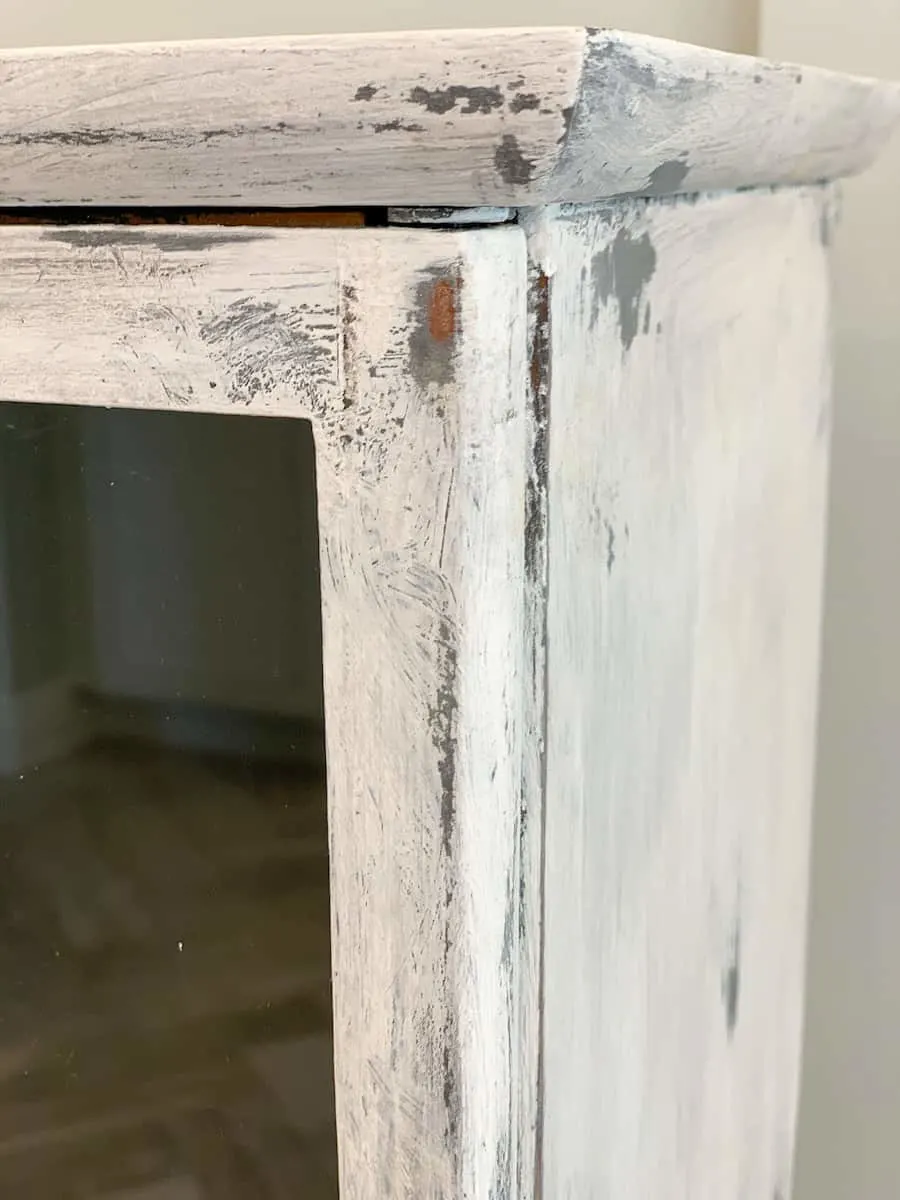
Wherever you put the Vaseline, the paint won’t stick. So be careful when adding it to the furniture and have a game plan ahead of time.
You just need a thin layer of the petroleum jelly. The paint won’t stick to it, so no need to slather it on. (It’s called a paint resist if you want to get technical.)
And, yes, the dollar store version of Vaseline is just fine to use! In fact, I highly suggest using it!
There are a variety of ways to do a cheap and easy furniture makeover. Check out my other ideas:
- How to Distress Furniture with Chalk Paint
- Easy Table Makeover
- 7 Things to Know About Buying Used Furniture
- How to Paint Furniture without Sanding or Priming First
- IKEA Kallax Hack: Adding Legs to Cube Storage Shelves
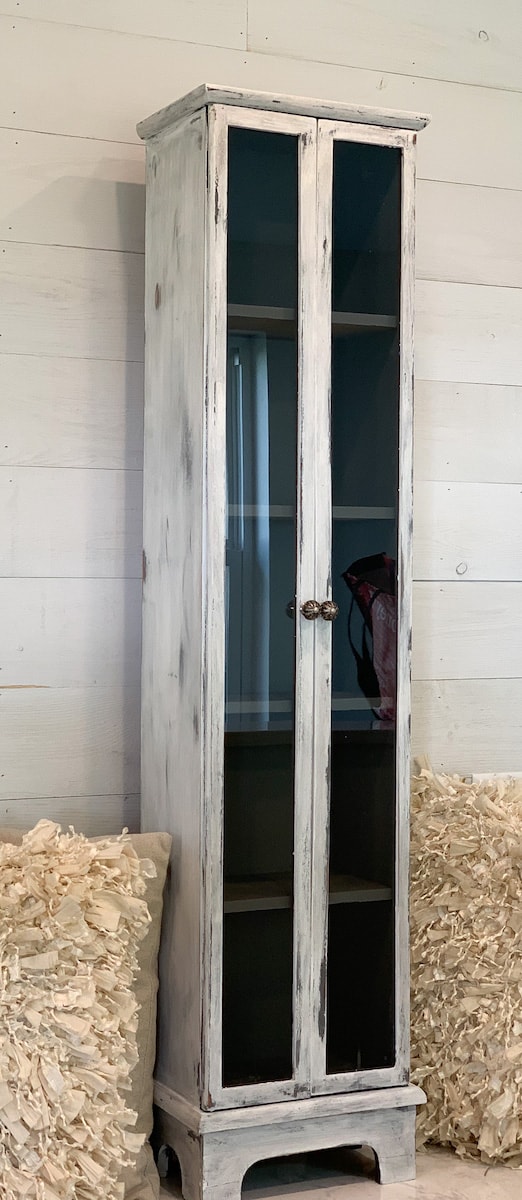
How to Distress Furniture with Chalk Paint and Vaseline
I share with you the colors that I used for this particular thrift store makeover using vaseline to antique the furniture. Keep in mind that you don’t have to use these colors. You will want two different, yet complementary colors of chalk paint (I labeled them Paint #1 and #2 for reference below). And I used two different colors of wax, which you only need to use one.
Supplies
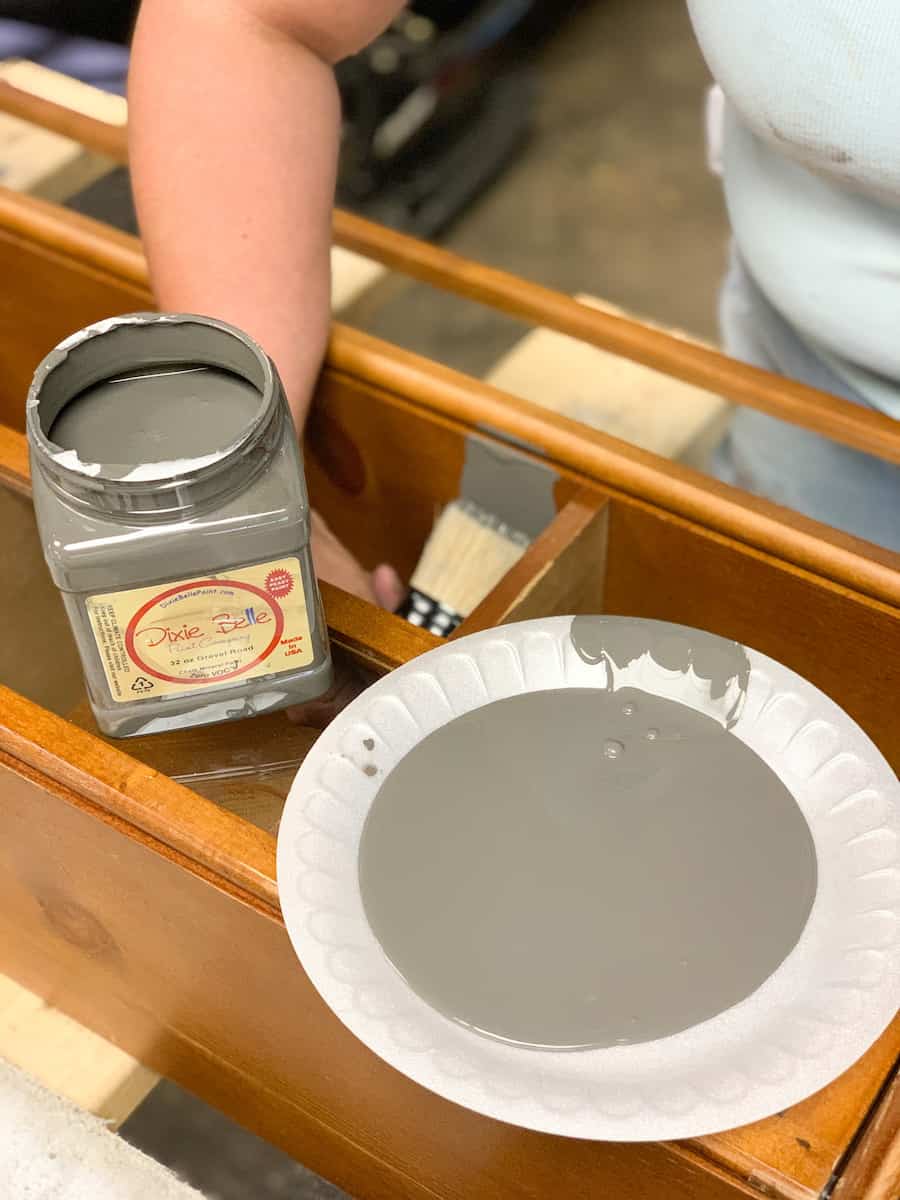
- Dixie Belle Gravel Road Chalk Paint (Paint #1)
- Petroleum Jelly (Vaseline)
- Dixie Belle Cotton Chalk Paint (Paint #2)
- Dixie Belle Best Dang Wax, Grunge Gray
- Dixie Belle Best Dang Furniture Wax, Clear
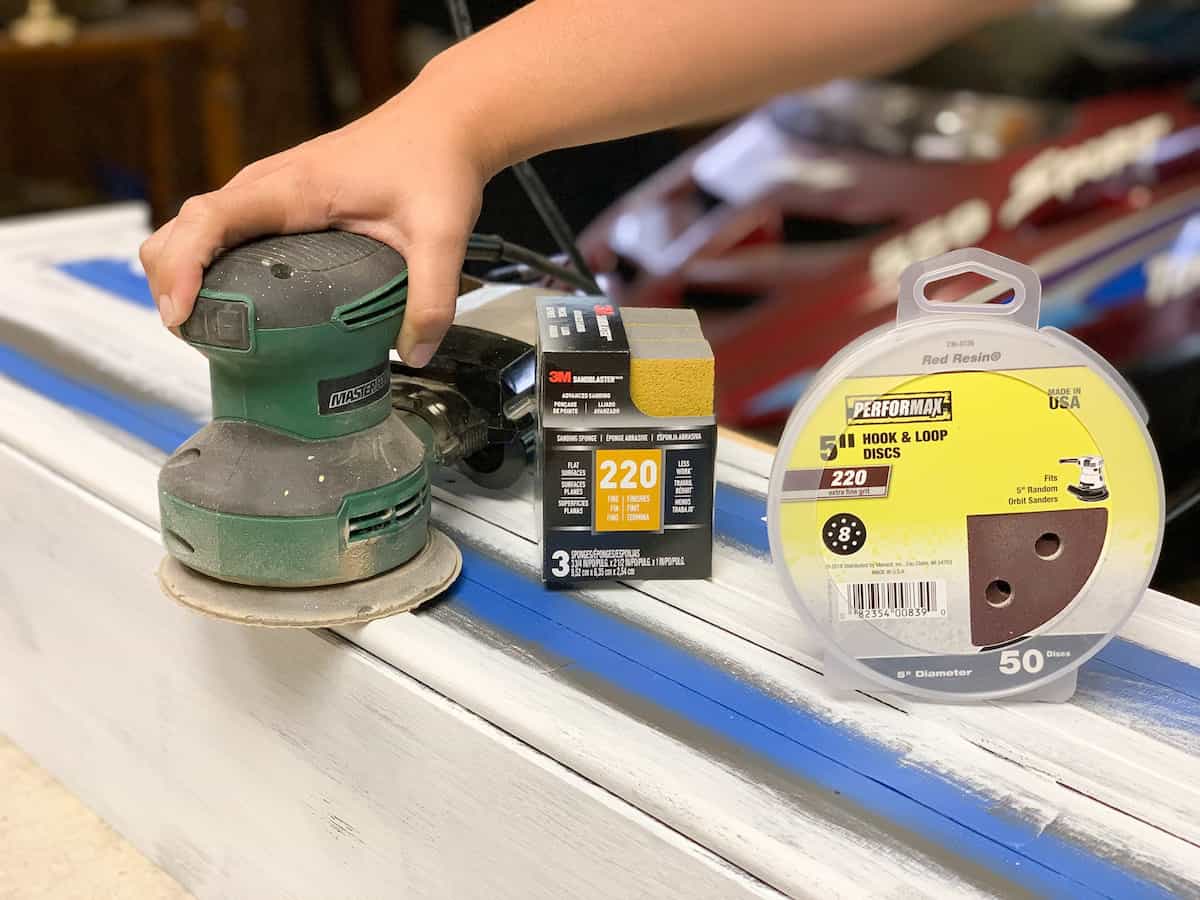
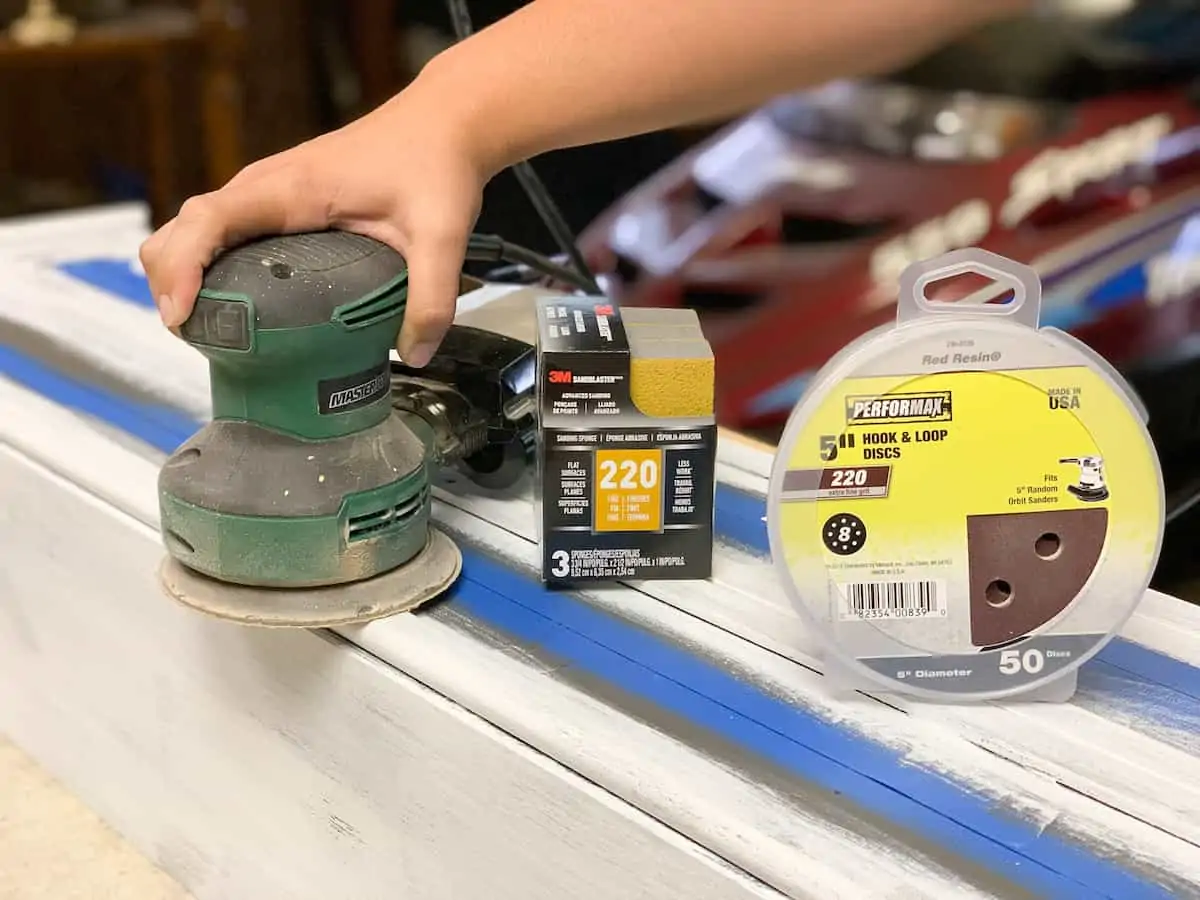
- 220 grit sandpaper and/or sanding block
- Foam Brush (optional)
- 3 Natural Bristle Chalk and Wax Paint Brushes (this three-pack gives you the right amount for what you’ll need)
- Four Lint Free Cloths
- Drop Cloth
- 2 Paper plates
- Mineral Spirits
Directions
Prepping
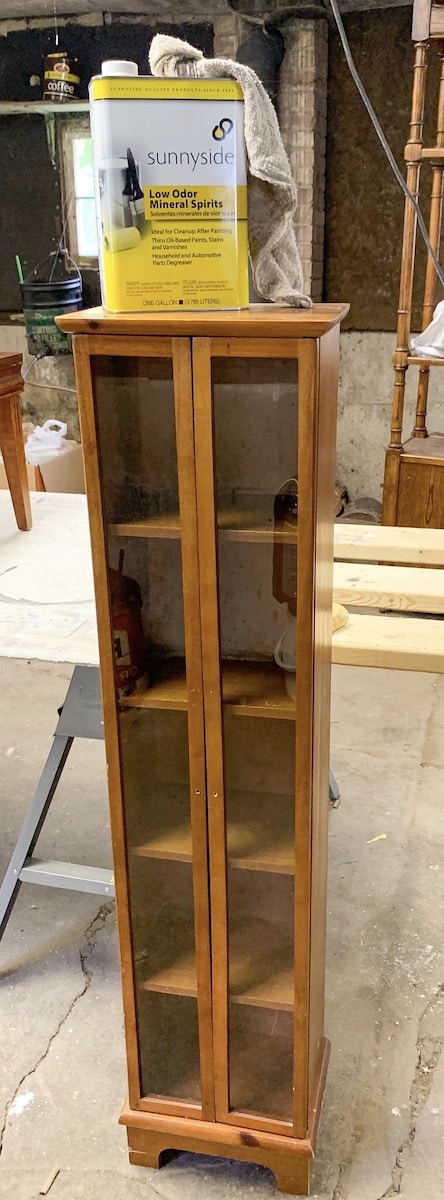
Place the furniture in a cleaned work space. If working in a garage, be sure to sweep or blow all dirt and debris out of the area you will be working in so that a breeze won’t accidentally blow it into your paint.
Lay a drop cloth down to make sure that paint does not drip and ruin your flooring.
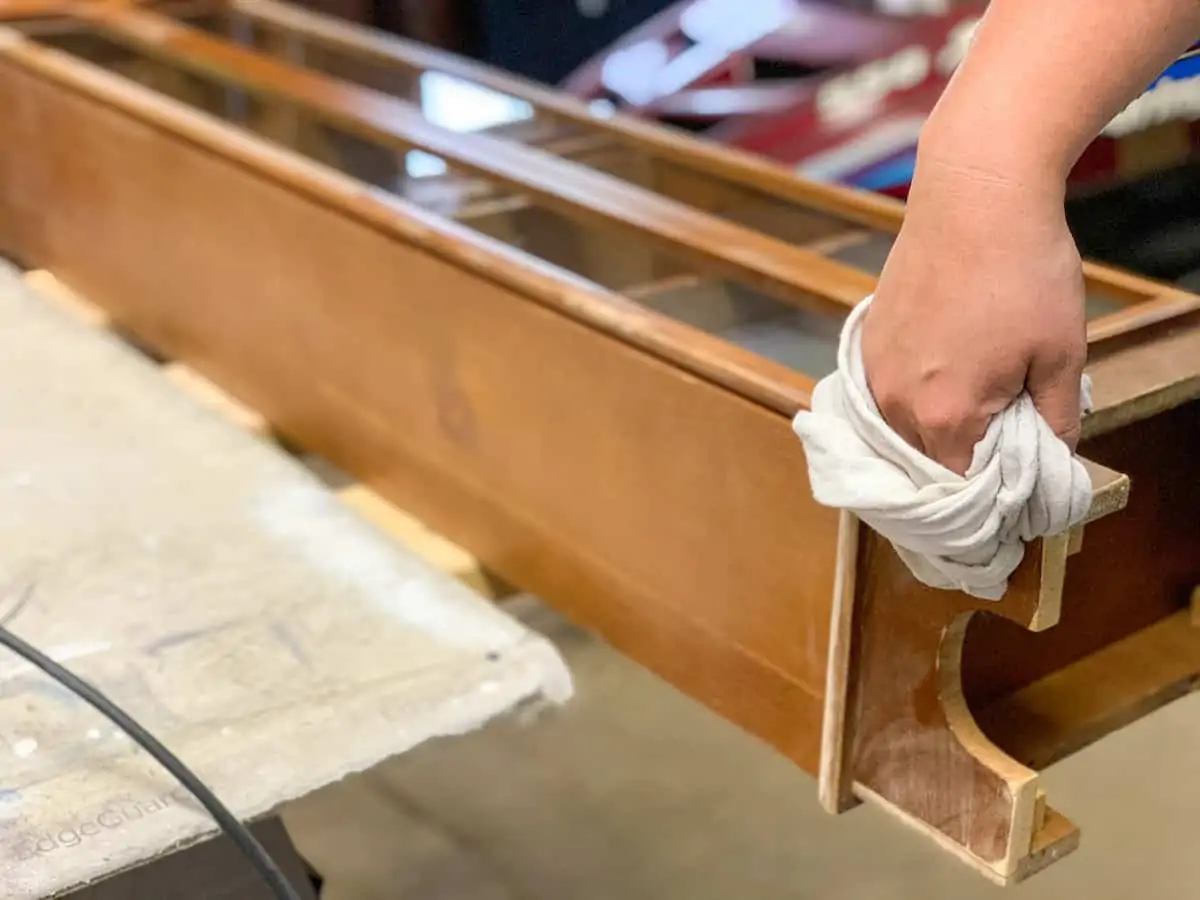
Take a lint free cloth and dampen with mineral spirits. Clean the entire piece of furniture with the spirits to remove any and all debris or oils that may be on the surface.
Be sure to wipe down anywhere you will be painting, including the inside of drawers and doors.
Wear a mask or be sure you are in a well ventilated area when using mineral spirits.

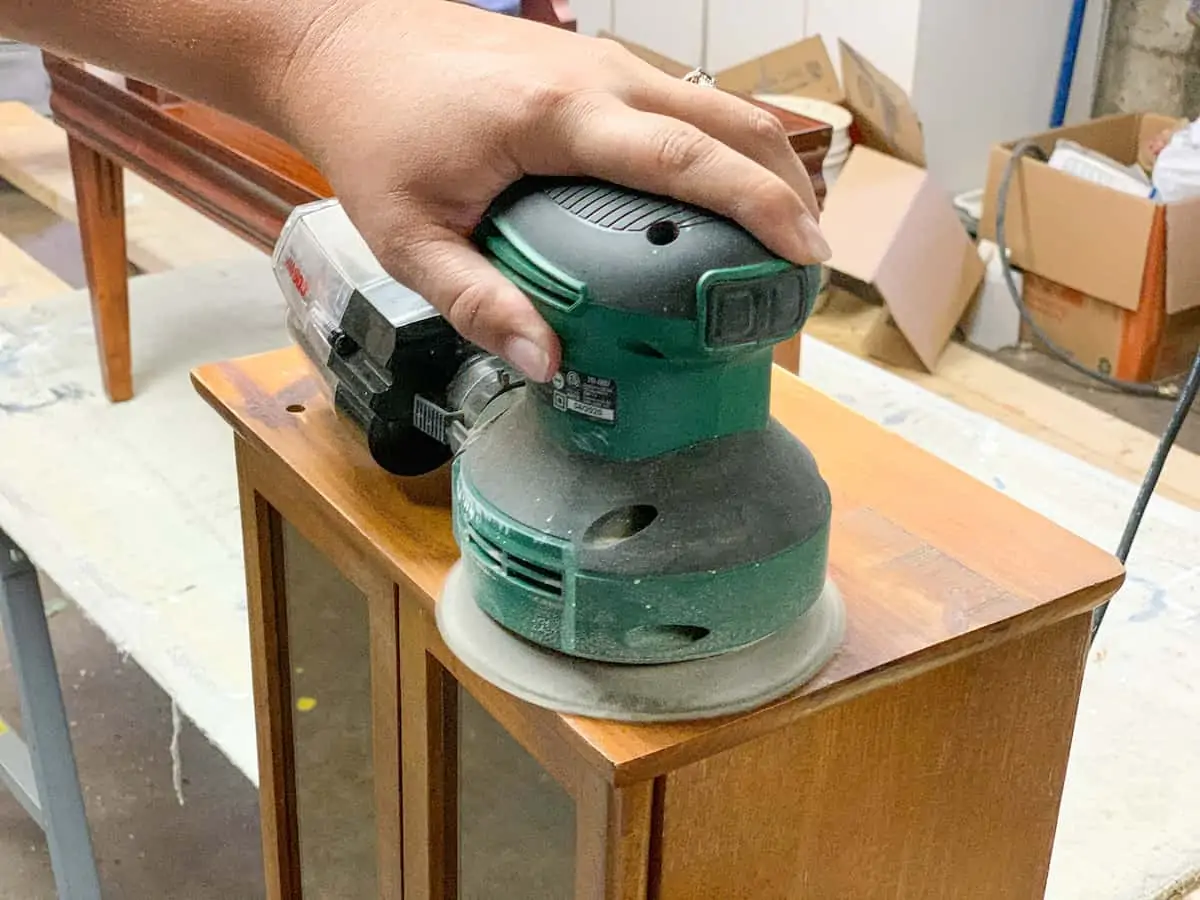
Sand the entire piece of furniture using 220 grit sandpaper. If you have an orbital sander you can use this for the top of your piece and any larger areas to save you time and energy. If not, sanding blocks and regular sandpaper will do just fine.
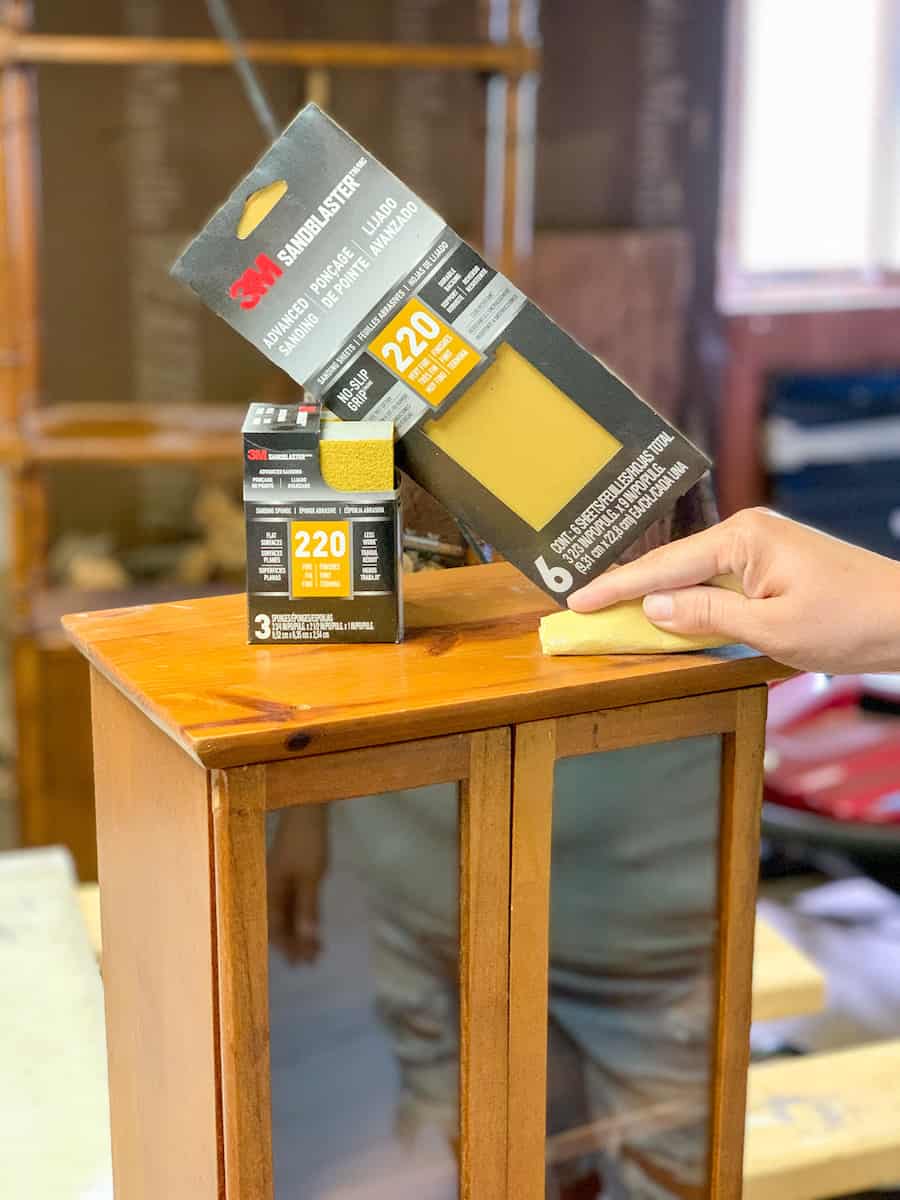

Be sure to rough up the existing finish to expose the natural wood grain. Smooth out any imperfections and ensure your piece is smooth to the touch.
Be careful around any small details. Sanding is all about the pressure you apply. Use heavy pressure in areas that have thick existing finish. Use light pressure (and hand-held sand paper) on corners and areas with detail you do not want to disturb.

With another lint free cloth, remove all of the dust particles from the sanding process. Take your time, you do not want any lingering particles that will live under your paint!
If you have an air compressor gun, you can use it and this process will be done in no time. Don’t miss the corners and crevices!

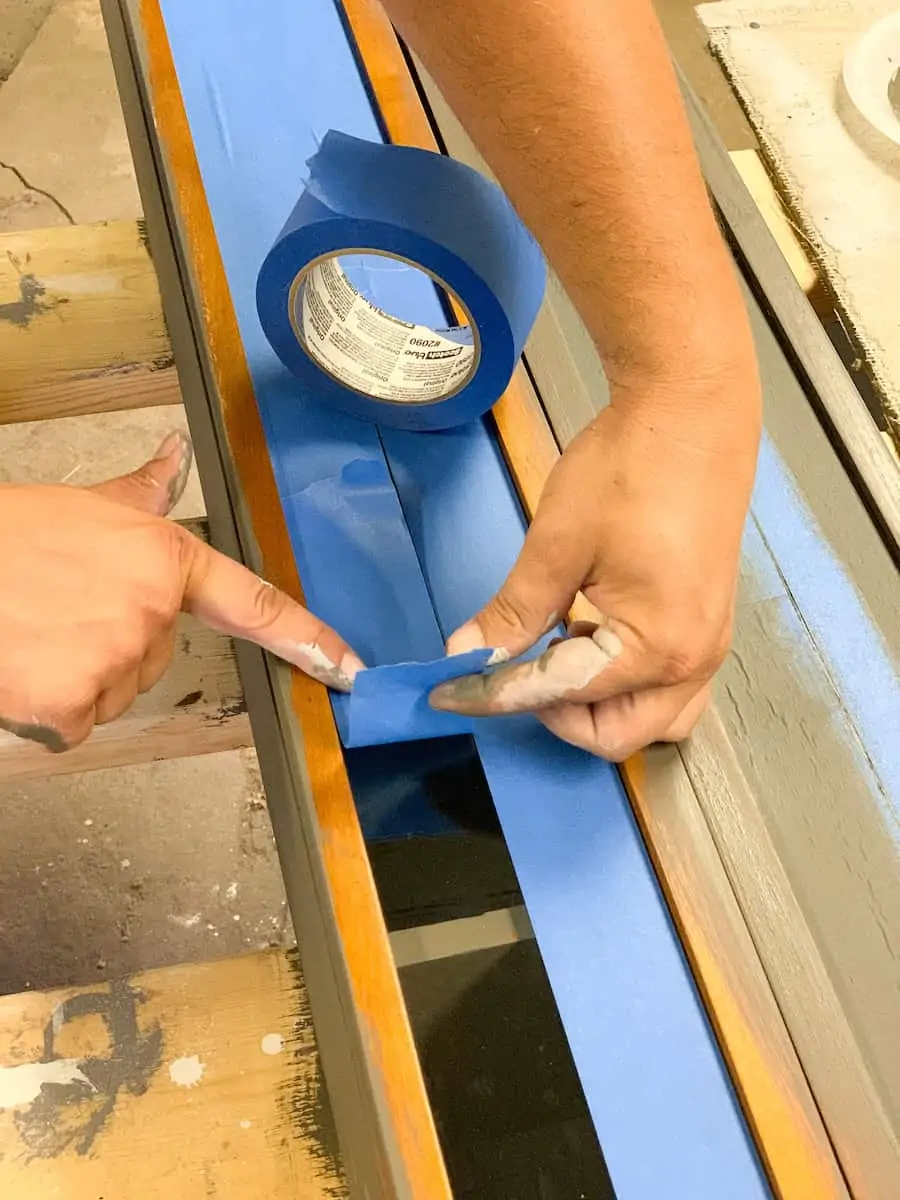
If you have glass or other surfaces not to paint, use painters tape and tape off the inside of the glass and the outside of the glass. Make sure you place the tape along the edges of the wood to prevent paint drips.
If you can easily remove the glass, then go ahead and do so.

Painting
Shake your Dixie Belle Gravel Road Chalk paint (Paint #1) for 30 seconds.
Pour paint onto a paper plate. Keep in mind, a little goes a long way! It’s better to start with a little bit and add more to your plate as you go to ensure that you do not waste it.

Using a brush, coat the bottom of your brush and start painting the top of your piece. Be sure to work the paint in the same direction of the wood grain.
Working from top to bottom will help minimize drips.
Coat the entire piece. Don’t worry if paint looks streaky, as it will all flatten out.
Let dry for 30 minutes.
Flip the furniture and paint the backside and underneath. Be sure to focus on any edges, insides of doors, or areas that might be visible to ensure full coverage.
Let dry for 30 minutes.
Apply a second coat of paint, working in the same direction of the wood grain. Paint the inside with a coat of paint.
Let the entire piece dry and cure for 24 hours (depending on weather and humidity).
If necessary, use 220 grit sandpaper to lightly sand any areas of paint drips or build up. Use a lint-free cloth to remove any debris.
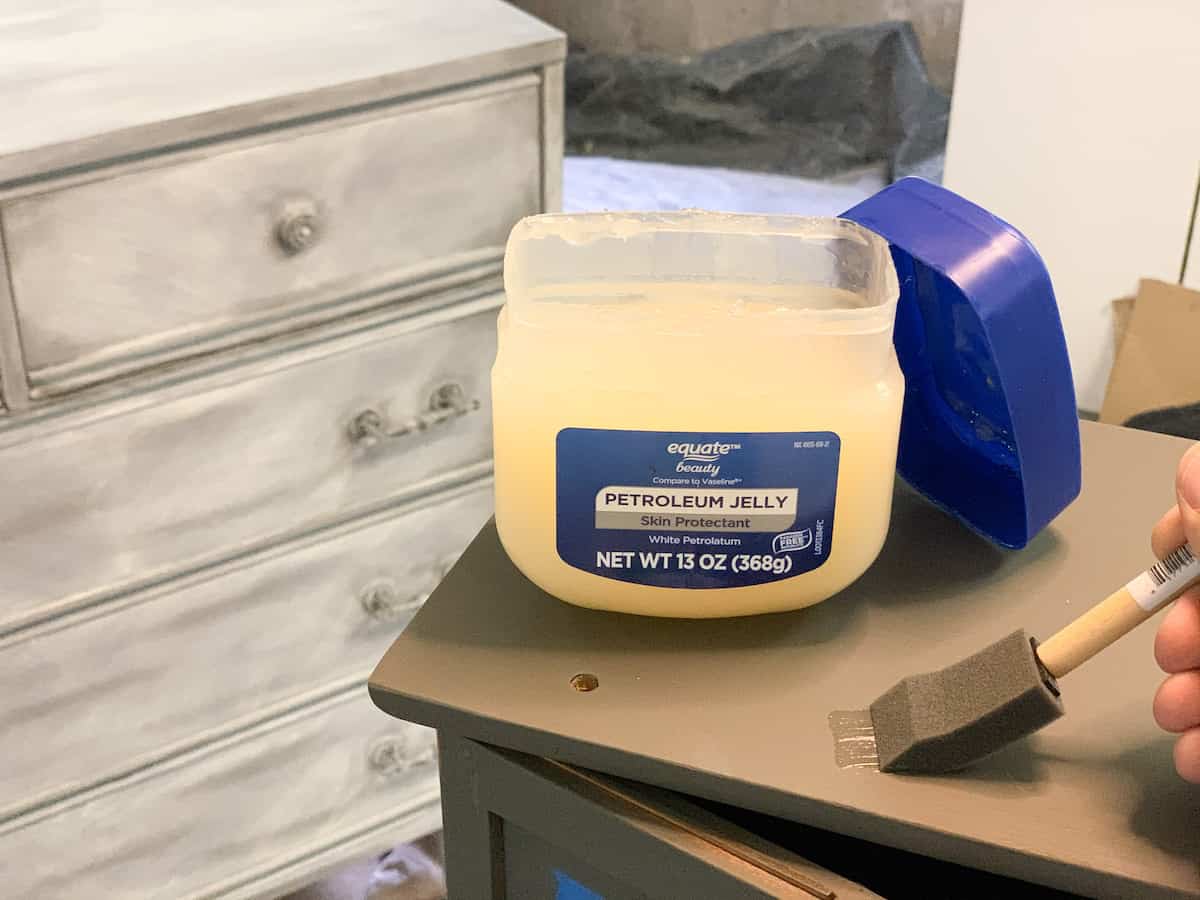
Using Vaseline Jelly for an Antiqued Finish
Apply thin coats of petroleum jelly with a foam brush on areas you want the paint to chip through (you can also use your fingers for smaller pieces of furniture to cover).
Focus on corners, detail areas, and other areas that would naturally become distressed.

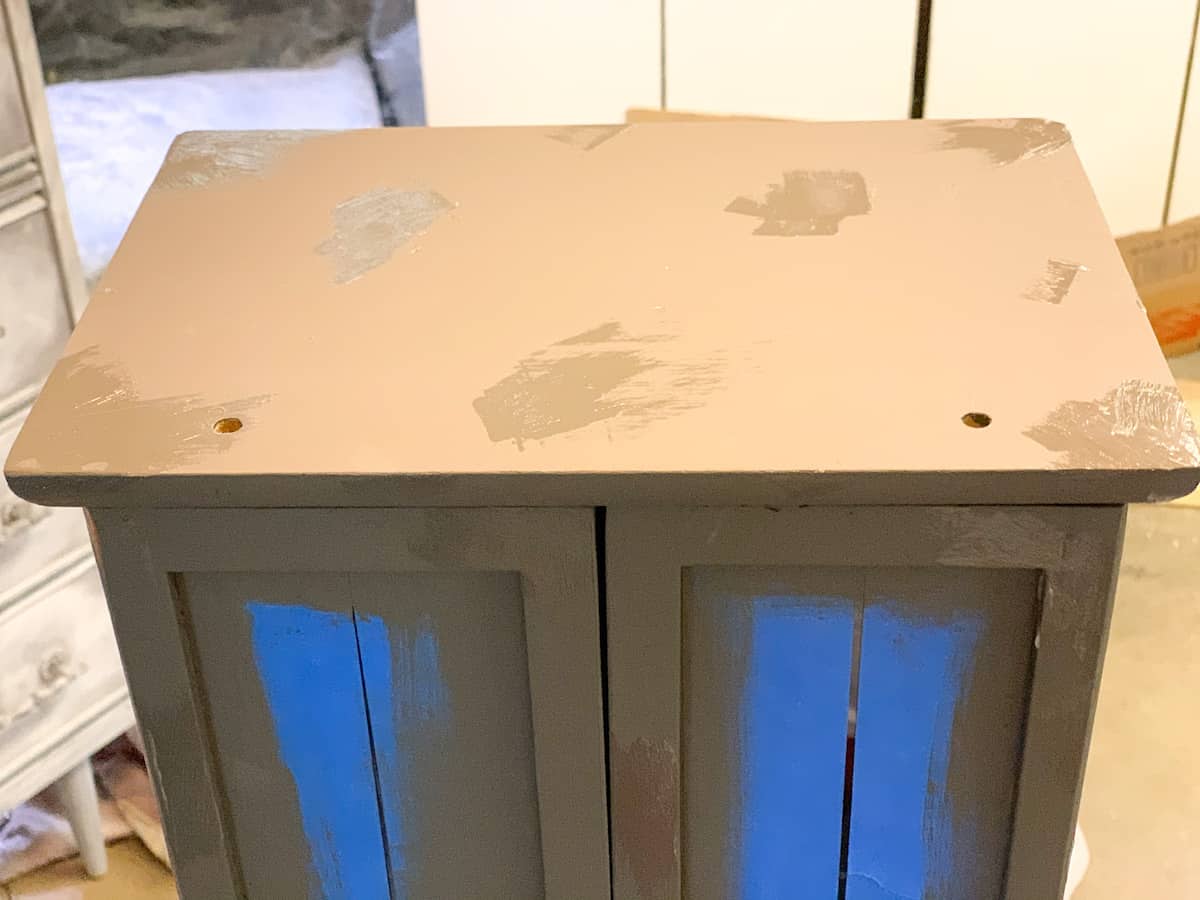

Shake your Dixie Belle Cotton Chalkpaint (Paint #2) for 30 seconds.
Pour this color onto another paper plate. Remember, a little goes a long way.
Using a chalk paint brush, coat the bottom of your brush and start painting the top of the furniture with the chalk paint. Paint in the same direction of the wood grain.
Work from top to bottom, being sure to paint over the petroleum jelly. You don’t have to fully cover the piece if you don’t want to. For a farmhouse look, apply the top coat of chalk paint quickly to allow some of the base coast to show through.
Let dry for 30 minutes.
Flip the piece and paint underneath and back with Dixie Belle Cotton. Be sure to focus on any edges or areas that might be visible to ensure full coverage.
Let dry for 24 hours, depending on humidity and climate.
Final Touches
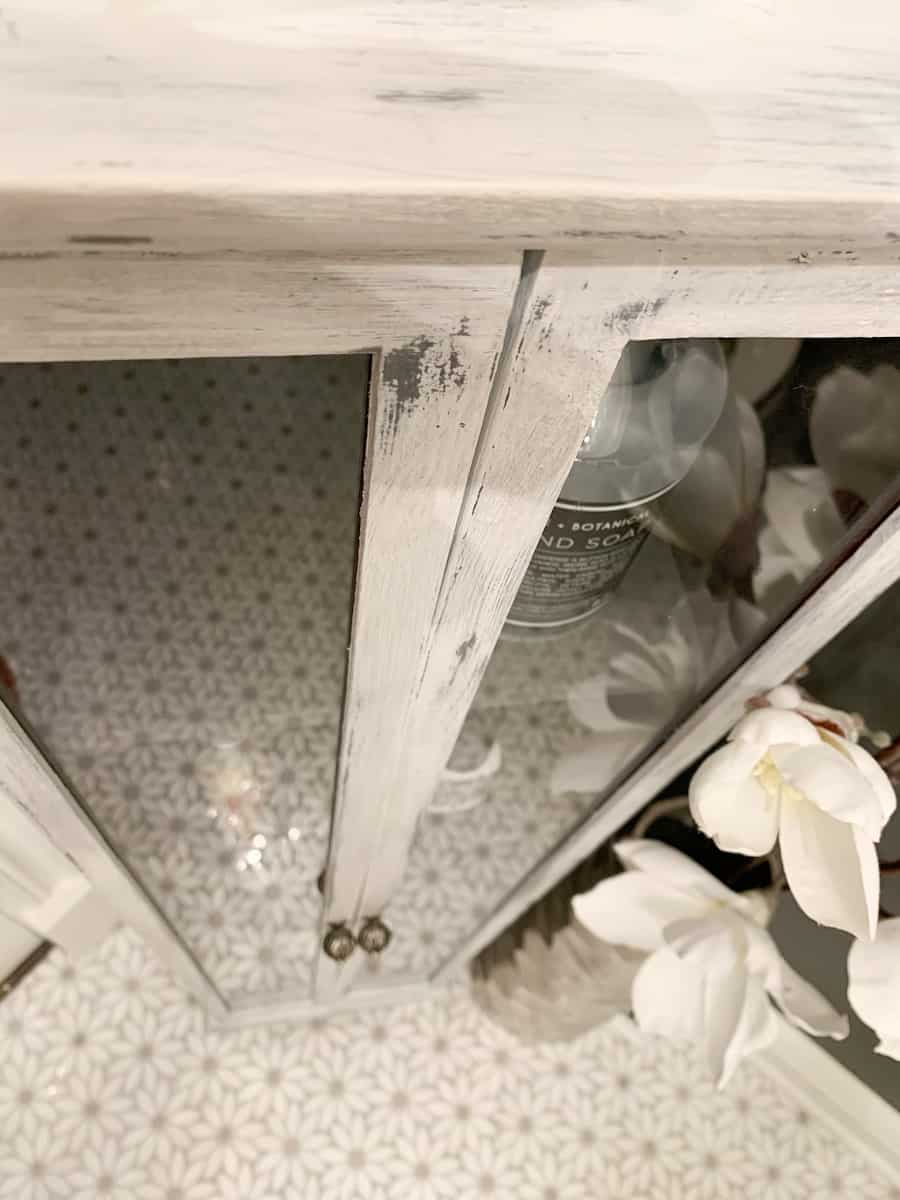
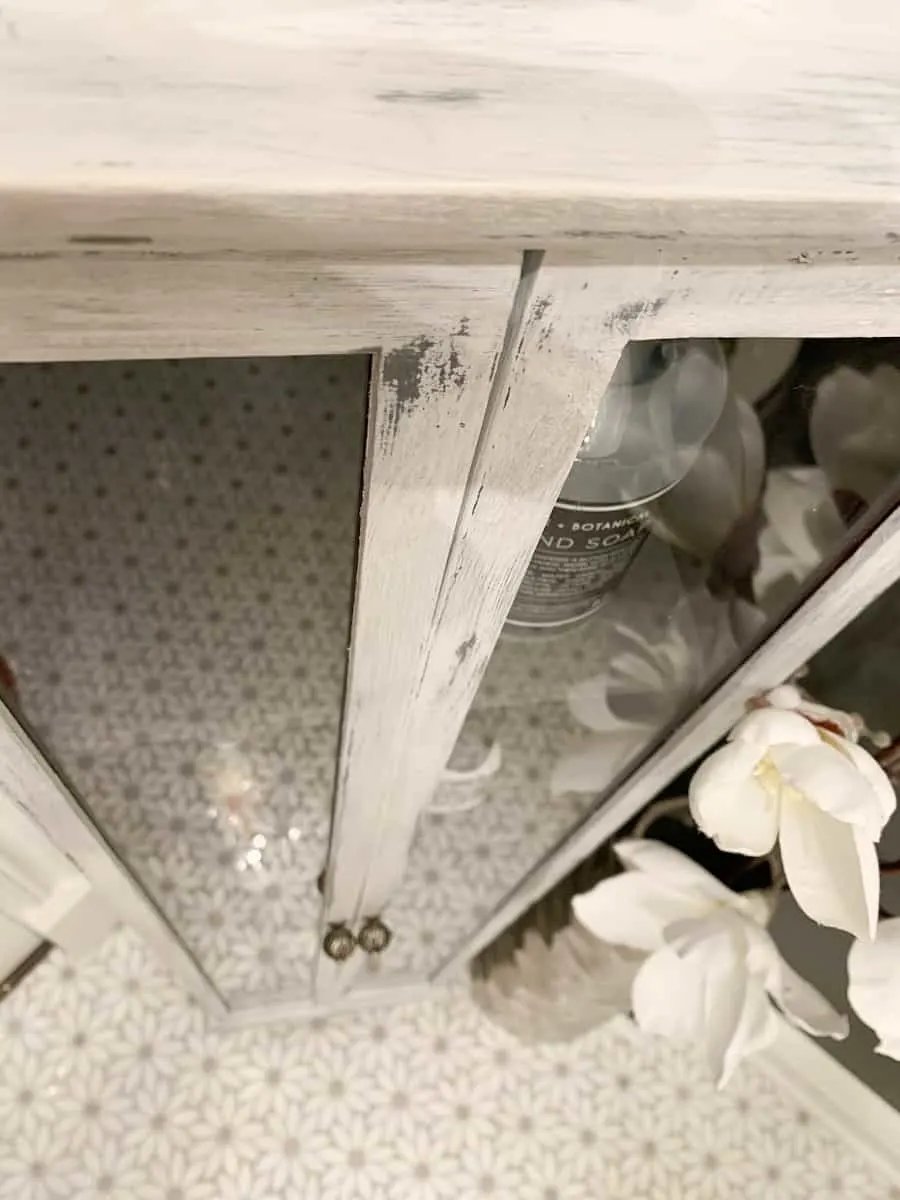
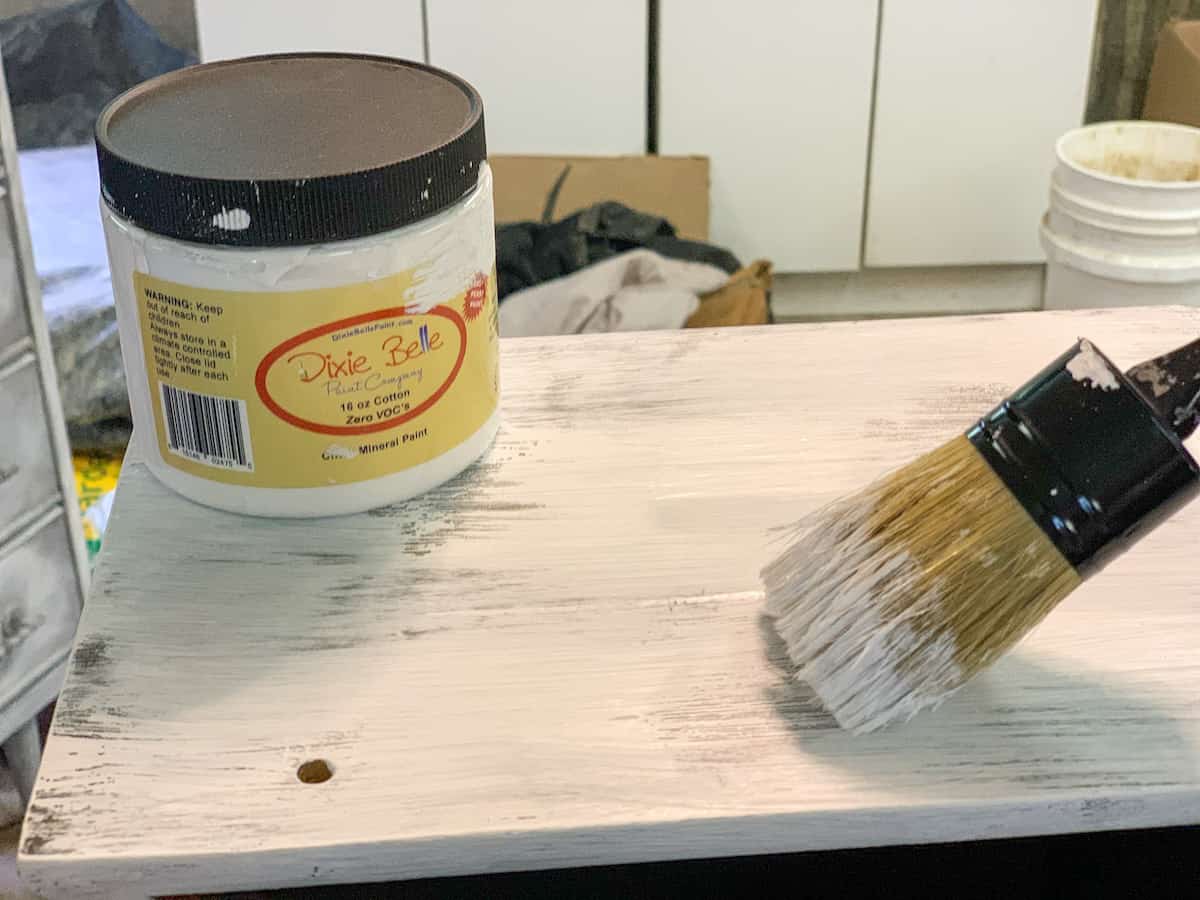
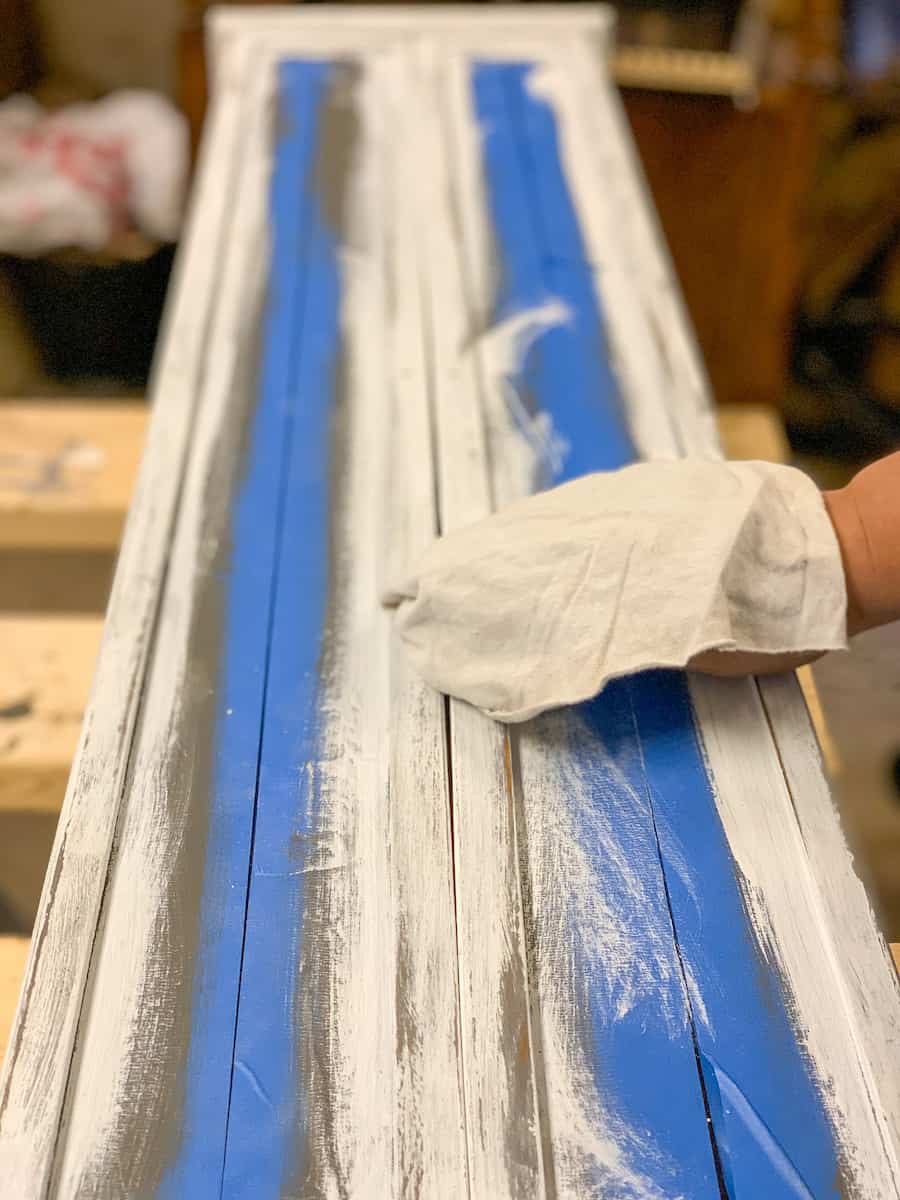
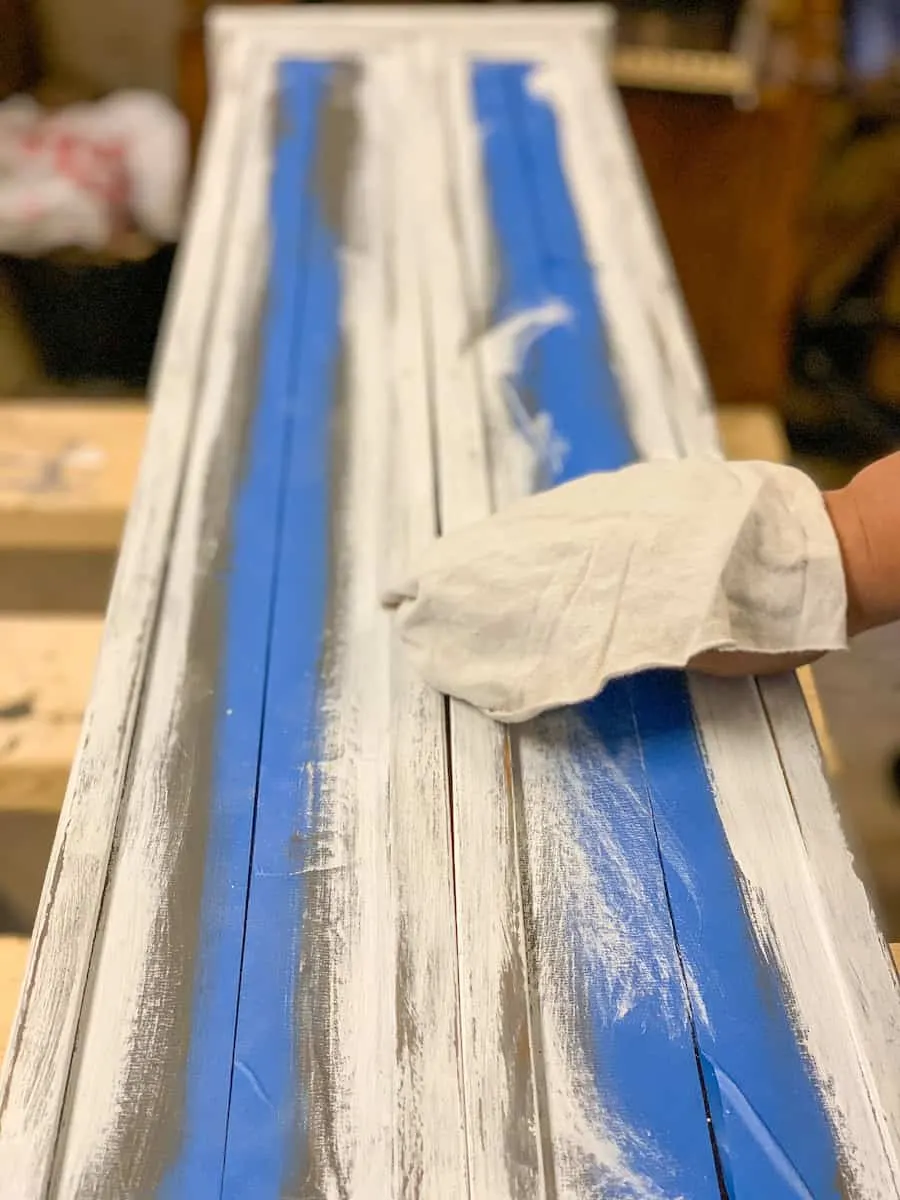
Using 220 grit sandpaper, sand the entire piece. The areas where the petroleum jelly was will chip off, exposing the base coat of paint. You can sand other areas, such as corners, legs, doors, and drawers, for additional distressing and antiqued details.
Use a lint free cloth to remove any dust or debris.
Set a timer for 15 minutes. With the countdown going, use your natural bristle wax brush and apply a thin coat of Dixie Belle Best Dang Clear Wax to the entire piece, including the inside.
There is no need to add the wax to a paper plate. You can dip your brush right into the tin. Apply a thin coat and work quickly!
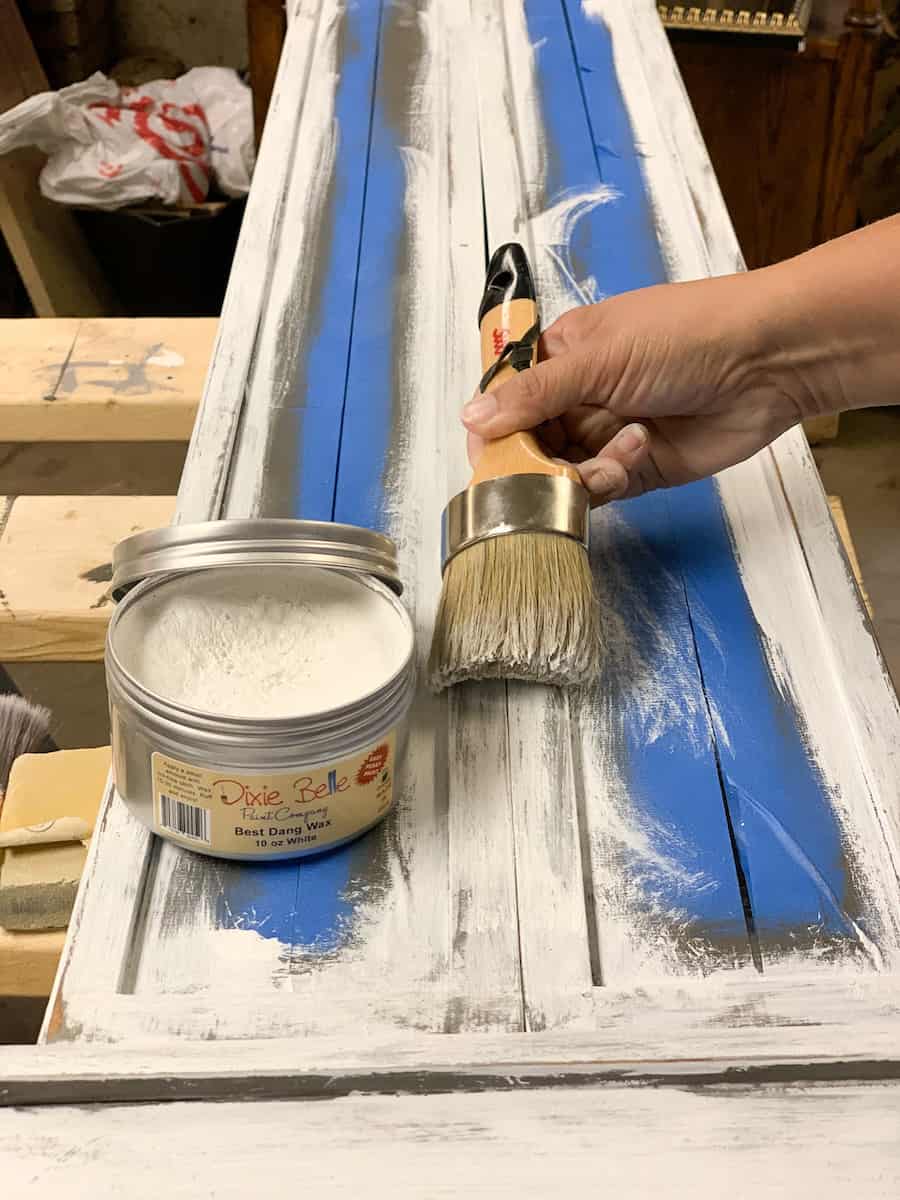

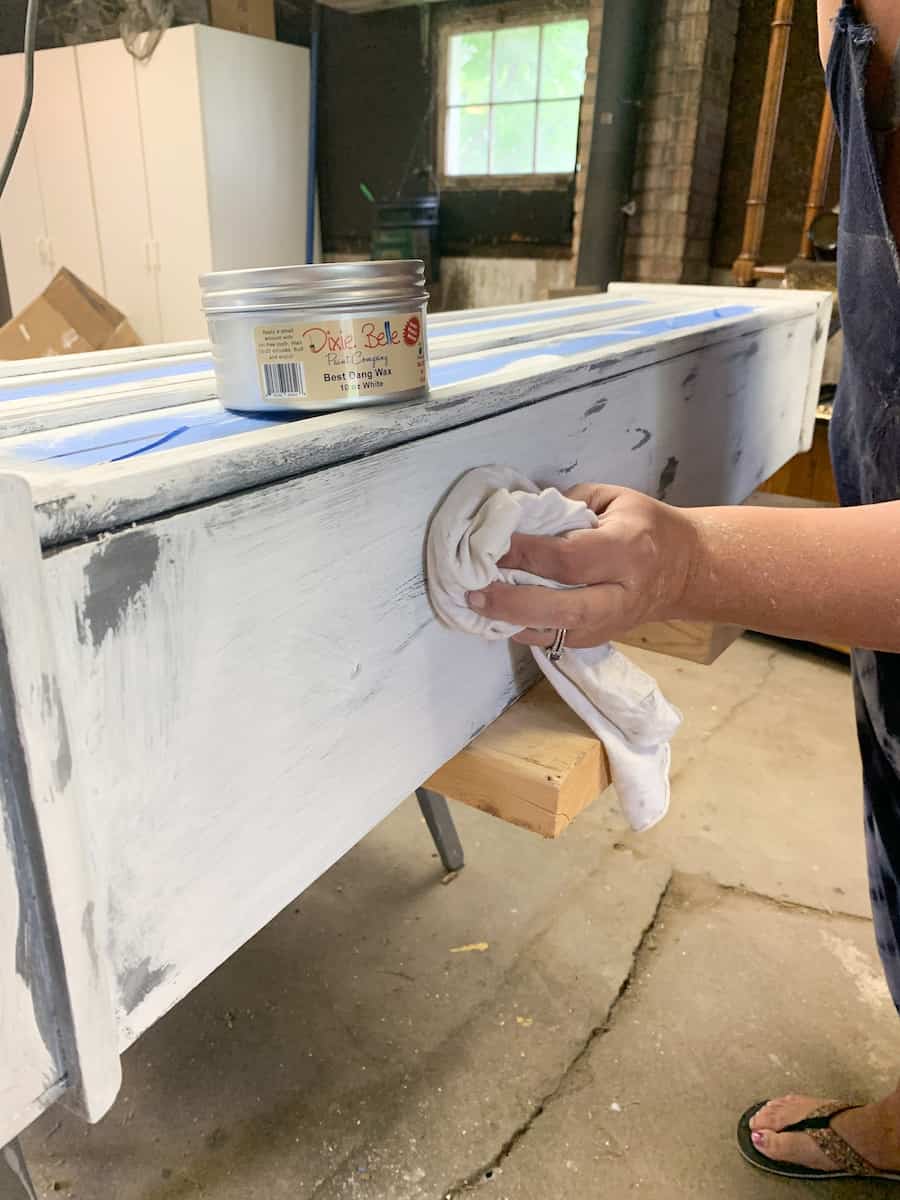
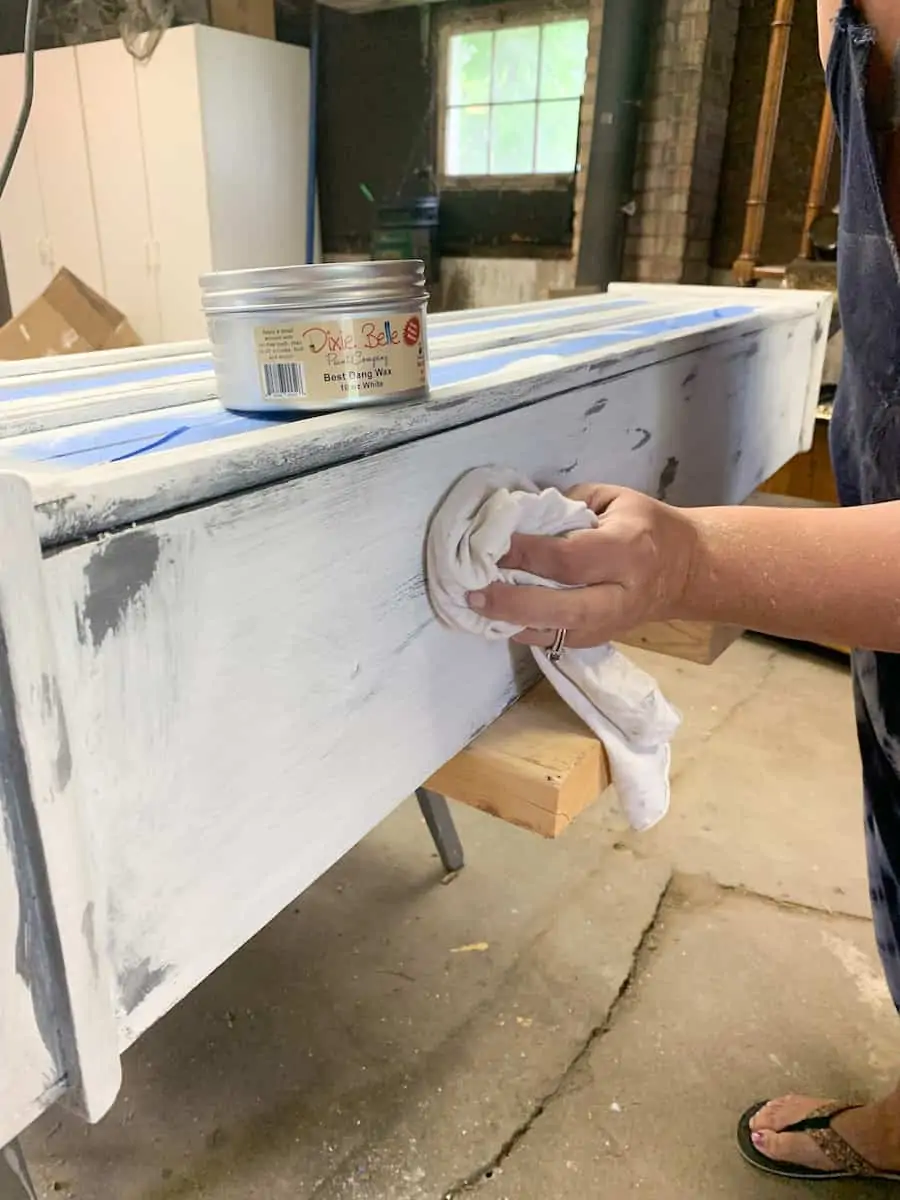
Once the timer goes off you can start to rub in your wax. Work in the area that you applied first. Using a lint free cloth, rub your wax into your piece. Be sure to rub in all directions and press the wax into the wood.
If you’re not sweating you’re not doing it right! This takes elbow grease.
Let dry for 2 hours.
Again, set a timer for 15 minutes. Using your lint free waxing cloth and Dixie Belle Best Dang Grunge Gray Wax, apply a thin coat to areas that you want to darken. You can dip your lint free cloth right into the wax container and select small areas to darken.
Use this wax as an accent. The more wax you use, the darker the piece will be. You can dip your cloth right into the tin. Remember to apply a thin coat and work quickly!

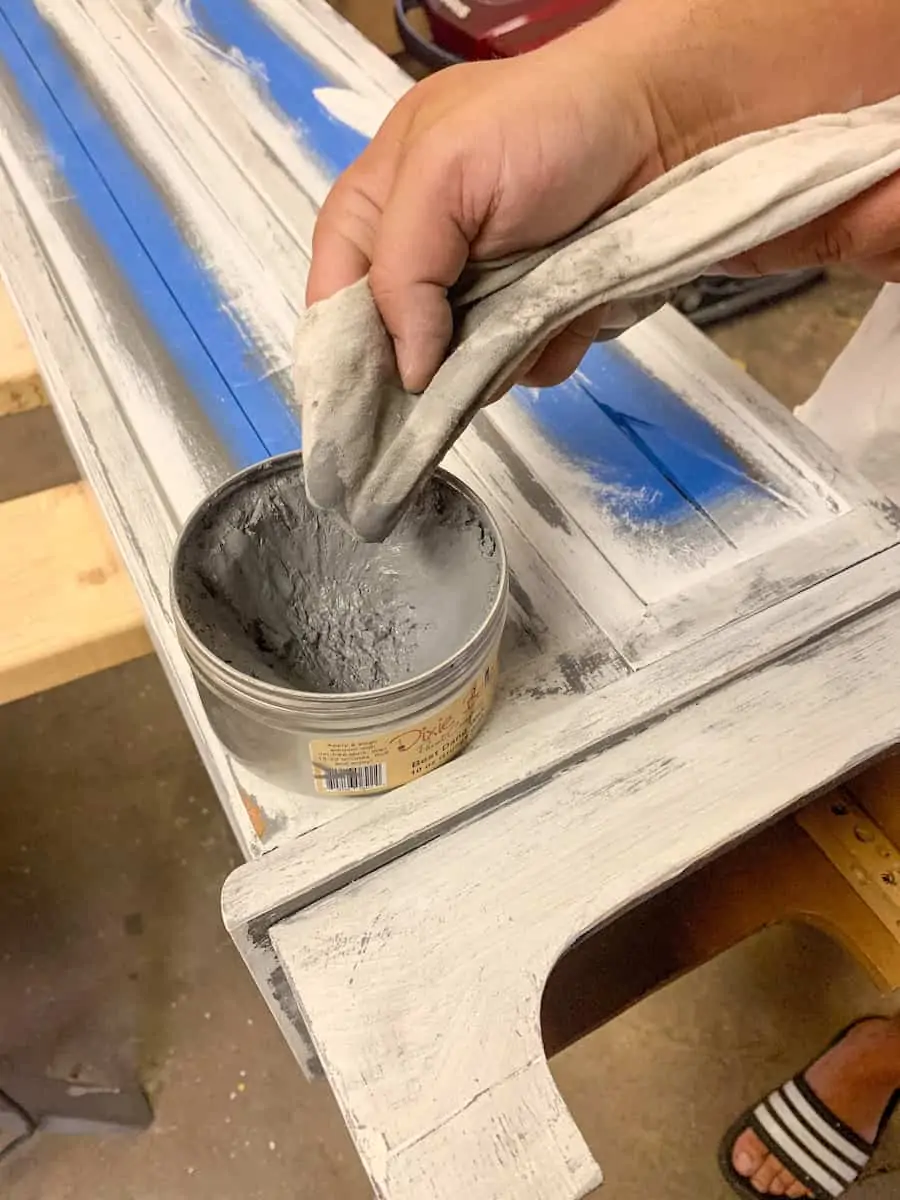
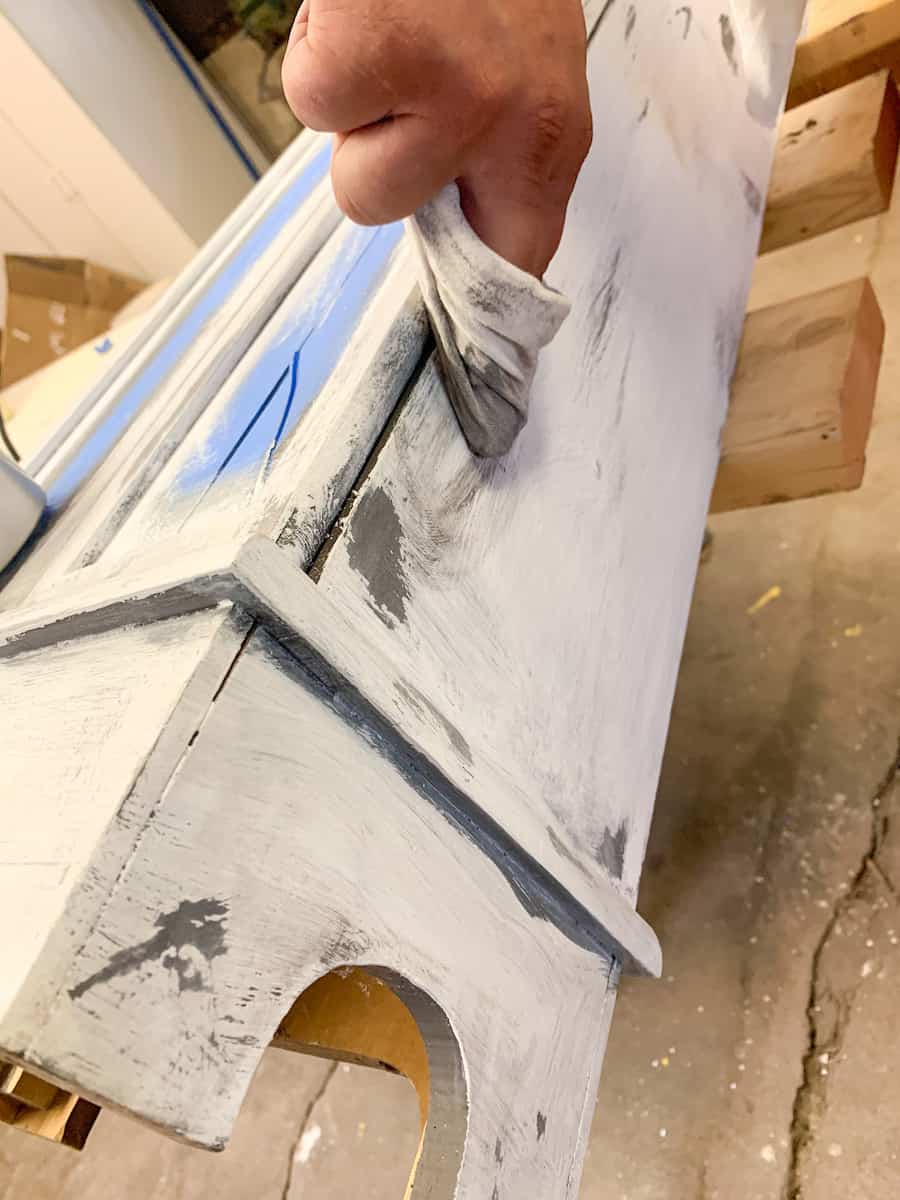

Once the timer goes off after 15 minutes, you can start to rub in your wax. Work in the area that you applied first. Rub the wax into the furniture. Be sure to rub in all directions and press the wax into the wood.
The full and complete drying time for the materials is 30 days. However, you can begin to gently use the furniture after 48 hours. Just don’t clean or drag anything across the furniture until 30 days later.
Cleaning Up
Clean all chalk paint brushes immediately after use with water. If buildup occurs you can gently clean with mineral spirits.
Place wax brush in a zip top bag. There is no need to clean your brush as long as you only use the same color wax with the same brush. Place in a ziplock bag immediately when you’re done using.
Want to save these instructions to refer to later? Be sure to Pin This to a DIY or Furniture Renovation board.
