


Every time I put a tin can into the recycling bin, I think there has got to be something else I can do with this. And there always is! Which is how I made these tin can wind chimes!
These cute wind chimes are so easy to make! They add a touch of cheer and happiness to my front porch.

I love upcycling tin cans. Here’s some more of my favorite repurposed tin can crafts:
Rough Edges on Tin Cans
Tin can crafts can be sometimes intimidating, because you don’t want to work with rough metal edges. And, yes, you do need to make sure that there are no exposed metal edges that can cut or hurt you.
But using a metal file can sand away rough metal if necessary. (This 6 pack of files in all different shapes is a great deal. I didn’t know they were that inexpensive!)
You can also wear heavy gloves, too.
I’ve also found that tin food cans these days don’t seem to have as many small, rough edges as I remember in the past. Maybe that’s just me. Or maybe I have a better can opener that doesn’t shred the metal as it is opening the can. Who knows?
How to Make Tin Can Wind Chimes
Supplies
- 2 empty tin cans (one large and one small)
- Washi tape
- Mod Podge
- Colorful beads
- Mini bells
- String
- Drill or hammer and a nail


Directions
Remove the label from the cans and wash them. Allow the cans to dry completely.
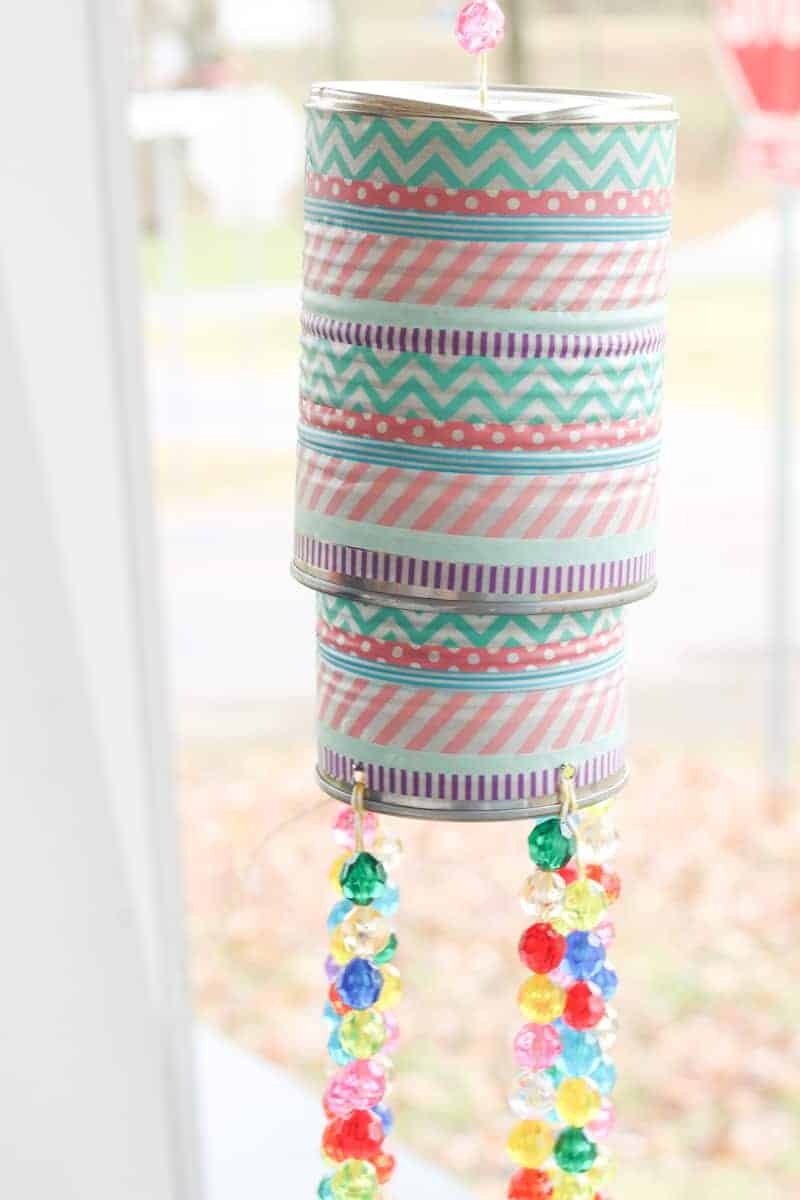
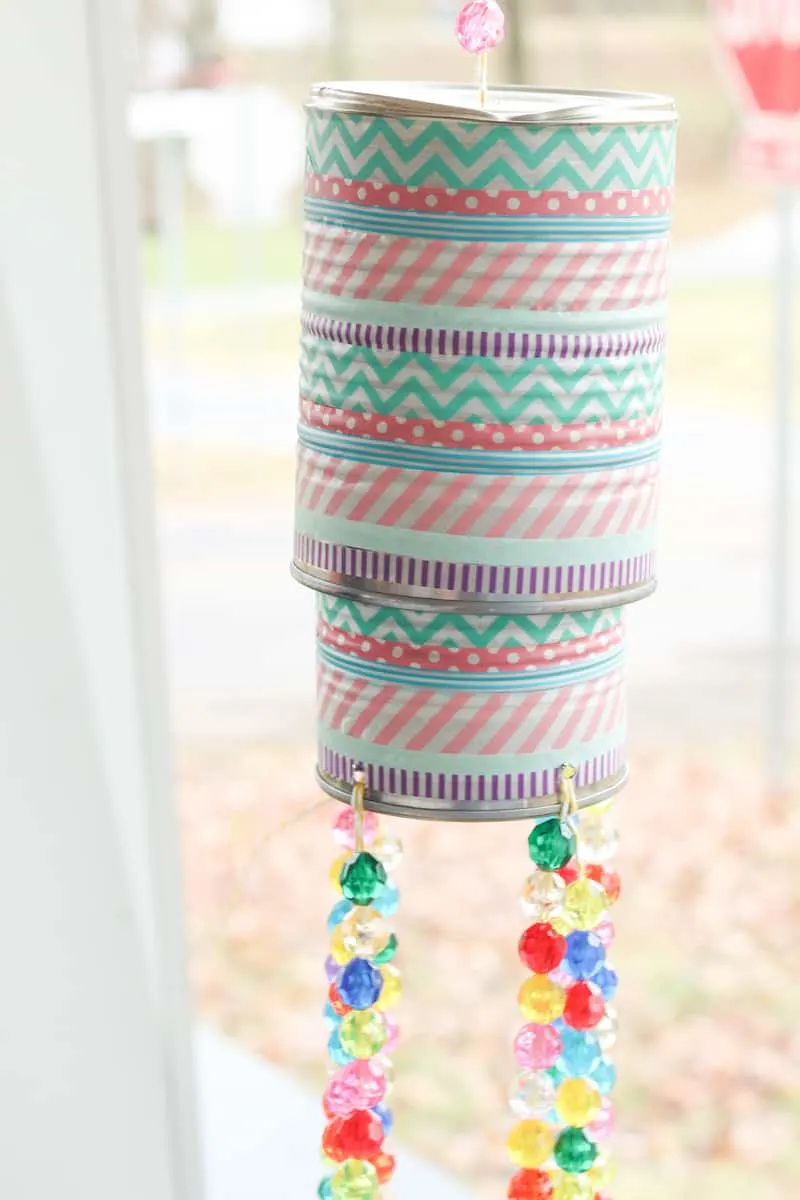
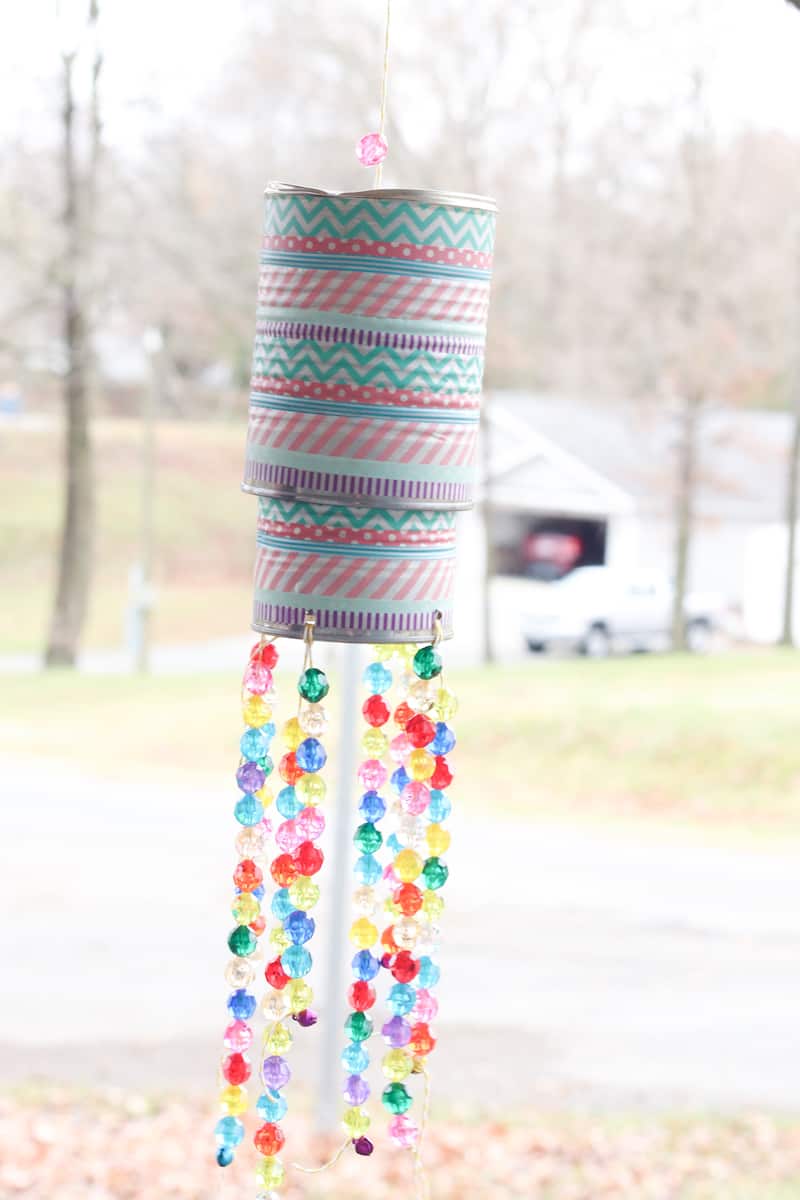
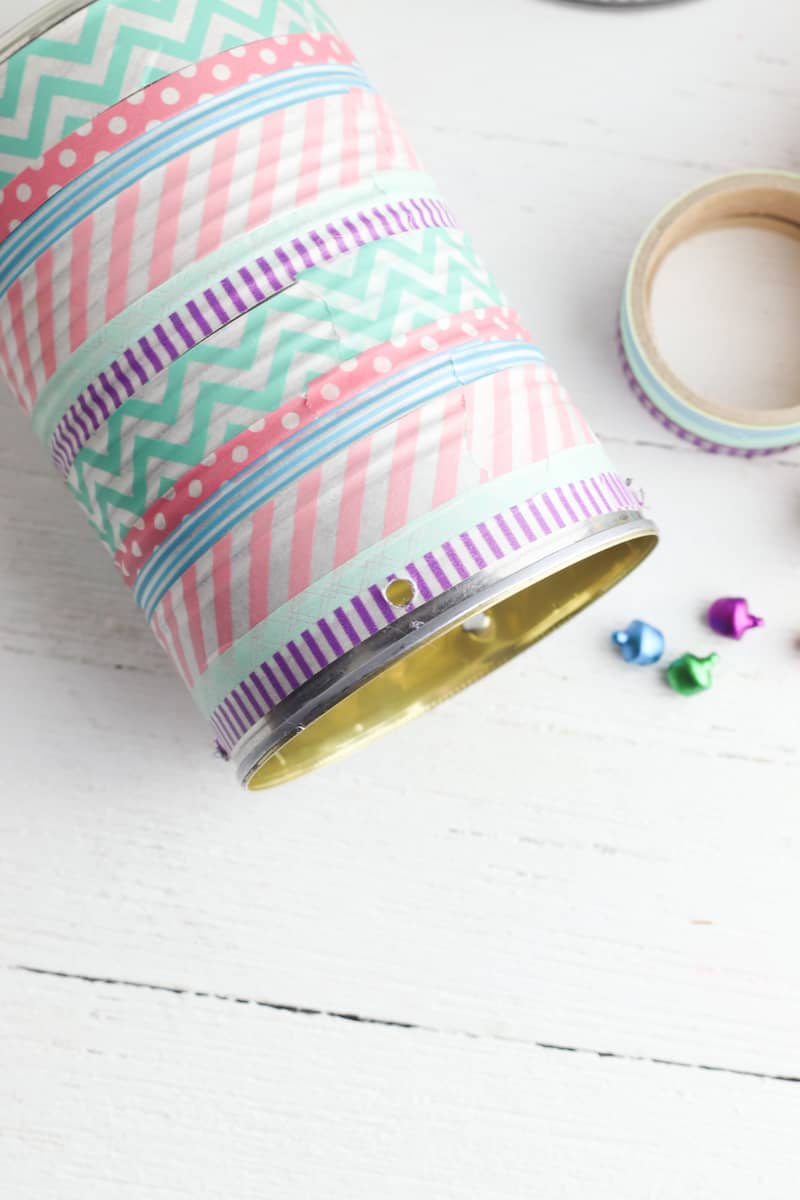
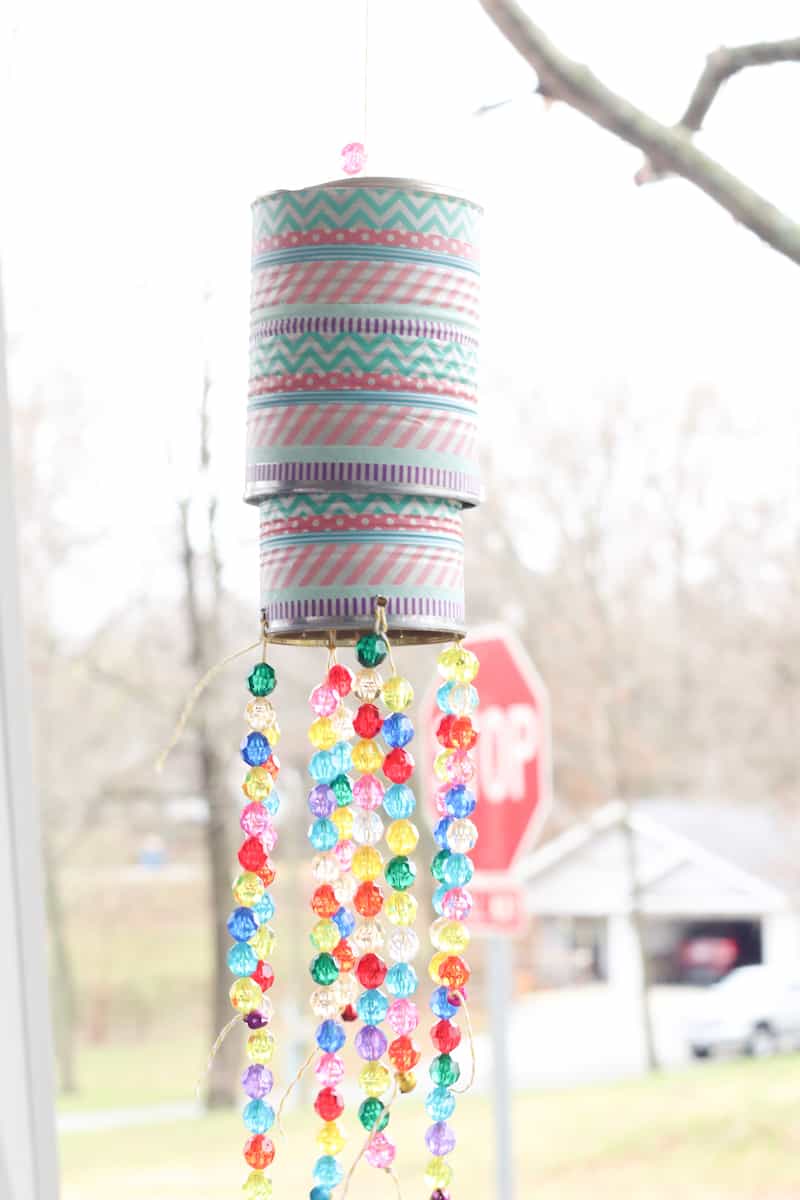
Wrap each can with washi tape. Use whatever colors or patterns you’d like. You can layer the washi tape to make bigger or smaller stripes.


To seal the tape and prevent damage from weather, coat the can with Mod Podge and allow to dry completely.
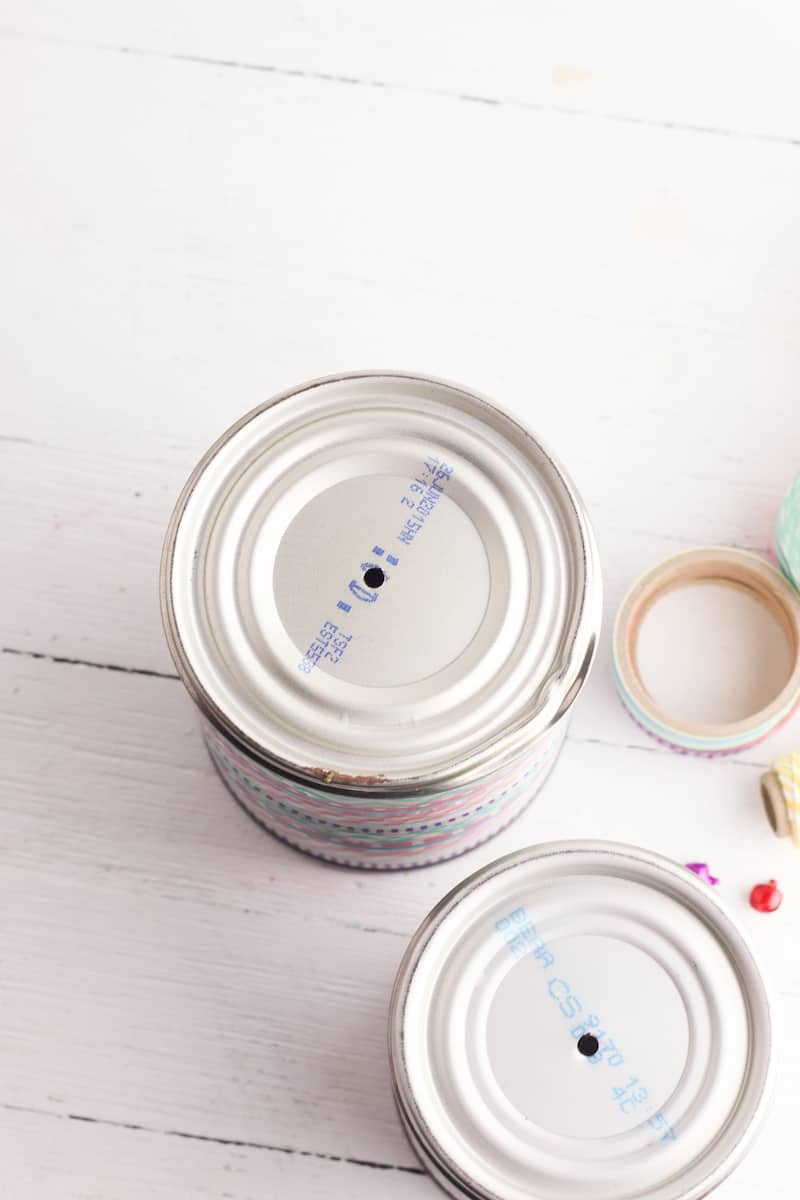
When the Mod Podge has dried, use a drill or hammer and nail to poke a hole in the bottom of each can.
*For all drilled or hammered holes, please be careful of any sharp edges. You can use a metal file if you’d like to remove any sharpness, but just also be mindful of being careful when adding yarn.

Poke four additional holes around the top of the smaller can.

Cut four pieces of string. Fold the string in half and thread the loop through one of the holes along the top of the smaller can.
Loop the ends of the string through the loop and pull to tighten (so that it looks like picture below).


Thread beads on the string until the desired length has been reached. Tie a mini bell to the end of the string.
Continue this process until all the strings have been added to the holes on the top of the can.


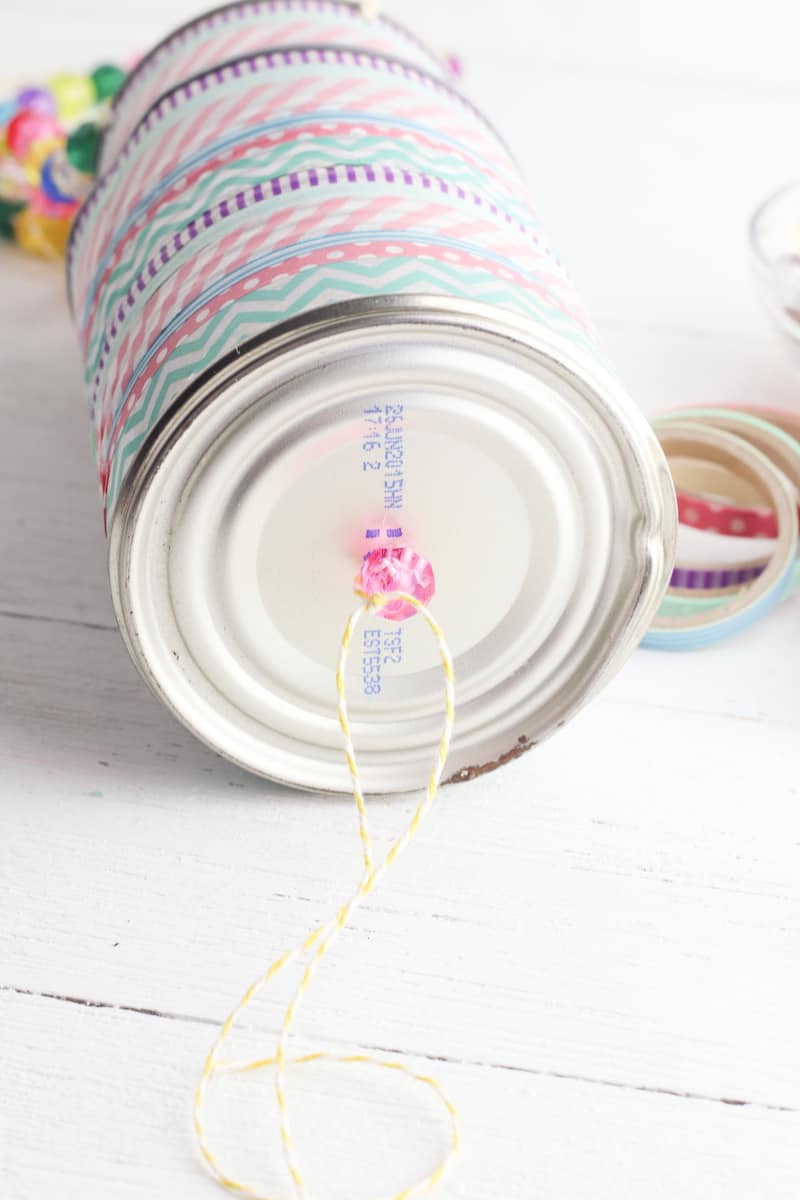
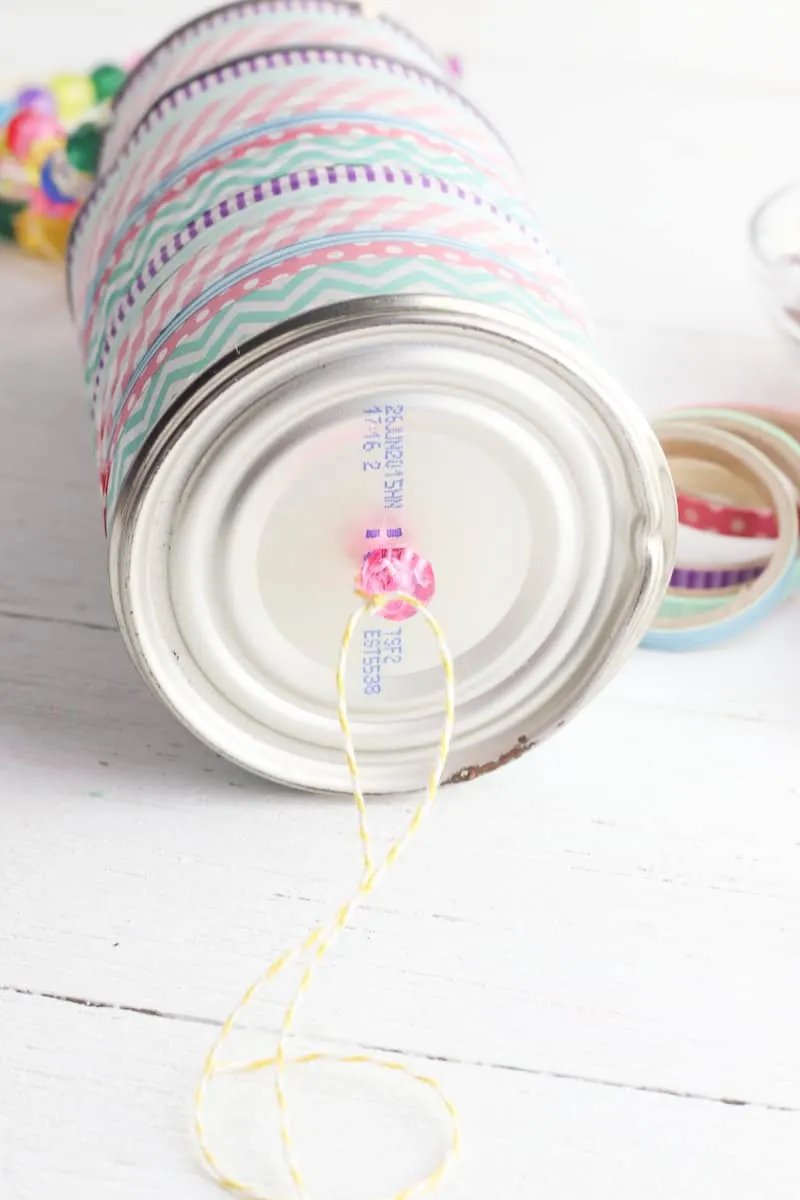
Cut a long piece of string and thread it through the hole in the bottom of the larger can. Thread a bead onto the string outside of the can and knot the string so the bead will not move.
This will keep the string from pulling through the hole on the top of the can.
Leave enough thread on top of the string so that you can use that part as a hanger for the wind chimes.


Then, thread the same piece of string through the hole in the bottom of the smaller can. Pull the string through the bottom until you can see the first knot in the string, making sure not to pull the thread all the way through both cans.

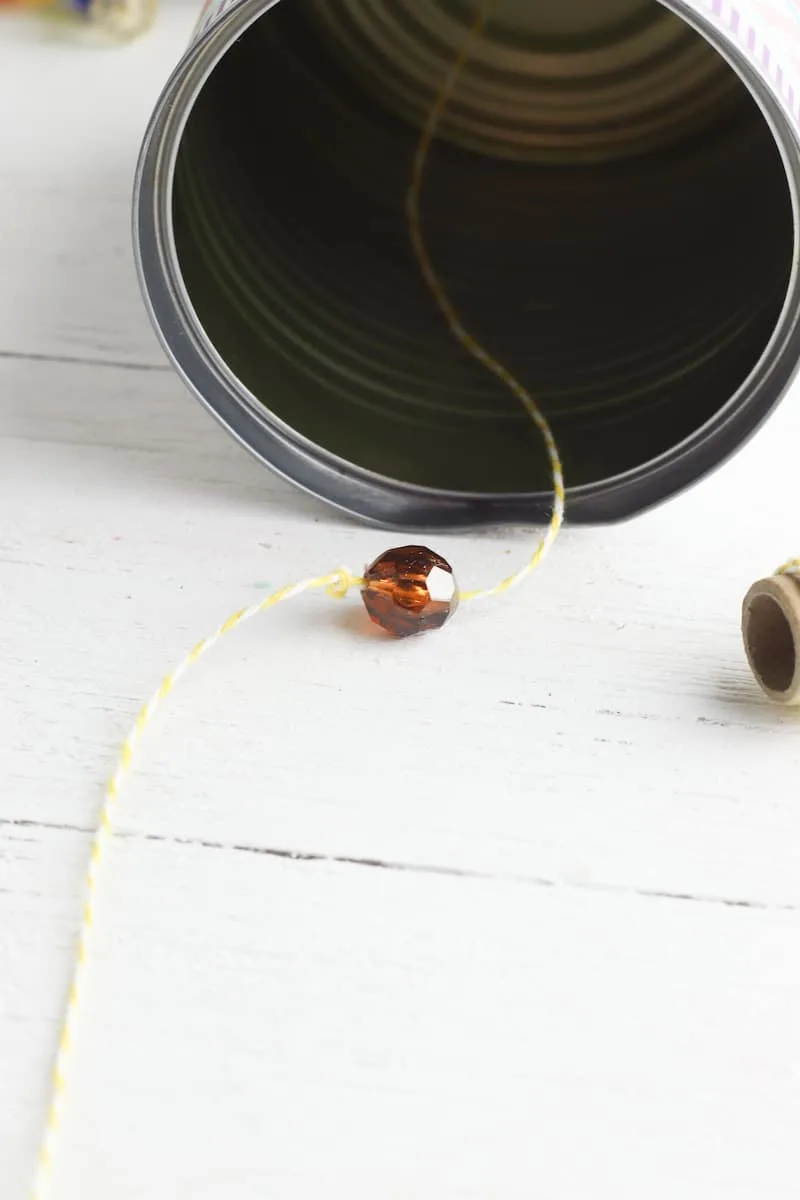
Tie a second bead 6 to 8 inches below the first knot, then pull the string back through the top of both cans.
The second bead will hold the smaller can in place so it hangs slightly lower than the larger can.


Use the string loop coming out of the top of the wind chimes to hang them outside.

If you have extra beads you can use them to make these DIY suncatchers.
Be sure to Pin This DIY to save for later!


Looking for my upcycling crafts? I turned an oatmeal container into a stylish plastic grocery bag holder. And these cereal boxes are upcycled into a really cute desk organizer.
I also turned an old cardboard box into a pretty storage box that I use in my kitchen.
