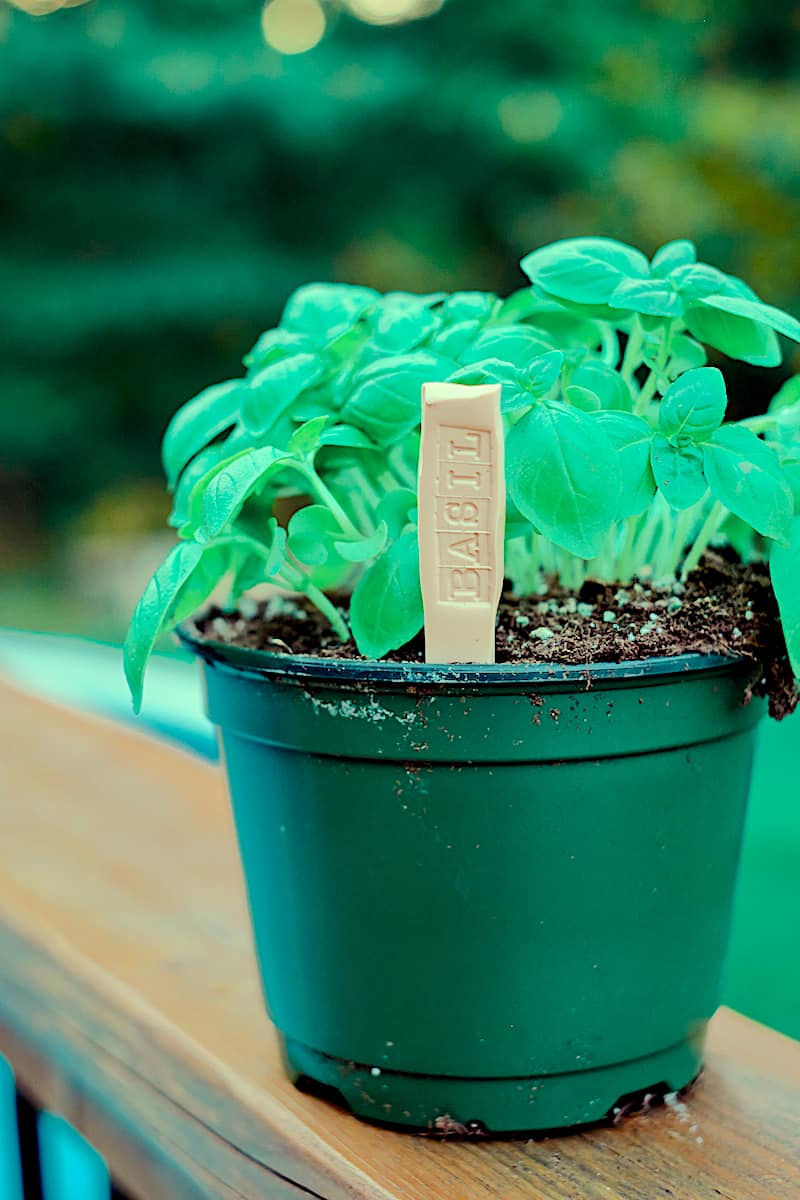
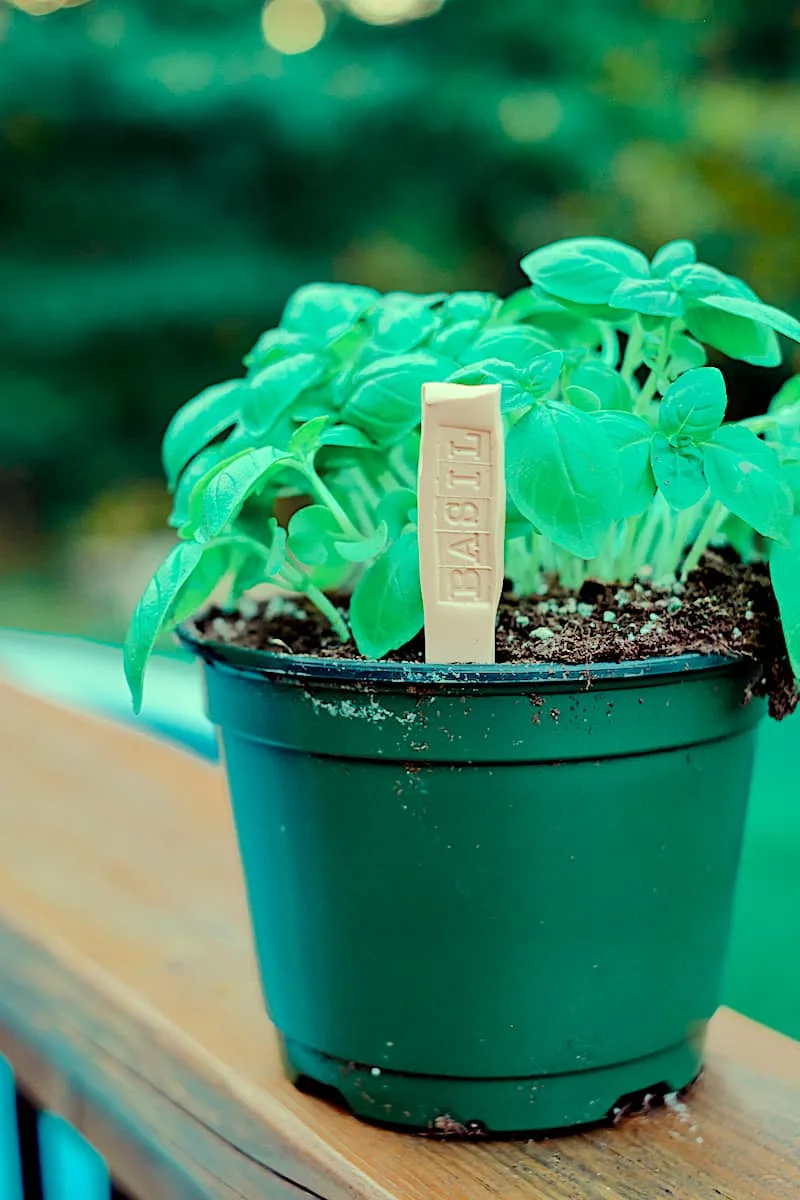
Are you like me, and you forget what you planted in what pot? Especially if you are planting from seeds?!?
These DIY garden markers are easy to make from oven bake clay. The plant markers make look fancy, but they are super easy to make in about 30 minutes.
What I love about these markers is that they make excellent gifts for gardeners. Make a few and pair them with seed packets or seedling plants for a Mother’s Day gift, birthday gifts, housewarming presents, etc.
These DIY wildflower seed bombs would be great to make to give with these clay garden markers.
Or gift someone a packet of dried seeds from your garden, along with a garden marker. Here are the easy ways for how to harvest cosmos seeds and how to harvest nasturtium seeds.
Helpful Tips
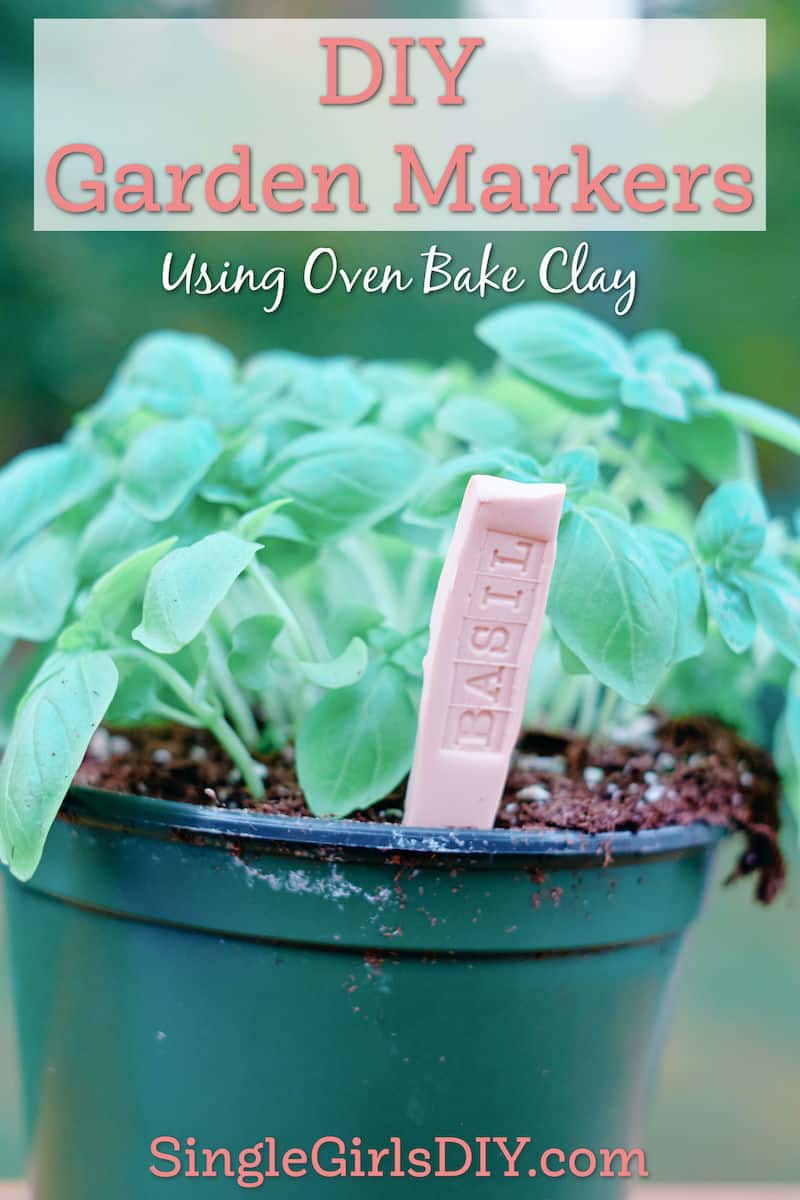
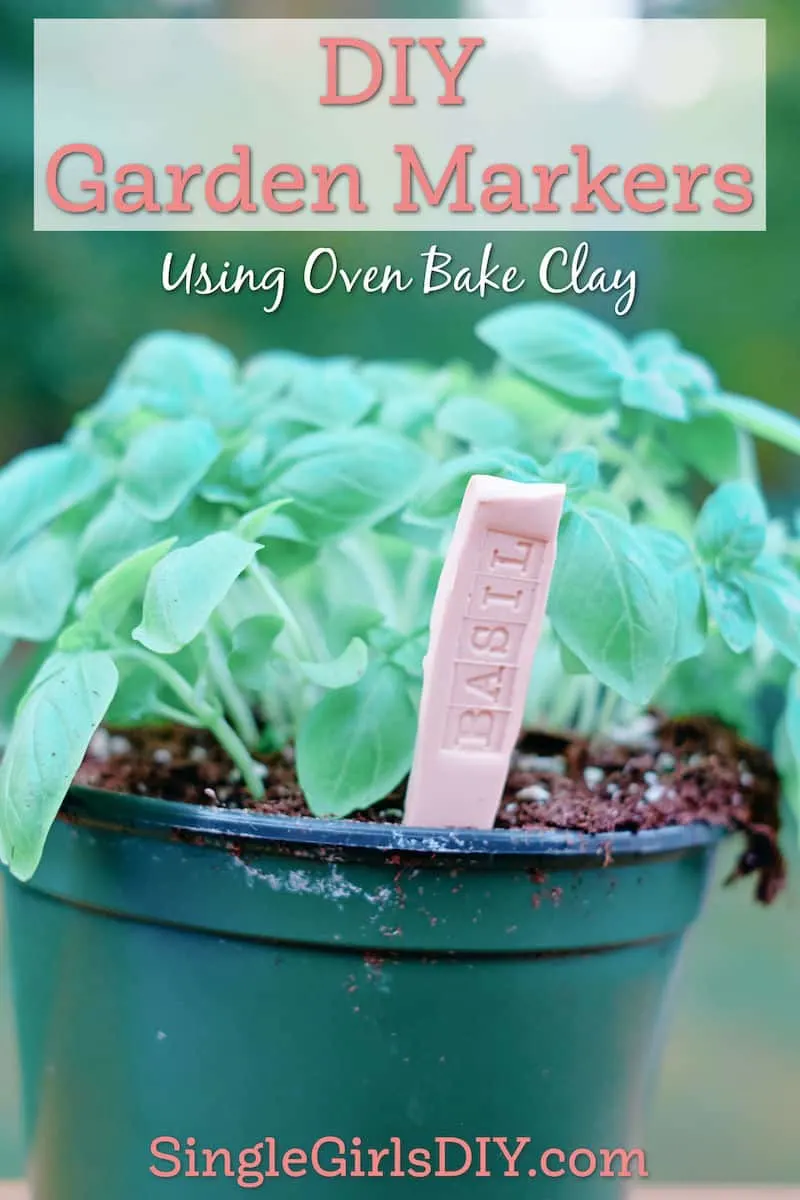
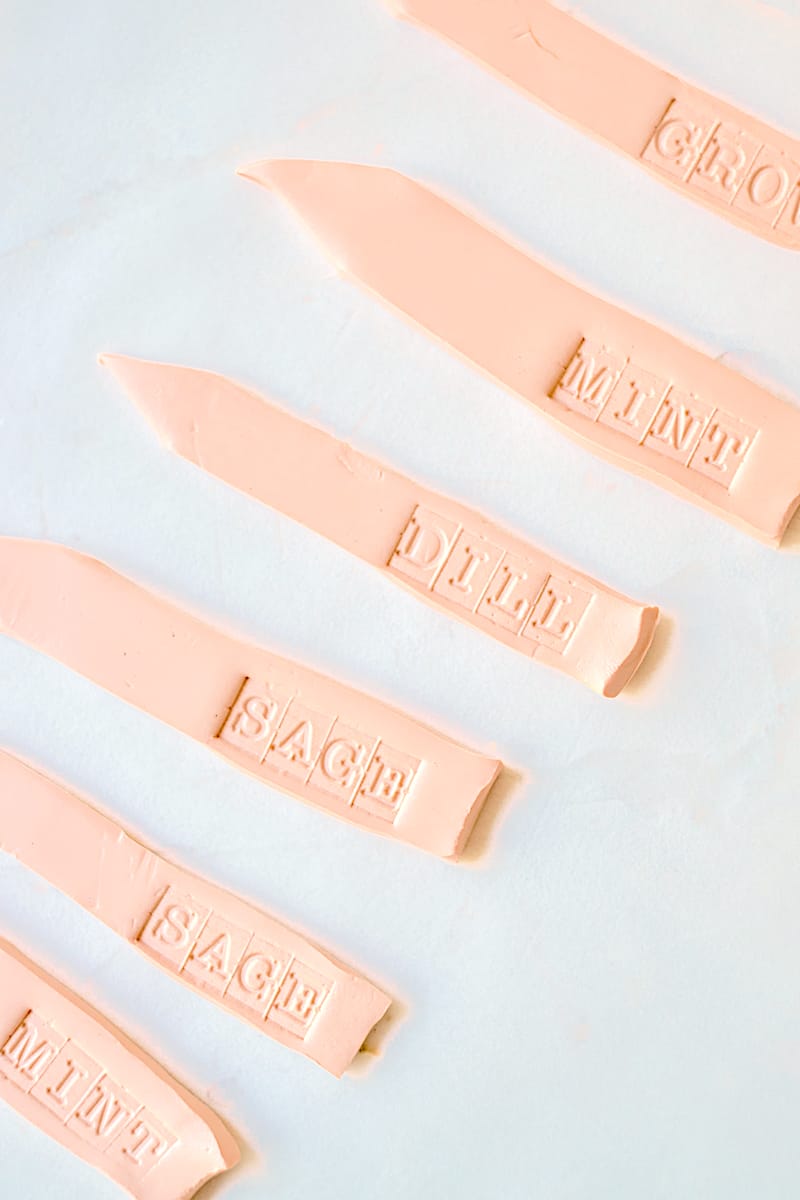
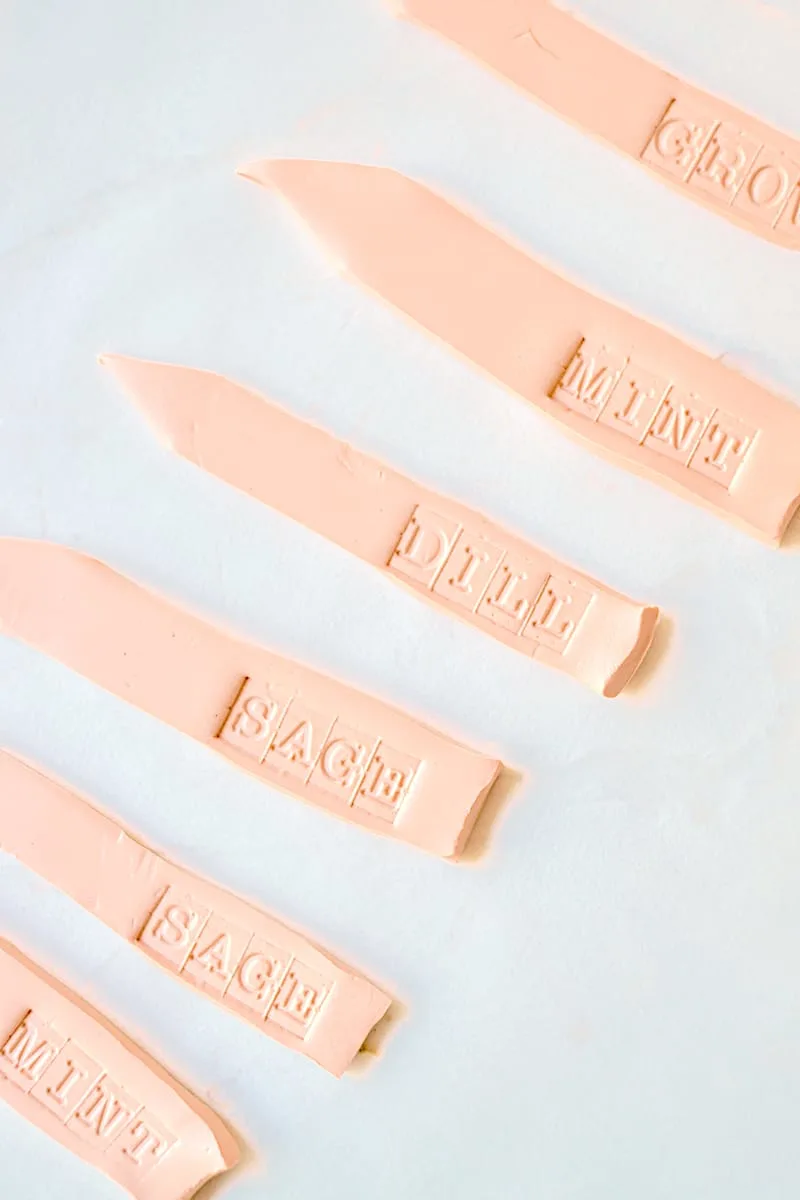
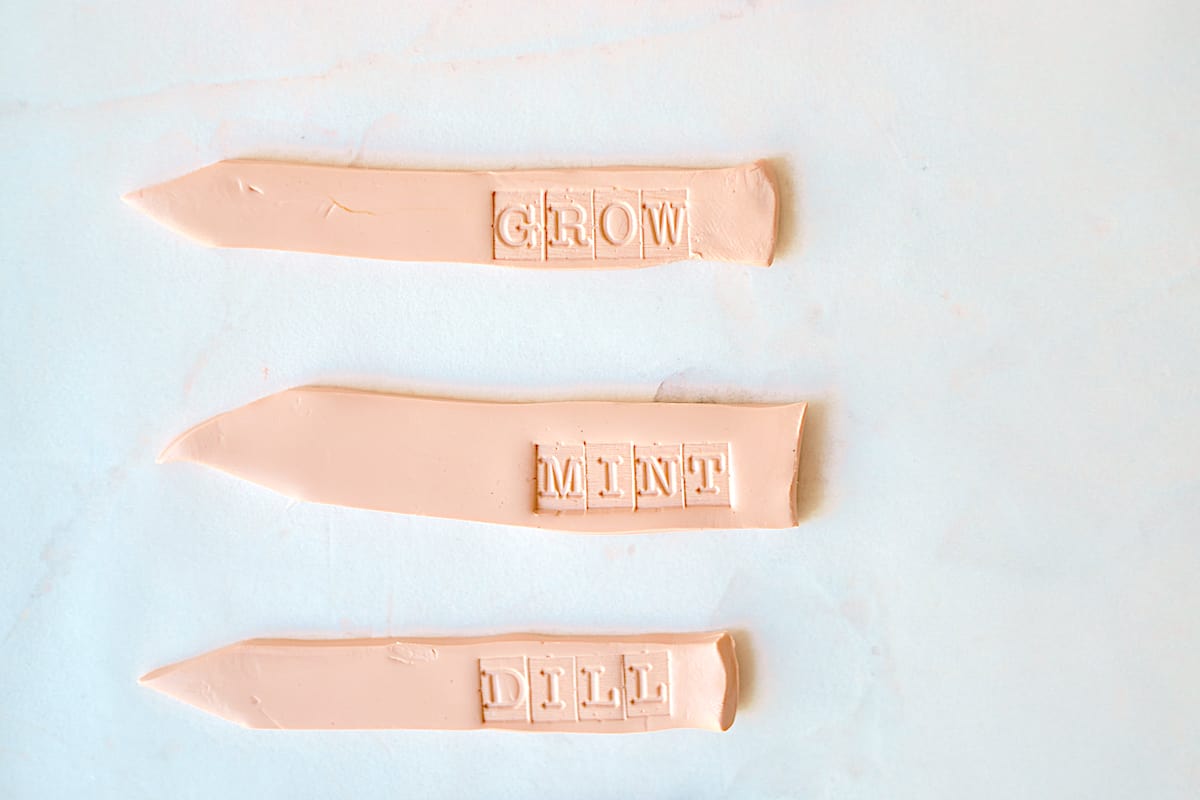
- Oven bake clay comes in a variety of colors. I chose a terra cotta color which is classic for gardening. However, you can choose whichever color you like.
- Imperfections make these markers even more charming. As you can see, mine aren’t perfectly straight. Just like no garden is perfect, these plant markers don’t need to be, either!
- You might like to paint the plant markers after baking them. Or add details with markers.
- If you are putting these garden markers in plants outside, paints might not stick to the tag. You would need to seal it.
- Ideally, these are great for indoor plants or plants that are protected outside. The clay could be easily broken from fallen limbs or curious animals.

How to Make Garden Markers from Clay
Supplies
- Oven Bake Clay
- Rolling Pin
- Rubber Stamps
- Knife
Instructions
- Roll out the clay into a thickness that’s not too thin (you don’t want them to break in half) and not too thick (you want them to bake). Your package instructions might offer suggestions for thickness.
- Cut the clay into thin strips with the knife. I made mine about 4 inches long and about ¾ inch wide. Cut the bottom of the strip at an angle on each side to make a point, so that it is easier to put into soil.
- Using your rubber stamps, add plant names or cute sayings onto the clay. Be sure to allow enough space to add all of the letters. (You might want to line up the stamps to the side before you start pressing them into the clay to make sure that all of the letters will fit.)
- Place on a parchment lined baking tray. Bake according to the clay package instructions. I baked mine at 250 degrees for 25 minutes in the oven.
- Remove and let cool fully. You could paint these afterwards if you would like.
Be sure to Pin This easy craft so that you remember it for later!