
Looking for a fun way to dye Easter eggs? Then you will love how simple this dyeing process is with drink packets!
Dying eggs with Kool-Aid is easy and fun to do. It just might be the easiest Easter egg dye recipe! Plus, you don’t have to worry about the coloring since it is just concentrated drink mix.
Another great thing is that this dyeing technique doesn’t use vinegar! Which means no vinegary smell while coloring eggs.

Another great vinegar-free way to dye eggs is this rice shake egg coloring method.
If you are looking for another fun way to color Easter eggs, check out how to dye eggs with Cool Whip or shaving cream. They are both definitely fun!
How to Dye Eggs with Kool-Aid
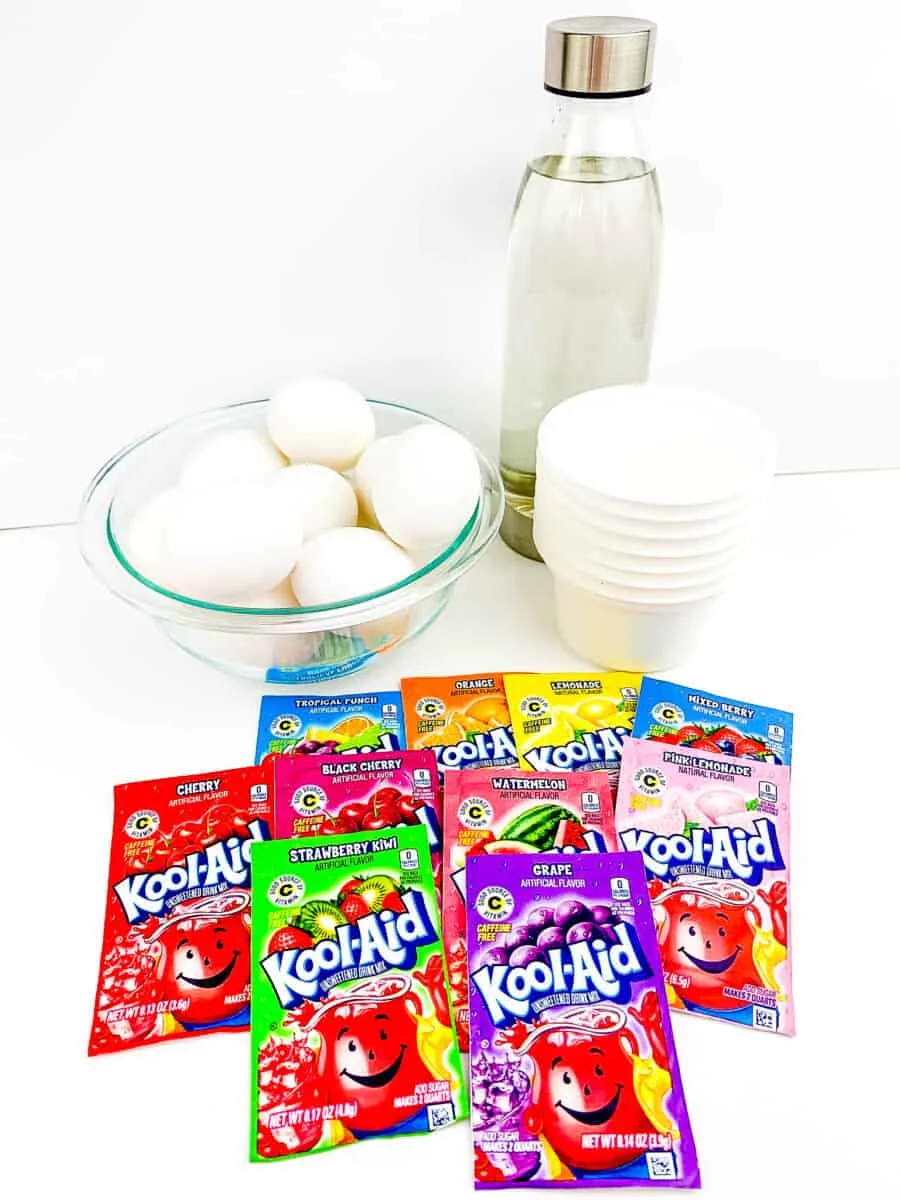
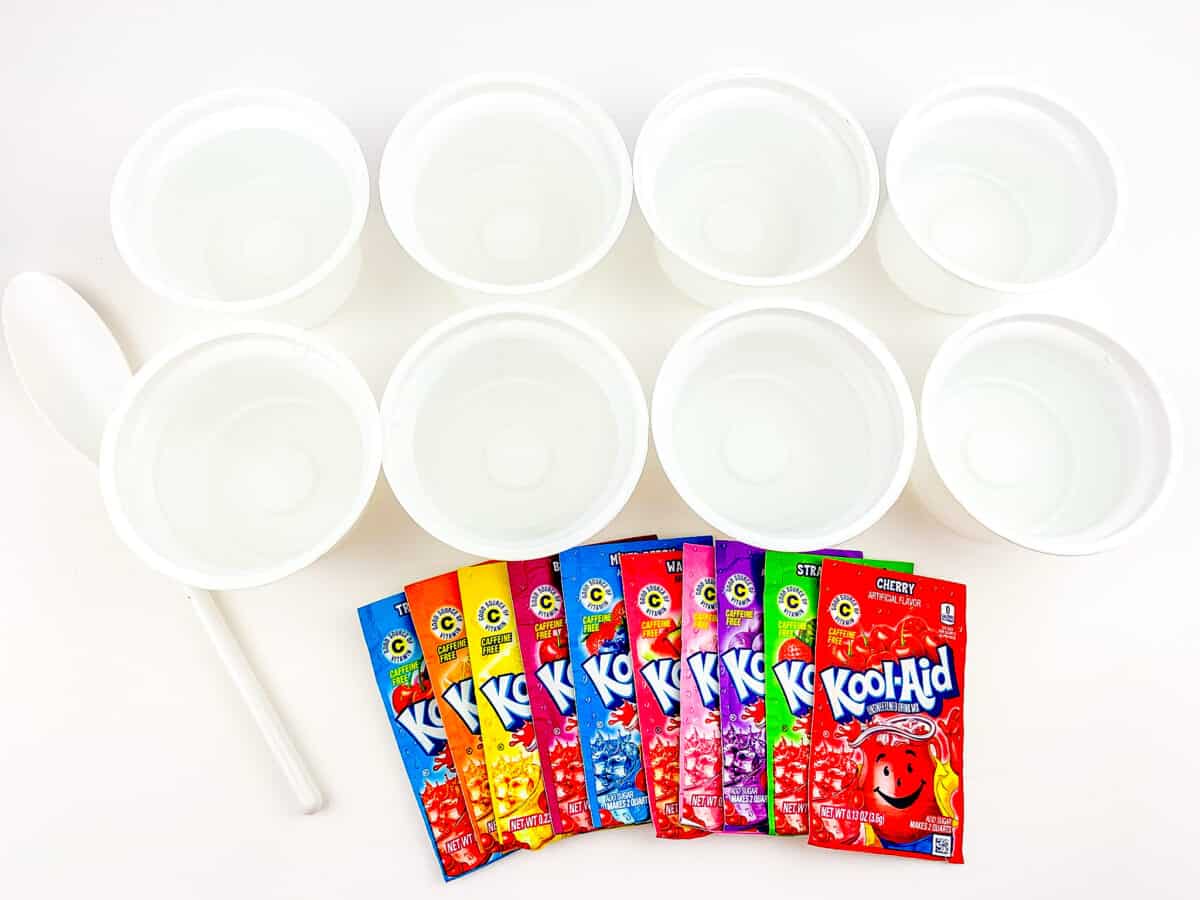
Supplies
- Kool-Aid packets, variety of colors
- Small, color-safe containers
- Water
- Paper towel lined tray
- Spoon

Instructions
Step 1
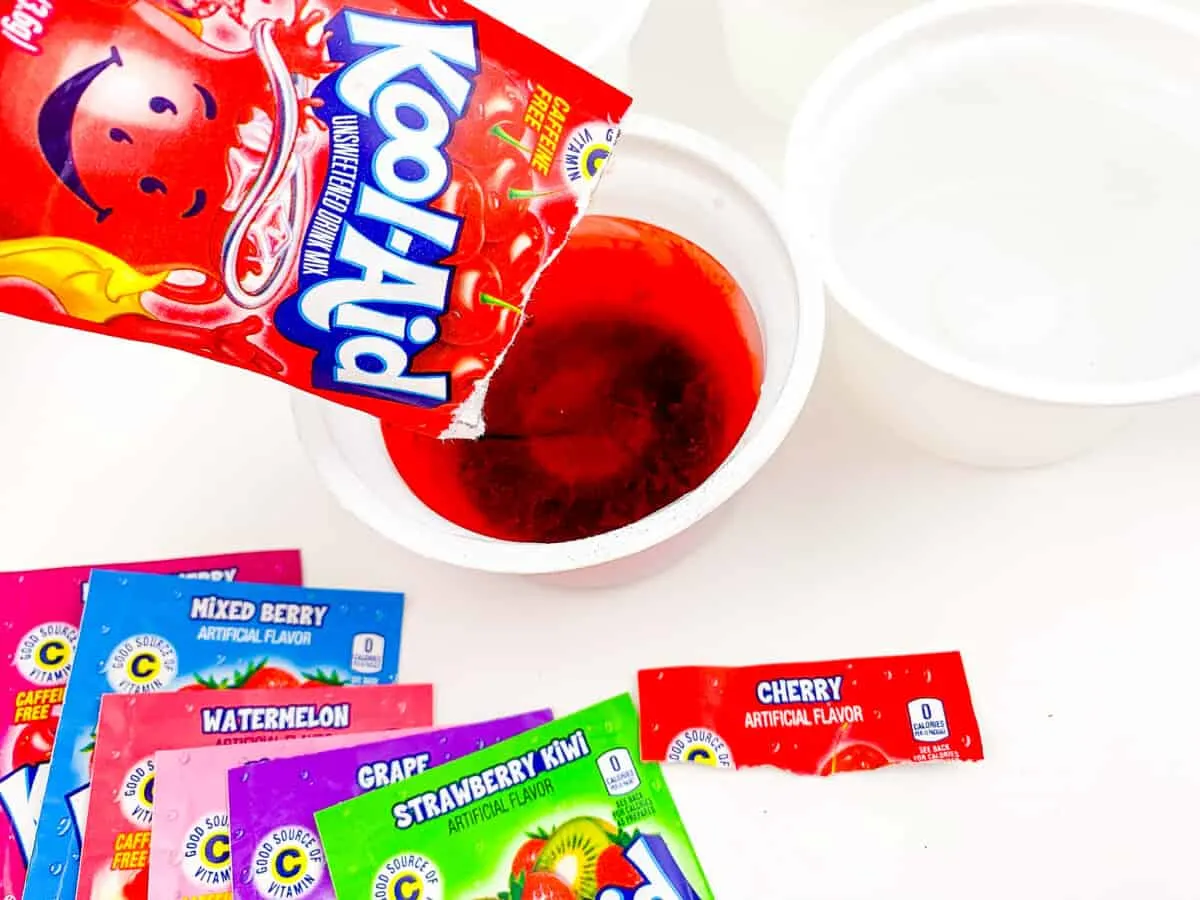
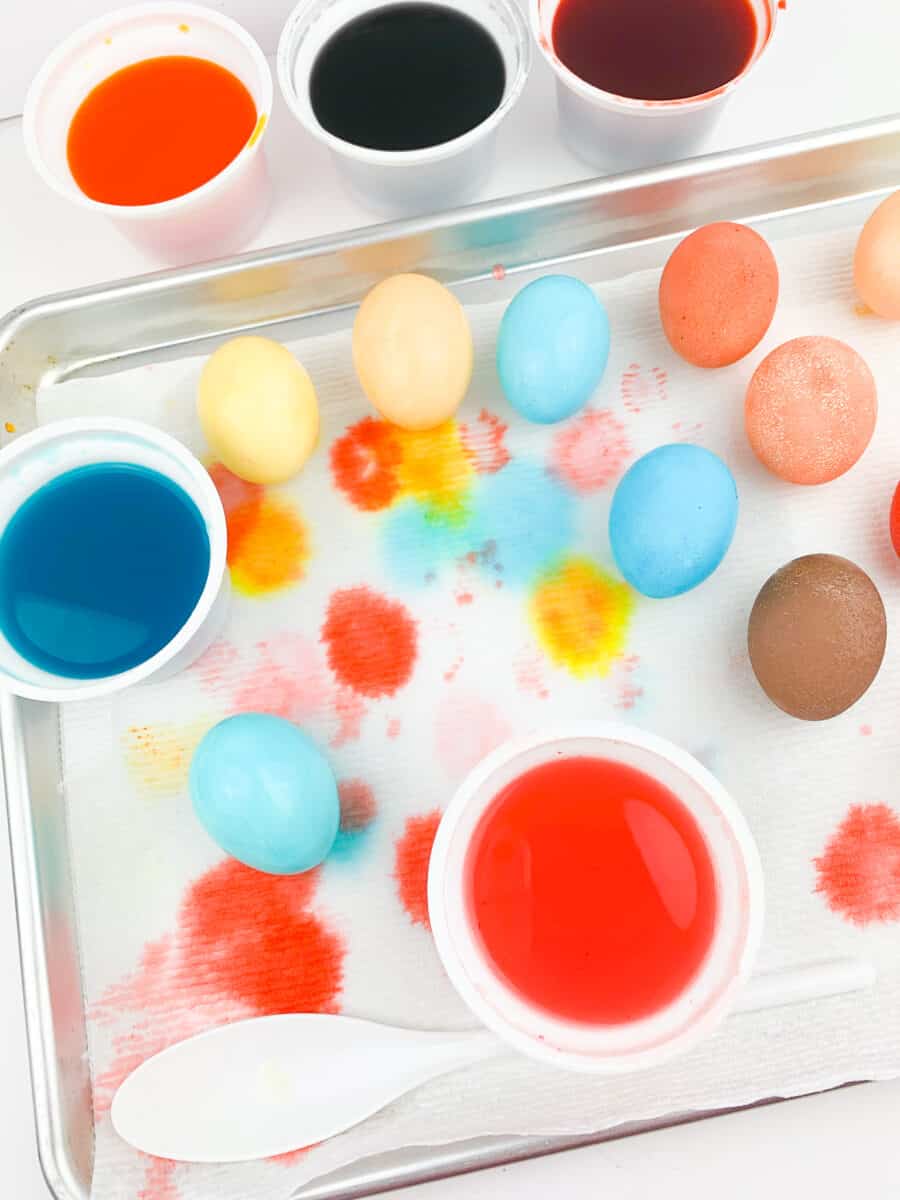
Pour water into each container (we used cleaned Greek yogurt cups) and fill it about ¾ full. You want to leave enough space for water to rise up in the cup when you add the egg later.

Step 2
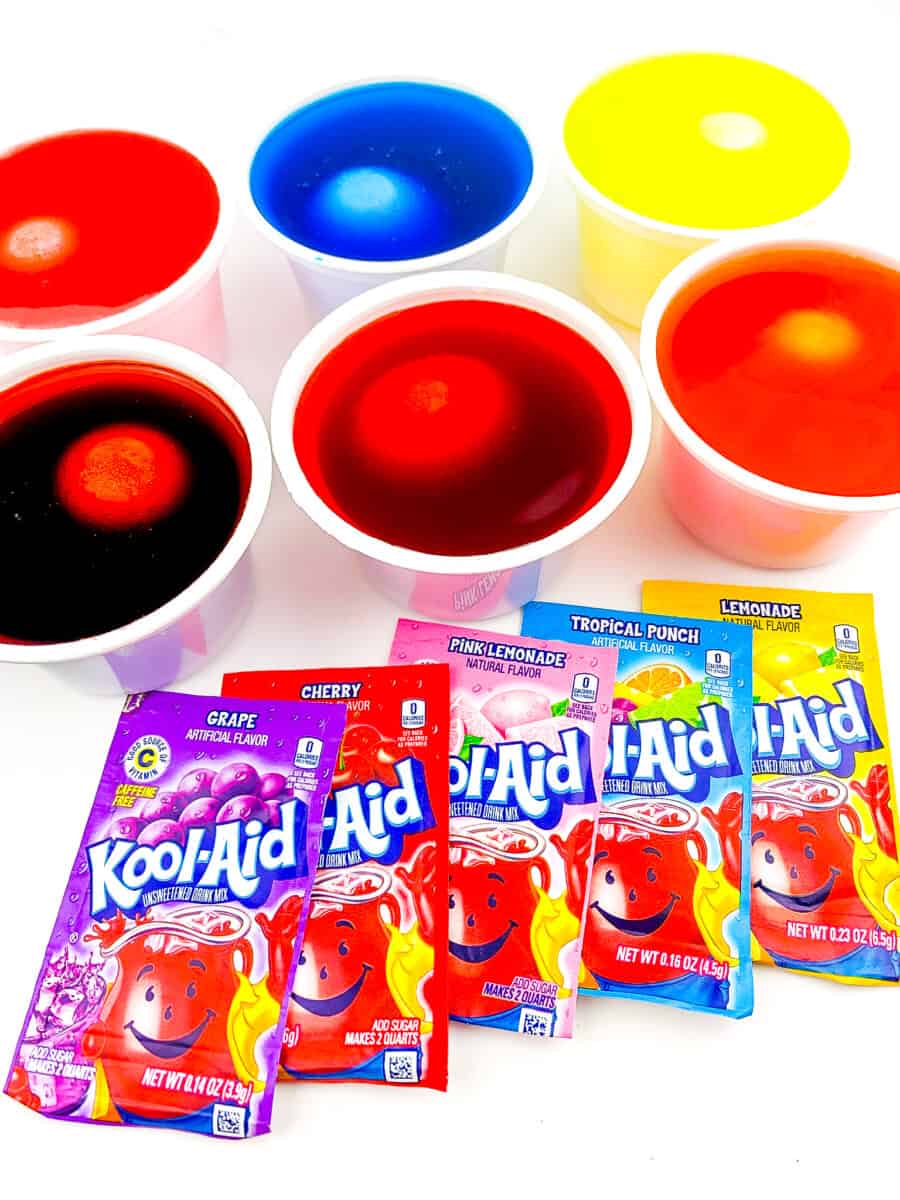
Add a full packet of Kool-Aid mix to each container of water. Stir well with the spoon.
Don’t use the spoon to mix up a darker color and then use the same spoon to mix the lighter colors unless you wipe off or rinse the spoon between mixing!


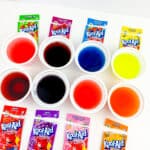
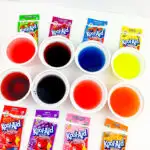
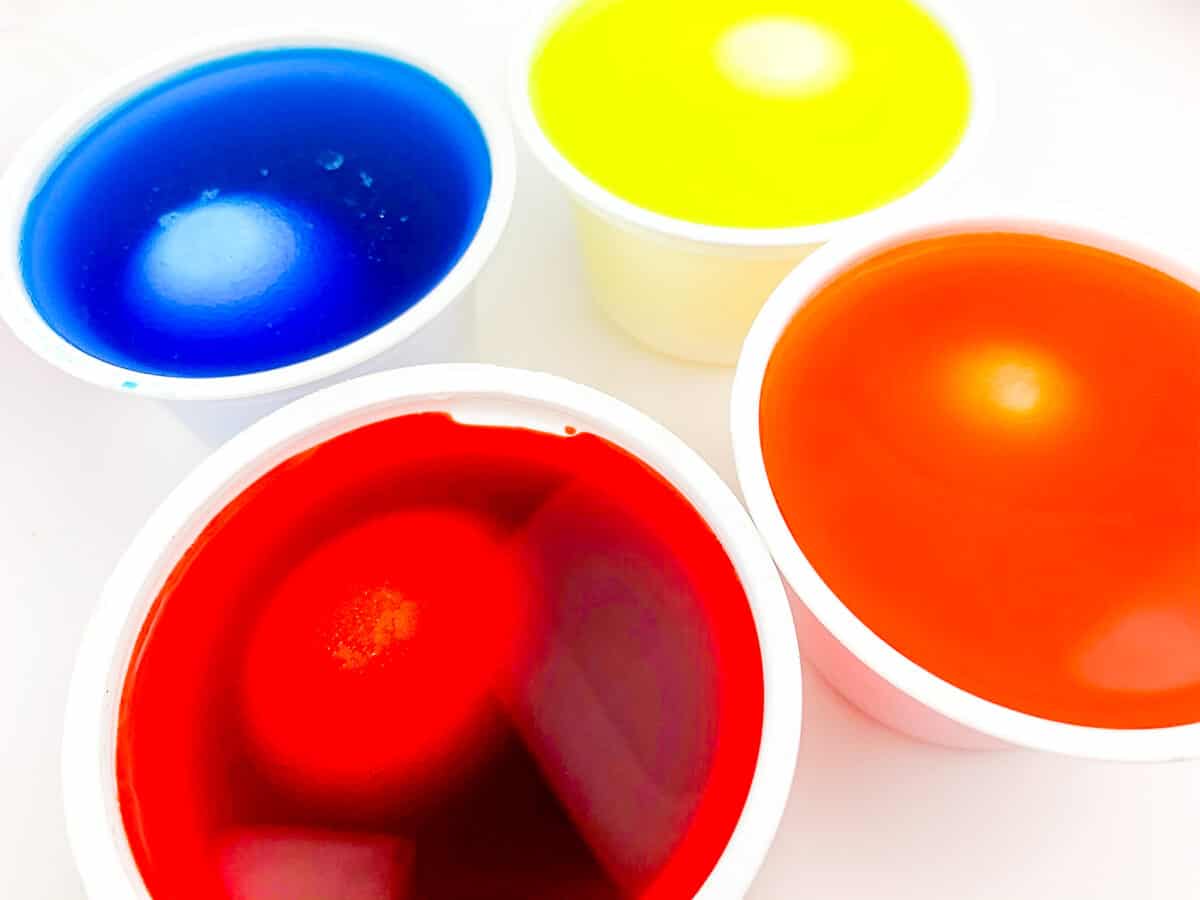
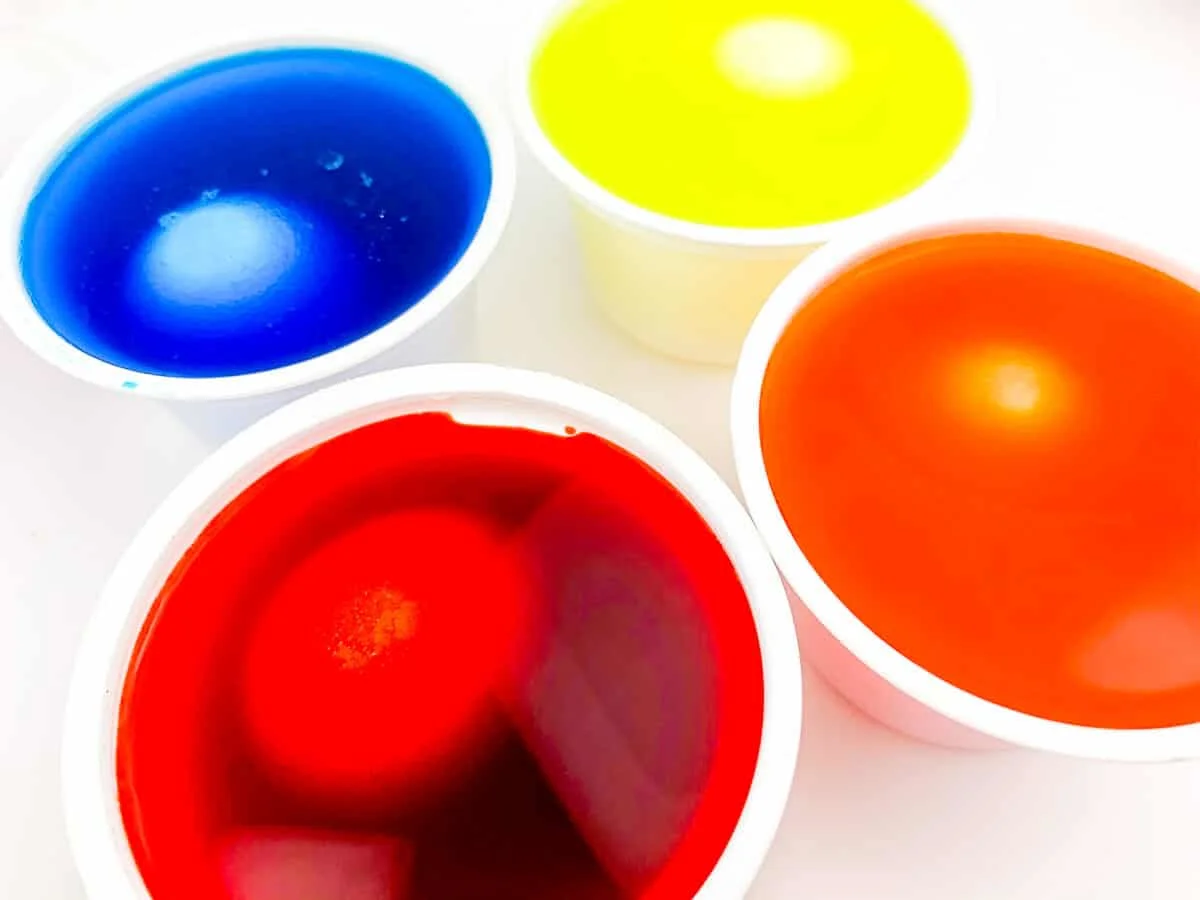
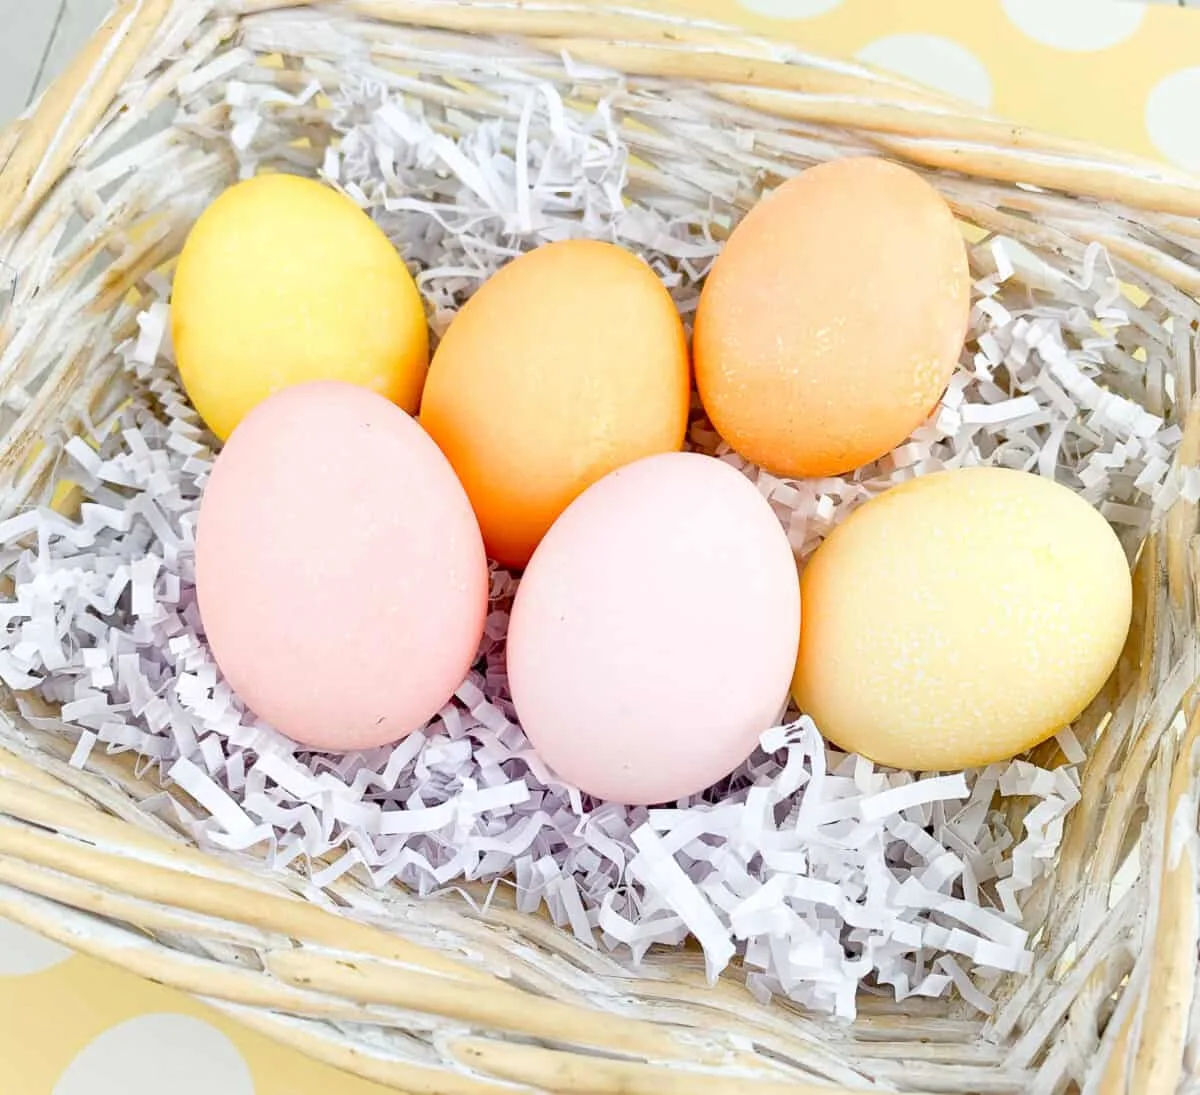
You can see the flavors of Kool-Aid packets above and what color dye they made.
I made this Easter egg dye coloring chart so you know the flavors and colors I used (from left to right):
- Top Row: Strawberry Kiwi, Black Cherry, Mixed Berry, Lemonade
- Bottom Row: Cherry, Grape, Pink Lemonade, Orange
Step 3
Place an egg into each cup of Kool-Aid dye. Move the egg around with a spoon to get an even color if it doesn’t stay submerged under the Kool-Aid.
Step 4
If you just want your eggs to be lighter in color and not speckled, dye the egg for 60 seconds or less. Keep checking the egg until it is the color that you would like.
For a speckled look, leave the egg in the coloring for longer.
Step 5
Place the egg on a paper towel lined tray to absorb excess coloring. Move the egg around a few times to avoid paper towel imprints in the dye. You can move the eggs with your fingers (touch as little as possible!) or using a pair of tongs. I’ve even gently just pushed the egg around with the tip of my finger to get it to move.

Helpful Hint to Prevent Smearing
If you dye the egg for longer than a minute, when you take it out you may notice a film around the shell. Don’t worry about this.
Just place the egg onto the paper towel and allow it to dry. You do not want to rub the egg a this point, or else the film will smear, which you don’t want. When the egg is dried, that film will become a nice, speckled look that won’t rub off
If the egg should smear, simply wash the egg and the film will come off. The dye it again.

If you liked this method of using Kool-Aid for Easter egg dye, you’ll also want to check out all of these 5 natural Easter egg dyes to make at home with fruits and vegetables.
Gather eggs on an Easter egg hunt with this cute DIY milk jug bunny basket.
