


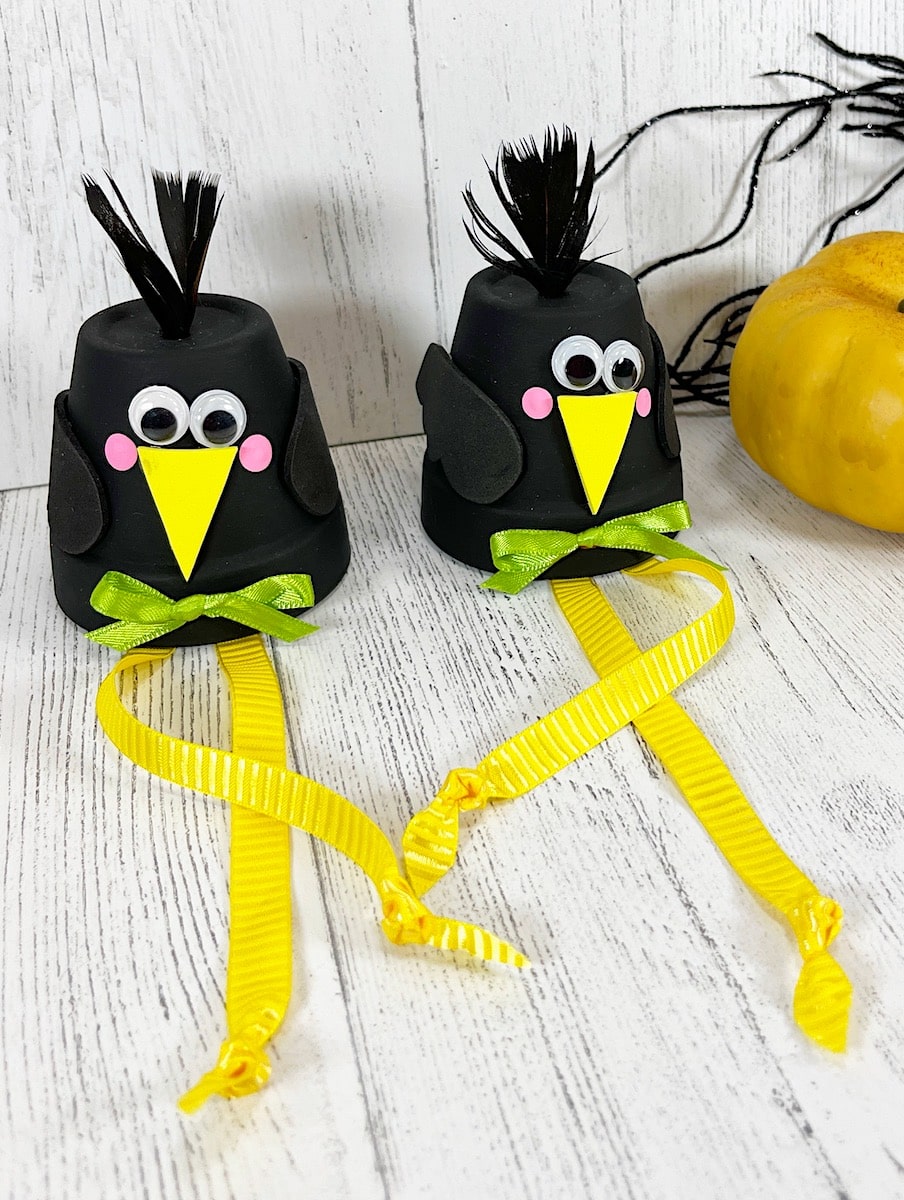
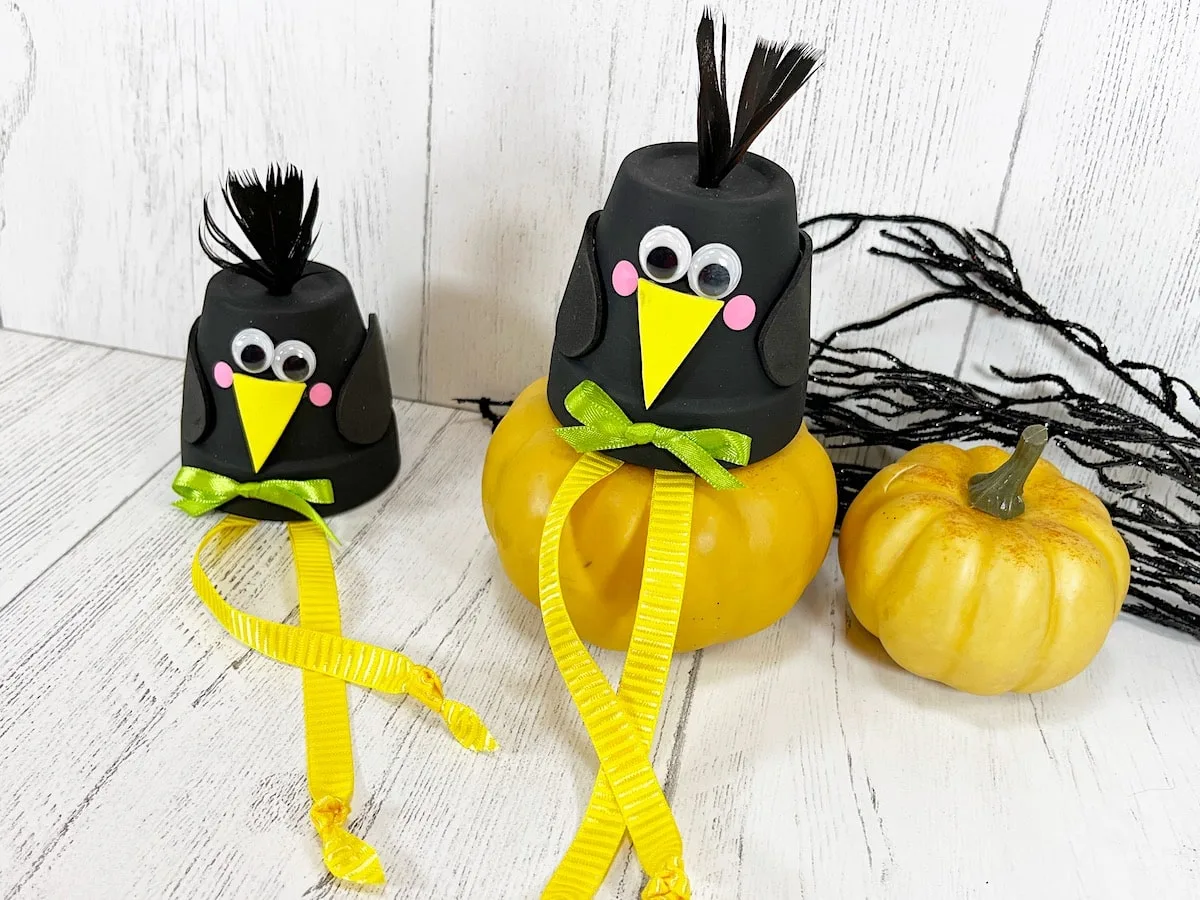
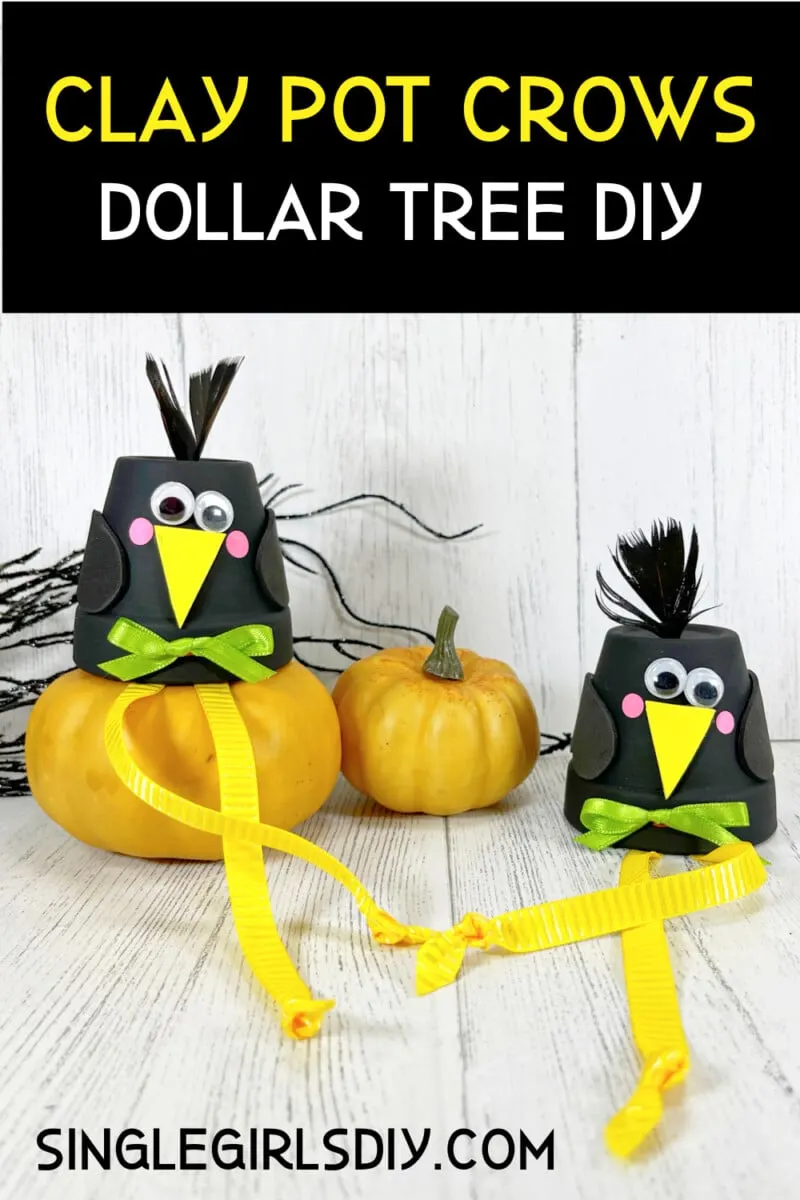
Clay pot crows are a cute addition to your fall decor. Using miniature terra cotta pots, these cute shelf sitters are an easy Dollar Tree DIY project!

I love using these mini clay pots because they are so versatile. Check out some of our other clay pot crafts:
Be sure to see all of our easy Fall crafts for more great ideas!
Display these crows where their ribbon legs can hang down. They would be ideal hanging on the edge of a shelf or mantel. Or put one on the top level of a tiered tray with their legs hanging over.

How to Make Clay Pot Crows
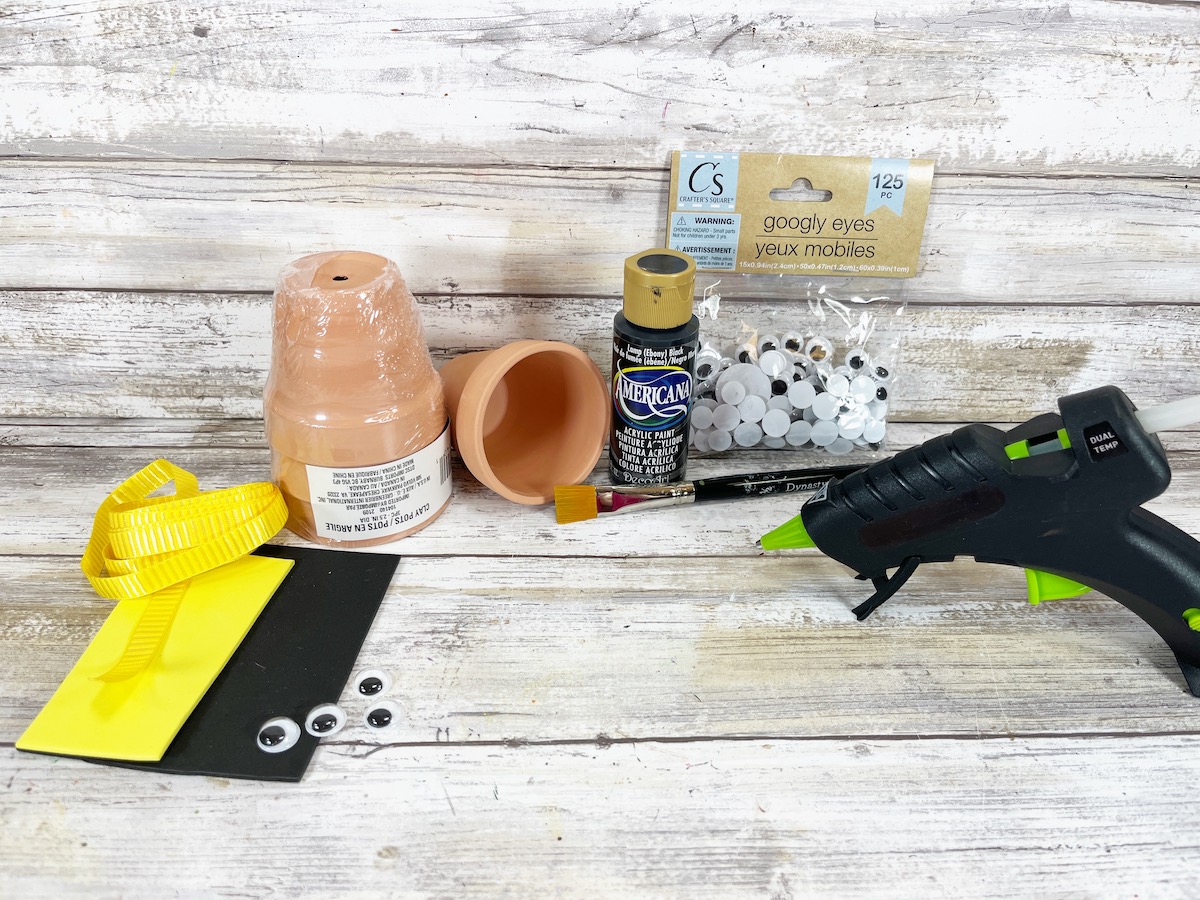
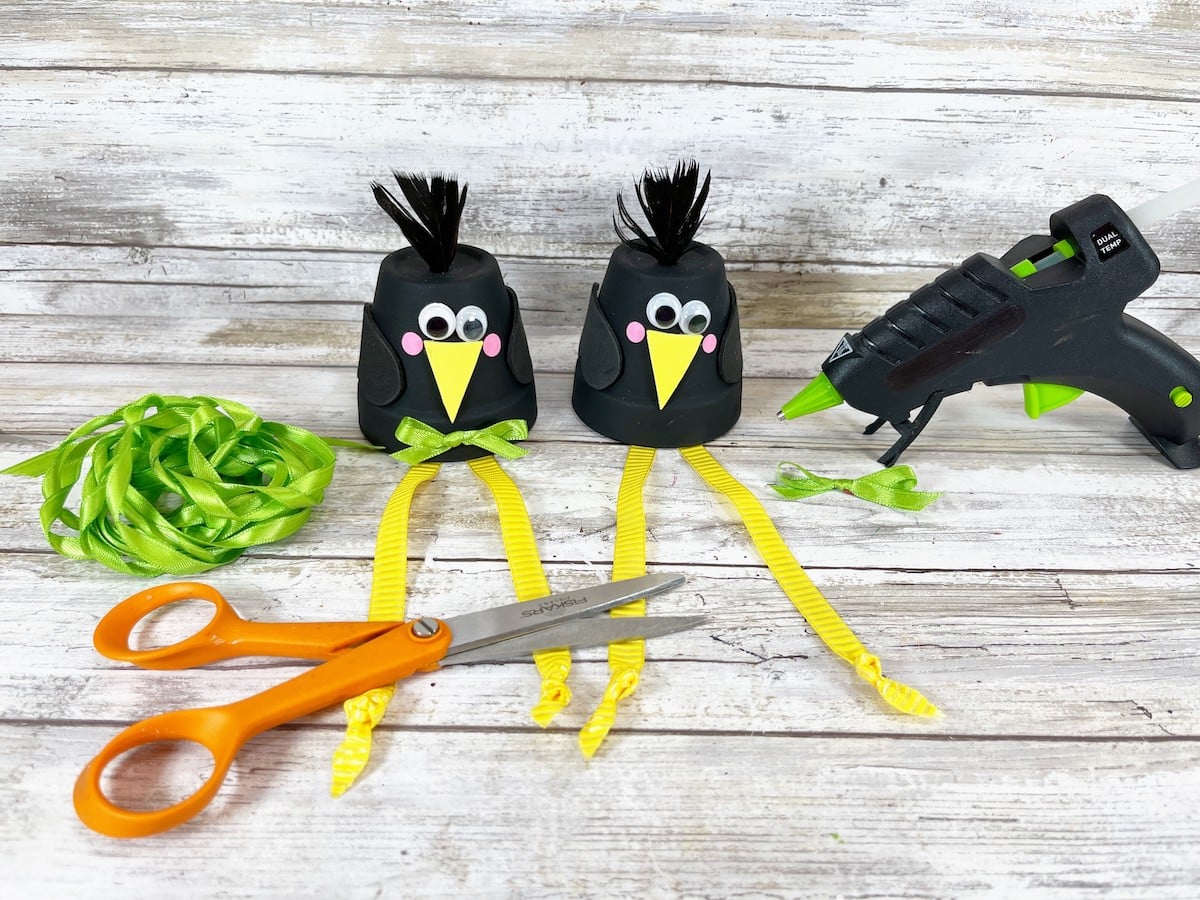
These directions are to make one clay pot crow. All supplies were bought at the Dollar Tree.
Materials
- 2.5″ Diameter Clay Pot
- Acrylic Craft Paint (Black and Pink)
- 2 Wiggle Eyes
- 1-2 Black Craft Feathers
- Craft Foam (Yellow and Black)
- Glue Gun and Glue Sticks or Craft Glue
- Yellow Ribbon, ⅜” wide
- Ribbon, ¼” wide (use any color, I chose green)
- Scissors
- Paintbrush
- Pencil with new Eraser (optional)
Instructions
Step 1
Remove the packaging and labels from the mini clay pots. Paint the clay pots with black acrylic craft paint.
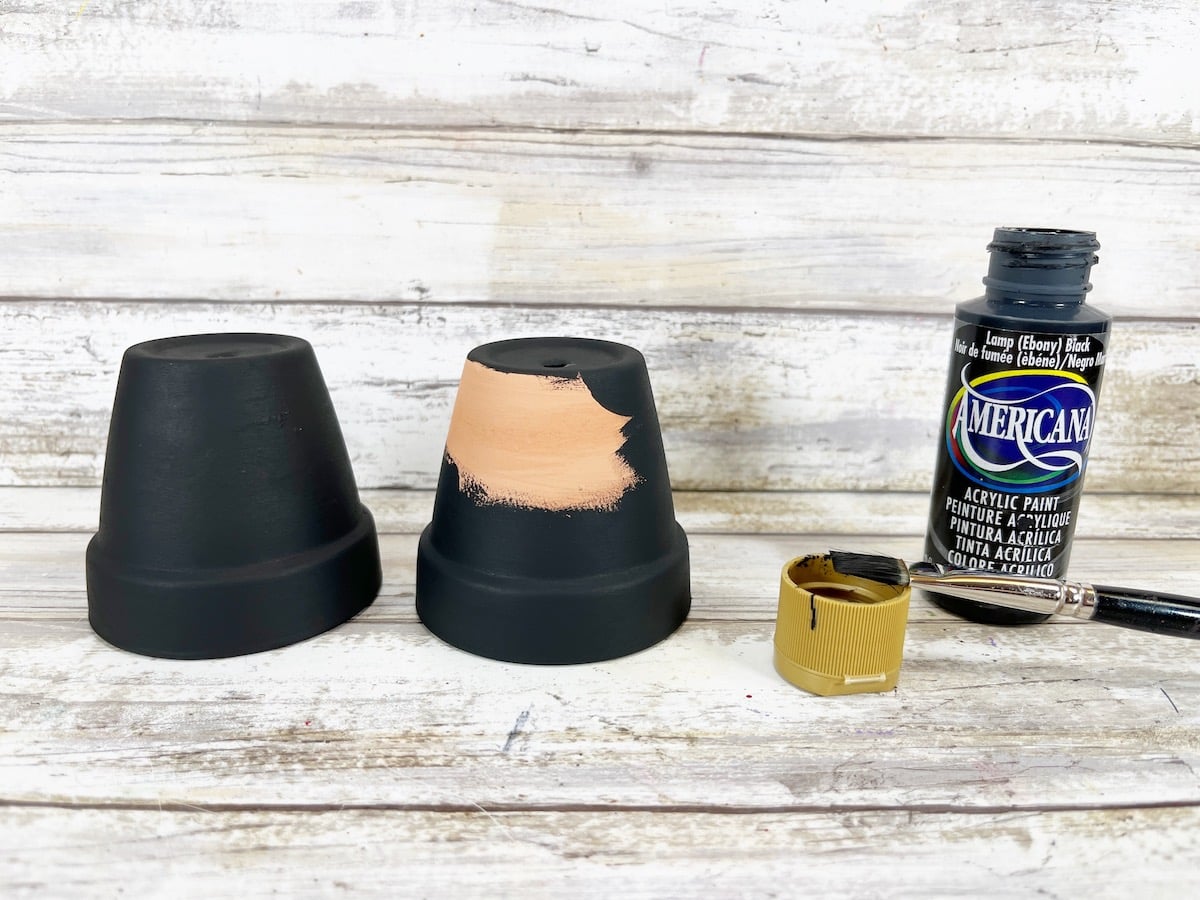
Allow to dry. You will probably need to apply a second coat of paint.
Step 2
Cut a small triangle from yellow craft foam for the beak.
Glue the beak and two wiggle eyes onto the top middle of the clay pot to make the crow’s face.
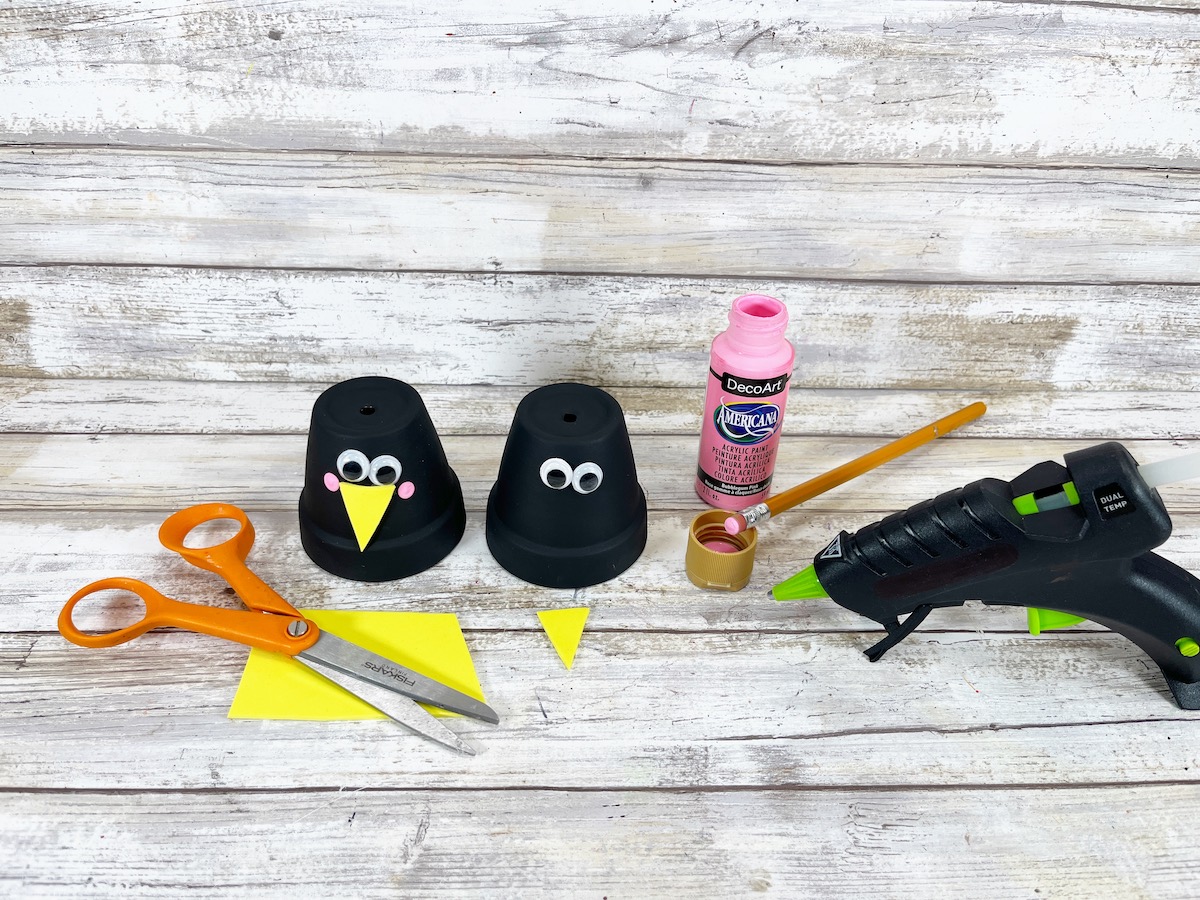
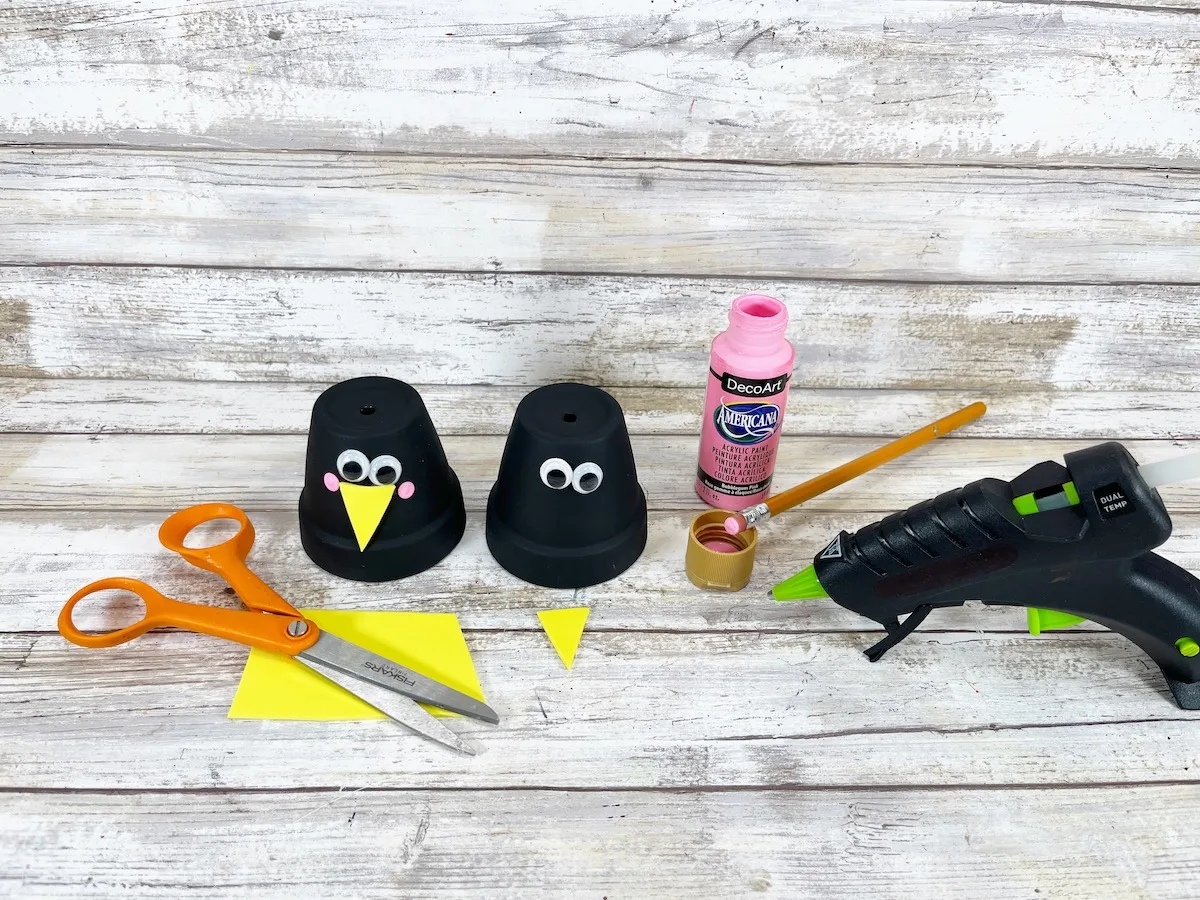
Add cheeks by dabbing a new pencil eraser into pink craft paint and stamping on either side of the beak. Or just paint two small circles of pink paint with a paint brush.
Step 3
Glue one or two black craft feathers in the drain hole of the clay pot.

Cut two 8” lengths of yellow ribbon for each crow. Loosely knot the ends of the ribbons and then glue the opposite end to the inside front center of the clay pot as legs.
Step 4
Draw a wing shape on a scrap of plain paper with a pencil, then cut it out with scissors to use as a pattern.
Trace the wing pattern onto black craft foam with a pencil, twice, and then cut out with scissors.
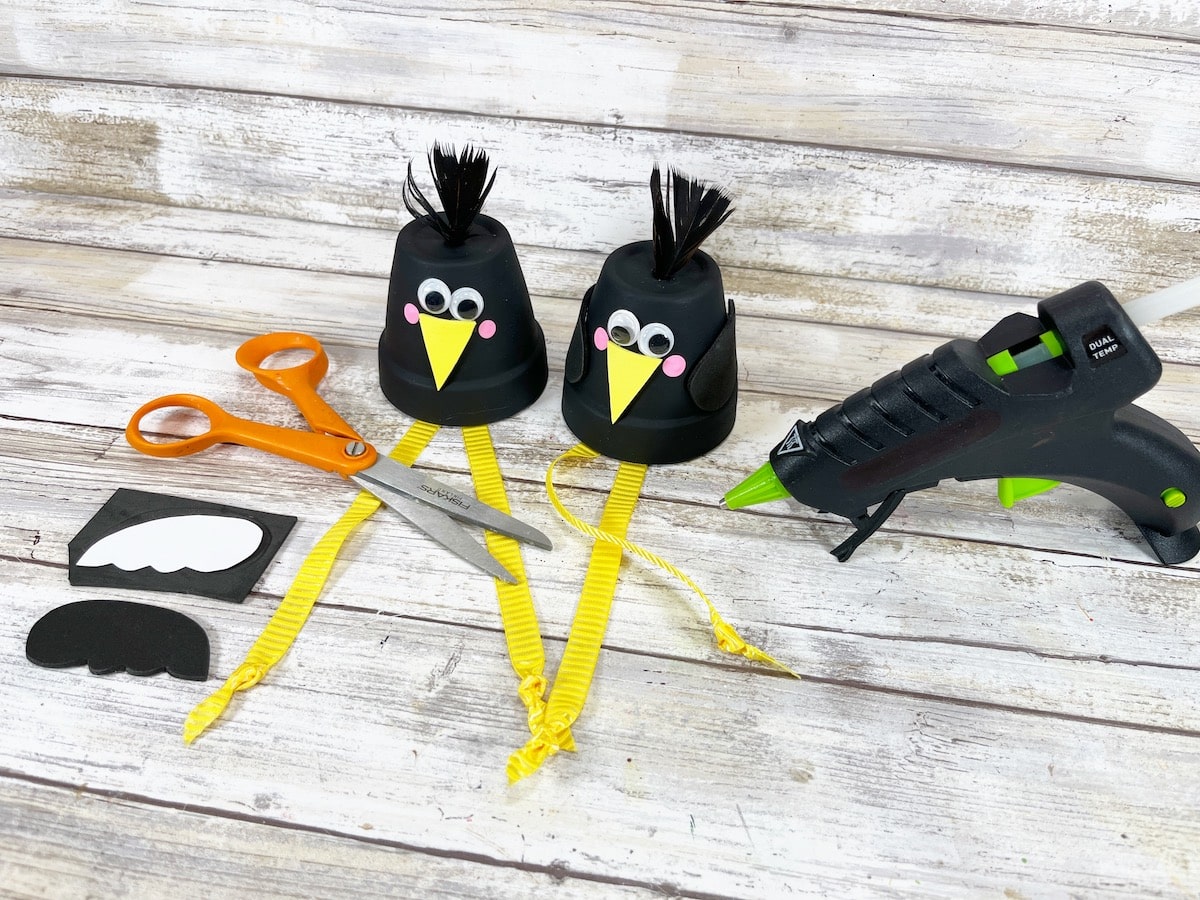

Glue one wing to the right side and one wing to the left side of the crow.
Step 5
Using skinny green ribbon, tie two small bows. Glue to the front bottom of the clay pot crows. Trim any long ends of ribbon with scissors.

Be sure to Pin This idea to save for later!

If you liked these Clay Pot Crows, you will love some more of our Dollar Store DIYs!
