
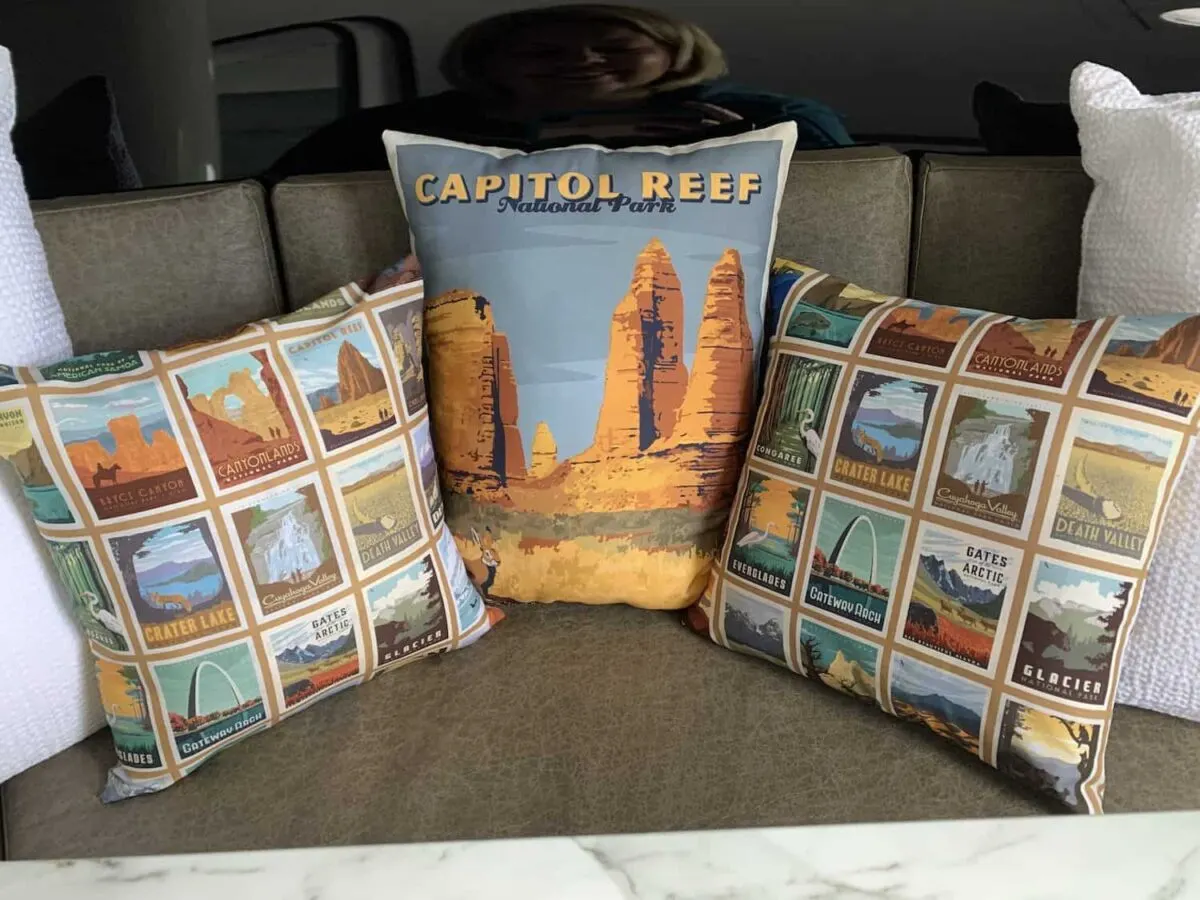
We’re visiting quite a few National Parks this year, and I wanted to do something to celebrate the places where we are going. When I saw this fabric while searching online, I knew I wanted to use it to make National Park Poster pillows to have in the RV!
They are the perfect decoration to show your love of nature and America’s great National Parks.
I didn’t realize there was National Park fabric available! But there is a wide variety of fun prints and quilt panels to choose from!

I ordered quite a lot of different National Park fabrics. LOL. This is just one of the projects that I have done with a National Park theme. I’ve also used the fabric to make this Popcorn Tin Storage Ottoman.
What I plan on doing is switching out the pillows on our dinette for whatever park we are visiting at the moment. I’ll be rotating them through the living areas. It’s a fun way to celebrate where you are traveling.
Of course, if you are a quilter, these quilt panels (there are even more styles to choose from!) would be great to make a bed cover or a hanging quilt for the wall.


Looking to make removable pillow covers? That’s what I did with the other National Parks fabric you see on the other pillows shown. Here’s our easy tutorial of how to make throw pillow covers.
Another great camping DIY project is this cute Happy Camper Tote Bag! Or use the SVG file to make a t-shirt, mug, etc.
How to Sew National Park Poster Pillows
Supplies
- National Park Poster fabric panels (I used this one in the tutorial)
- Thread
- Sewing Machine
- Needle
- Poly-fil stuffing
Directions
Step 1
Cut out two artwork panels from the fabric.
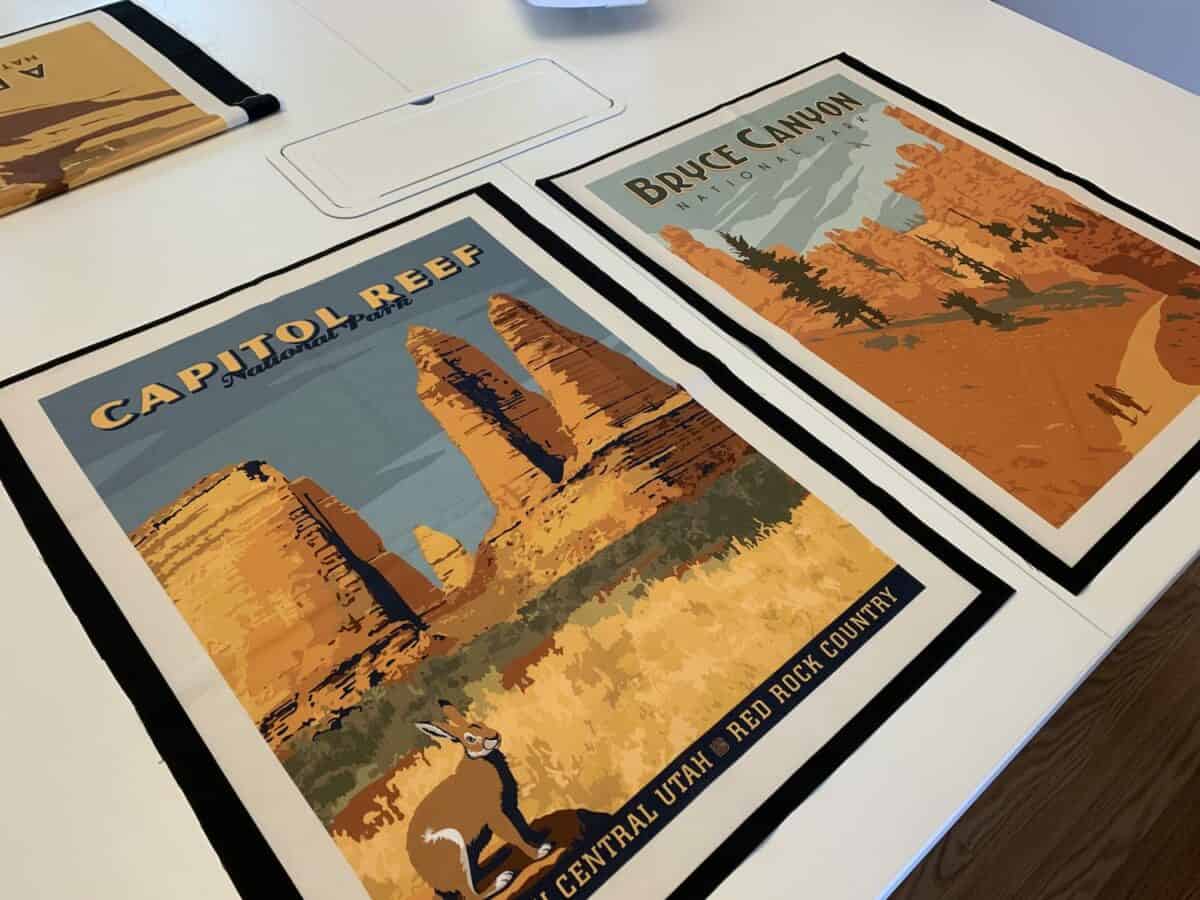
I chose not to use the black edging around the panels because once I cut in-between the panels that were side by side, the edging would only be half the size as the edging on the outer edge of the panels. While I did cut around the panel, leaving some of the black edging, I did this so that I would have some extra fabric to make the seams and then have more of the white edge of the artwork be able to show.
Step 2
Place two panels together, right sides facing together. Try to match up the area where the National Park posters panels are exactly, so they are even on both sides. Pin the panels together.
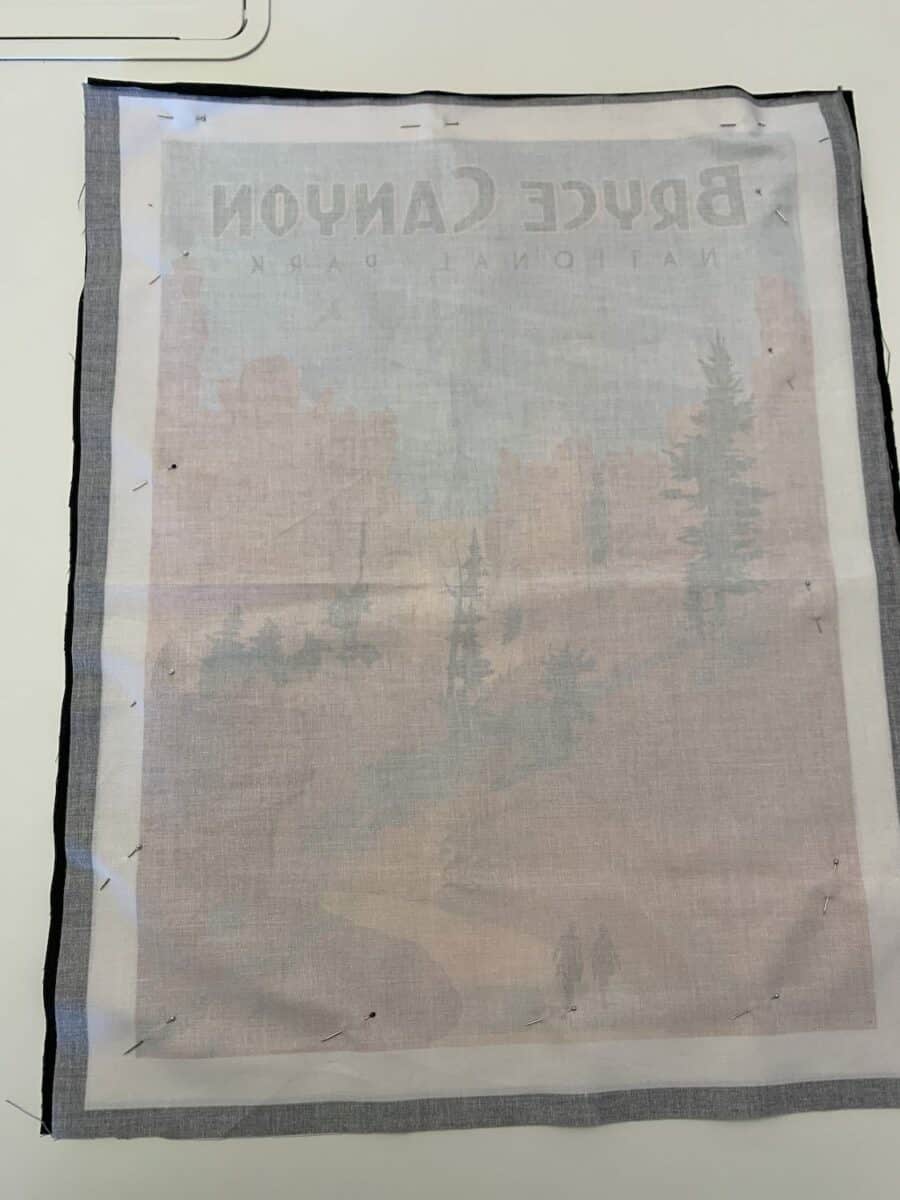
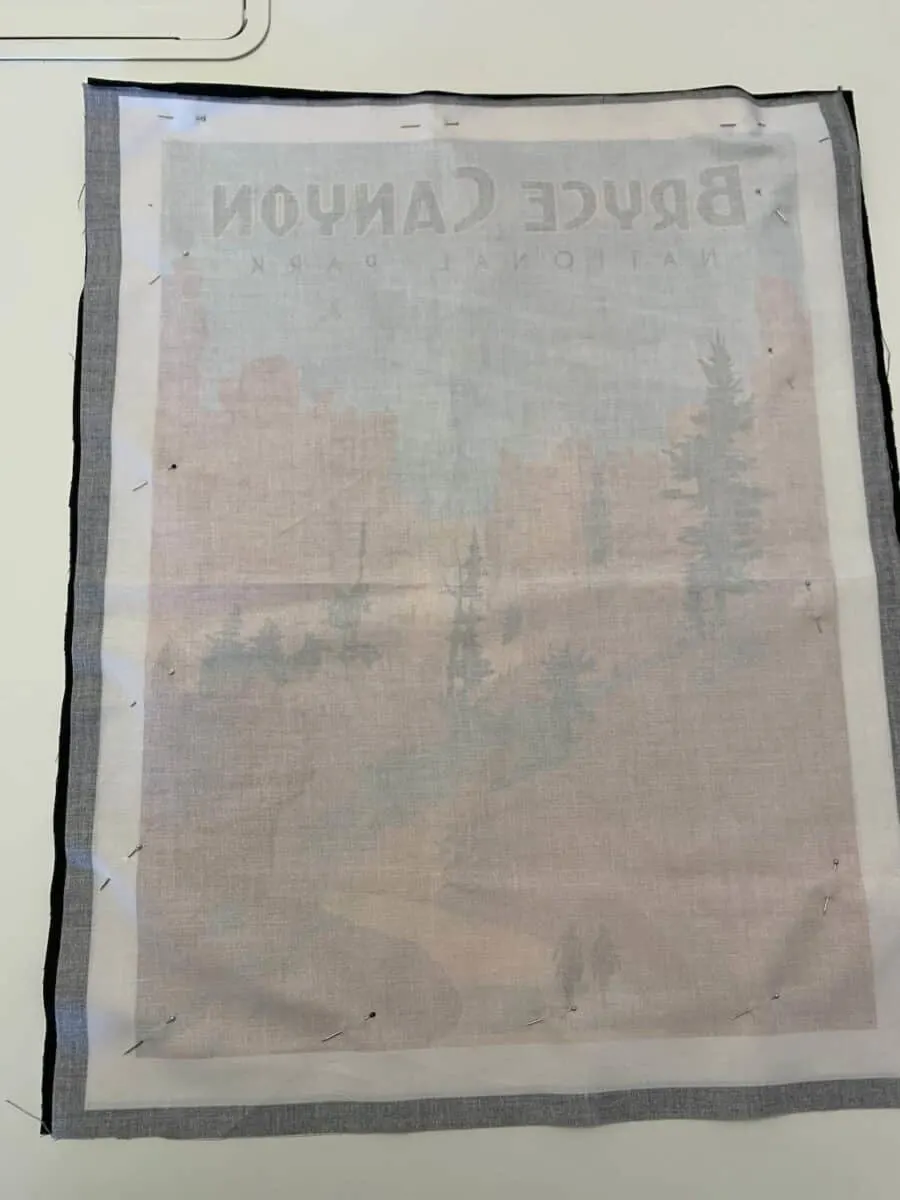
On my fabric, I tried to just match up the panels’ edges by holding it up to the light and seeing where they matched. However, I found that some of the panels weren’t printed in the same size and were just slightly off. Do as best as you can, slightly adjusting the placement so that they are as close to the center as possible.
Of course, if you just measured equal distances around each of the panel’s edges and cut them out, all you would have to do is turn the right sides together and sew a seam! However, I took the easy way out and just kind of eye-balled it while cutting, so matching up the panels was just a tad more difficult.
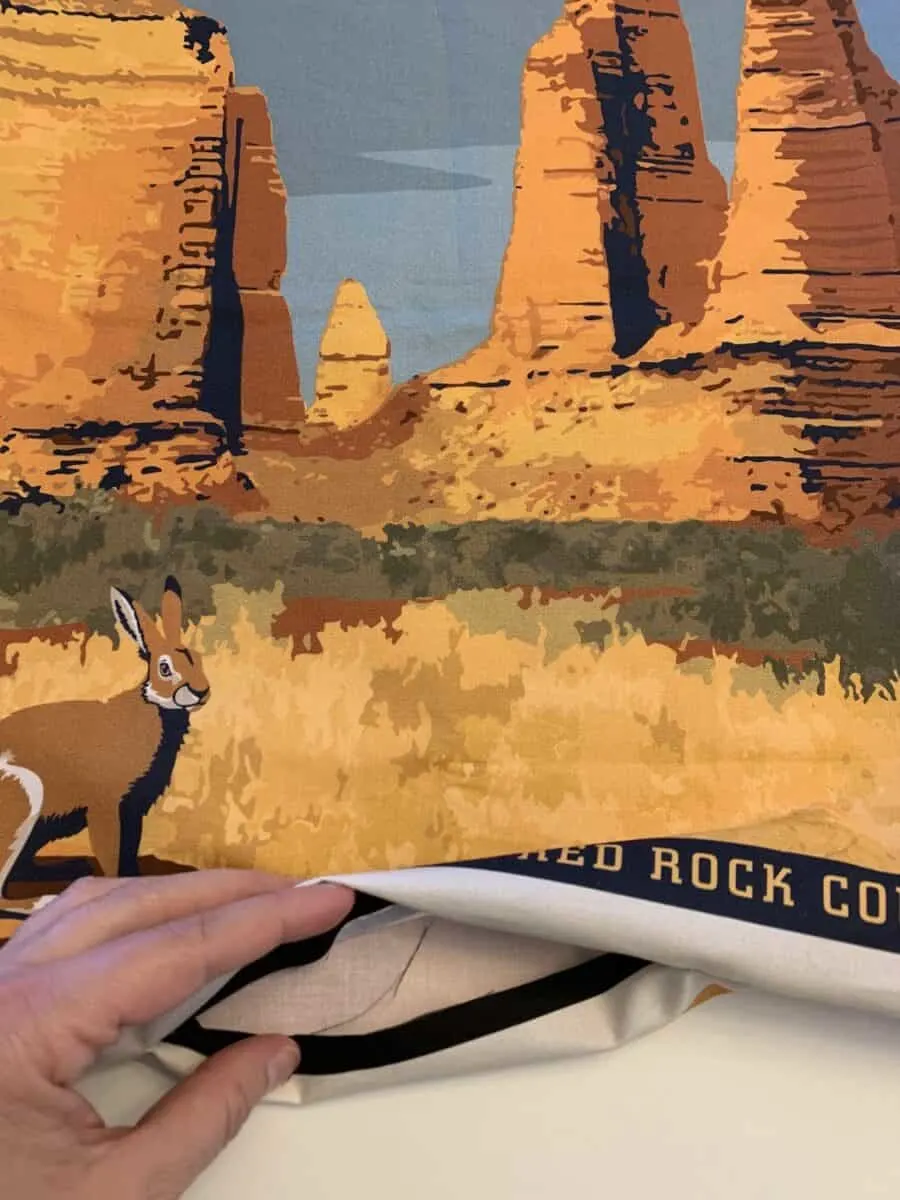
Step 3
Using your sewing machine, sew the seam almost all the way around the panels, leaving an opening at the bottom of about 5 inches to stuff the pillow.
I sewed along the edge of the black and white edging to have a straight line and to make sure that none of the black fabric would show through.


Trim off extra fabric, thread, etc. I cut the corner edges at an angle to reduce how much fabric is in the corner when trying to push out the corners.
Step 4
Turn the pillow inside out by putting your hand in the opening on the bottom, grasping the top inside of the fabric, and pulling it through the opening.

Push out the corners to be as straight as possible. A turning tool (I love this flamingo turning tool) or chopstick can help you to push out the corners from inside the pillow form to get a square edge.
Iron the fabric if it is wrinkled.
Step 5
Stuff the pillow with Poly-fil (stuffing).

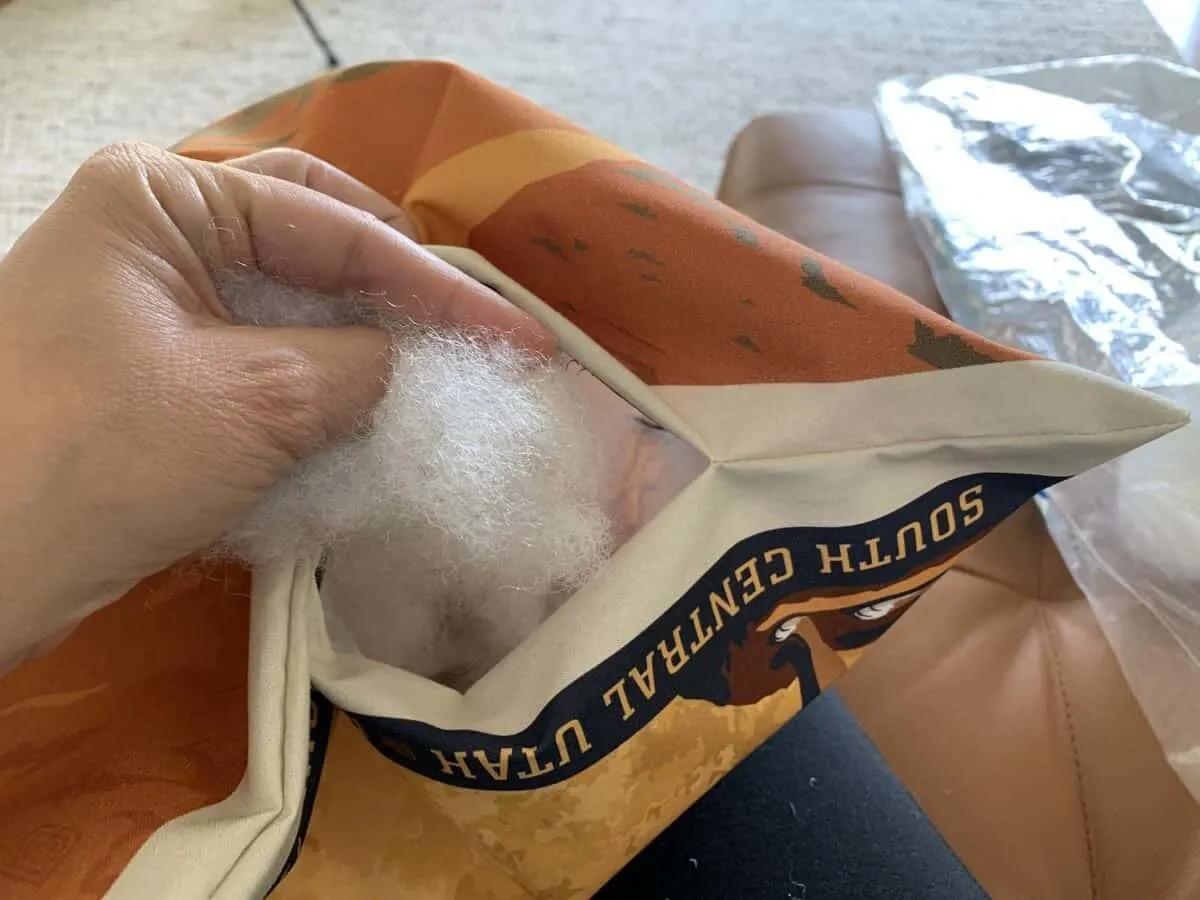
I was running short on stuffing, so I used some rolled up batting to put inside and flattened it out, surrounded by Poly-fil. It actually worked great, and gave the pillows a little bit of support to stand up straight.
Step 6
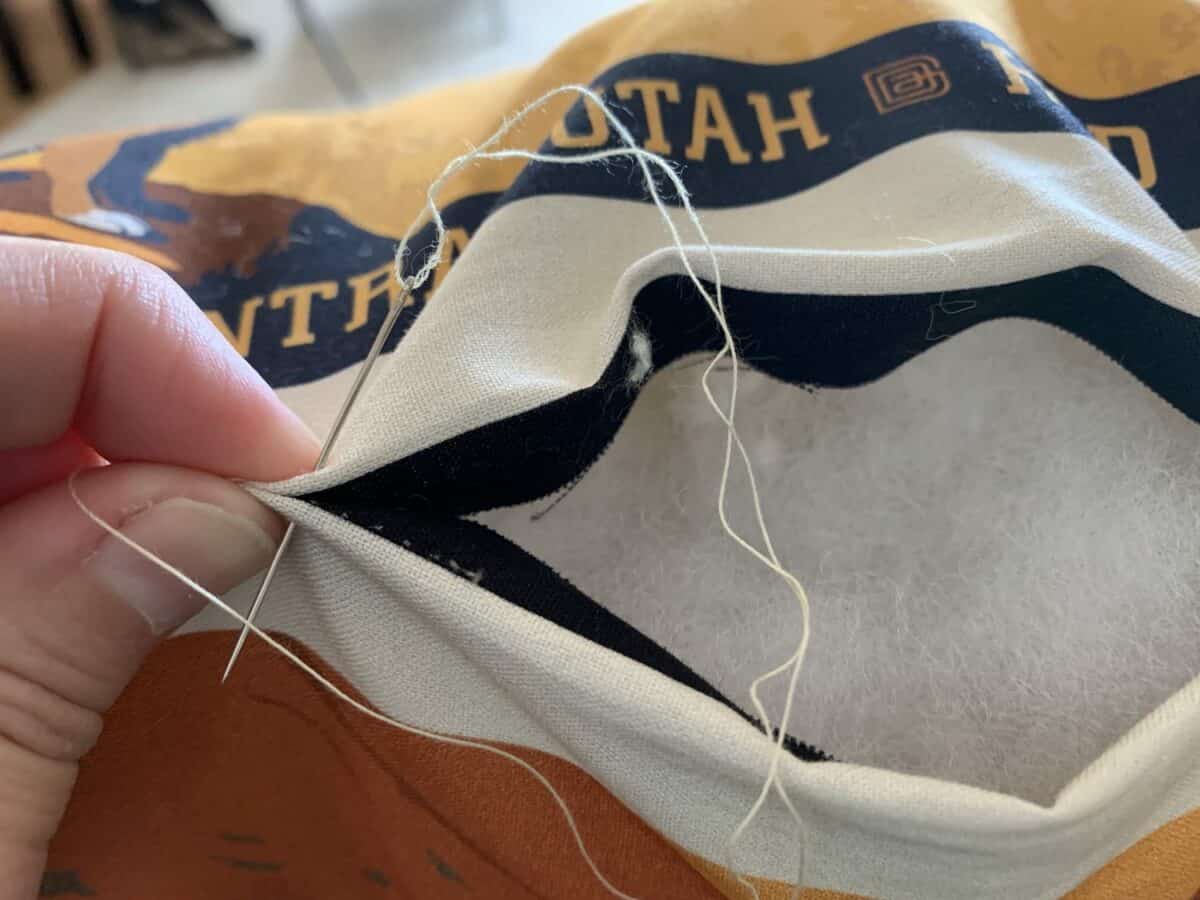
Hand stitch the bottom opening closed with a needle and thread.

Do you prefer a video tutorial? I show all of the steps to make these pillows in my Youtube video below:
Looking for other camping-friendly DIYs? Check out our wax-dipped pinecone fire starters and these scented fire starter candles. Both are great for outdoor campfires.
