
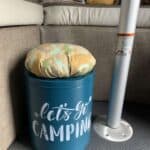

This popcorn tin storage ottoman is so easy to make! Plus, it is great for camping, RVing, or using at home.
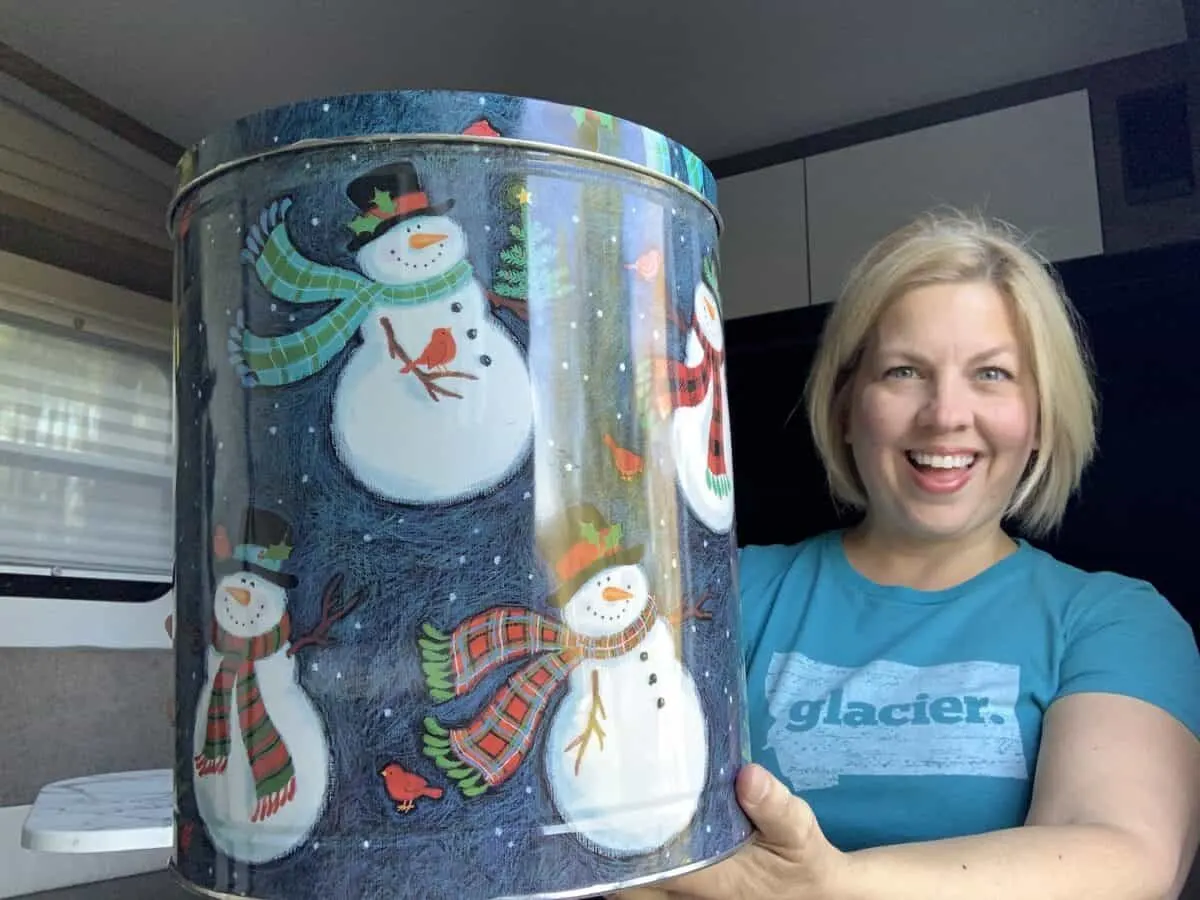
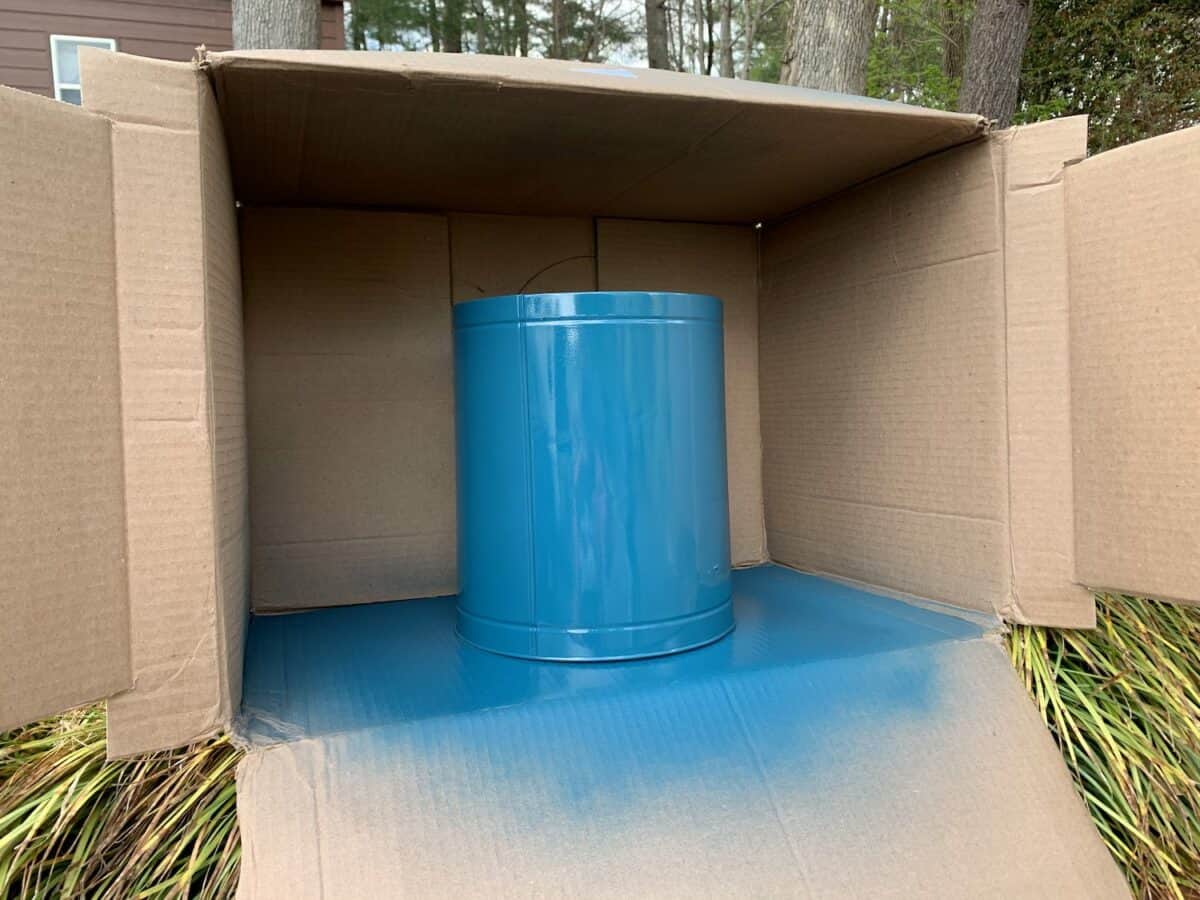
When I found a large empty popcorn tin container at the thrift store for just 25 cents, I knew I had to buy it. But I didn’t know what to do with it. Until I sat down in our new RV and realized my feet wouldn’t touch the floor because the seats were so deep.
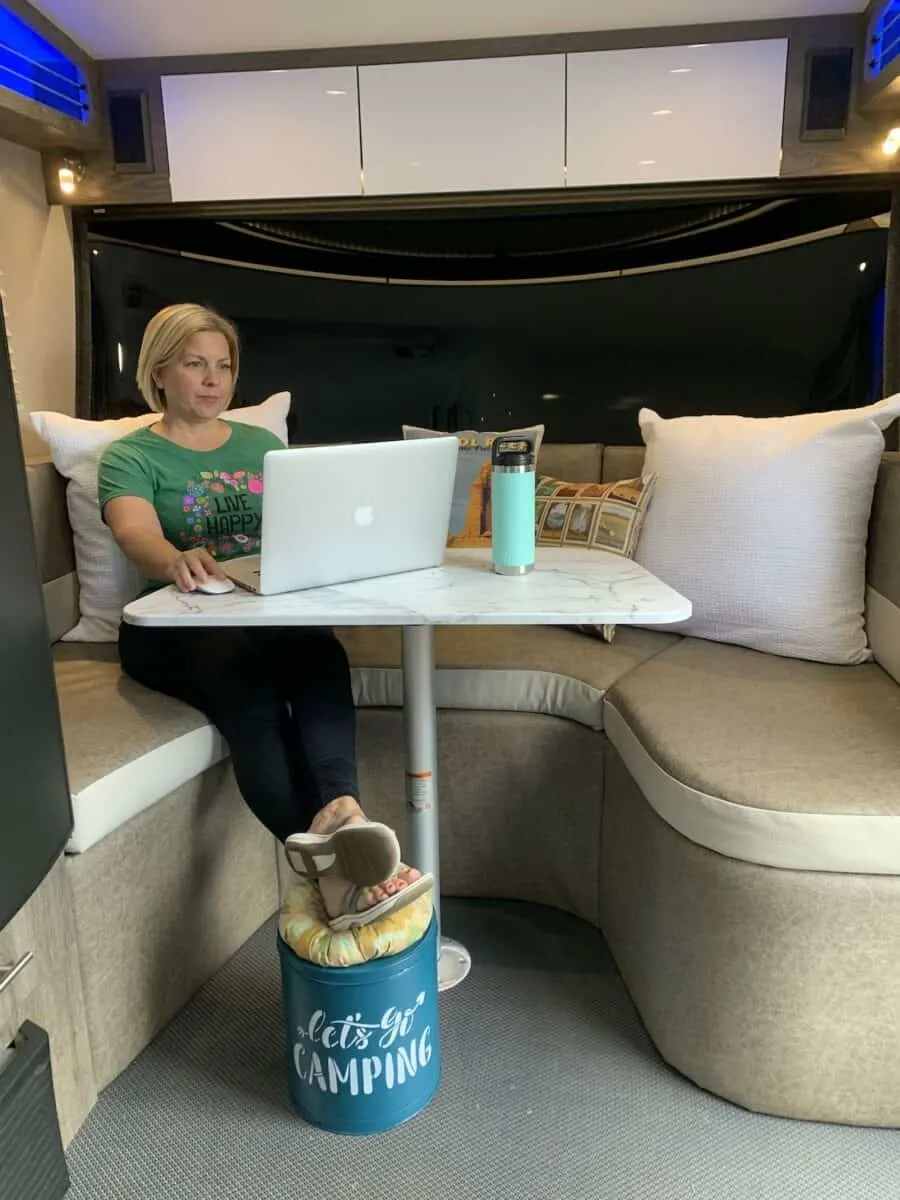
I needed something to prop my feet up on. So I went into the garage to see if the popcorn tin container would work. And it was a great height to use as an ottoman!

What I love about this tin container ottoman is that it has dual functions, which is always important when camping or RVing. After all, small spaces need multi-purpose items.
It also fits easily underneath our table, without taking up too much space.

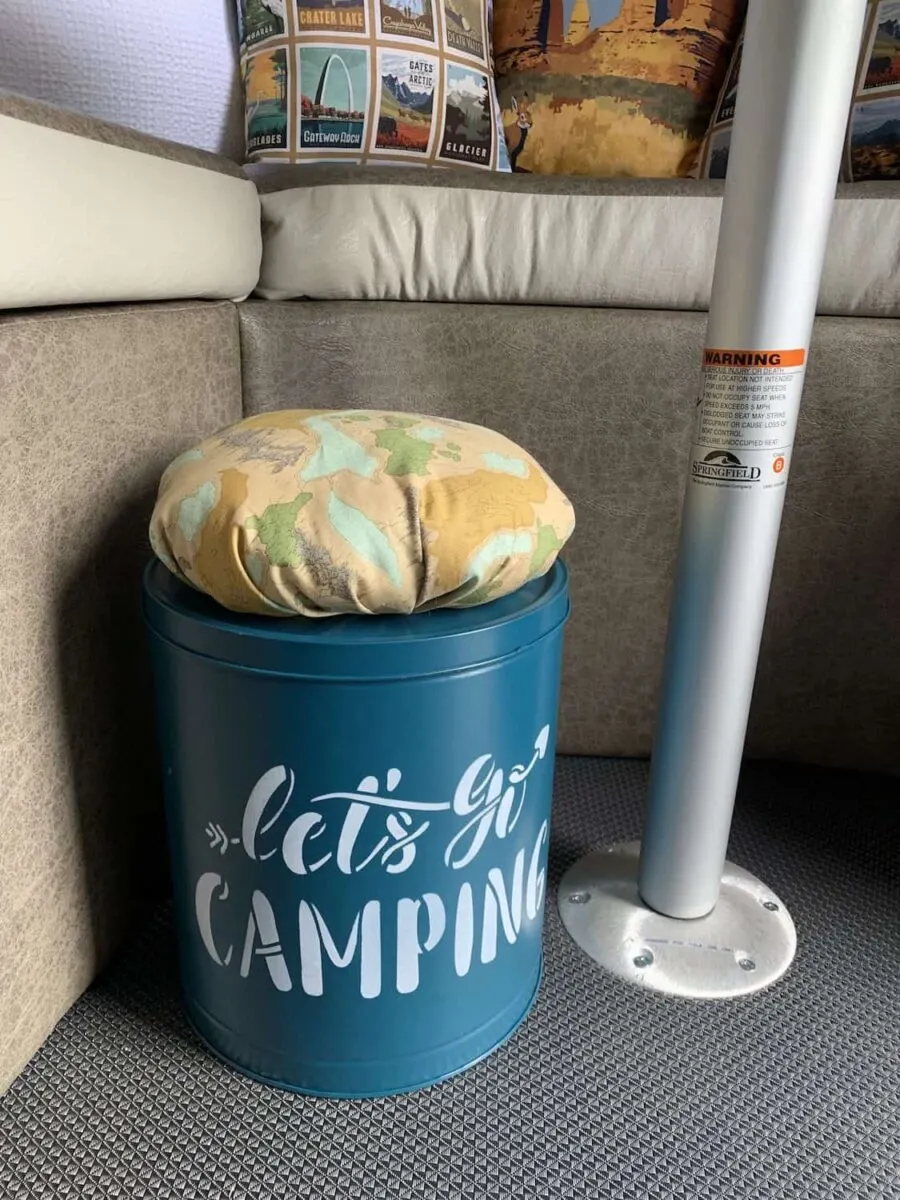
Not only can I use it as an ottoman, but it also doubles as a seat or stool. Which is great for adding extra seating around the campfire. It’s the perfect sit-upon can!

Plus, I can store all kinds of things inside, including:
- Smores-making ingredients
- Non-perishable foods
- Shoes
- Clothing
- Dirty laundry
- Toilet paper
- Toys
- Tools
- Outdoor equipment
If you like camping DIYs, check out my National Park Poster pillows. And you’ll want to see this cute DIY Happy Camper Tote Bag!
These easy fire starter candles perfect for a campfire. And these fire starter pinecones are great to bring along, too.
Helpful Tips

- Make sure you’ve removed any residue or debris from the tin before painting. I didn’t see a clear piece of tape on the tin until after I painted it, and it definitely stands out!
- I liked the fluffy look of a thick seat cushion for my ottoman, so I used Poly-fil. However, you might not want something so poofy. You can also use batting cut into a circle. Use one layer or add multiple layers.
- I overstuffed the seat cushion, because I knew the stuffing would compress and flatten after using it.
- A thick piece of upholstery foam would also be great for using as a topper. The easiest way to cut it into a circle would be to use an electric carving knife.
- Consider using a water-resistant vinyl fabric is you want to be able to wipe off the padded top.
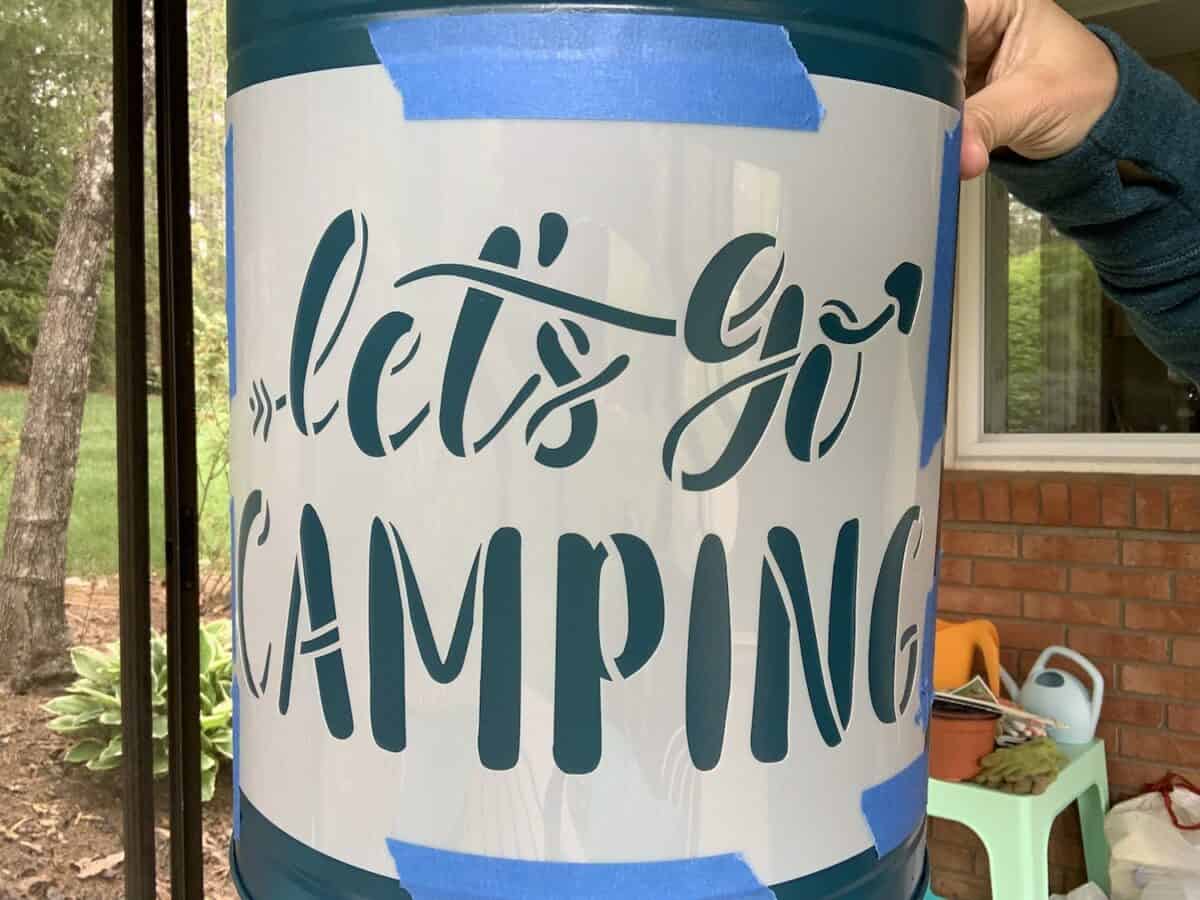
- There are so many stencils that you can use to personalize your ottoman! I used this camping stencil, but I also considered using this cute one, too. I highly recommend this small business that creates some of the best stencils!
- If you’d like, you can seal your painted tin with a spray sealant. This would prevent the paint from chipping off with use.
How to Make a Popcorn Tin Storage Ottoman
Supplies
- Empty popcorn tin (cleaned and dry)
- Spray paint (I used Krylon Fusion All-in-One, Satin Peacock Blue)
- Let’s Go Camping Stencil, optional
- Acrylic paint, optional
- Foam stencil brush, optional
- Painter’s tape, optional
- Fabric (I used this National Parks map fabric. For more fun National Parks prints, check out this small business online with some great finds!)
- Needle and Thread
- Stuffing (Poly-fil) or Batting
- Hot Glue (I suggest these glue sticks which are weather-resistant)
Directions
Step 1
Spray paint the popcorn tin in a color that you like. I recommend using an all-in-one primer and paint that works on metal. Be sure to paint the lid and the tin separately.

I only had to use one coat of paint.
Step 2
I added a camping stencil to my ottoman seat and I love it. It’s the perfect touch.
I taped the stencil down with painter’s tape.

Then using an angled foam brush, I applied acrylic paint to the stencil.

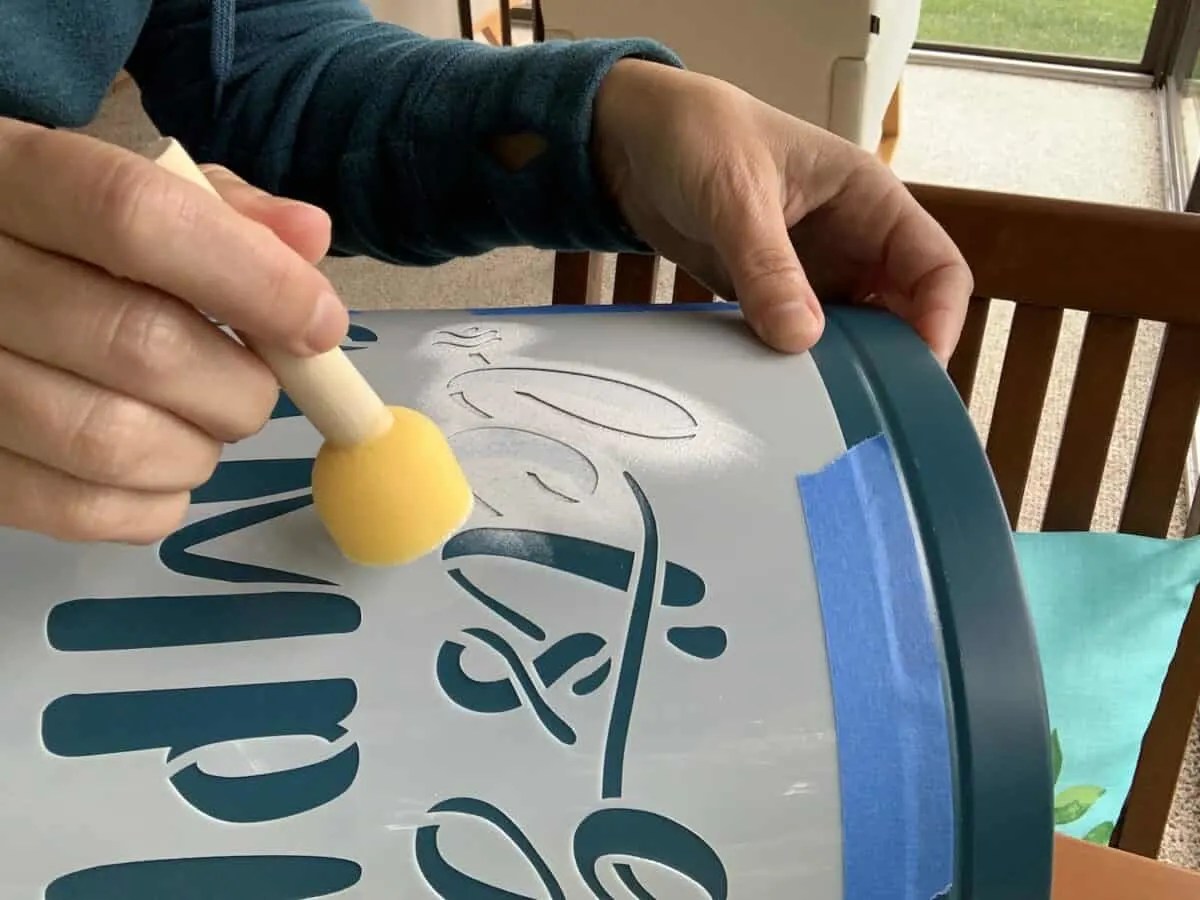
When stenciling, you want to use as little paint as possible. Using too much will cause the paint to bleed under the stencil. Add just a little paint to the brush and dab off almost all of it. You might think that the foam brush is too dry. But it’s better to dab on paint in a few coats rather than one thick coat.

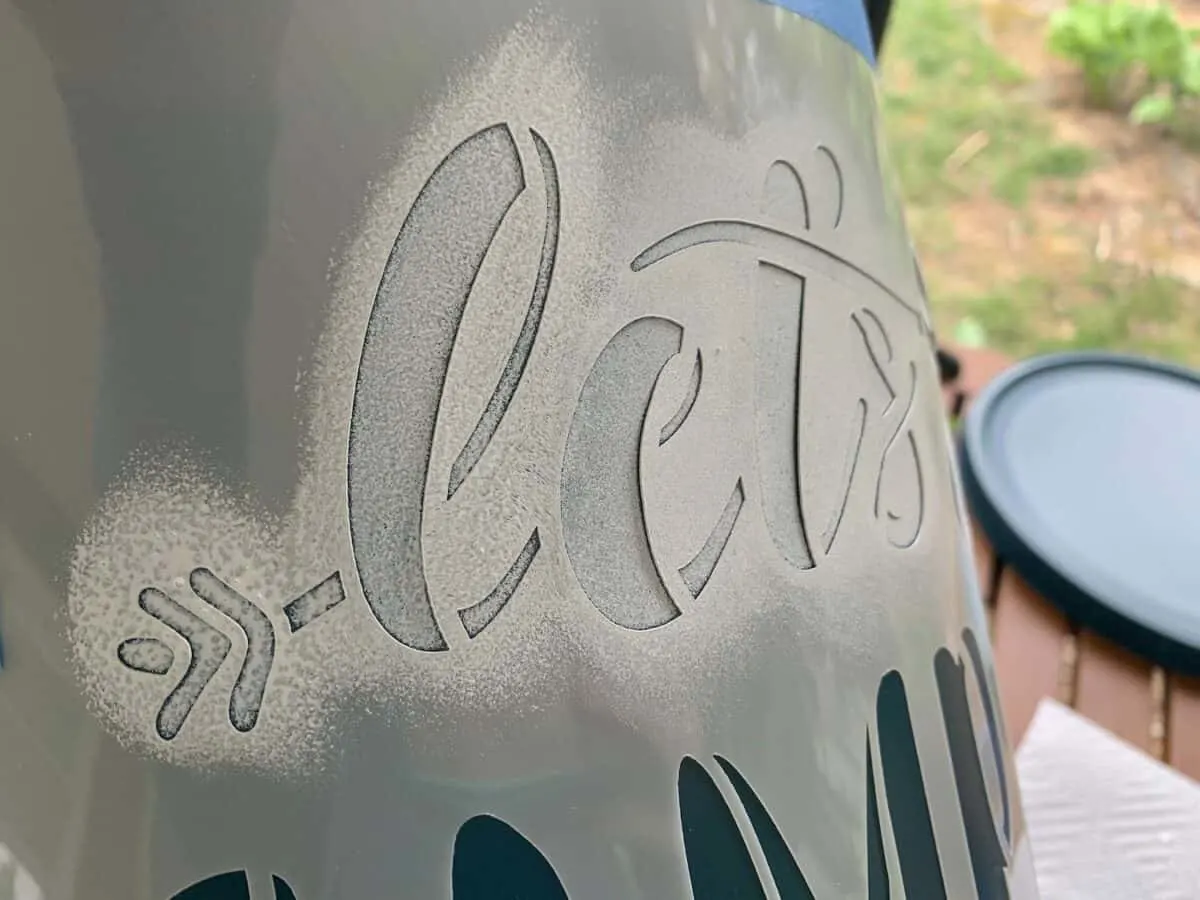
Remove the stencil carefully while the paint is still wet. You don’t want the paint to dry before taking it off, because the paint could peel off with the stencil.
Step 3
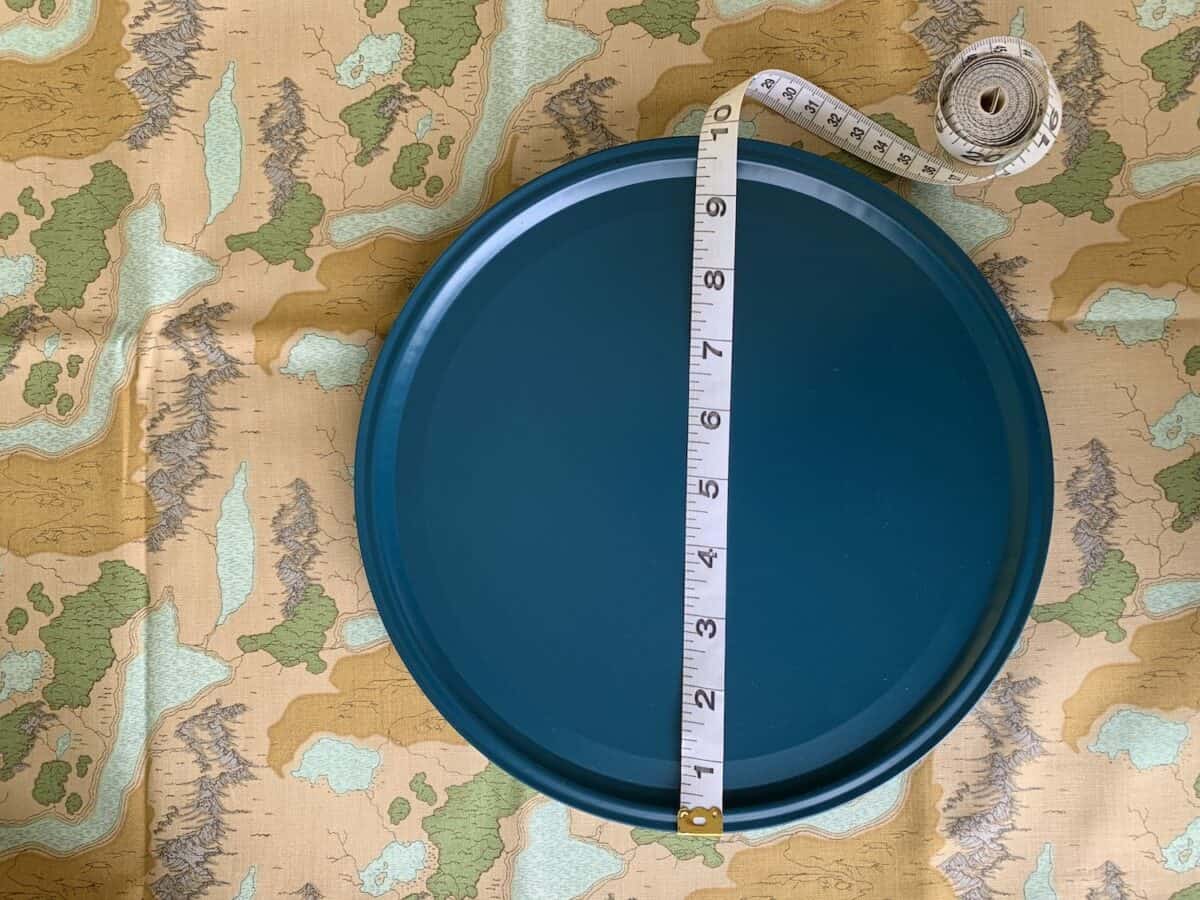
For the ottoman seat, measure the diameter of the popcorn tin lid. My lid was 10 inches in diameter.

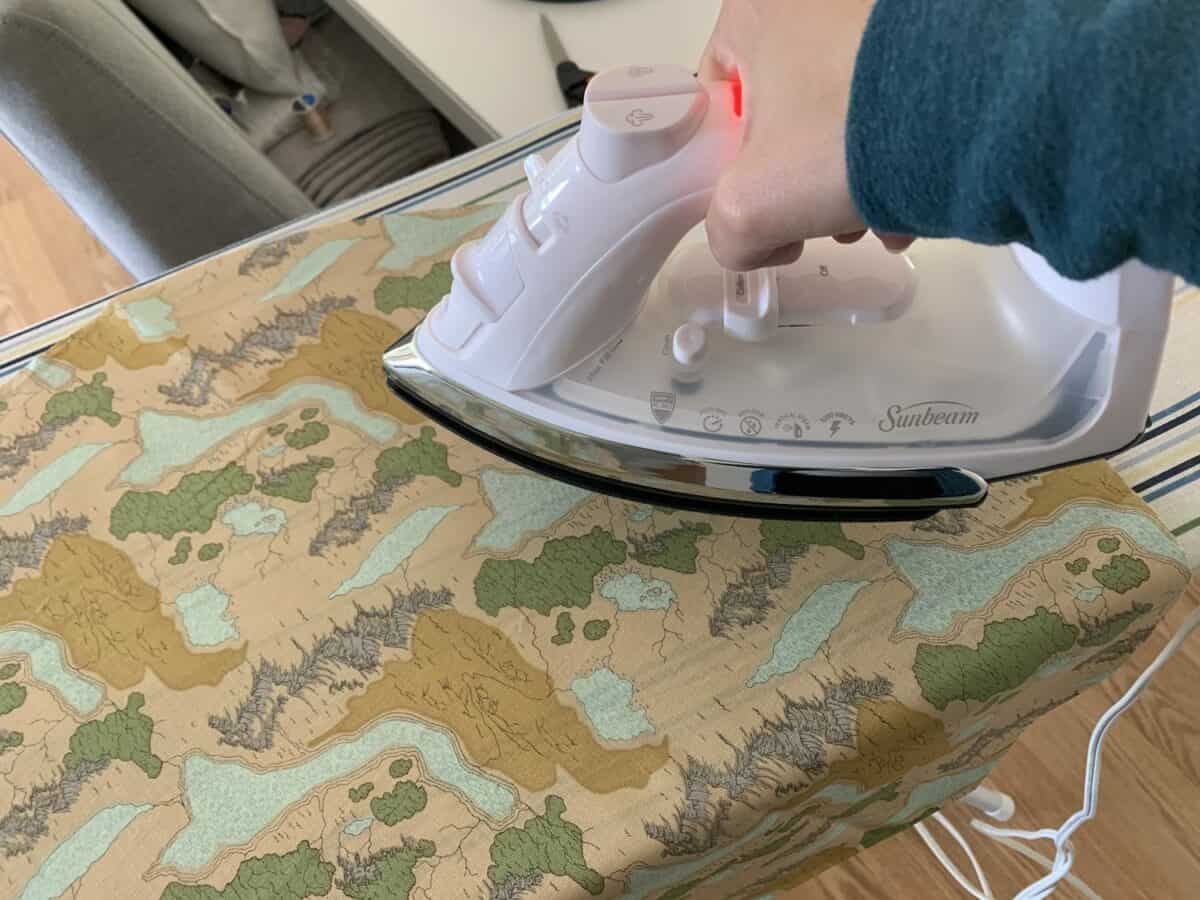
Before measuring your fabric, be sure to iron out any wrinkles if there are any.
I wanted the fabric to wrap around the stuffing/batting that I used and cover underneath, too. So I doubled the size and cut a 20-inch diameter circle.
You can easily cut a fabric circle by laying the lid on the fabric. Then, take the measurement of how much extra fabric you need (in this case, I needed an extra 10 inches to double the size) and divide in half. Take that number and measure the amount around the entire lid with a ruler, making marks with a pen or pencil.

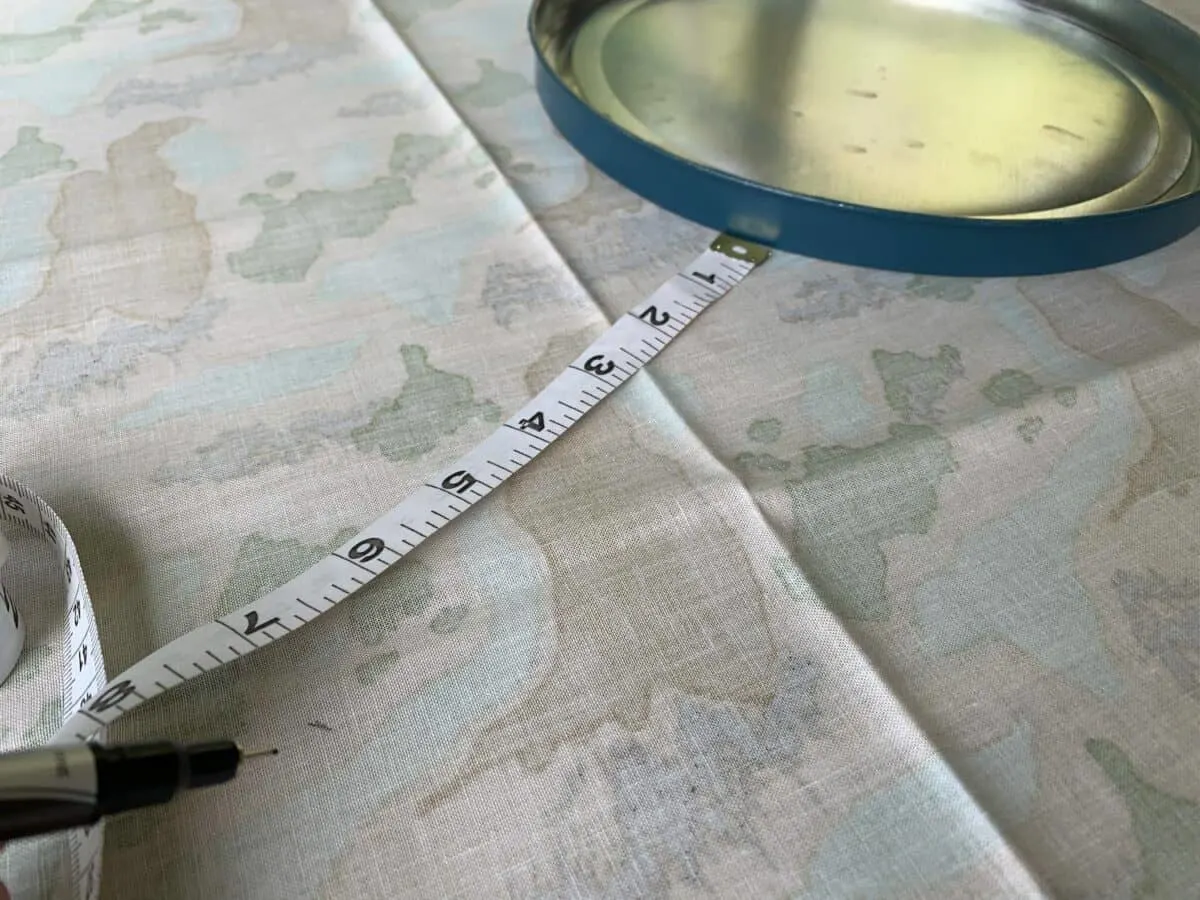
For example, I took the extra 10 inches I needed and divided in half, which is 5 inches. So, I measured an extra 5 inches from the outer edge of the lid all the way around the lid to create a circle pattern.
(In the photo, I’m measuring 7 inches. Those dimensions didn’t work, so I suggest the 5 inches that I suggest previously.)
You can then draw a line connecting the dots and cut the circle out.
*A helpful hint is to measure only the area where you want the seat padding to be, not the entire lid. I could have used less fabric, because I didn’t want the seating cushion to be to the outer edge. I wanted it to lay in between the raised edges of the tin. In reality, I really only needed about 9 inches in diameter of fabric on top of the seat cushion.
Step 4
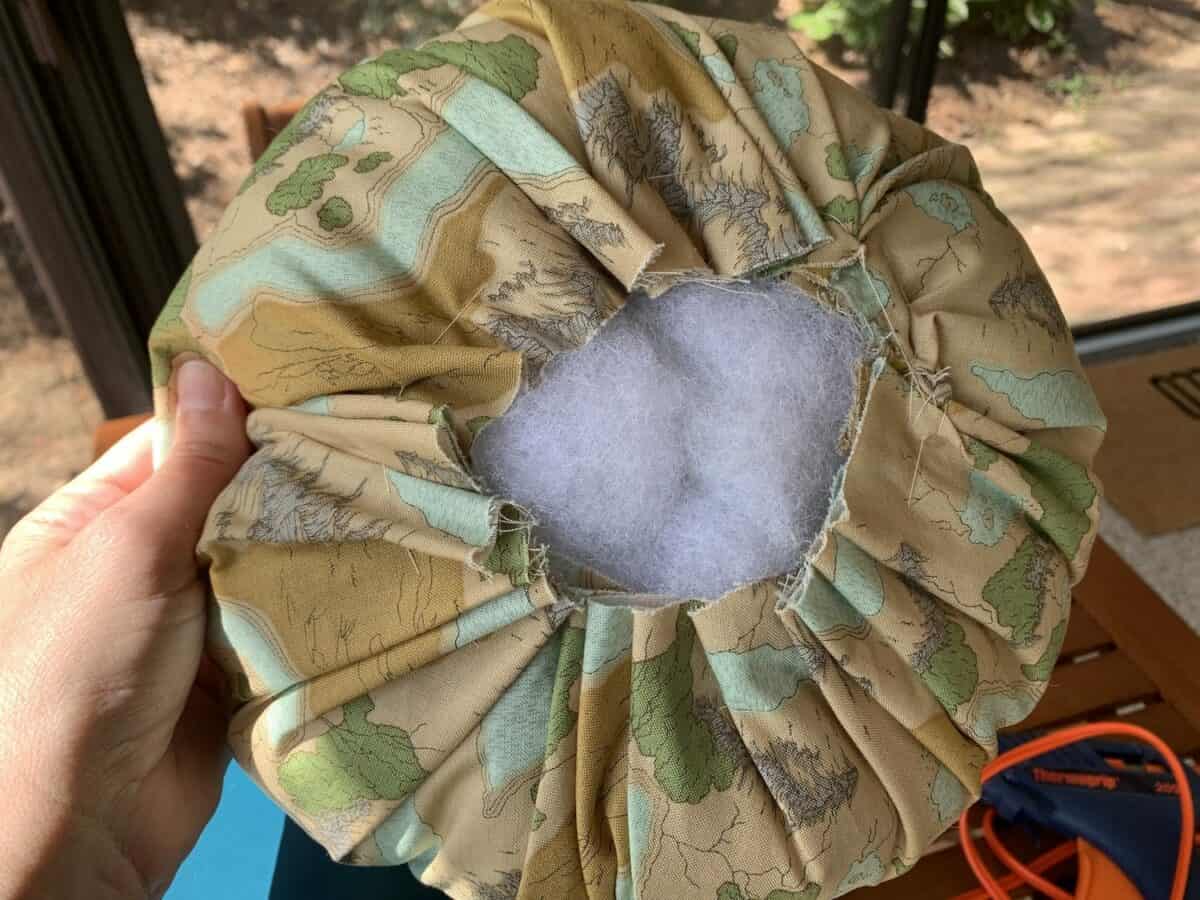
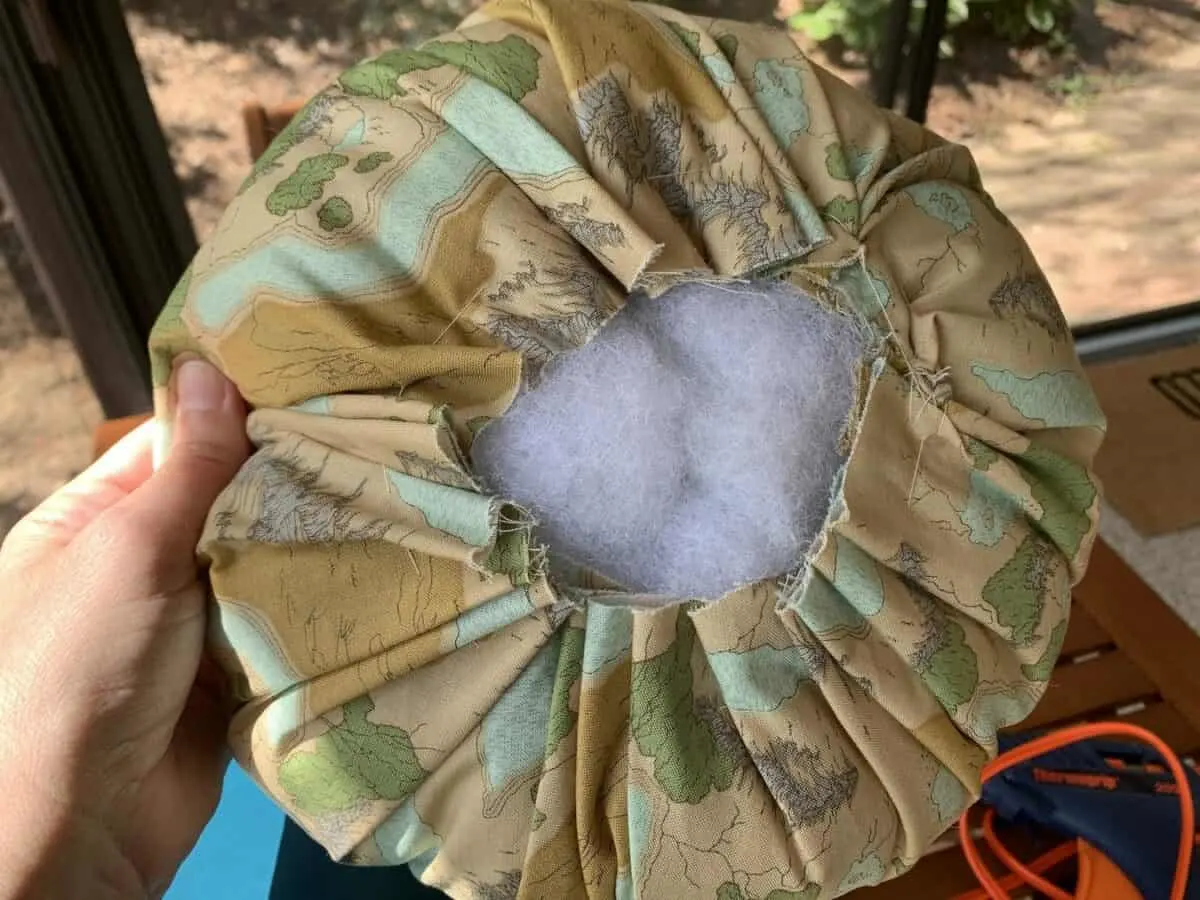
Using a large basting stitch, I hand-sewed a running stitch around the perimeter. I did not finish off the end after I sewed around the edge. Instead, I pulled on the thread to gather the fabric into a circular pouch. I kept pulling the fabric and arranging the layers until it fit correctly on my popcorn tin lid.
Step 5
Add stuffing into the fabric circular “pouch” until it is as thick as you’d like. You could also add batting cut in a large circle to fit the shape of your lid.
Tie a knot in the end of the thread to secure.
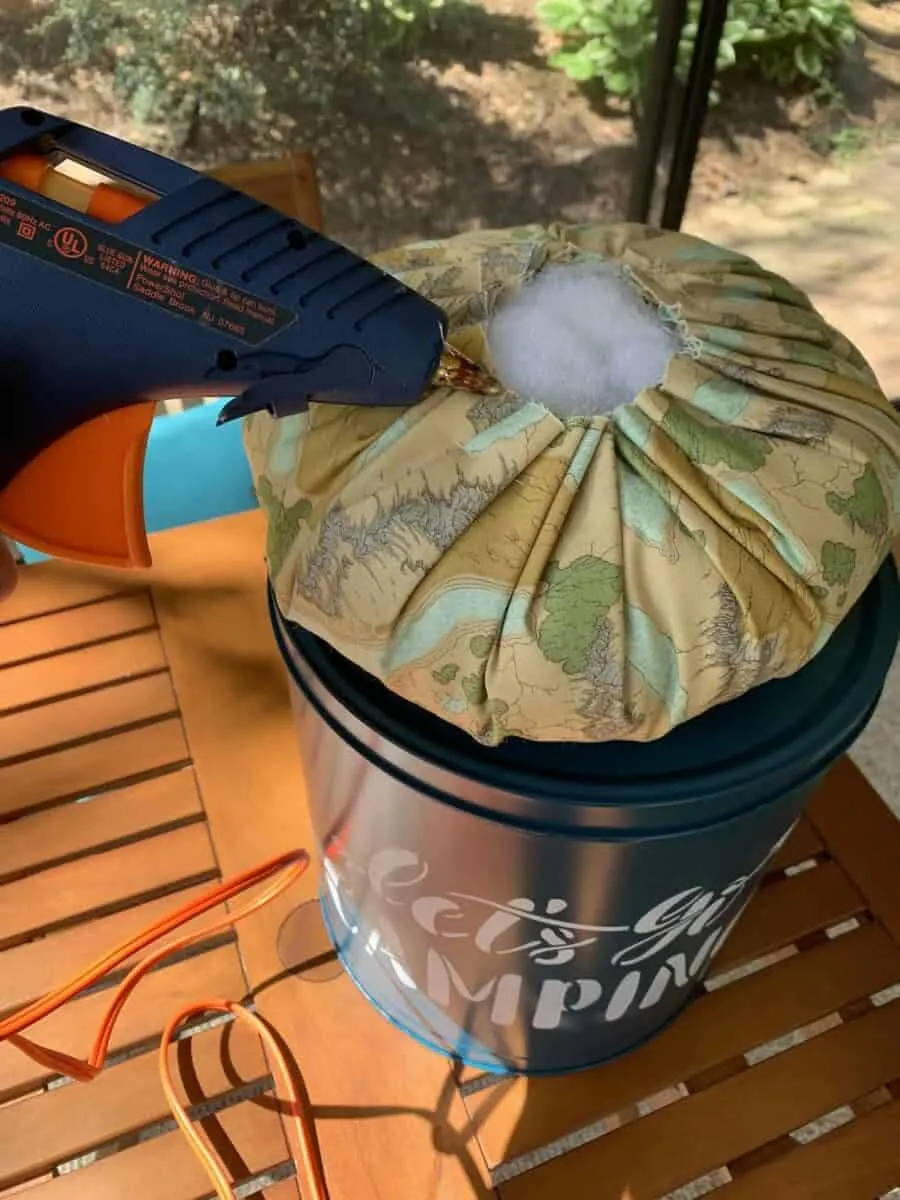
Step 6
Hot glue the cushion to the top of the lid.

Want more details for how to make this popcorn tin seat? Check out my video showing all of the details (and I’d love if you subscribed to my Youtube channel!):
I’ve also turned an old tire into an ottoman. It’s perfect for at home!
