
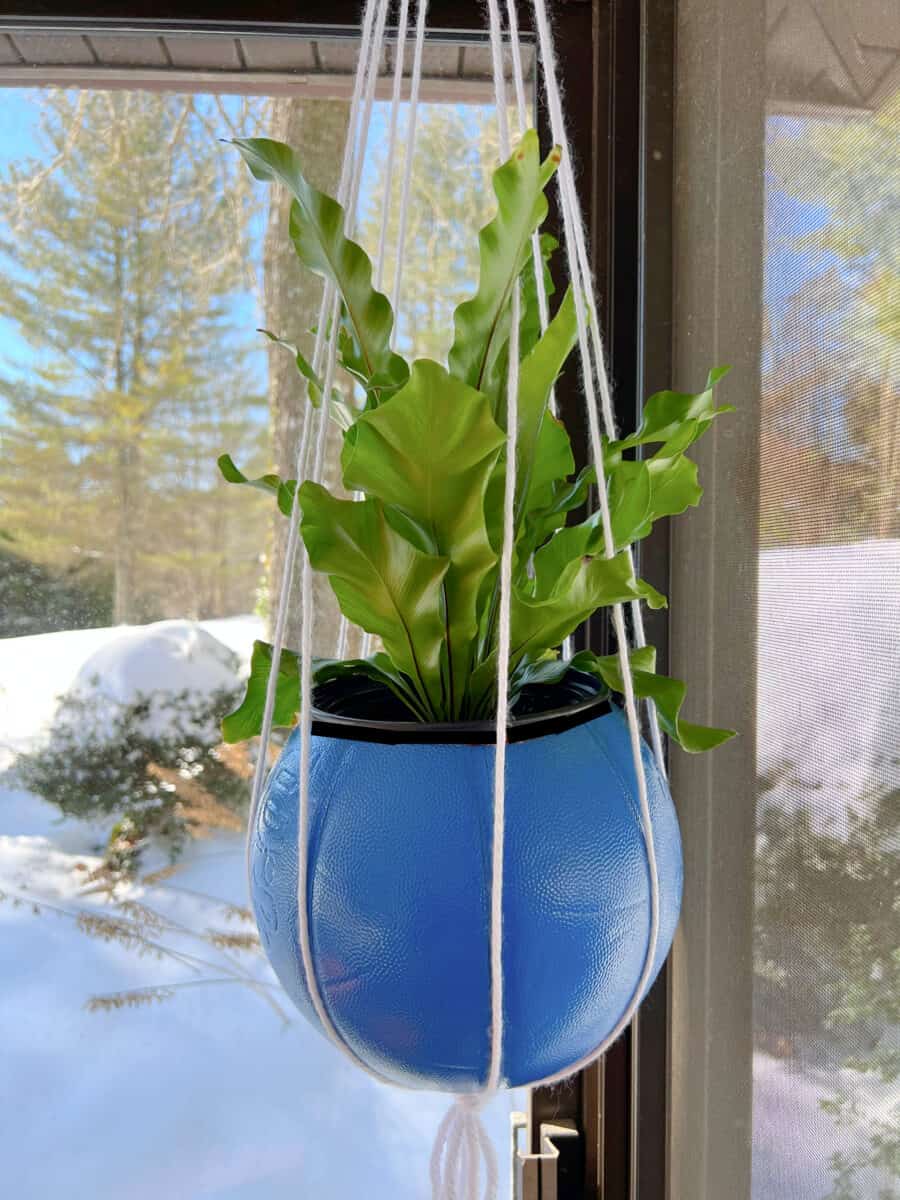
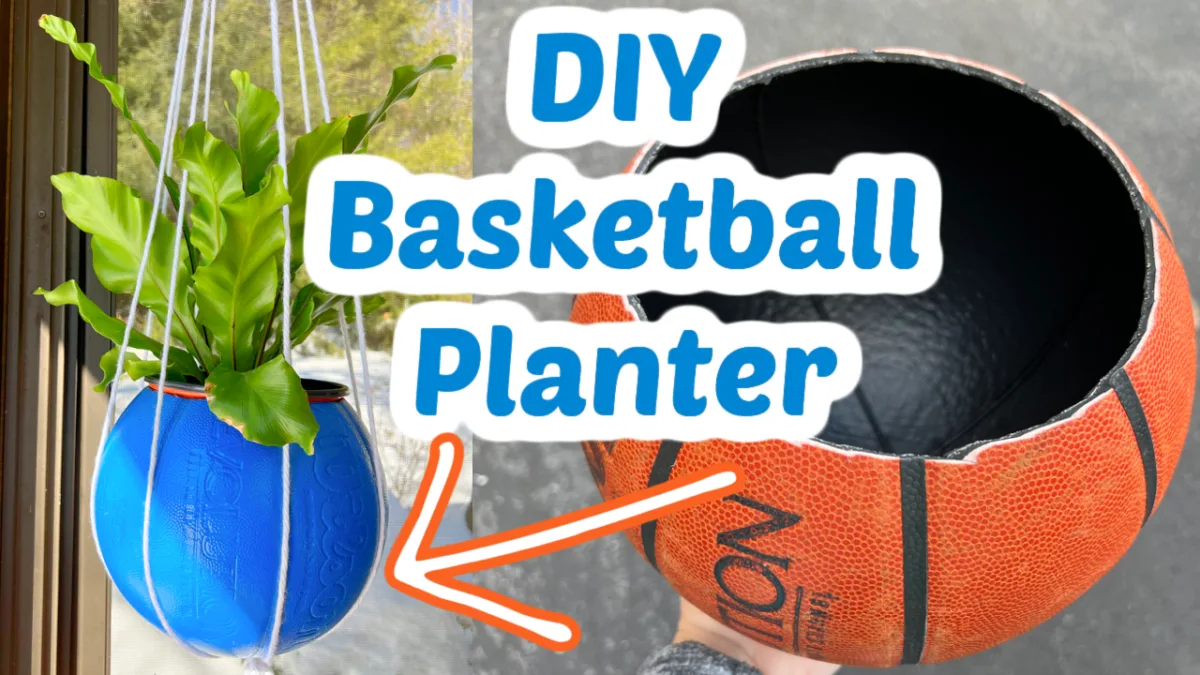
If you have an old basketball at home that no one is using anymore, why not turn it into a pretty plant pot? This DIY Basketball planter is so easy to make, and it took me less than hour to do.
You can leave the basketball as it is, without painting it, for a sporty look. Or you can spray paint it like I did for some extra color. Either way, I think you are going to love this easy tutorial!

I actually made this planter with a basketball my sister was throwing away. You probably can find an old basketball from friends or neighbors who don’t use theirs anymore. Or try thrift stores.
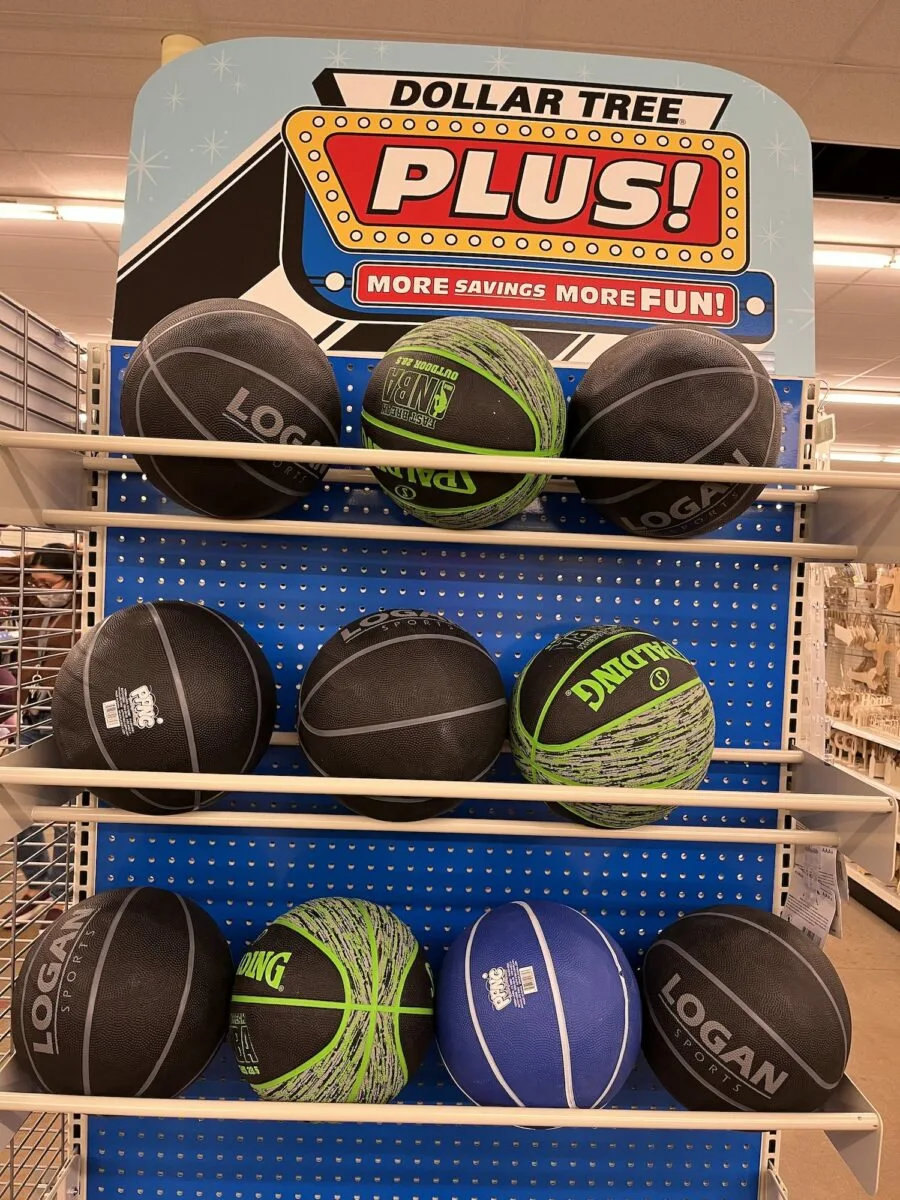
If you don’t have a basketball to use at home, you can buy a new one. I recently saw new basketballs for $5 at Dollar Tree Plus.

FAQs
What If My Basketball Is Deflated?
I used a half-deflated basketball for my project. However, I did add air to the basketball so that I had a solid surface to cut on. I would not suggest trying to do this with a ball that was not blown up.
What Kind Of Paint Should I Use on a Basketball?
Use multi-purpose spray paint that works on plastic.
Can I Use Something Other Than Yarn?
Yes! While I used craft yarn, you could use twine rope, thick ribbon, metal chain or leather straps to hang the basketball planter.
Do I Have to Use a Utility Knife?
No. We found it easier to poke a hole and get the cutting started with a utility knife. However, if you can get the cutting started with scissors, there’s no reason not to just use scissors for cutting. In fact, we found it easier to cut with scissors than the craft knife.

How to Make a Basketball Planter
Supplies
- Basketball
- Utility knife (optional)
- Scissors
- Marker
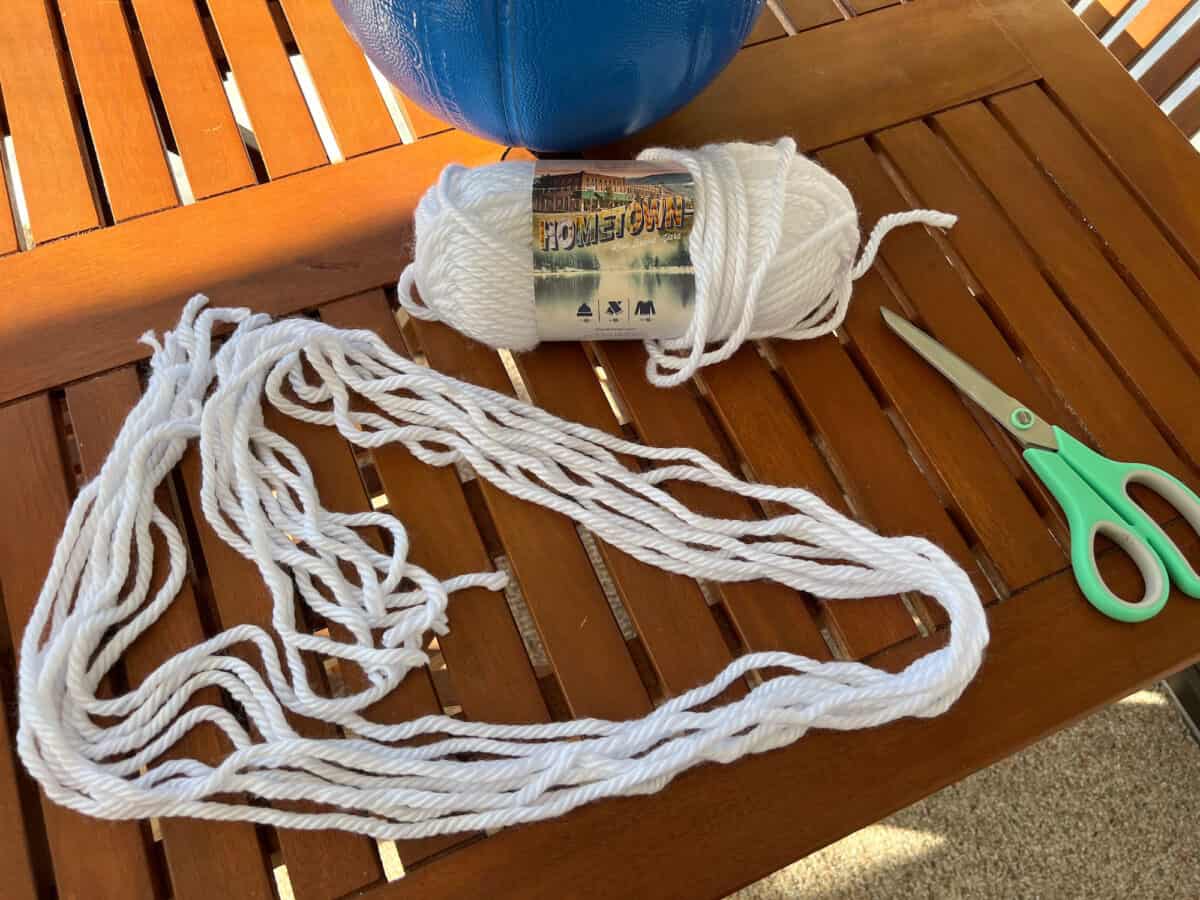
- Yarn or other type of cord
- Spray paint (optional)
Instructions
If you want to leave the basketball unpainted, be sure to clean it up beforehand. Wash it with soap and water and a scrub brush to get it looking its best.
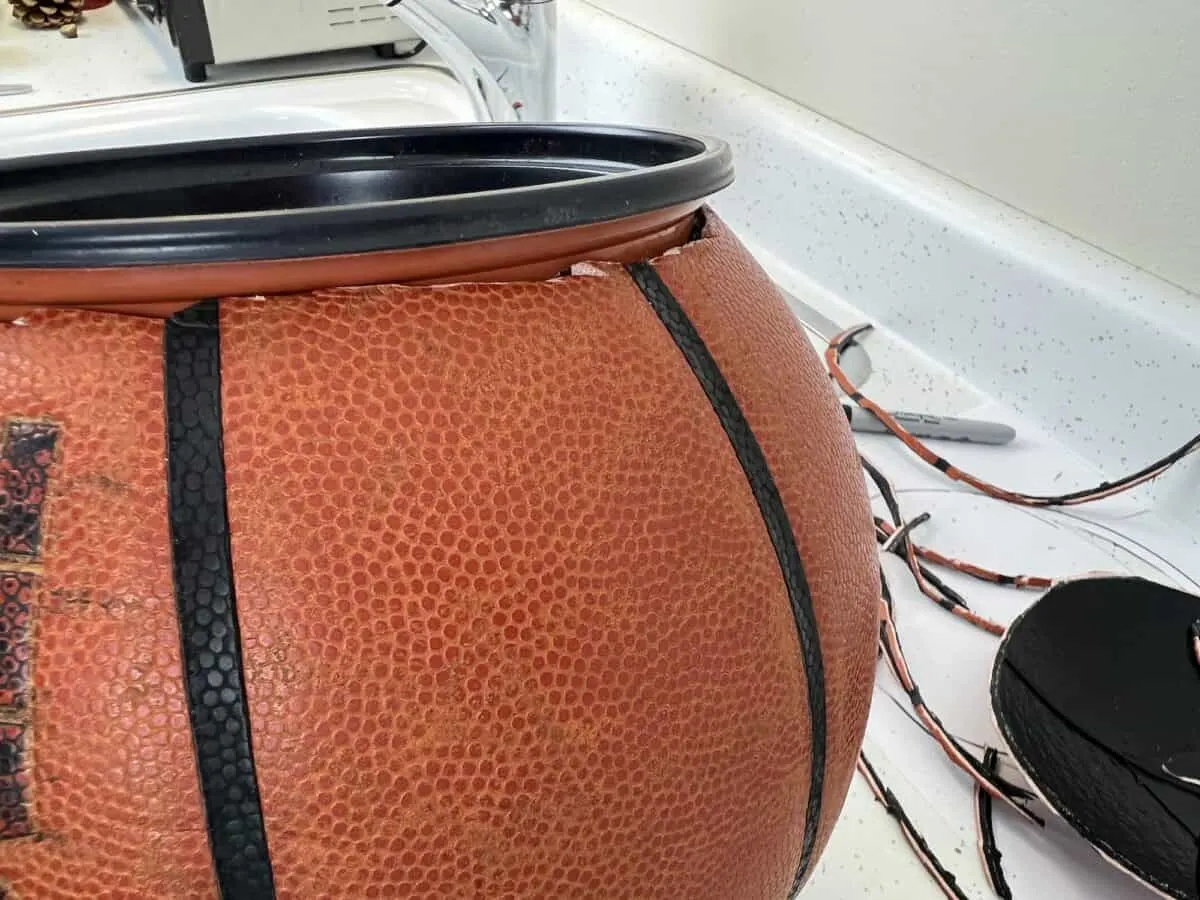
Decide which pot you are going to use in the basketball. You should not cut a hole and then try to find a pot to fit. You will need specific measurements from the pot when cutting.
Turn the empty pot upside down on a sheet of white paper and trace around the outside. If your pot has a plant in it already, you can measure the width of the pot and draw a circle using that measurement. Cut out the circle template.
Trace around the circle template with a marker on top of the basketball, where all of the vertical seams meet together.
Start cutting out the circle drawn on top of the basketball. We used a utility knife to make the first cut into the basketball, then scored the circle with the utility knife to help with cutting.

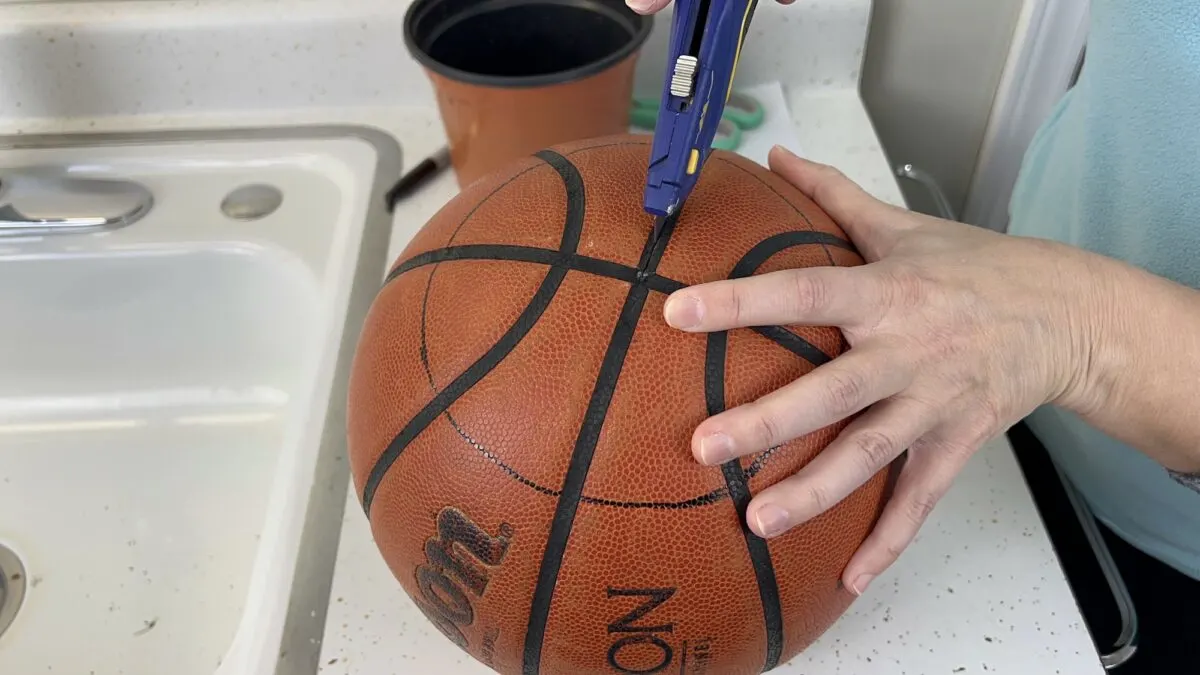
Then I used scissors to cut around the circle and remove the portion of the basketball top.
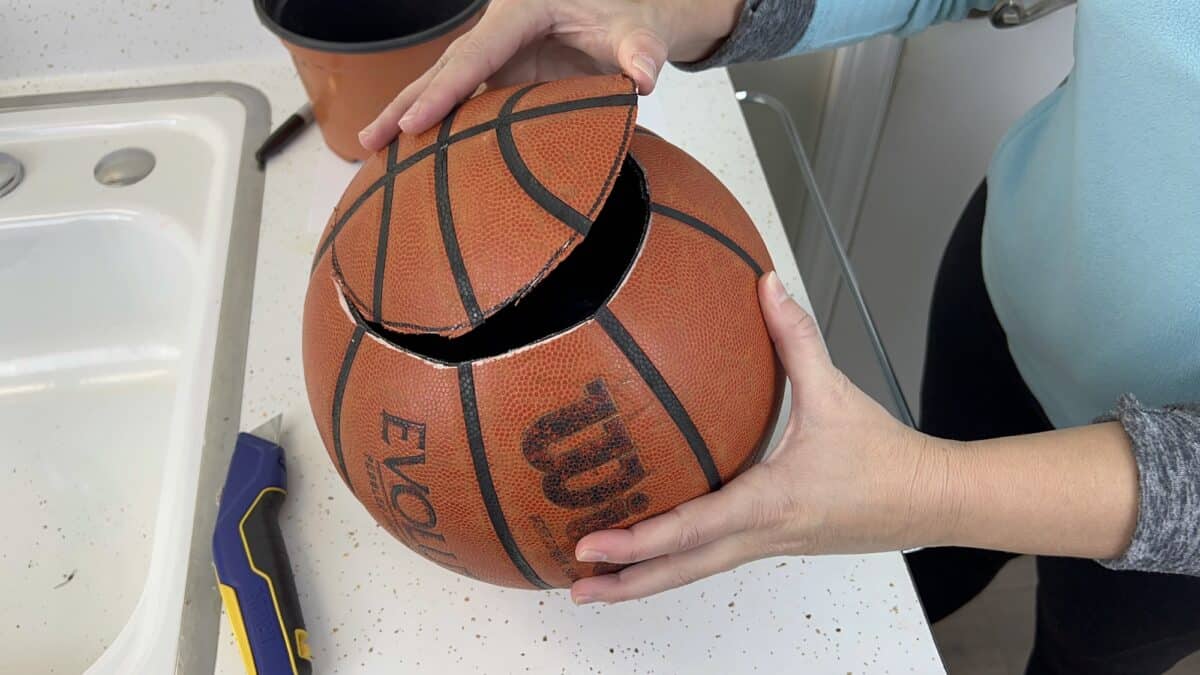

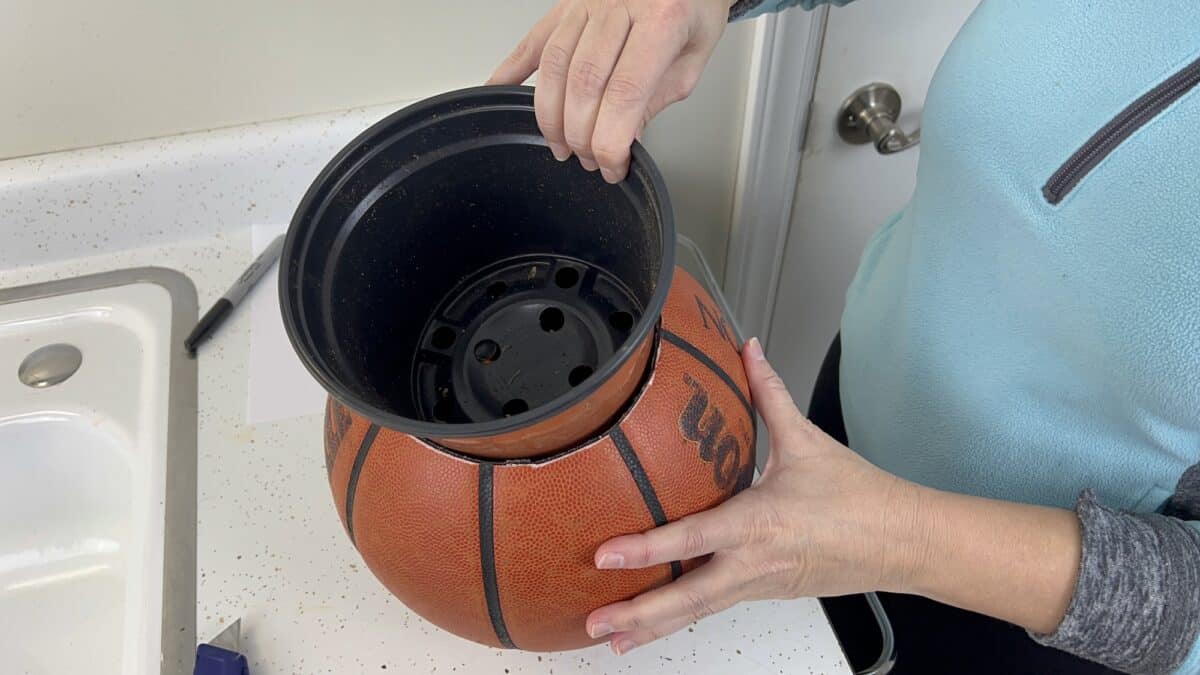
Try putting the pot inside the hole. If it doesn’t fit, trim the sides of the opening until the pot easily goes into the basketball but hangs over the edge just a little so that it doesn’t fall through.


If you’d like, spray paint the basketball. Let dry completely.
Cut eight 4-foot sections of yarn. Tie the bottom of the strands of yarn together in a knot, leaving enough hanging down to form a tassel.

At the other end of the yarn, tie all of the pieces together in a double knot to make a hanger.
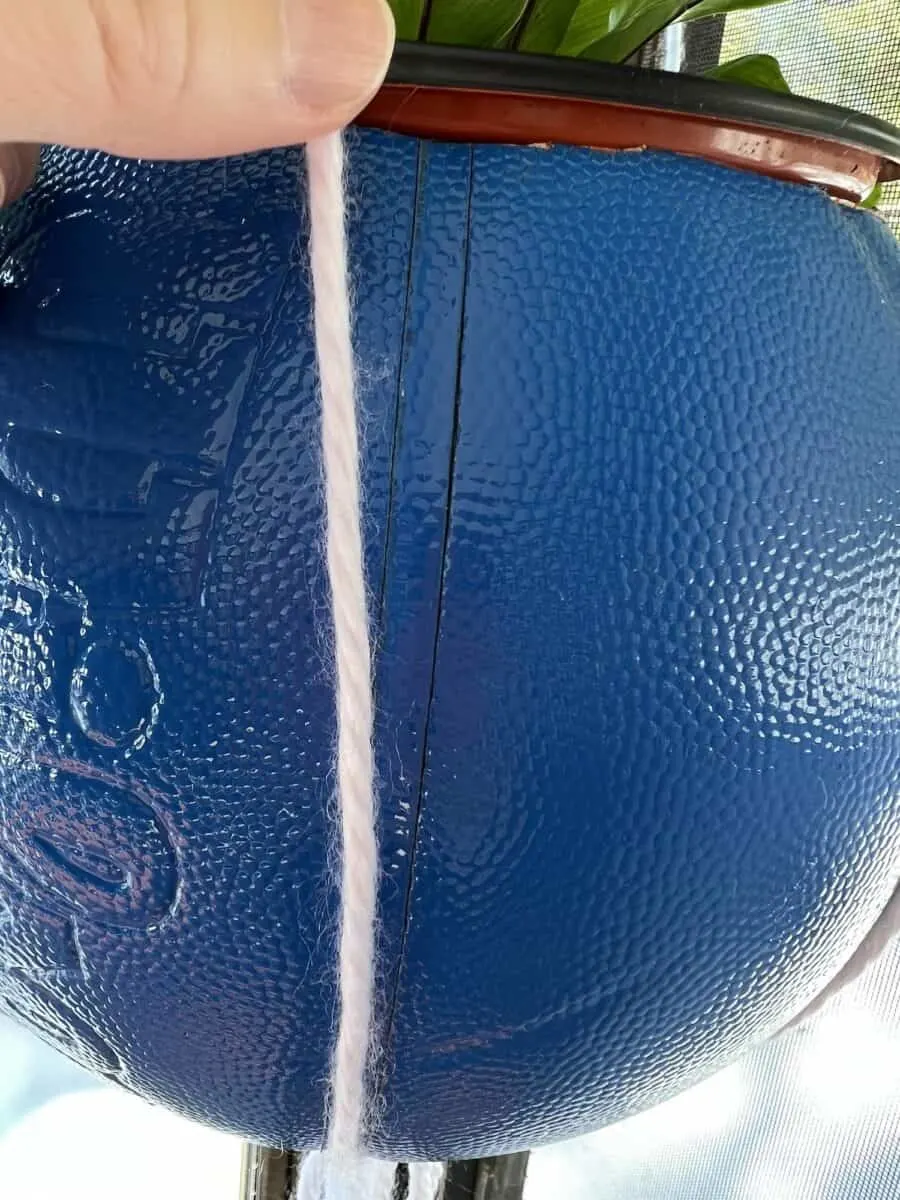
Position the basketball on top of the bottom knot with the tassel. Place each piece of yarn over one of the vertical seams of the basketball.

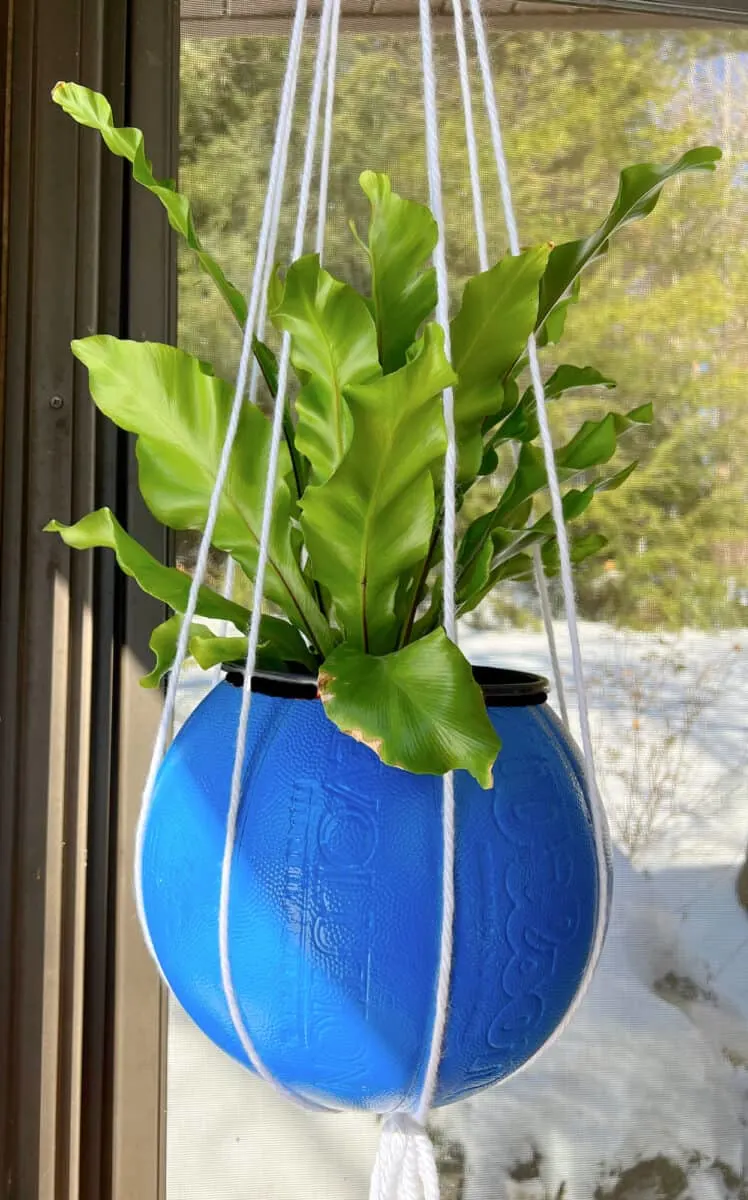
Hang the basketball planter. Add your plant pot inside. When watering, remove the pot to prevent water dripping inside the planter and causing mold.
Be sure to see my video below for even more detailed instructions.

If you love this DIY Basketball Planter, then you might want more ideas for upcycling crafts. Check out these fun finds:
