


Mushroom decor is very popular at the moment. Everywhere you go you can find mushroom decorations. Including the Dollar Tree.
I had an idea for making a mushroom wreath for a few months. It wasn’t until I walked into the Dollar Tree with my mom and we found these foam mushrooms and woodland craft supplies that I decided how to make the wreath I had been envisioning.
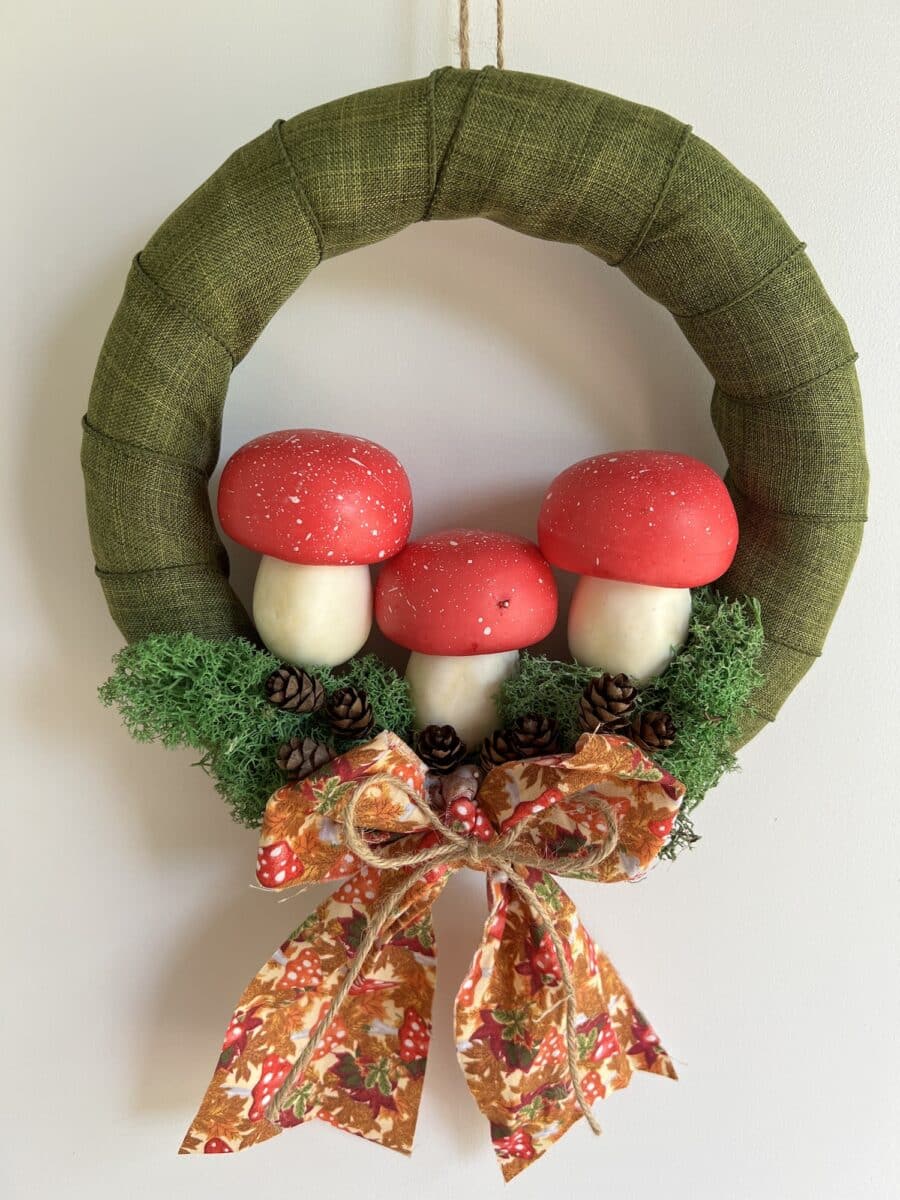
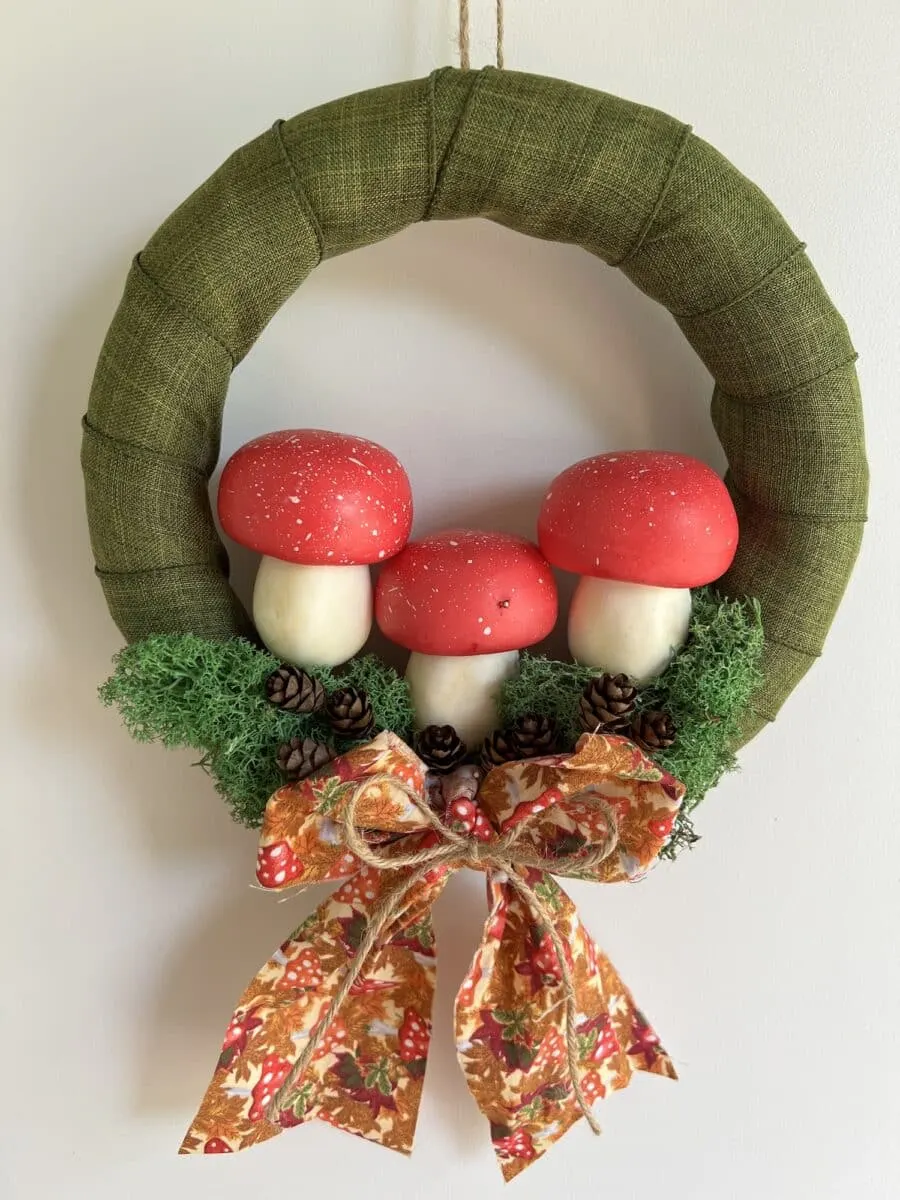
Everything came together at once and I only spent around $5 to make this wreath! I actually spent less because I only used a portion of the craft items, which means I have leftovers to make another craft!
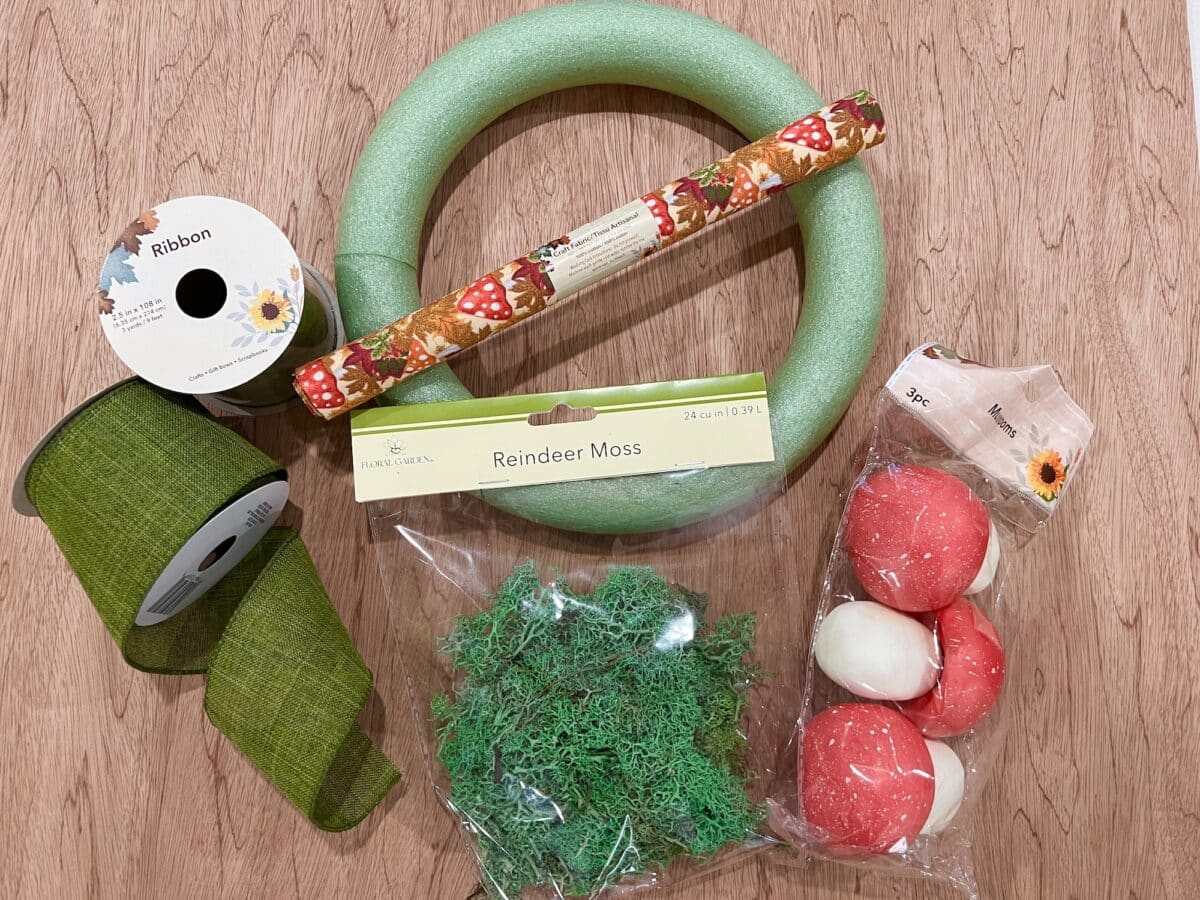
All of the supplies that I used I bought on the shopping spree with my mom at Dollar Tree. Let’s face it, though, not every dollar store has the same supplies available. So I’ve added links to similar items for your convenience.
If you love the Cottagecore look (cozy decorating with natural elements), then check out these DIY projects, too:
Helpful Tips
- Use whatever size wreath form you have. I think a 10-inch wreath form is a bit too small, but it is what I had and it worked.
- A grapevine wreath or straw wreath would also look great with this craft. You won’t need to wrap the form with ribbon if you are using natural elements.
- Instead of using fabric strips, you can use a complimentary ribbon to make the bow.


Easy DIY Mushroom Wreath
Supplies
- Wreath Form (I used a 10 inch styrofoam wreath form, this one is similar)
- Moss Green Ribbon, 2.5 inches wide (I used one roll (9 ft) of moss-colored ribbon from Dollar Tree, but this ribbon is almost the same)
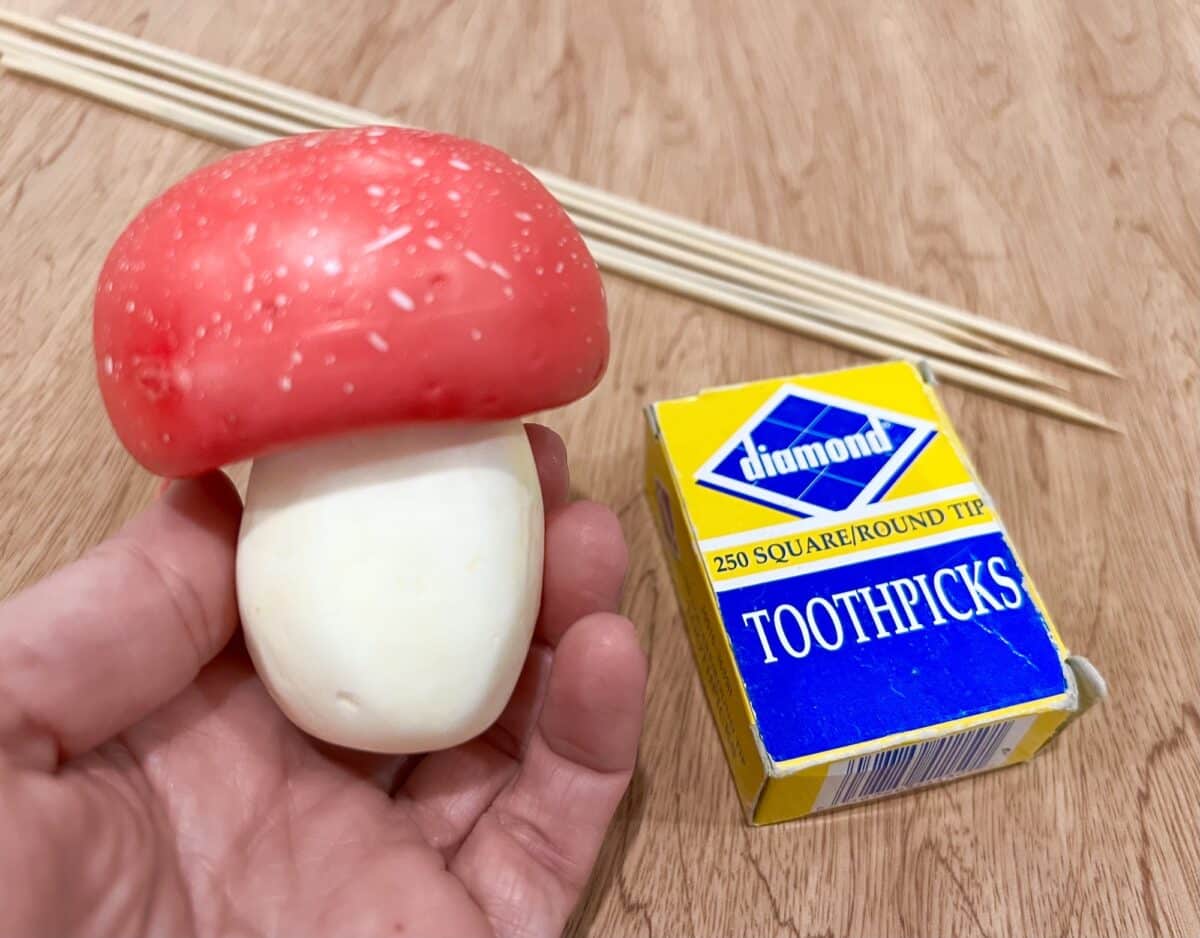
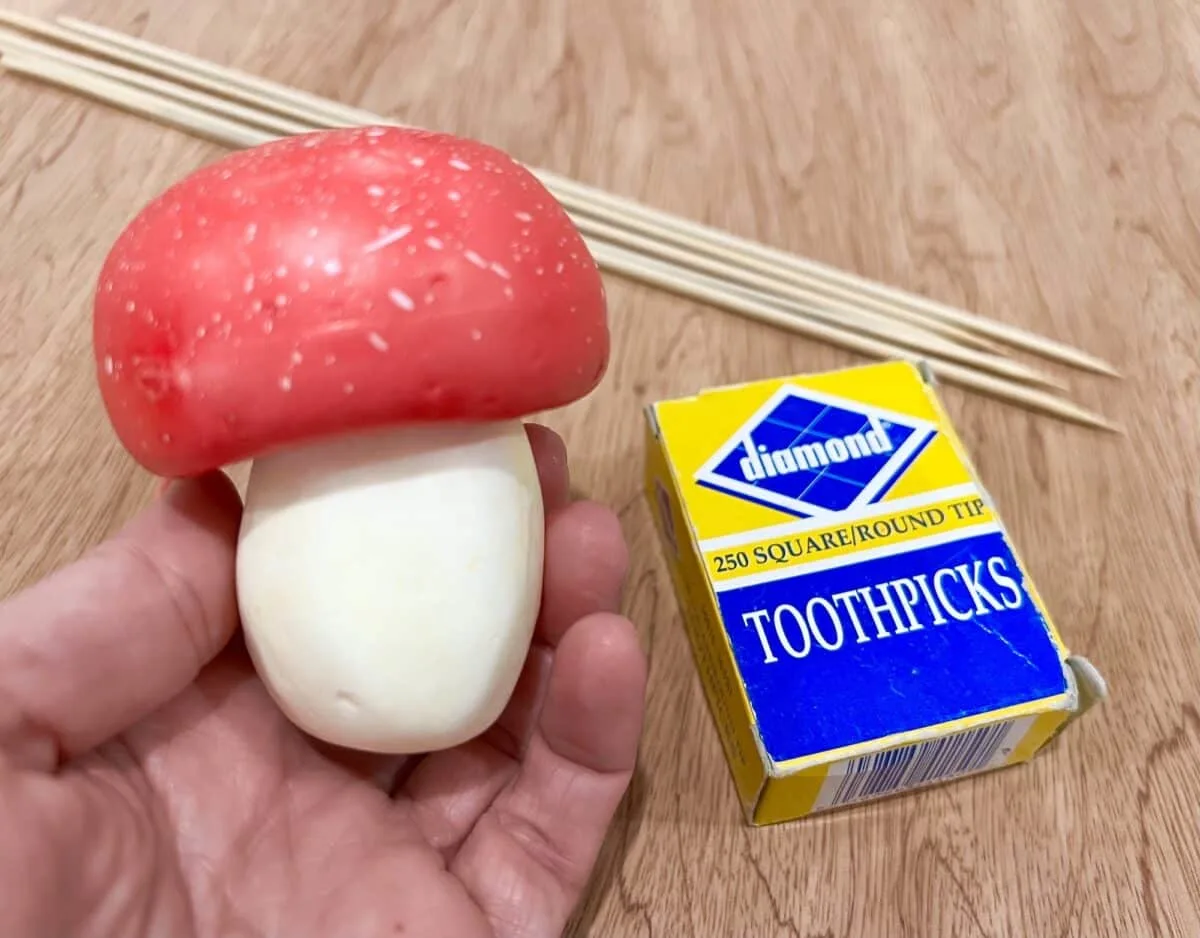
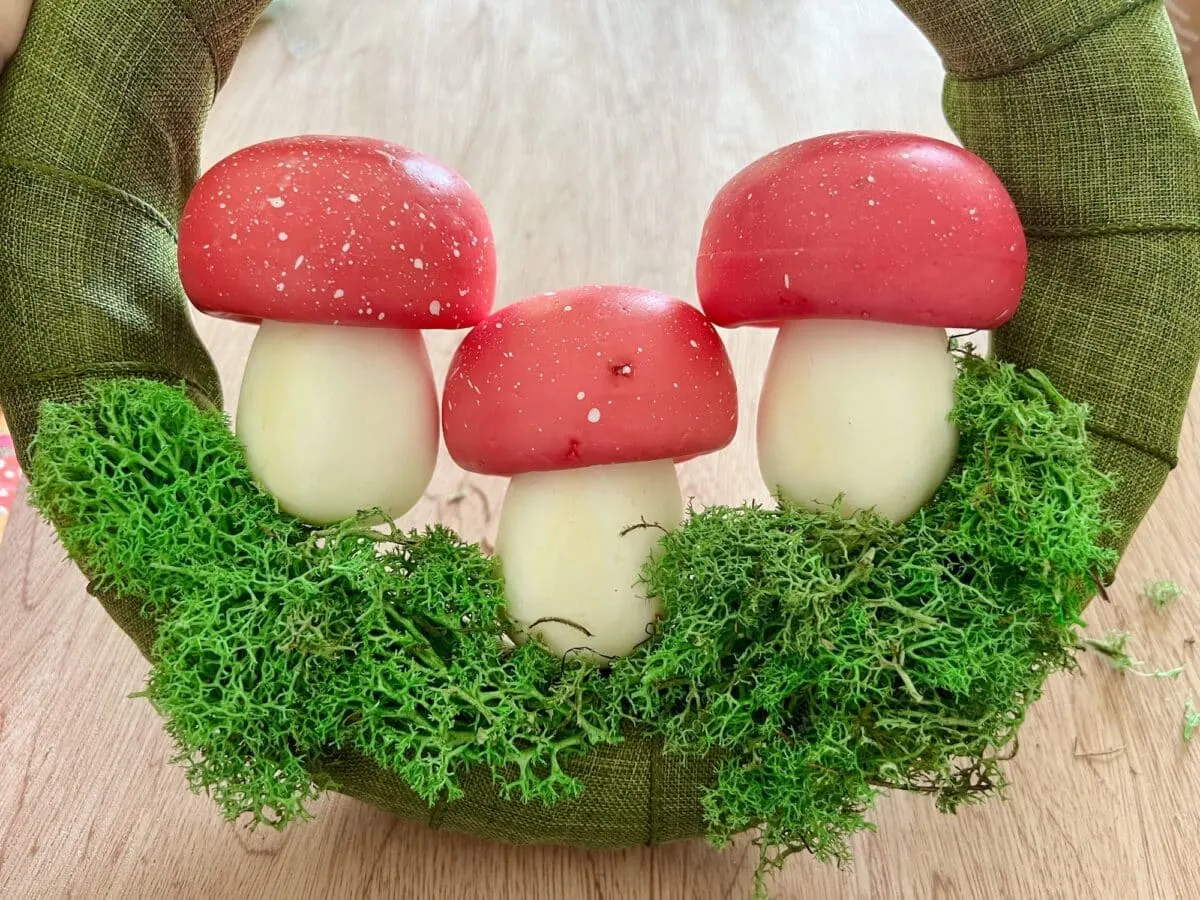
- 3 Faux Foam Mushrooms (Dollar Tree, these are similar miniature mushrooms)
- Green Moss (Dollar Tree, this moss is similar)
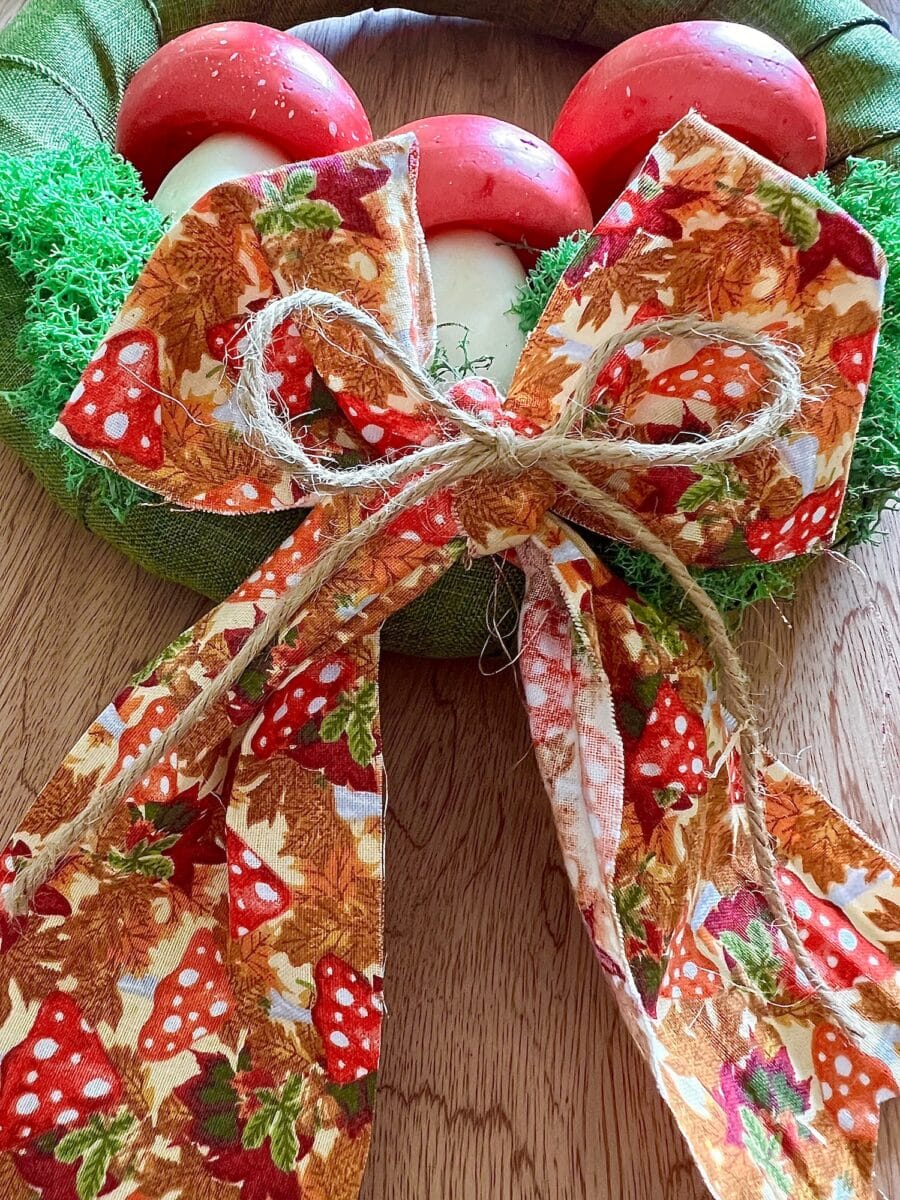
- Mushroom Print Fabric Quarter (Dollar Tree, this fabric is similar)
- Twine
- Toothpicks or Bamboo Skewers
- Glue (either craft glue or hot glue)
- Straight Pins (optional)
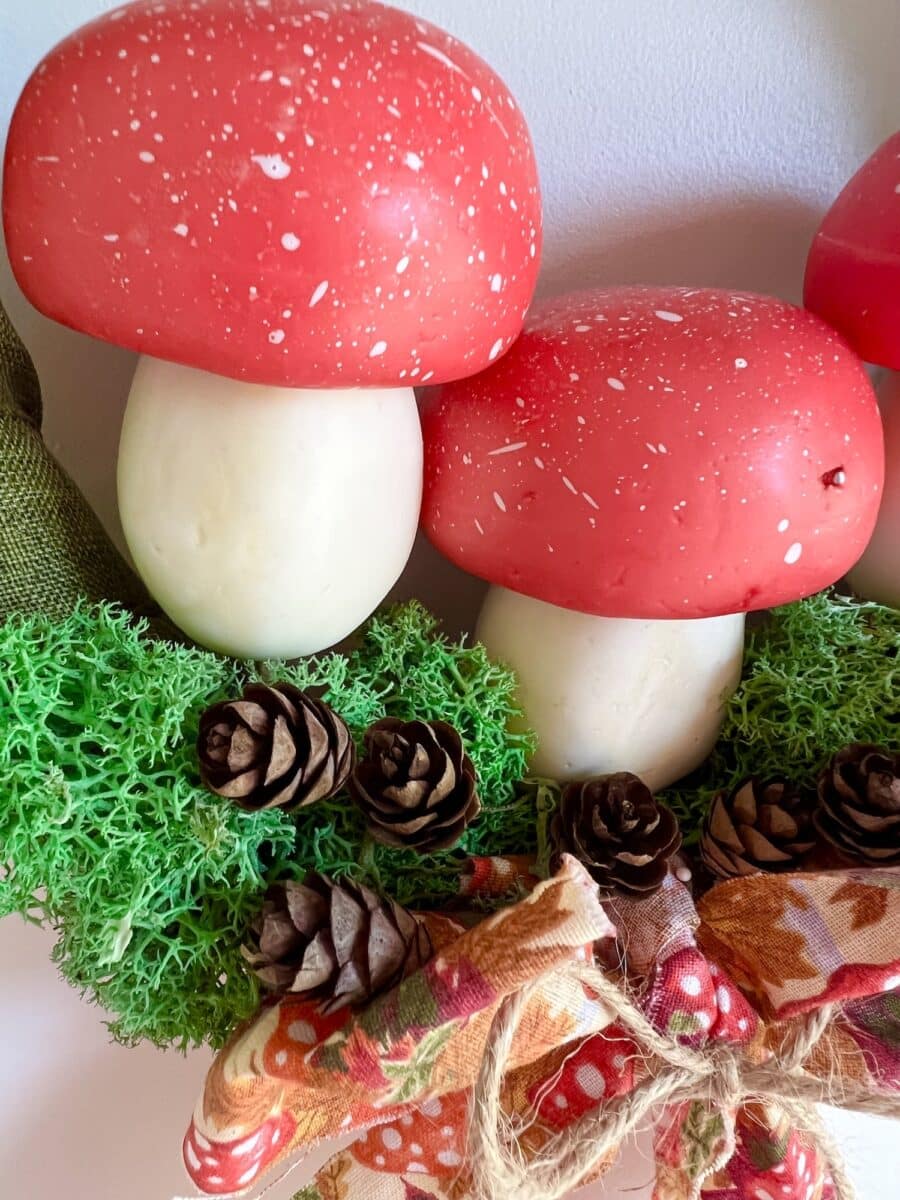
- Pinecones and other other natural materials (optional)

Directions
Step 1
Wrap the ribbon around the wreath form, overlapping the edges.
I pinned down the starting edge with pins, then wrapped the ribbon until I used the entire roll.

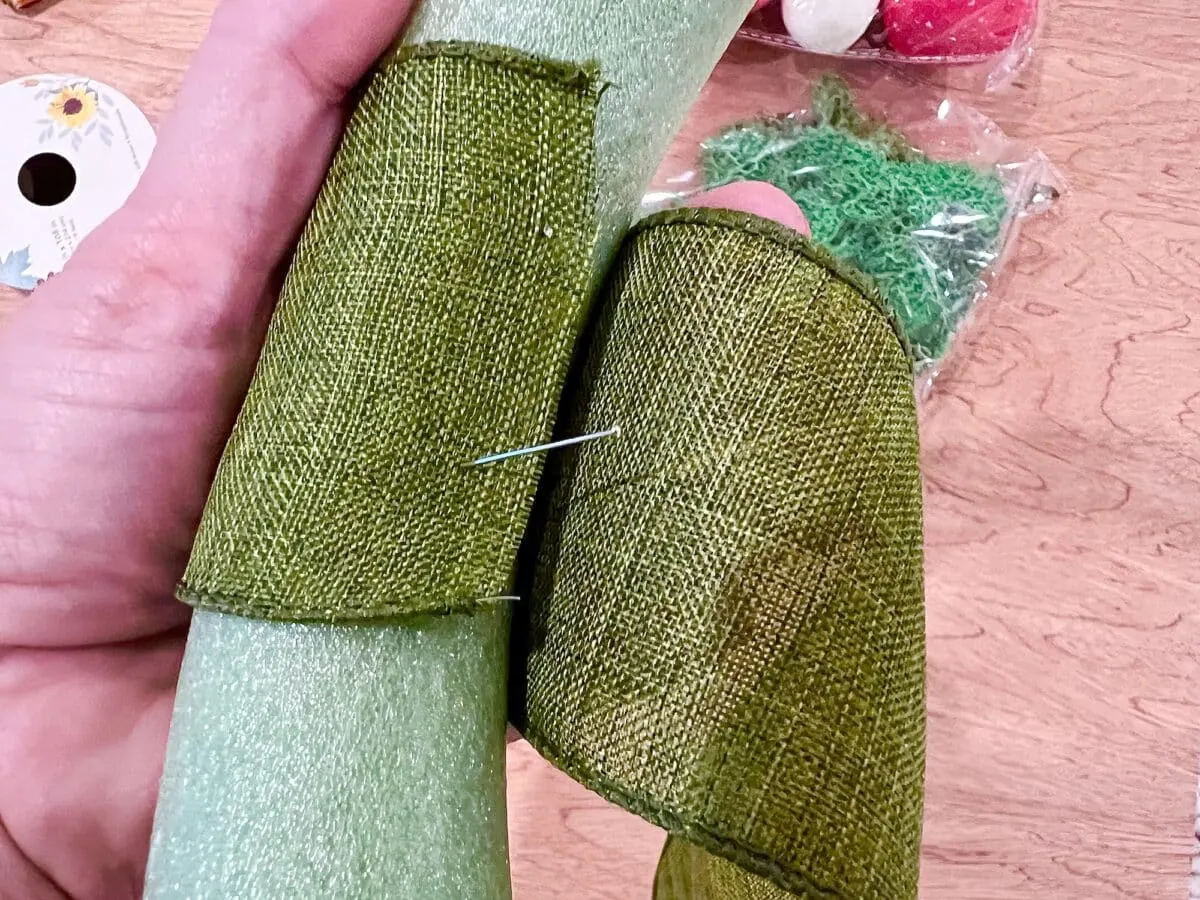
You can attach the ribbon with glue if you would like.
Wrapping a 10-inch wreath form did not use all of the ribbon on the roll. I did have some leftover.

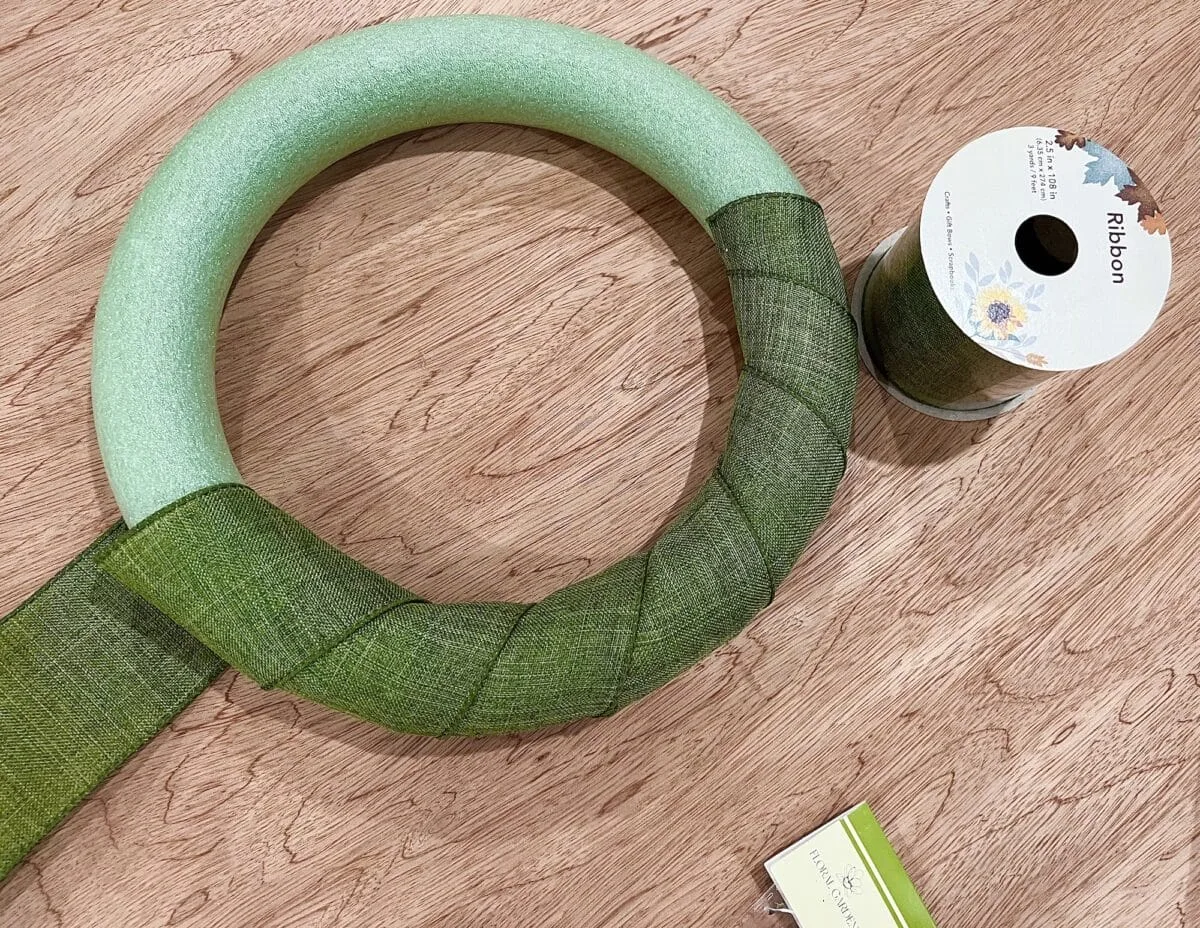
I then pinned down the edge in the back with push pins.


Step 2
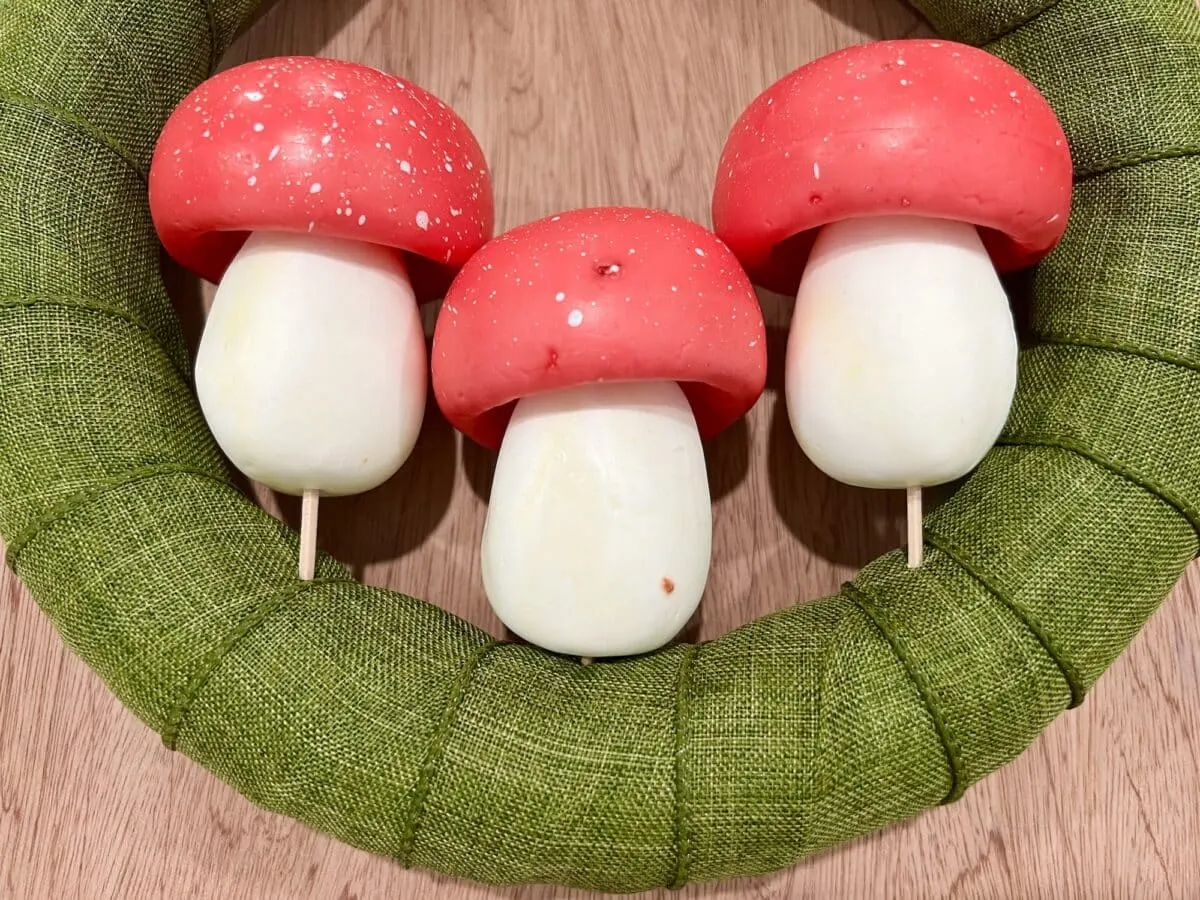
Insert a wooden toothpick into the base of the foam mushroom. Push the toothpicks in at staggering depths so that the mushrooms are not all the same height in the wreath.
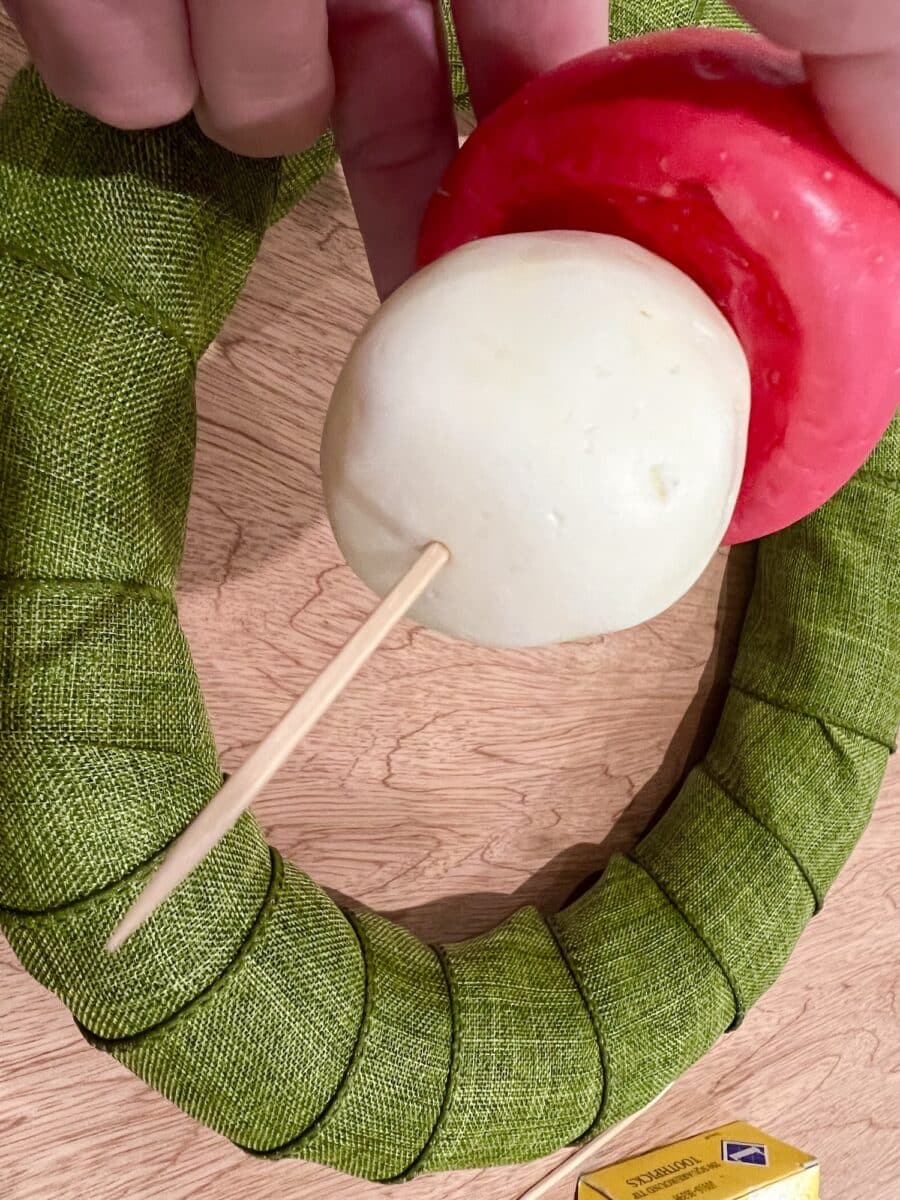
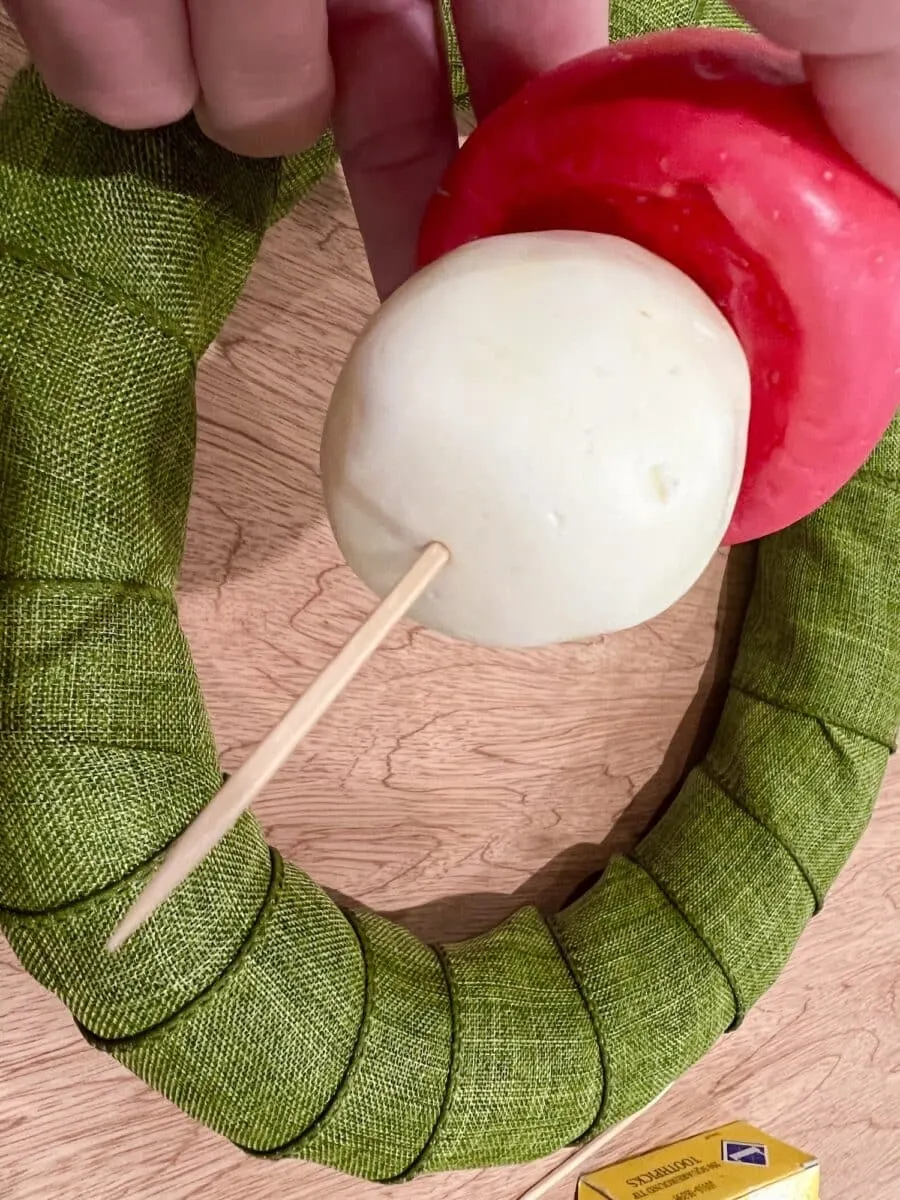
You could cut down a bamboo skewer and use it to insert into the mushroom if you would like.
With the mushroom on one end of the toothpick, push the empty end into the wreath form. I pushed the toothpick through the ribbon and into the wreath.
It is okay to leave parts of the toothpick exposed to give the mushrooms different heights.

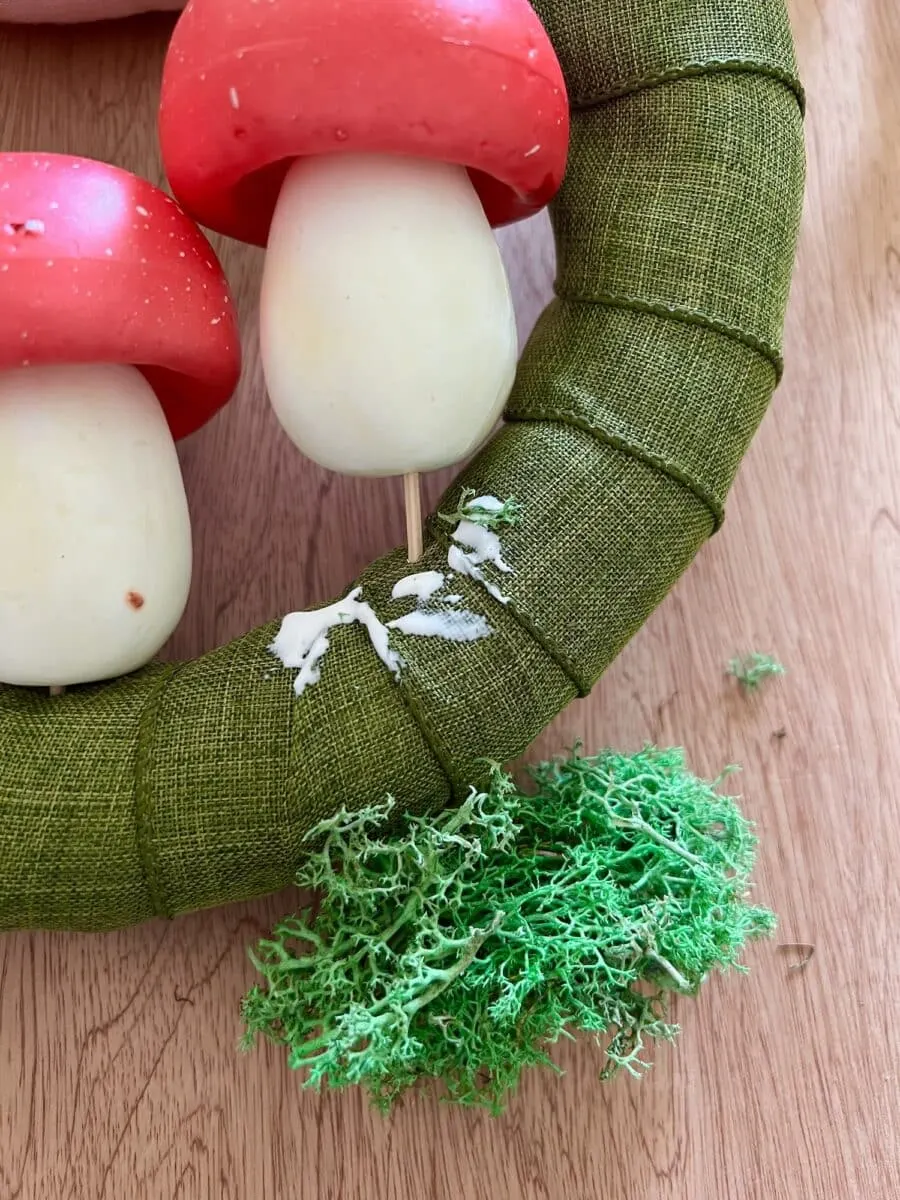
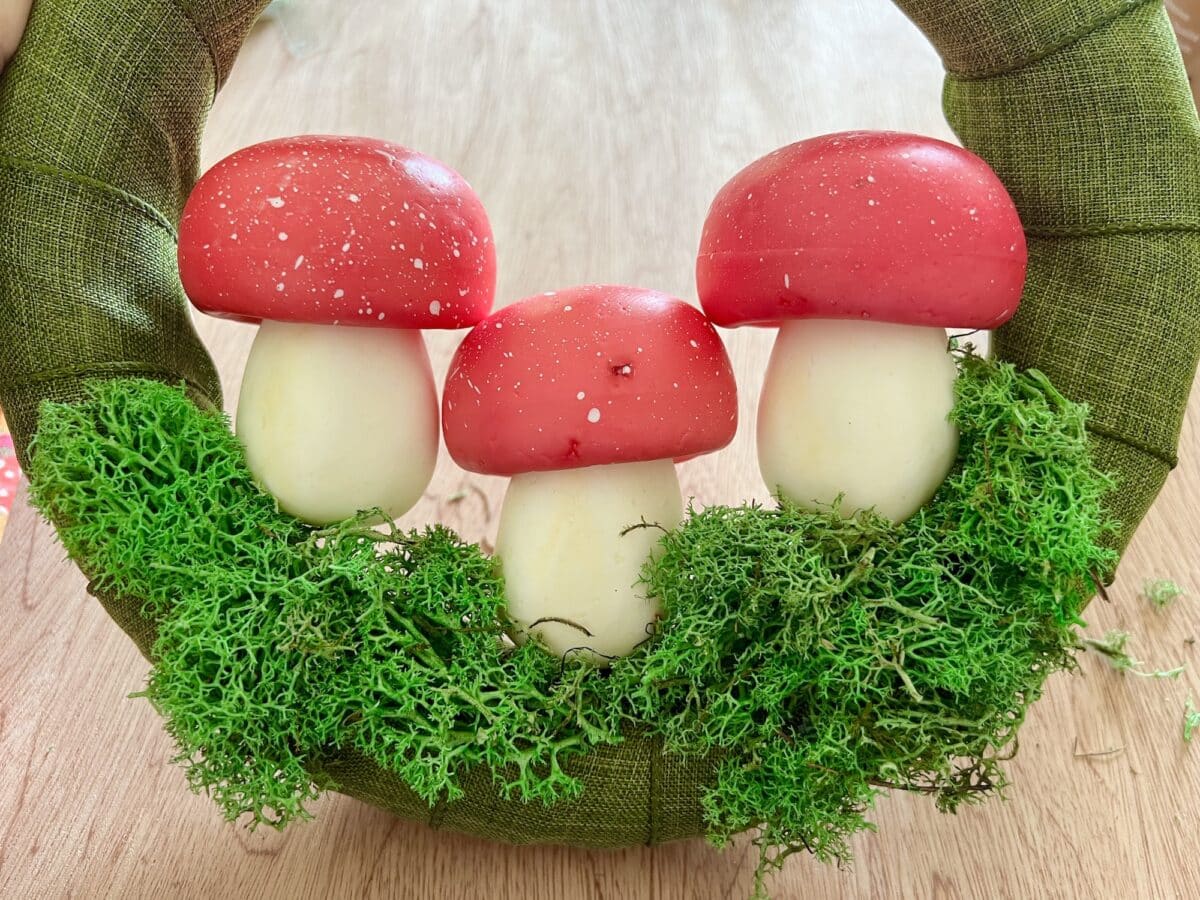
Step 3
Glue moss around the base of the mushrooms and onto the wreath form. Be sure to cover up the exposed toothpicks, if necessary.

Step 4
Cut the fabric into a 3-inch wide strip. I cut two strips of fabric across the width and tied them together in a knot to create one long piece. However, cutting one strip vertically on the fabric would work, as well.
Step 5
Tie the fabric strip into a bow. Glue it to the base of the wreath just underneath the mushrooms.
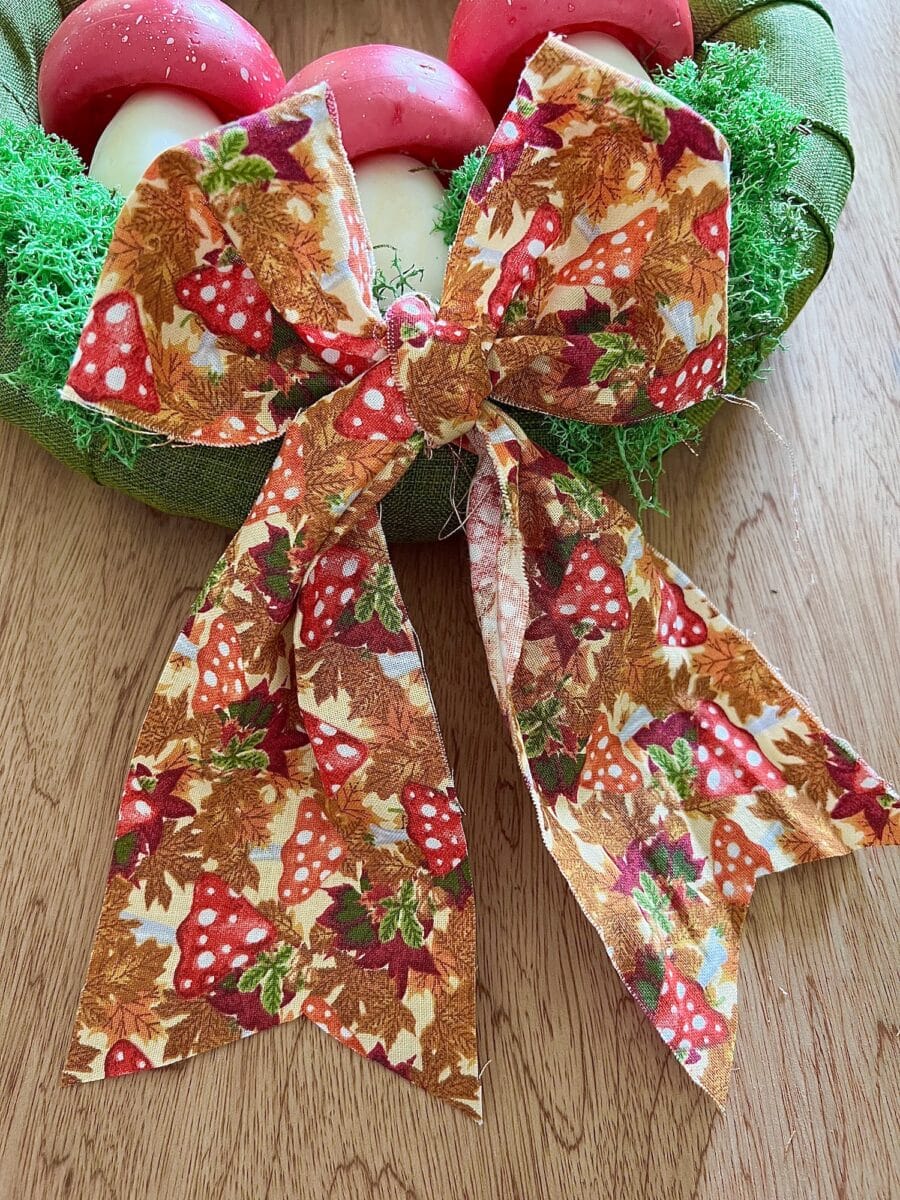

Trim the tails of the bow to the desired length. Notch the ends if you would like.


Don’t worry about the edges of the fabric fraying. It gives the wreath a more natural and weathered look.
Want more ways to make bows? Check out these bow tutorials:
Step 6
Using about 18-inches of twine, tie another smaller bow with the twine.
Glue the twine bow onto the fabric bow.

Step 7
Glue small natural elements, such as tiny pinecones or acorns, into the moss.

Step 8
Create a wreath hanger by tying another piece of twine into a loop to fit your door. Glue or pin the loop to the back of the wreath and use as a hanger.
I used a 12-inch piece of twine tied into a knot at the ends as my loop, but you may need a shorter or longer loop.


If you like how easy it is to make this mushroom wreath, be sure to see all of my DIY wreaths for every season!
