
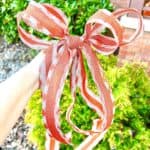

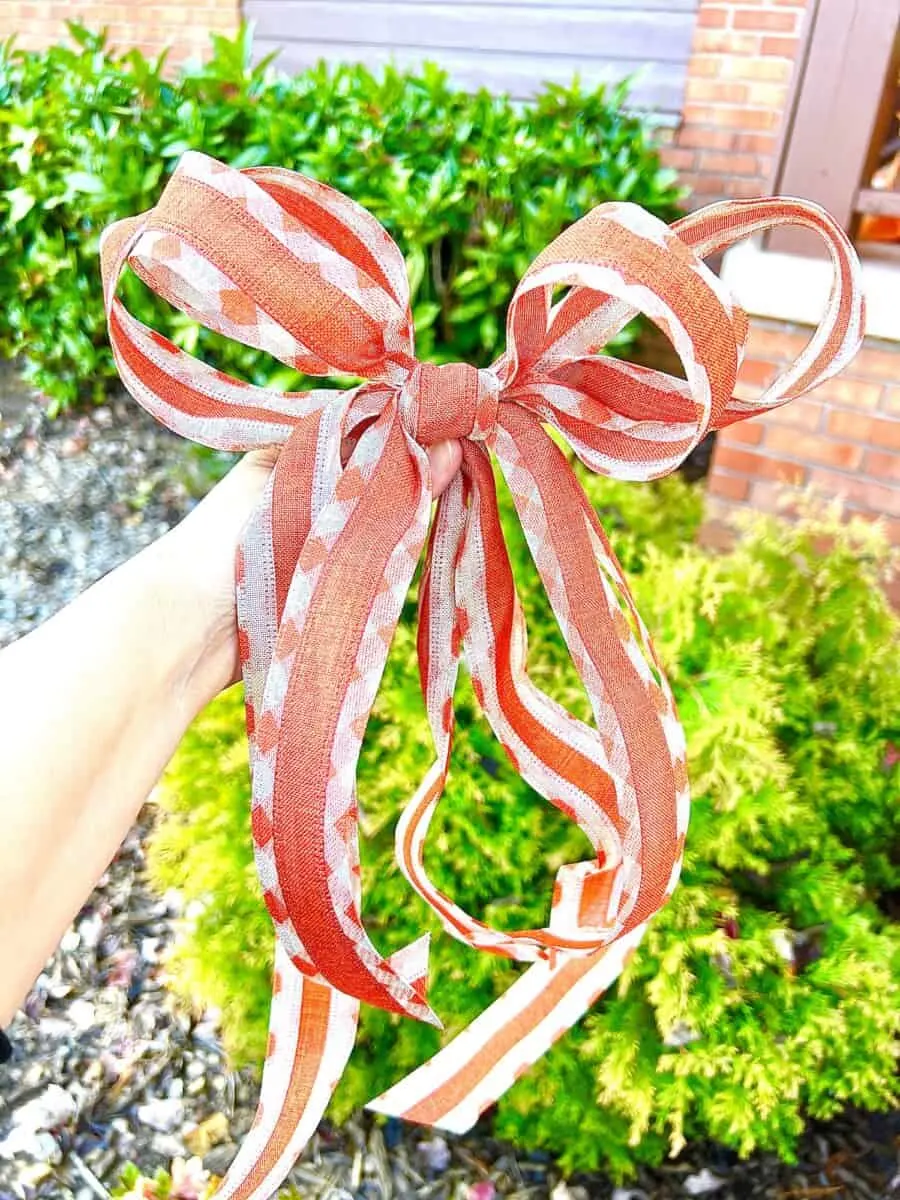
Making a big bow to decorate a railing, wreath or Christmas tree is easier than you think! Here are the easy instructions for how to make a bow with wired ribbon.
Buying pre-made bows can be very expensive in the stores. Save a lot of money by learning how to make bows with wired ribbon.
Forget those complicated tutorials with lots of measurements and folding. If you can tie a bow on your shoe, then you can make these gorgeous bows! So let’s get started.

Once you learn this skill, you will be able to make large and small bows for all holidays and all occasions!


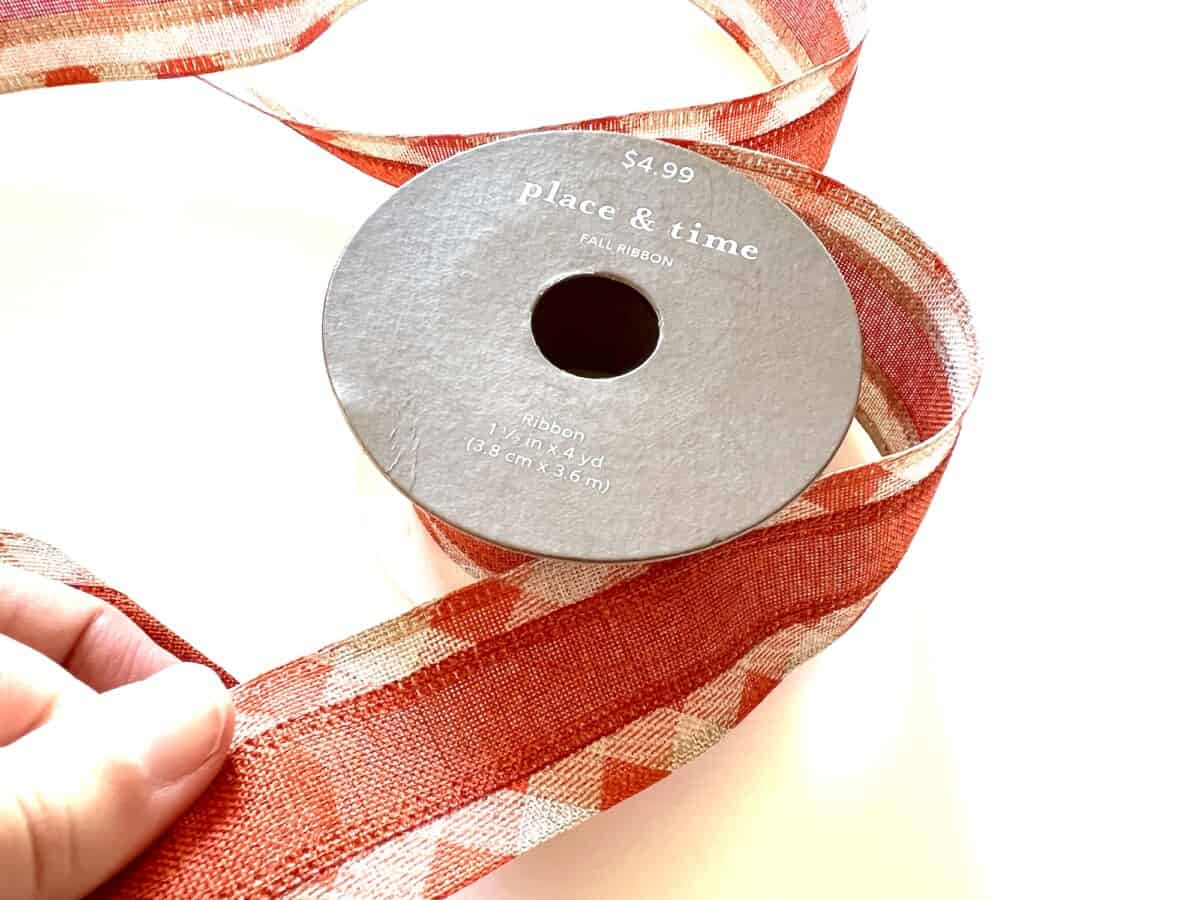
Not every roll of ribbon is the same. They will come in a variety of lengths and widths. Some ribbon will have a wire edge and many will not.
For helpful hints in choosing the right type of ribbon to make bows, see our FAQs section below.
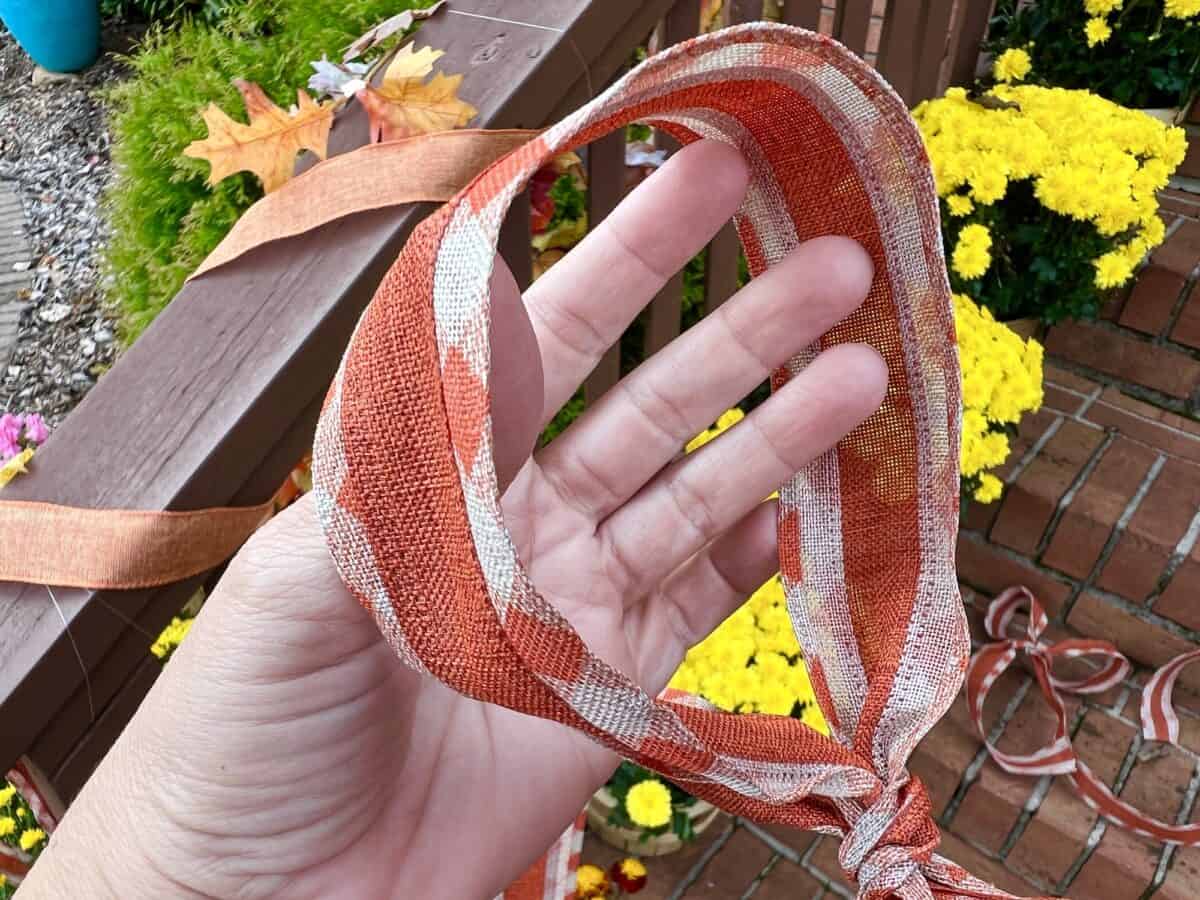
I used a 4-yard (12 feet) roll of wired ribbon to make my bow. It is the perfect size for making big, loopy bows.

Smaller ribbon rolls, such as 3-yard rolls of ribbons, will have less ribbon to use, so your bows will be slightly smaller.


These bows are perfect for decorating wreaths, Christmas trees and outdoors. See my DIY wreaths for great ideas to use these bows!
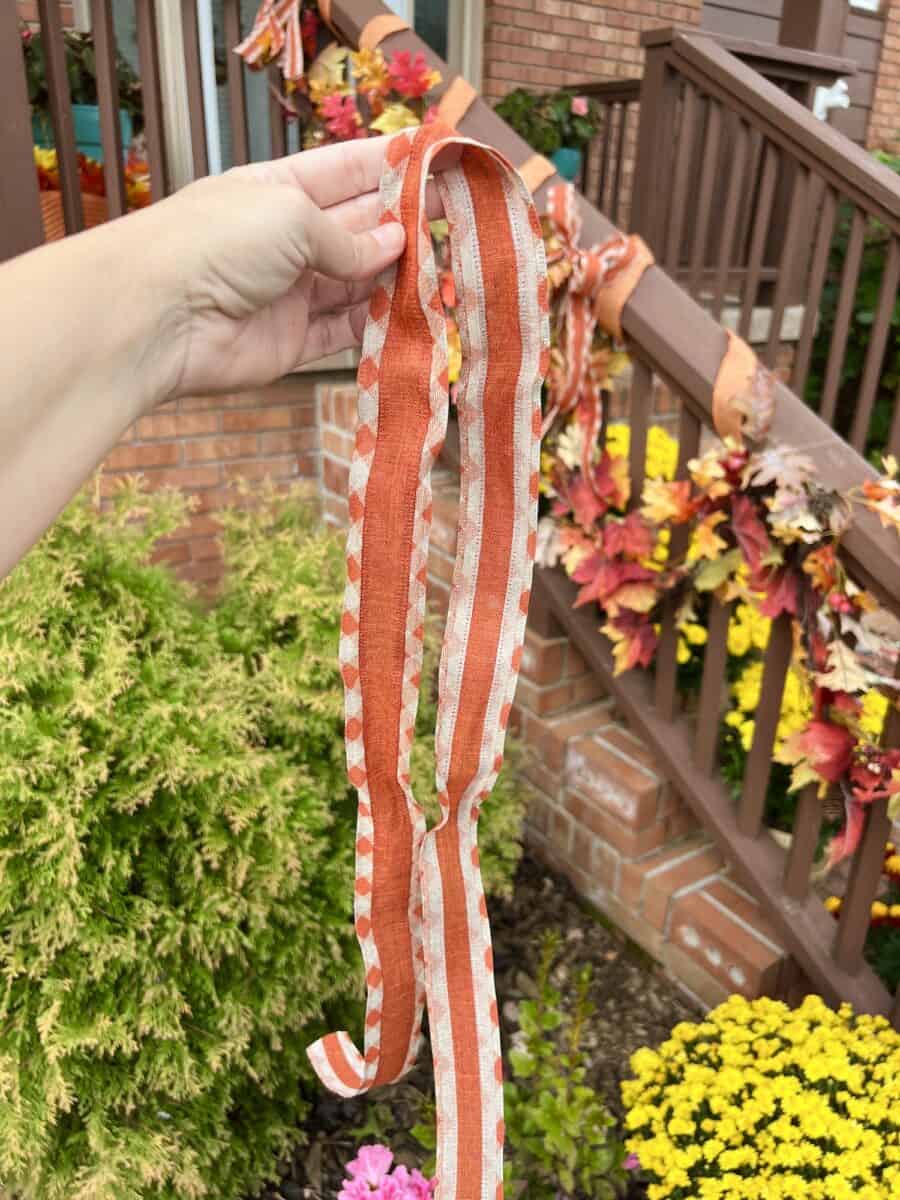
As you can see, these bows were used on my porch railings. Here are more ways that I decorated my porch for Fall on a budget.
How to Make a Bow with Wired Ribbon
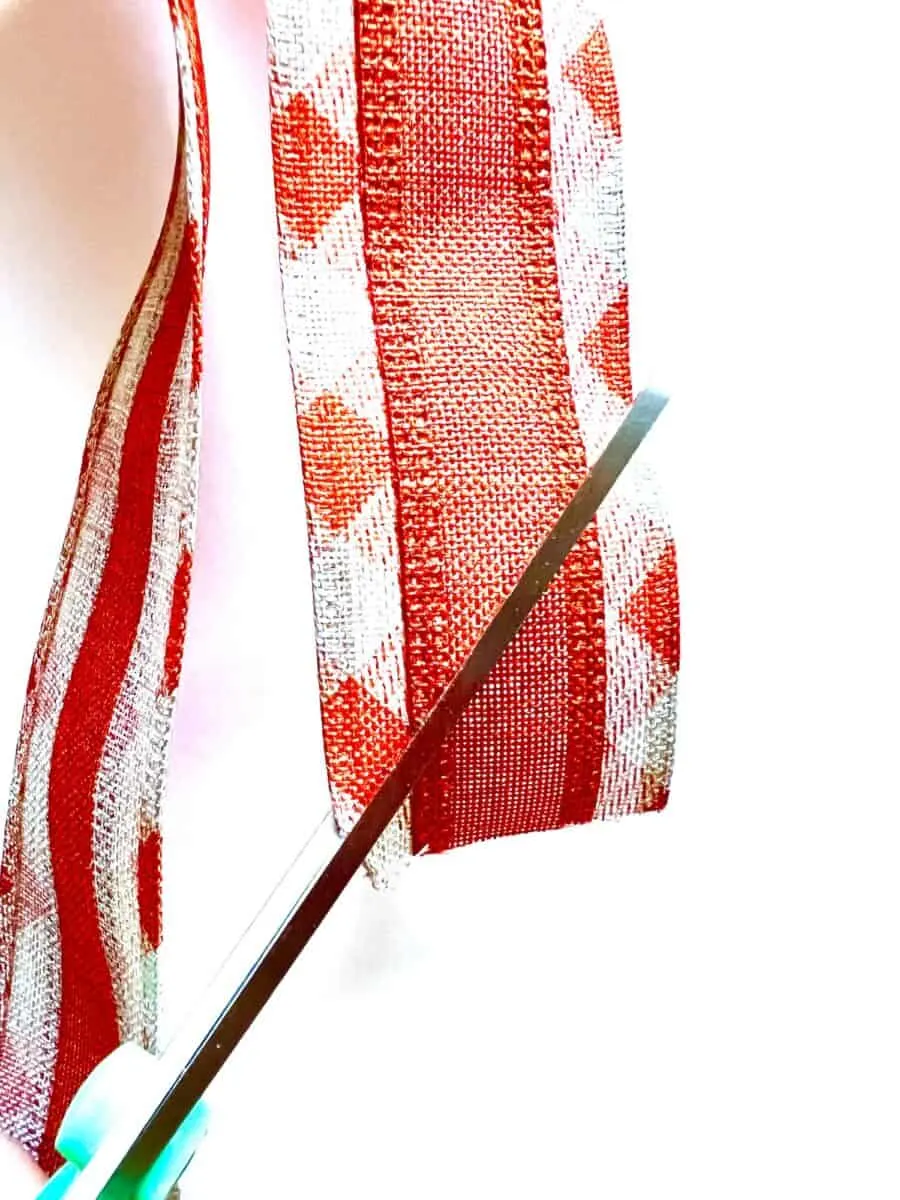
Remove the wire ribbon from the roll. Cut into three sections.
I use normal everyday scissors to cut the wire ribbon. The wire is so thin that it is easily cut. No need to buy specialty scissors.
For a 12-foot roll of ribbon, these are the measurements that I used:
- 48 inches
- 62 inches
- 30 inches

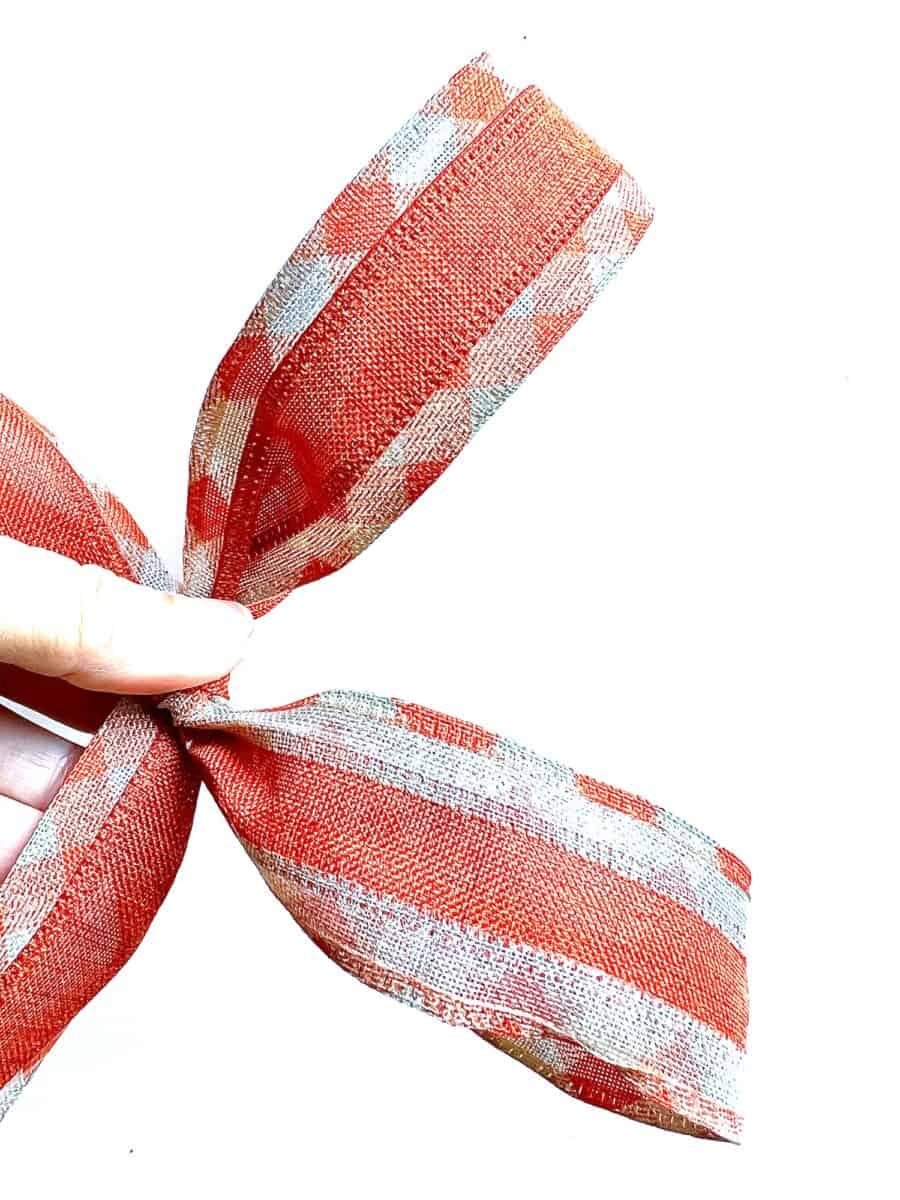
Take the 48-inch piece of ribbon and tie in a bow. You don’t need to use any fancy method, just tie a bow like you normally would.
Chances are your bow won’t be perfect the first time. One tail might be longer than the other. In that case, just untie the bow and keep trying again until the tails are about even and the loop is as big as you would like.


Fluff out the bow’s loops by putting your hand in the loop and pushing it out with your fingers.

One of the loops will probably be showing the wrong side (not the finished side) of the ribbon. Just twist the wire ribbon to show the finished side facing outward.
Next, take the 62-inch ribbon section and repeat the same steps above. Make this bow a bit larger than the smaller bow. The loops should be about an inch or two bigger, and the tails will be a little bit longer, too.
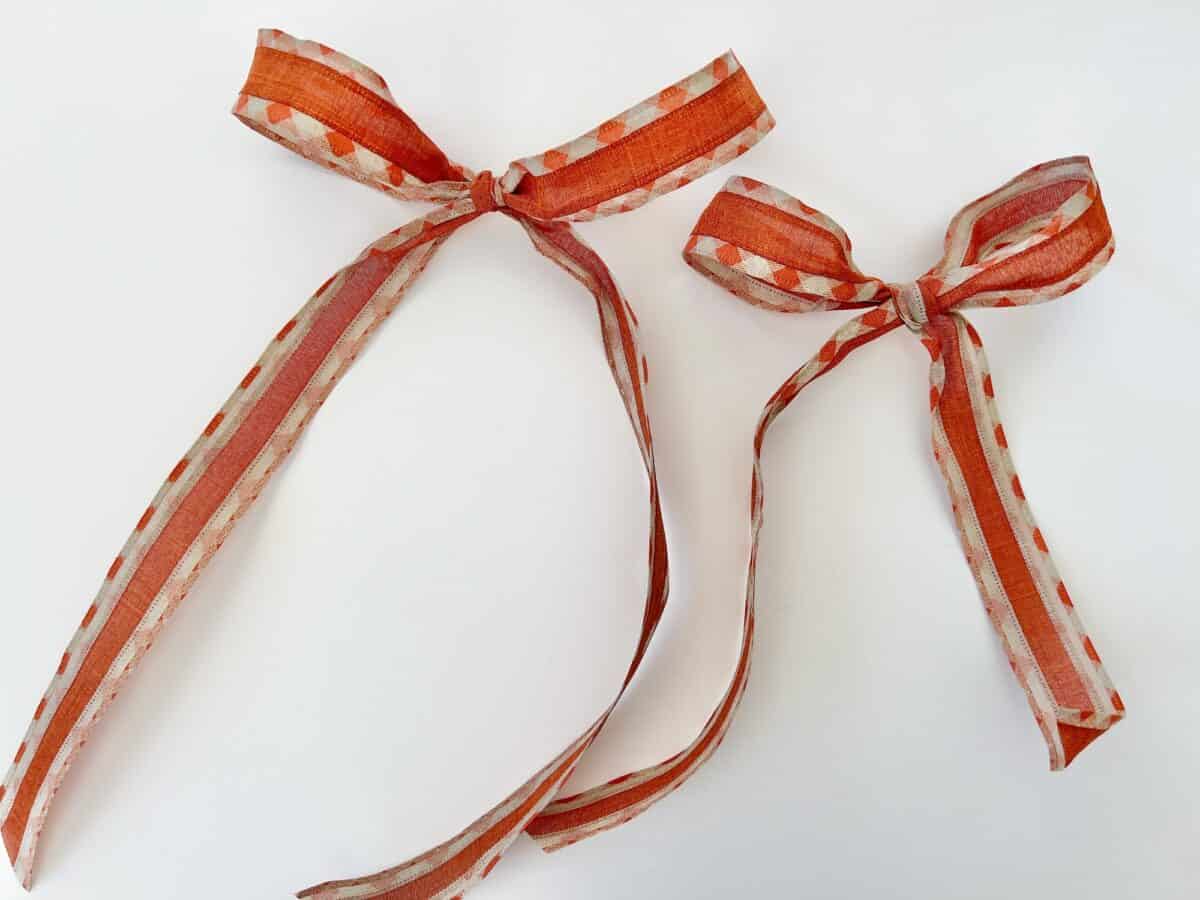
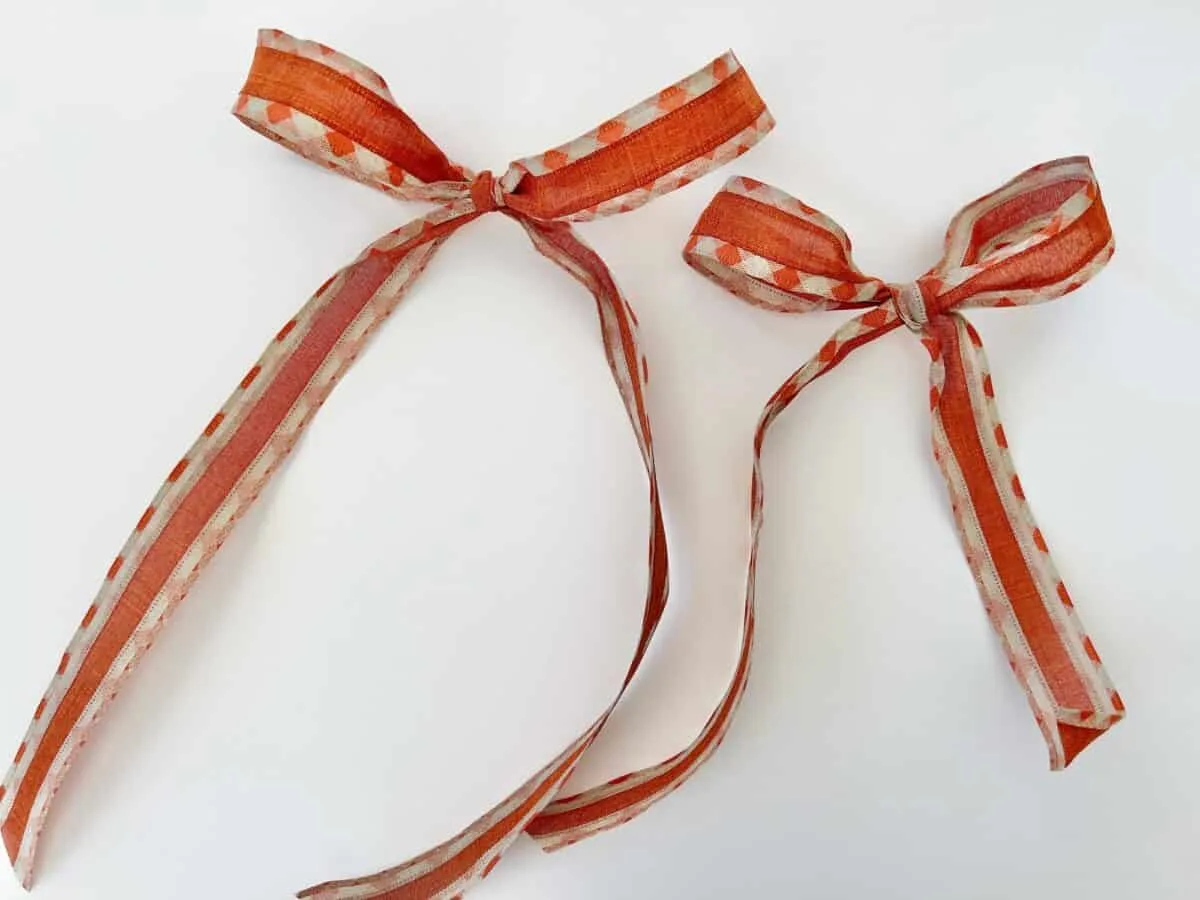
Now, lay the small bow on top of the big bow.


Using the 30-inch piece of wire ribbon, drape the ribbon over the center of the two bows. Make sure the right-side of the ribbon is facing outward.

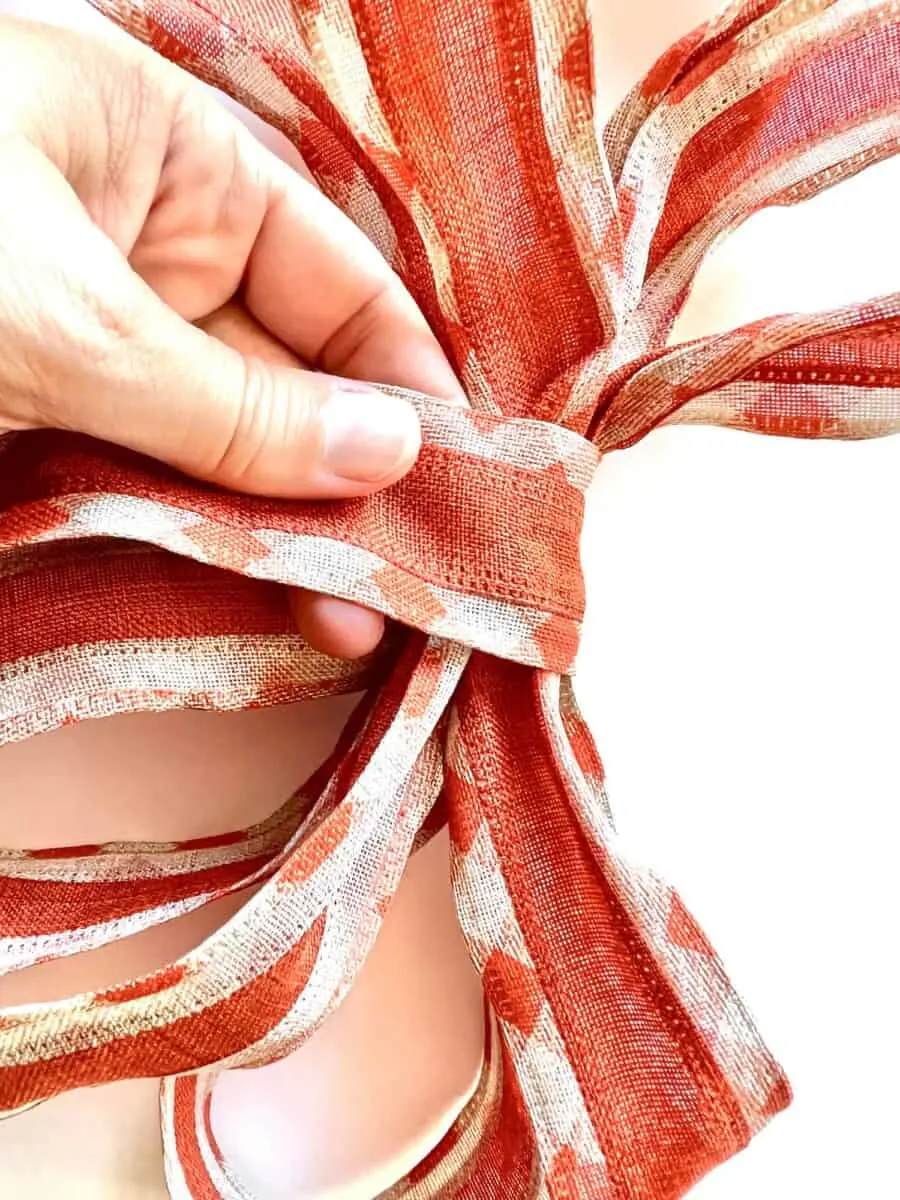
Then, tie a knot in the ribbon piece underneath the middle of both bows. This piece of ribbon will now hold both of the bows together.

Arrange the ribbon so that the tails hang down with the tails of the bows, and so you cannot see the knot.
Optional step: If you want to hang the bow, you can put a long piece of yarn, pipe cleaner or fishing line in the back of the two bows before securing them together. Afterwards, tie a knot in the yarn or fishing line to create a hanger.

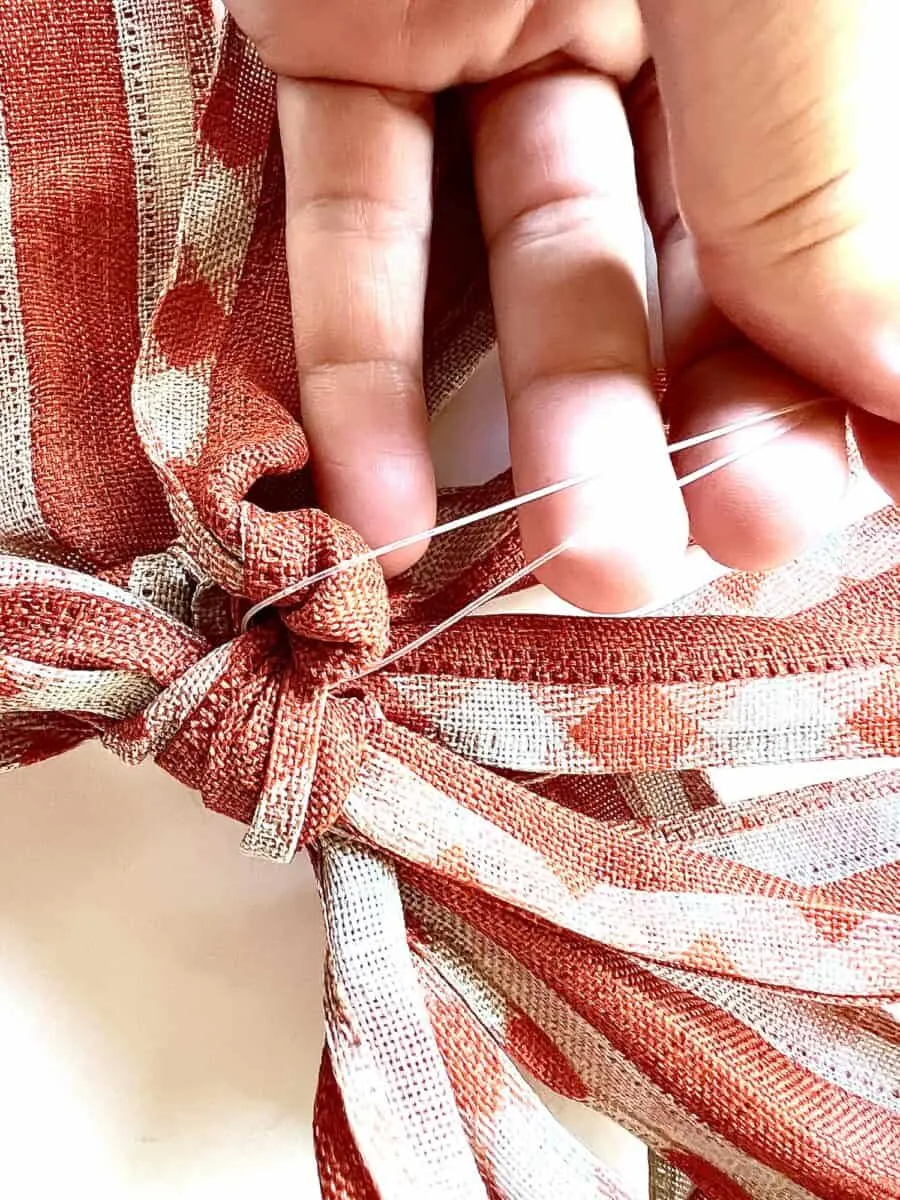
I personally just cut a piece of fishing line after making the bow and gently push it through the back of the bow underneath the knot.
A large yarn needle can help you thread ribbon, yarn or fishing line through the knot more easily.
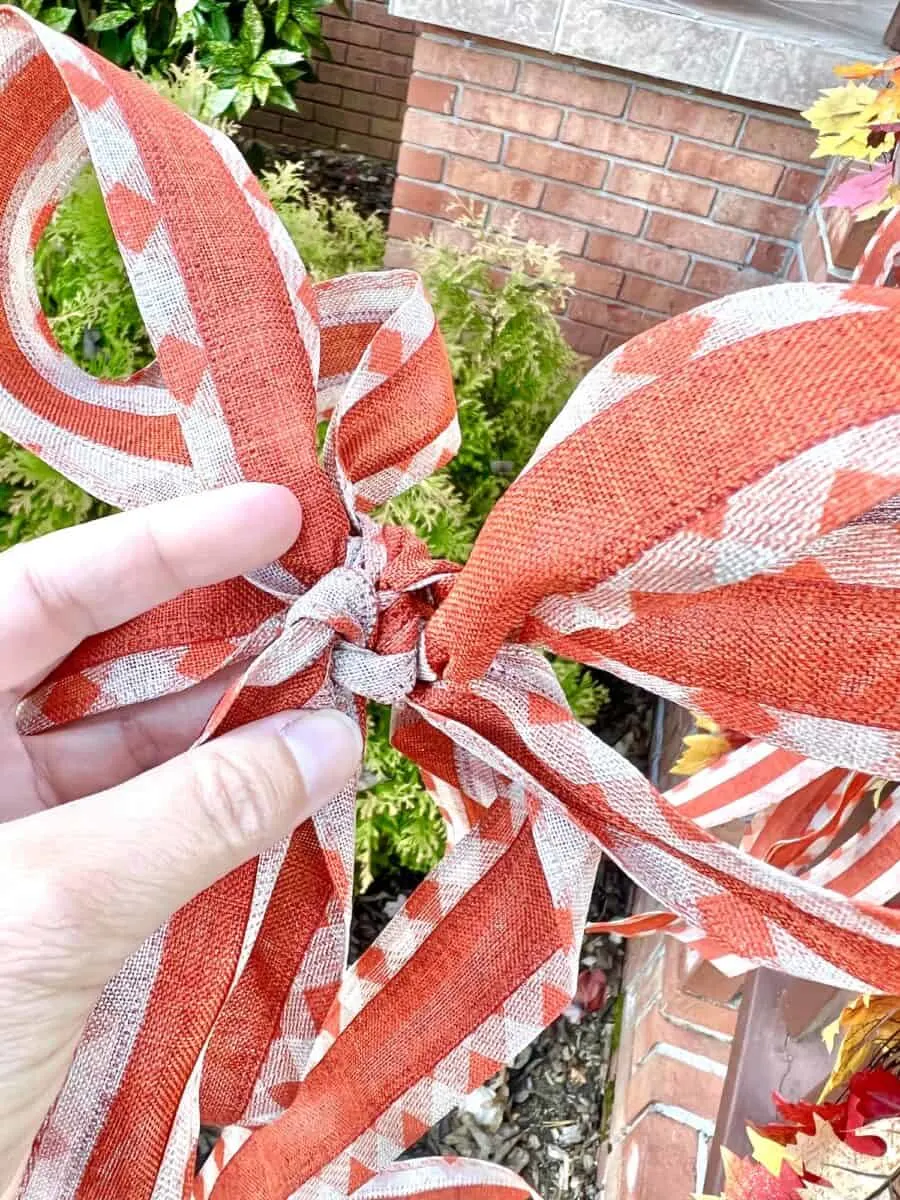
Fluff out the wire ribbon loops to be as big as possible. Arrange the loops to your liking.
If desired, trim the bow tails. You can also cut the end of the tails in a diagonal cut, if you would like.

There are many ways to make a bow. Check out my tutorial for how to make a bow for a wreath, that uses a different method for a different style.
Also see how to make a burlap bow using inexpensive ribbon.
FAQs About Making Bows Out of Wired Ribbon
Do I Need Wired Ribbon?
You don’t have to use wired ribbon, but it sure does make it easier! The loops of the bow will not stay puffed out without the thin wire in the edges of the wired ribbon.
What is Wired Ribbon?
Wired ribbon is any type of ribbon that has thin, bendable wires in the outer edges. This ribbon is easy to mold into shapes and loops and keep the appearance, unlike fabric ribbons.
What Width of Ribbon Should I Use?
These instructions will work with any width of ribbon. However, you will probably use ¾ inch to 2 inch ribbon for making the bows.
Thin ribbons do not have enough space to be wired, so they will be harder to work with. Wider widths of ribbon, such as 3 inch ribbon or larger, will be hard to tie in a bow.
How Many Loops Are In This Bow?
These instructions for making a wire ribbon bow will have a bow with four loops. However, you can add as many loops as you would like.
To add more loops, add more bows and tie them all together. For instance, if you have three bows, then you will have six loops. Using four bows will give you eight loops.
For each bow that you add, you will add another two loops to your ribbon.
How Big Are These Bows?
You can make these wired ribbon bows as big or as small as you would like. It depends on how much ribbon you have as to how big you can make the bow.
If you would like to make a really huge bow for outdoors, you can do that. Just be sure to buy a roll of ribbon that has many yards on the roll.
For smaller bows, such as gift wrapping bows, use the same instructions with smaller cuts of ribbon.
How Can I Customize The Bows?
While you can choose one roll of ribbon and make one bow, there are many ways to customize the look.
Consider combining different types of ribbons to make the bow. Tie one bow in one ribbon, the other bow in a different type of ribbon, and secure together for a two-tone effect.
Combining textures is also a popular way to vary the look of the bows. Use burlap and cotton ribbon together. Or mix velvet and satin ribbons.

Barbara Dowd
Sunday 30th of October 2022
You write that it is easy...I'll give it a try!
Kimberly
Monday 31st of October 2022
Barbara, I think it's easy! So much easier than some other ways I've seen doing it!