
Our instructions for how to make a dream catcher are easy to understand and use inexpensive supplies. Make this DIY dream catcher in 30 minutes or less.
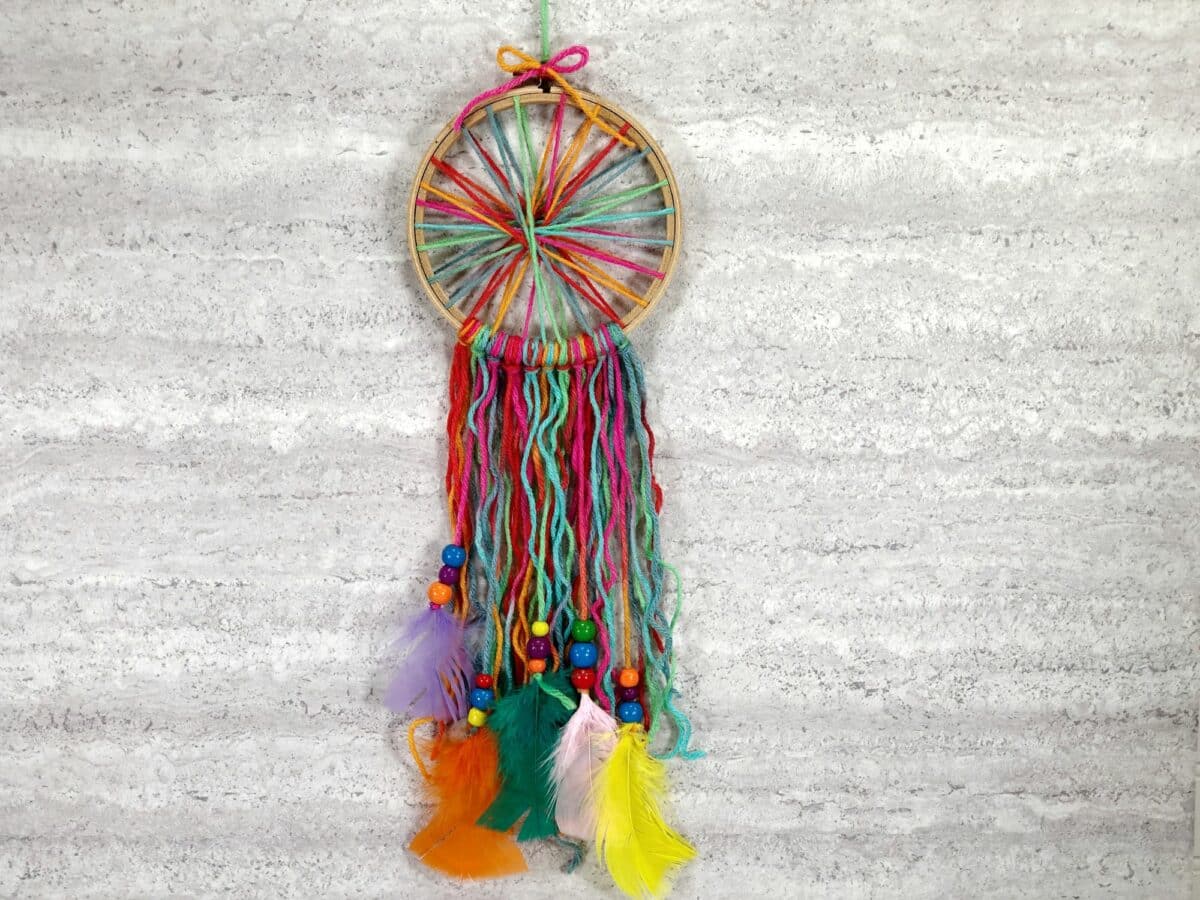
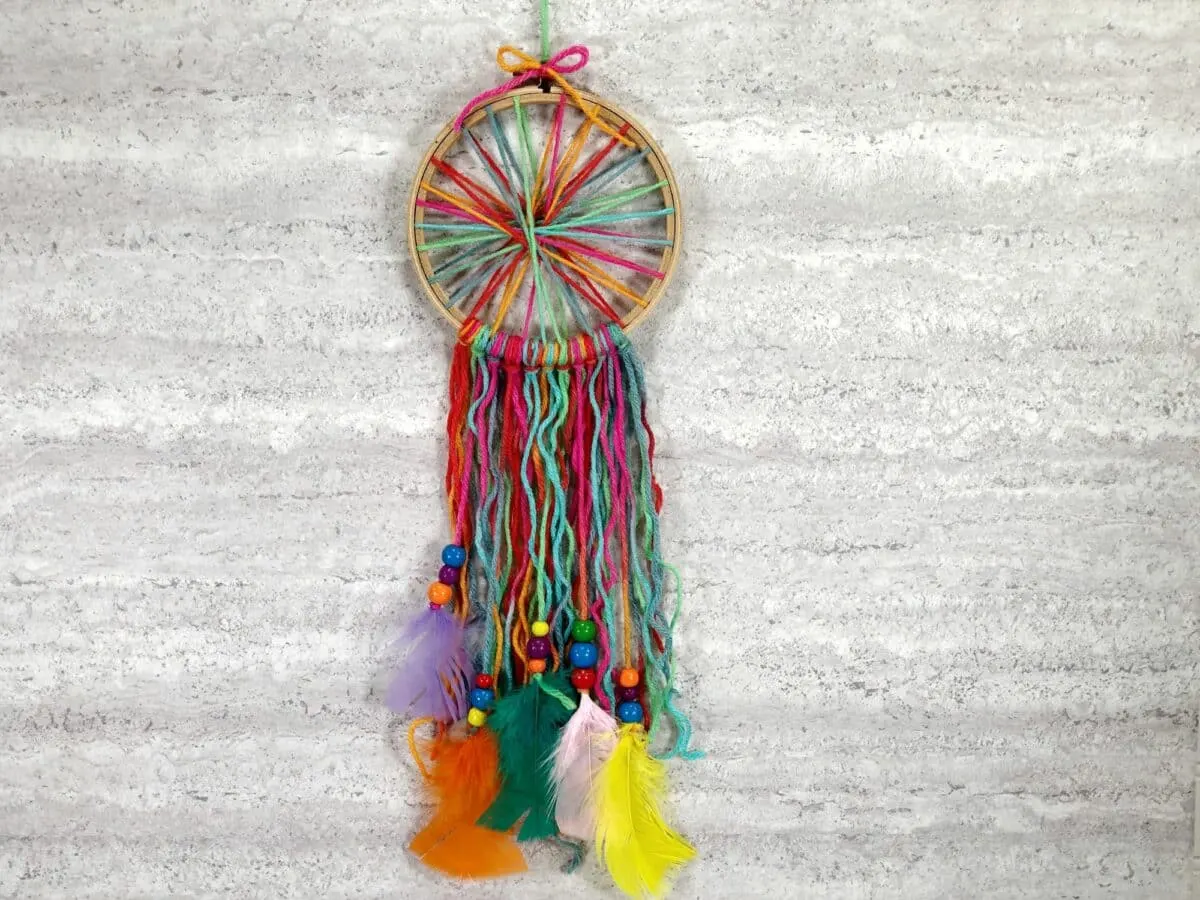
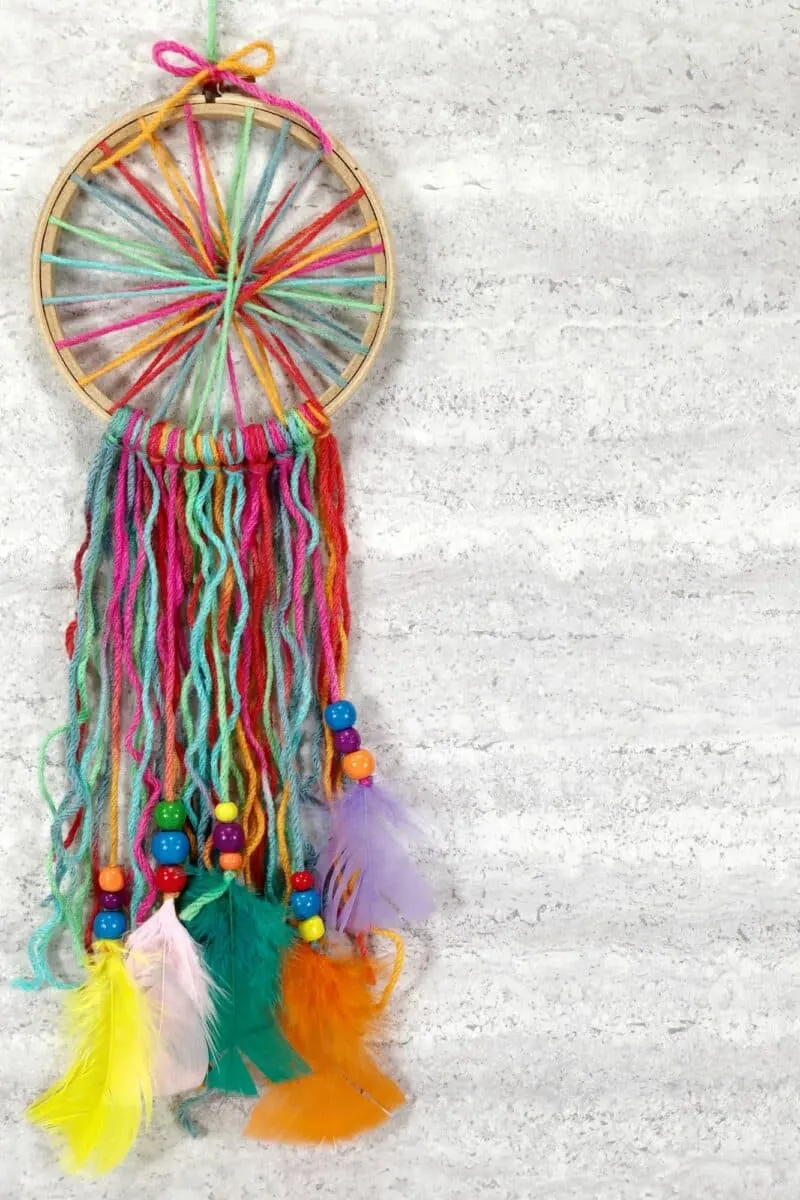
This colorful dream catcher uses a rainbow of colors with the multi-colored yarn, feathers and beads.
The size of your dreamcatcher depends on the size of embroidery hoop that you choose. If you want a large dream catcher, then choose one of the largest sizes of embroidery hoops.
Dream Catcher Spiritual Meaning
A dream catcher is a handmade craft that originates from Native American culture. Traditionally, it is believed to protect the sleeping individual from negative dreams, while letting positive dreams pass through.
The spiritual meaning behind a dream catcher is deeply rooted in the idea that it acts as a filter for dreams, allowing only the good ones to enter the dreamer’s mind. The web-like design of the dream catcher is thought to capture the bad dreams, which are then destroyed by the morning light, while the feathers act as gentle channels for the good dreams to reach the dreamer.

This ancient symbol continues to be cherished for its beauty and the positive energy it is said to bring into the lives of those who possess it.
How to Make a Dream Catcher
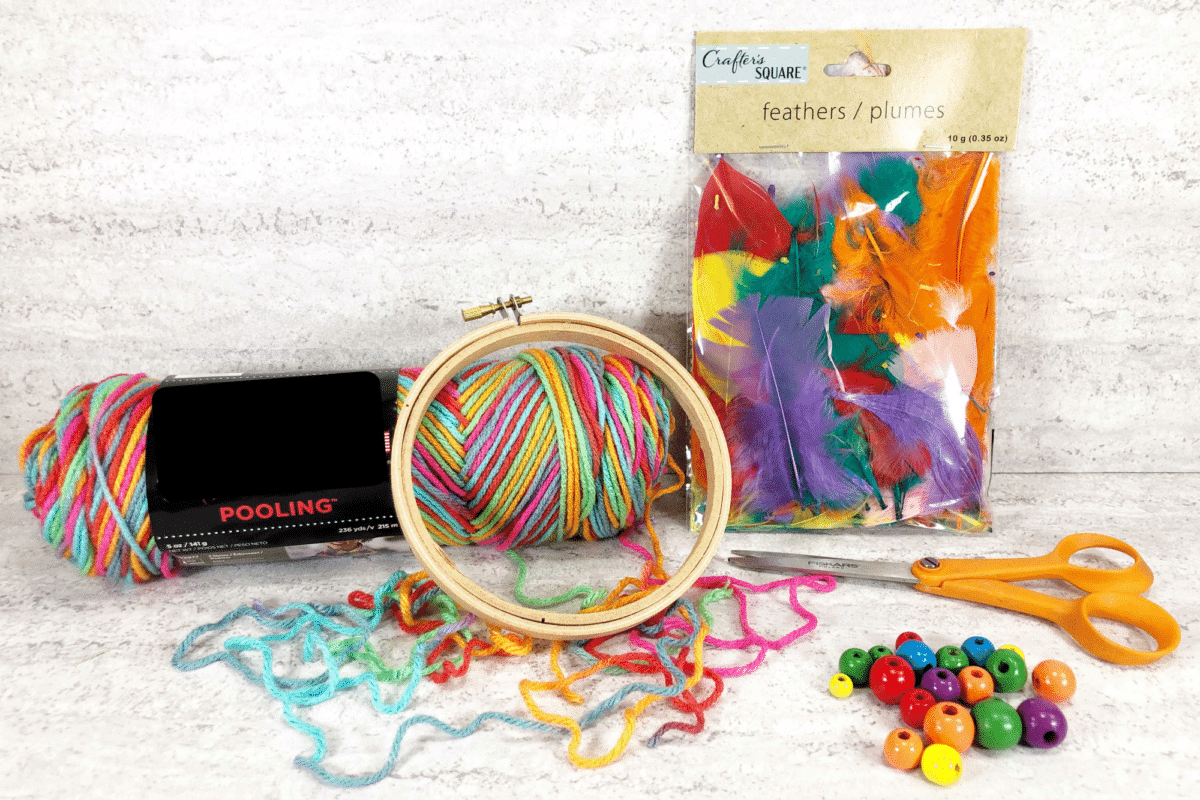
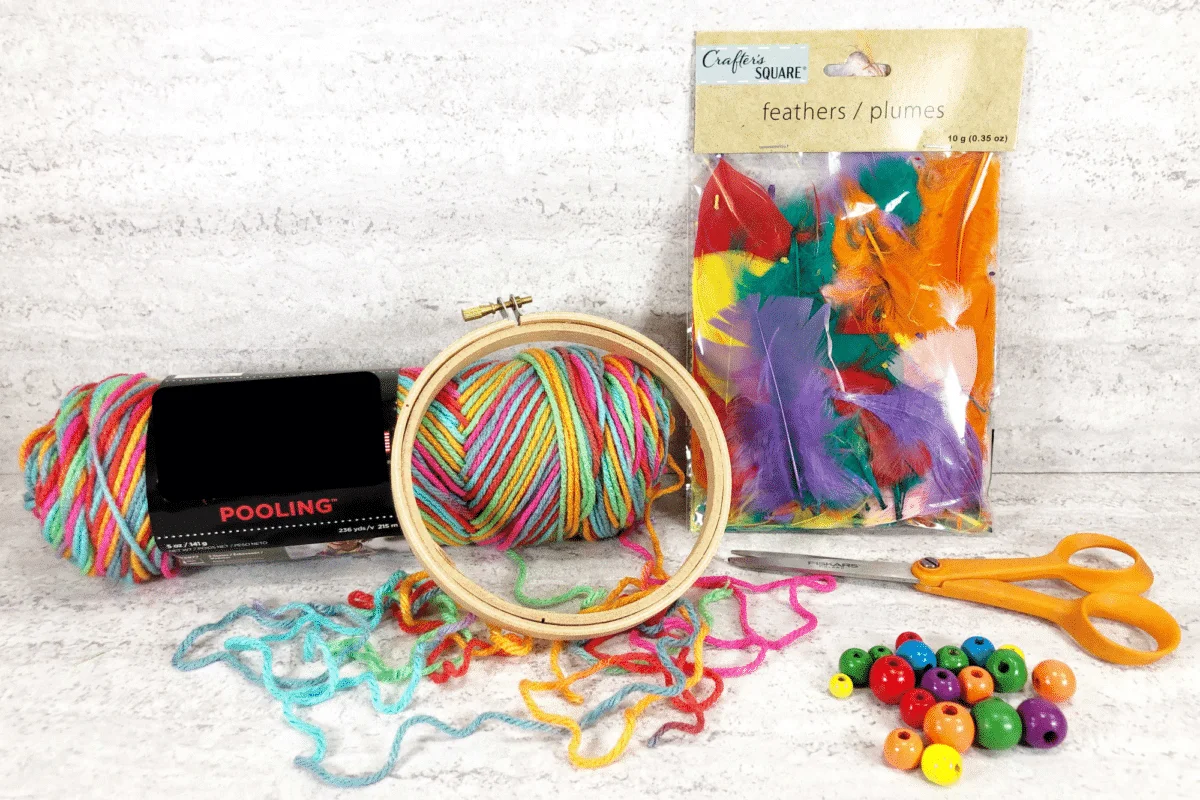
Supplies
- Colorful Rainbow Yarn (this yarn is similar)
- Embroidery Hoop
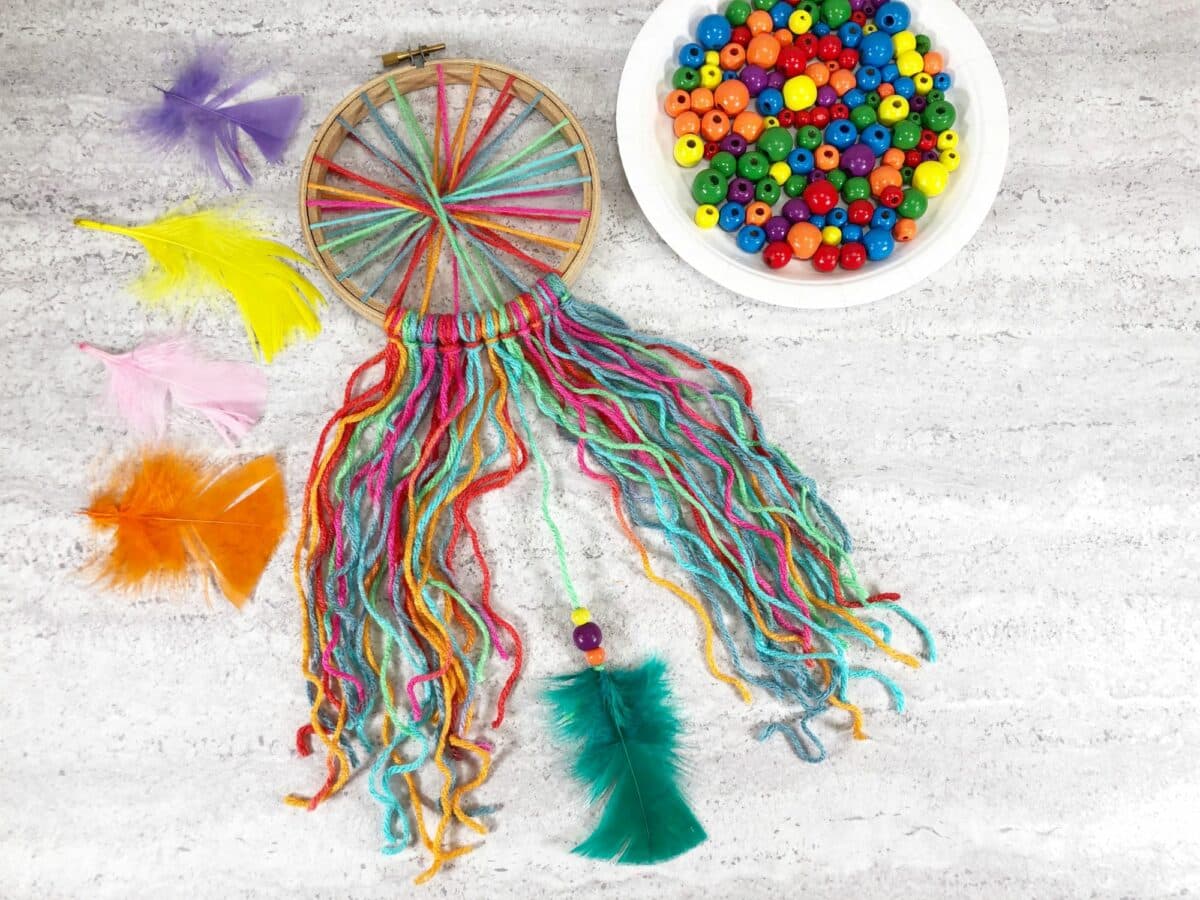
- Assorted Wooden Beads
- Assorted Feathers (I bought mine at the Dollar Tree, but these dream catcher feathers are similar)
- Ruler
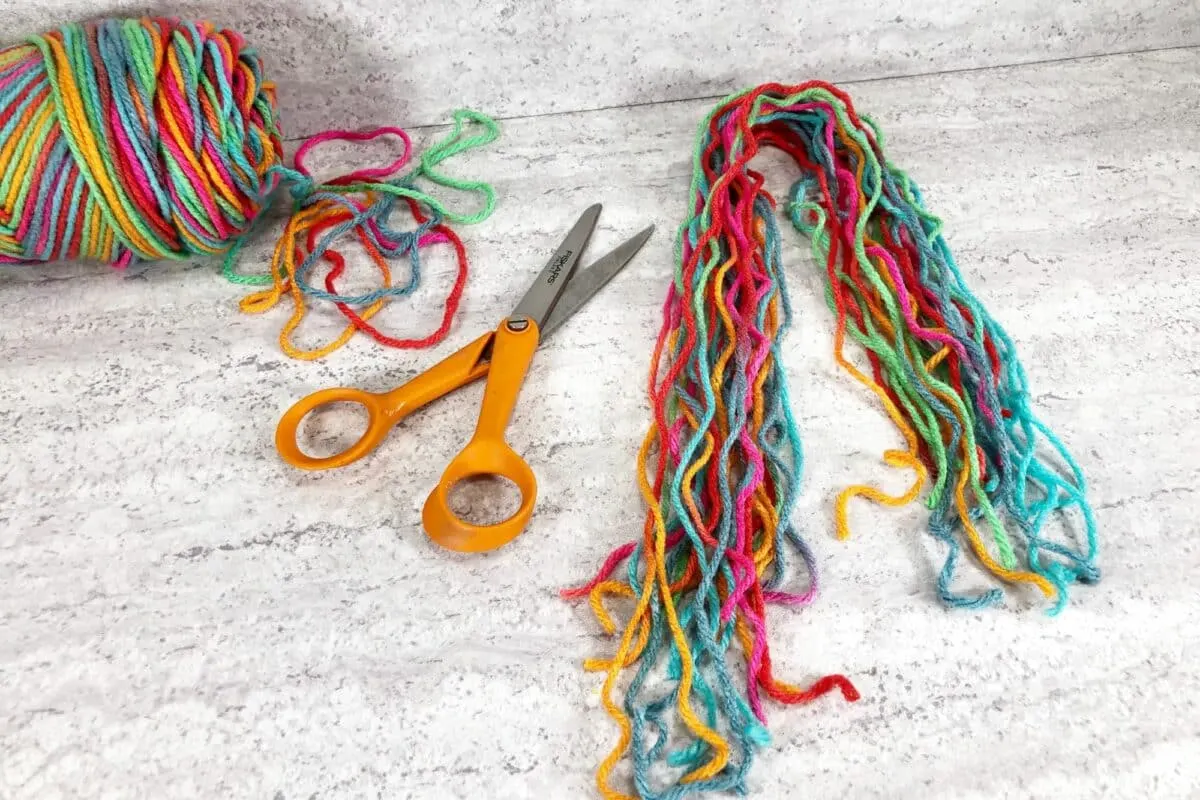
- Scissors
Directions
Step 1
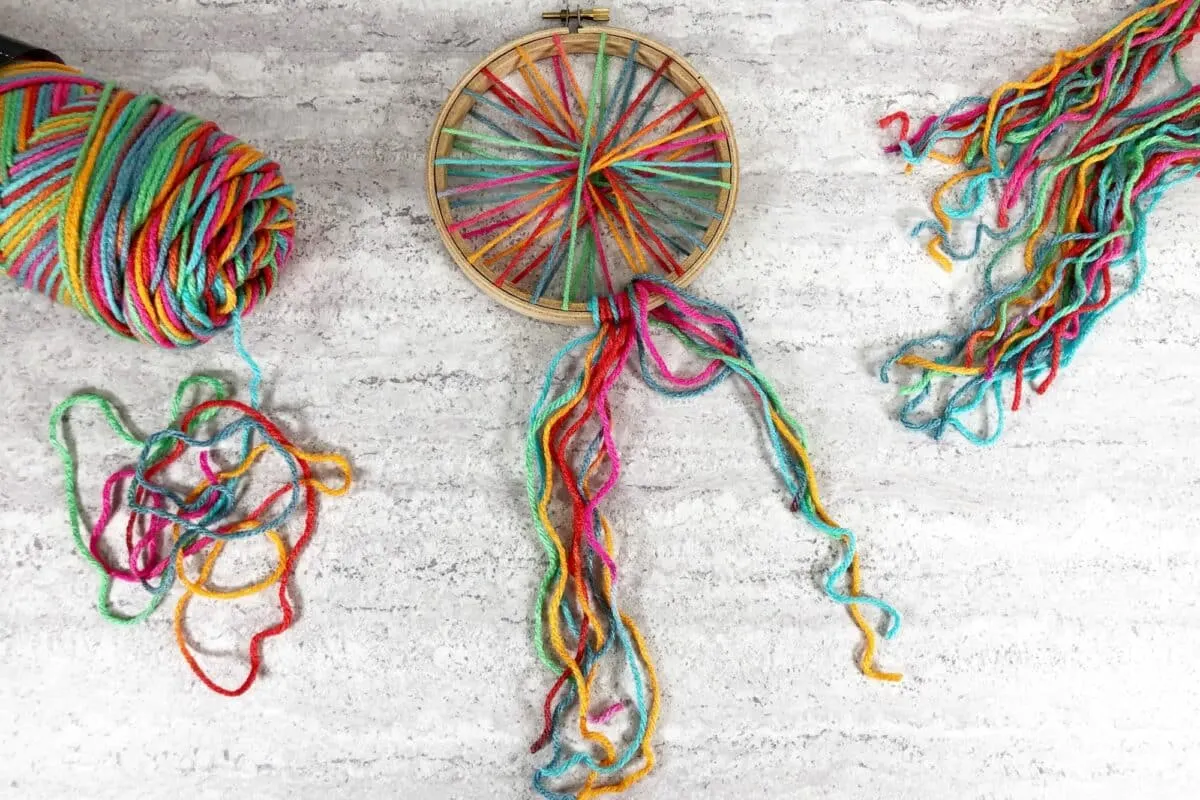
Loosen the screw at the top of the embroidery hoop and separate the rings.
Using the yarn, tie a double knot around the inside ring and trim the yarn tail with scissors.
Step 2
Hold the ring in one hand and tightly wrap the rainbow yarn around the outside edge of the ring in a circular pattern.

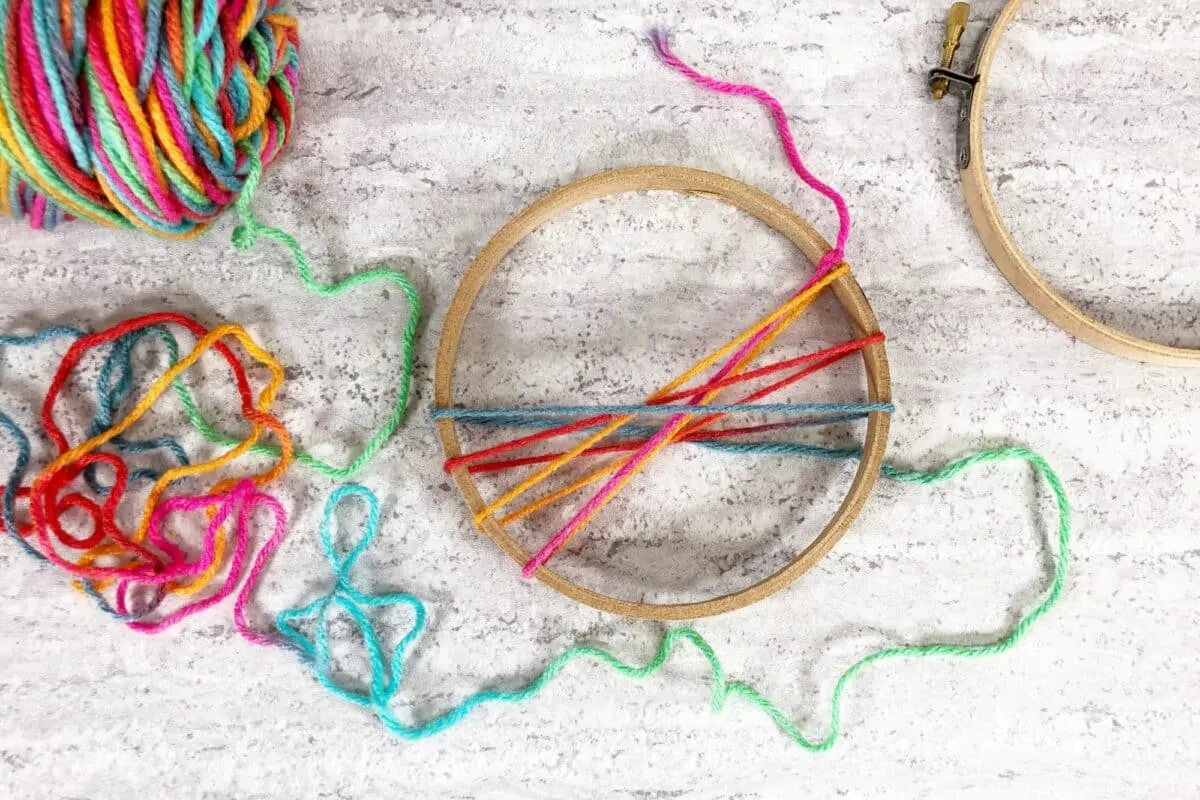
Step 3
Tie off the yarn with a double knot and trim the yarn tail with scissors.

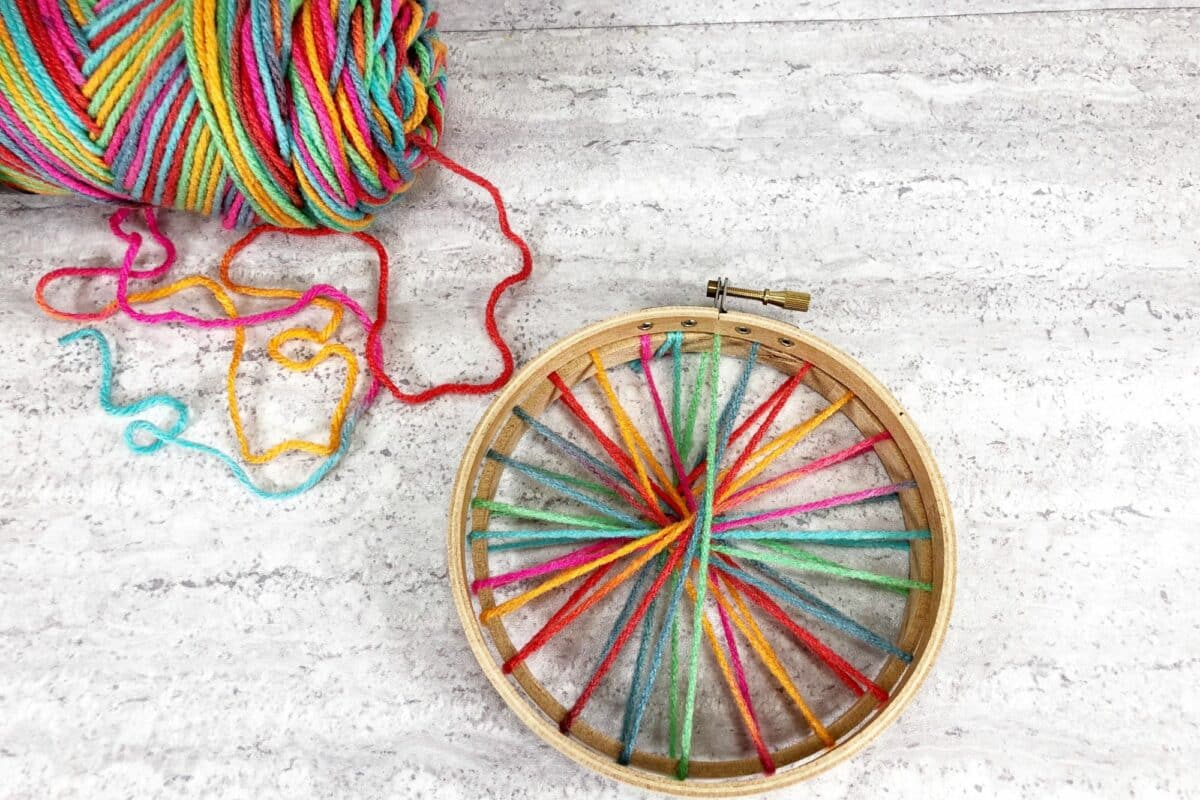
Step 4
Place the outer ring of the embroidery hoop on top of the inside ring and then tighten the screw at the top.

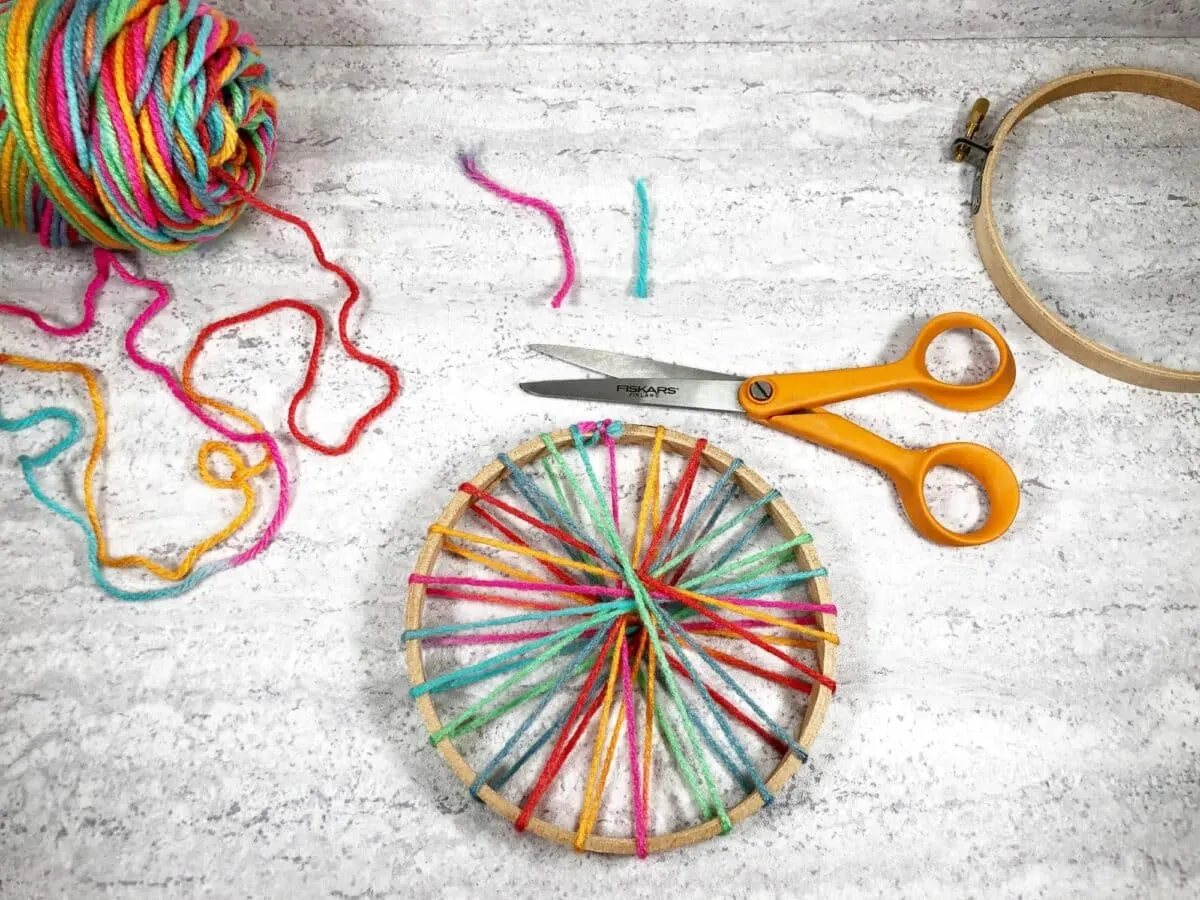
Step 5
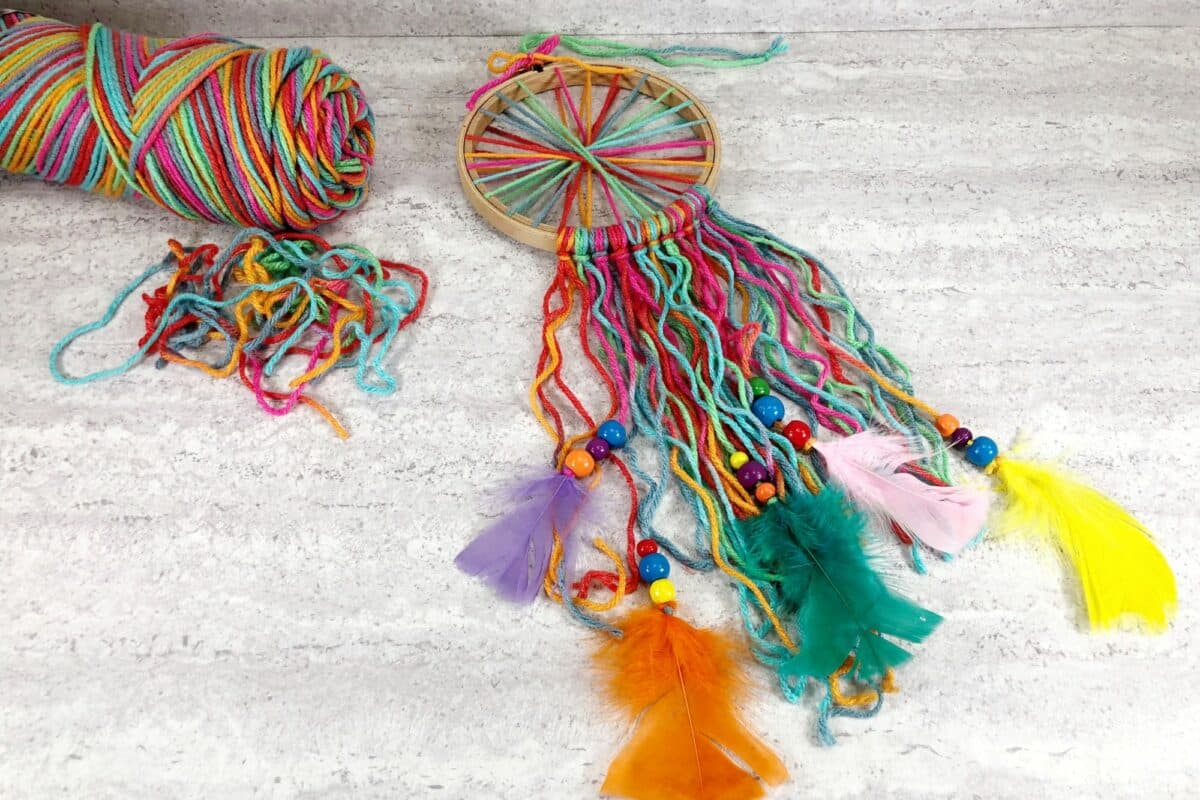
Cut 24 lengths of yarn that are 24” (2 feet) long.

Step 6
Attach the yarn, two strands at a time, to the bottom of the embroidery hoop, using a luggage tag loop method.

Step 7
String wooden beads onto several of the lengths of the yarn. Then tie a colored feather to the end of the yarn with a double knot.
Slide the wooden bead down the yarn, covering the feather’s quill.
Step 8
Measure and cut two 12” lengths of yarn. Tie the first in a loop through the screw, securing it with a double knot.
Tie the second piece of yarn around the screw in a bow.

Helpful Tip: You can use a dot of liquid craft glue to secure the knots permanently.
Want more embroidery hoop ideas: Check out these crafts next:
