
Cleaning your snowblower carburetor is essential to ensuring that the machine works correctly. You might not now how to do it, though. That is why you need an easy, step by step guide for how to clean a snowblower carburetor.
To clean your snowblower carburetor, you will need carburetor cleaning solution, compressed air or copper wire, a screwdriver, and if possible, the machine’s manual. This process takes around one hour, although with experience you can easily cut this time in half.

Why Cleaning Your Snowblower Carburetor Is Essential
Major snowblower manufacturers recommend cleaning your carburetor every six months to extend the life of the machine. During the summer months when the snowblower is not being used, gas breaks down inside the carburetor forming a ‘gunk’ which clogs the passageway to the combustion chamber.
This gunk prevents the machine from starting or limits the machine’s capabilities significantly.
I choose to clean my carburetor just before the start of the snow season and once again six months later.
Related Posts:
Warning Signs You Need to Clean the Carburetor
There are a number of things you may notice when using your snowblower that signal that the carburetor needs cleaning. These include:
- Snowblower’s engine turns over but either does not start or struggles to start.
- The engine of your snowblower seems sluggish or jerky.
- Your snowblower seems to be consuming more fuel than normal.
- Snowblower exhaust is pumping out black smoke.
If you continue to use your snowblower for a long time while it is showing these signs, then you will probably cause extensive damage to your machine.
Related Posts:
- Best Time to Buy a Snowblower to Save Money
- Minimum Snow Depth to Use a Snowblower
- Best Brands of Snowblowers
- Heated Hand Grips for Snowblowers
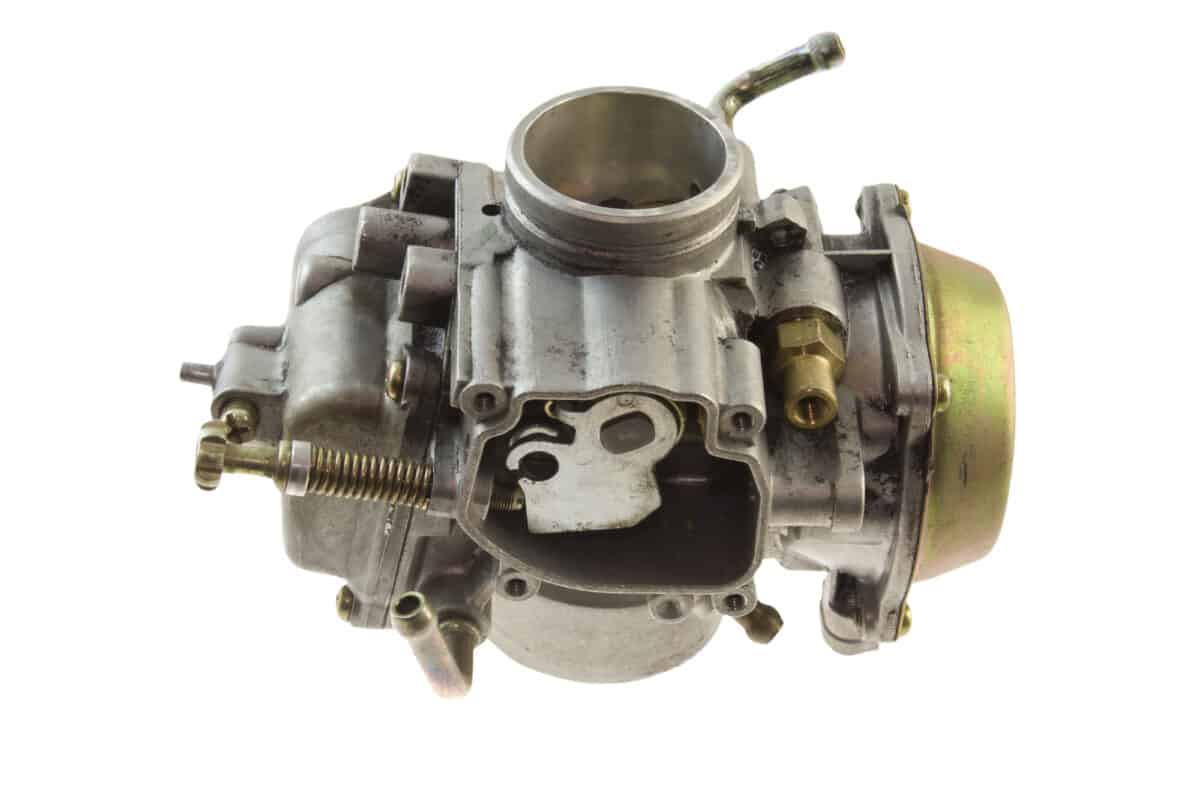
How To Clean the Carburetor On A Snowblower
It could take you over an hour to clean a snowblower carburetor for the first time. However, with practice over time I have found the process becomes quicker and easier.
See our instructions for how to properly dispose of snowblower oil, as well, for proper maintenance of your machine.
1. Check the Manual
Not all snow blowers are the same. Some carburetors will be in different places depending on the make and model. I suggest reading the manual (if you have it) and following their step-by-step instructions as they will be specifically designed based on your snowblower.
2. Clear Your Workspace
There are several small parts you will be removing from your snowblower and the carburetor during the cleaning process. Missing even one tiny screw can cause a lot of hassle.
I recommend (based on multiple experiences of losing parts and spending longer looking for them than I care to admit) clearing a space for you to put these items.
3. Remove the Carburetor
You will need to remove the carburetor from the snowblower to clean it. If this is your first time cleaning a carburetor, then consider taking a handful of photos for reference if you need them when refitting.
To start, locate the carburetor on your machine before removing it using a screwdriver.
4. Apply Cleaning Solution
Once removed, put the carburetor into a bowl and cover it with carburetor cleaning fluid (I use Chem-Dip) for around three hours. After this time, you will want to remove the carburetor from the fluid and rinse it with water.
Once the snowblower carburetor has dried you can use either copper wire or a compressed air canister to get any remaining dirt out from the smaller holes. Be sure that the carburetor is as clean as possible before you begin the reattachment process.
The better the job that you do at this stage, the better the end result will be.
5. Reattach the Carburetor
Once you have cleaned every nook and cranny on the carburetor, it is time to put everything back together.
Every single piece needs to be exactly the way it was before you began if the snowblower is to work correctly. Taking your time with this process and referencing back to the photos you took should minimize the likelihood of this happening.
6. Leave Notes
In the past, I have found it helpful to leave a sticky note either in the manual on the carburetor cleaning page or elsewhere in my garage about the experience. Anything I noticed that was different from the manual, or simple hints and tips that I discovered, I am sure to jot down to remember six months from now.
It is one of those things that most people skip, but it takes two seconds and can save you hours of remembering or reenacting past experiences or mistakes a few months later.
I also write the date that I completed the cleaning so I can reference back to it if required. This is especially helpful if you are planning on selling or donating your snowblower as people often enquire about when the carburetor was last cleaned or replaced.
If cleaning the carburetor seems like a difficult task, then you can either pay someone to do it or replace the old carburetor with a new one – they cost less than $50 in most cases.
