


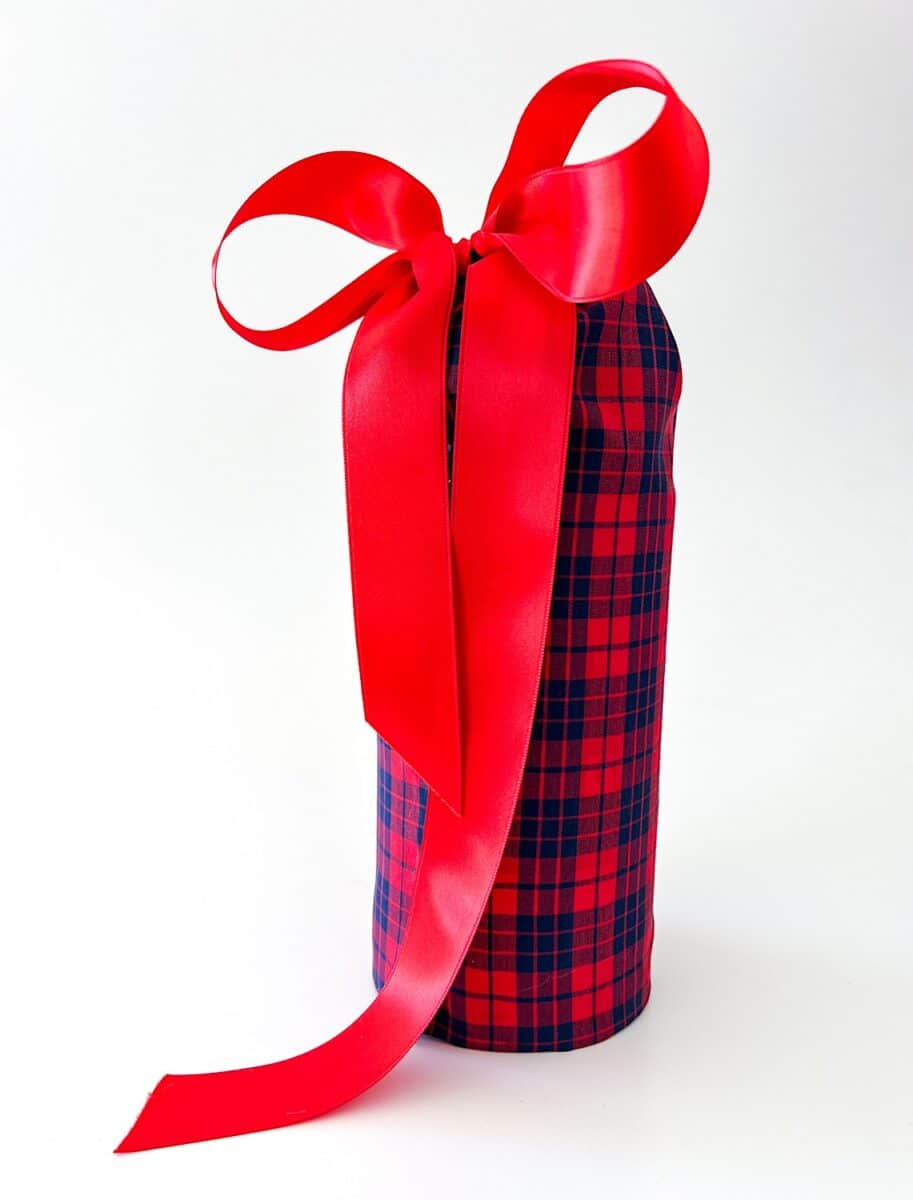
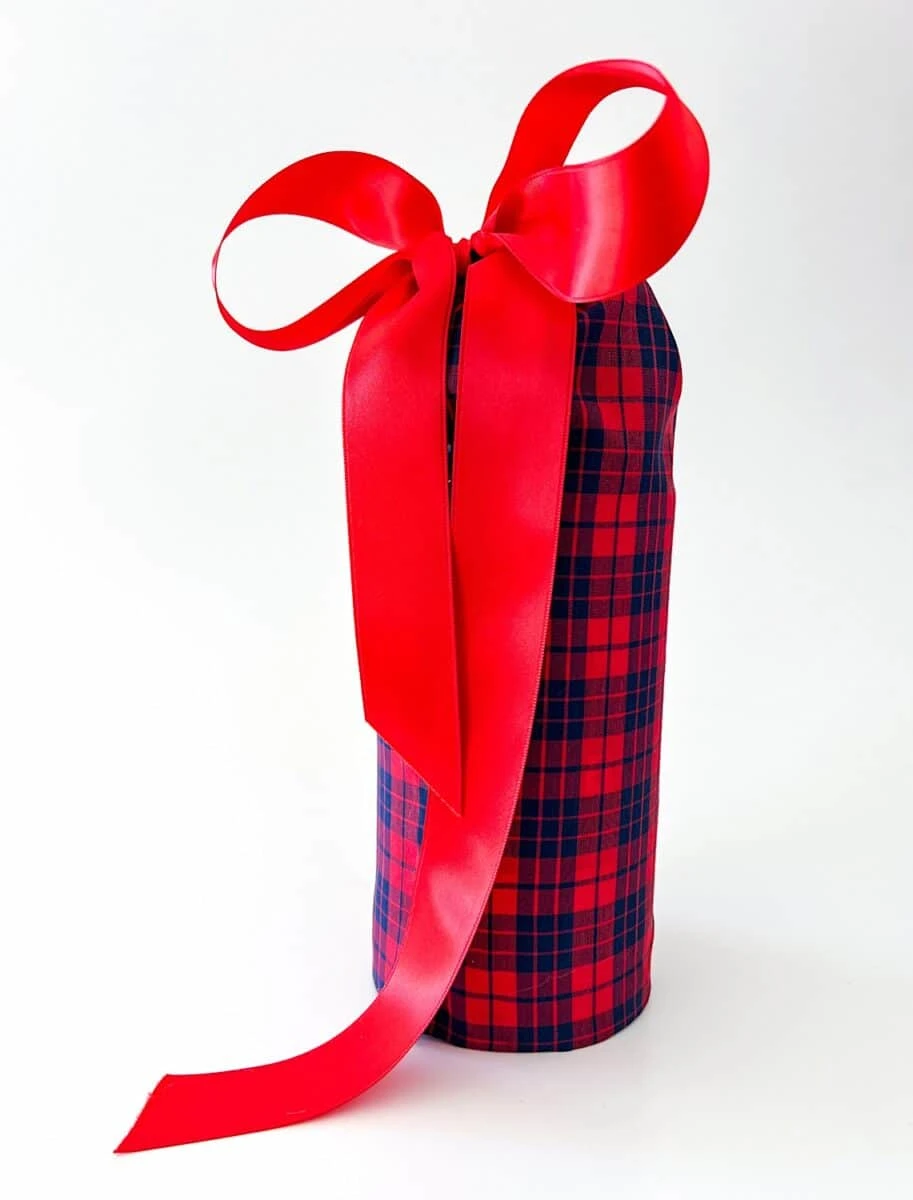
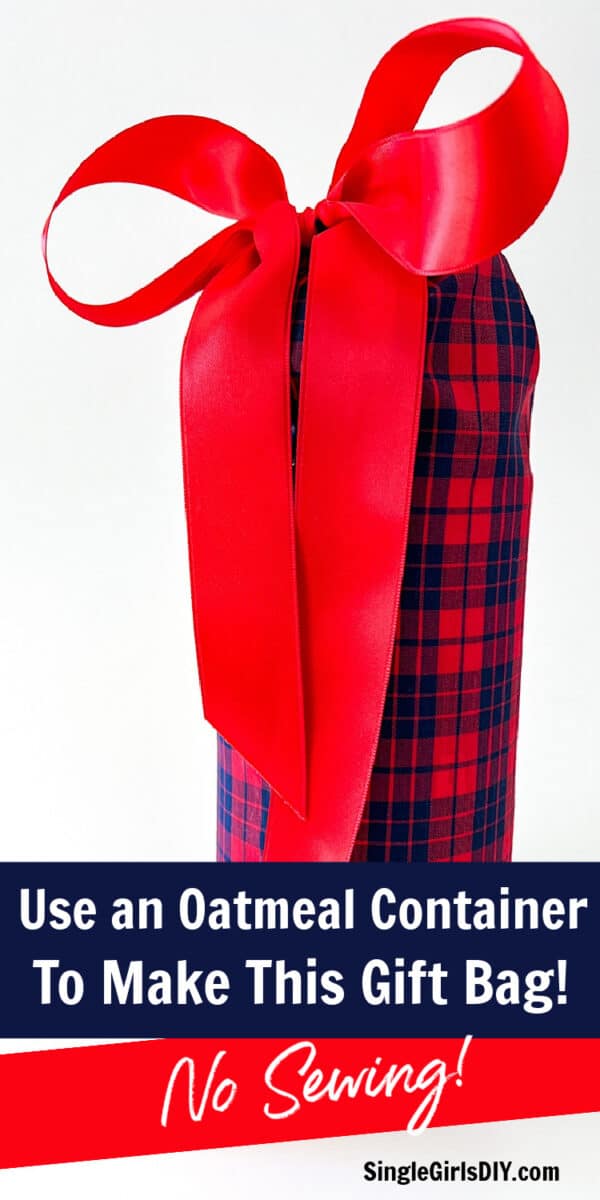
Turn an oatmeal container into a stylish gift bag perfect for hard-to-wrap items. This easy DIY creates a gift bag with adjustable top to accommodate unusual shapes and sizes.
Any size oatmeal container will work.
No sewing is needed to make this gift bag. However, if you would like to sew rather than glue the seams you could.
This handmade gift container is especially great for items that may be fragile and would not work well in a gift bag. Things like ceramic statues, glass, handmade crafts or other breakables are perfect to put inside the protected cardboard container and cinch the fabric closed on top.
It is especially perfect for lotion tubes and other items that can’t easily be wrapped with gift wrap.


You will want to see our other oatmeal container crafts, too, including this Plastic Grocery Bag Holder.
DIY Oatmeal Container Gift Box
Supplies
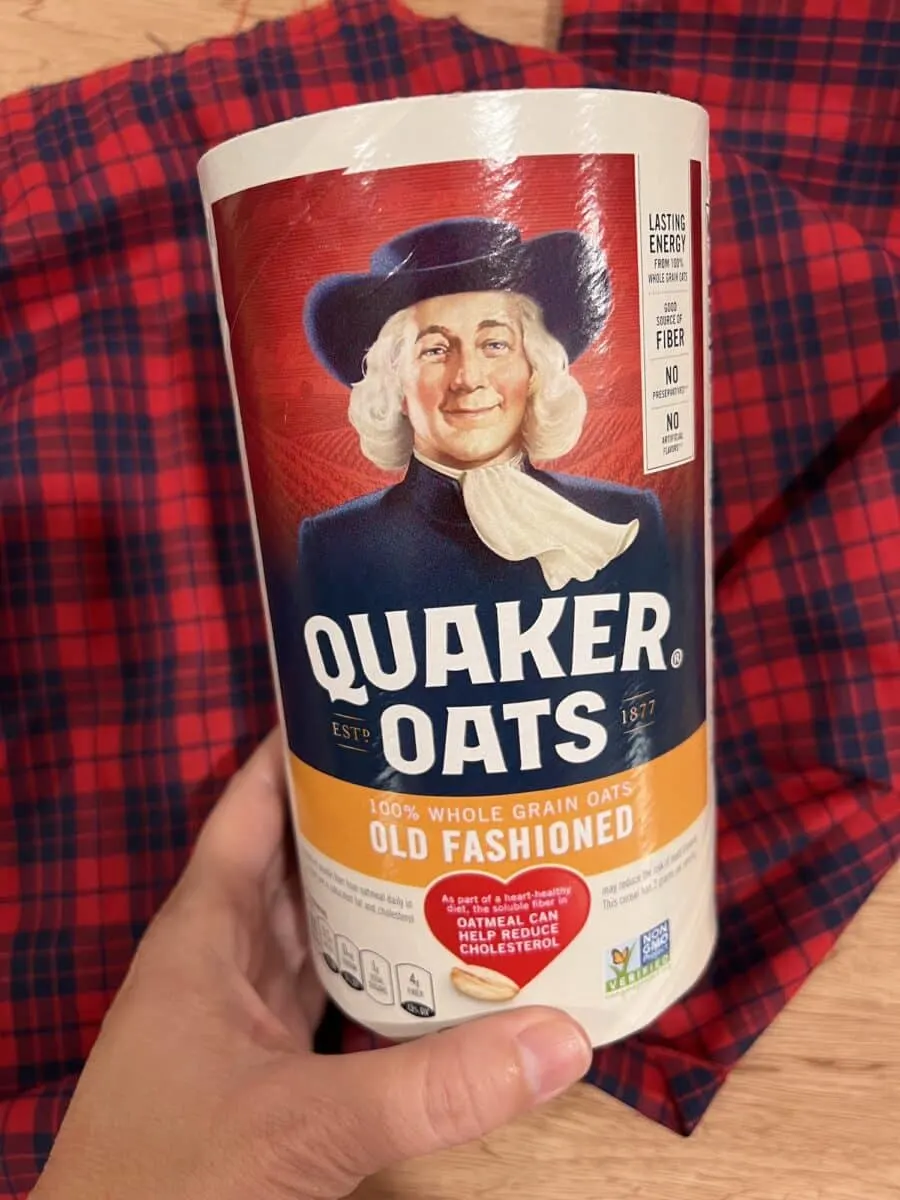
- Empty oatmeal container carton (I used an 18 oz. Quaker Oats container)
- Fabric (I used a 14 x 14″ piece)
- Hot glue gun or craft glue
- Ribbon (I used 1-inch wide satin ribbon)
- Paper for liner (optional)

Instructions
Make sure all of the crumbs are out of the oatmeal container before starting.
Step 1
Lay the cardboard container on its side and measure a width of fabric that will cover the entire oatmeal container as well as an additional ¼″ hem on each side as well as a little bit of fabric to overlap at the seam.
For my 18 oz. oatmeal container, I cut a piece of fabric that was 14 inches wide.
This was a perfect size for the container that is 12 ½″ in circumference, plus ¼ inch seam allowance on each end (for a total of ½″ extra in the measurement) plus another inch to overlap when gluing the finished edges together.

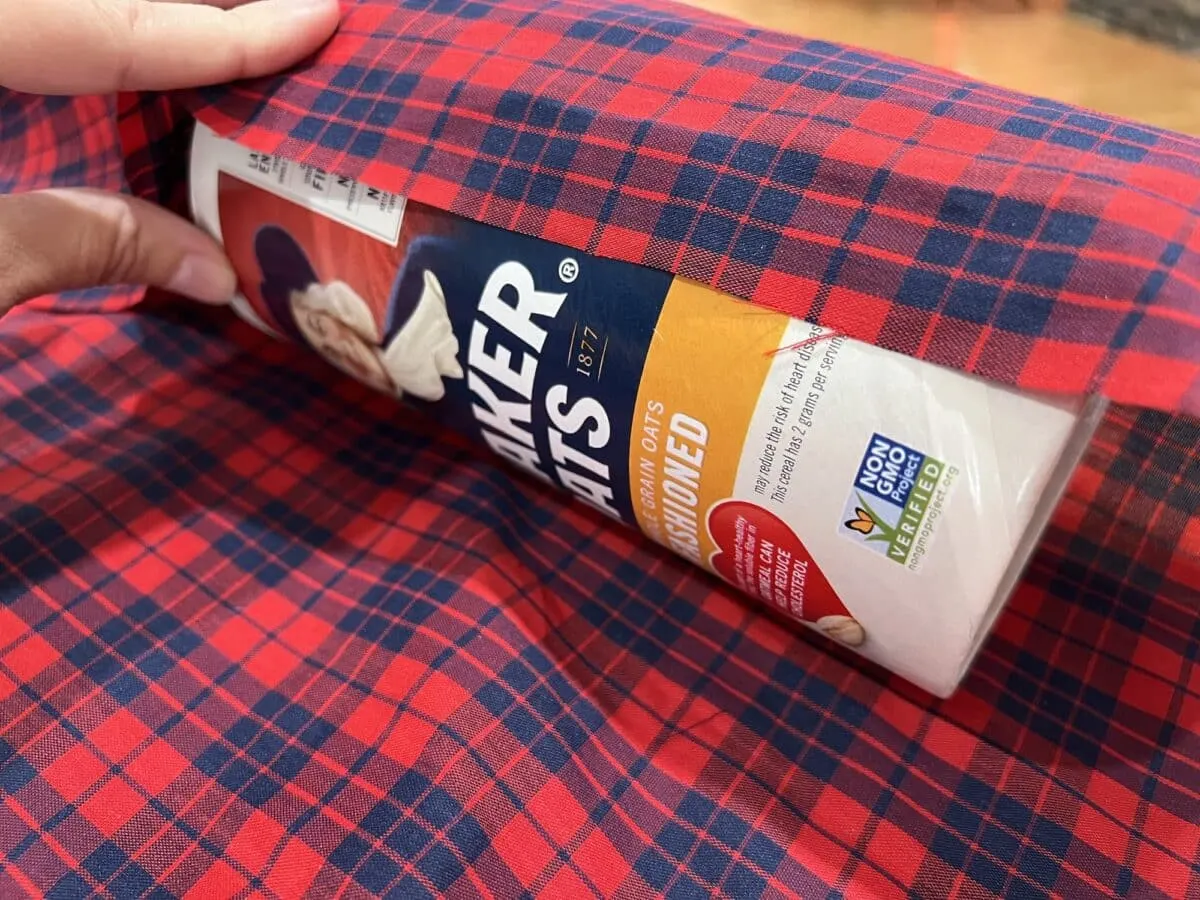
The height of the fabric piece depends on how tall the item is that you will be wrapping as well as how wide your ribbon is.
I used a piece of fabric 14″ in height. This was a good size to accommodate a taller item inside the gift box, while also allowing plenty of room for the fabric to be gathered and tied into a bow.
Step 2
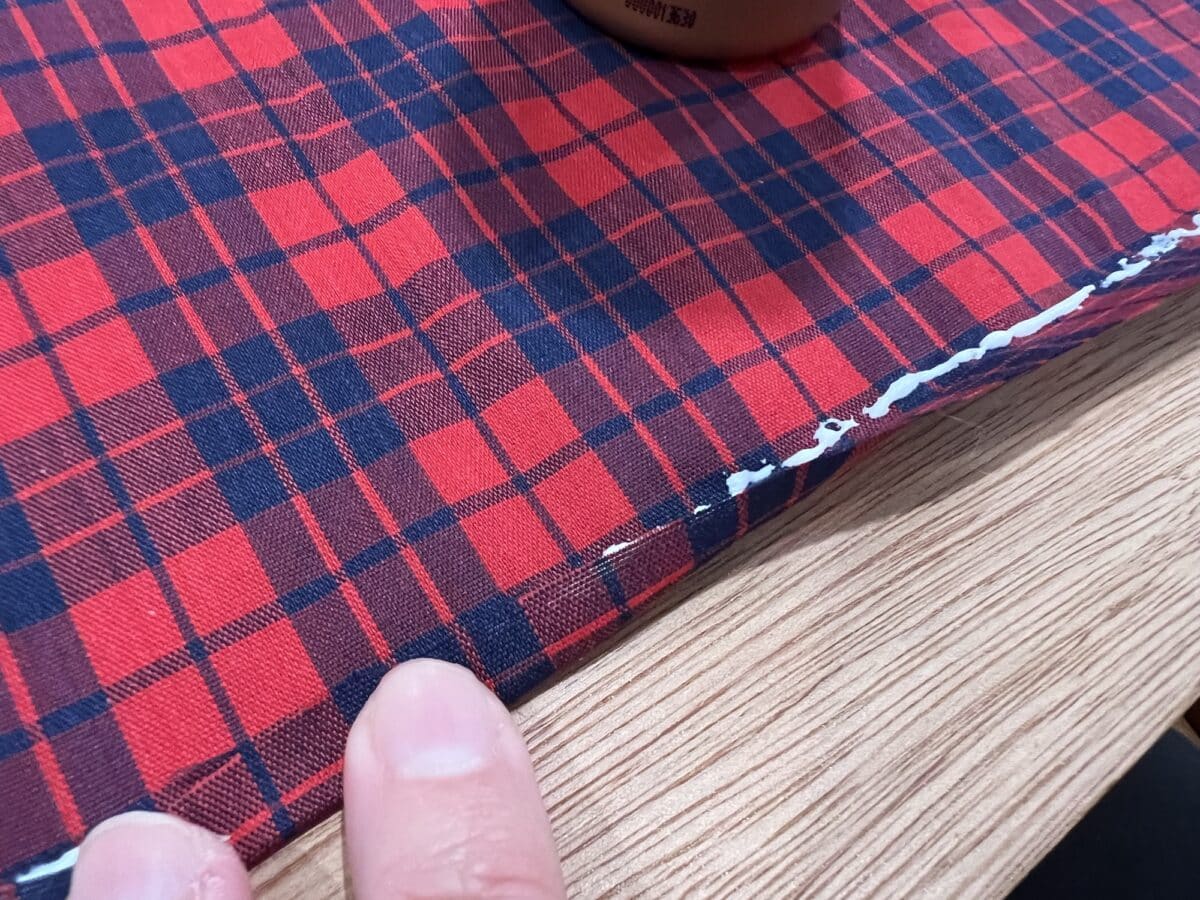
Once you have cut your fabric, you will want to glue the seams on three sides. You will glue the seams for the edges of the width, as well as the bottom seam on the base of the container.
Do not glue the seam for the top of the container yet.
Place a thin line of glue across the edge of the fabric and then turn the fabric over about ¼″ and press down to secure.
I used craft glue, however you can use hot glue.

If you would prefer, you could sew the hems.
Step 3
Now it’s time to create the hem with the ribbon.
Place the ribbon on top of the fabric where the raw cut edge is. Position the ribbon so that you can fold down the fabric over the ribbon and glue the seam down without gluing the ribbon to the fabric. You will want just a little bit of space between the glued-down seam and the ribbon.


Add a thin layer of glue to the top edge of the fabric and fold over to secure, holding down the fabric until the seam is secure.
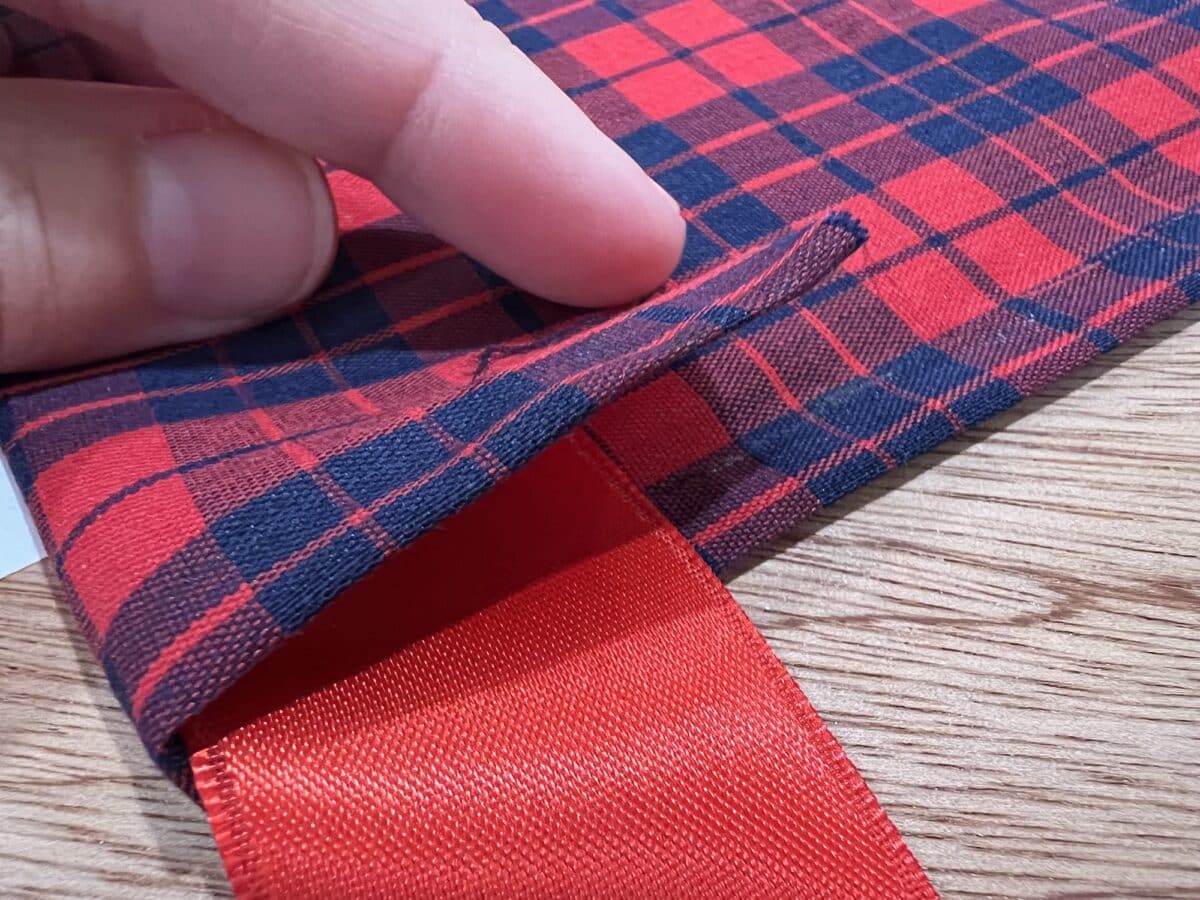

Be sure to glue the fabric on the “wrong” side, the same side where you have the glued seam on the base. You do not want to see the glued hem on the outside of the container.
Step 4 (Optional)
You can add decorative paper inside the container to hide the cardboard interior.
The size of the interior is about 12 ½″, which makes a plain white sheet of copy paper just a little too small to cover the interior, as seen in the photo below.
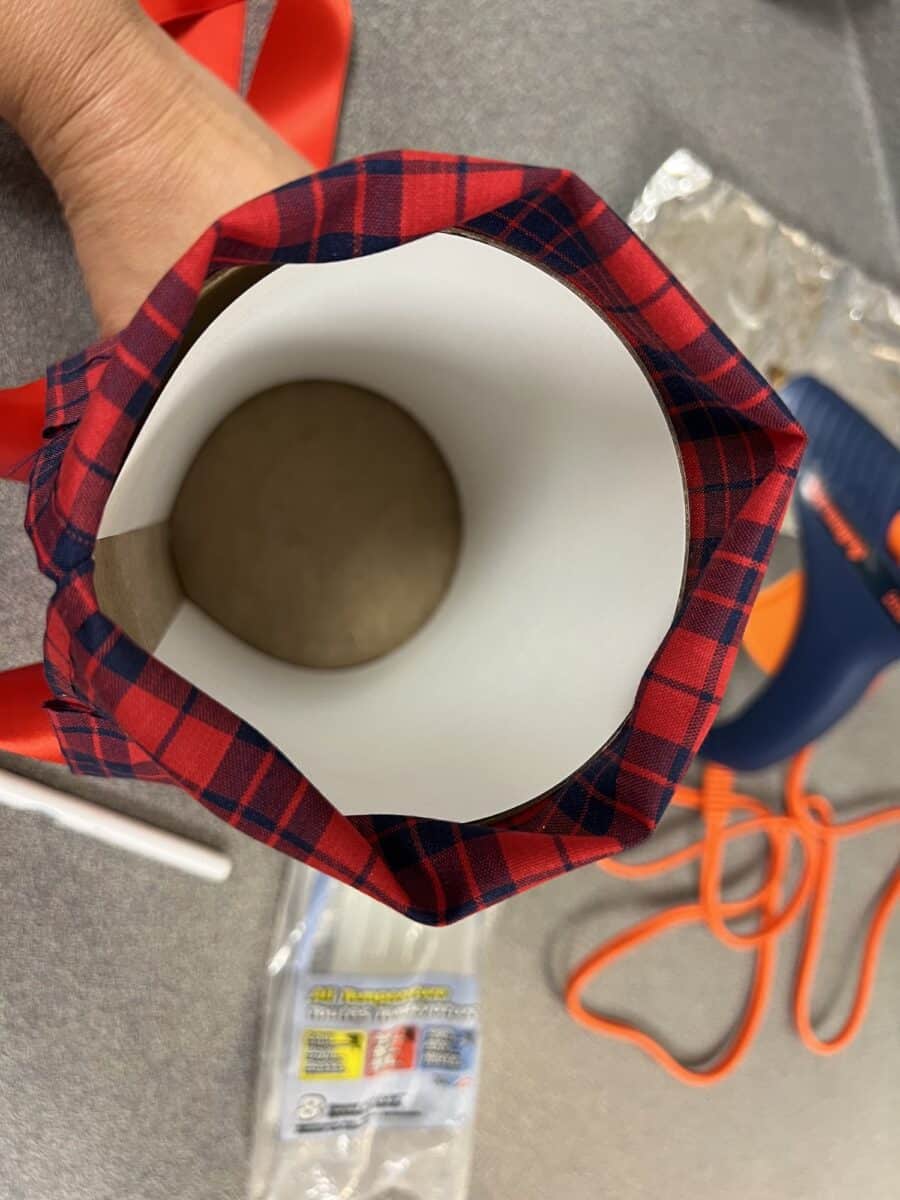
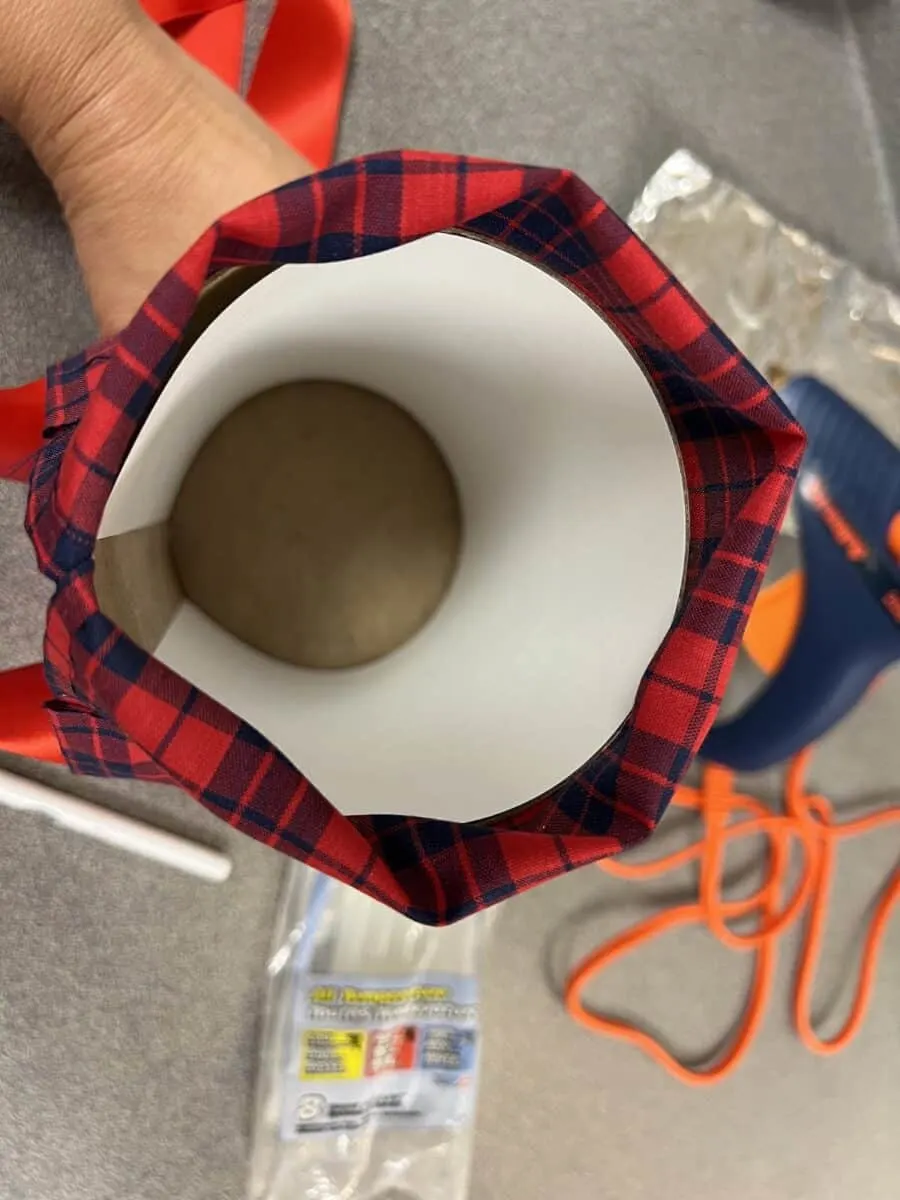
Many scrapbook pieces of paper are 12″ X 12″ so those might still show a gap, too, unless you cut a small piece of paper to fill the gap.
Step 5
Once the hems are dry and secure, it is time to attach the fabric to the oatmeal container.
First, line up the bottom hem with the base of the cardboard container. Start to glue the edge of the seam along the edge of the bottom of the container to start.
Then glue the long edge to the oatmeal container.
After you have the one side secure, continue to work around the tube, gluing the base hem down.
After the glue has dried and is secure, gently pull the fabric to be tight around the oatmeal container and glue down the other side, overlapping over the seams and matching patterns, if needed.
I didn’t put any glue on the oatmeal container other than where the seams are glued down. I did not add any to the middle of the cardboard tube.


For the fabric above the container, you can choose to leave it open or glue it shut. I glued the seams together about 2 inches above the container top. I wanted to leave enough gap to easily add in an item and for the gift to be easily removed.
You can glue the seams together all the way up to the ribbon.
See how I made the gift wrapping in my YouTube video:
Pin This Oatmeal Container Craft to save for later and share with others!
If you liked this oatmeal container gift bag, be sure to see more of our DIY gift wrapping ideas:

Nicole L
Friday 15th of December 2023
Very cute idea! I love the fact that it's reusing a container so it doesn't go to waste. You can use this idea for other containers/sized objects as well. I also like the fact that it is no-sew and could be used in the classroom to "wrap" parent gifts.
Kimberly
Tuesday 19th of December 2023
another great idea! Using it to wrap parent gifts is smart!
Barbara
Saturday 2nd of December 2023
Love this. What a great way to present small, fragile gifts, or any combination of jewelry, make-up, brushes, etc. Thanks for sharing a "non-sewn" project. Quick and easy.
Kimberly
Sunday 3rd of December 2023
Thank you so much, Barbara! I do like gift bags that don't need sewing!