
Super cute DIY signs are all over the place these days! This is a huge trend in home decor. Want to learn how to make your own hand-lettered signs, but don’t want to invest in anything special?
Many of the how-to’s out there call for making the letters or templates with a cutting machine. I haven’t yet invested in a cutting machine. So, when I wanted to make a sign for a friend’s birthday, I had to go old school!
Here’s how you can make a hand lettered sign, with no special tools required.
HOW TO MAKE HAND LETTERED SIGNS – NO SPECIAL TOOLS REQUIRED!
TOOLS & SUPPLIES

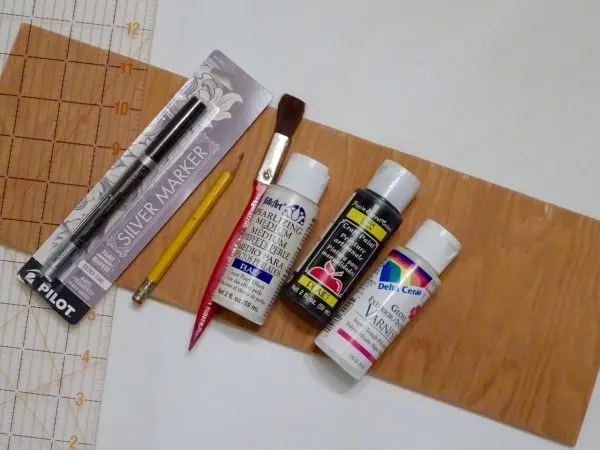
- Sign board (I used a scrap piece of wood, about 5 ¼″ x 15″)
- Acrylic craft paints
- Craft varnish
- Paint brush
- Paint pens
- Ruler (I used one like this)
- Pencil & eraser
THRIFTY TIP: Look in the art section of your local thrift store for an ugly old sign that you can repurpose for your sign backing. You don’t have to buy new!
To begin, decide what you want to write on your sign. You’ll need to know how big your sign board should be, and how big your letters can be to fill the space.
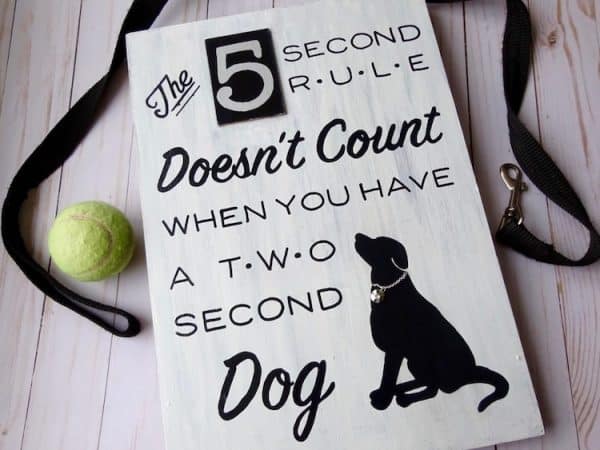
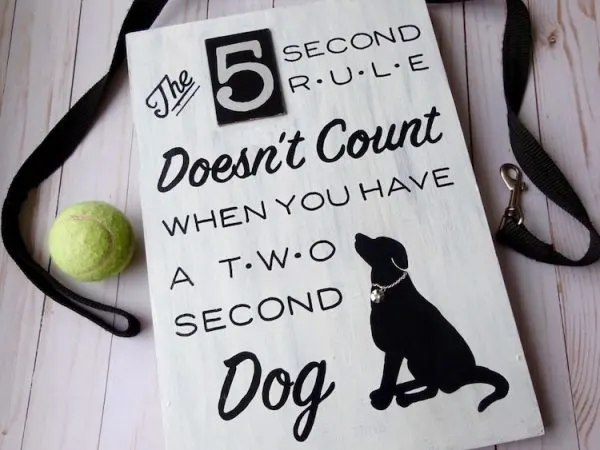
I chose a phrase that was absolutely perfect for a friend of mine, and created this sign as a birthday present.
When you know what you want to write, grab a piece of scrap paper and just write out your words a few times. Try difference sizes, different lettering styles, and spacings. Play with the word layout. This will help you plan out the size and shape of your sign.
Have your idea ready? Let’s get to the fun part.
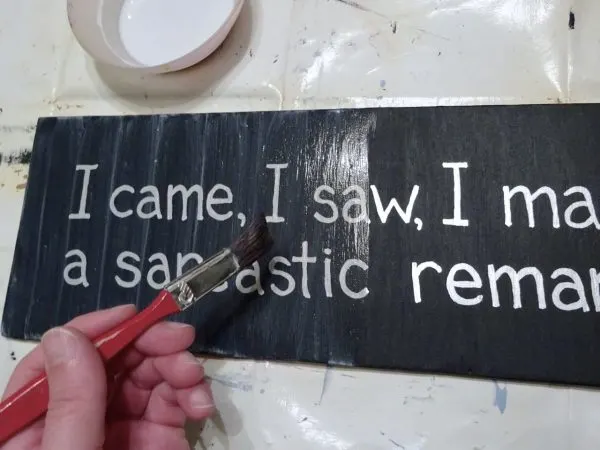
1. Paint the background color
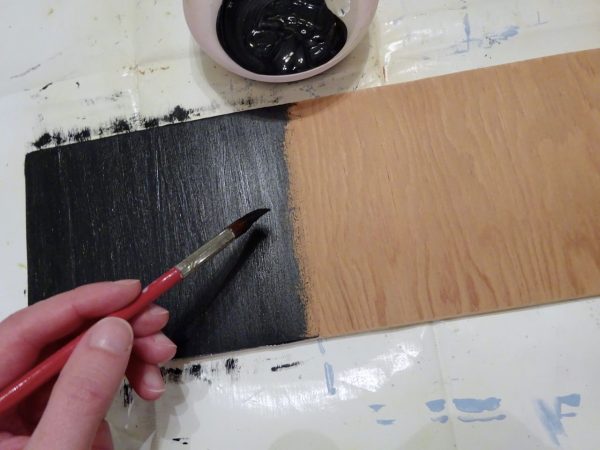

Paint the sign background and let dry completely.
This is your sign. You can make it any color you want. I chose a black background.
Apply a water-based acrylic craft paint with a brush. You may need more than one coat.
Let it dry completely before the next step.
2. Draw reference lines

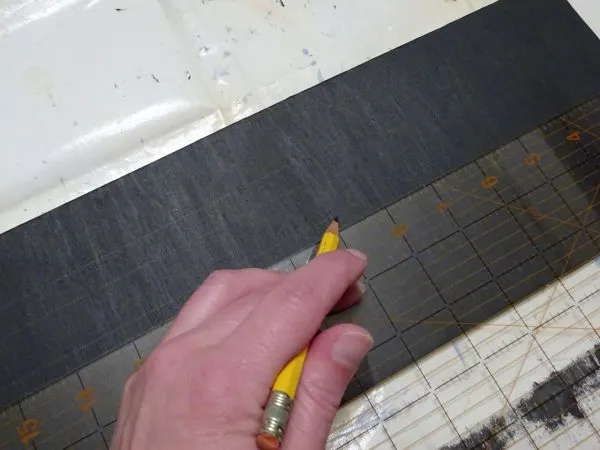
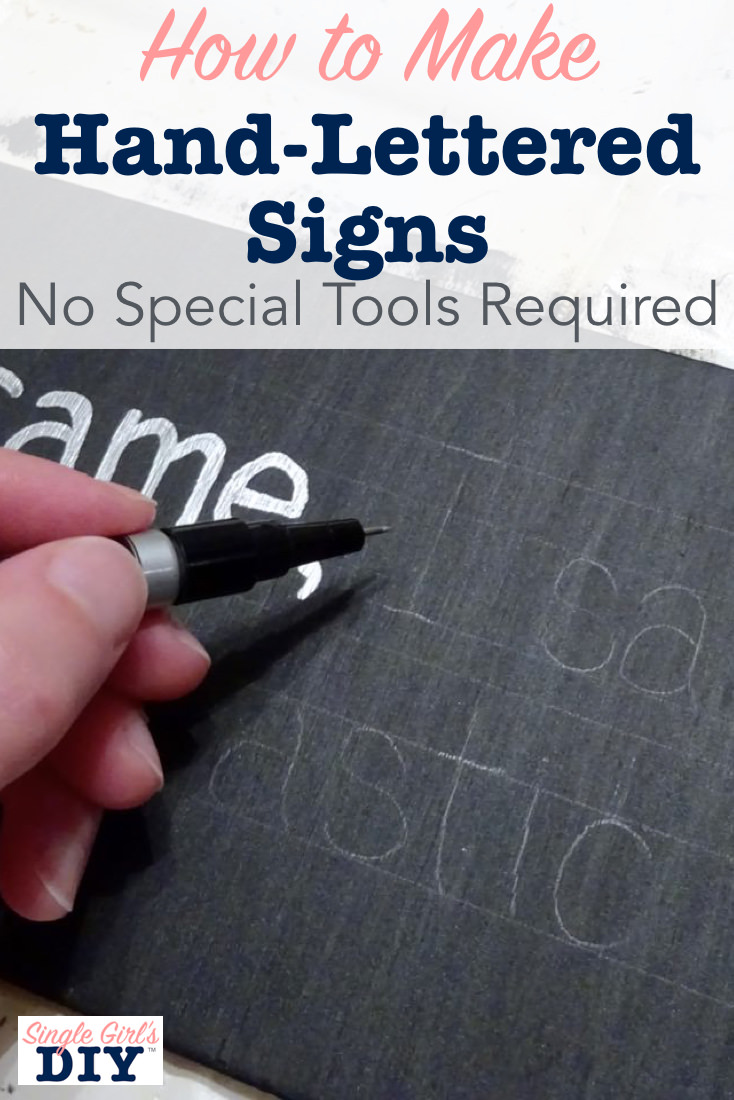
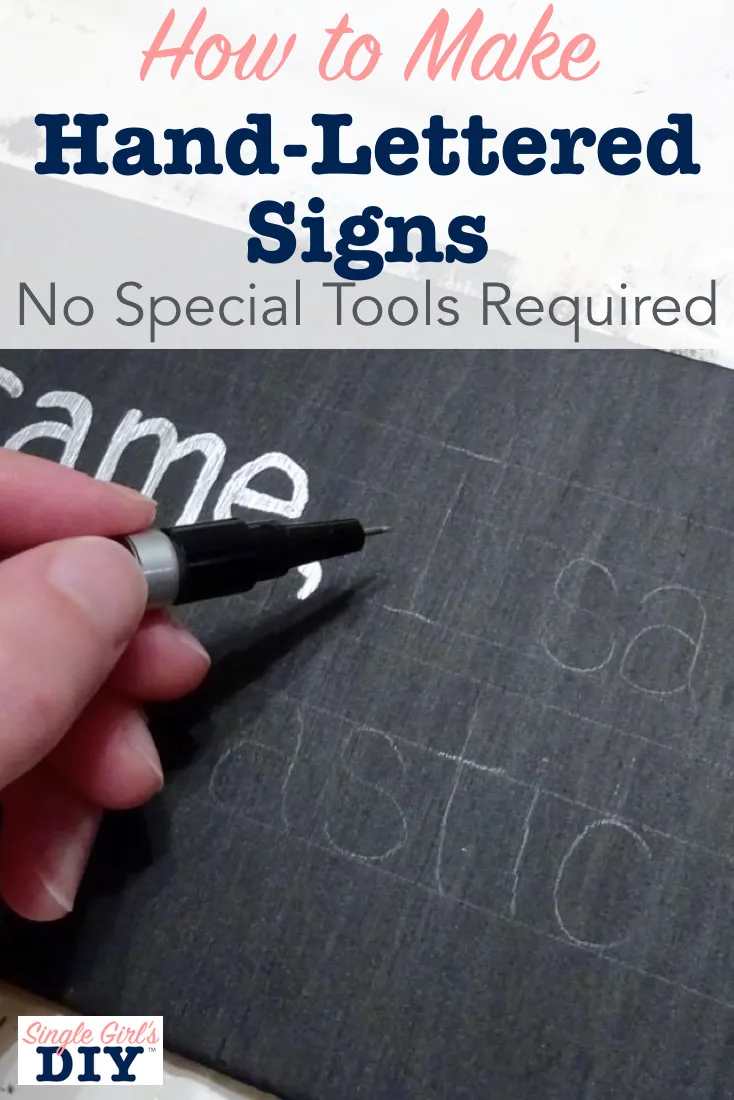
Mark writing guides onto the sign board.
Just like in grade school, when we practiced our writing on lined paper, guidelines will help you make a pretty hand lettered sign. Use a ruler and pencil to lightly draw lines on your sign board. (You’ll want to erase them later, so press gently.)
Leave yourself a bit of margin from all edges of your board. Then you’ll need to make three sets of lines for each row of text.
One line guides the placement for the bottom of every letter. Above that, another line guides the height of capitals, and other tall letters. About two-thirds of the way between the two, a third line helps constrain the height of lowercase letters.
If you have a lot of letters with tails that stick down below the bottom line, like “y”, “g”, “p”, etc., you’ll want to add a fourth guideline. Also, add a little more space between rows of text.
Here’s what I used for the spacing on my sign:
- 1 ¼” margins from top / bottom / sides
- 1 ¼” tall capitals & tall letters
- ¾” tall lowercase letters (Make your lowercase letters about ⅔’s the size of the capitals.)
- ¼” between text lines (Increase this if you have lots of letters with “tails”)
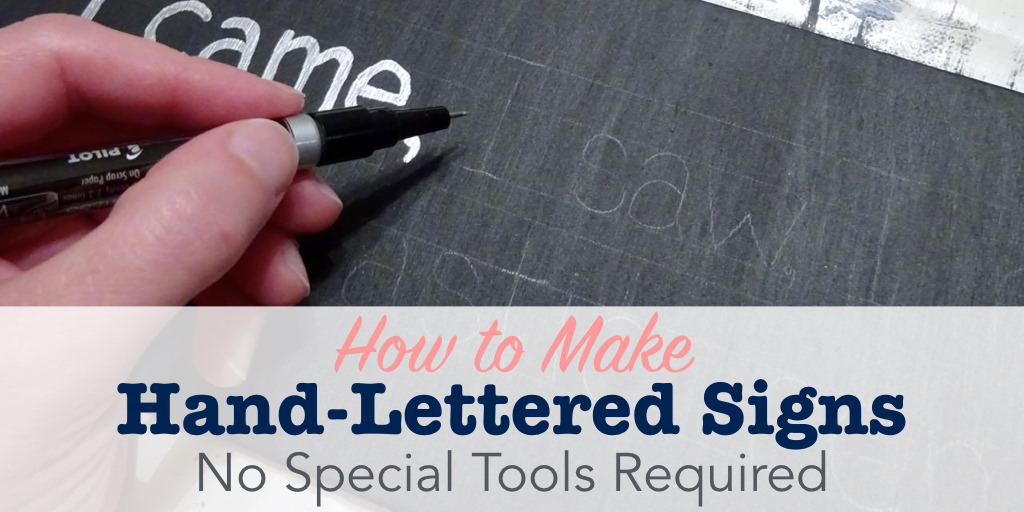
3. Write your words
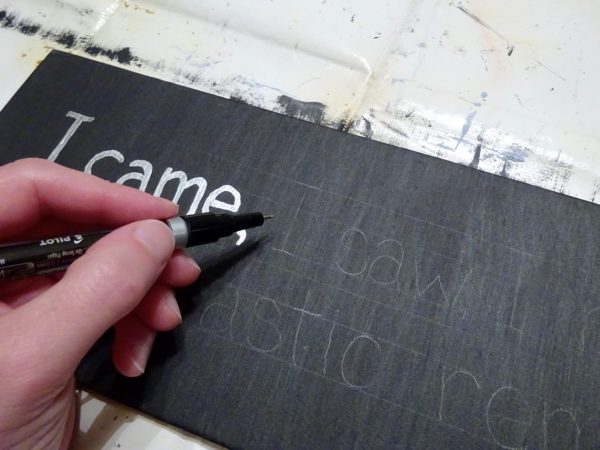

Write out your words in pencil before tracing over with a paint pen.
Using the lines you made as guides, write out your words in pencil. This is where your practice sheets come in handy, to help you with layout.
Once you’re satisfied with the penciled letters, you can trace over them with a paint pen. I went over each letter a couple times, to make them fatter.
As a lefty, I had to be extra careful not to put my hand in the wet paint and smear it. Luckily, paint pens dry pretty quickly.
Again, make sure your paint is completely dry before doing the next step, or you could ruin your sign.
4. Erase your reference lines
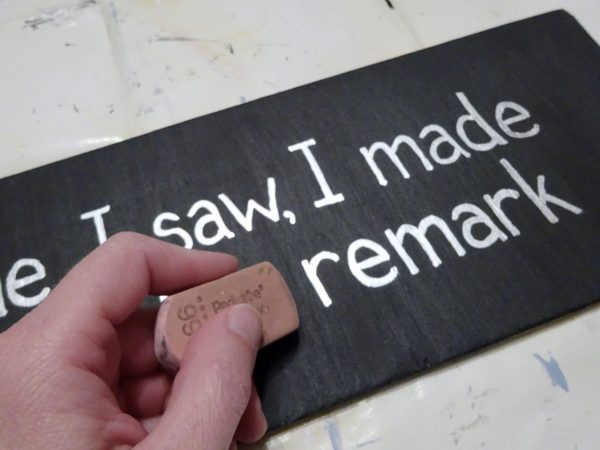
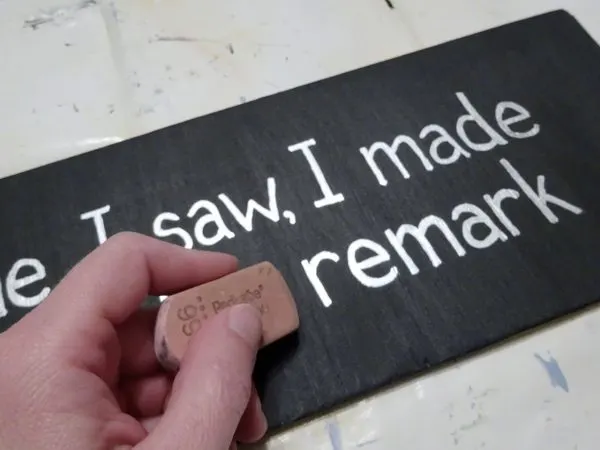
Gently erase your reference lines.
Ever so gently, use an eraser to remove your reference lines. Rather than just rubbing the eraser over everything, carefully work between the letters, disturbing as little paint as possible.
You can also erase any practice letters that didn’t get covered by the paint pen.
5. Apply a coat of varnish
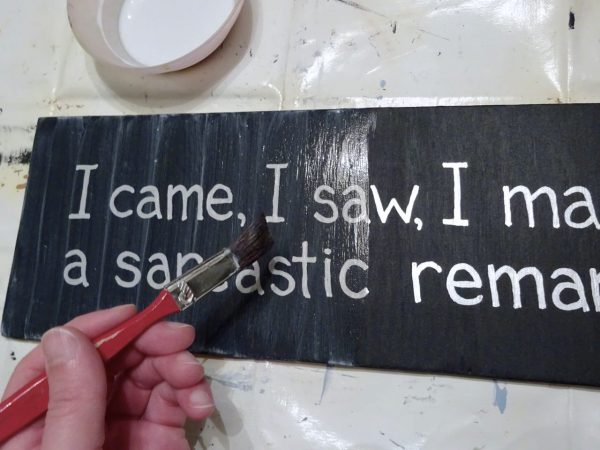
Varnish adds a little shine, and protects your paint.
Lastly, apply one or two coats of craft varnish to your sign. This protects your lettering, and also adds a little shine. (And, it helps to hide any final traces of pencil marks.)
And with that, you have finished your very own personalized, custom, hand lettered sign, with no special tools required.
Here’s what mine looked like. Let’s see yours! Please add your photo to our Pin on Pinterest here. I’d love to see your work.


If you liked this sign, you’re absolutely going to fall in love with my adorable dog sign. You can see a full tutorial and download a free template in my post: Unleash Your Creativity with this Adorable DIY Dog Sign.
Check it out. And thanks so much for joining me on this DIY adventure!