
Are you looking for an easy way to stain and seal a deck that doesn’t take a lot of time? My wood deck needs constant maintenance with the wet and cold Seattle winters. And this is the easiest deck stain method that I found to seal my deck.
Staining a weathered deck doesn’t have to be a big project. In fact, you don’t even have to strip off the old stain before resealing.
I was thrilled to discover how to stain a deck and apply waterproofing all at the same time. I’ve done this twice now, about two years apart, to protect the wood and keep my porch looking good.
For some reason, when my house was built, the roof was designed so that it doesn’t fully cover the front porch. About half of the porch is completely exposed to the weather (which is a lot of rain).
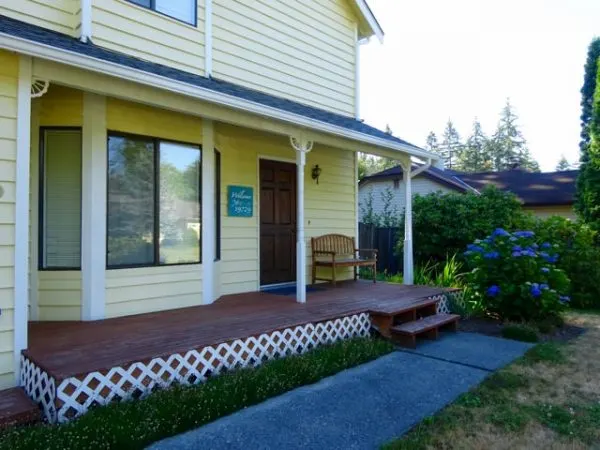
Being exposed to the weather means that the deck boards need a fair amount of attention to keep them weatherproofed and looking good. Over time, they start to look worn and weathered.
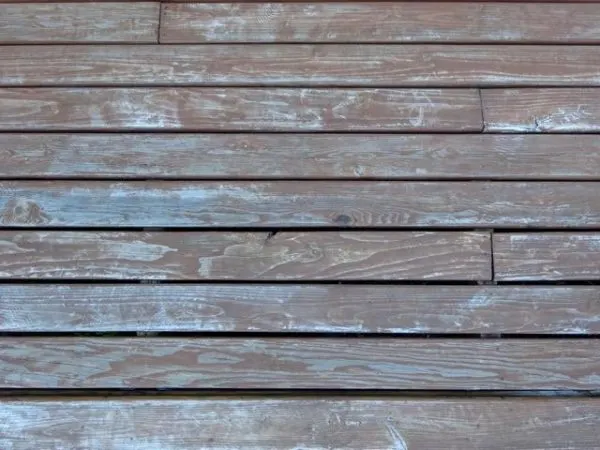
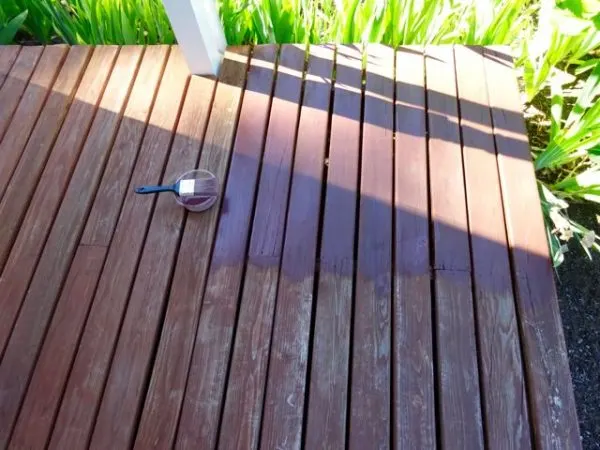
This is how I stained and waterproofed my ten year old front porch in one easy step. My deck boards went from looking like this:
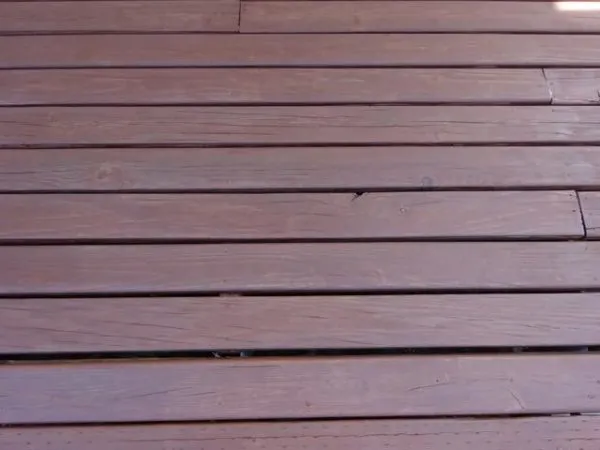
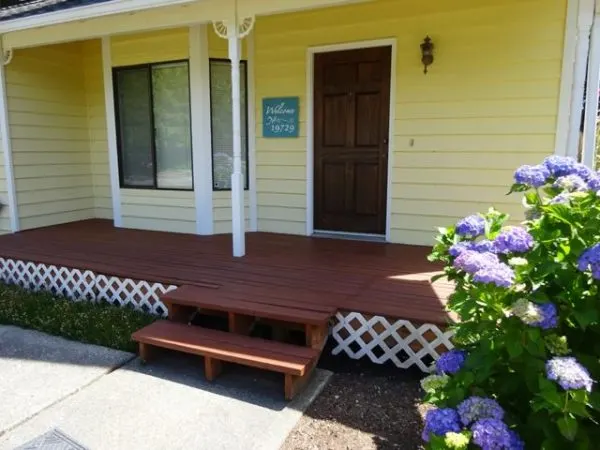
And after sealing in one step they now look like this:
If you like this project, then be sure to check out my Fall Home Maintenance Checklist and my Spring Home Maintenance Checklist (and download your free copies) to see more easy ways to take care of your home.
HOW TO STAIN & SEAL A DECK IN ONE STEP
Materials to Refinish a Deck
- Thompson’s WaterSeal Stain & Sealer (I used Autumn Brown, there are other colors)
- Paint brush or deck roller
- Small bowl or roller tray
- Nitrile disposable gloves
- Broom
Directions
Preparing to Seal a Deck
My porch boards have never been painted, but I have used other stain and sealer products in the past. Still, I didn’t have to do any sanding or stripping before starting this project.
About two days before I wanted to start work, I rinsed the deck off with my hose. That helped to remove buildup of dust and pollen. It also gave the wood plenty of time to dry again before I started working.
Before I started to stain and seal, I just swept off the dry porch one more time that day. Then I was ready to begin.

Applying Thompson’s WaterSeal to the Deck
The Thompson’s WaterSeal Stain & Sealer product that I use is a stain and waterproofing combo. The deck stain sealer combo is the only way that I have the patience to maintain my wood deck.
Applying the sealer with a brush allows for better control of the coverage. However, for bigger projects, you can apply with a deck roller. Using a roller on an extendable stick can really save your back and knees from bending over and applying the water sealer.
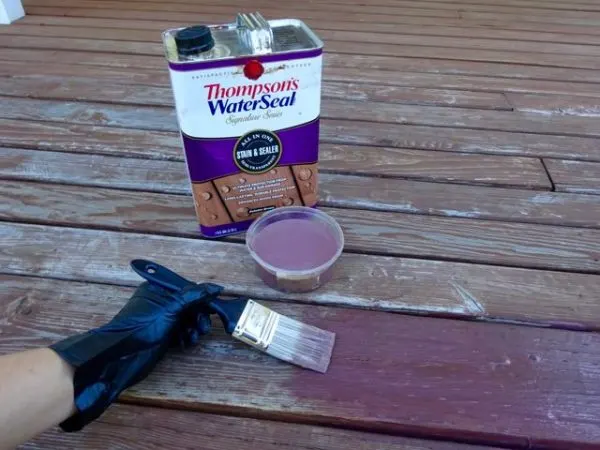
I wore gloves to keep the sealer from staining my hands. I applied a thick coat to the most weathered boards first, making sure to get the product down the sides and into any cracks.
As I got to the more protected boards under the roof, I applied less product. Over-applying the product can make it sticky because it doesn’t cure properly.
The Thompson’s WaterSeal combo comes in different colors. I used Autumn Brown. The great thing about this color is that it looks very similar to the color of pressure treated wood. That helps it to blend with the treated lumber I used to build the deck. (It reminds me a little of chocolate pudding while I’m painting it on.)
Staining the Deck in Sections
I usually stain short sections of a few deck boards, and then move down the length, until those boards are completely stained. Then I move on to a few more boards.
Working this way keeps a “wet edge” as I continue to add the new product to a wet area. It helps the stain to blend better.
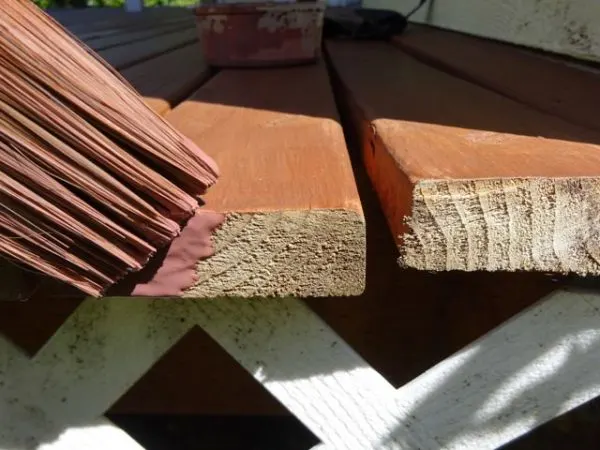
Be sure to apply a thick coat of the sealer onto the ends of your boards, too. This exposed area can really absorb water if it’s not protected and sealed.
How Much Time It Takes
It takes me only about an hour to stain and seal my front porch. This simple deck weatherproofing is all it takes to get it looking great again.
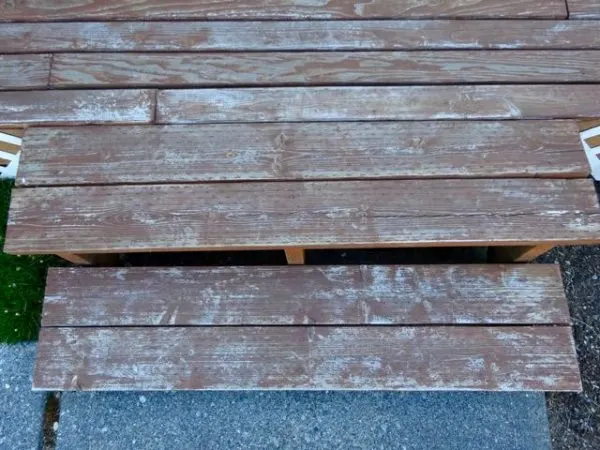
Here are my deck steps before treating:
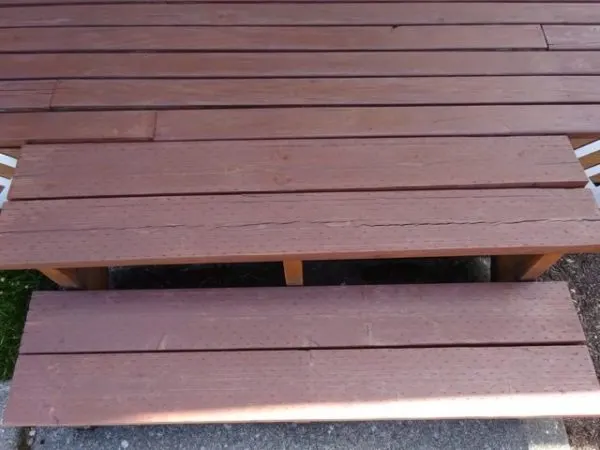
And here’s what the steps looked like after sealing them:
How Often to Apply
It’s a good idea to apply a treatment to your deck every summer. That way, it will withstand harsh winter weather. Or heavy rains.
This small investment of time extends the life of your deck, and saves you from having to replace rotting boards. Plus, it just looks good!
Thankfully I was able to protect and preserve my front porch deck. But the back deck was too rotten to save. See how I replaced it with a concrete-alternative patio. It’s just one step of my DIY budget-friendly backyard makeover that I love!


