
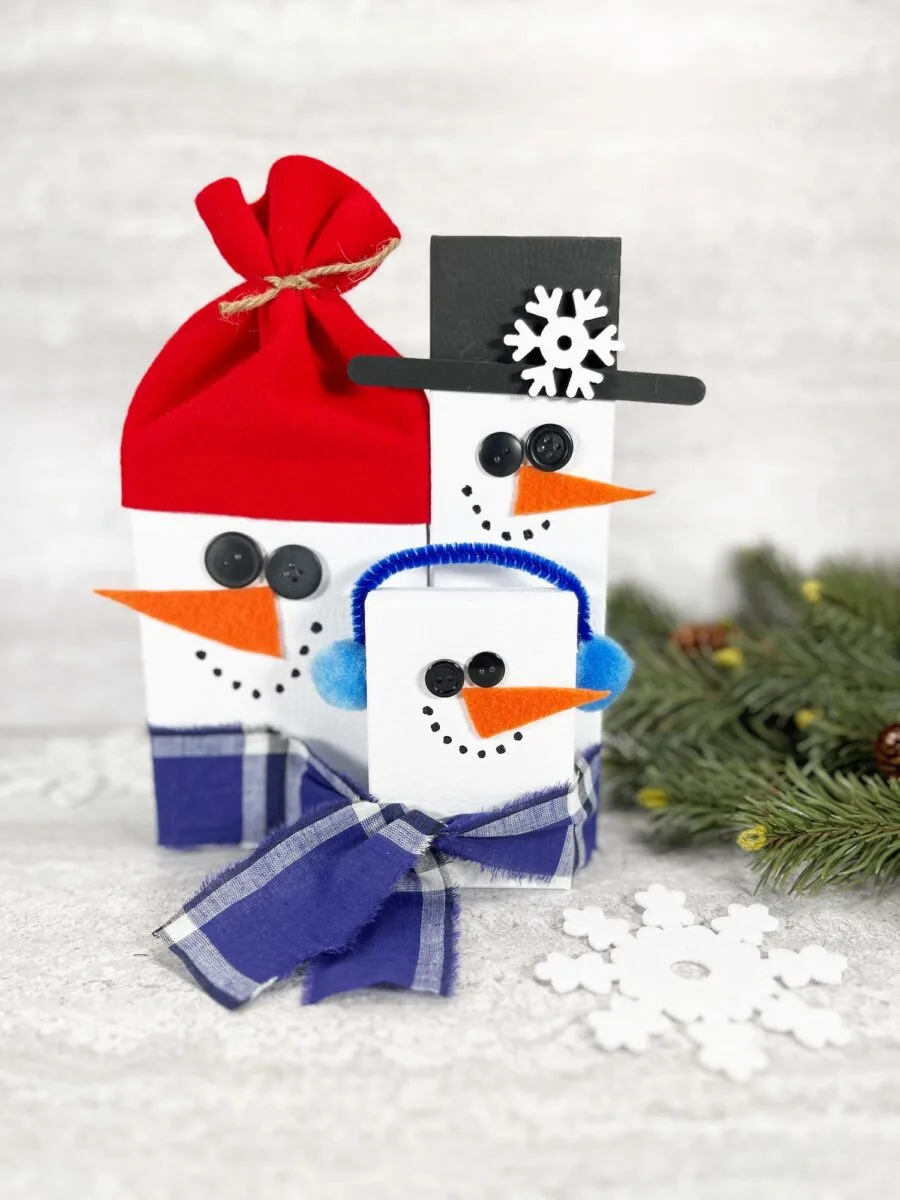
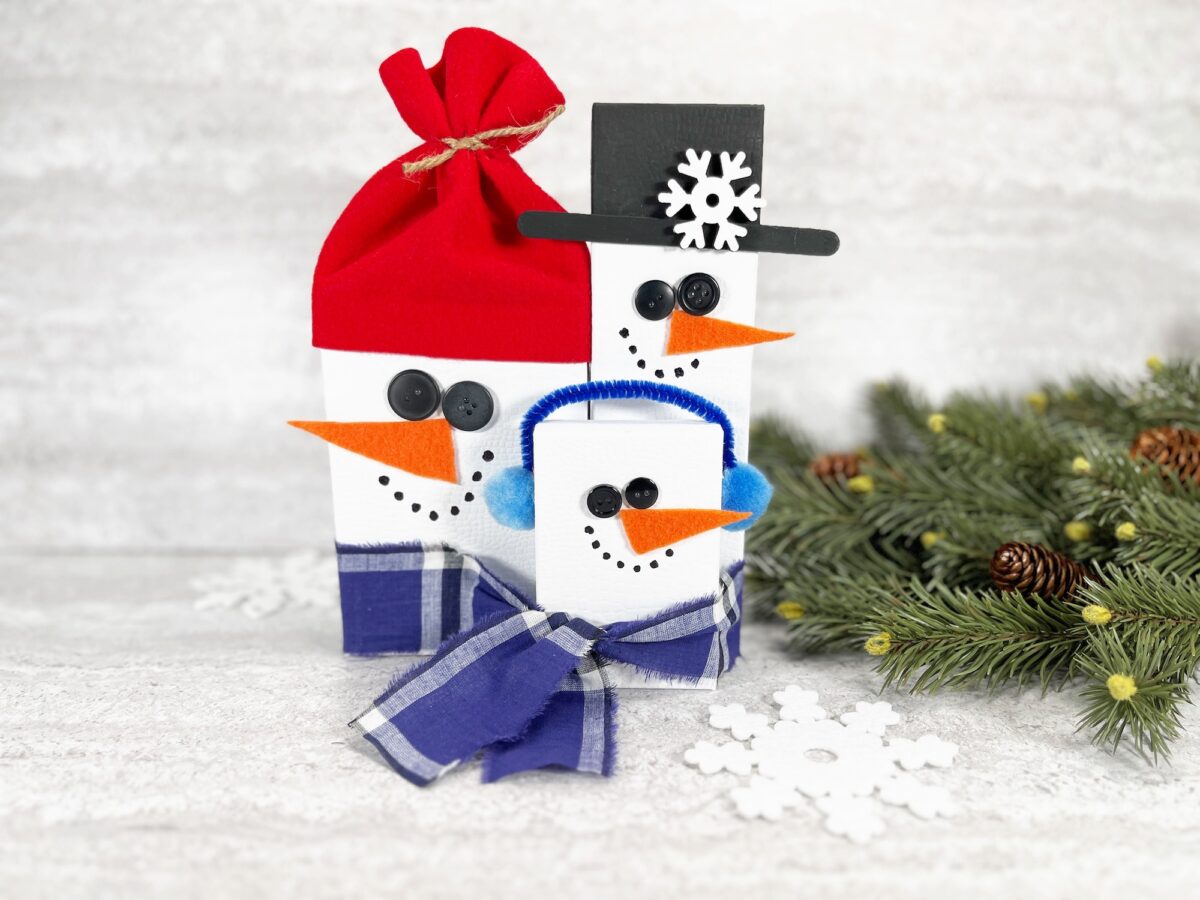
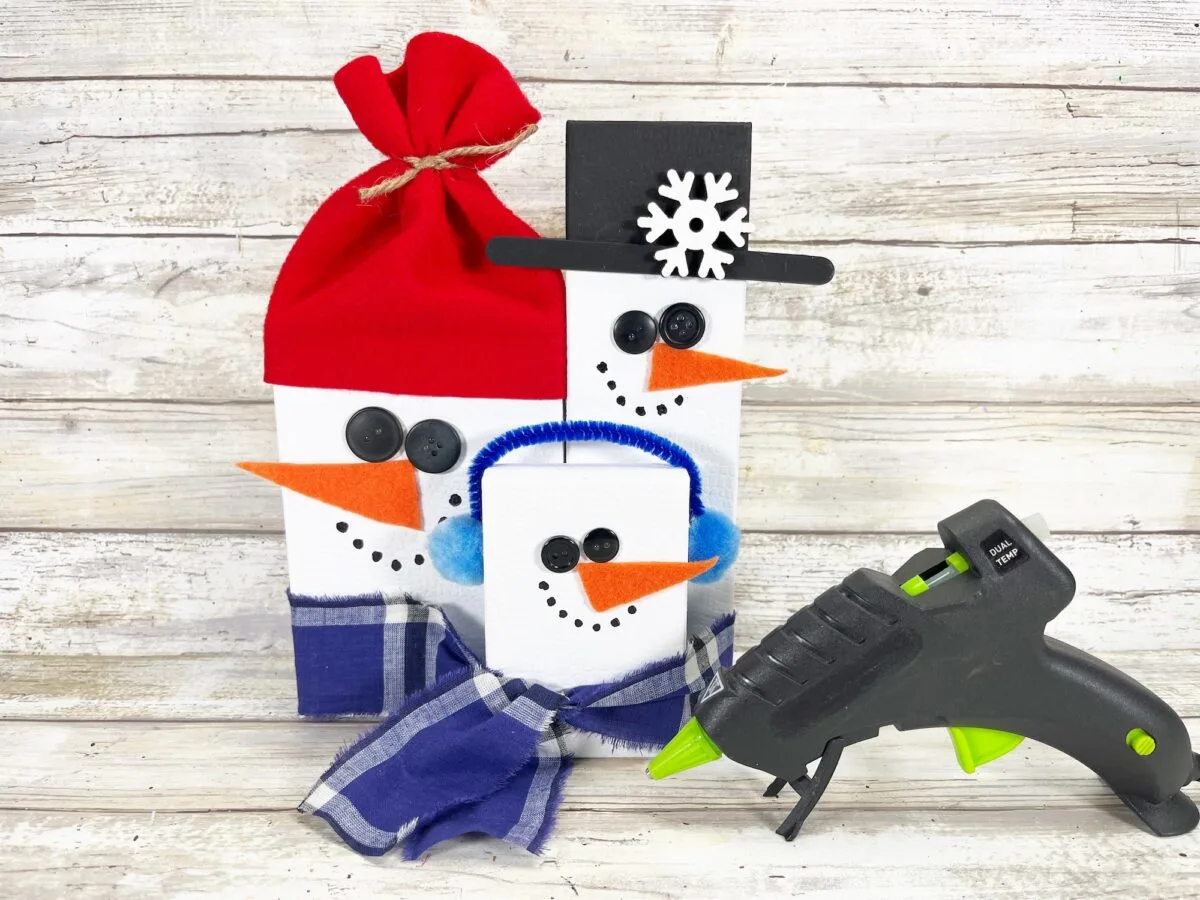
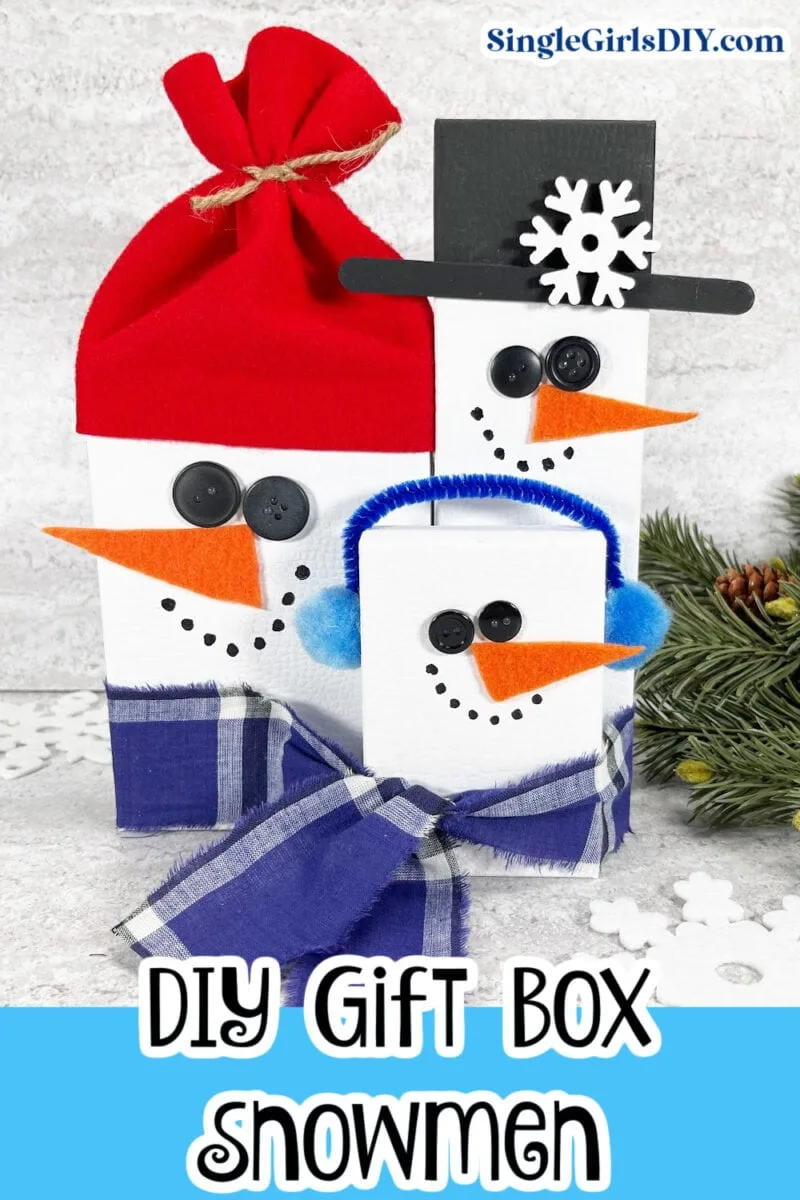
This cute jewelry box snowmen trio is fun winter craft to make with dollar store supplies. Just paint and glue the materials together to make a DIY snowman decoration to enjoy during colder months.

We bought new gift boxes from the Dollar Tree, but this is also a great project to use up extra gift boxes from holiday presents.
This quick and easy craft is perfect for older kids, tweens, teens, adults and winter crafts for seniors. In fact, it is a great DIY project for almost anyone!

Many of the craft supplies we used are also used for our other Dollar Tree DIY snowmen, including this melting snowman craft, our Boho-inspired rope snowman, and snowman sunglasses. You could easily buy the materials and make several different projects in a day.
How to Make Jewelry Box Snowmen
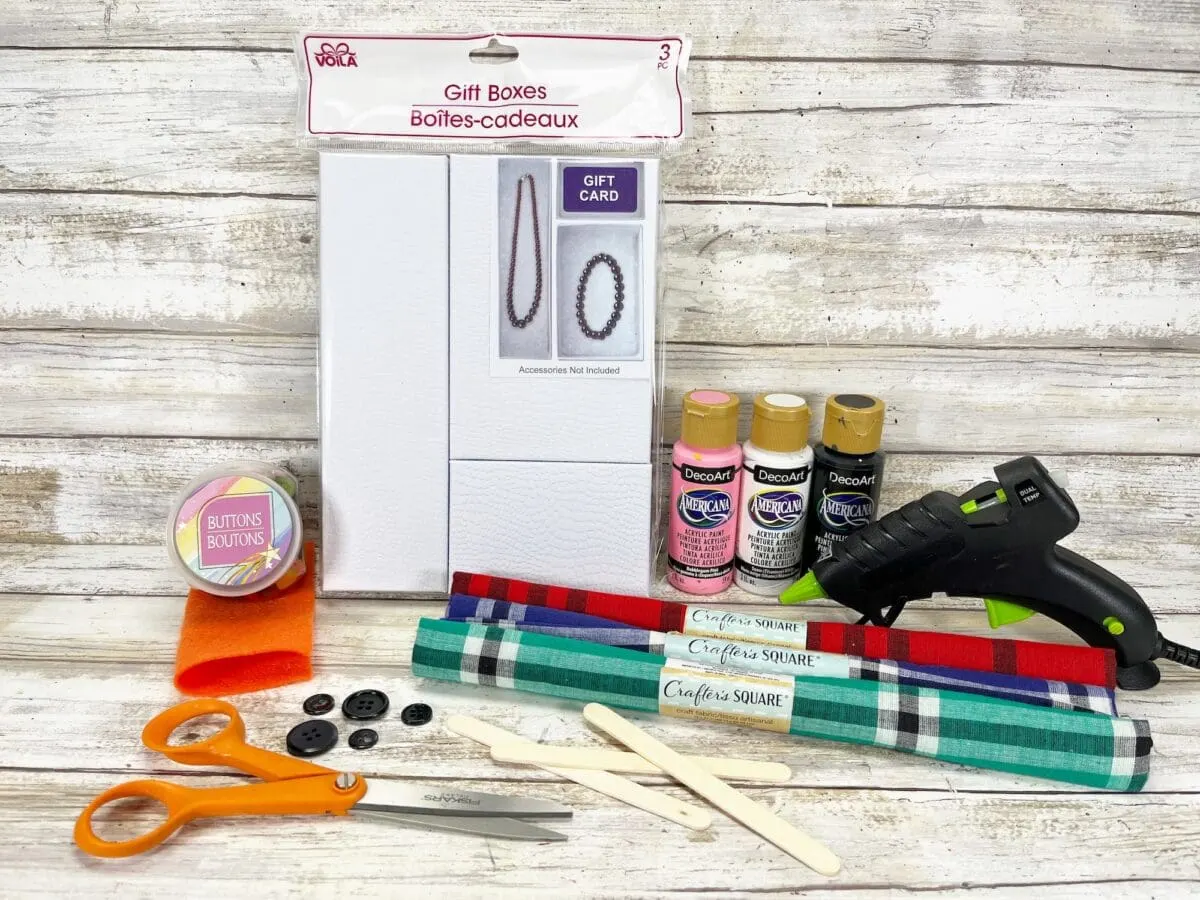
Most of our supplies were bought at the Dollar Tree.
Supplies
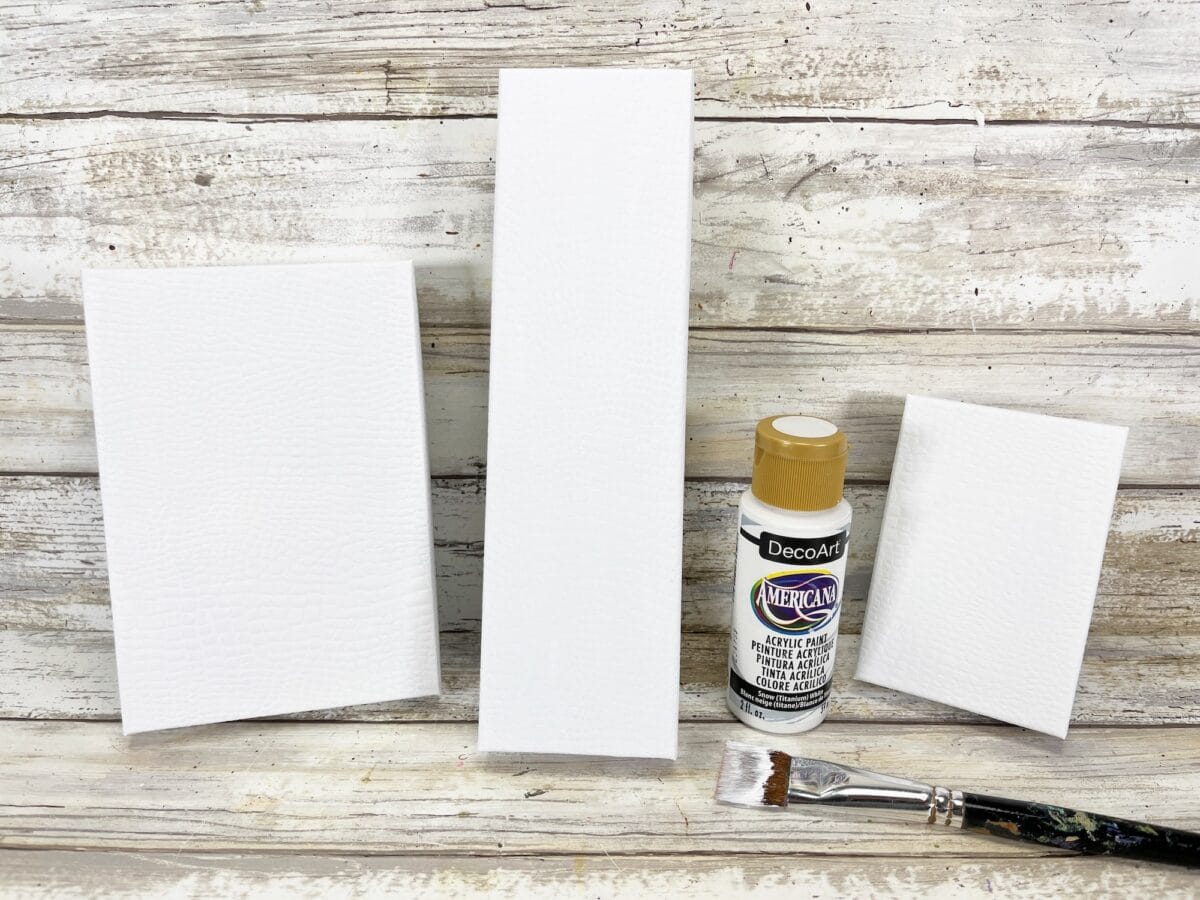
- 3 pack of Jewelry Boxes in assorted sizes (make sure one is tall)
- 1 Craft Stick (Popsicle Stick)
- 1 Wooden Snowflake
- 6 Black Buttons
- Acrylic Craft Paint (White, Black)
- Craft Felt (Red, Orange)
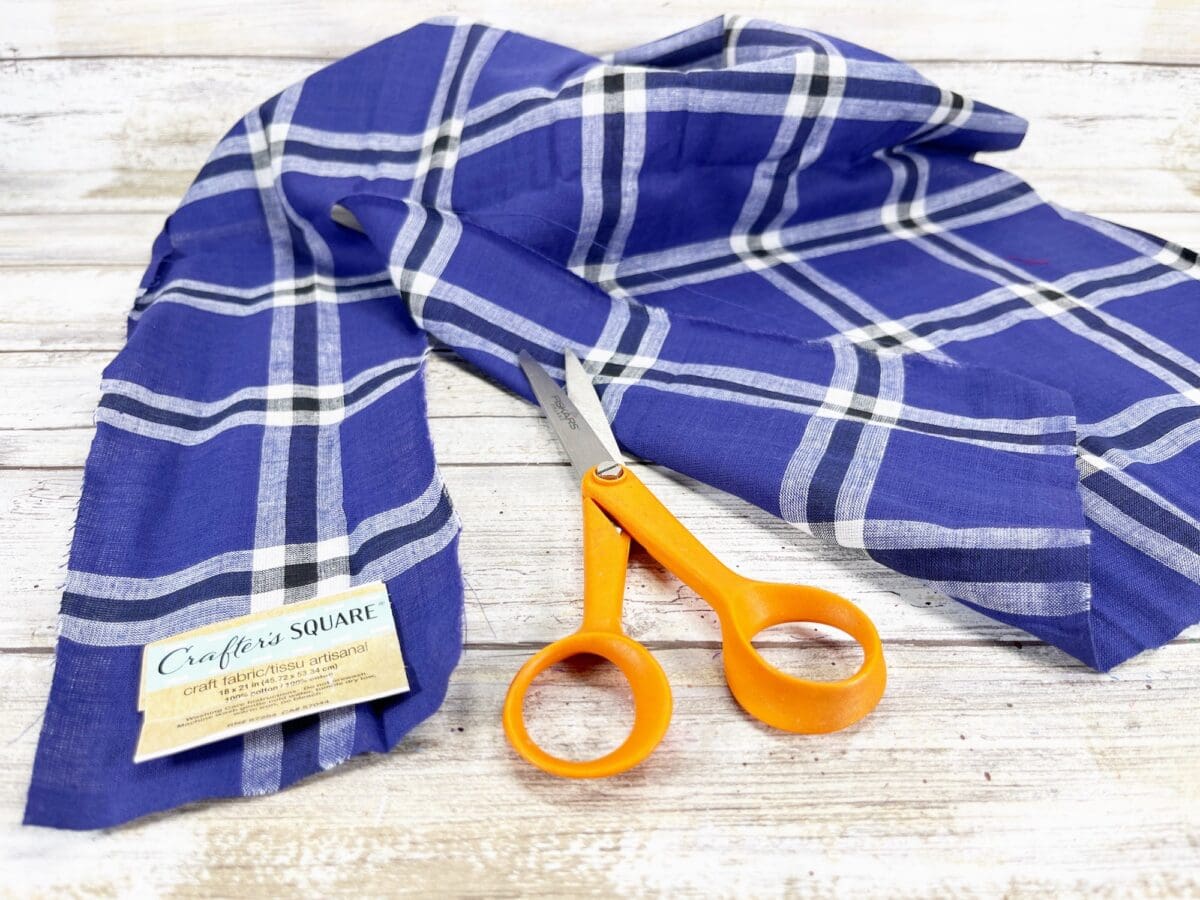
- 3 in. X 36 in. Plaid Fabric (or glue together two 3 in X 18 in strips from a fat quarter)
- 10 inch Natural Jute Twine (or ribbon, if you prefer)
- 2 Pom Poms
- 6 inch Chenille Stem
- Hot Glue Gun or Craft Glue
- Paintbrush
- Scissors
- Pencil
- Permanent Black Marker

Instructions
Step 1
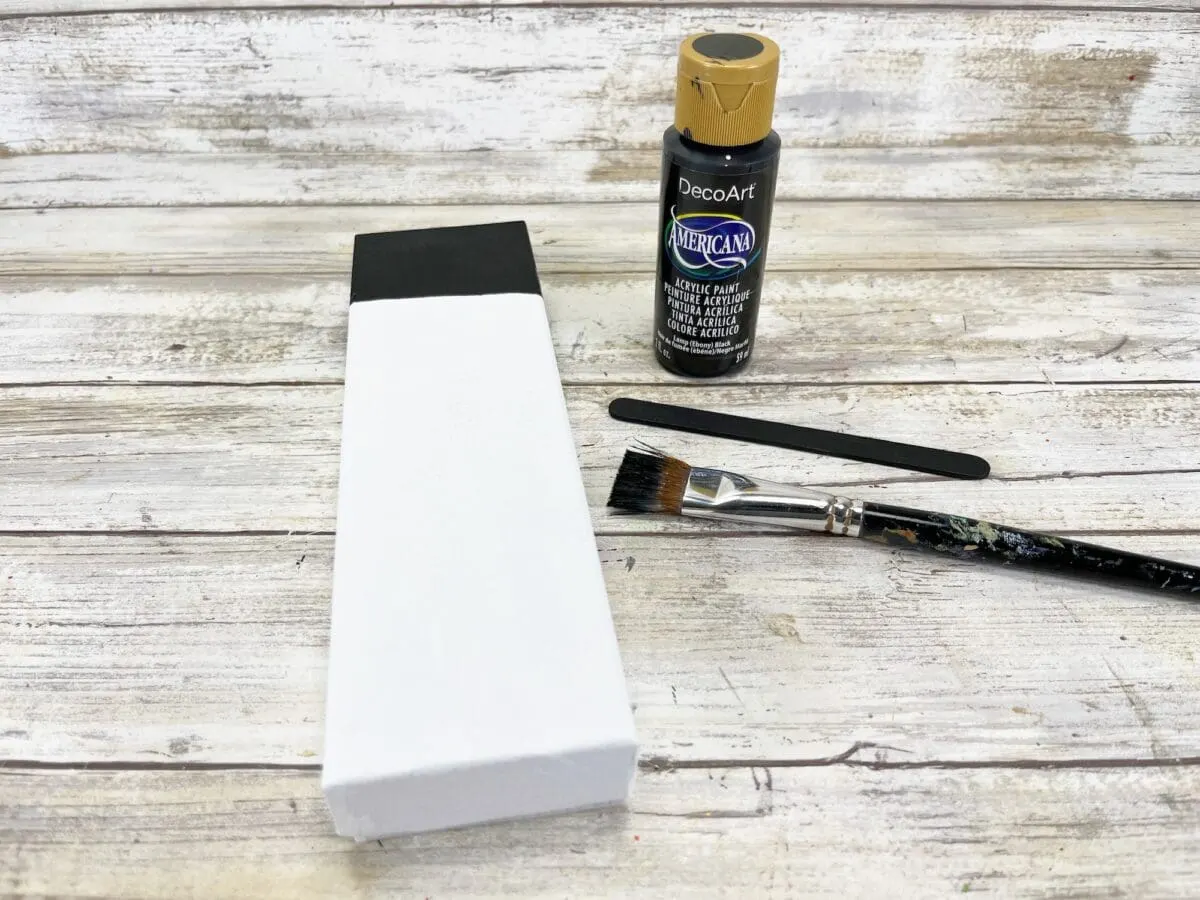
Paint the three cardboard jewelry boxes with white acrylic craft paint. Set aside to dry and apply a second coat, if necessary.

Step 2
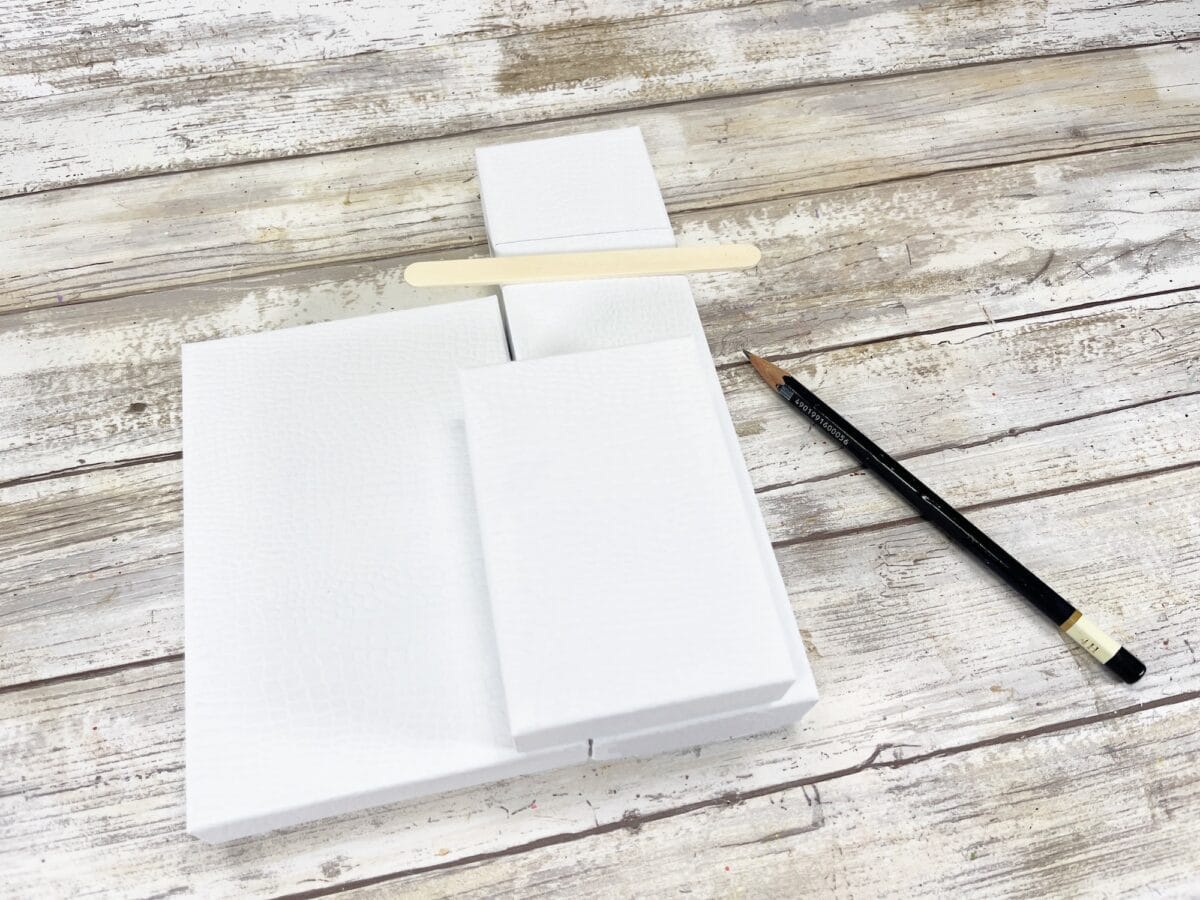
Arrange the cardboard jewelry boxes in a grouping, as seen in the photo below. Place the craft stick at the top one-third of the tall jewelry box (we placed it at an angle) and draw a line across the box with a pencil.

Step 3
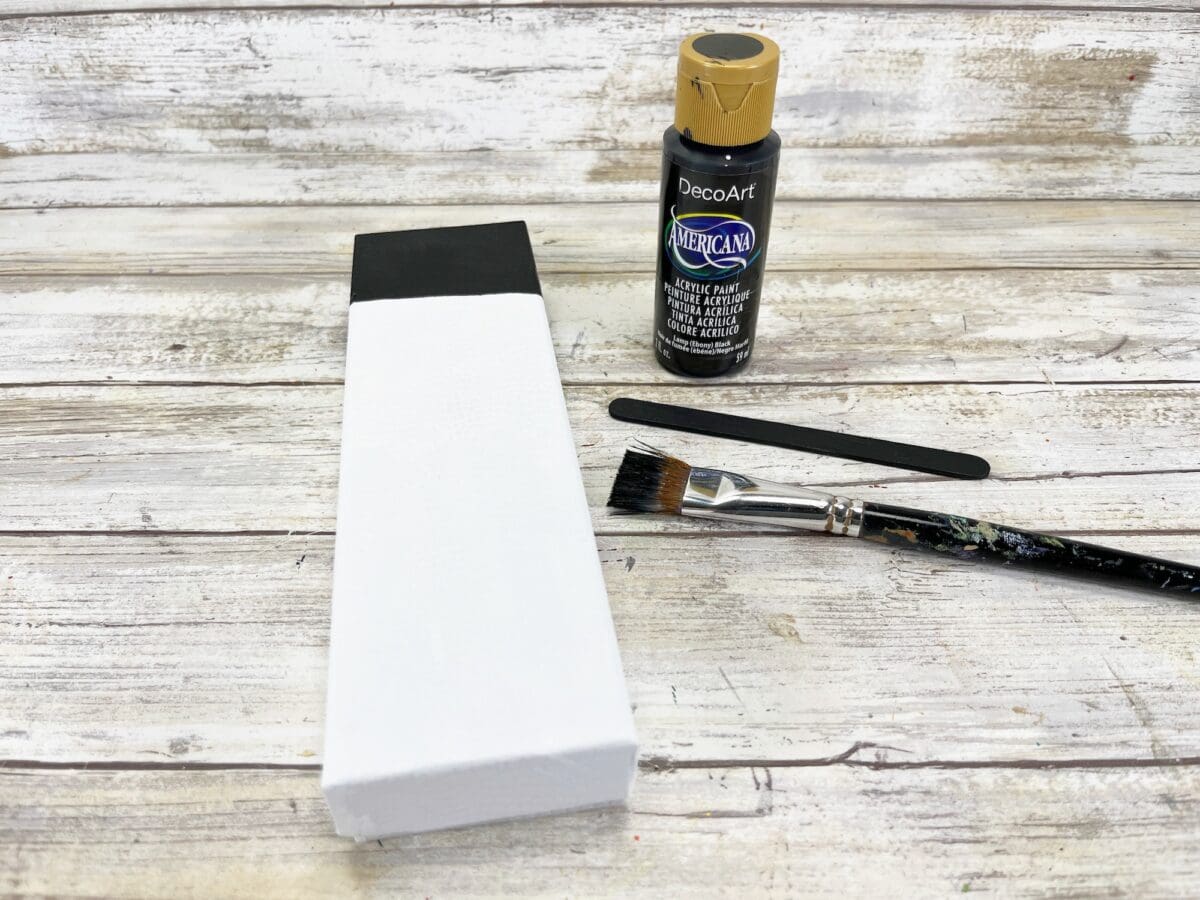
Paint the craft stick and the top part of the tall jewelry box above the pencil line with black acrylic craft paint. Let dry, and apply a second coat, if necessary.
Step 4
Attach the three box lids to the three box bases with glue. Do not glue the three boxes together yet, just attach the lid to each individual box.
Glue the black craft stick on the tall box as the hat brim.

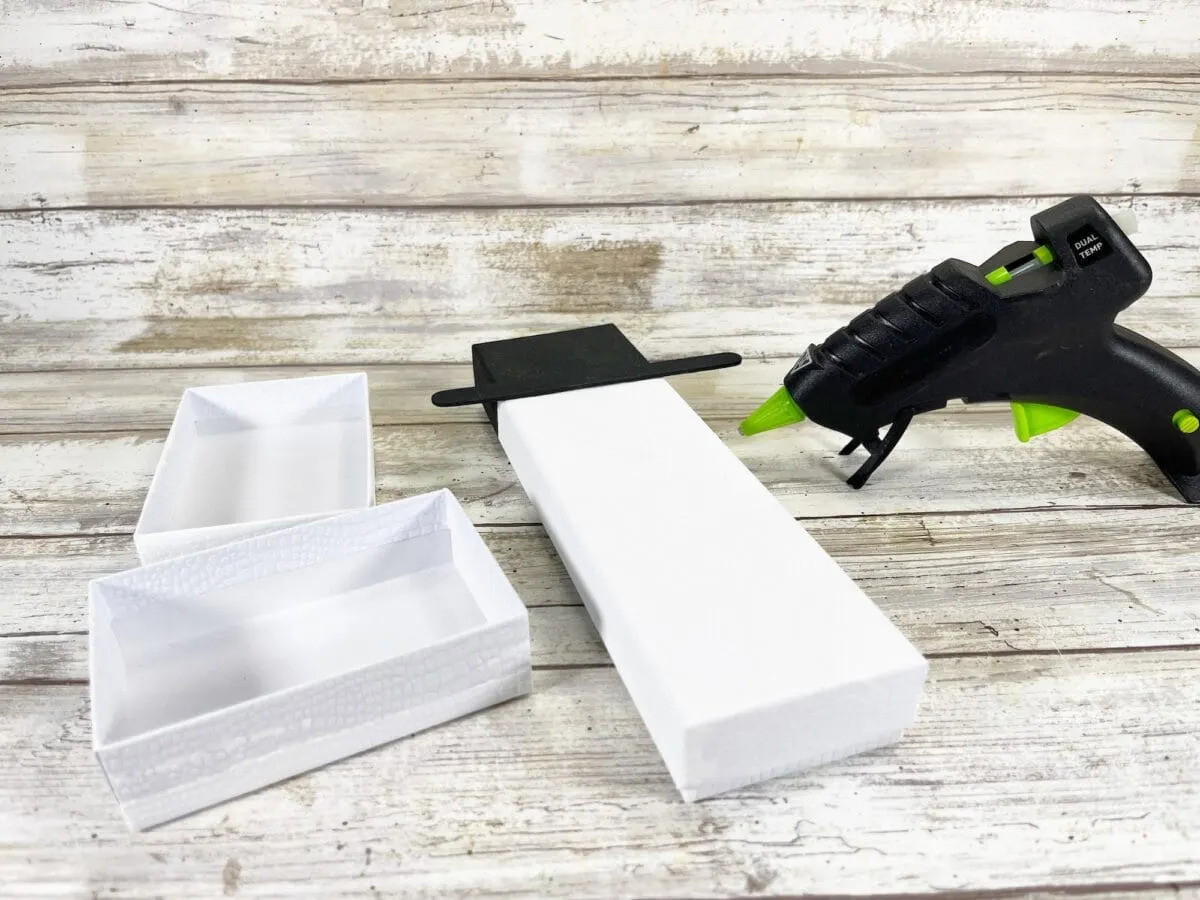
If you are using a liquid craft glue, allow time to dry.
Step 5
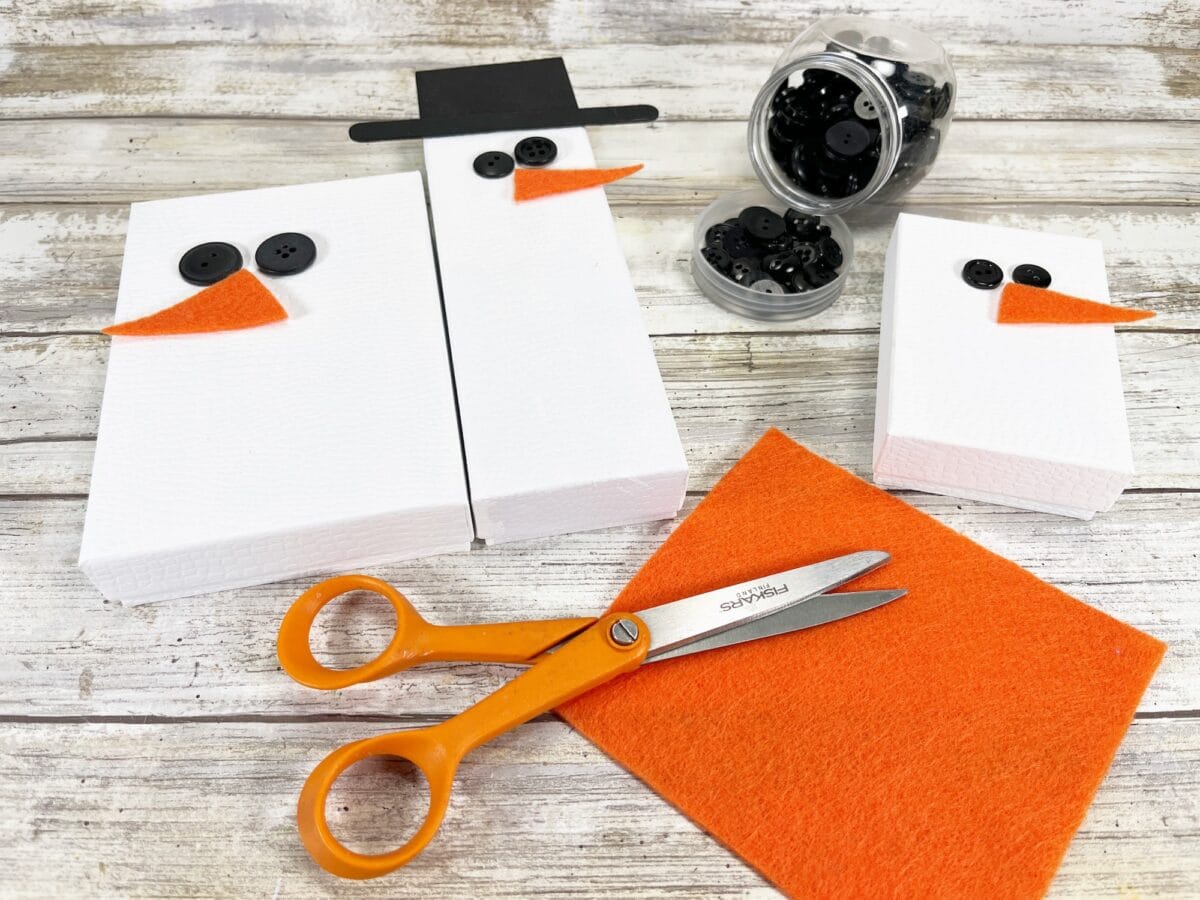
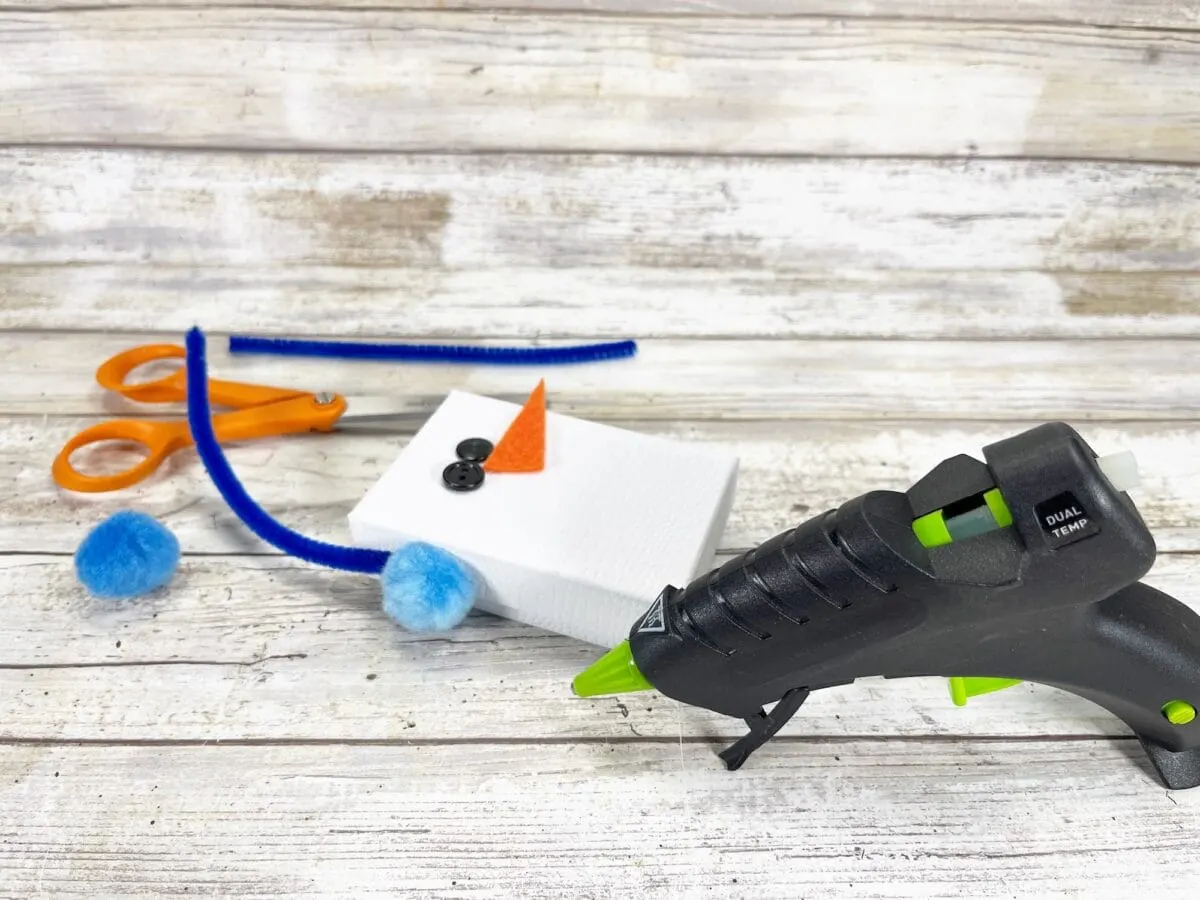
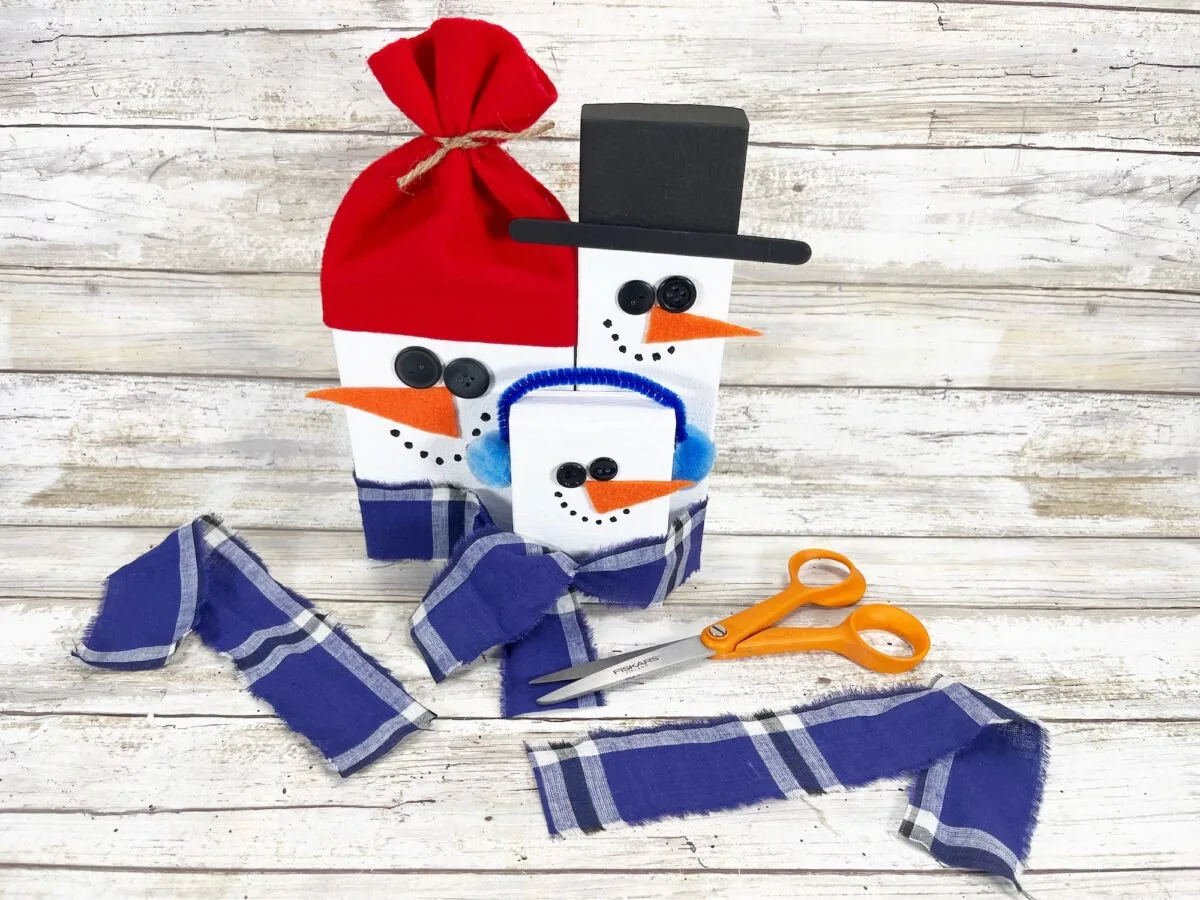
Cut out a carrot shape for each of the snowmen’s noses from the orange craft felt.
Glue the carrot nose and two black buttons onto each snowman with glue.

Step 6
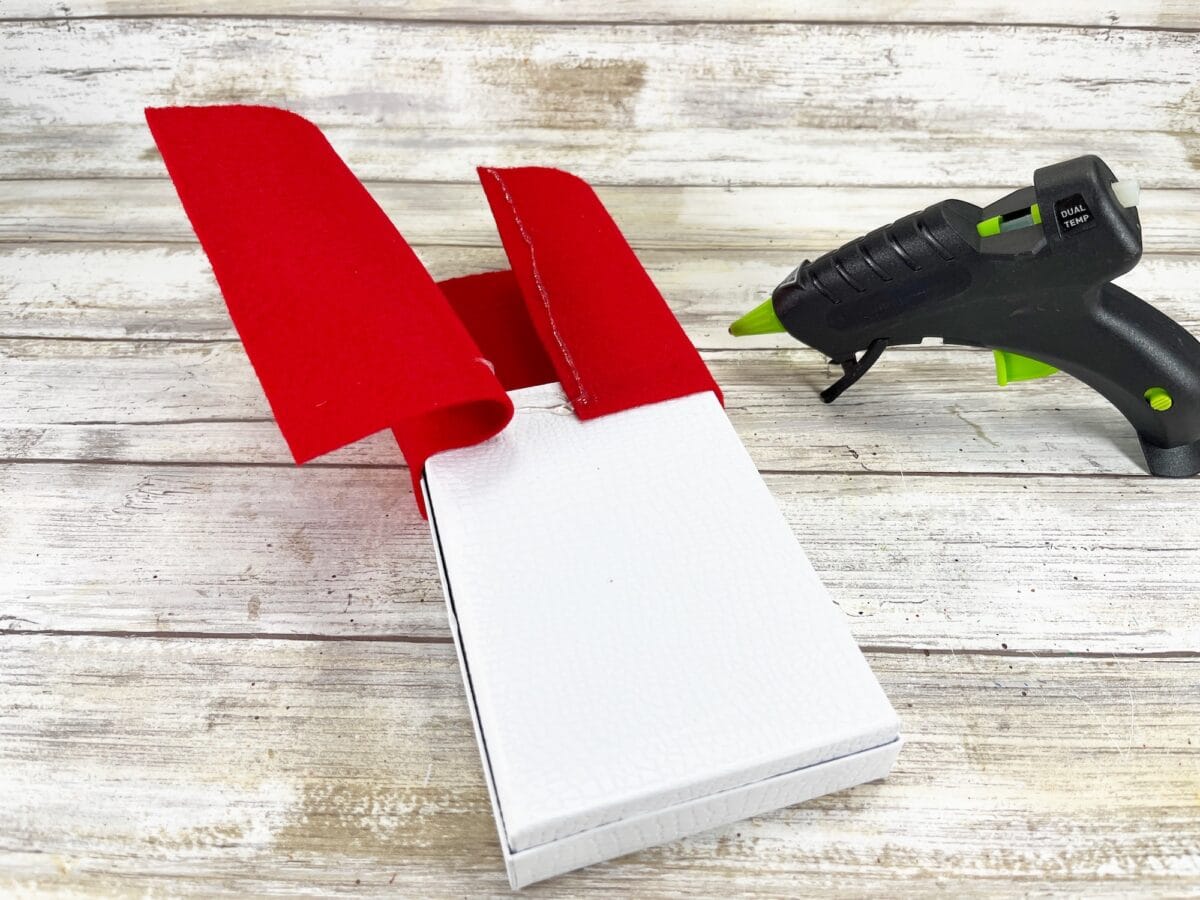
Cut a 5” by 9” rectangle from red craft felt.

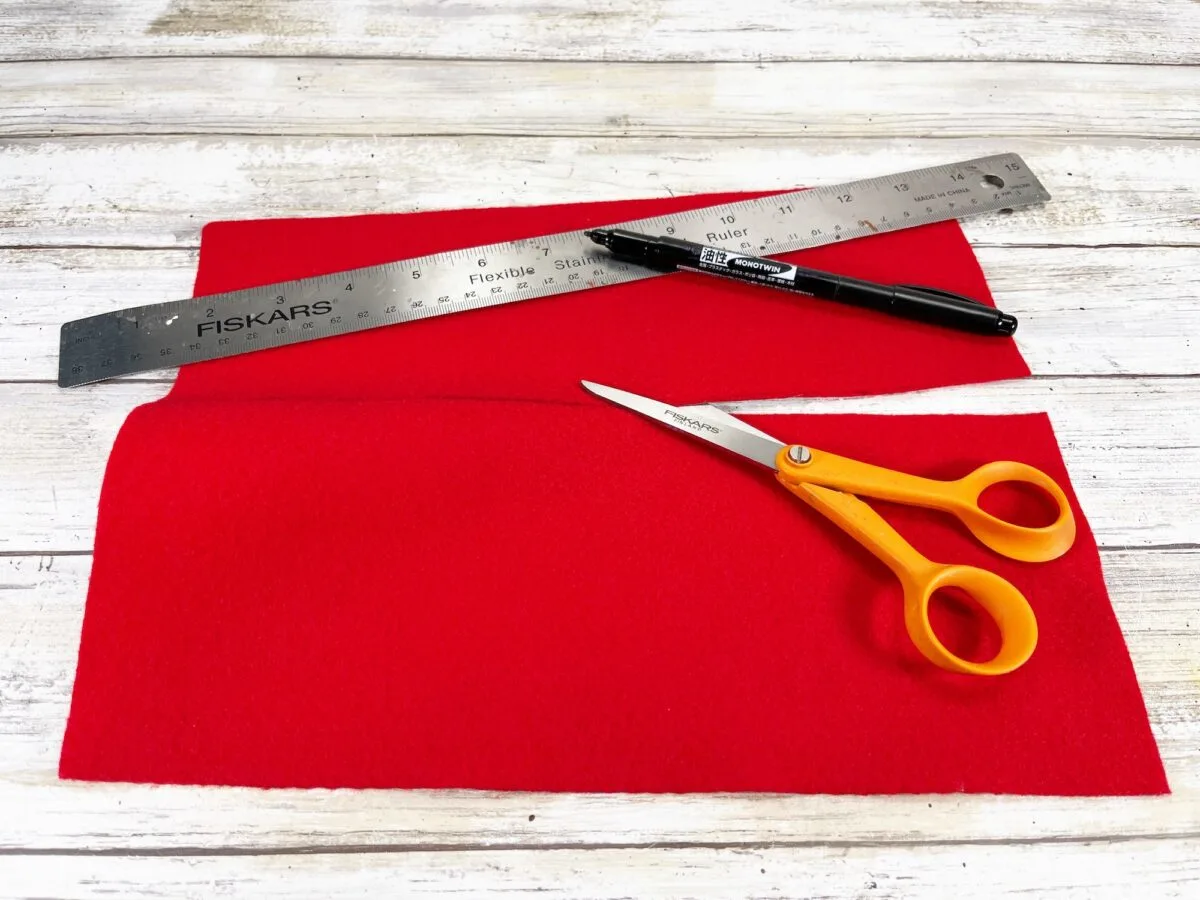
Glue the felt rectangle to the top of the large snowman box with the seam at the back, making sure to secure the seam closed with glue. You only need to glue about ½ in to 1 inch of felt on top of the box, leaving the rest open on top.

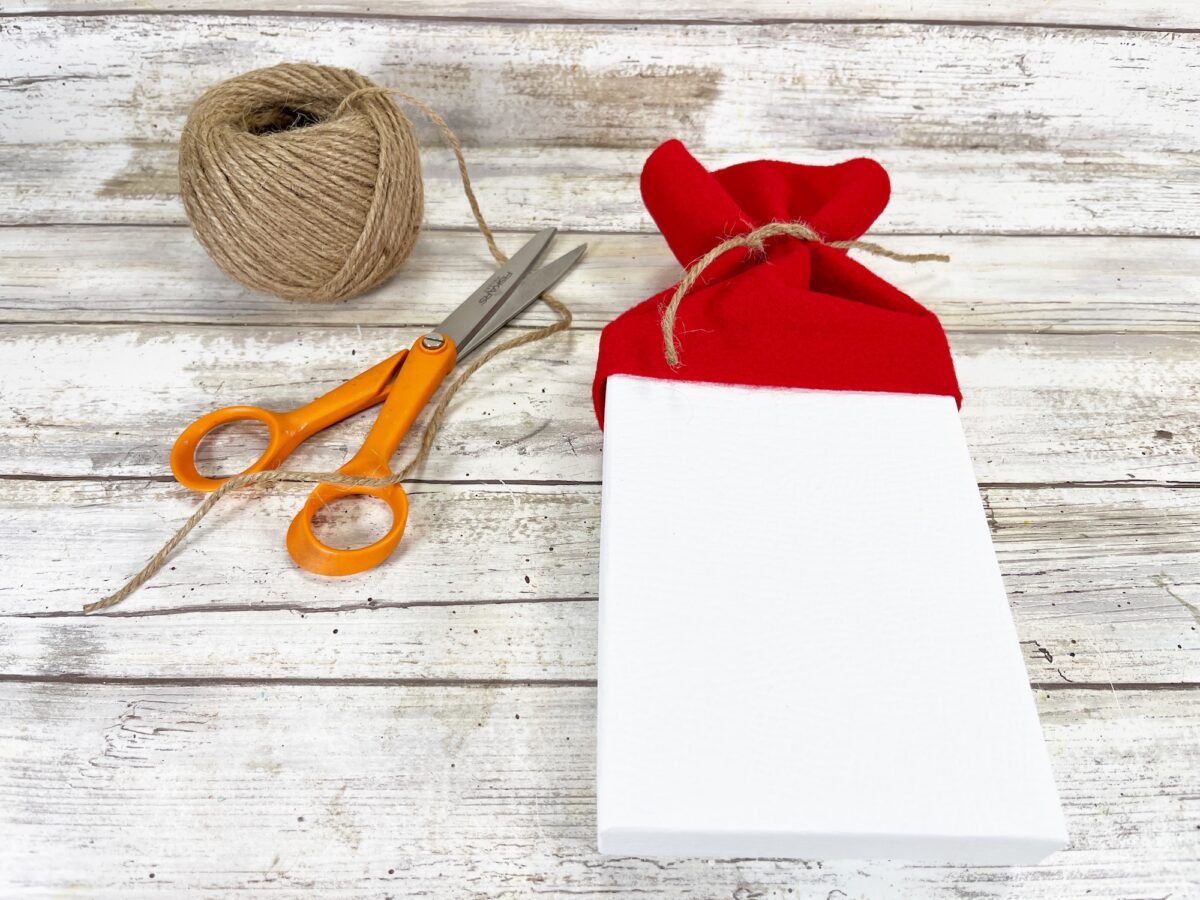
Once glue is dry, bunch up the felt to look like a fleece hat and tie the jute twine around the top to gather and secure. Tie a knot and trim any long ends.

Step 7
Cut a 6” length of chenille stem, then glue to both sides of the small box.
Glue a pom pom on top of the cut ends of the chenille stem to create earmuffs.

Step 8
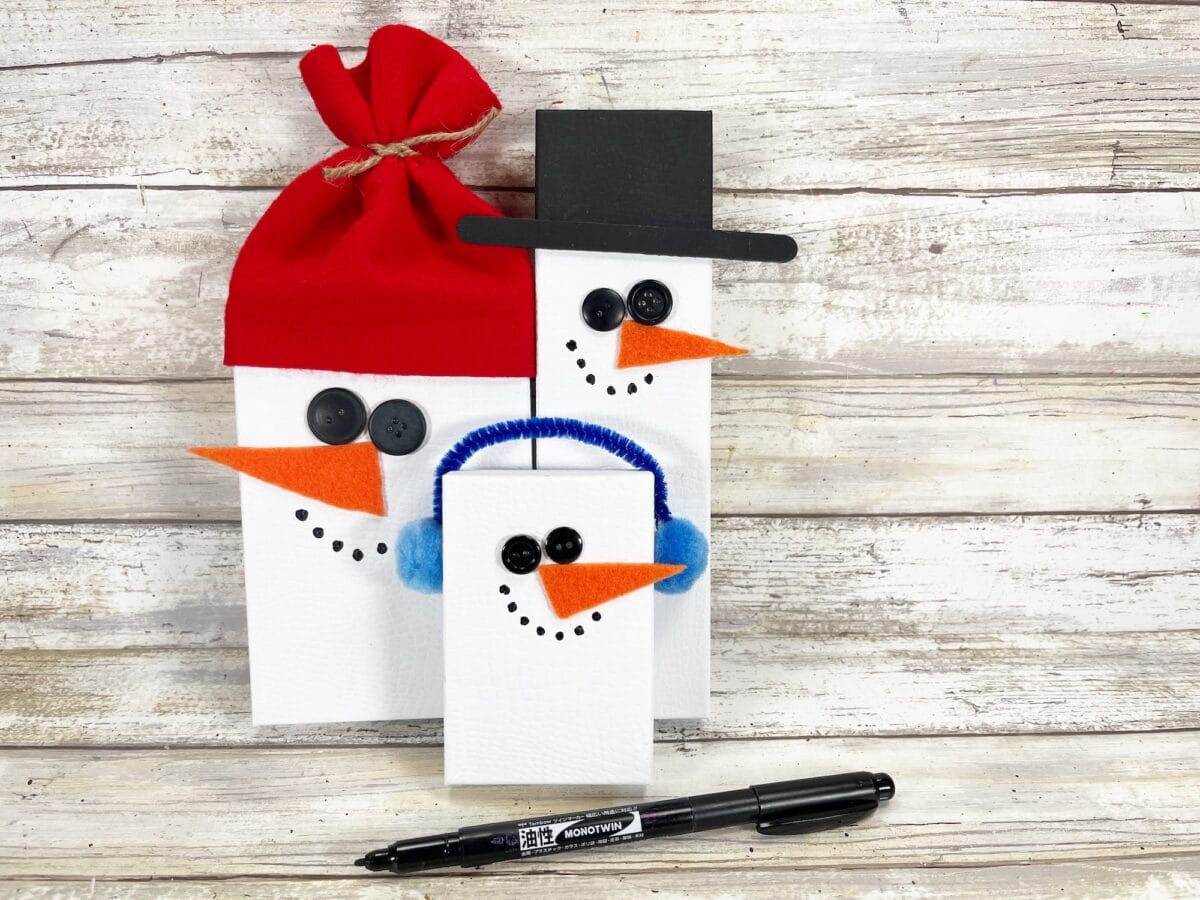
Using a permanent black marker, draw on the coal mouths for each of the three snowmen.
You could also use black acrylic paint to paint on small dots instead.

Step 9
Cut a 3 inch X 36 inch strip of plaid fabric. Or glue together two 3 inch X 18 inch pieces of fabric strips cut from a fat quarter (as we did from a Dollar Tree fat quarter) by overlapping the short ends slightly and gluing together.
If you prefer a frayed edge along the fabric, as seen in our photos, you will want to tear the fabric rather than cut.

Step 10
Glue the large and tall snowman boxes together, lining them up on the side and gluing along the edges that meet.
Glue the fabric strip to the back of these two boxes, slightly off-centering the middle of the fabric in the middle of the boxes.
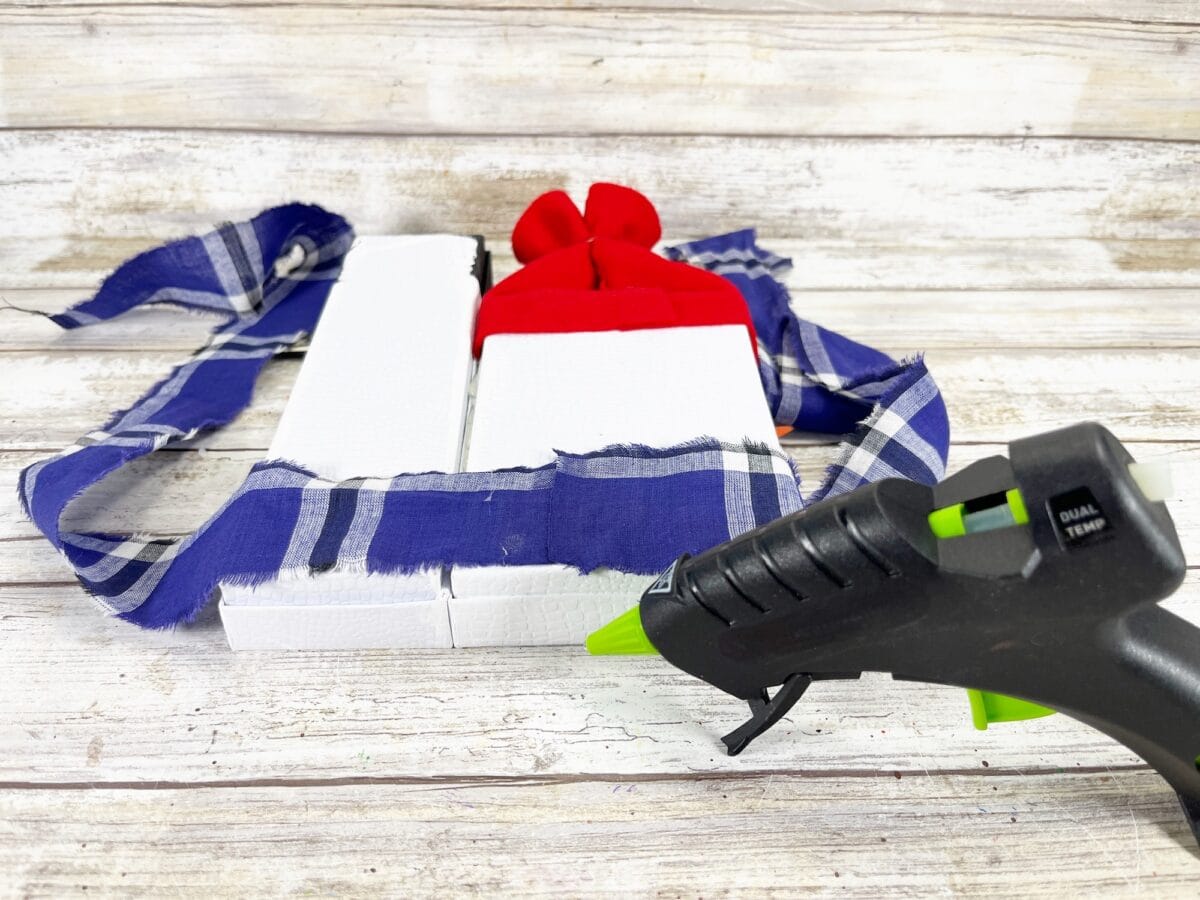

Step 11
Attach the small snowman to the front of the other two snowmen boxes with glue.
Tie the plaid fabric scarf around the trio of snowmen, securing in the front with glue. Trim any long ends of the scarf with scissors.

Step 12
Paint the small wooden snowflake with white acrylic craft paint. Let dry, and apply a second coat, if necessary.
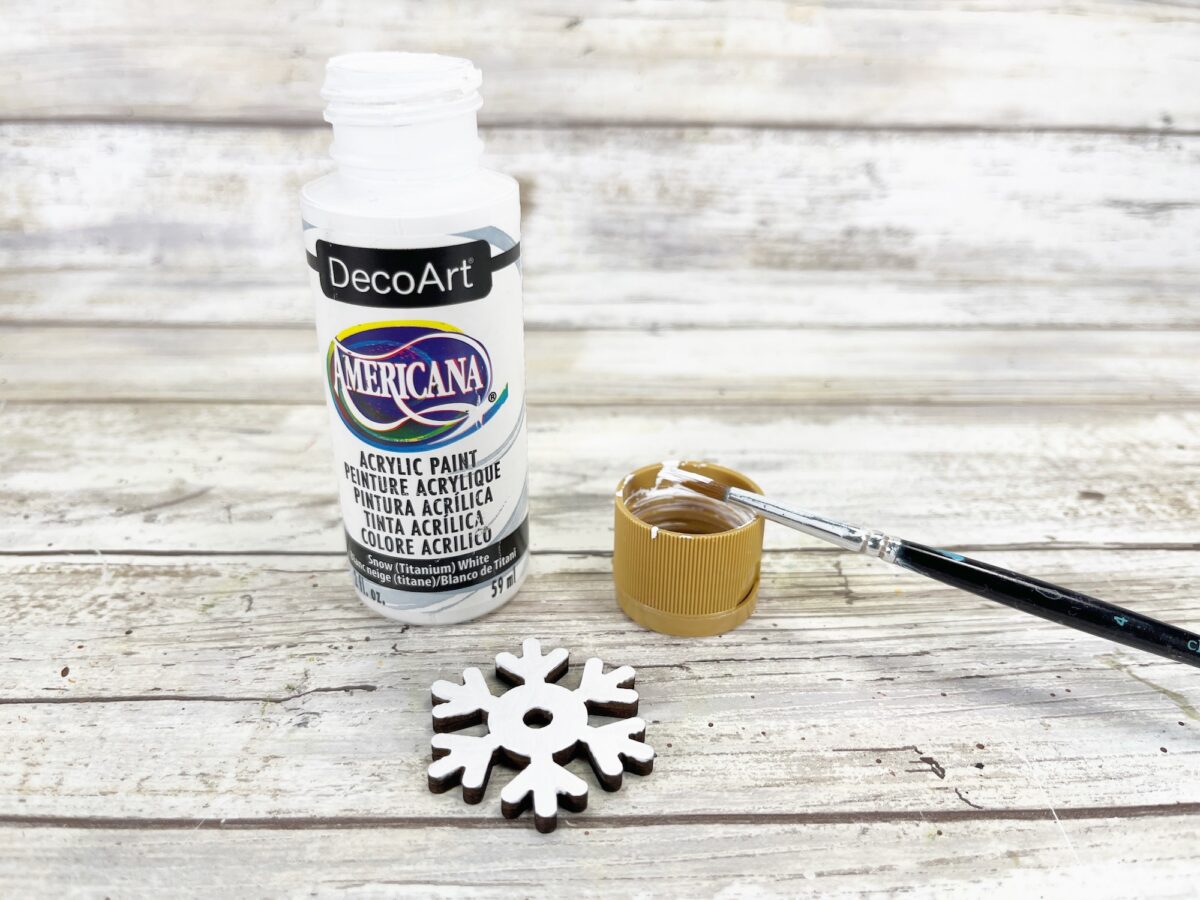

Glue the wooden snowflake to the tall snowman’s hat.

Save this idea to Pinterest to remember for later!

Want more snowman crafts? See these easy ideas next:
- Foam Dice Snowman
- DIY Snowman Bracelet
- Mop Snowman Gnome
- Snowman Wreath
- Reversible Wood Block Snowman
- Pumpkin Stack Snowman
- Snowman Vase
- Snowman Bookmark
- Tumbling Tower Snowman
