


What could be cozier than sipping a pumpkin-spiced coffee while snuggled up under a blanket reading a good book? If you want to enjoy all the Fall feels this year, you will definitely want to make this Pumpkin bookmark!
Our cute fall bookmark corner is made with a free pattern and scrap pieces of felt. While we hand stitched this pumpkin bookmark, you can glue the pieces together instead, if you would like.
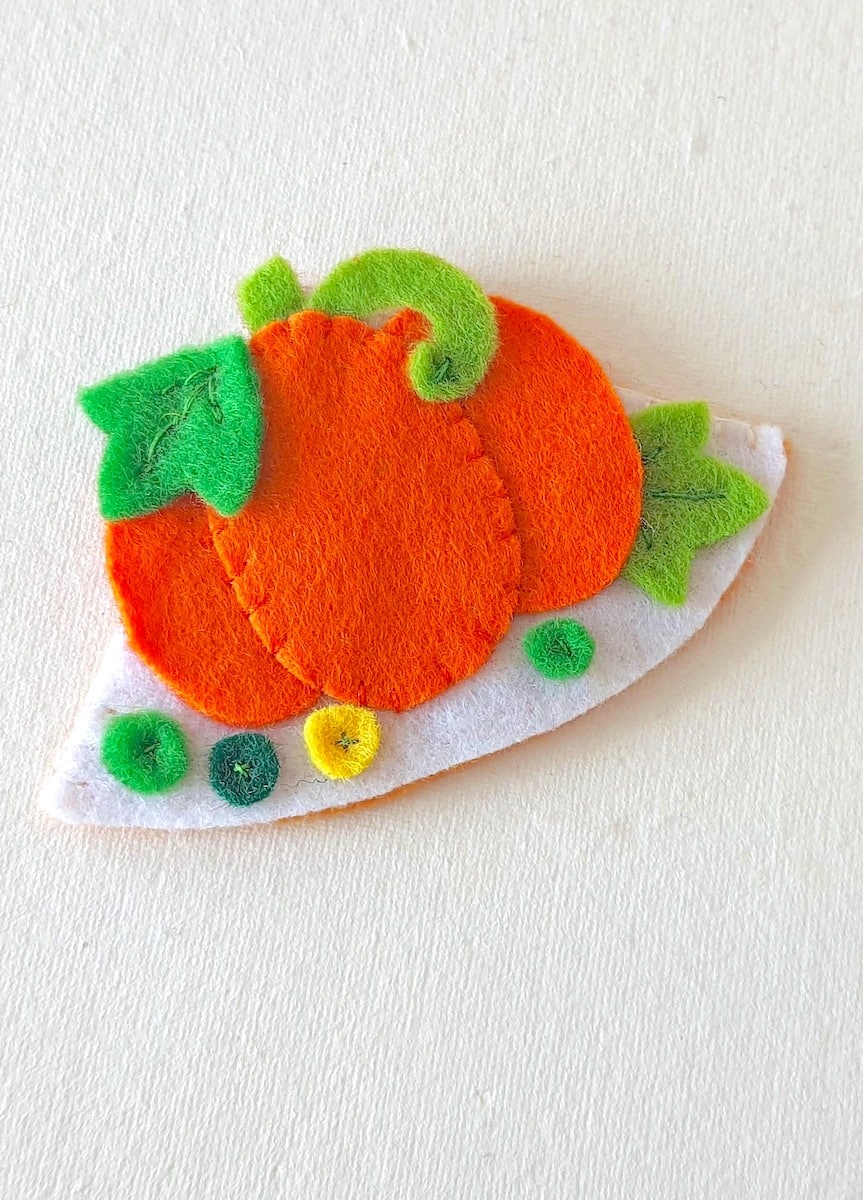

This easy pumpkin bookmark is the perfect way to use up felt scraps from other craft projects. In fact, you only need tiny little bits of green and yellow felts to make this adorable corner bookmark.
If you love reading, you will want to see these other DIY bookmarks, too:
- Snowman Bookmark
- Wire Heart Bookmark
- Harry Potter Bookmark
- Simple Fabric Bookmark
- Felt Flower Elastic Book Band
How to Make a Pumpkin Bookmark for Fall
Materials
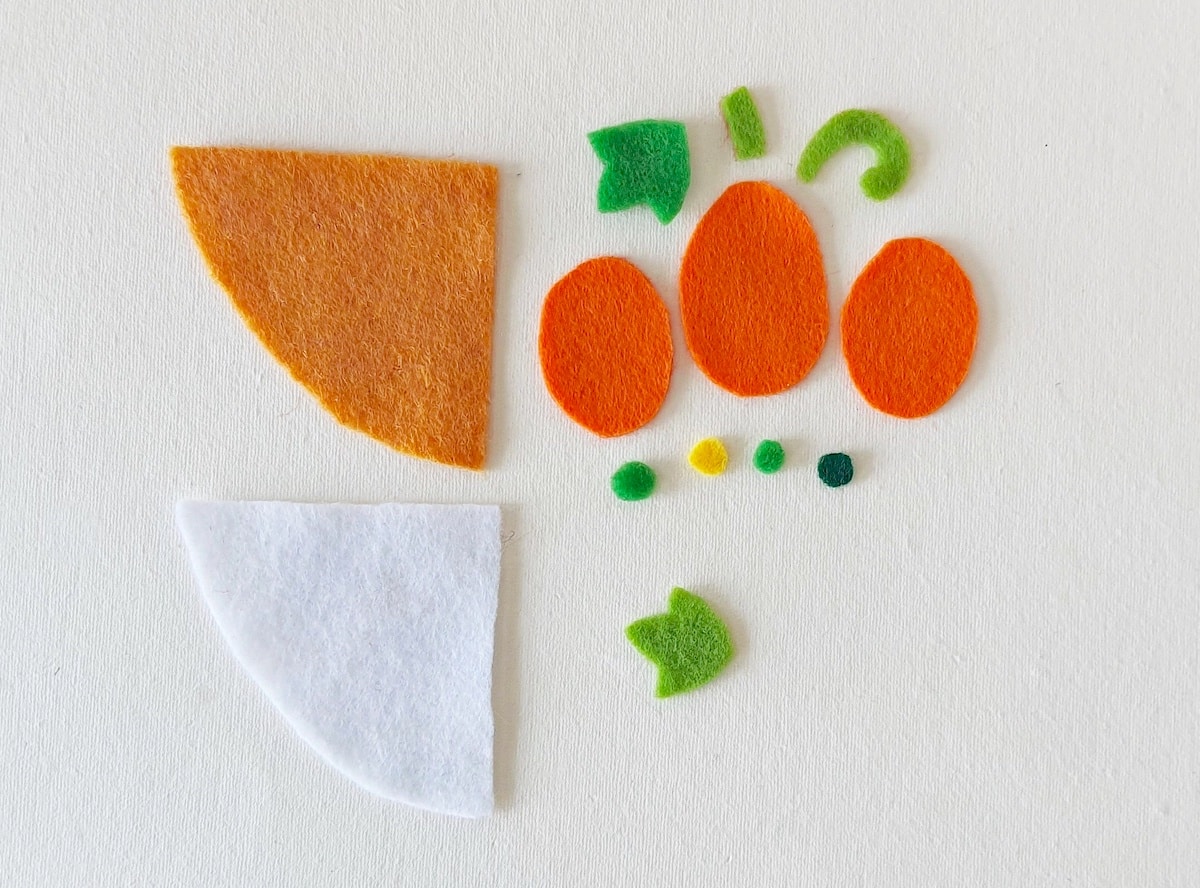
- Free Fall Bookmark Pattern
- Small pieces of felt (I used white, brown, orange, green and yellow)
- Matching threads
- Pencil or erasable fabric marker
- Needle
Instructions
Step 1
Trace and cut out the bookmark pattern from the felt fabrics.

Step 2
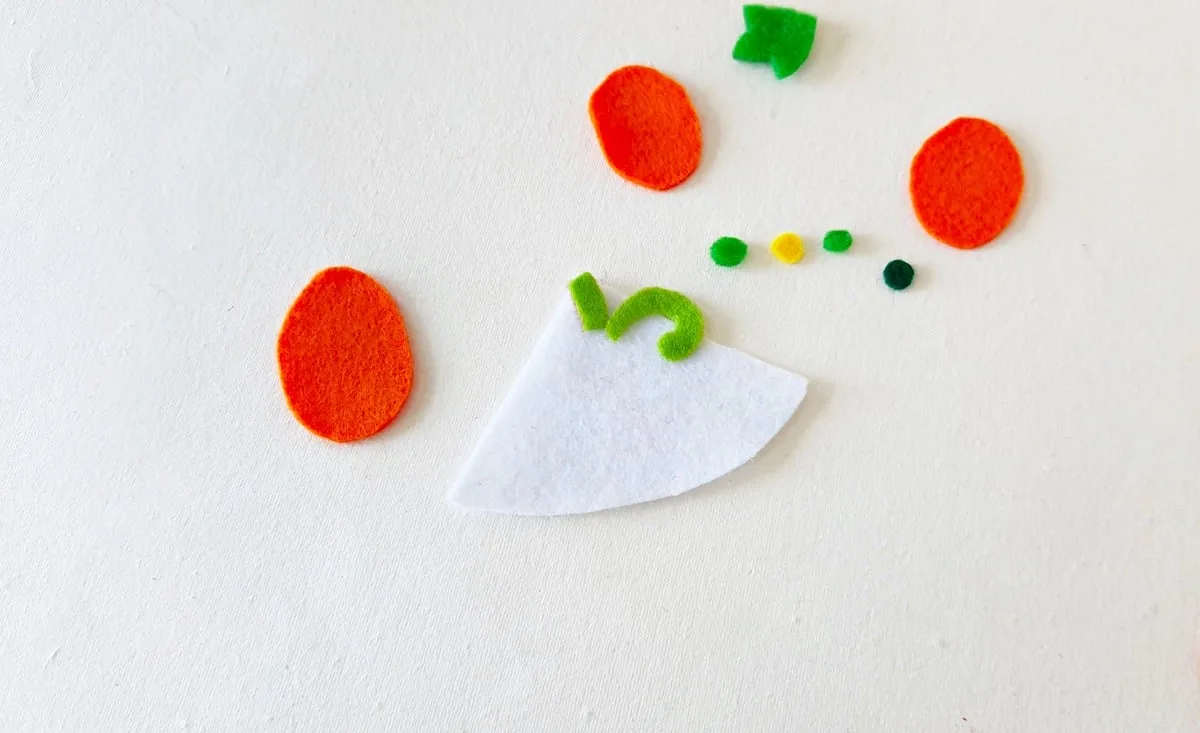
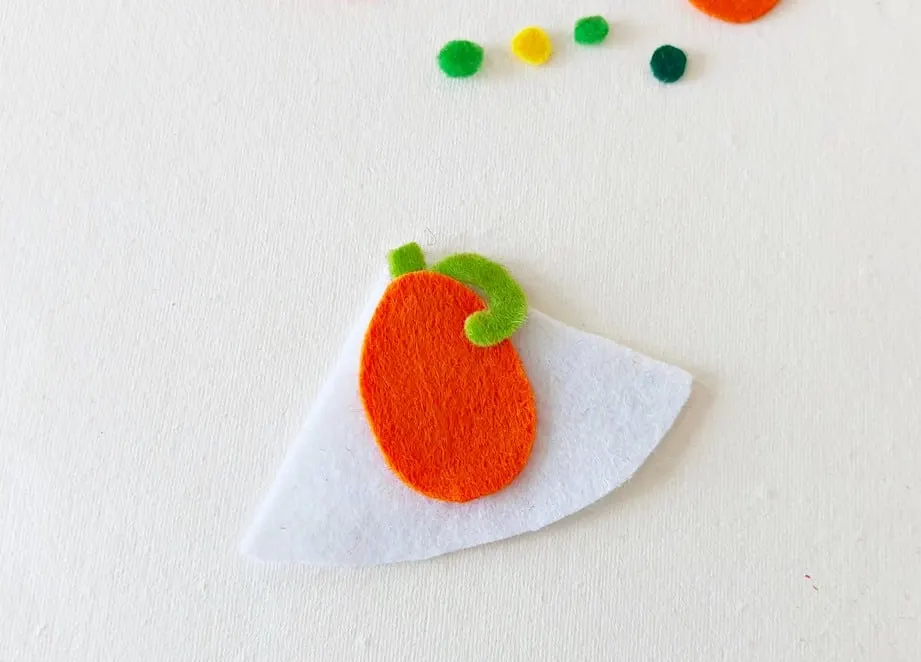
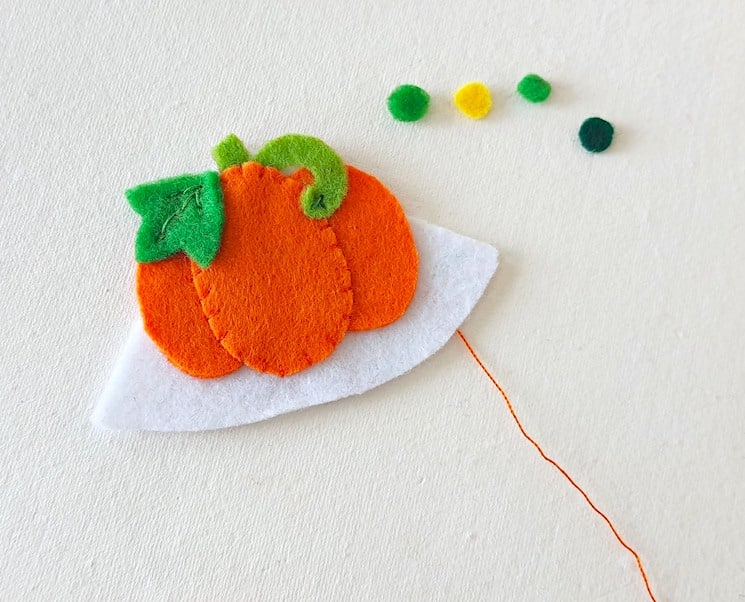
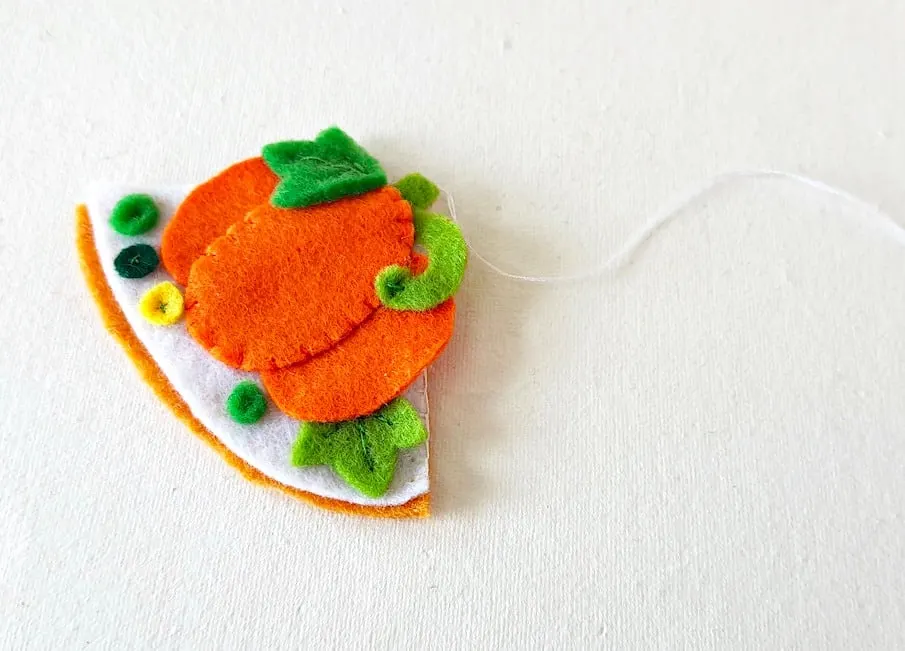
Put the small pumpkin stem and vine pieces near the pointy end of one of the bookmark bases. This will be the front of the corner bookmark.

Step 3
The pumpkin pattern comes in three parts, which are three oval shapes.
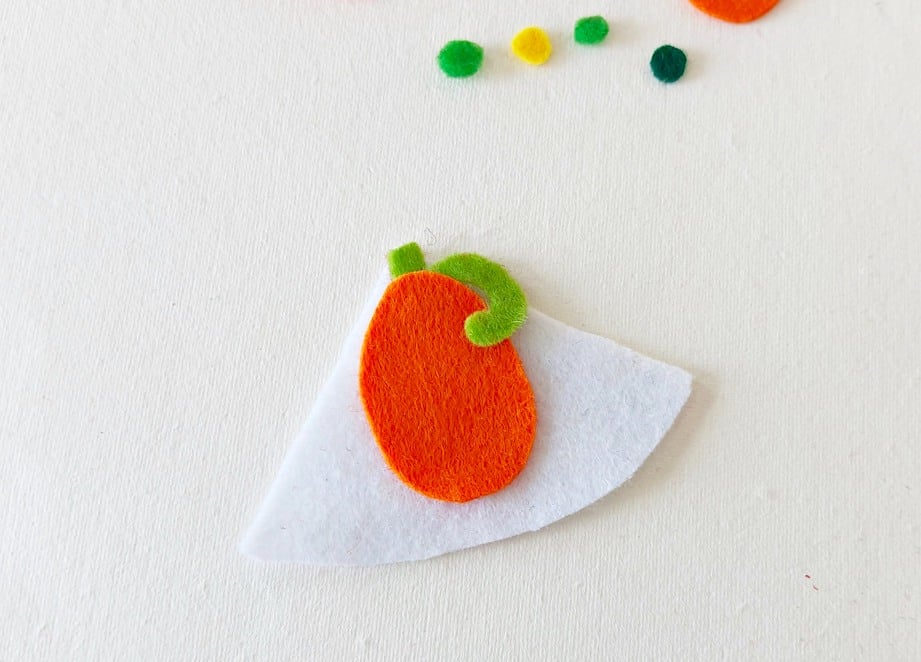
Place the middle part of the pumpkin slightly covering the bottom sides of the stem and vine. Bring the end of the vine to rest on top of the pumpkin piece.
Step 4
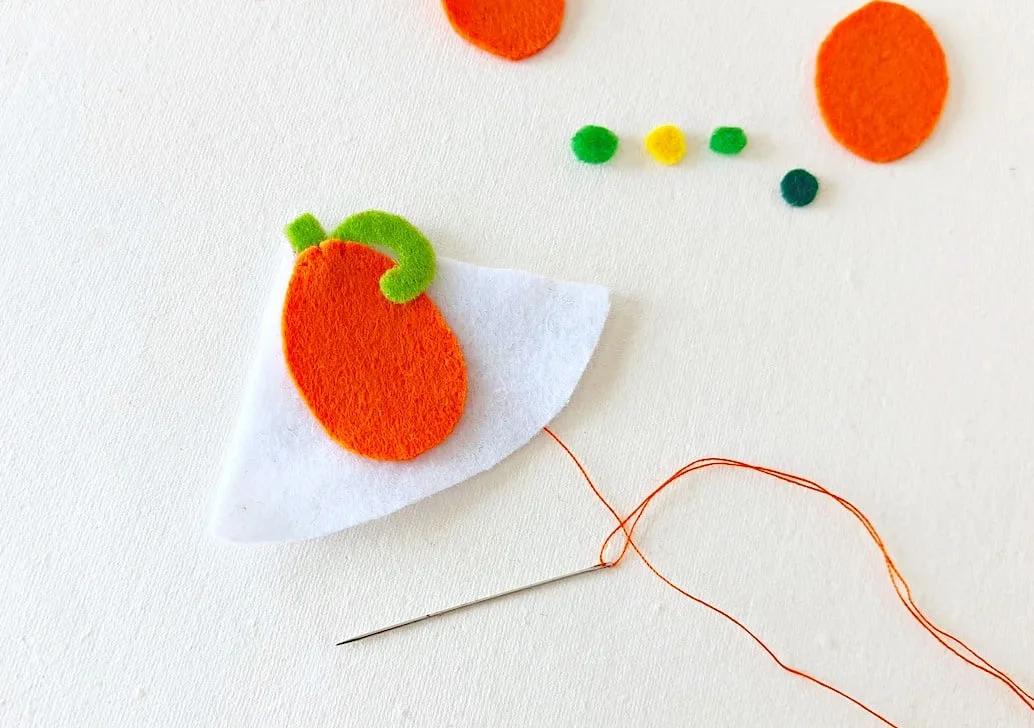
Using a matching thread for the pumpkin felt, stitch the top part of the pumpkin shape to the bookmark base, making sure to stitch the pumpkin, stem, and vine together, as well.

Step 5
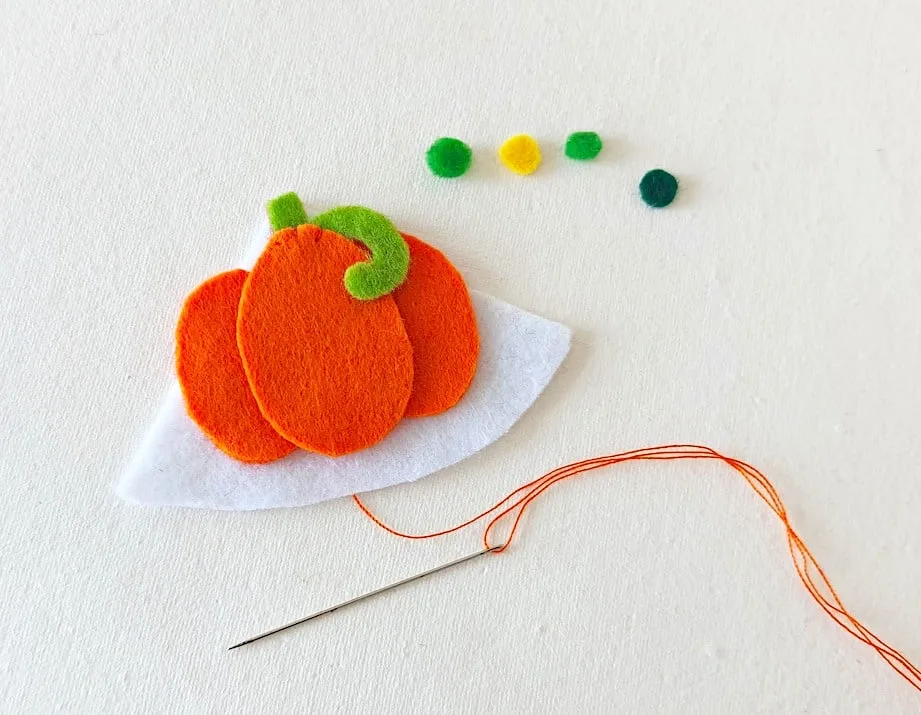
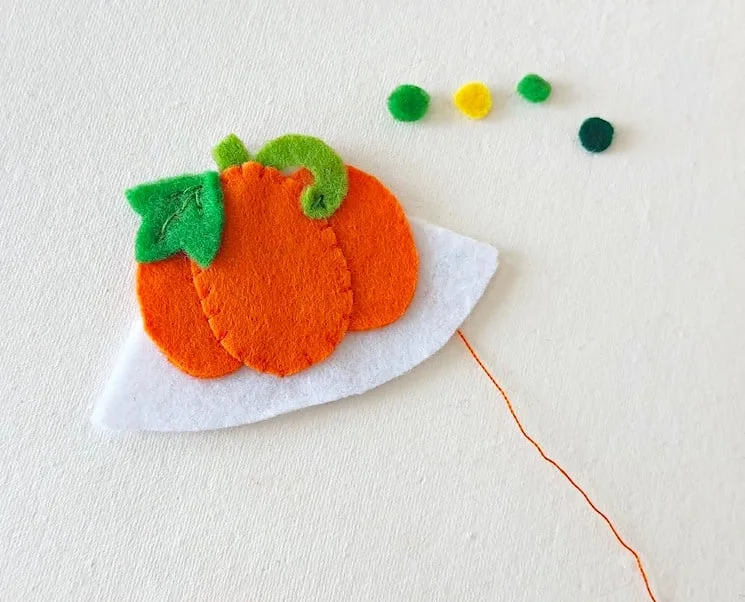
Place the 2 other pumpkin parts underneath the middle pumpkin piece on either side, with the middle piece slightly overlapping the side pieces.

Step 6
Using a needle and thread, hand stitch around the middle piece of the pumpkin, making sure to sew through the pumpkin layers and the bookmark base.

Step 7
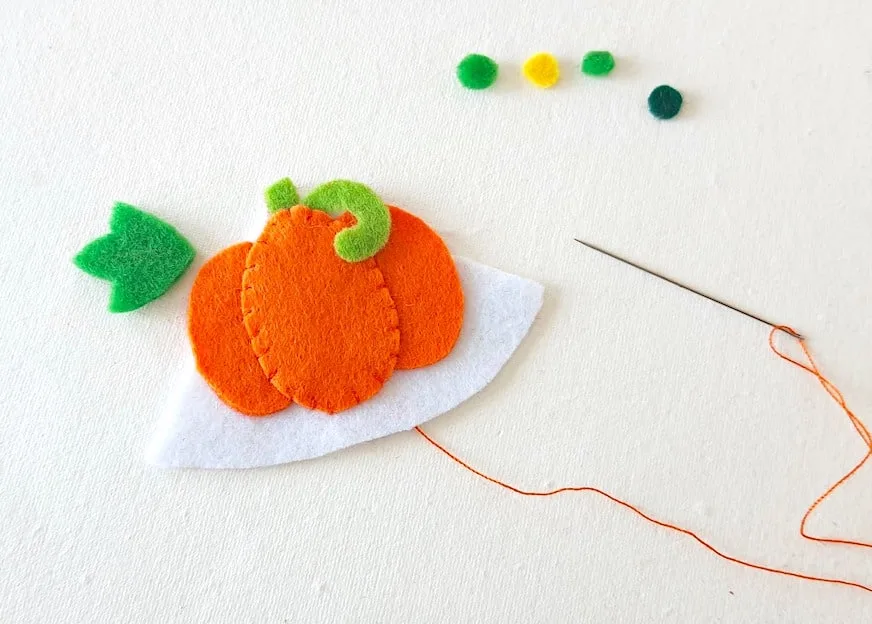
Sew the small leaf pattern on the side of the pumpkin across from the vine. You will only need a few stitches using a matching shade of thread.
I added a small x-shaped stitch on the end of the vine to hold it down to the pumpkin.
Step 8
Put the second leaf underneath the pumpkin base in the corner, tucking the leaf underneath the edge of the pumpkin.
The small dots will be placed underneath the pumpkin along the base of the bookmark corner.
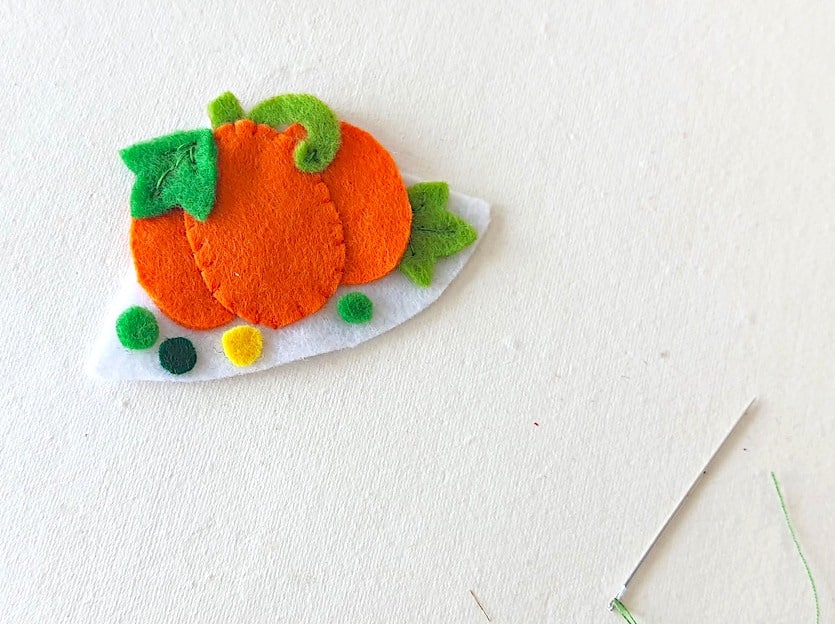

Sew the leaf to the base with a matching thread color. Then, using a small x-shaped stitch, attach the small circles to the bookmark corner.

Step 9
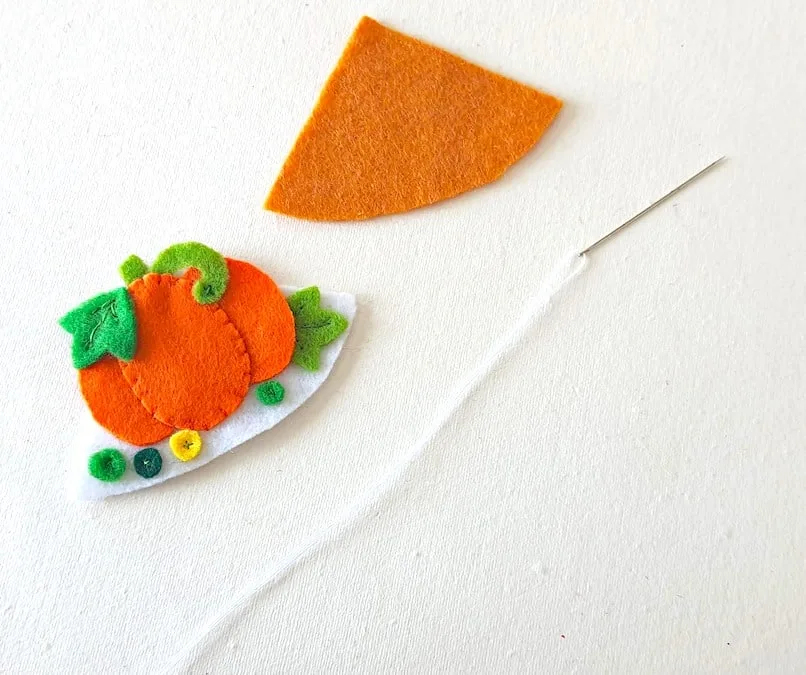
Place the pumpkin bookmark pattern on the top of the plain one.

Stitch the straight edges of the bookmark corner together using a matching thread that matches the color of the front piece. Do not stitch the rounded edge. Finish off with a knot to secure.
Place the bookmark on the corner of the book page where you want to save a place in the book.
Be sure to Pin This craft to Pinterest to save for later!


This is just one of our easy sewing crafts that you will love!
Get Your Fall Gratitude Journal Now!
Fall is a time to rest, reflect and be grateful. This printable planner and journal pack will help you capture your memories, and plan for the busy season ahead.
Be sure to see all of our Fall DIY crafts!
