

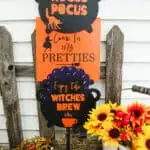
If you love the Hocus Pocus movies like we do, then you will have so much fun making this Hocus Pocus porch sign to use use outdoors.
We used Dollar Tree wooden signs to create this fun Halloween decoration that would look great by your front door, on the patio or anywhere outdoors.

This is a great DIY craft to make for a Hocus Pocus themed party! Be sure to see our DIY Bubbling Cauldron craft and our fun Hocus Pocus vase for even more spooky decorations.
We’re giving you three free Hocus Pocus SVG files to make this cute decoration!
While Mod Podge helps protect this sign a little bit from moisture, you wouldn’t want to display it where rain or snow will damage the signs. Be sure to keep it under cover if using outdoors.

Hurry! Get Your Halloween Printables Pack Now!
This fun Halloween printables pack has banners, signs, treat bags and cupcake toppers. Don’t miss out!
How to Make a Hocus Pocus Porch Sign for Halloween
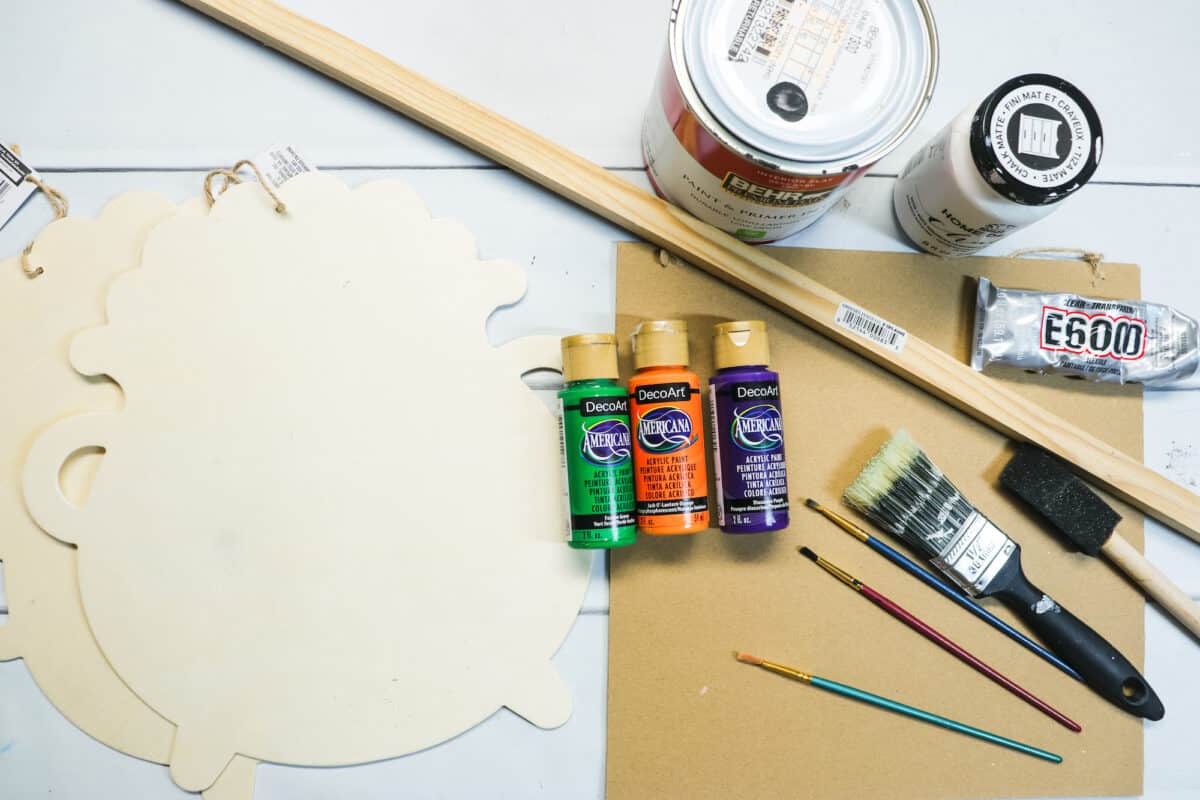
Supplies
- 2 Pot of Gold St. Patty’s Day wood signs from Dollar Tree (or something similar)
- 1 Square wood sign from Dollar Tree (repurpose any holiday one, just flip it over)
- 3 foot wood garden stake
- Hocus Pocus SVG files (3 in total)
- Paint: green, orange, purple, black, white
- Mod Podge
- Paint brushes and foam brushes
- E6000 glue
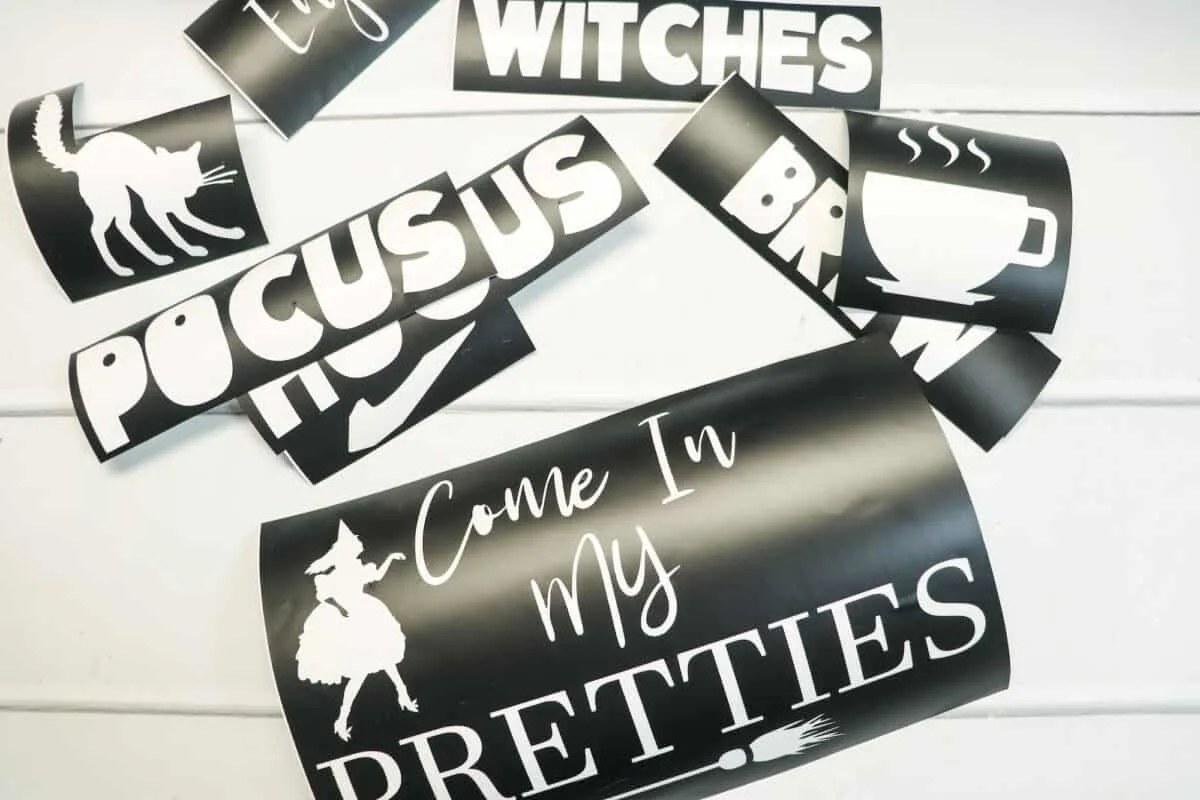
- Black vinyl
- Black sharpie marker
- Cricut machine

Instructions
Step 1
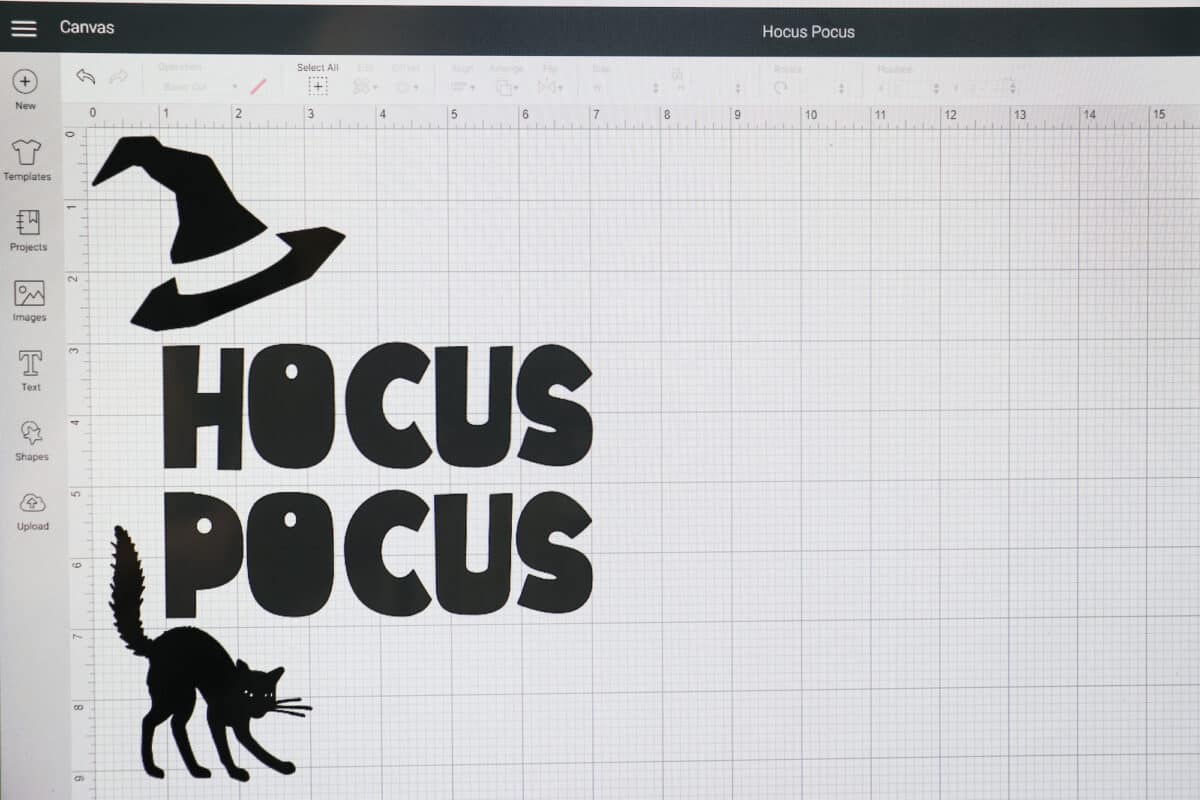
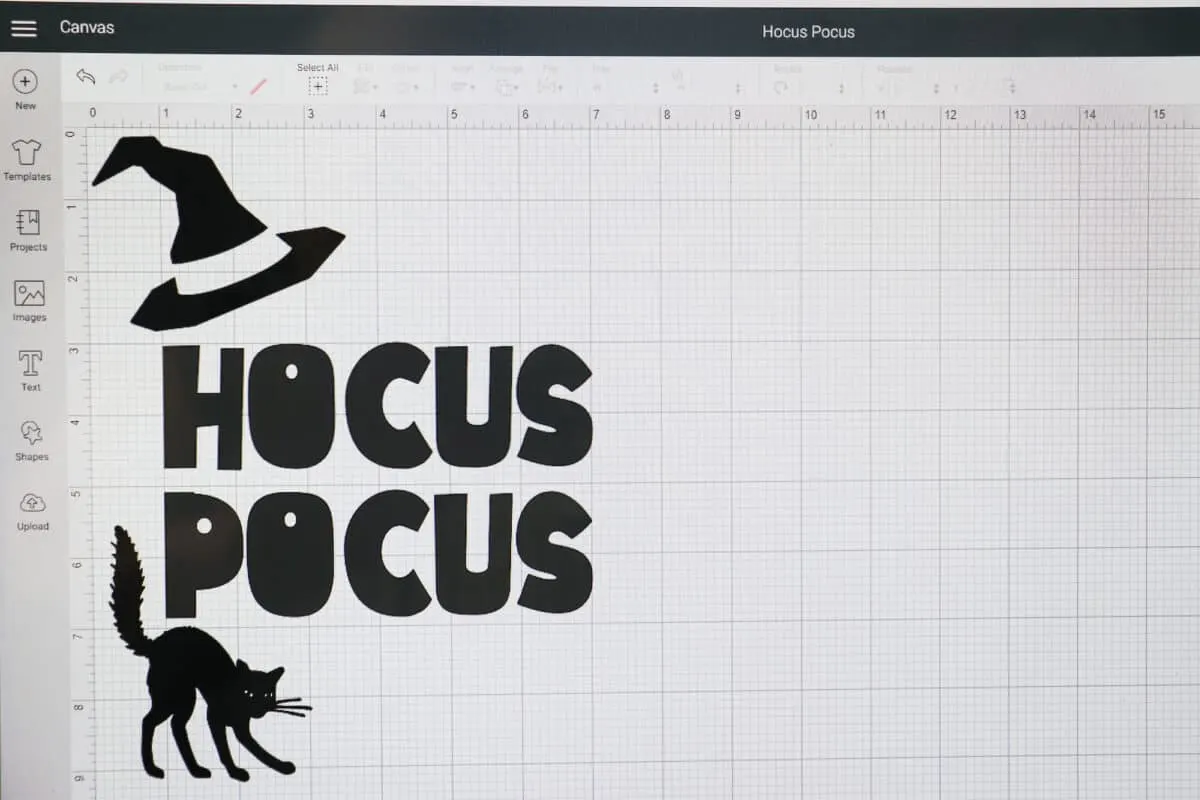
Upload the Cricut SVG designs into your Design Space and cut out of the black vinyl.
Step 2
Create stencils by weeding out the center of the cut letters and pictures. Be careful to leave in the tiny dots in the P and O of Pocus, for example.
Cutting away the excess vinyl around the stencils will allow you to better place them on the design.

Step 3
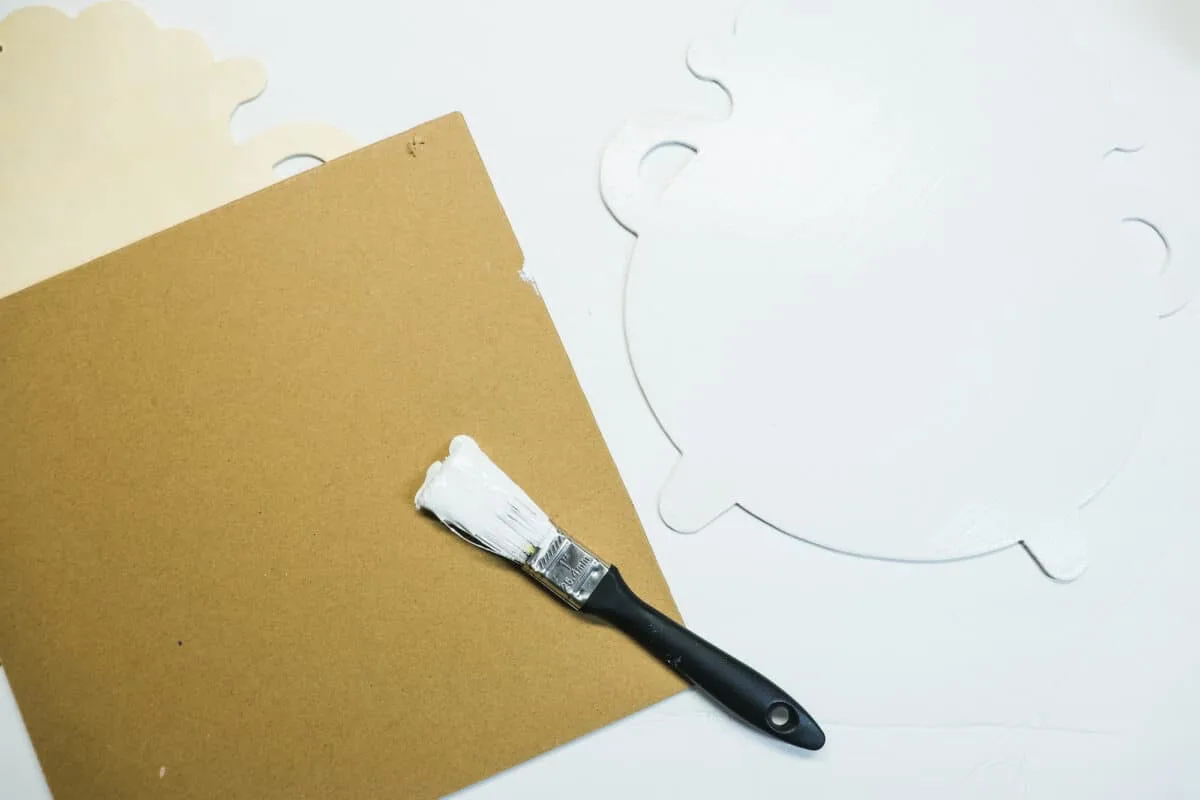
It’s time to paint all of the signs the different colors.
I first painted the wood cauldron signs with white paint first to act as a primer. The plain wood will soak up the paint a lot, so I chose to use white paint as the base coat, but you don’t have to.
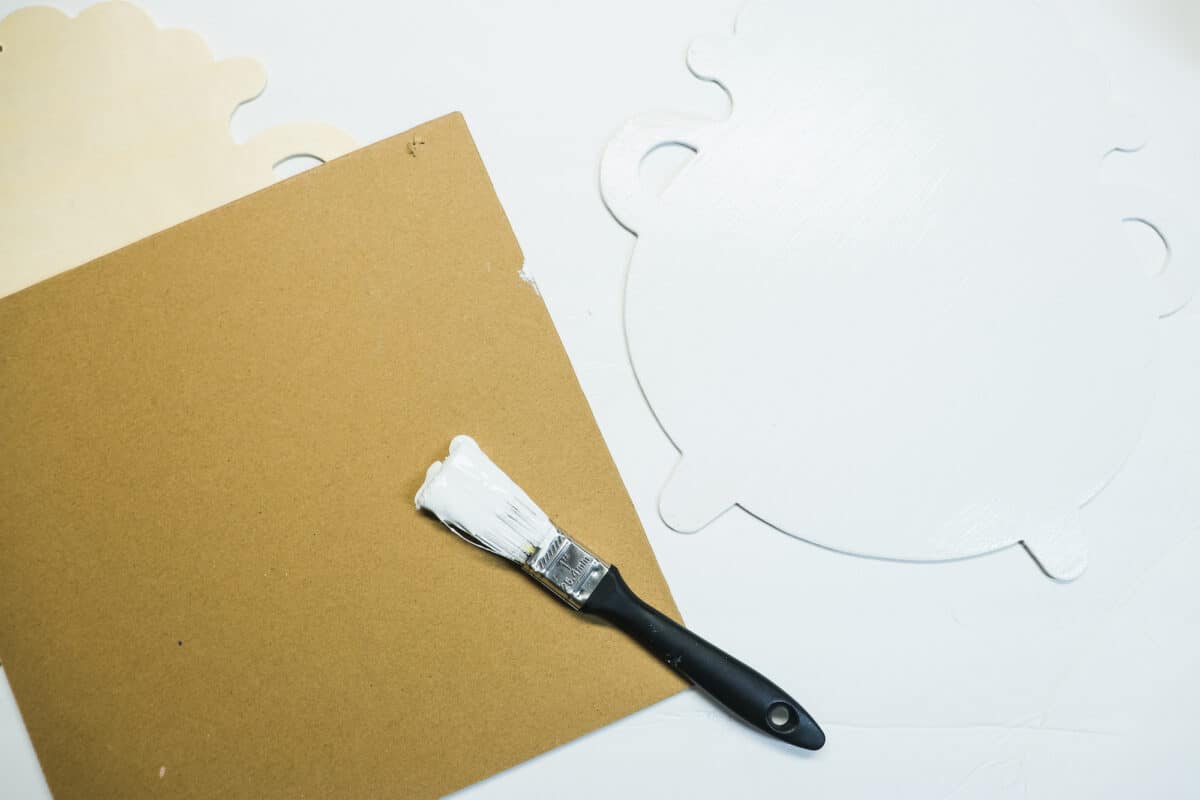
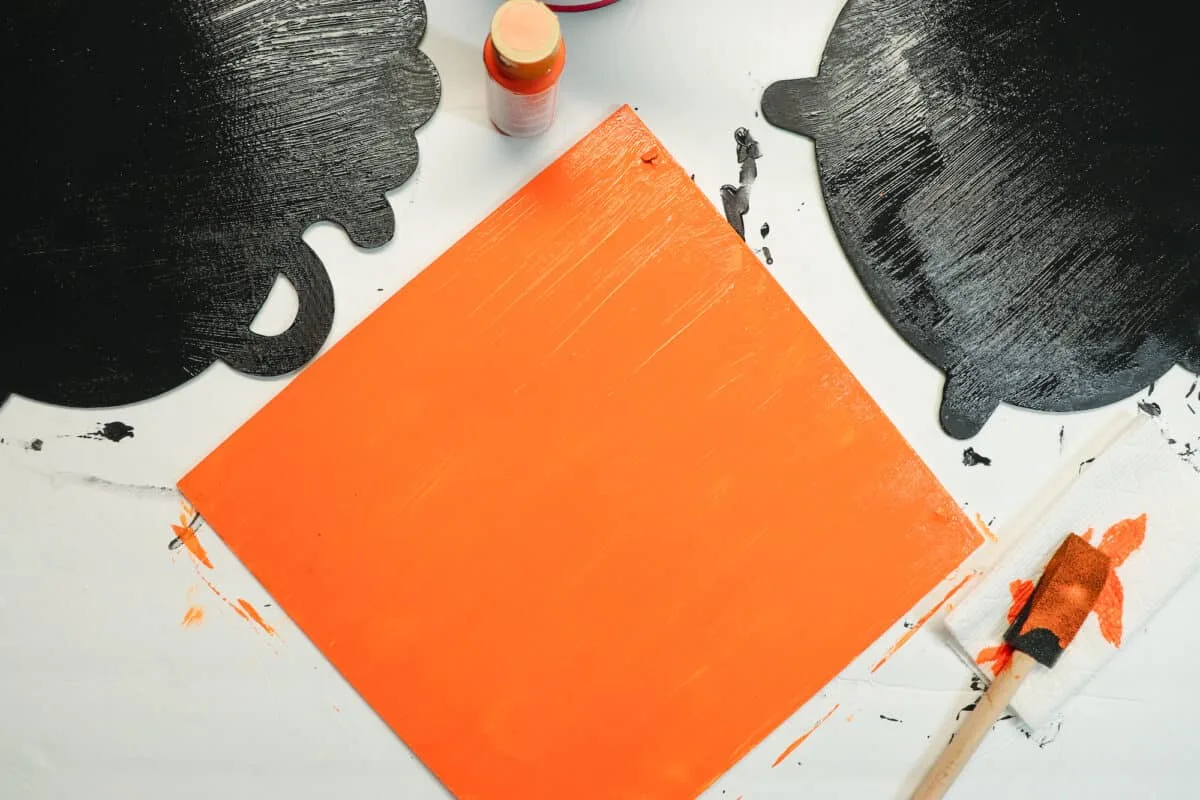
Paint the cauldrons black. This may take two coats. You can paint both sides if you would like.
Paint the square sign orange. This may take two coats.

Paint the wood stake black.
Let all signs and stake dry completely.
Step 4
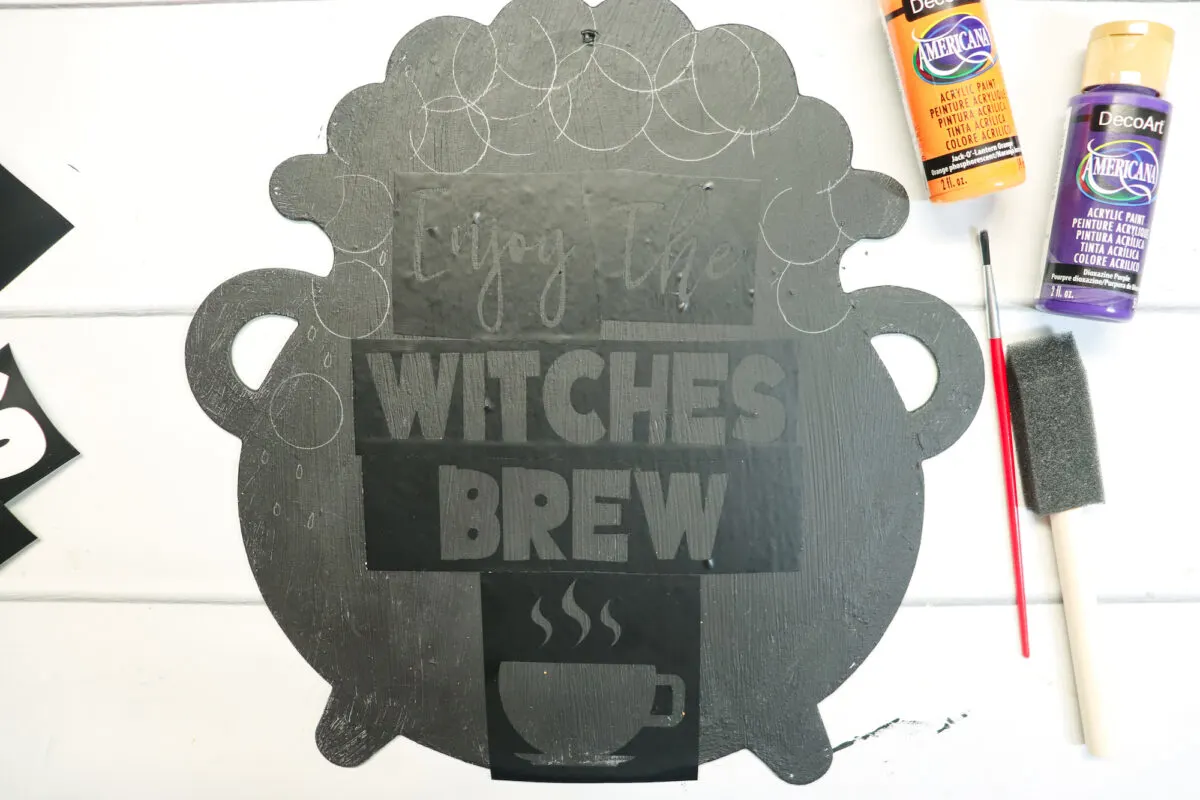
On one of the cauldrons, center the “Enjoy the Witches Brew” stencil and press firmly into place.
Draw bubbles with a pencil to get an idea of where you want to paint the circular purple bubbles on the cauldron and bubbling down the sides.
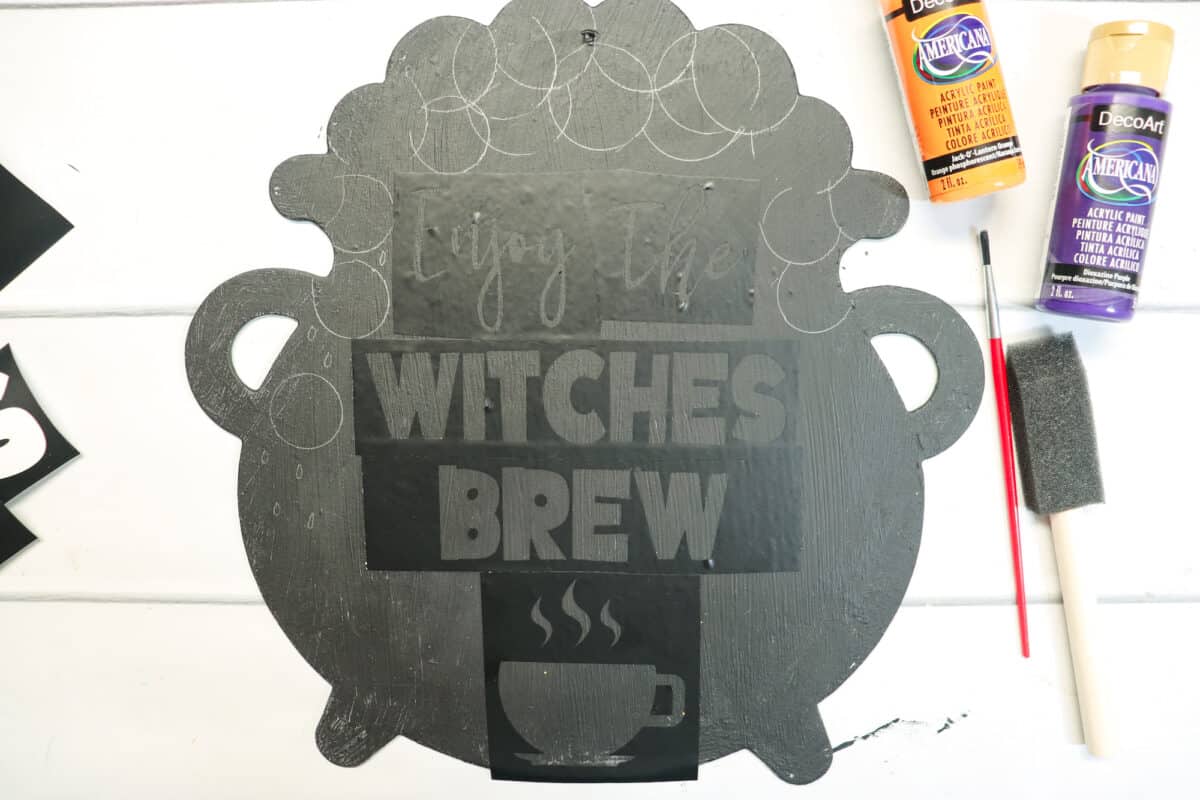
Use a paint brush dipped in purple to create the bubbles. Paint in a circular motion, following your pencil line, and as it dries, paint more to create texture.
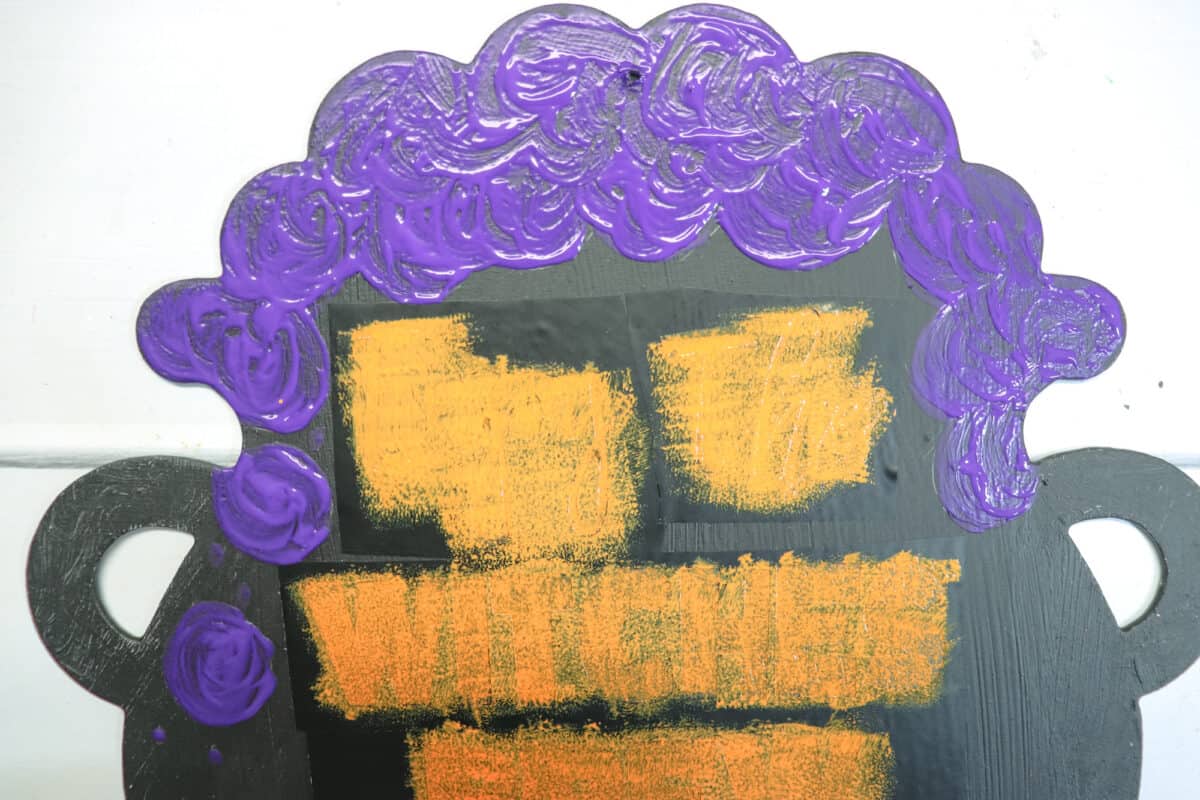

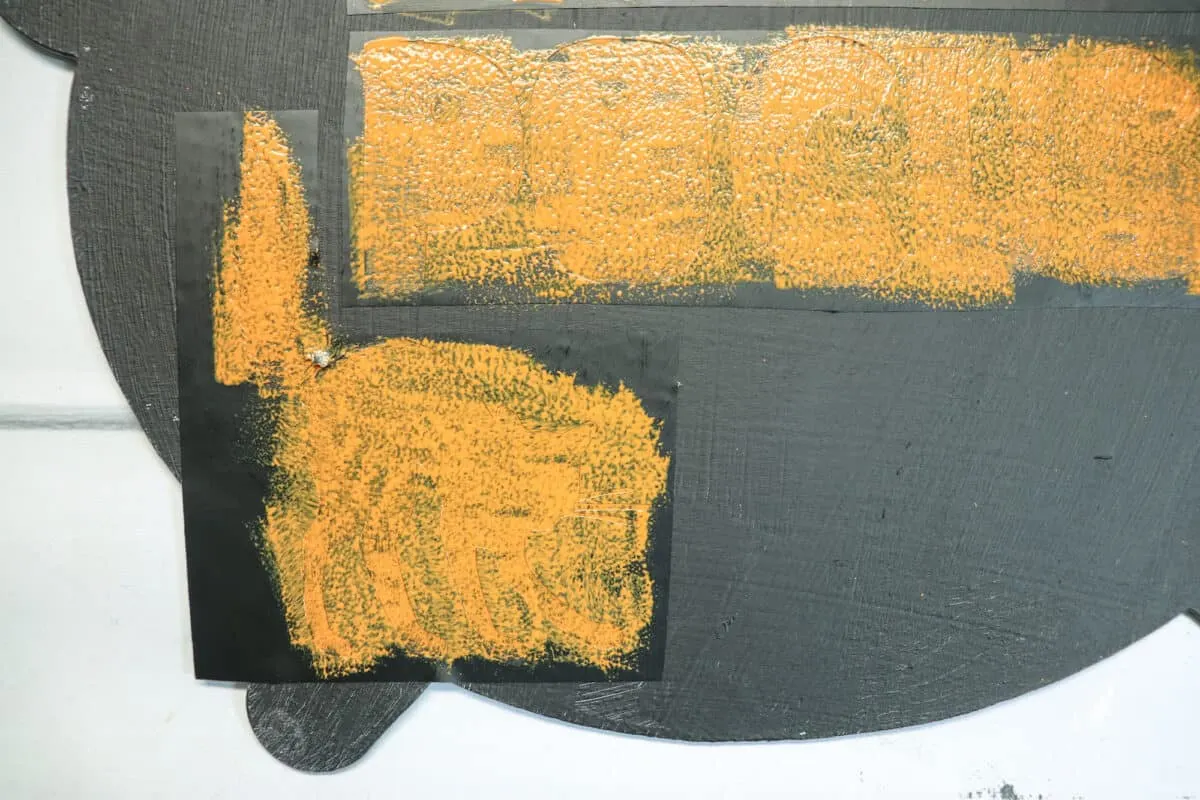
Use the foam brush dipped in orange and dabbed on a paper towel. Dab the stencil up and down over the “Enjoy the Witches Brew” stencil to cover the words and cup completely. Allow to dry and lift. Touch up any areas as needed with a smaller paint brush.
Step 5
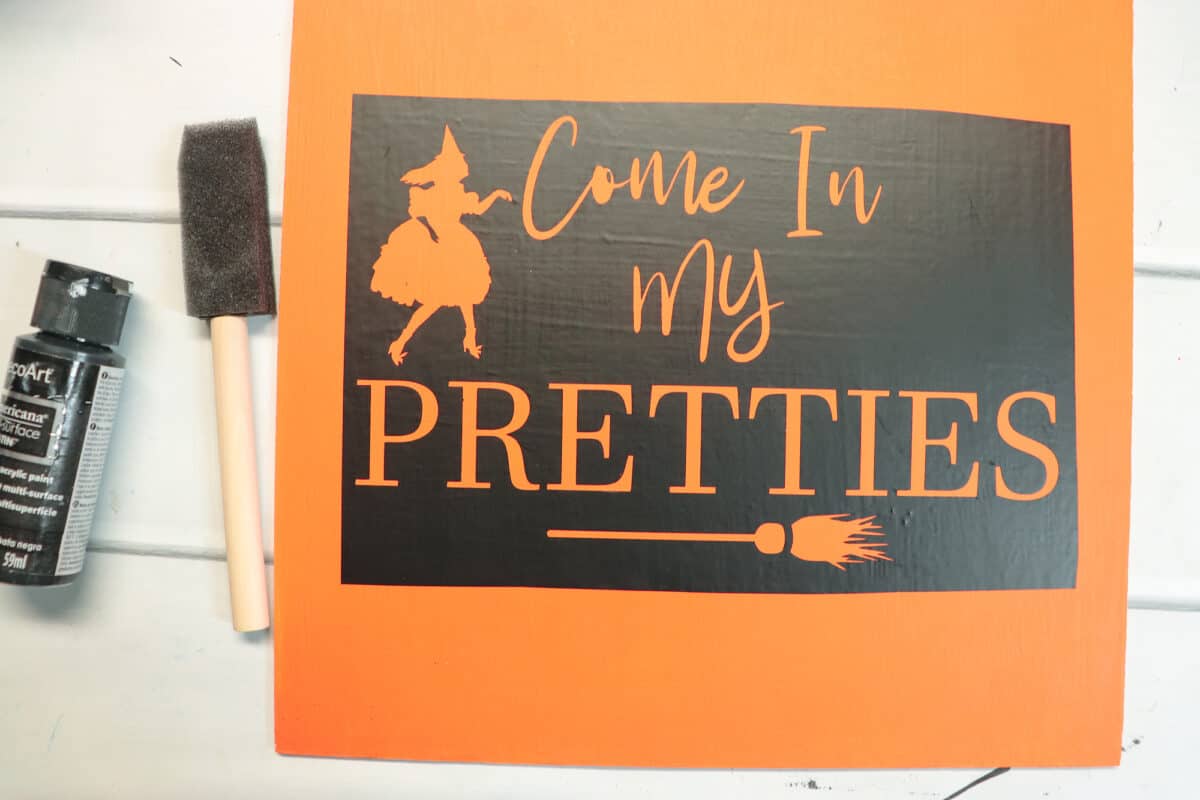
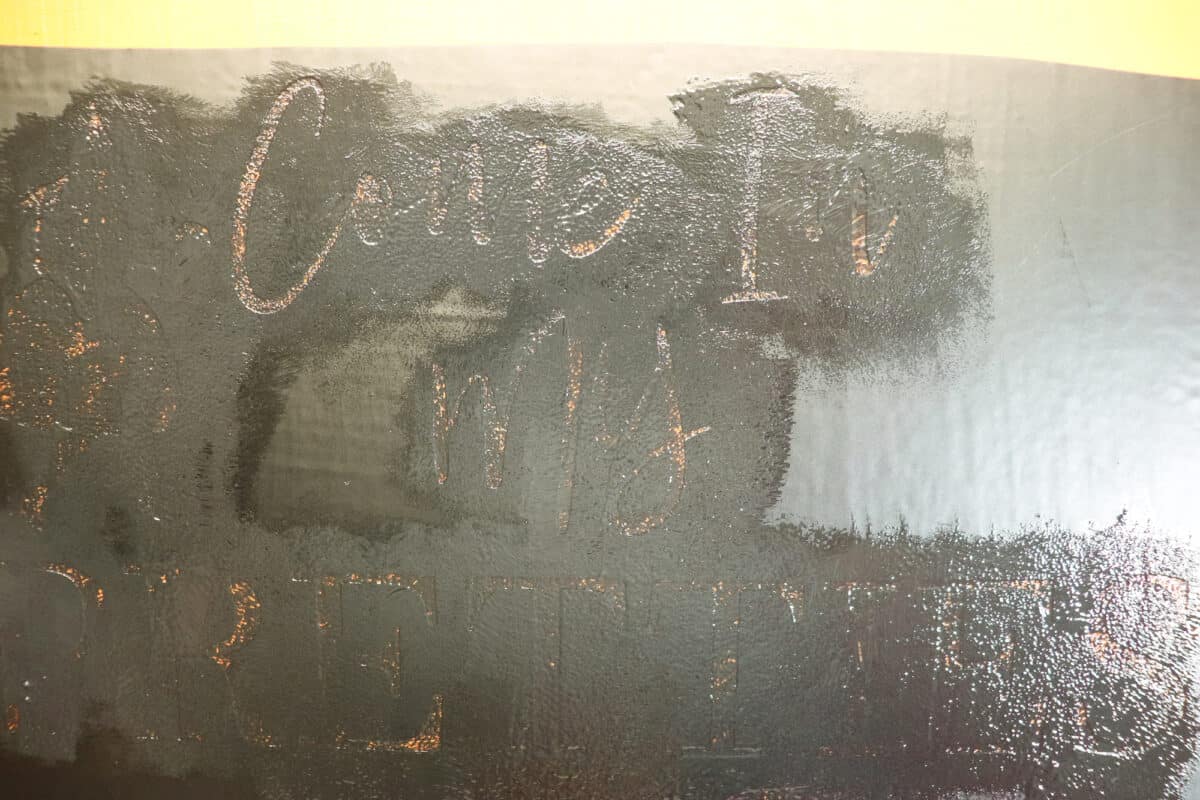
Use the “Come In My Pretties” stencil on the orange painted square and dab black paint with a foam brush.

Step 6
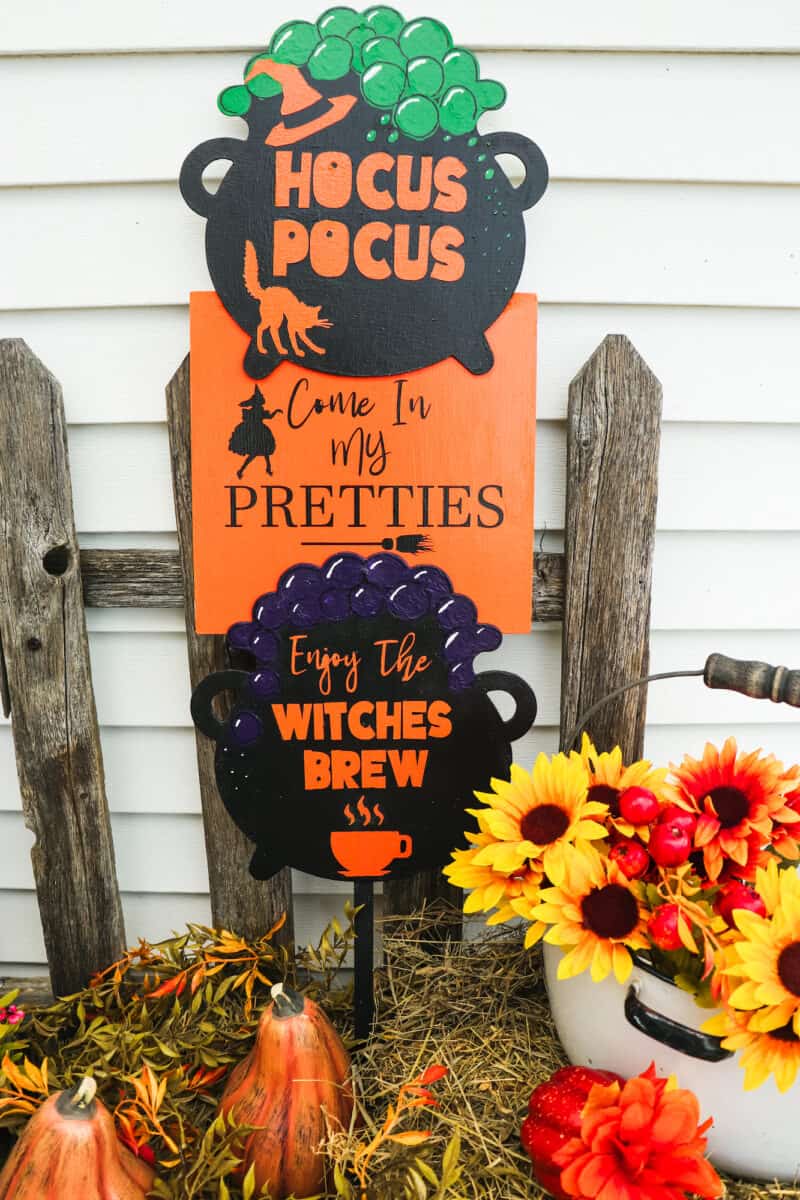
For the “Hocus Pocus” cauldron, carefully place and center your design along with the witches hat and cat.
Next, draw your bubbles with a pencil.
Paint the “Hocus Pocus” stencil orange by carefully dabbing on the paint.

Paint the bubbles green. Add some tiny bubbles, too, around the words.
Step 7

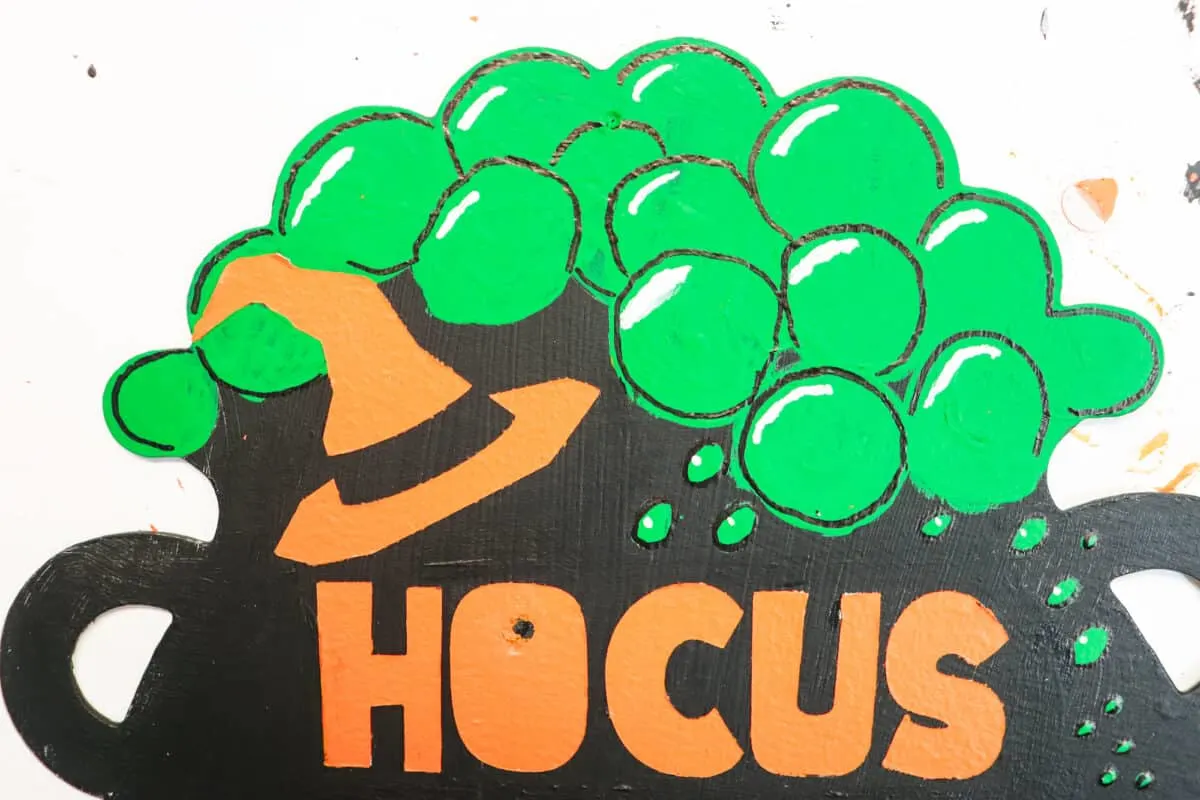
When the signs are dry, enhance the purple and green bubbles by painting a slight white crescent shape on the sides of the bubbles and outlining with the black sharpie marker. Or you could use black paint with a thin brush to outline the bubbles.
Step 8
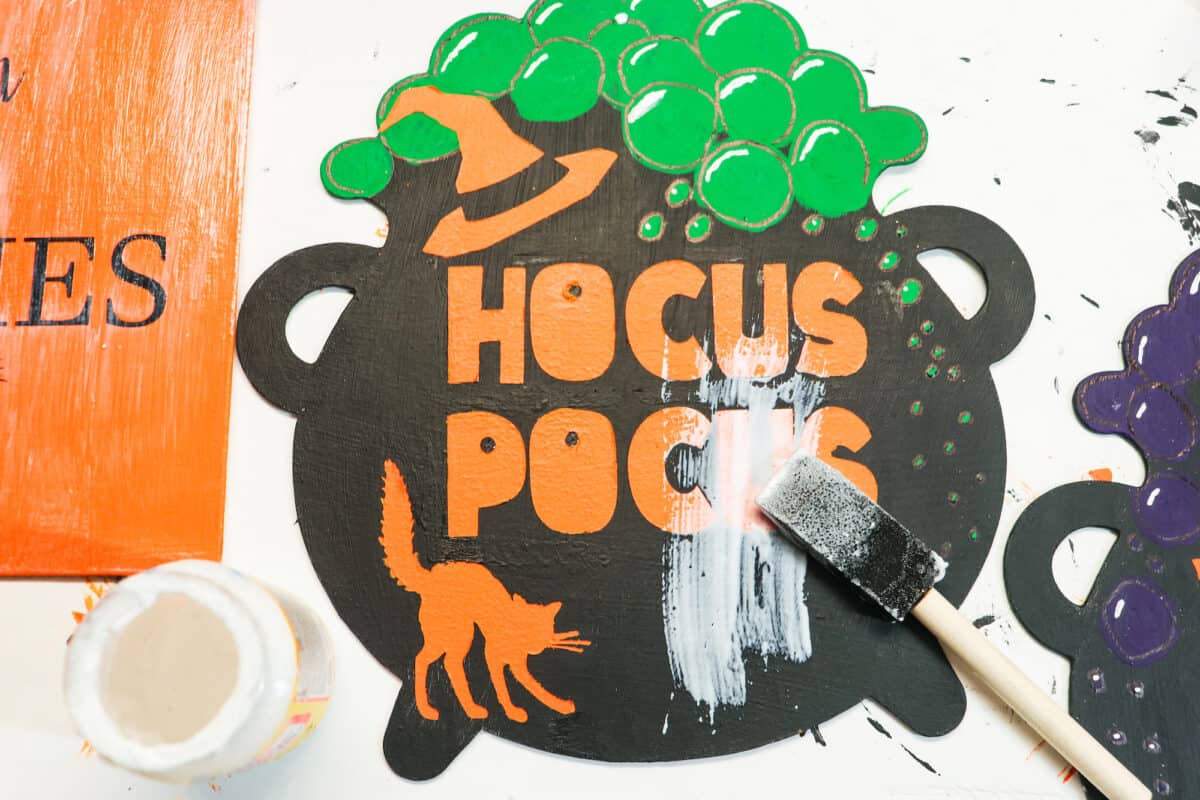
When the signs are completely dry, paint them each with a coat of Mod Podge. Once dry, cover with another coat of Mod Podge.

Step 9
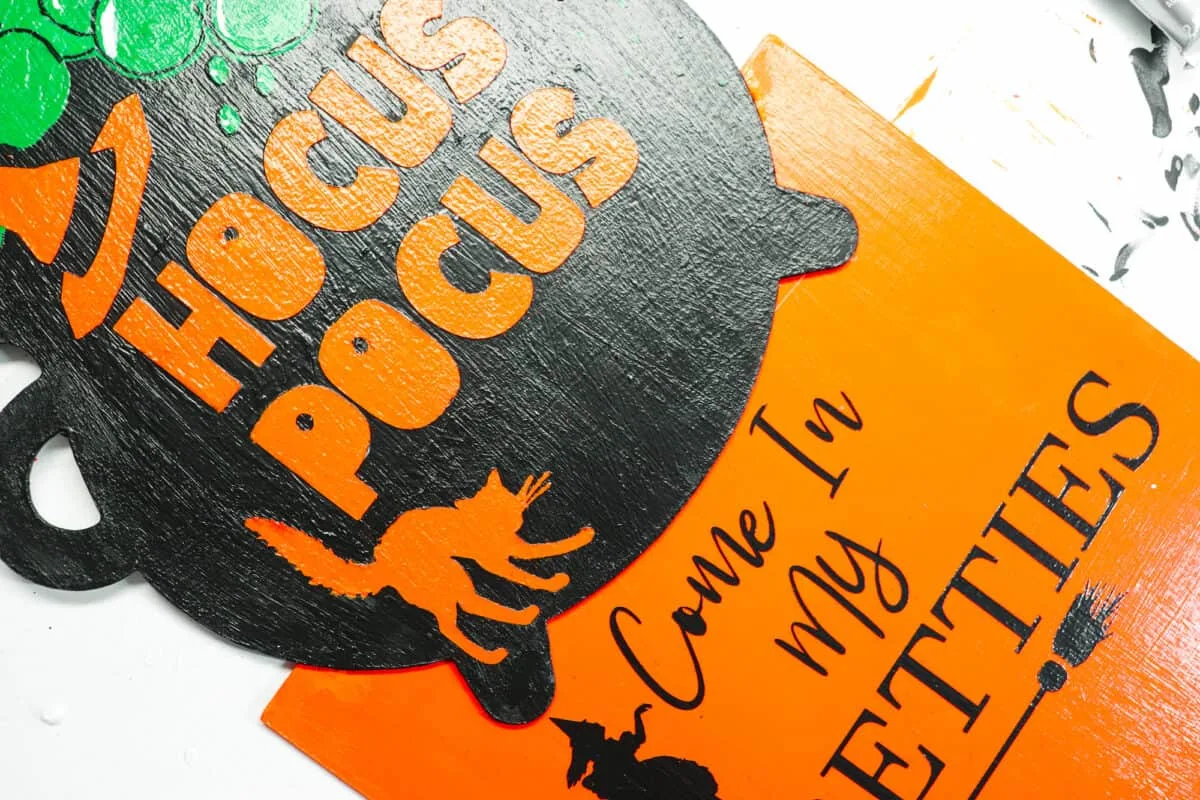
When all the pieces are dry, it is time to assemble using the E6000 glue. Place your signs together to get an idea of how you want them to look.
I have the “Hocus Pocus” cauldron overlapping the “Come In My Pretties” orange sign with the “Enjoy the Witches Brew” cauldron covering the bottom of the orange sign.

The top 4-6” of the wood stake should be glued to the center back of the top “Hocus Pocus” sign and down the others so that there is a good foot of stake left to put in a pot or bundle of straw.
You can see the finished sign in our Youtube video below:
If you like this Hocus Pocus sign, be sure to see all of our Halloween crafts!
