


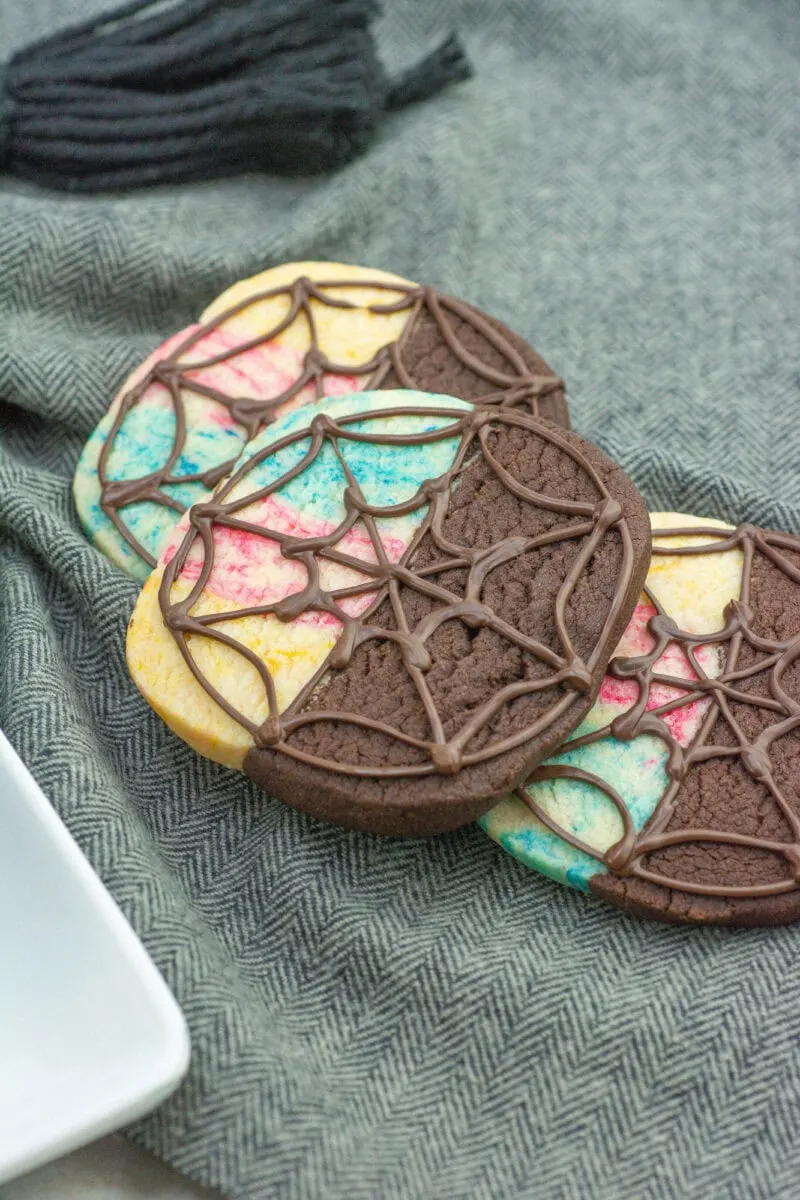
Inspired by the famous spiderweb window from the Addams family Netflix television series Wednesday, these colorful stained glass and chocolate cookies portray the light and dark personalities of Wednesday Addams and her best friend Enid.
The stained glass window in Wednesday and Enid’s room at Nevermore Academy is a well-known backdrop in the TV series. These cookies recreate the window that is colored on one half and dark on the other.


Even if you have never seen the TV series, these cookies are fun to make for Halloween and definitely a unique treat!
You may also like our easy Spider Web Pretzels, too!

Ingredient Notes
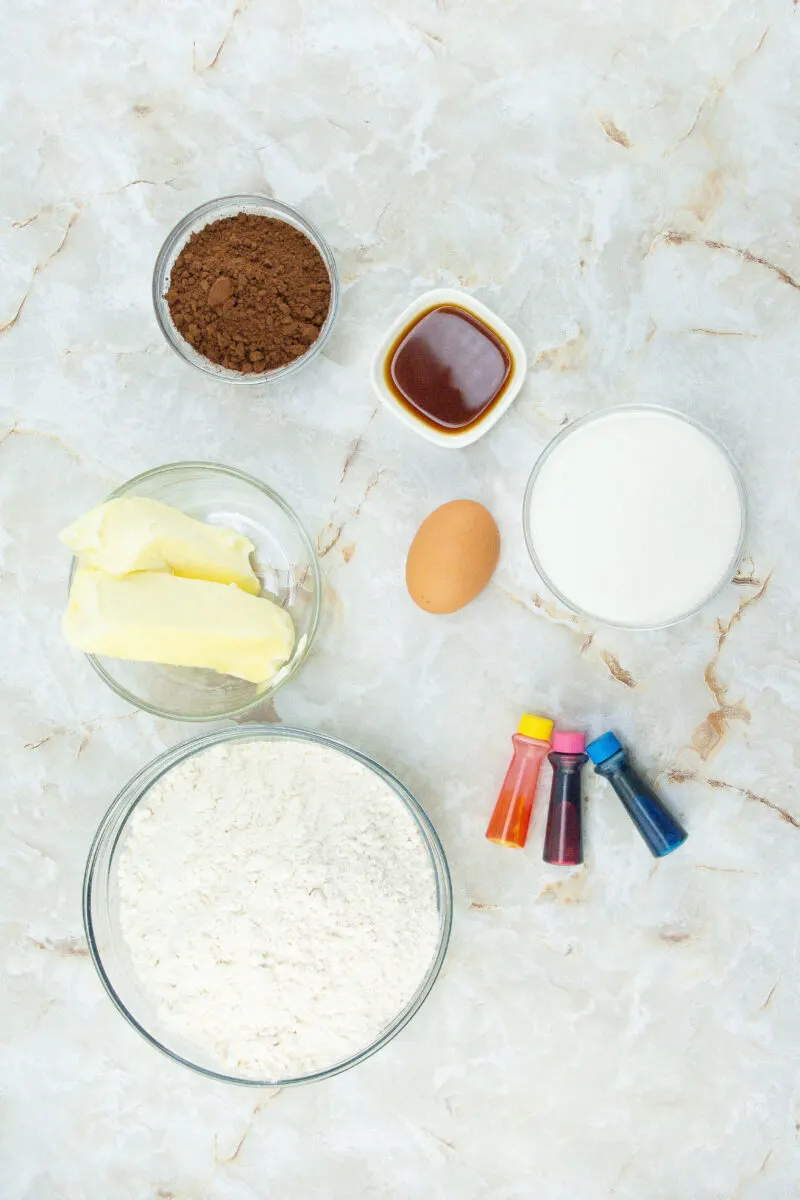
- In this recipe we used black cocoa powder to get the really dark half of the cookie. You can use regular cocoa powder, but the color will be lighter.
- Be sure to use liquid food coloring rather than gel food coloring.
How to Make Spider Web Stained Glass Cookies

Step 1
Preheat the oven to 350 degrees. Line two baking sheets with parchment paper and then set aside.
Step 2
Blend together ½ cup of softened butter and the sugar. Cream together until light in color and fluffy.
This can be done with a stand mixer or a hand mixer.

Step 3
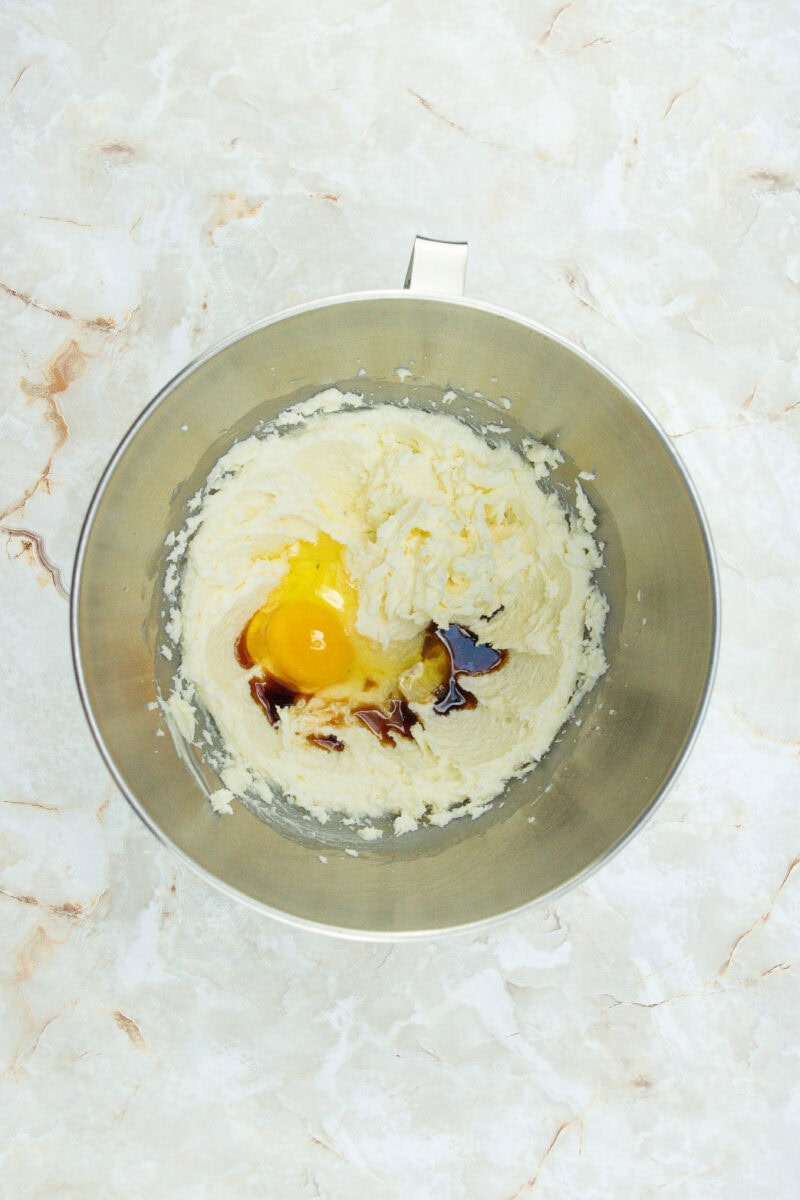
Add in the vanilla and egg. Mix together well.
Add in the flour and stir together until the mixture forms a dough and pulls away from the side of the bowl.
If you are using a stand mixer, change the whisk attachment to the paddle attachment.
Step 4
Divide the dough in half.
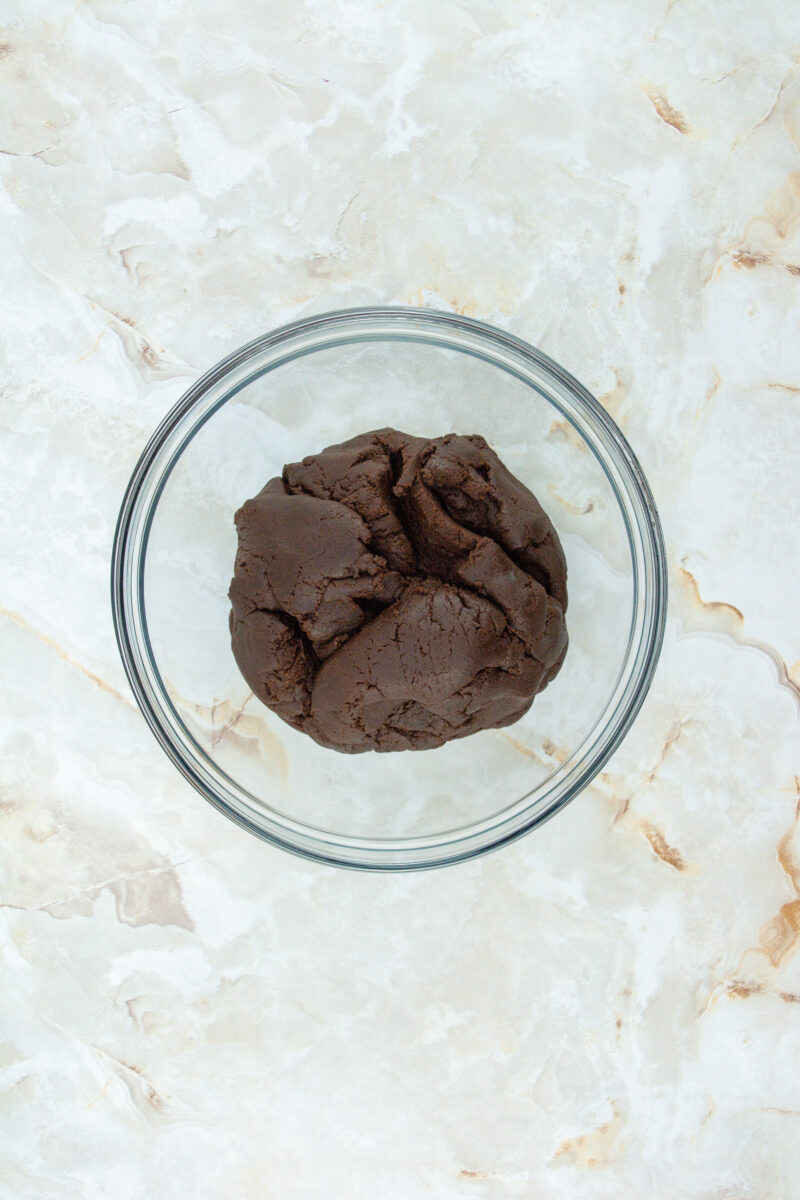
Combine one half of the cookie dough, the cocoa powder and the remaining ¼ cup softened butter.
Mix together until smooth. Set aside.

Step 5
With the remaining half of the cookie dough, divide the portion into three smaller, equal sections.
Squeeze a couple drops of food coloring (yellow, pink and blue) into each of the three sections, with one color added to each section.
Gently blend the food coloring into the color by kneading just until the dough is streaked with color. You do not want to mix in the color completely, but rather a tie-dyed look.
Step 6
Once each ball of dough has color, roll it into logs.
Place the logs side by side and press together. Reshape the logs if needed to equal out the lengths and width.
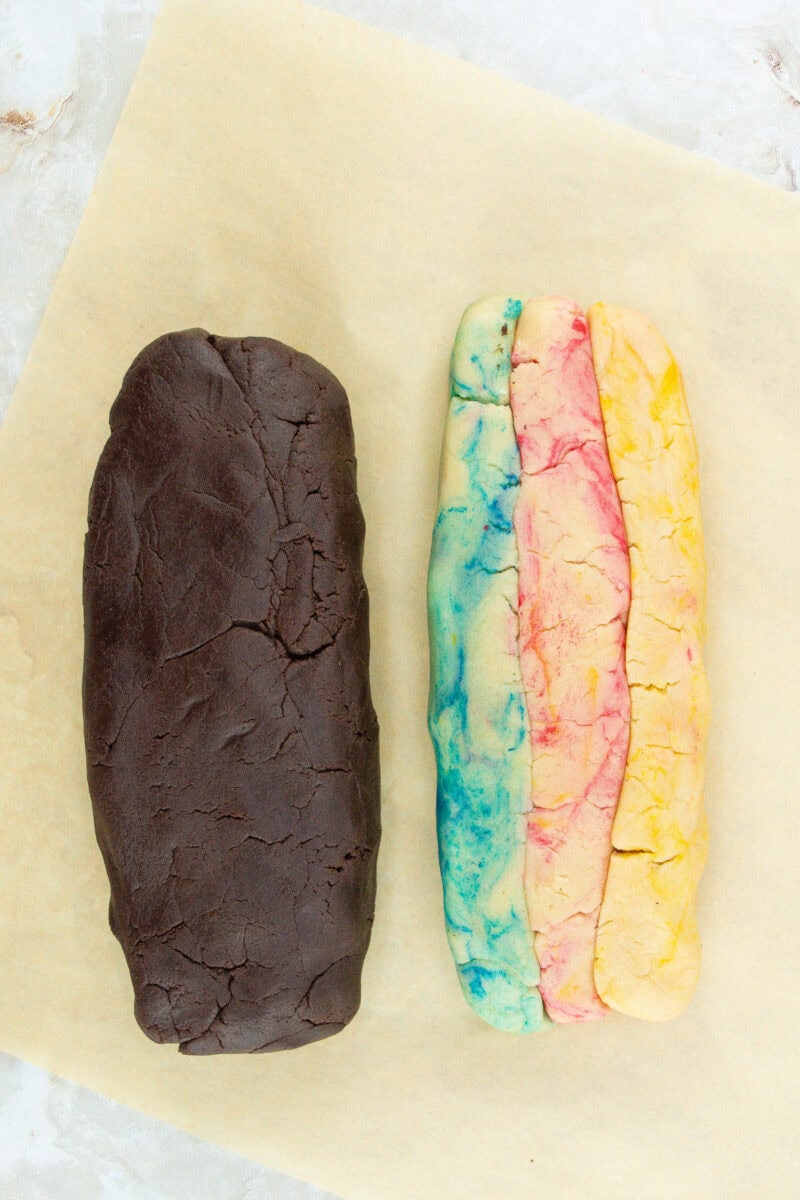

Form the chocolate dough into a log, as well.
Now lay the chocolate log on top of the colored log and gently press together until they are combined and do not fall apart, but are still separate colored logs.
Step 7
Using a sharp knife, cut off about ¼ inch slices from the cookie dough log.
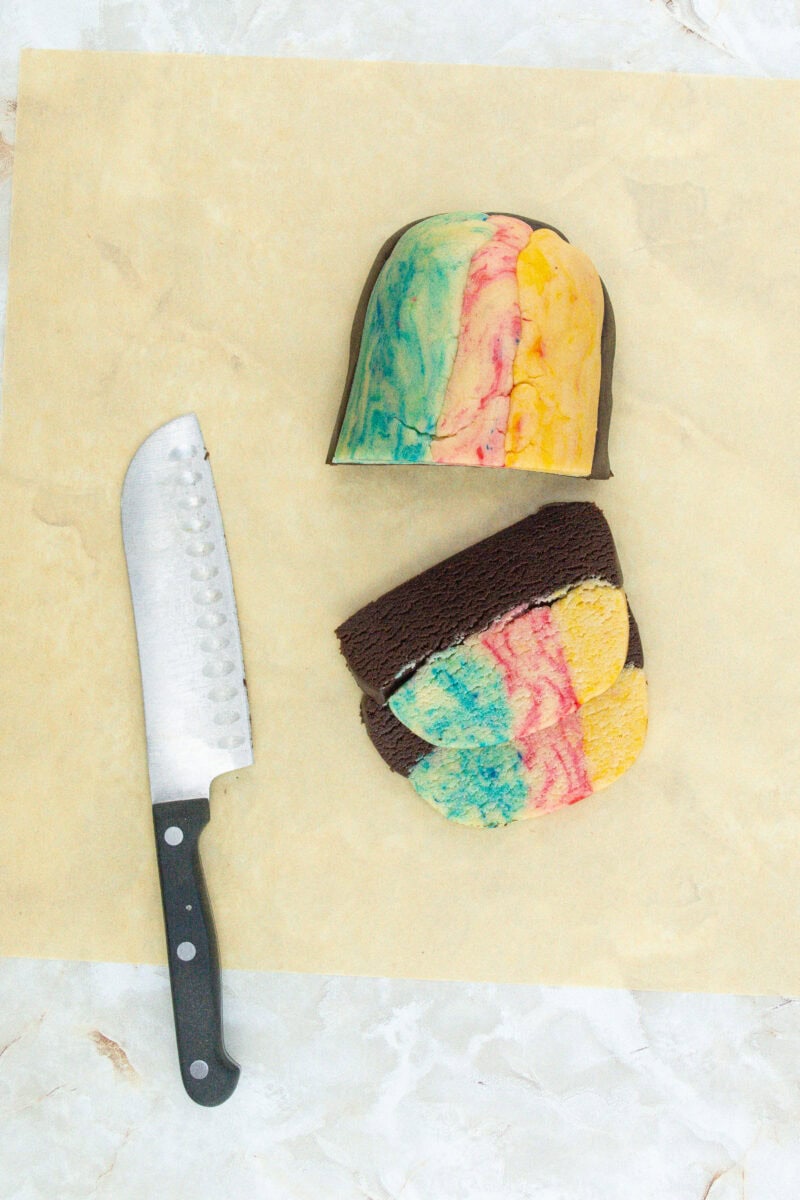

Reshape the cut dough slices into more of a circle shape if needed and place on the baking sheet.
Leave a little room around each cookie, but they should not spread much while baking.
Continue with the remaining dough.
Step 8
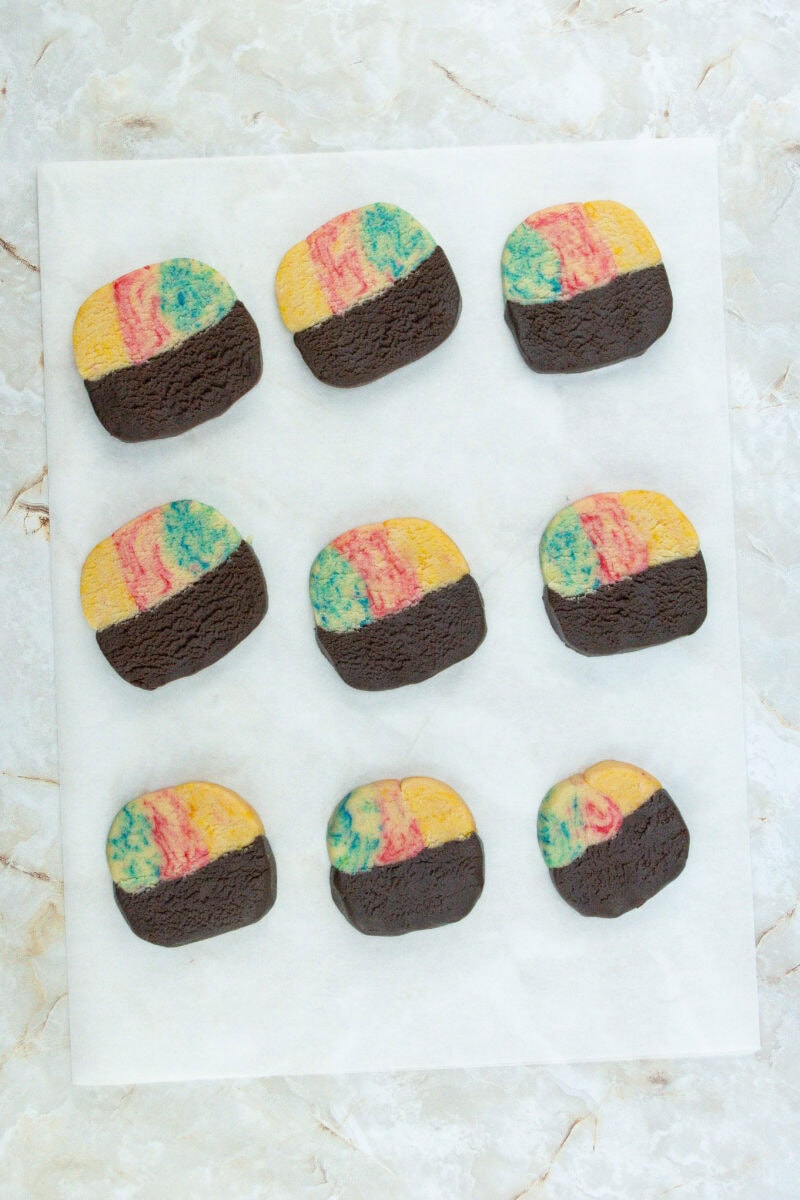
Bake in the preheated oven for no more than 12 minutes.
Do not overbake! It will dry out the cookies. Cookies are done when the edges are set and the edges and
bottom are just slightly starting to brown.
Transfer to wire racks and allow to cool completely.
Step 9
Once the cookies have cooled, add the chocolate chips to a microwave safe bowl. Heat
for 30 seconds and stir thoroughly. Heat for another 15 seconds and stir again. Continue the process of heating in short intervals and stirring afterwards so that the chocolate does not burn.
Once melted, transfer to a piping bag or a plastic zip-top baggie.


Step 10
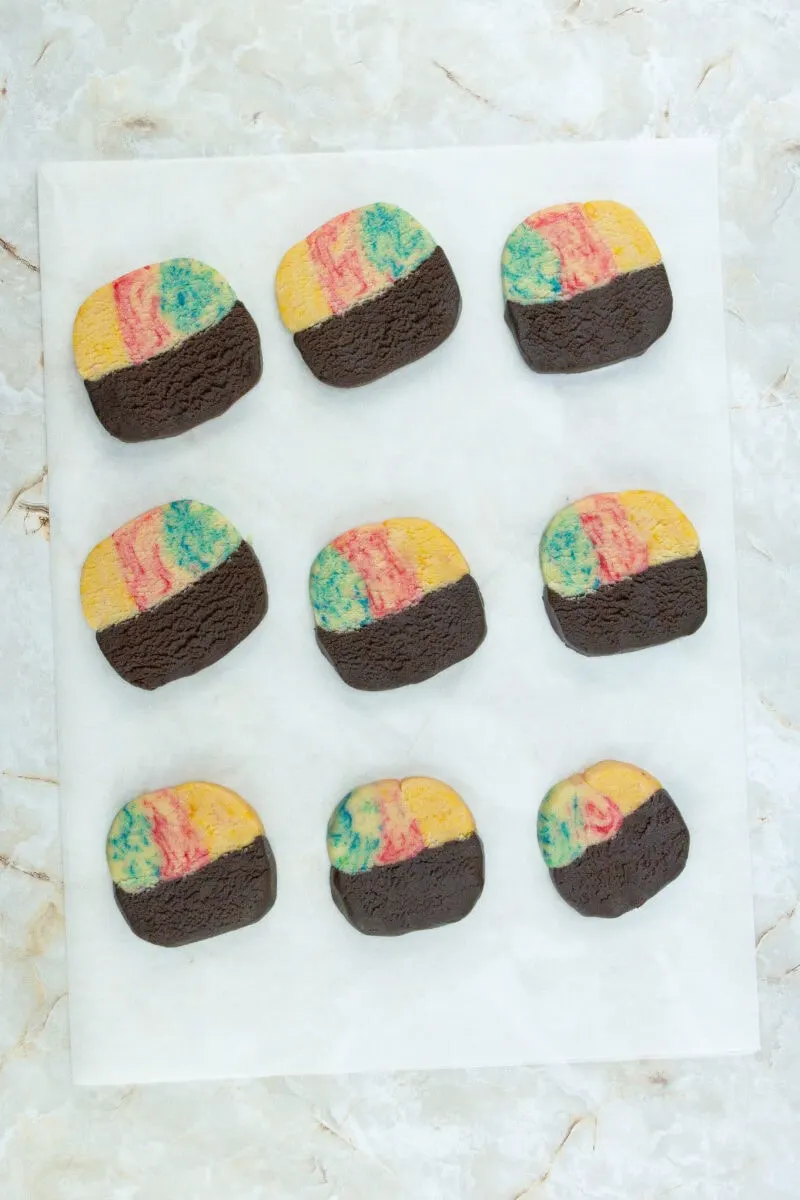
Cut a small hole in the end of the piping bag or plastic bag corner.
Pipe a large circle around the edge of each cookie.
Then divide the cookie in half and pipe a line of chocolate between the chocolate side and the colored side.
Pipe two more lines equally spaced to create 6 pie slices. Then pipe rounded pieces to connect each line in the form of a spider web.


Allow the chocolate to cool and set.
How to Store the Cookies
These Wednesday and Enid Sugar Cookies can be stored in an airtight container for up to 3 days or frozen for 3 months.


Save this recipe by Pinning It to Pinterest or printing out the recipe card below.


Want more easy Halloween recipes? See these spooky cookies next:
- Jack Skellington Cookie Balls
- Halloween Pretzel Rods
- Mummy Brownies (Boxed Mix Recipe)
- No-Bake Ghost Cookies
- Mummy Cookies
- Sweet and Salty Candy Corn Cookies


Wednesday and Enid Window Cookies
Ingredients
Method
- Preheat the oven to 350 degrees. Line two baking sheets with parchment paper and then set aside.
- Blend together ½ cup of softened butter and the sugar. Cream together until light in color and fluffy. This can be done with a stand mixer or a hand mixer.
- Add in the vanilla and egg. Mix together well
- Add in the flour and stir together until the mixture forms a dough and pulls away from the side of the bowl. If you are using a stand mixer, change the whisk attachment to the paddle attachment.
- Divide the dough in half.
- Combine one half of the cookie dough, the cocoa powder and the remaining ¼ cup softened butter. Mix together until smooth. Set aside.
- With the remaining half of the cookie dough, divide the portion into three smaller, equal sections. Squeeze a couple drops of food coloring (yellow, pink and blue) into each of the three sections, with one color added to each section.
- Gently blend the food coloring into the color by kneading just until the dough is streaked with color. You do not want to mix in the color completely, but rather a tie-dyed look.
- Once each ball of dough has color, roll it into logs.
- Place the logs side by side and press together. Reshape the logs if needed to equal out the lengths and width.
- Form the chocolate dough into a log, as well.
- Now lay the chocolate log on top of the colored log and gently press together until they are combined and do not fall apart, but are still separate colored logs.
- Using a sharp knife, cut off about ¼ inch slices from the cookie dough log.
- Reshape the cut dough slices into more of a circle shape if needed and place on the baking sheet. Leave a little room around each cookie, but they should not spread much while baking.
- Continue with the remaining dough.
- Bake in the preheated oven for no more than 12 minutes. Do not overbake! It will dry out the cookies. Cookies are done when the edges are set and the edges and bottom are just slightly starting to brown.
- Transfer to wire racks and allow to cool completely.
- Once the cookies have cooled, add the chocolate chips to a microwave safe bowl. Heat for 30 seconds and stir thoroughly. Heat for another 15 seconds and stir again. Continue the process of heating in short intervals and stirring afterwards so that the chocolate does not burn.
- Once melted, transfer to a piping bag or a plastic zip-top baggie. Cut a small hole in the end of the piping bag or plastic bag corner.
- Pipe a large circle around the edge of each cookie. Then divide the cookie in half and pipe a line of chocolate between the chocolate side and the colored side. Pipe two more lines equally spaced to create 6 pie slices. Then pipe rounded pieces to connect each line in the form of a spider web.
- Allow the chocolate to cool and set.
Nutrition
Notes
- You can use regular cocoa powder, but the color will be lighter.
- These Wednesday and Enid Sugar Cookies can be stored in an airtight container for up to 3 days or frozen for 3 months.
- For step by step photos, see the original blog post on SingleGirlsDIY.com
Tried this recipe?
Let us know how it was!